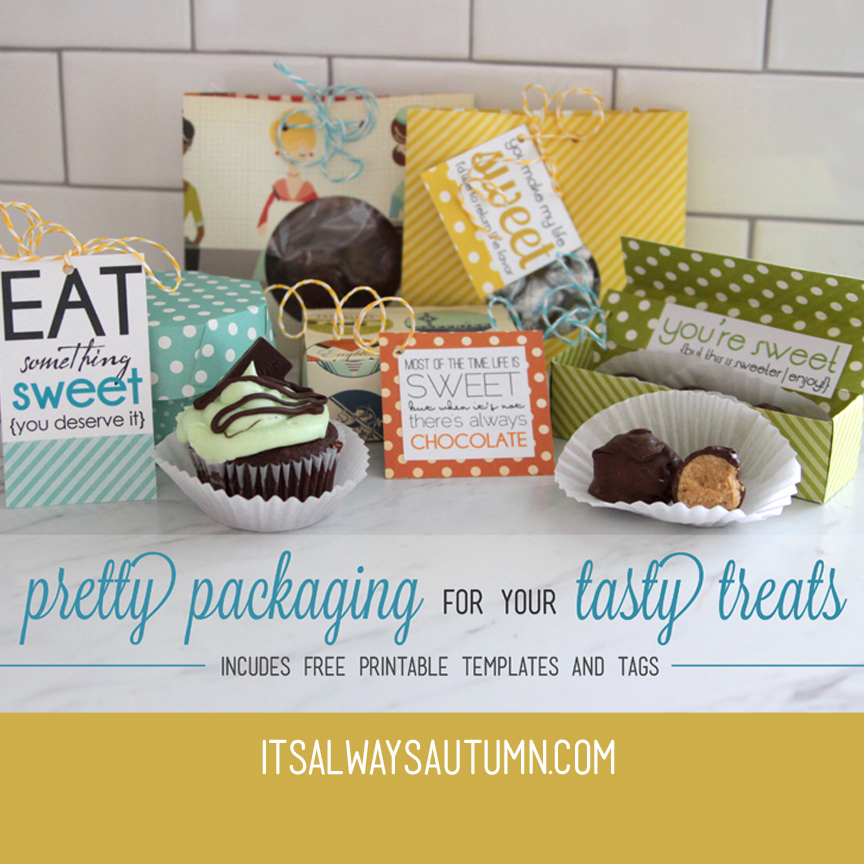
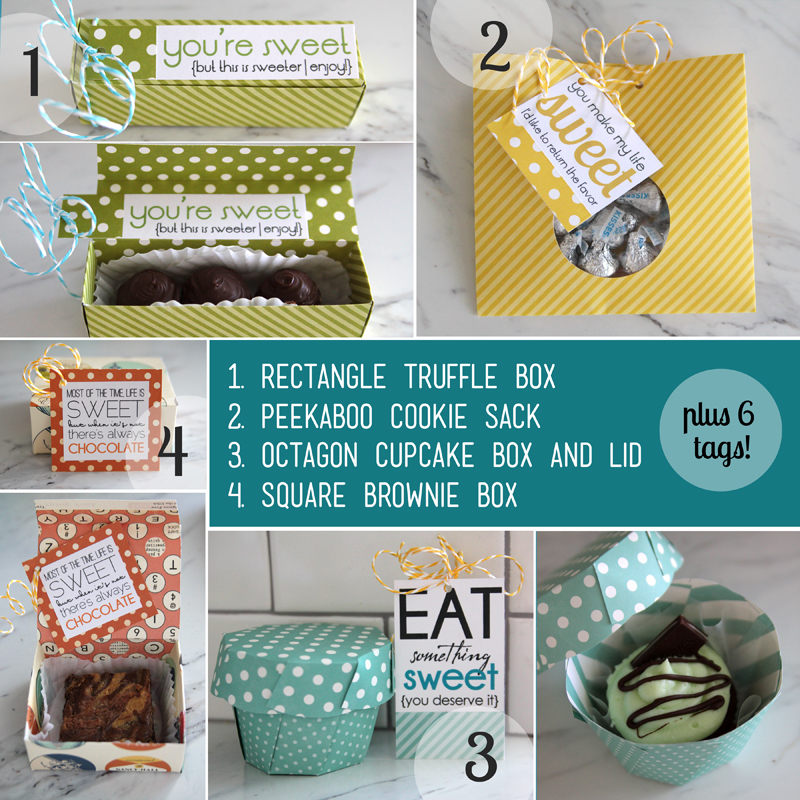
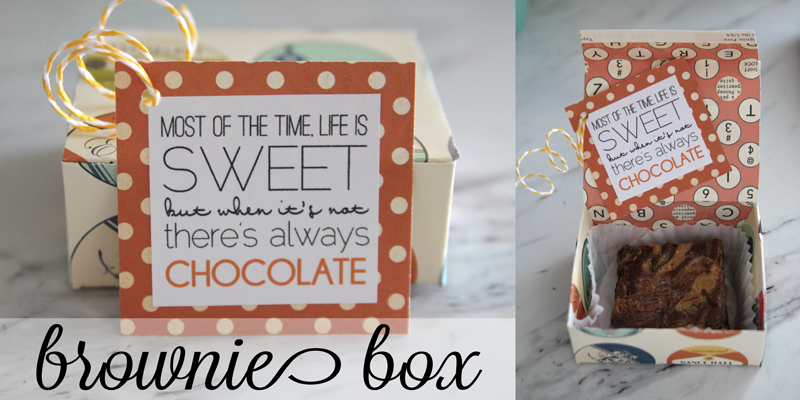
If you’ve checked in lately, you’ve already seen the pretty treat packaging I’ve designed because I wanted a special way to package up individual servings of treats for giving away. Today I’m sharing free printable templates for each of the packages, as well as a sheet of tags with fun “sweet” sayings on them.
Each package can be made fairly quickly using one sheet of 8.5×11 paper, EXCEPT the brownie box which needs to be 8.5×12 (so cut down a piece of 12×12 scrapbook paper for this box). First, you’ll need to download or print the PDF template for any of the boxes you’d like to make. Click on each link below to be taken to the PDF, then you can right click the file to save to your computer or print directly from your browser. All boxes will look nicer and be a bit sturdier if you use a heavier weight scrapbook paper (cardstock weight works great). Plan to line your boxes with wax paper or extra cupcake liners so you don’t end up with grease spots from the treats. (Instructions for each package follow.)
Cupcake Box Cupcake Lid Cookie Bag Brownie Box Truffle Box Tags
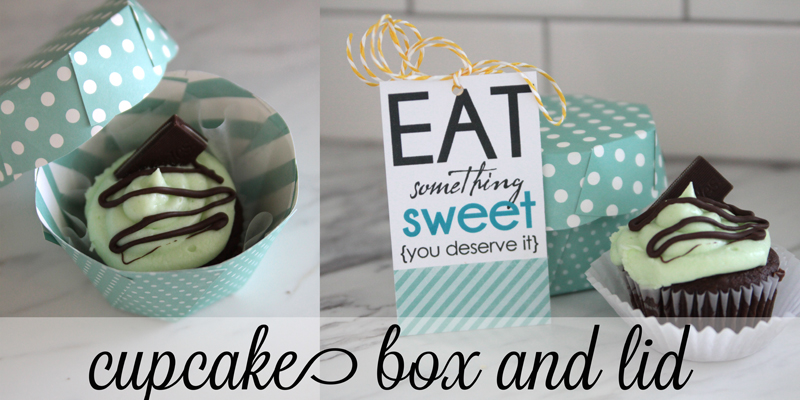
Instructions for cupcake box and lid
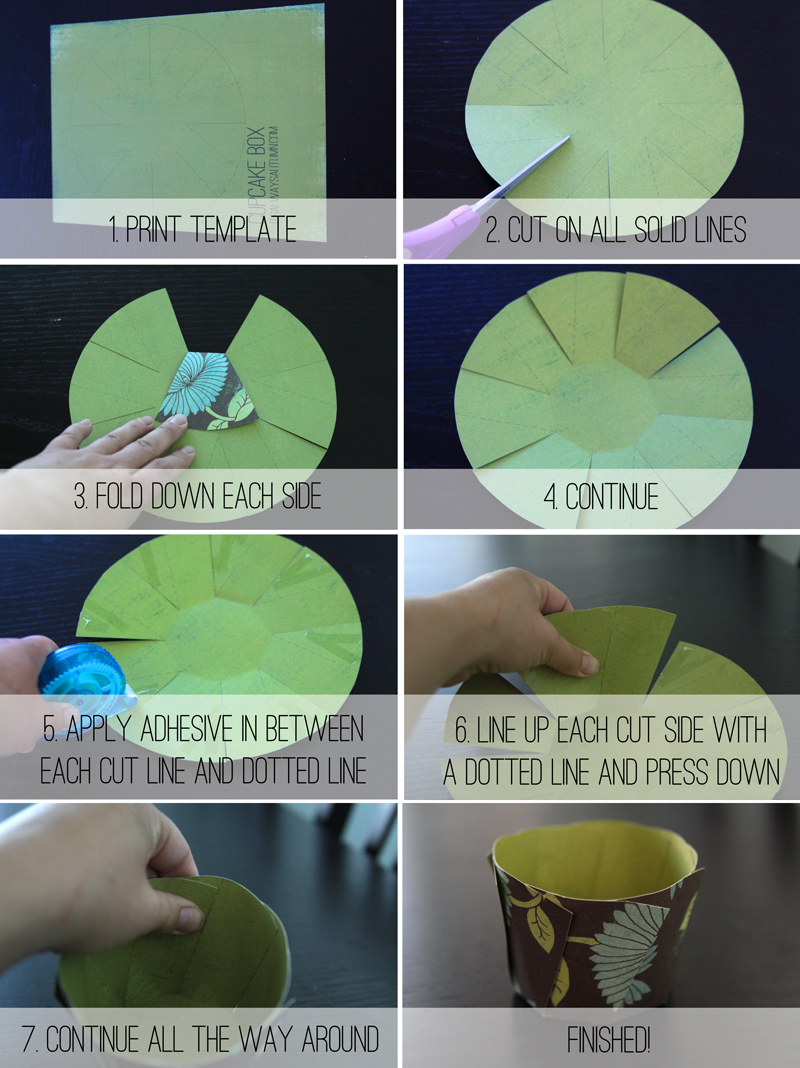
The box and lid are both constructed the same way. First, trim a 12×12 piece of scrapbook paper down to 8.5×12 so you can run it through your printer, then print the template on the side of the paper that you want to be the inside of your box or lid. Next, cut all the way around the circle and discard the extra paper. Then, make cuts along each solid line pointing toward the middle of the circle (stop cutting where the lines stop). Now you have a center octagon and eight petal-like pieces, which will be the sides of the box. Fold each side toward the center and crease, as shown in the photos below.
Now, place adhesive in between each cut line and dotted line. Start folding the sides up and adhering together, lining up each cut line with the dotted line next to it, as shown. Continue all the way around the circle until box or lid is complete. The box is designed to accomodate a standard size cupcake with plenty of room for frosting.
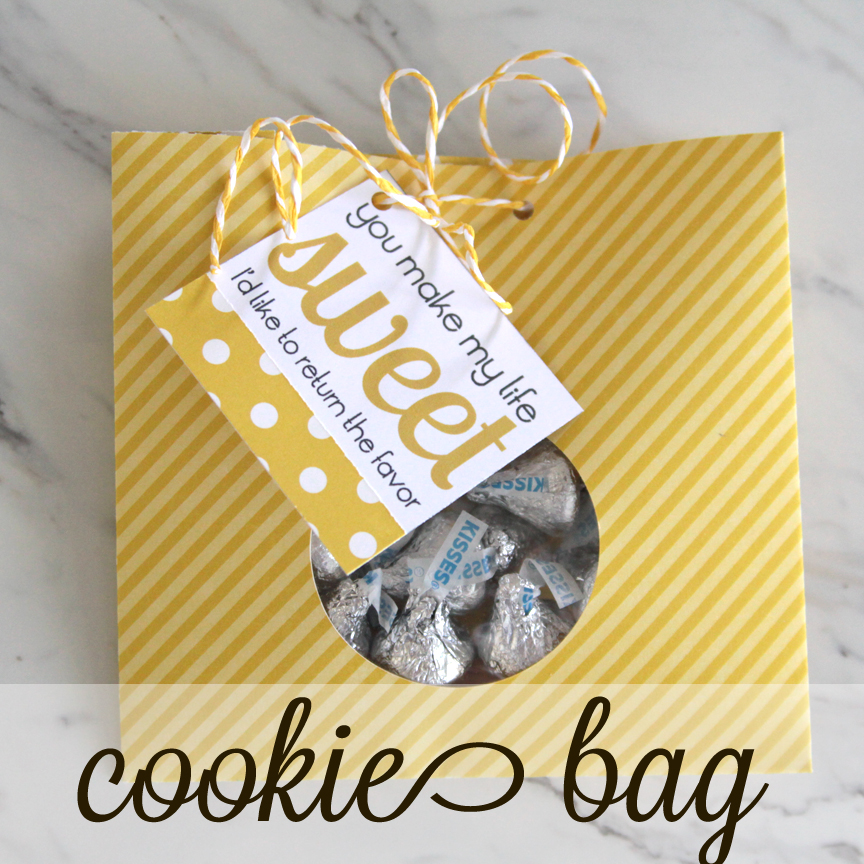
Instructions for cookie bag
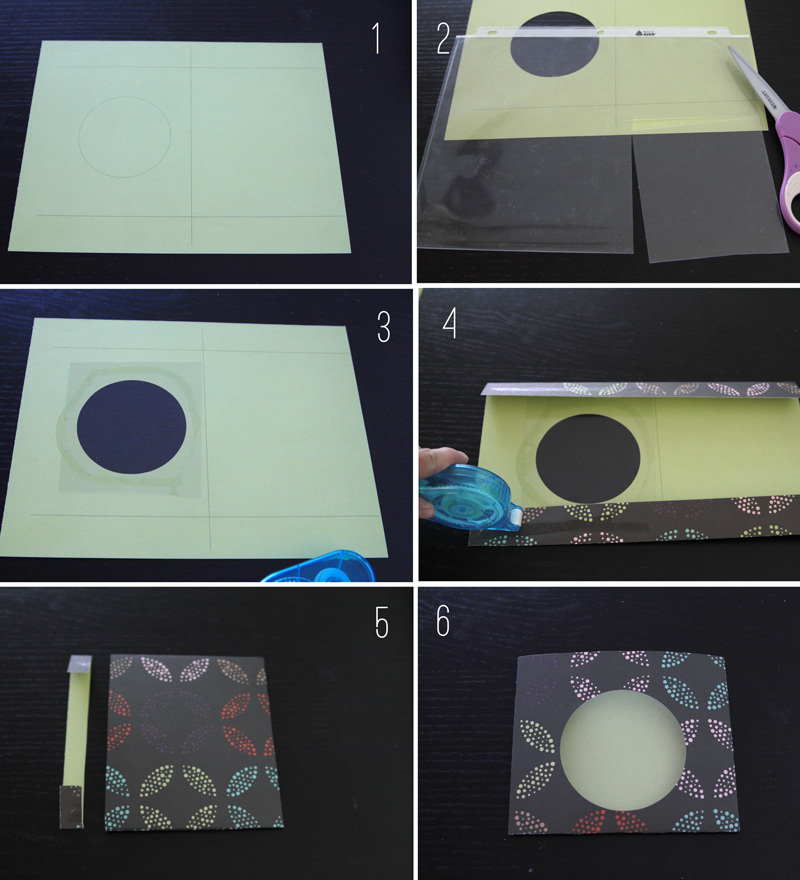
Trim paper to 8.5 inches wide and print template on the paper side that you want to be inside your box. Using a circle cutter, cut out the circle. Cut a piece of plastic from a page protector just larger than your circle and adhere as shown. Then fold both long edges in along the solid lines, and apply adhesive as shown. Fold bag in half along the middle line and press to adhere halves together. Trim to even out top, then punch holes to tie a ribbon through.
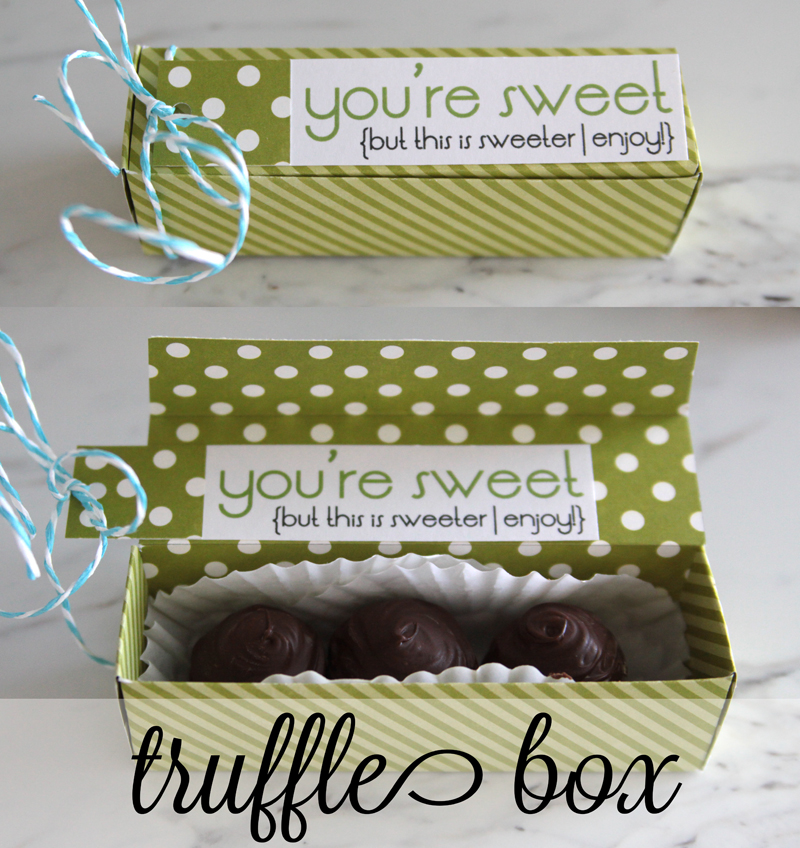
Instructions for Truffle Box:
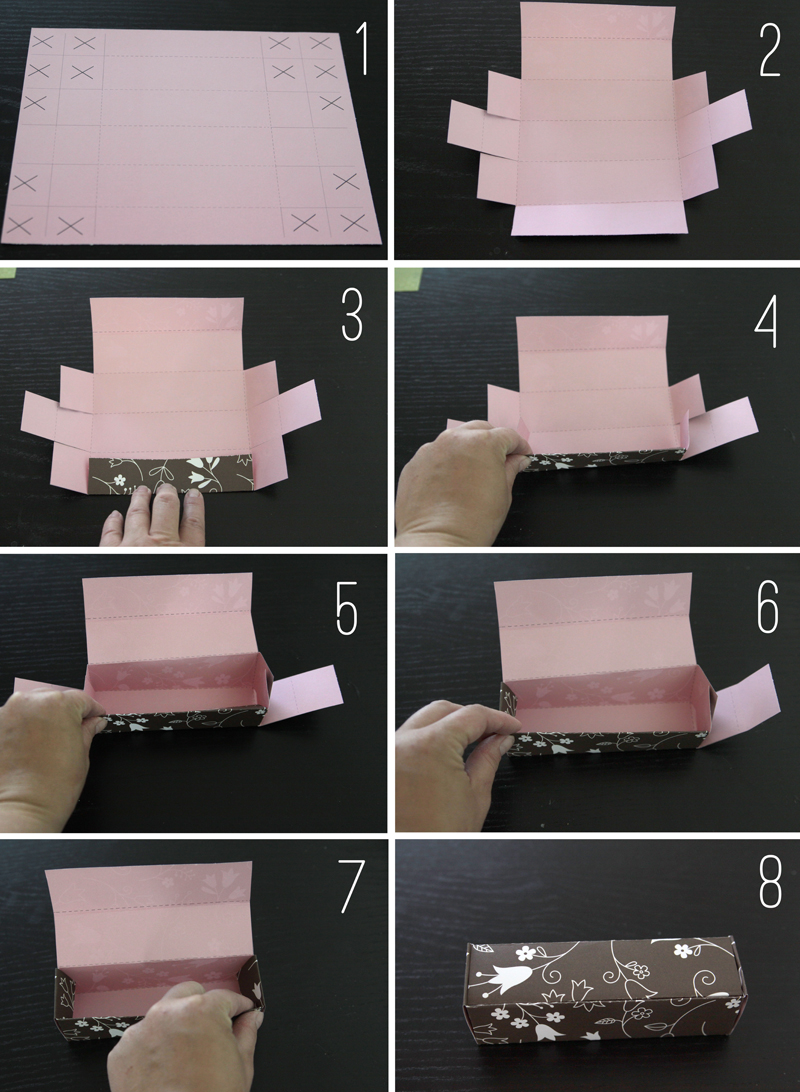
Trim paper to 8.5 inches wide and print template on the paper side that you want to be inside your box. Cut on all solid lines and fold (scoring first makes this simpler) on all dotted lines. Assemble box as shown, adding adhesive at the end on any flaps that don’t stay down:
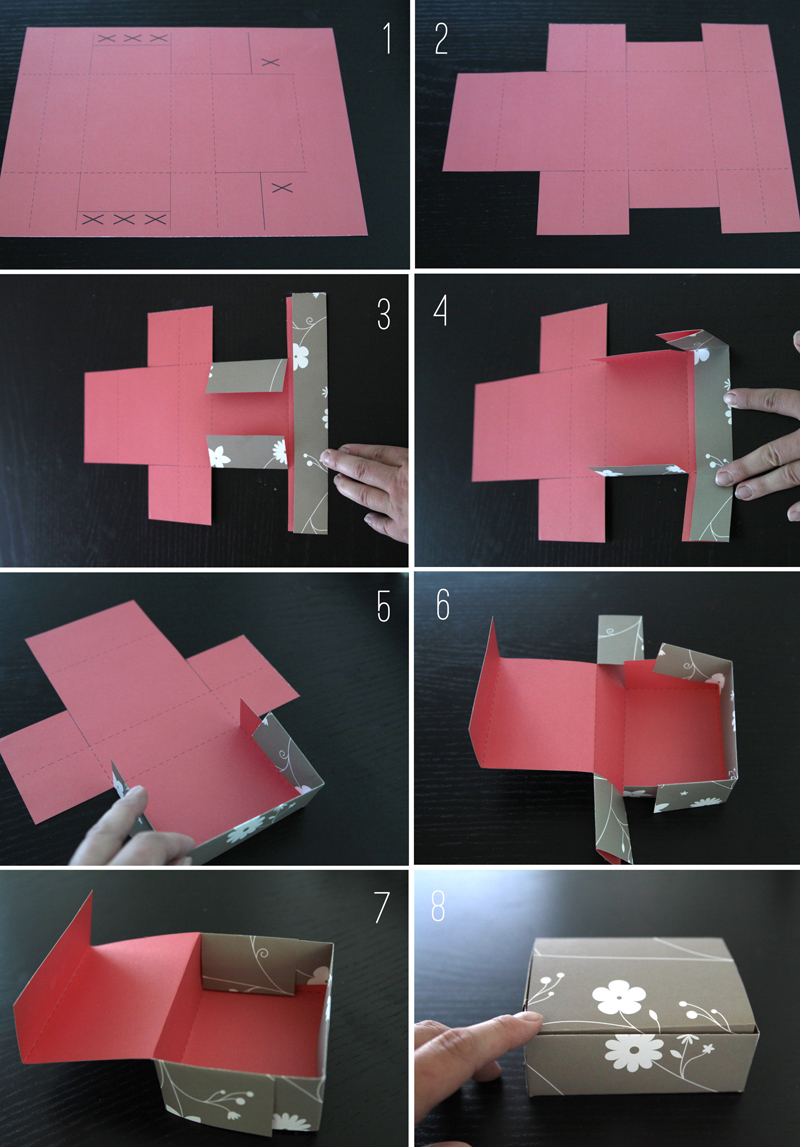
Instructions for Brownie Box:
Trim paper to 8.5 inches wide but make sure it remains 12 inches long. Print template on the paper side that you want to be inside your box. Cut on all solid lines and fold (scoring first) on all dotted lines. Assemble box as shown, adding adhesive at the end to any flaps that don’t stay down:
And there you have it! Use leftover scraps of paper to dress up the “sweet” tags and you’ll have a fantastic looking gift for someone special. Thanks!
Want more DIY packaging ideas? Visit these posts:


Maria says
Thank you so much. You are one of the few pages out there that when you click on a link for a template, you actually get the template. I love your page….
kristi@ishouldbemoppingthefloor says
These are seriously adorable! Thanks for sharing!
autumn says
you’re welcome!
Monica says
Thank you so much for these tutorials! The templates and directions were perfect and easy to follow.
autumn says
You’re welcome! Thanks for letting me they worked out.