
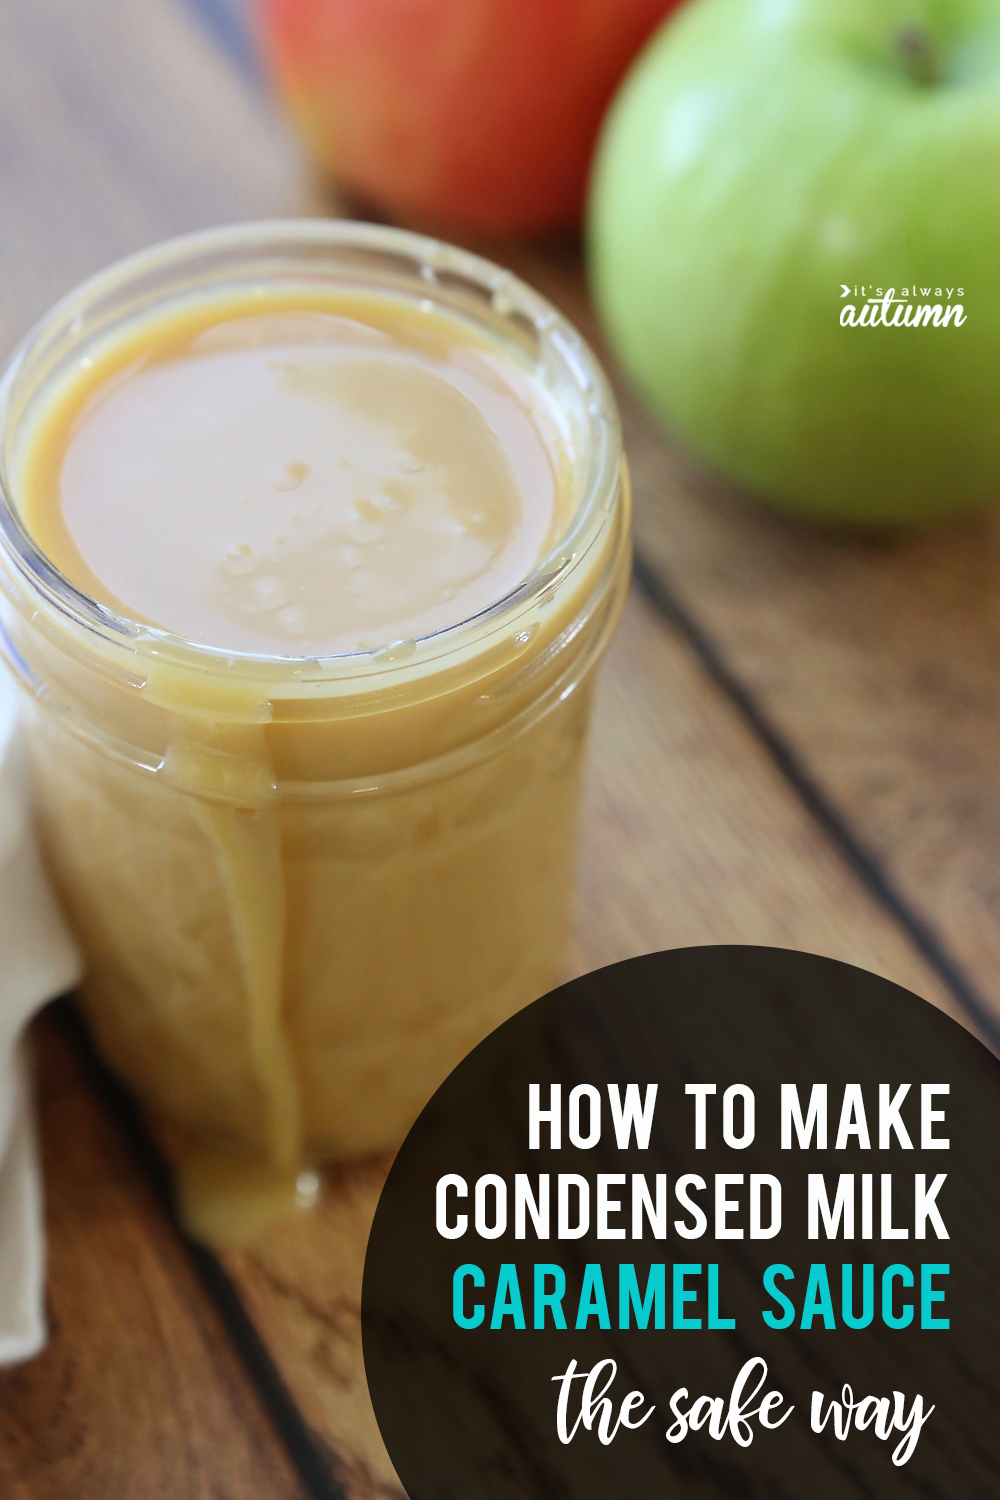
In today’s post: Learn how to make delicious 1-ingredient condensed milk caramel THE SAFE WAY! Makes a perfect caramel apple dip.
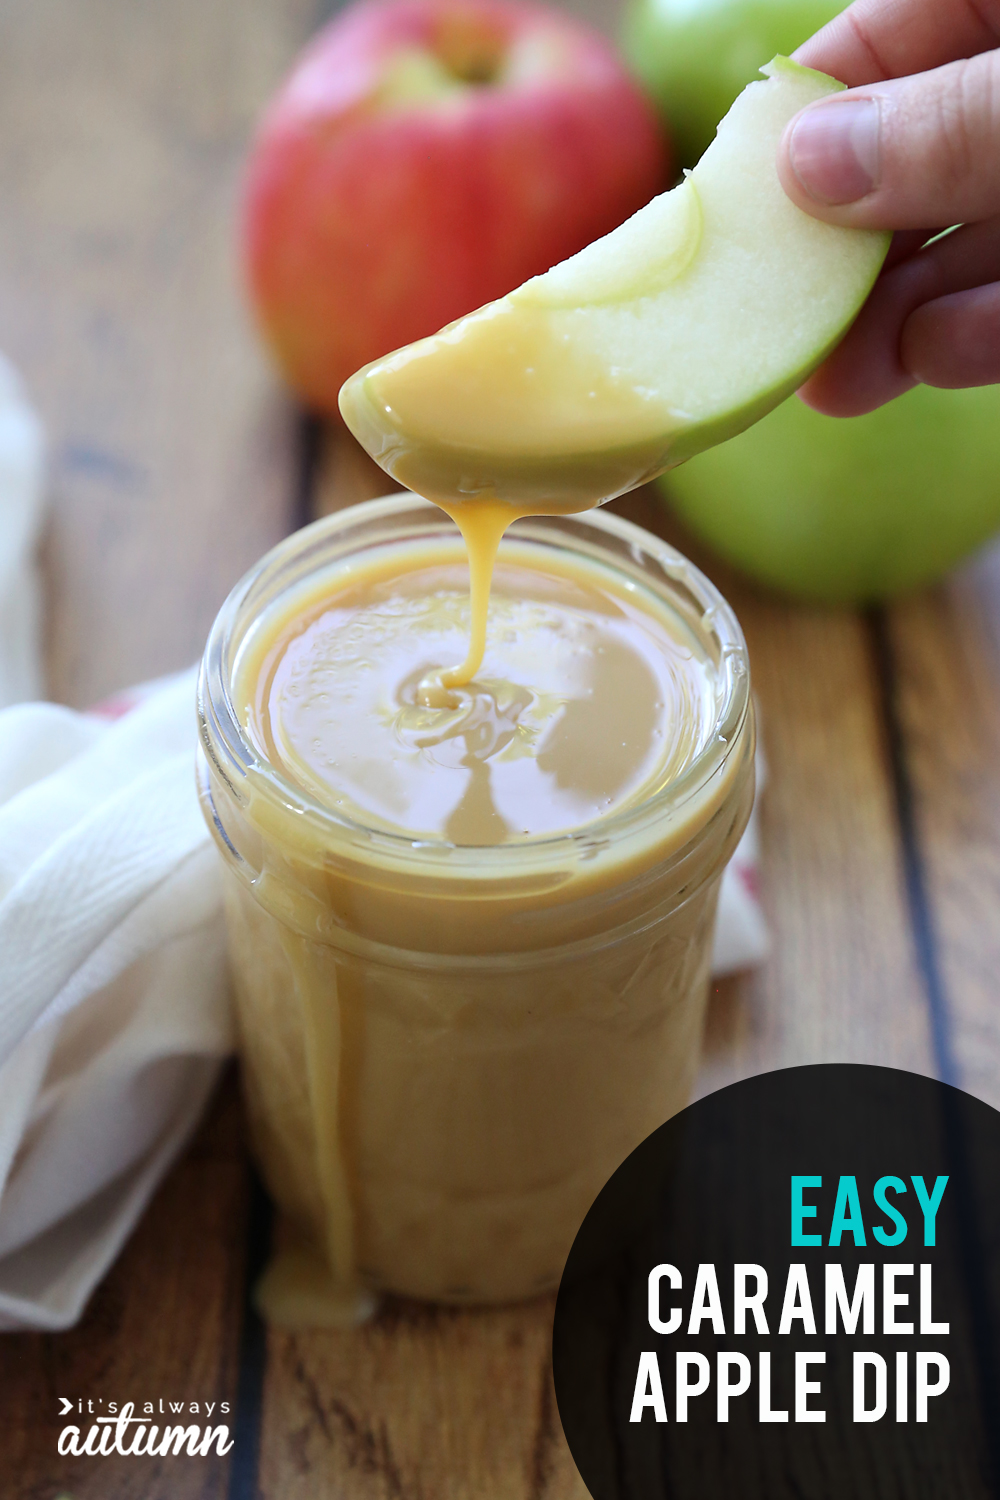
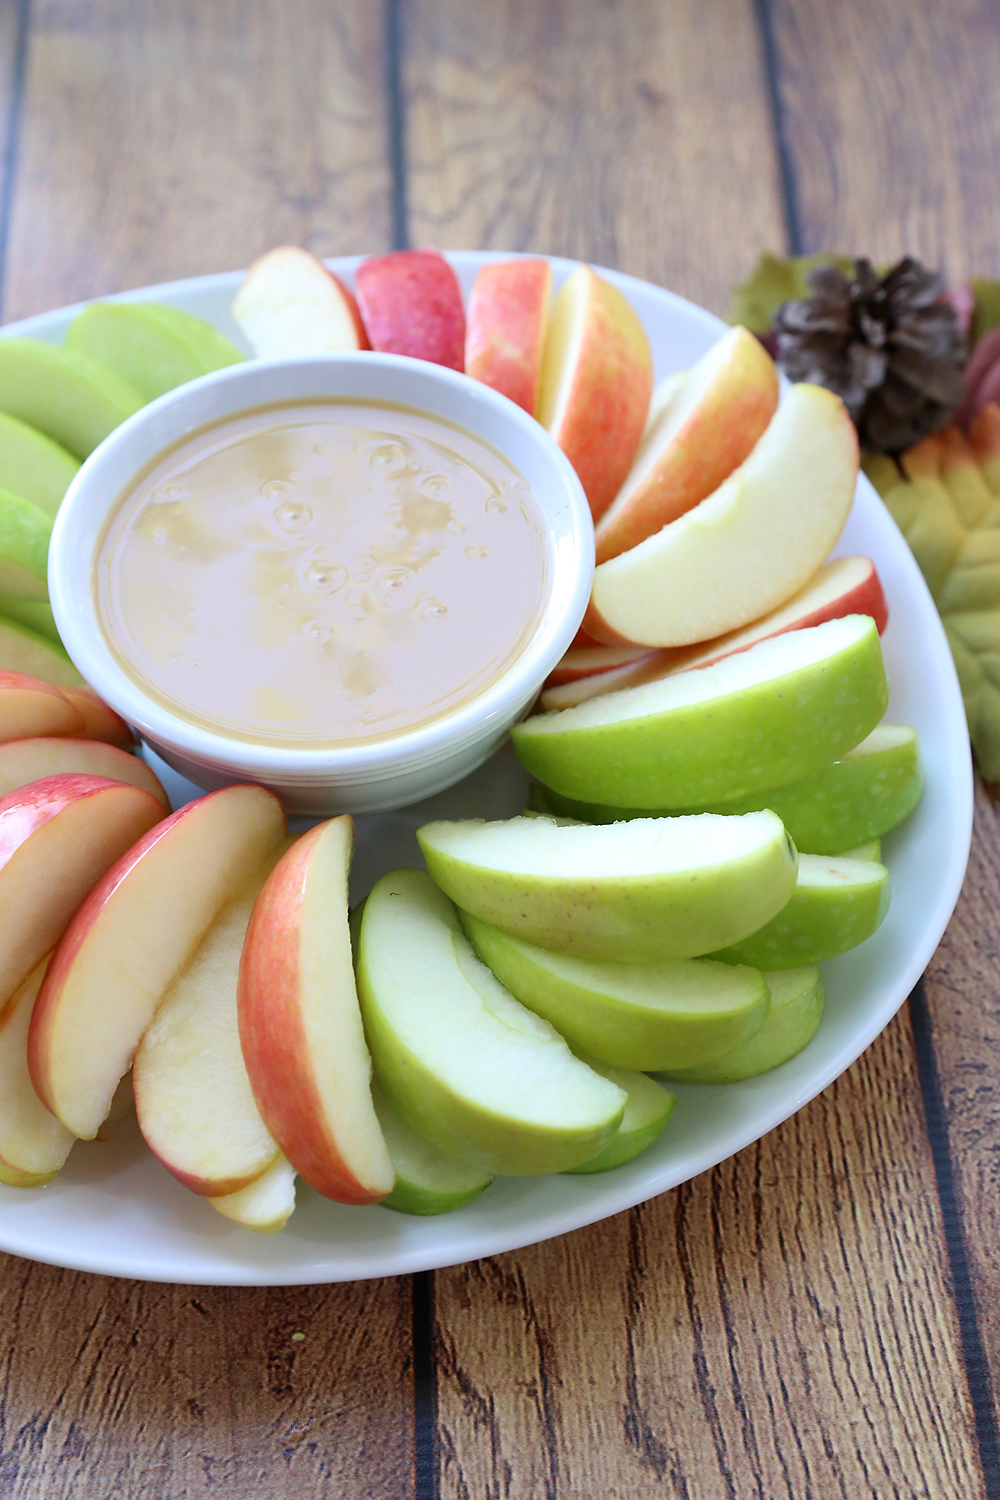
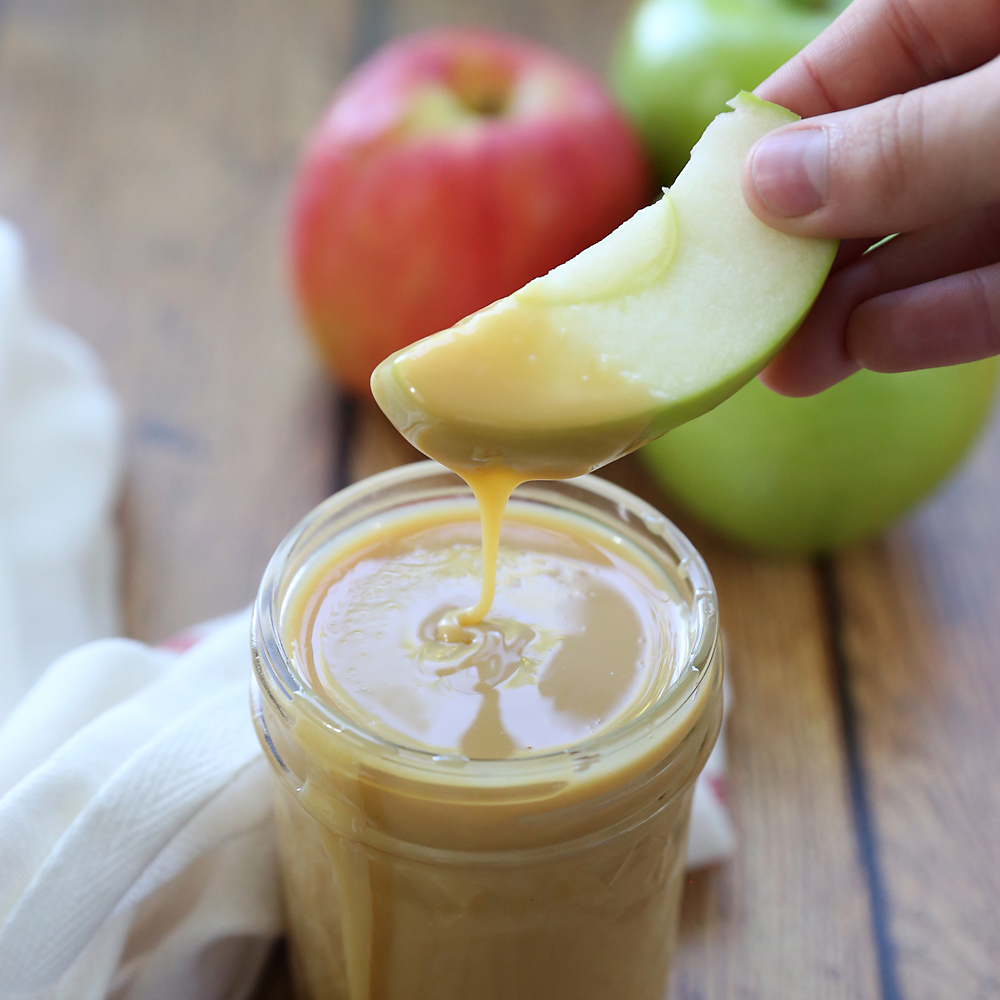
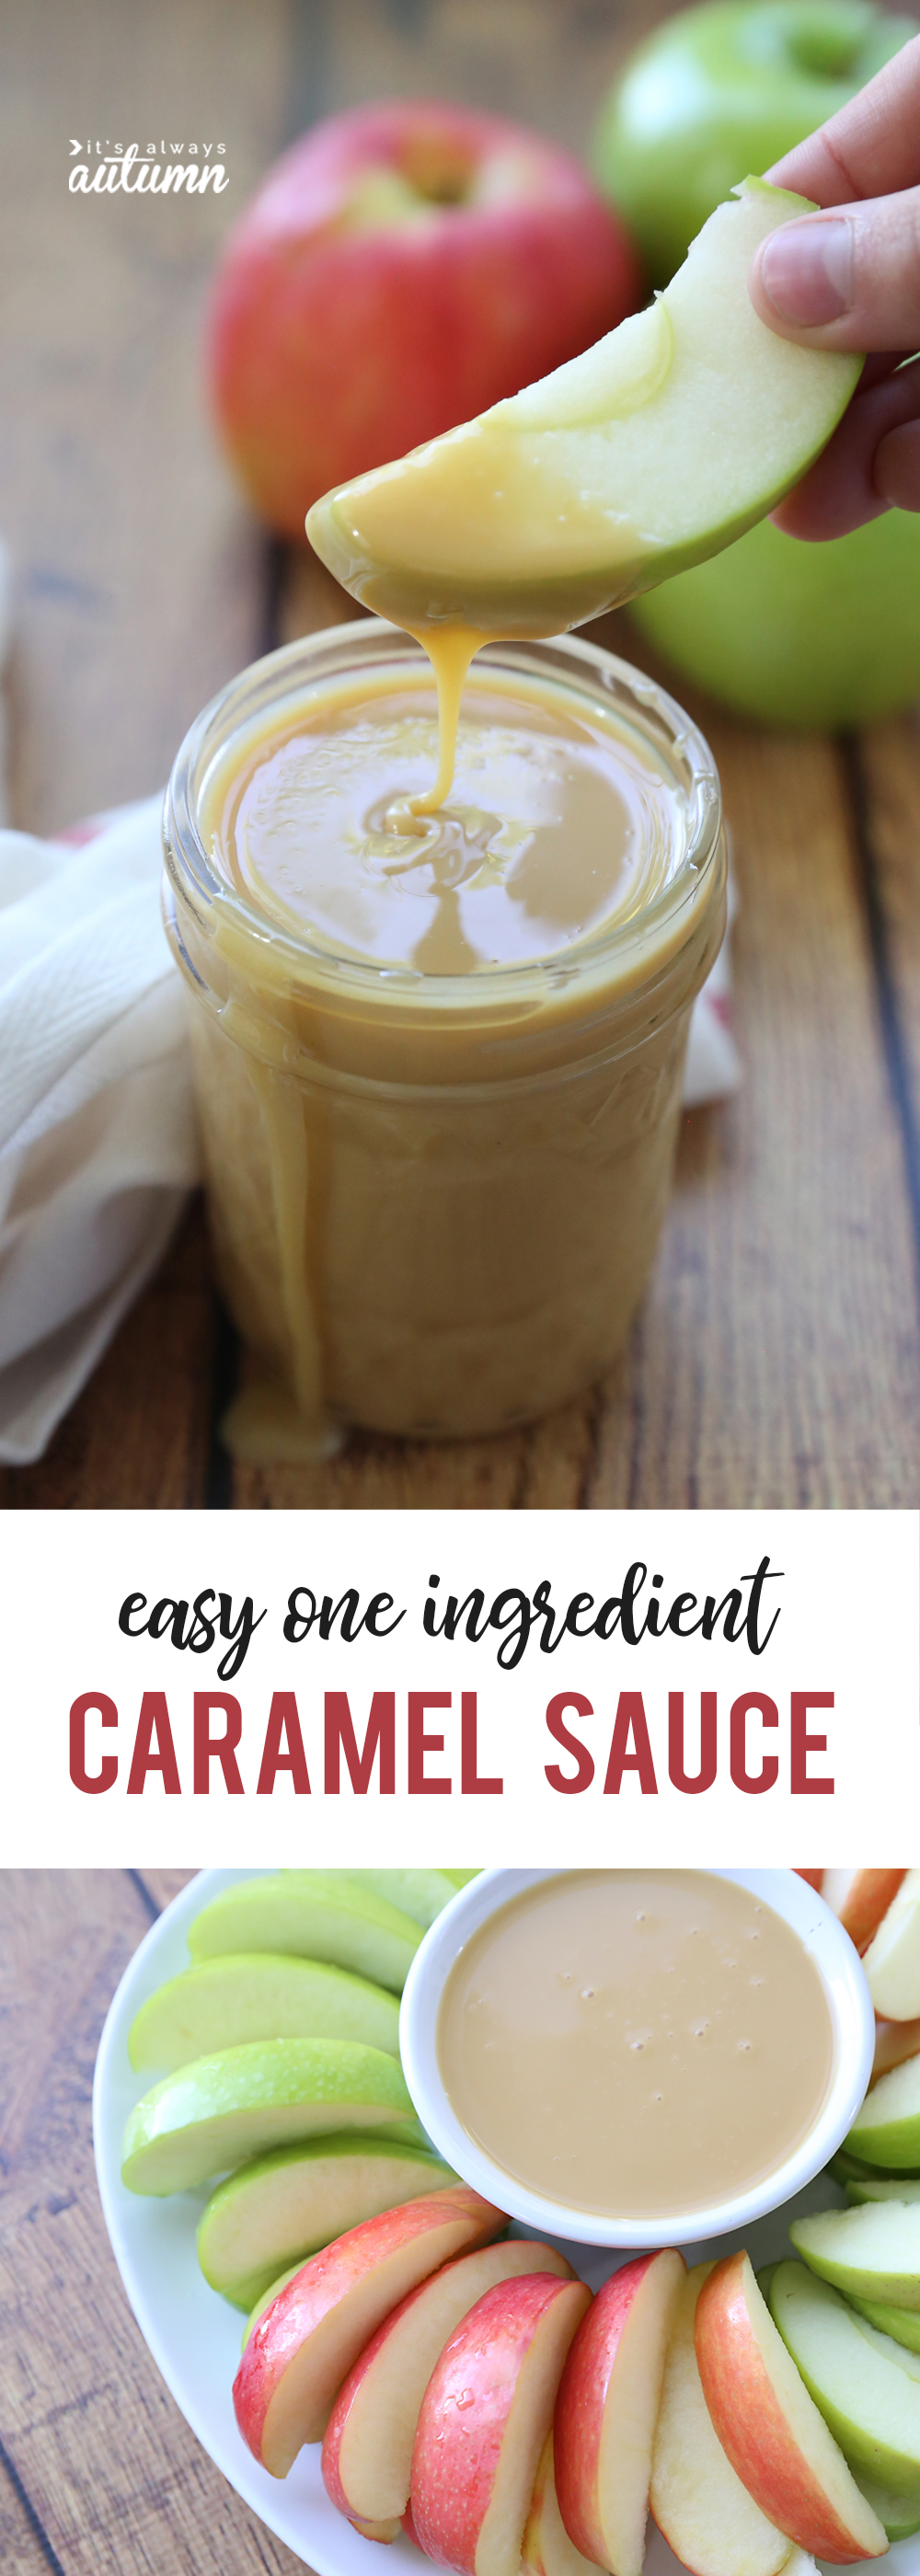
One of my very favorite side dishes to take along to barbecues or potlucks is a big plate of apples with creamy homemade caramel apple dip. Everybody loves it (and I mean everybody!), it’s great for kids who might be a little picky, it’s inexpensive, and best yet it’s SO EASY to make! And you only need one ingredient: sweetened condensed milk.
Now, maybe you’ve heard of sweetened condensed milk caramel before, and maybe you even know someone who has experienced a condensed milk caramel disaster: the “old” method of making caramel sauce from condensed milk involved cooking the milk in an unopened can, which when done incorrectly can lead to the can exploding!
Cooking sweetened condensed milk in the unopened can is a cool concept, and I know many people have had success with that method. However, you do have to simmer the can on the stovetop for a few hours (or cook it in a crock pot for 8 hours) and it MUST stay covered with water the entire time. If you remember to check it regularly to ensure the water hasn’t boiled off it’s probably perfectly safe, but if (like me!) you have a tendency to get distracted, you run the risk of letting the water boil off – and that can cause the can to explode, shooting hot caramel and sharp pieces of can all over the place! Using a crockpot is a better bet than simmering on the stove because it’s much less likely to boil dry, and if you watch the water level I’m sure you’d be fine, but comments like this one make me a little wary:
“I blew up a crockpot and covered my kitchen in caramel and glass doing this recipe(a few years ago now), the pan was on very low with a lid on but over the hours the steam escaped and it still boiled dry as I left it overnight! If I had been in the kitchen I would have been very badly burned and cut as glass, bits of pot and caramel went everywhere! We had to repaint the walls and roof once we had scraped off the caramel, not fun 😛 Please can I warn your lovely readers to use LOADS of water and check it/top up if needed!”
This caramel sauce is delicious, but nothing’s delicious enough to risk life and limb! So, cook it the safe and easy way instead. Here’s how:
How to make sweetened condensed milk caramel (aka caramel apple dip)
Watch this video to see how easy it is to make (written instructions follow):
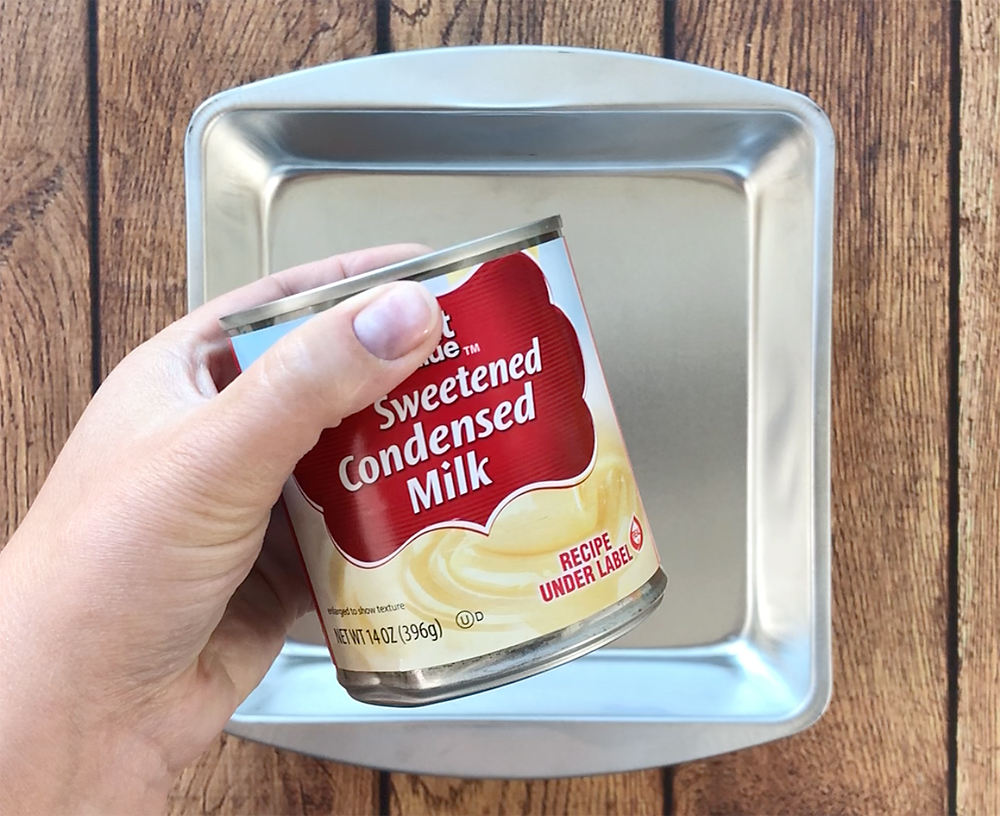
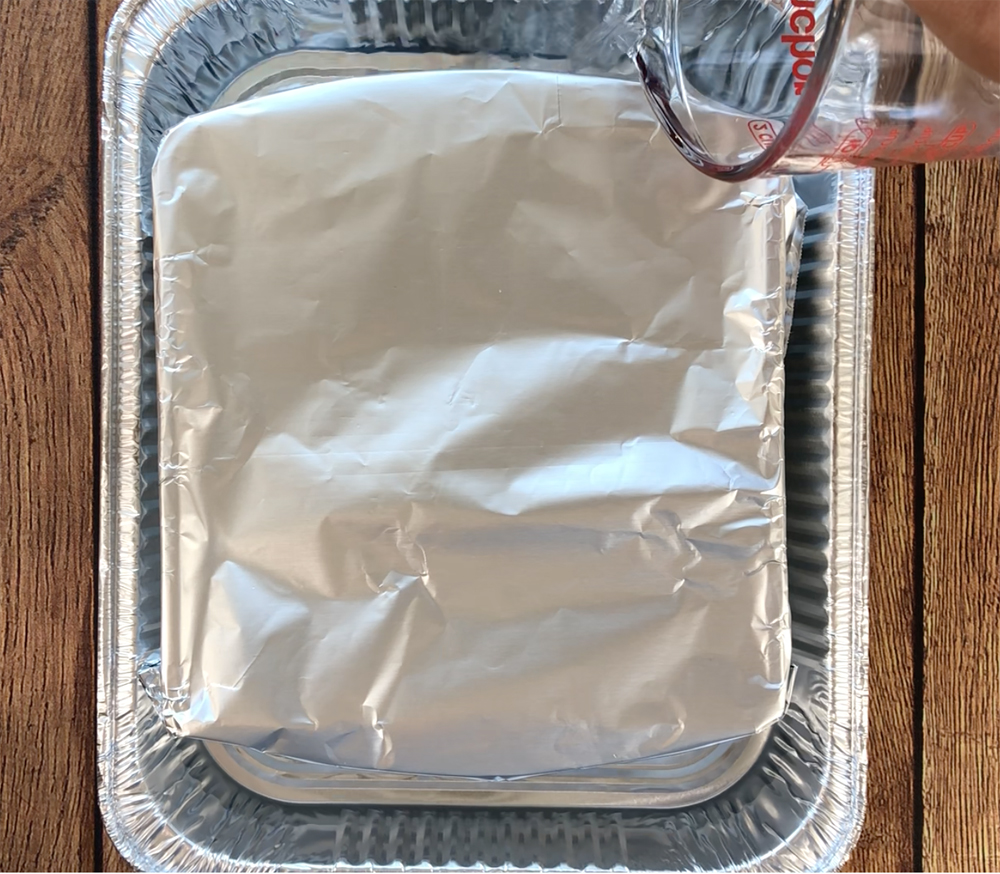
1 – Pour a can of sweetened condensed milk (NOT evaporated milk) into a metal baking pan like a pie plate or an 8×8 pan. Cover it tightly with foil.
2. Place your baking dish into a larger pan – I use a disposable foil pan. Pour enough water into the larger pan to come up 1 inch.
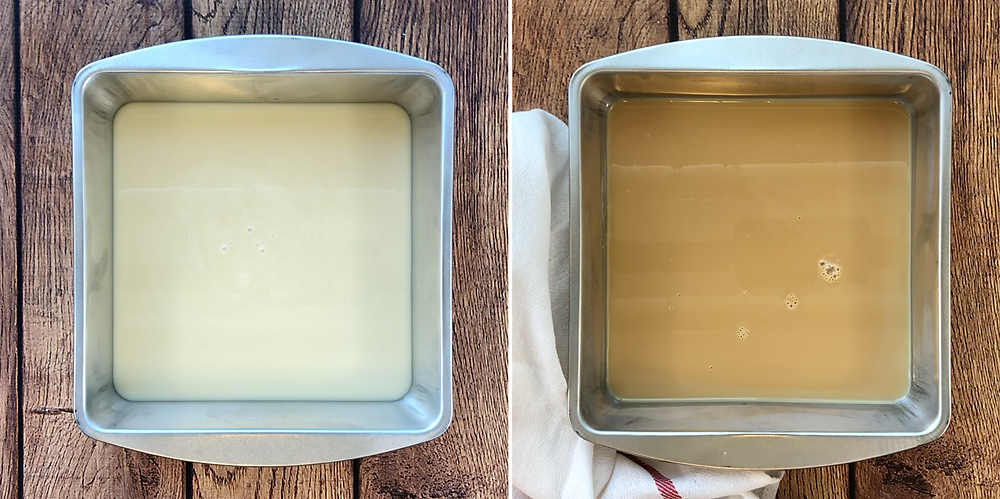
3. Place both pans into a preheated 400 degree oven and bake for 90 minutes to 2 hours, or until the caramel sauce is as dark as you’d like. The photo below shows the milk before and after baking.
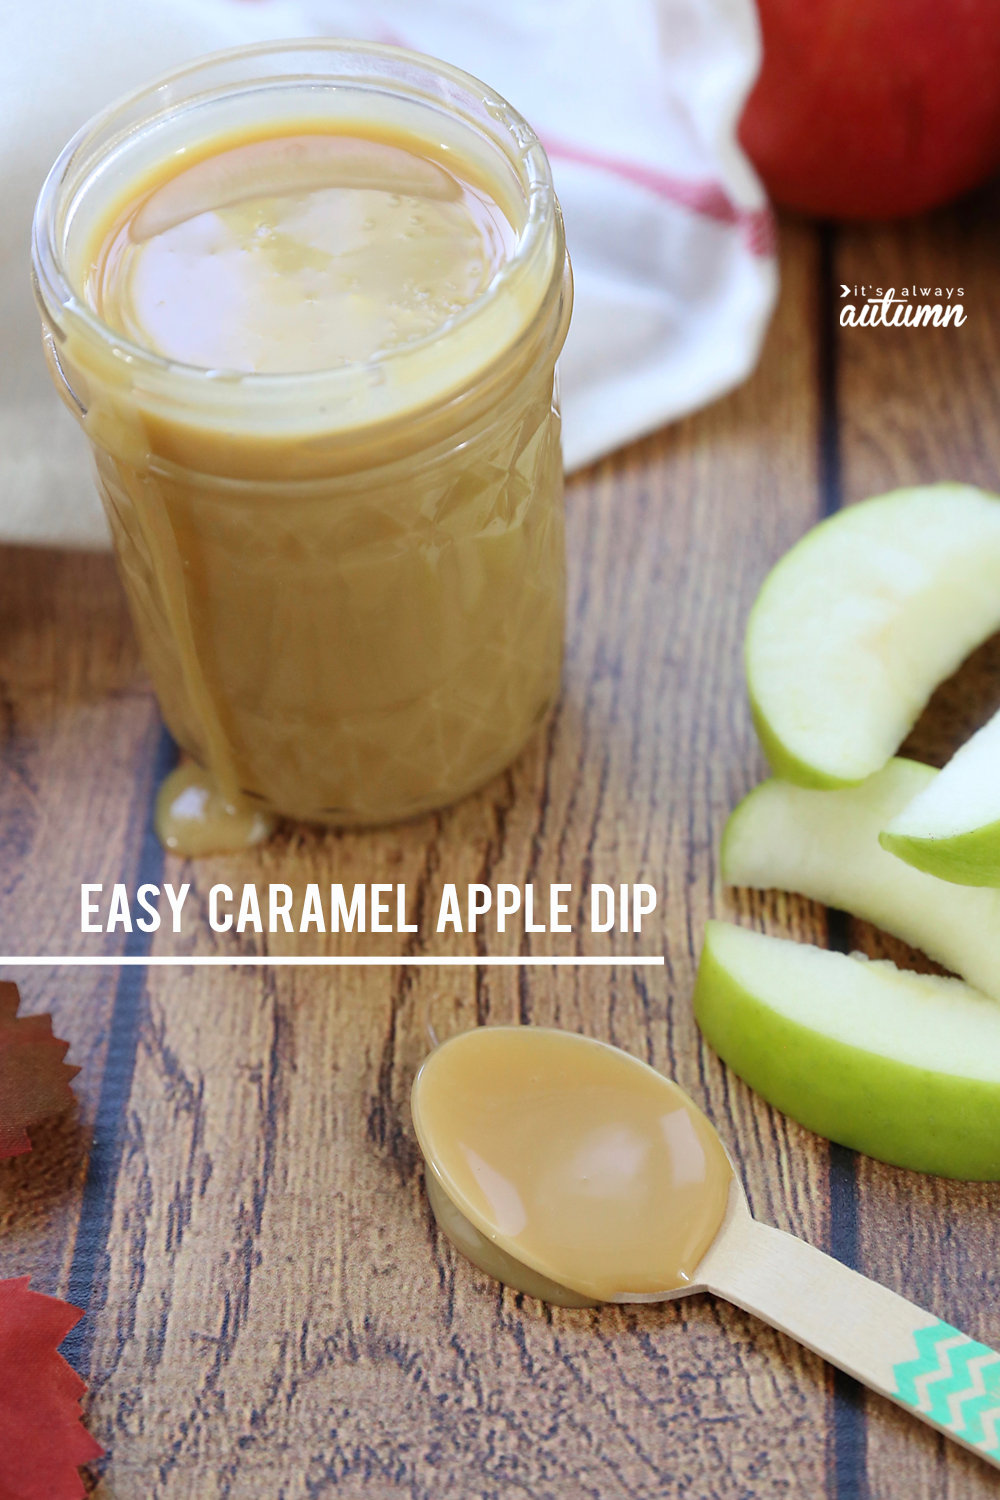
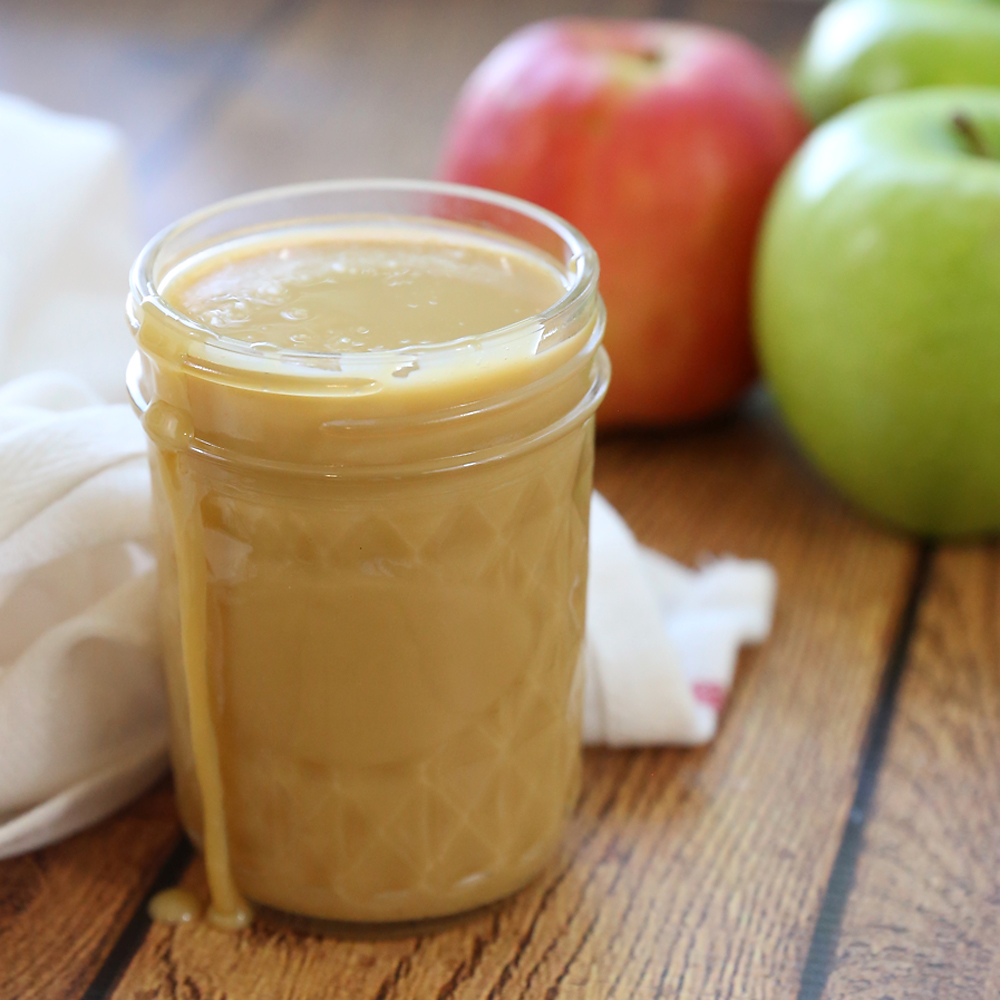
4. Whisk sauce until smooth. Serve warm (it will be more like a caramel sauce) or chill (it will get thick like a dip).
Easy and safe! If you forgot about the caramel using this method it would eventually burn, but nothing’s going to explode all over your kitchen. Sounds good to me.
Sweetened condensed milk caramel tips
- Store your condensed milk caramel in the fridge. It should keep for a couple of weeks, although it never lasts more than a few days at my house.
- This makes about 1 cup of sauce. When I serve it as a caramel apple dip, I usually cut up 7 apples to go with it.
- Little pots of caramel and a few apples would make a lovely gift – just remind people it needs to be refrigerated.
- You can also use this sauce on ice cream or brownies. It will get a little thick in the fridge, but it loosens up nicely when microwaved for a bit.
Looking for more delicious fall recipes? Check out these posts:
Pumpkin Chocolate Chip Cookies


Loretta says
This sounds great and I can’t wait to try it! But… If you are using as glass pan for the water bath, DO NOT add more water after its been in the oven. The glass pan can explode from the difference in water temp. Just put more water in at the start of you think you might want darker caramel.
CTY says
Thank You, THAnk YOu, THANK YOU! I have seen this done in the can all over Pinterest and couldn’t help but think this is an accident waiting to happen. Another concern was what chemicals/metals/can liner would leach into the caramel when heated in the can.
Just wanted to say, I love bringing apples to a get together because, 1. I slice a few right away & the rest on demand (with one of those whole apple push slicers) which cuts down on waste due to apples turning brown from sitting too long. 2. At pot lucks they can be placed on the side dish table, appetizer table or the dessert table (depending on which table needs it most). 3. They are healthy for anyone on a restricted diet (they can skip the dip). 4. Inexpensive and easy to find in all kinds of stores. 5. Can be even healthier by swirling in some all-natural peanut butter (DH’s preferred way).
Ange says
Thanks for the great post, love your pictures. Have been wanting to try the crock pot method was concerned about all the issues people have had using that method. Your way is the safe way. Thank you!
Sara Dimmick says
I’ve always wanted to try this!! So glad i never did it in the can, I know for sure I would have an accident on my hands! For sure trying it soon! 🙂
Lara says
I always cook mine in the can, however I always leave 3-5 hours to do so and NEVER leave the house, I check on it about every 1/2 hour or so. If you cook it in the original can, you can do several at a time and not open it, it’s then shelf safe and you can open it later.