
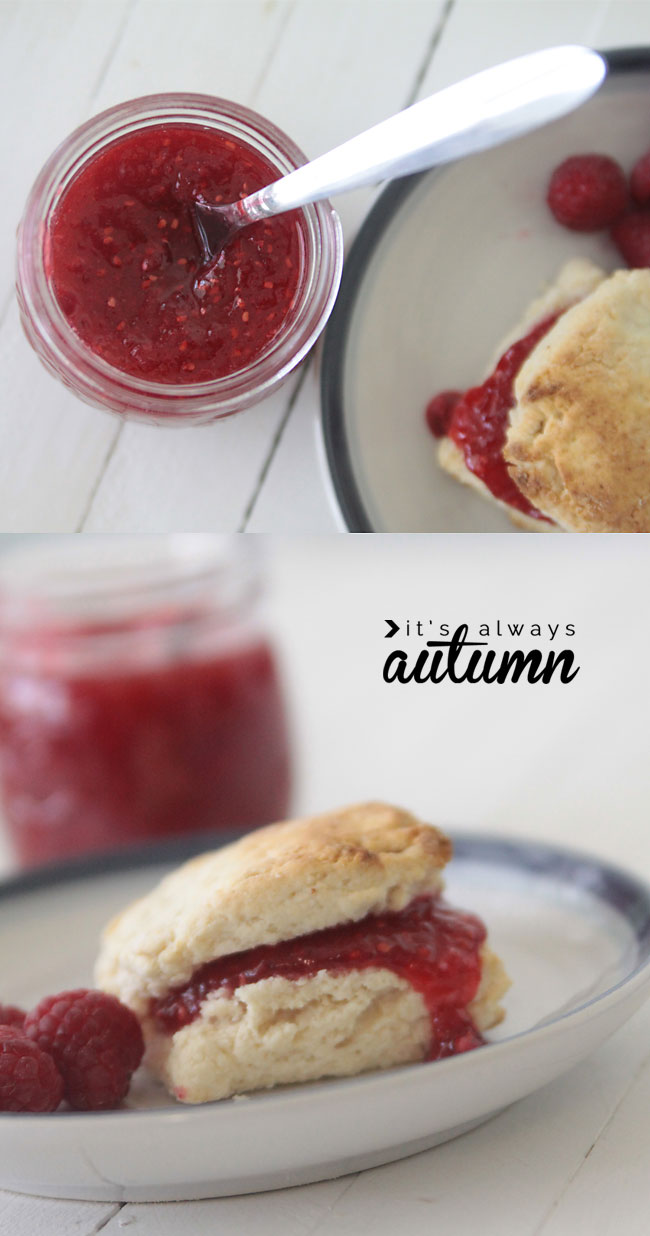
In today’s post: Learn how easy it is to make homemade raspberry freezer jam and you’ll never go back to storebought again!
If you’ve never made raspberry freezer jam before, you are missing out! Homemade jam is so much tastier than the store bought version that it’s almost a completely different food. Making your own jam might seem intimidating, but freezer jam is dead simple to make – no big canning pots or supplies required – you don’t even need jars!

How to make raspberry freezer jam
I’ll walk you through all the steps in this post with photos of the process so you’ll feel ready to make your own raspberry freezer jam. You can make a batch in about half an hour with nothing but fruit, sugar, and pectin. If you buy fruit in season it’s fairly cheap to make, and a small jar of jam makes a beautiful gift – if you can bear to give any away once you’ve tasted it.
If you want to see just how easy it is to make, watch this quick video:
Freezer jam ingredients
I’m going to show you how to make raspberry jam, because that’s my very favorite kind, but by using the same process you can make just about any fruit jam (just refer to the instructions that come with your pectin). You’ll need to buy fruit, sugar, and pectin. I like to use Sure-Jell pectin in the yellow box you see below because you don’t need any additional ingredients, but other pectins (like Ball) are also very easy to use.
If you’d like to make jam using a different fruit, click here for recipes for other jams made with Sure-Jell.
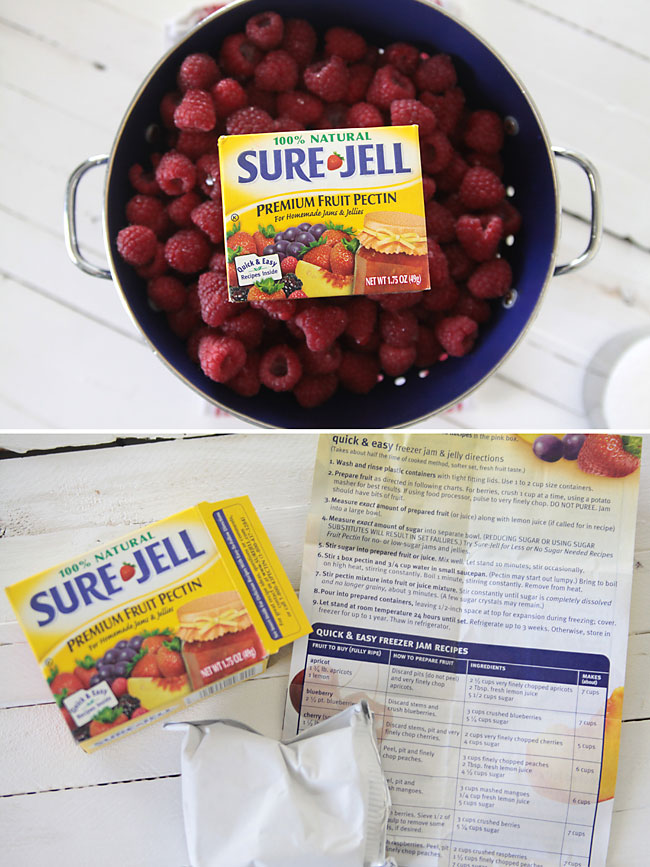
When you open the box, you’ll find a white packet of pectin and an instruction sheet, which gives you the amounts of fruit and sugar needed for different varieties of jam. For raspberry freezer jam, you need 3 pints of berries, or 2 – 12 oz packages. Here’s how you get started:
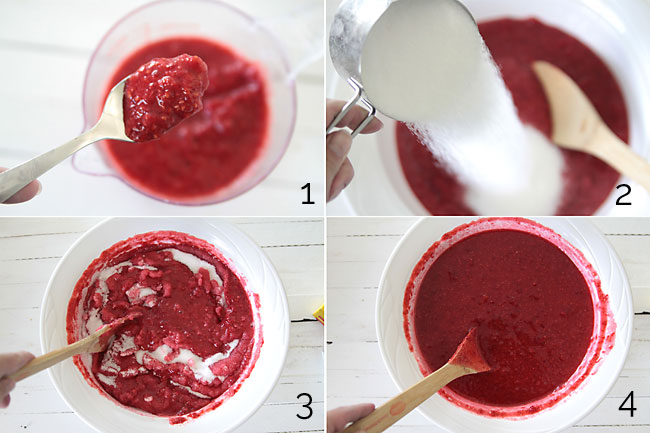
1 – Rinse your berries and bounce them in a colander to drain most of the water. Crush berries and measure the exact amount of crushed fruit (3 cups for raspberry jam) into a large bowl. You can crush berries using a potato masher or in a blender or food processor. I have a Blendtec and I use two short pulses to crush the berries. Try not to completely puree them – you want a little bit of texture like you can see above.
2 – Measure out the exact amount of sugar into another bowl (5 1/4 cups for raspberry jam), and then pour into the berries. I just measure the sugar directly into the berries, but if there’s any risk of getting interrupted and losing track of what cup you’re on, it’s a good idea to measure the sugar into a separate bowl first.
3 – Stir until combined.
4 – Let the mixture sit for 10 minutes, stirring occasionally. I usually use this time to clean up the mess I made crushing and measuring the berries.
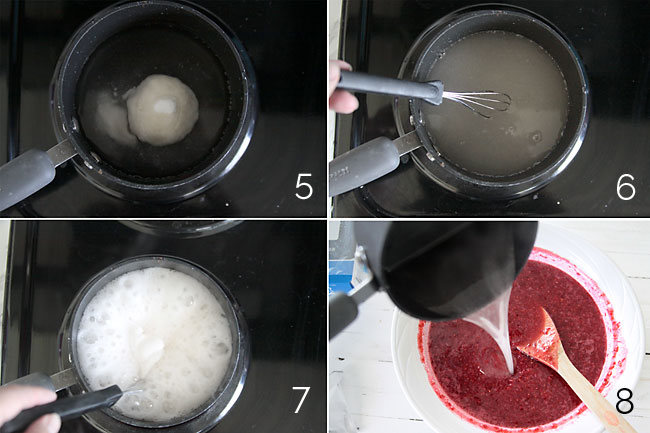
5 – After the 10 minutes are up, combine the pectin and 3/4 cup water in a medium saucepan (the one I used was kind of small). It will be lumpy at first.
6 – Turn the heat on to high and whisk – you’ll see the pectin begin to dissolve. Keep stirring.
7 – Let it come to a full boil – lots of bubbles – and set a timer for 1 minute. Keep stirring. Turn down the heat a little if it looks like it will boil over.
8. After 1 minute of a full boil, pour the pectin into the fruit and stir for 3 minutes.
Once you’ve stirred for 3 minutes, you’re all done! Just use a ladle to scoop your jam into containers, leaving at least 1/2 an inch of space at the top of the container because jam will expand as it freezes. Let it sit on the counter overnight (it will thicken up), then place one container in the fridge for immediate use and the rest in the freezer.
What containers should I use for freezer jam?
You have a couple of options when it comes to containers for freezer jam. If you have glass jars you can certainly use them, but you can also use plastic, tupperware-type containers. I prefer the Ball brand plastic freezer jars, which are readily available at Walmart or any store that carries canning supplies. They are a bit of an investment up front, but they last forever and don’t get brittle or break when frozen like cheaper plastic storage containers do.
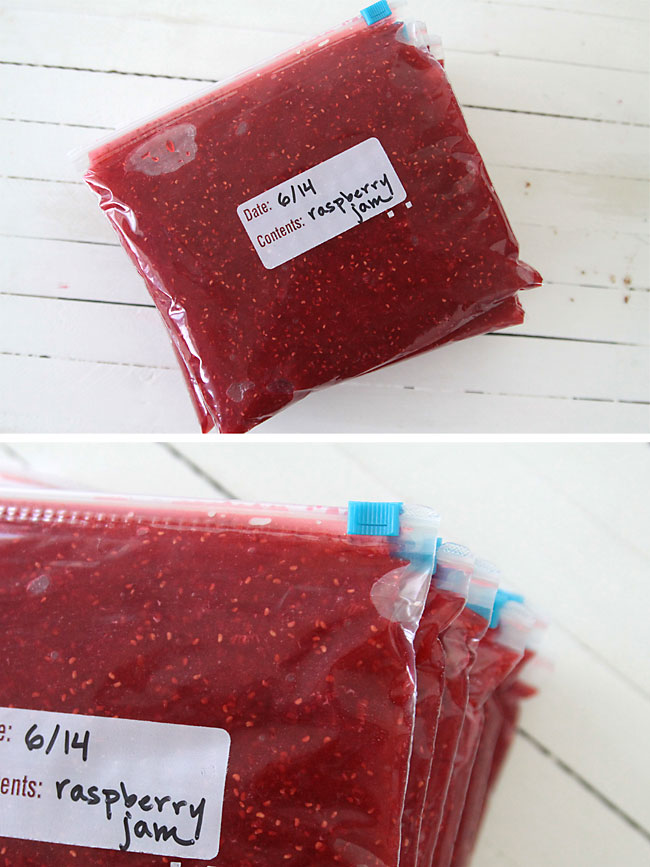
You can also store your jam in quart size freezer bags! Fill them half way full, then lay them flat and stack them on top of each other in the freezer. It takes up way less room and I don’t have to worry about whether I have enough containers. When I take a new bag out of the freezer I let it defrost on the counter for a few hours, then snip off a corner and squeeze the jam out into a pint size jar or plastic container to keep in the fridge. You’ll need about 4 bags per batch, which is about 7-8 cups of jam.
It’s really very easy, especially once you’ve gone through the process a time or two. I almost always make 3-4 batches of jam back to back in one afternoon. I often recruit my older kids to help and have two batches going at the same time in separate bowls. Just be sure not to try to make a double batch together in the same bowl – for some reason that can cause the jam to not set up.
One last note – homemade freezer jam is not quite as thick as store-bought jam, so don’t worry if it’s a little drippier than what you’re used to. It shouldn’t be super runny like syrup though – that means something’s gone wrong. But don’t worry, I’ve probably made 100 batches over the years and every single one has turned out great – so just follow these instructions and you should be good!
How long does freezer jam stay good?
Check the instructions on the pectin you buy for guidelines. I generally keep freezer jam in the freezer for up to one year and it’s never gone bad. Once thawed, we keep it for 3-4 weeks in the fridge (or however long it takes to get eaten, which is usually not that long).
For more summer recipes, visit these posts:
20 cold treats to try this summer


Sharon lips says
I love sure jell but I just bought some and the recipe isn’t in the box. Also can I use black raspberry with the seeds removed for freezer jam?
Autumn says
Sure!
Patty says
I don’t like seeds. Can I make freezer raspberry “jelly” without the seeds?