
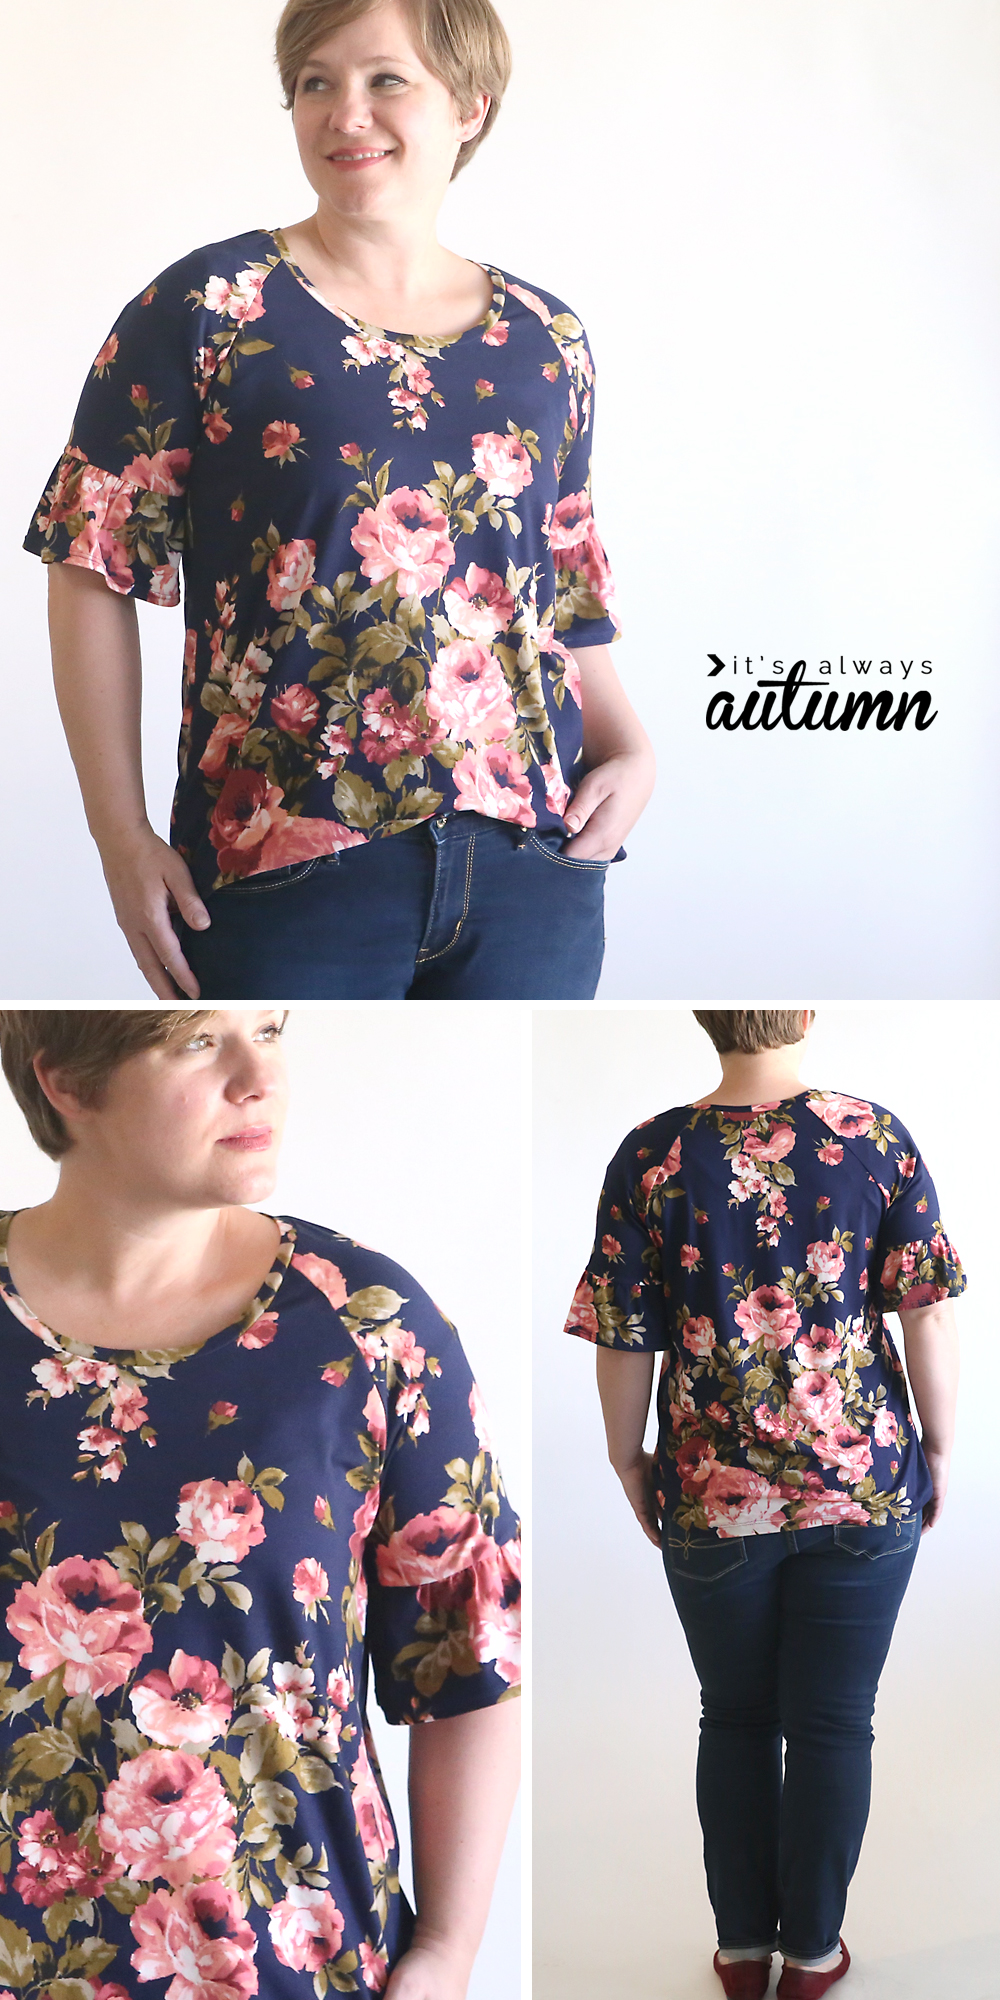
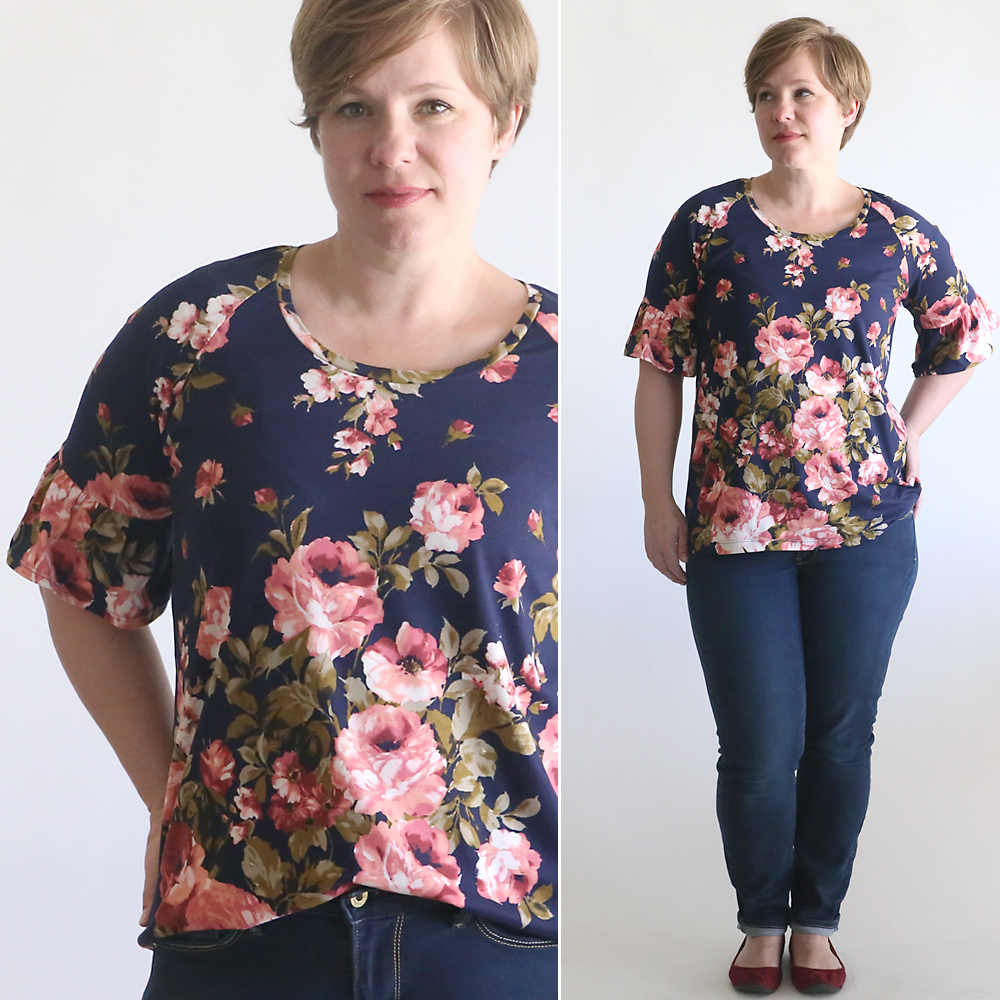
Ok, so I was pretty sure I was going to hate this shirt the entire time I was sewing it. Ruffles on sleeves? What am I, a pirate? (Cue Jerry Seinfeld: I don’t wanna be a pirate!) But, you know, I’ve seen some bell sleeves and ruffled sleeves making their way back into stores and I think they’re actually kind of pretty, unlike many of the other 70’s inspired clothes that are apparently headed our way (why? not again!).

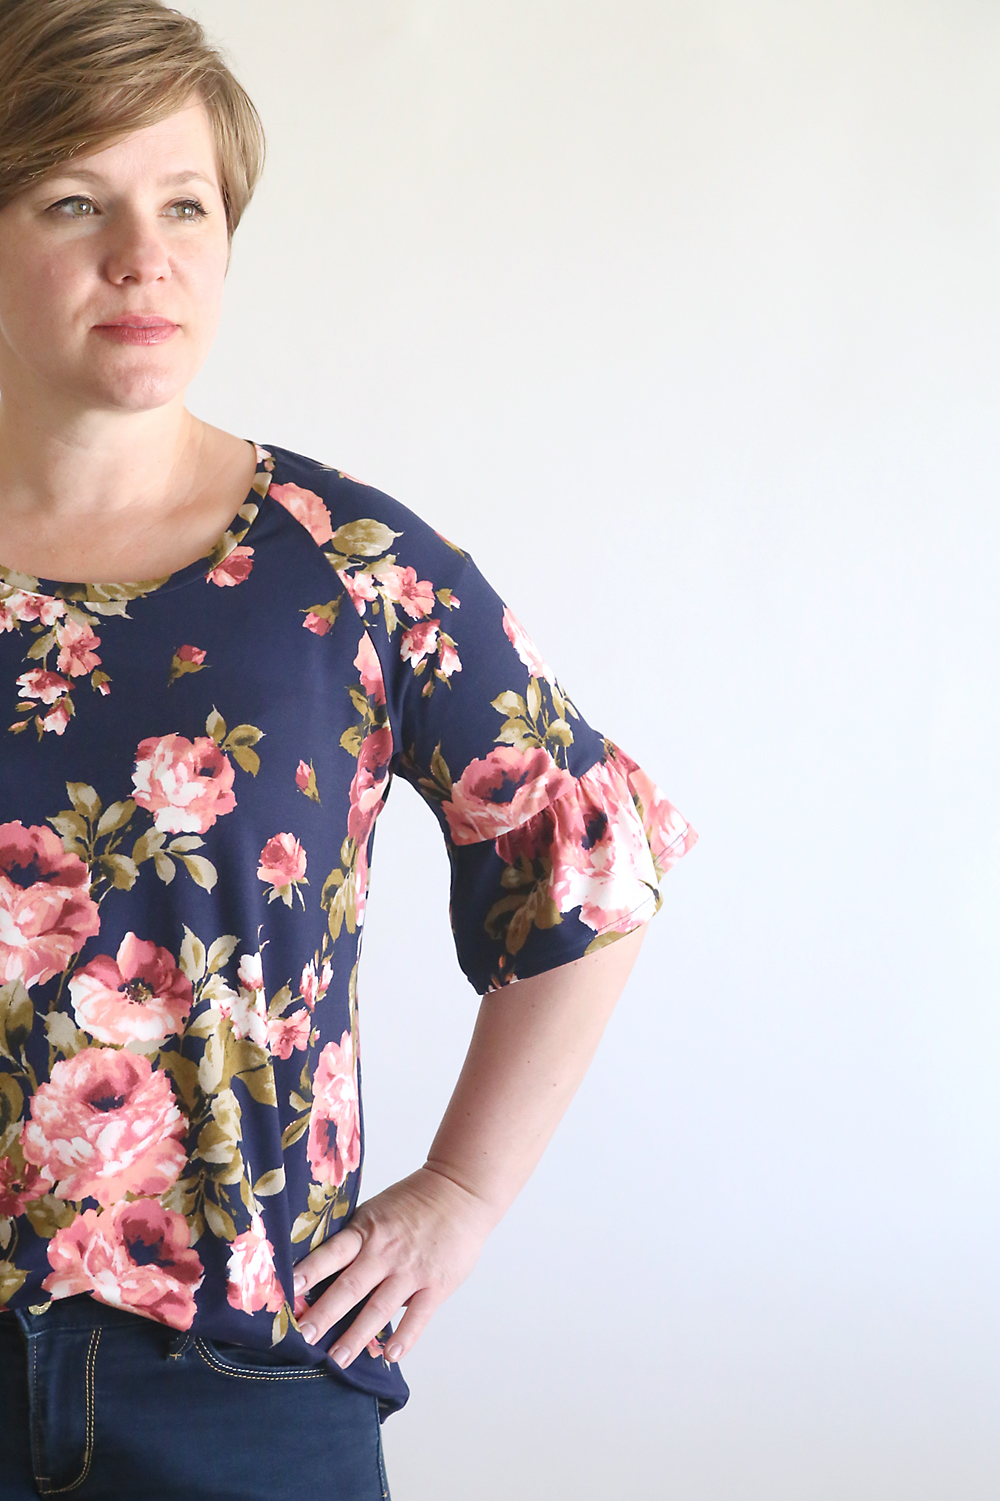
So I gave it a shot. I took my raglan tee pattern and added ruffled bell sleeves. Like I said, I was pretty skeptical while I was sewing this top – I’m not one of those skinny girls who look amazing in everything – but I secretly hoped I’d end up liking it. And I do. It’s fun and a little romantic without being over the top. A step up from my normal tee shirt without being any less comfortable than a normal t-shirt.
This is a pretty simple hack of my raglan tee pattern. If you haven’t sewn a raglan tee before, you’ll need to read through that post for the full instructions. Then in this post I’ll show you how to add the ruffle to the sleeves.
You’re going to need 1.5 yards of 60 inch wide knit (stretchy) fabric. Wash and dry it before you begin. You will also need my raglan tee pattern, which you can download by clicking here.
Print the pattern out at 100% or full size (the grey squares should measure exactly 1 inch). Don’t trim the pages, just butt them together and tape. The pattern will look like this:
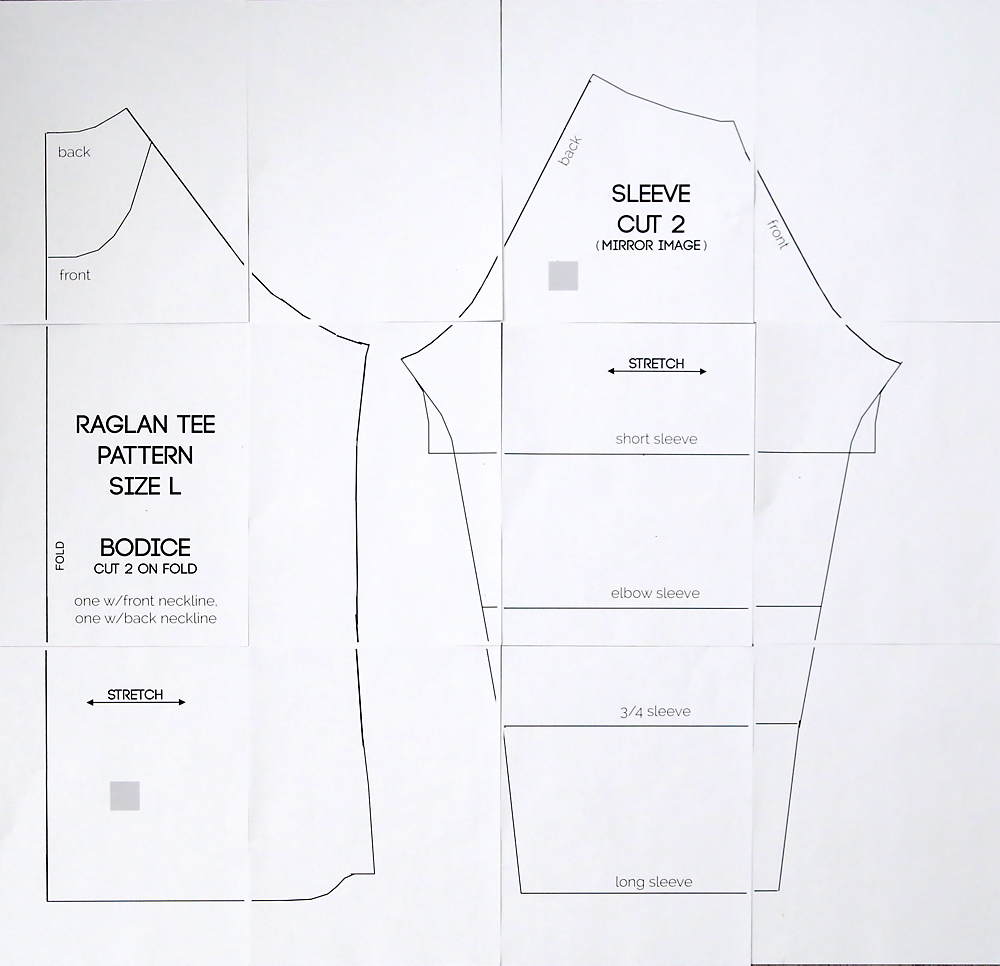
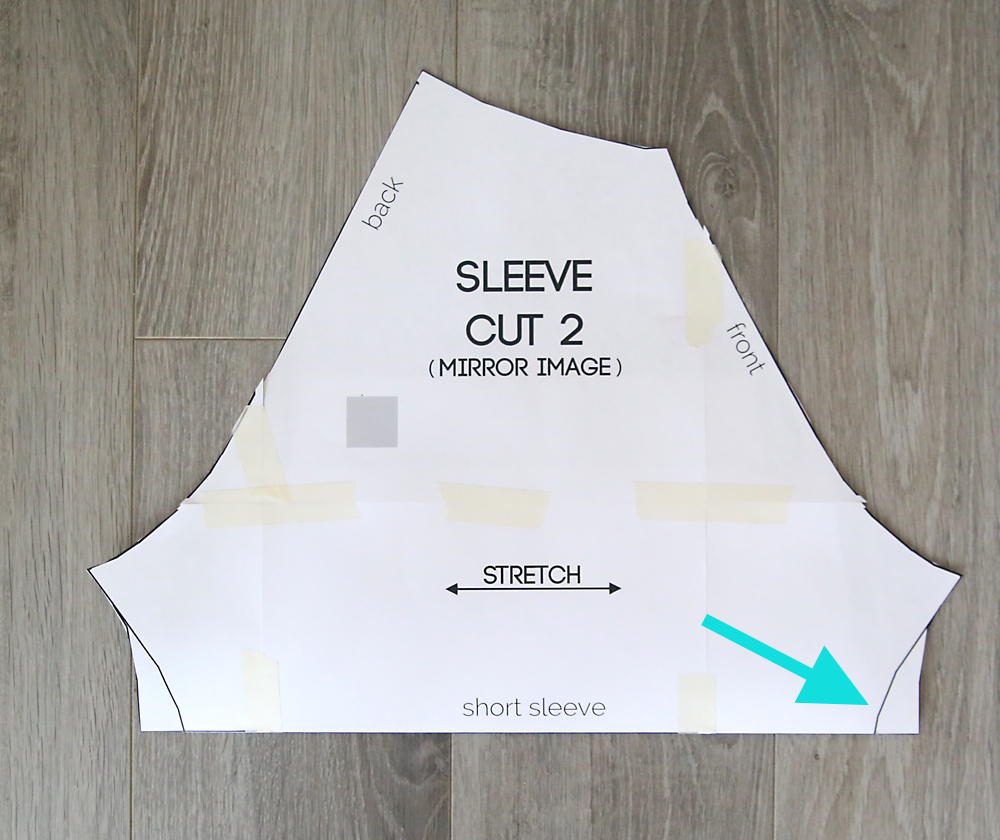
Cut out the shirt piece and the sleeve to the short sleeve mark. Normally when you use this pattern at the short sleeve length, you’ll cut on the outside lines at the bottom of the sleeve. However, since we are adding a ruffle, you’re going to cut along the inside lines (shown with an arrow below).
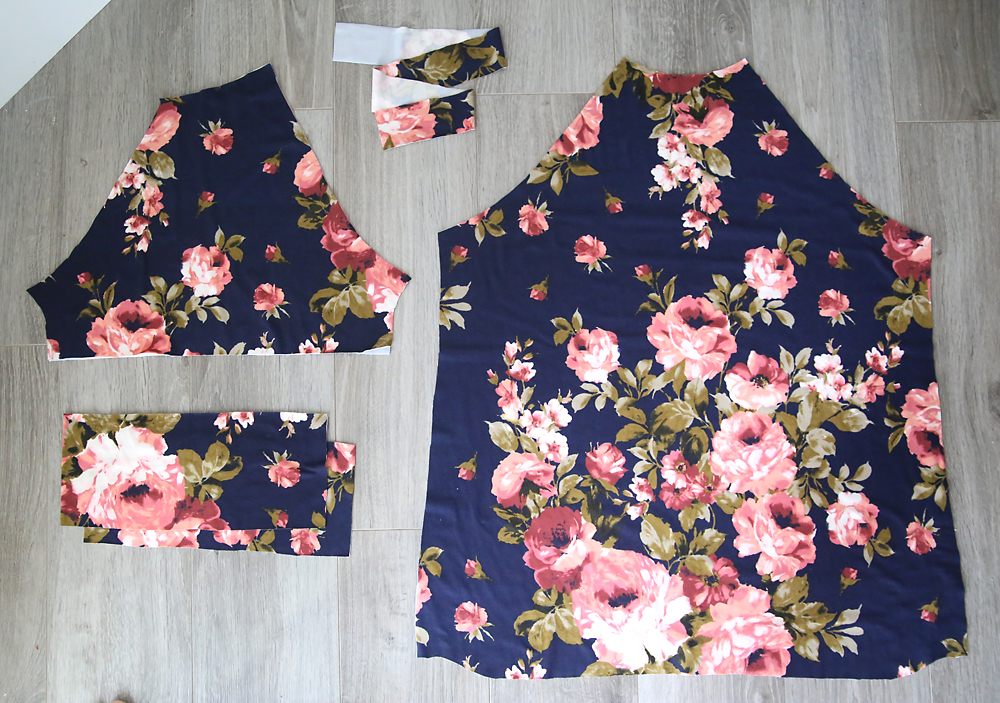
As directed in the pattern, cut out two sleeve pieces and 2 bodice pieces (bodice pieces on the fold). You’ll also need a neckbinding piece, which should be about 1.75 inches high and 28 inches long (stretch going along that length).
To add ruffles to the sleeves, you will also need two ruffle pieces, each 5 inches high and 21 inches long (stretch going along the length). You can see all the pieces cut out in the photo below:
Start by taking each ruffle piece. Hem one long edge by turning up 1/2 an inch and sewing (I used a double needle for all my hems on knit fabrics). Then sew 2 rows of gathering stitches along the other long edge. A gathering stitch is a stitch with a long stitch length and a low tension.
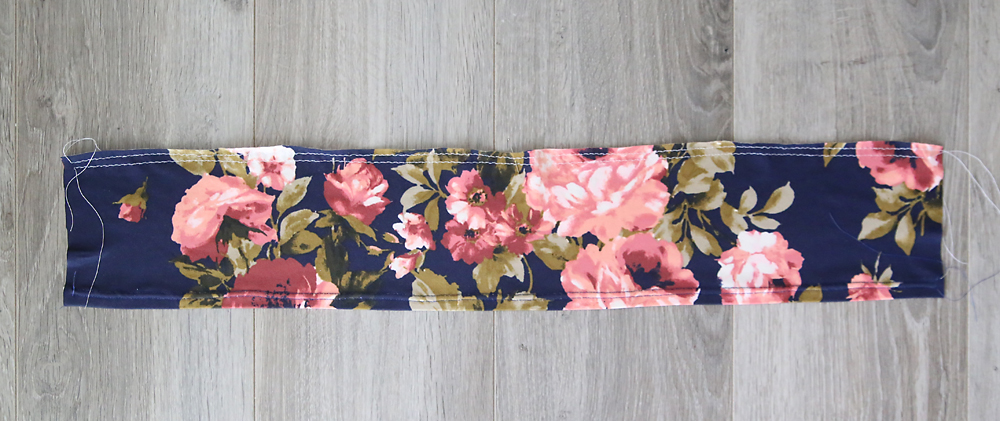
Pull on the bobbin threads of the gathering stitches to gather up the ruffle until it is the same width as the bottom of the sleeve piece:
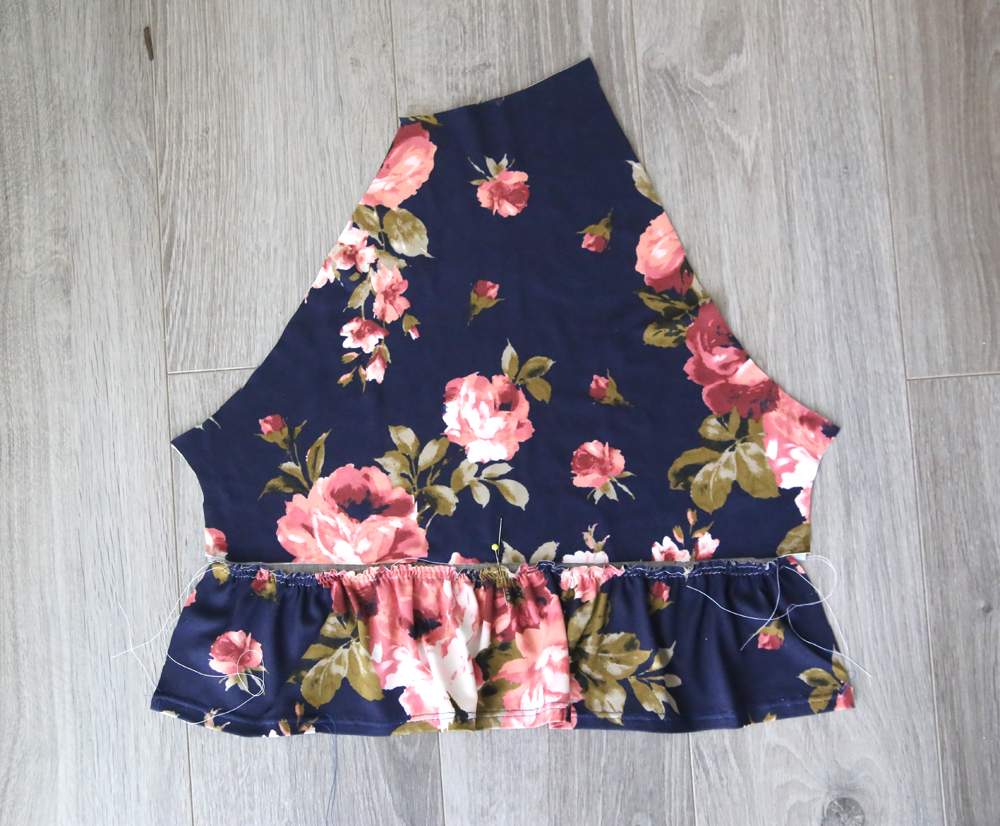
Evenly distribute the gathers. Then place the ruffle piece down on the sleeve piece, matching the ruffles to the bottom edge of the sleeve, with right sides together.
Pin and sew, using a stitch that will stretch – zig zag, serger stitch, stretch stitch – (1st photo below). Then flip the ruffle down and press (2nd photo below).
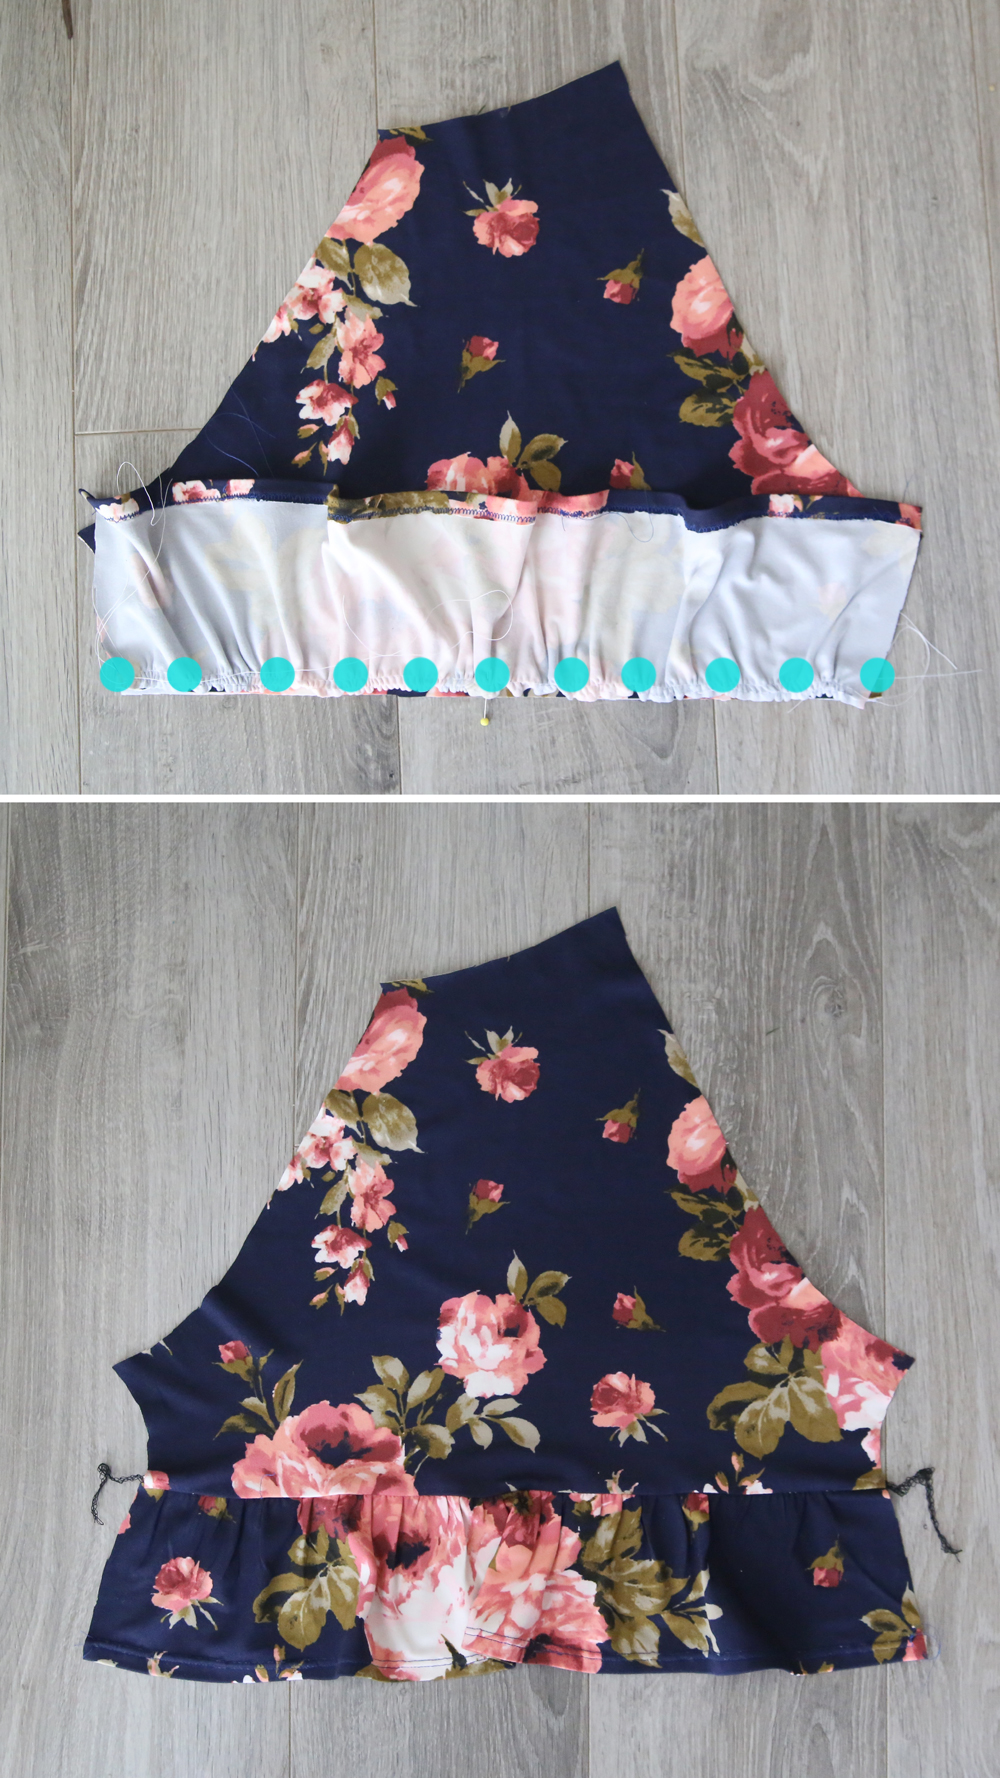
Now your sleeve pieces are ready to go and you can sew up the shirt as explained in the original raglan tee post.

Karen Teal says
Just found this site! Love it! For a flutter ragan sleeve. Does the sleeve need to be wider? I’m 69 years old and have been looking for the boho pattern. The tee shirt pattern looks just like it except there is no flutter, not ruffle, to the sleeve. And the neckline just folded over on my old pattern. Threaded crochet yarn through it. My pattern was lost when my Mama died. Thank you for giving me hope to make it again! You rock!! Karen Teal, 70’s girl!
Autumn says
No, it really need to be a stretch fabric.