
If you’re a regular reader of my blog, or have ever seen me in real life, you know I really like dresses with magical muffin top disguising properties. I like to blame my muffin top on my five children, but honestly my love affair with ice cream is the true culprit, and I frankly can’t be bothered to do much about it at this point in my life. I can, however, be bothered to figure out what dresses look best on me, and something that is fitted on top and flares out on the bottom is definitely my best bet. I’m always on the lookout for this type of dress when I go shopping and it can be hard to find one that’s long enough for me (I wear all my dresses to the knee), so I decided it was time to finally just draft a pattern that I know will work for me.
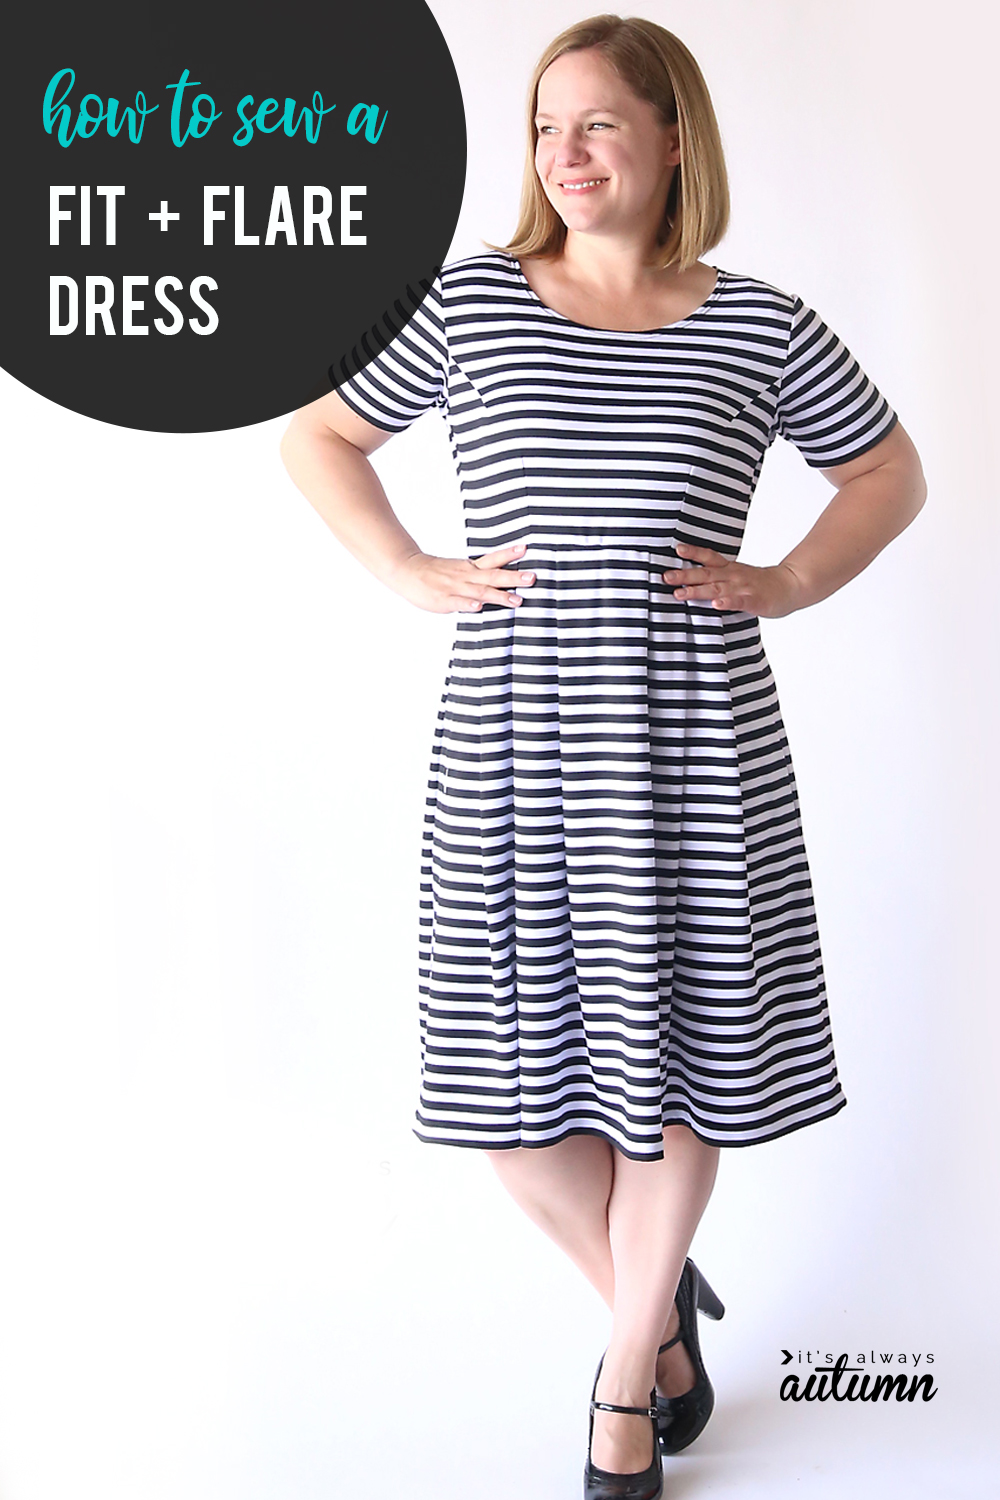
I’m hoping in the next week or two to have a printable version of this pattern for those of you who are about my size, but in the meantime I’ll show you all how to make your own pattern in any size. This is a dress I know I’ll be making again and again in different fabrics because I like how it looks and it’s super comfy.
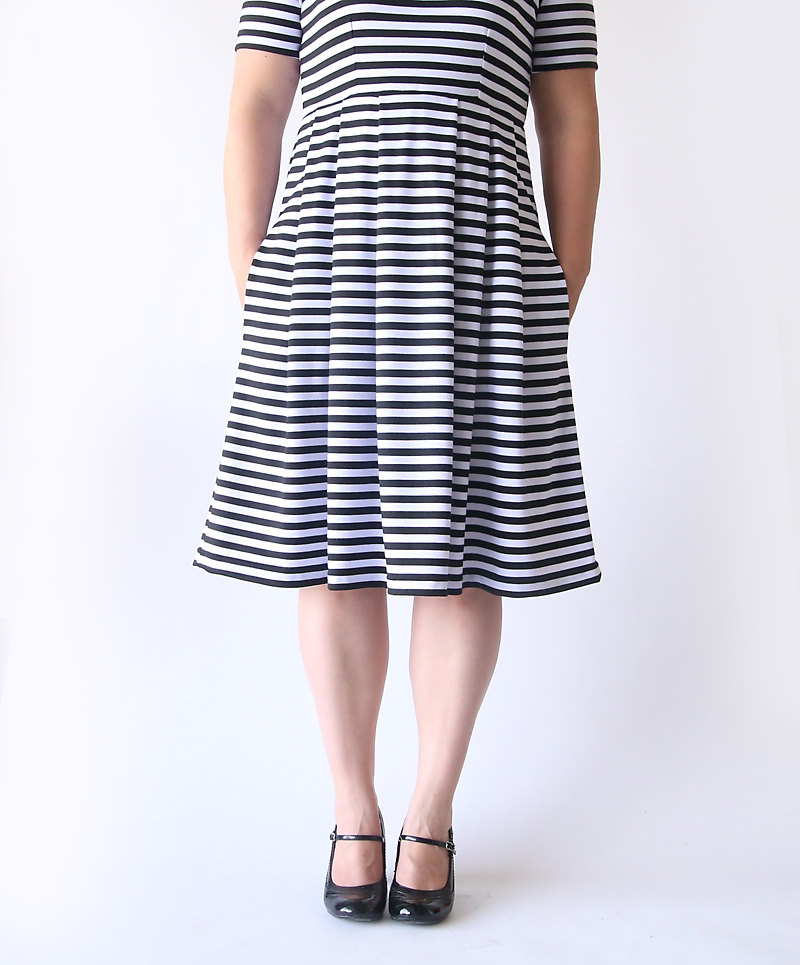
I used two yards of fabric and that was BARELY enough to eke out this dress, which goes just to the bottom of my knee (I’m 5’3″), so you may want 2.5 yards to be safe. You must use a knit (stretchy) fabric for this dress, probably something with at least 40% stretch. I used ponte, which is a bit thicker than most knits and has some structure to it. It’s also super easy to sew with.
To make your own fit & flare dress pattern in any size you’ll want to start with a fitted tee shirt. Not something skin tight, but something that follows the curve of your body pretty well.
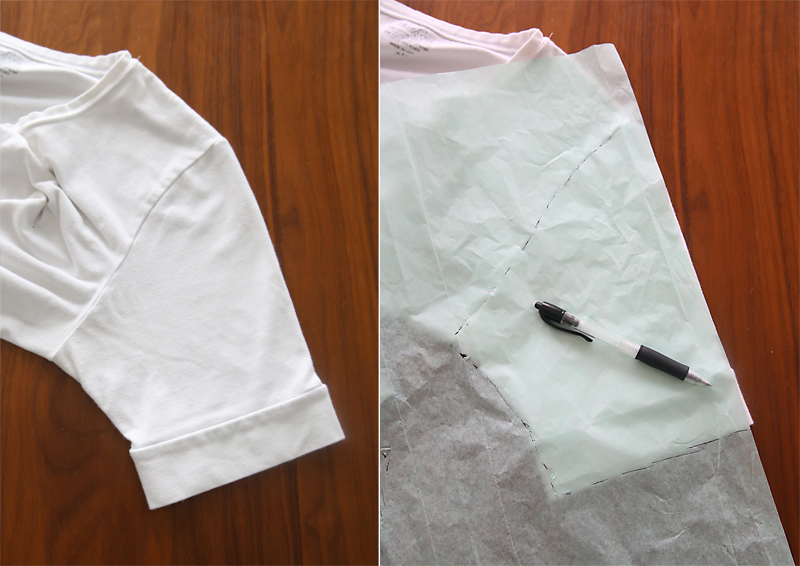
Lay the tee flat on a table. Pull one of the sleeves inside the shirt, as you can see below. Make sure the tee is still as flat as possible, then find the exact middle. Lay some tracing or tissue paper over the shirt and trace around it, marking both the front and back neckline. You don’t need to trace the full length of the shirt, just down to your natural waist, or wherever you want the skirt to attach.
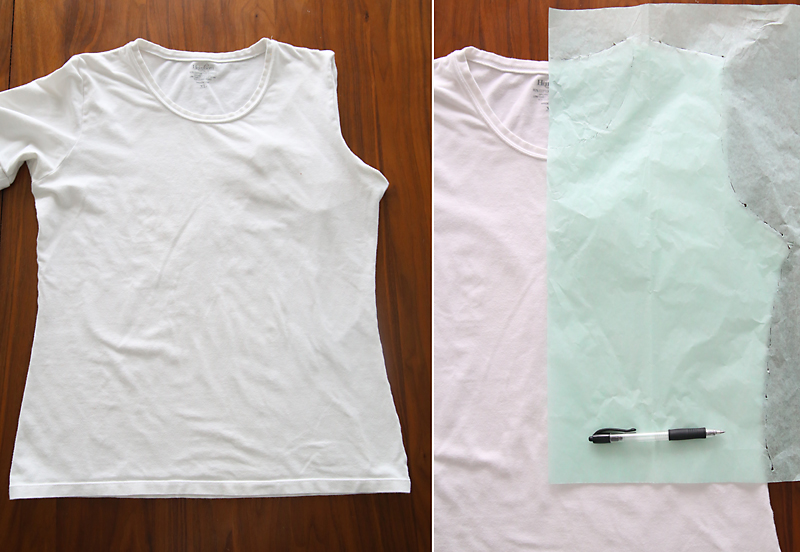
Now pull the sleeve back out and spread it out flat, as you see below. This will require you to scrunch the body of the shirt up a little bit. Where the sleeve attaches to the shirt should be a very slight S-curve. Trace the sleeve.
This will give you two pattern pieces like the ones you see below, both of which will need to be cut on the fold. At this point it’s a good idea to re-trace the pieces onto paper, adding seam allowance everywhere that’s not on a fold (plus hem allowance on the sleeve). Or you can be like me and skip this step; you just have to remember to add seam allowance as you’re cutting your fabric.
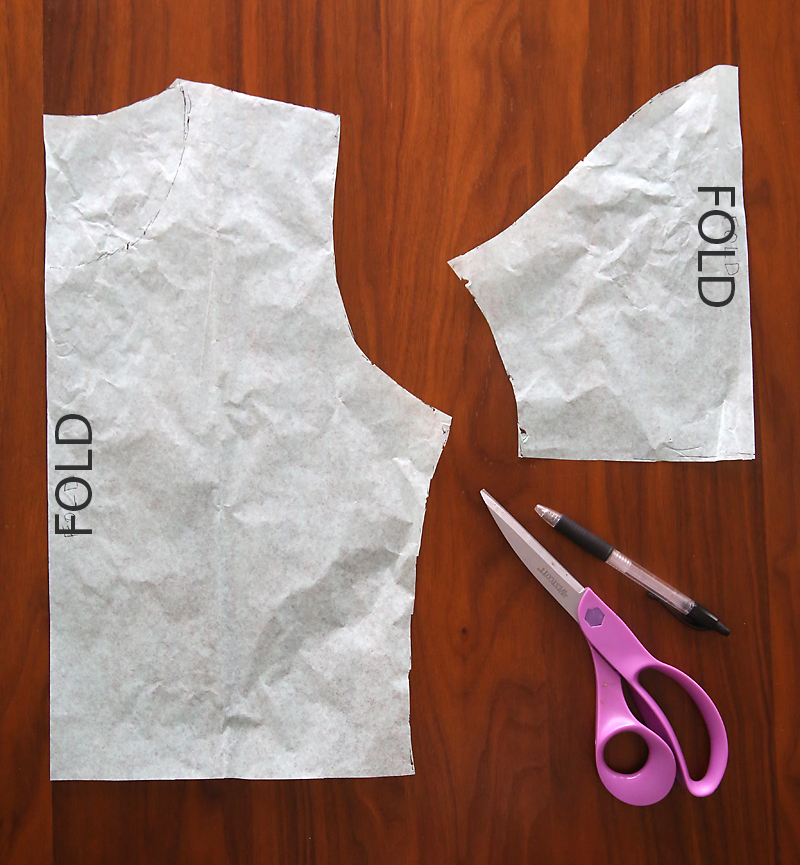
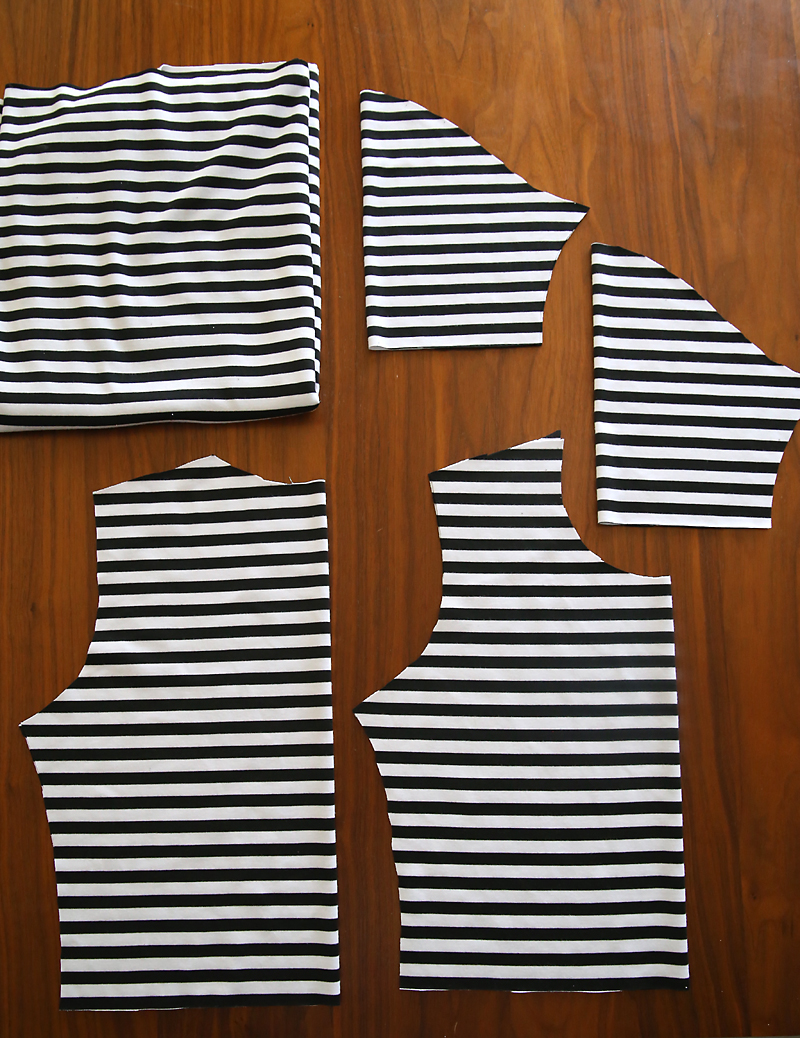
Cut two sleeve pieces on the fold; cut two bodice pieces on the fold, one with the front neckline and one with the back neckline.
You also need two skirt pieces. These should be as long as you want your skirt plus seam allowance on top and hem allowance on the bottom. My skirt pieces were 27 inches long. Each skirt piece should be at least as wide as your waist measurement. I cut mine about 42 inches wide to make sure I’d have plenty of room for pleats.
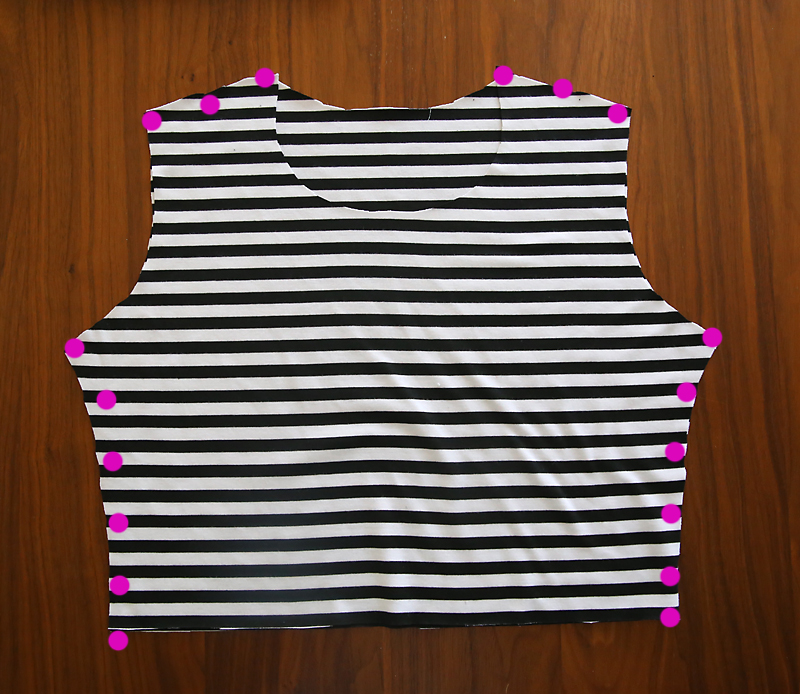
Start by constructing the bodice. Lay the front and back pieces right sides together and stitch across the shoulders and down the sides, as shown below.
Now try on the bodice and adjust accordingly to get a good fit. If you’re using something quite stretchy like a spandex knit, you could just take in the side seams until the top fits as you’d like (this is the easiest method). Since I wanted my dress to look a little more structured, I decided to add darts instead. Pinch and pin any excess fabric until the top lays nice and flat around your body.
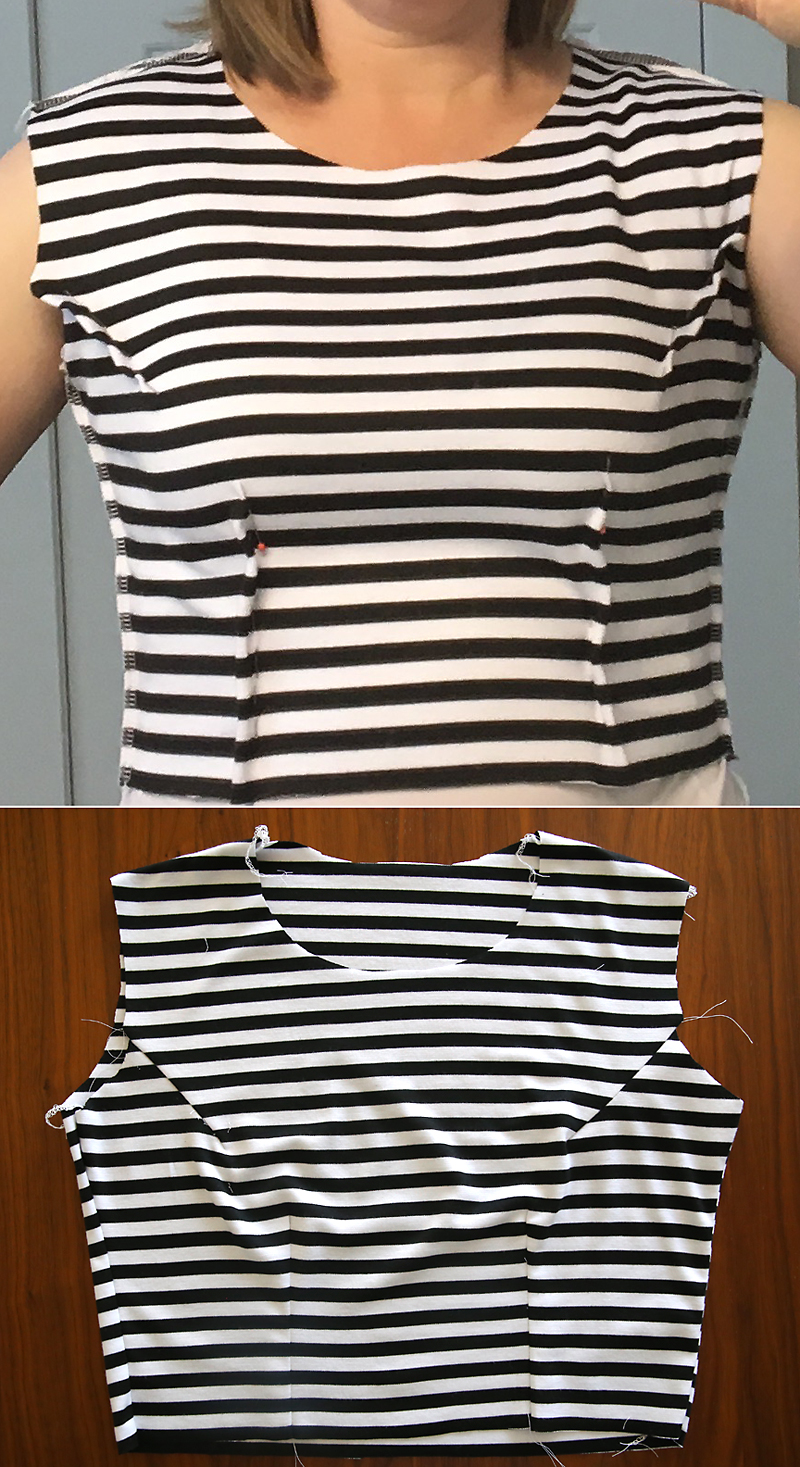
When sewing in your darts, make sure they equally distant from the center of the bodice and that they start and stop at the same place on both sides. Basically, you just want them to be nice and even. Sew them in, press them down flat, and try on the bodice again, making any other adjustments needed.
Once you like how the bodice looks, it’s time to add sleeves. Keep each sleeve piece folded in half, right sides together, and sew down the seam as shown below. Then mark the center of the sleeve with a pin (on the fold line at the very top of the curve). Turn you bodice inside out and a sleeve right side out, then insert the sleeve into the bodice as shown by the picture on the right below.
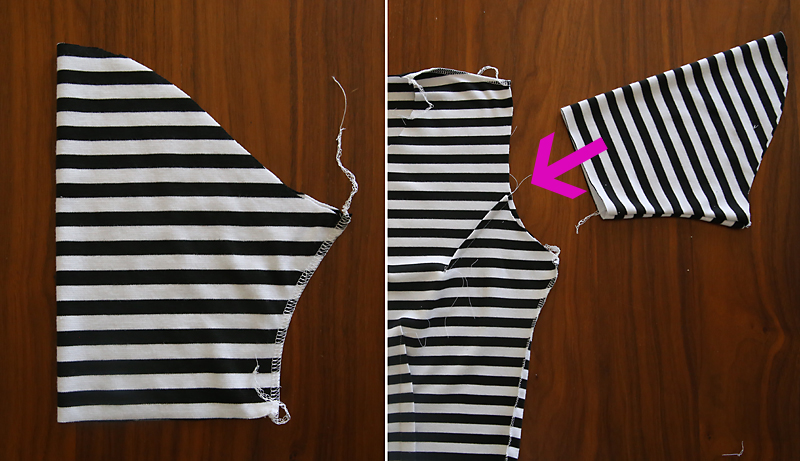
Match up the pin in the sleeve with the shoulder seam, and match up the side seam and sleeve seam. Pin the sleeve into the armhole. The sleeve is going to have a different curve than the armhole; that’s ok. You’re working with knit fabric so it’s fairly simple to just “ease” the sleeve into the armhole and make it fit. Then sew.
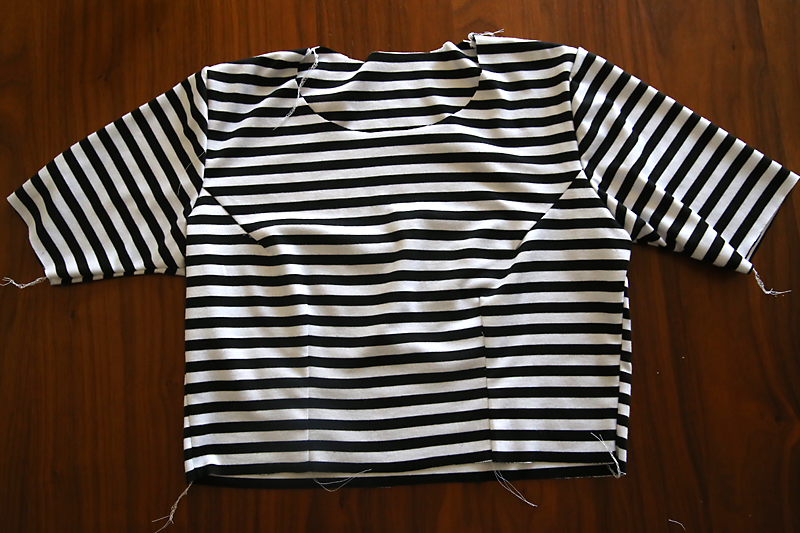
Repeat with the other sleeve and the bodice is done!
To start the skirt, take one of the skirt pieces and lay it down flat. Mark the exact center with a pin. Then measure out to the right 2 inches and mark, then 4 inches and mark, then 2 inches, etc. You’ll have pins at 2, 6, 8, 12, 14, and 18 inches from the center. Repeat on the other side of center.
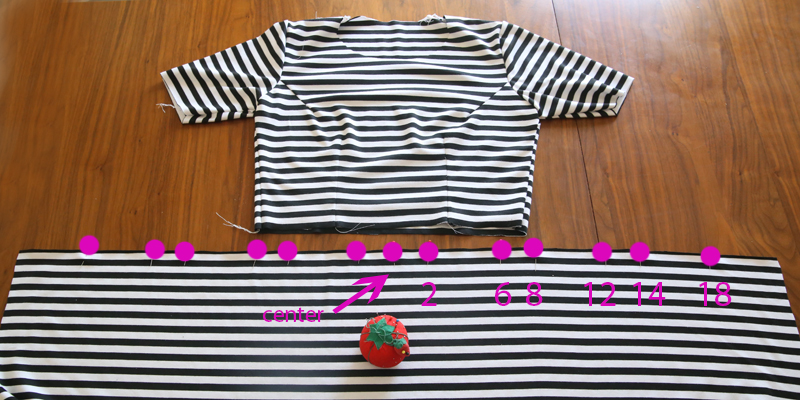
Then you’ll make pleats by grabbing the pin that’s 6 inches from center and bringing it to touch the pin that’s 2 inches from center, folding the fabric behind and in toward the center:
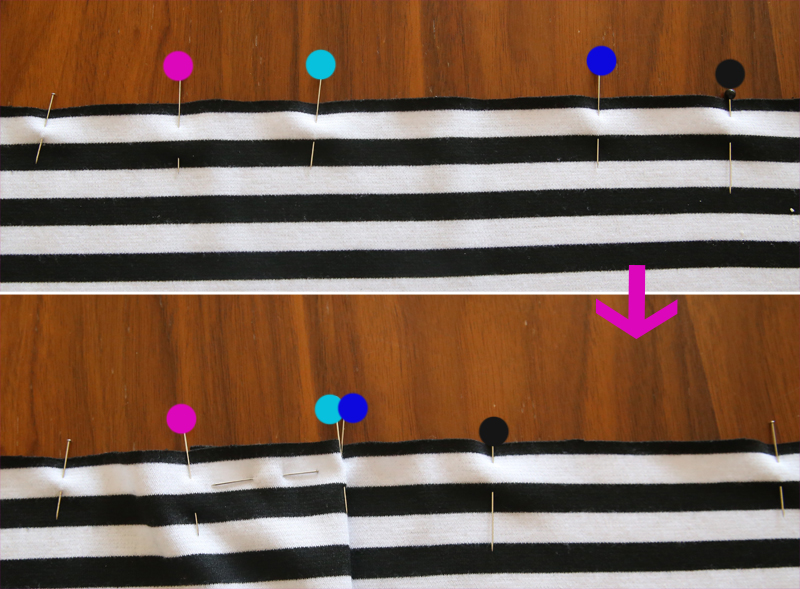
Make 3 pleats on each side of center and pin them well. It’s not a bad idea to sew across them with a basting stitch just to make sure they stay in place.
NOTE: you may need to adjust how many pleats you use and how big they are based on your size. If you’re kind of tiny, you may want to use 1.5 inches and 3 inches instead of 2 and 4. Or you may just want to kind of eyeball it instead of measuring. Just get enough pleats in there so that your skirt front is slightly wider than your bodice, as shown below:
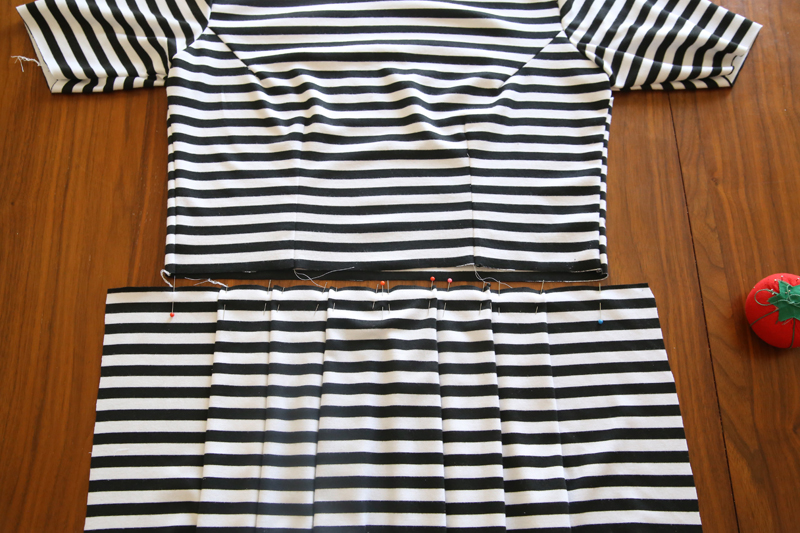
Mark on the skirt where the bodice side seams are. Repeat with the other skirt piece, matching it up with the back of the bodice (which, if you’ve put pleats in the front, will be a little bit wider). Again, mark on the back skirt where the bodice side seams are.
Sew the skirt pieces together at your markings, making the top of the skirt the same width as the bottom of the bodice.
At this point you’ll turn the skirt inside out. Keep the bodice right side out and slide it inside the skirt as shown below.
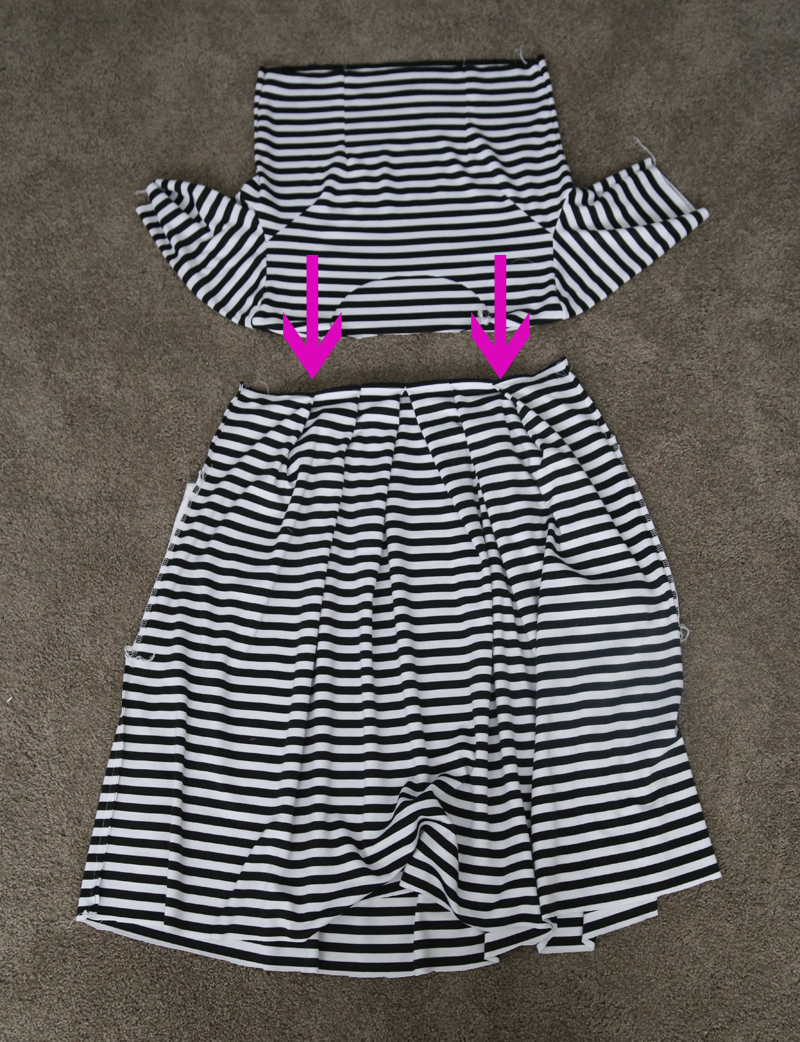
Match up the raw edges and sew all the way around USING A STITCH THAT WILL STRETCH, such as a zig zag, stretch stitch, or serged stitch. If you use a straight stitch you’ll pop this seam the first time you put the dress on.
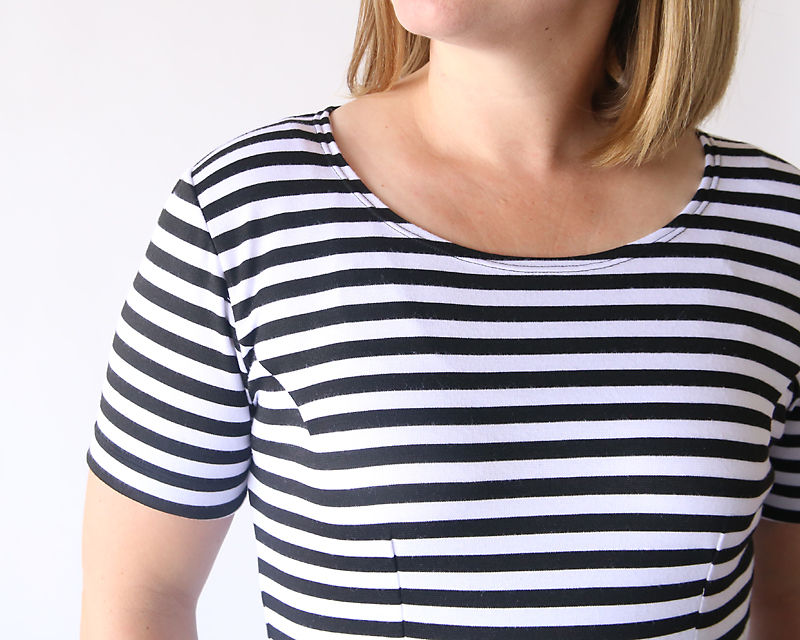
Now the basic constructions is done and you just need to do the finishing: bind the neckline (I just turned it under and stitched with a double needle), hem the sleeves…
…and hem the bottom of the skirt. Finished!
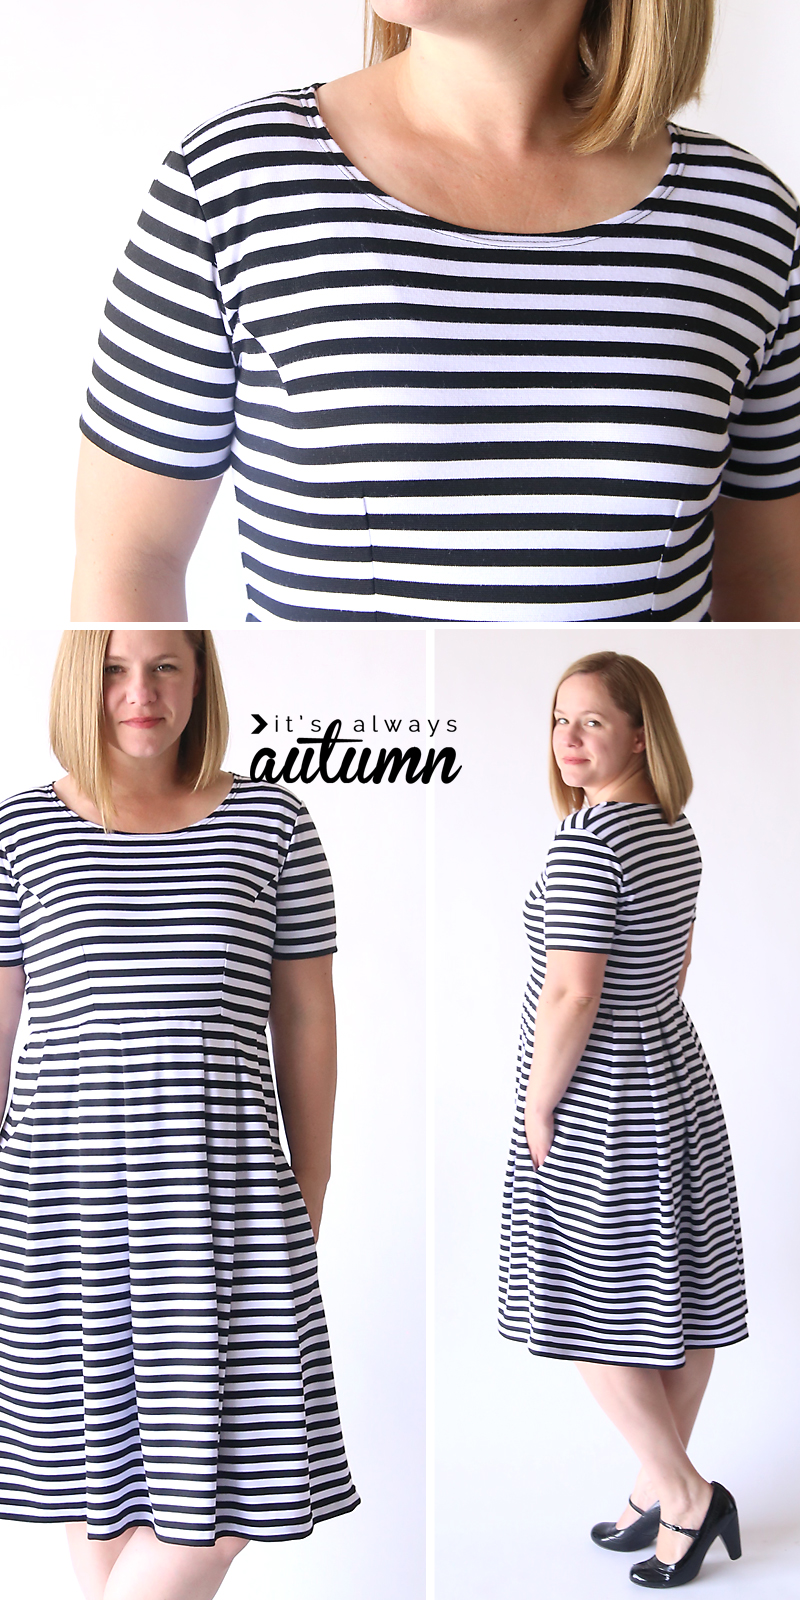
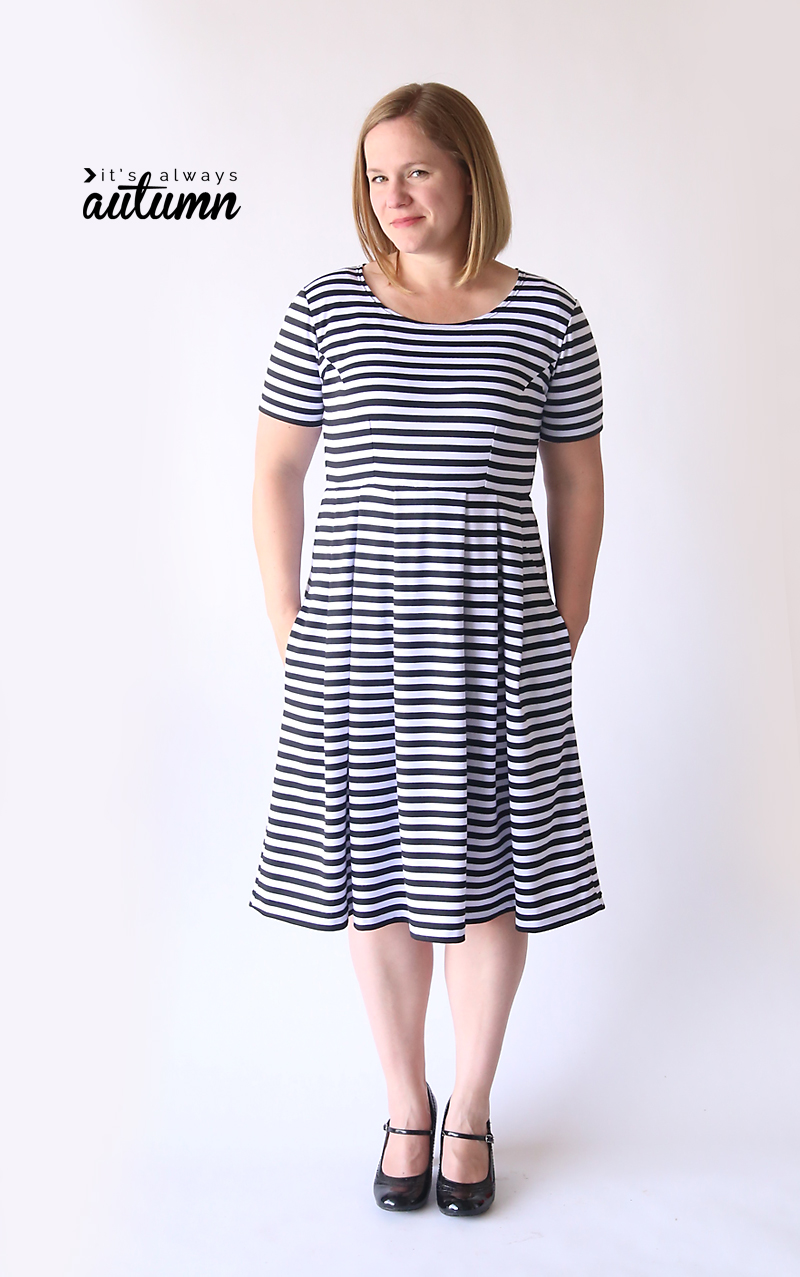
Now, you might notice I added side seam pockets. This tutorial is long enough already so I’m not going to cover that, but if you’d like to add them do so before you sew the skirt side seams together.
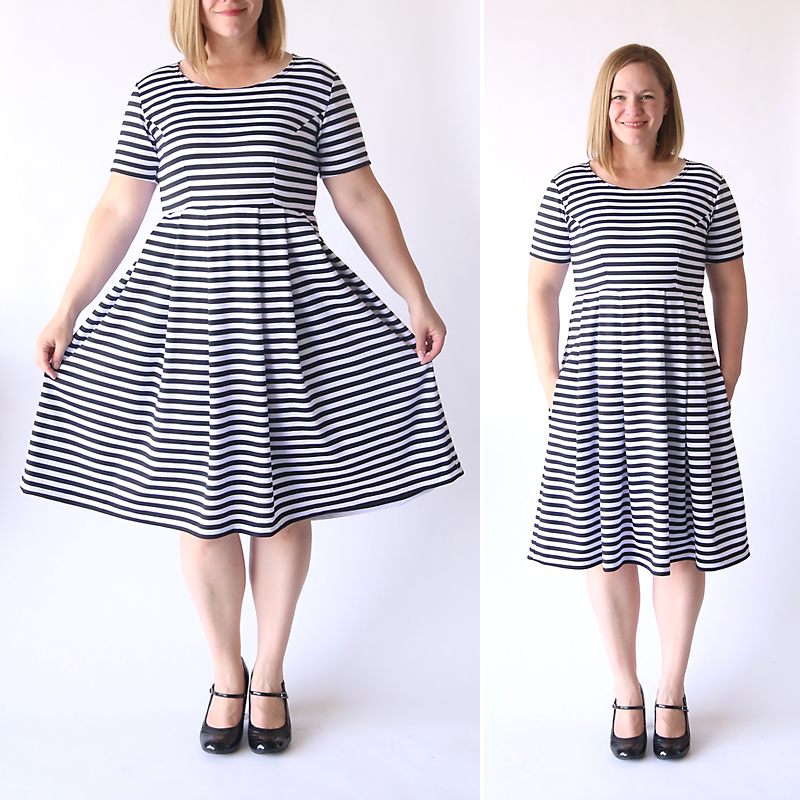
I’m pretty excited I have the perfect custom fit & flare dress pattern for me and I’m going to make another dress next week, this time with a gathered skirt instead. The plan is to include a free printable pattern for those of you that wear my size (L), so stay tuned!


Emmanuelle says
Omg this is awesome
Thank you so much !!
I love your sewing post, they’re so great and easy. You’re a vert generous person, may Good bless you.
Loves, from France
Bonnie Wiscombe says
WHY have I never thought to pull the sleeve into the bodice when tracing off a pattern??? You genius, you! Love the dress and love b&w striped everything!
Jessica says
I’ve never thought to do this either, GENIUS!!!
Melody Lema says
Thank you so much for this post. I always wanted to have a dress like this, but never could find a pattern. And not see from a pattern? Horrors, I shudder at the thought. But you made it seem so simple. My first hurdle was a T-shirt that fit right. Then I remembered I had downloaded the Tonic Tee from SBCC website. It is a free download for curvey chicks like me. I just followed along your instructions, and as of 10 minutes ago, I have a pleated skirt dress, and a gathered skirt dress. I am a true apple. I am 49-46-58. I lost a lot of weight and have a lot of loose skin in the tummy area. Nowhere can I find instructions for a large tummy adjustments for dresses or blouses. But your dress did it. I did cut my waistline a little shorter in front than in back, still added darts, but still have a loose fit. I am allowing my dresses to hang for 24 hours before I hem. I don’t know if that is still recommended, but my mom did it, so the habit continues. Thank you again. Now away from the computer, to make a couple more. With this heat they are perfect.
Justine Davis says
Thank you again Autumn for another fabulous tutorial. You are the most useful blogger I follow and I really look forward to your emails landing in my in box! Thank you so very very much!
Michelle says
That is adorable!! I love it and can’t wait for your pattern (since I am your size!) Thanks so much for sharing!