It's Always Autumn

creative tutorials for everyday life

  • Holidays
  • Holidays
    • back to school
    • birthdays
    • Christmas
    • Easter
    • Halloween
    • July 4th
    • Mother’s Day/Father’s Day
    • teacher appreciation
    • Thanksgiving
    • Valentine’s
  • Crafts
  • Crafts
    • crafts + DIY
    • handmade gifts
    • photo crafts
    • kid crafts + activities
  • Recipes
  • Recipes
    • bread
    • dessert
    • main dish
    • side dish
  • Sewing
  • Sewing
    • free sewing patterns
    • sewing for women
    • sewing for kids
    • how to sew
    • gifts
  • Photography
  • Photography
    • beginning photography tips
    • posing tips
    • photo editing tips
  • Tips
  • Tips
    • parenting tips
    • travel tips
    • books I love
  • FAQ

how to sew sewing
May 31, 2012

Ruching fabric the EASY WAY! {how to sew ruching}

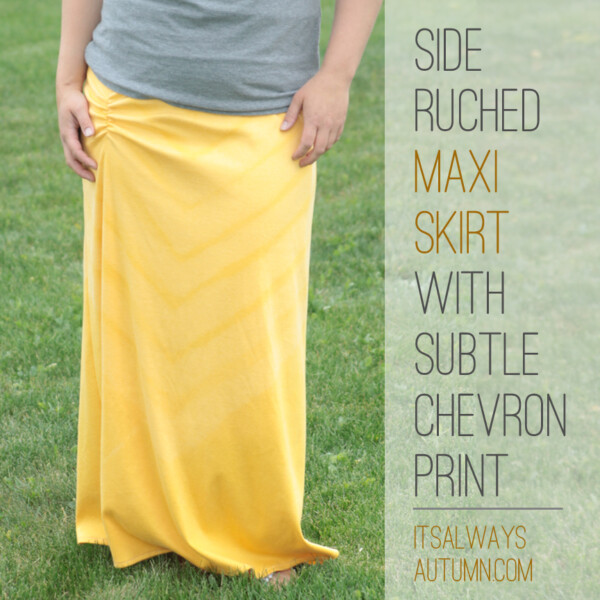
I just wanted to give you a quick tutorial on ruching fabric, like I did on the side ruched maxi dress from a few days ago. It’s very fast and easy, and it comes in handy anytime you want to add a few gathers that stretch. I used it on my skirt to add a little interest in the front:

Ruching fabric the easy way - how to sew ruching on a yellow maxi skirt.

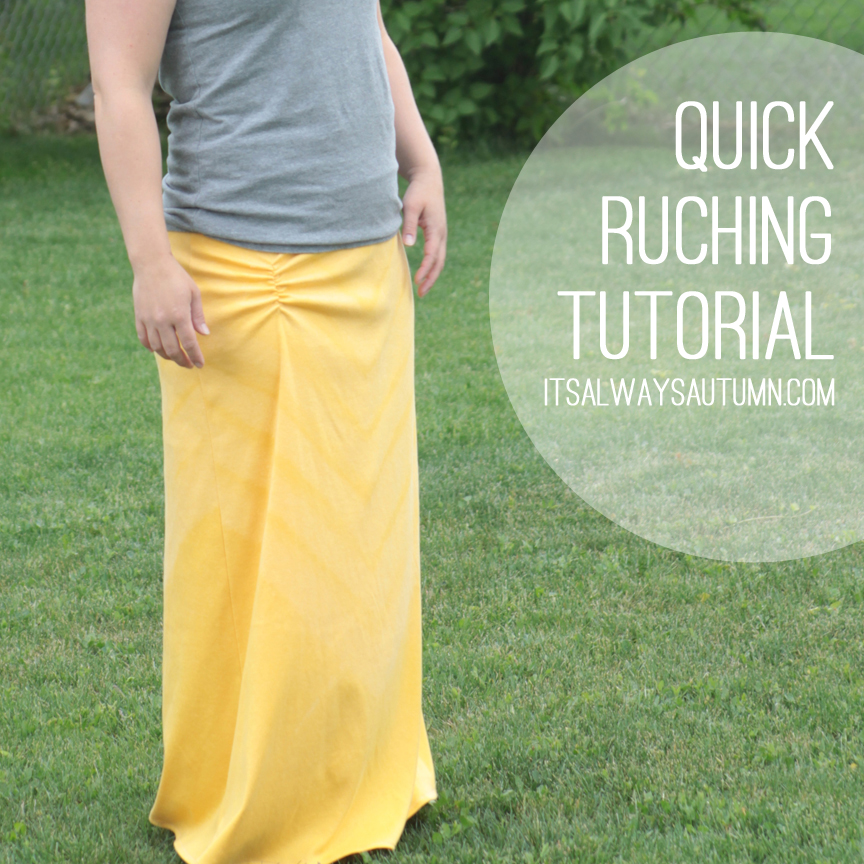
Then I used it again along the back waistband since the skirt was a little too loose. It adds a few gathers in back to cinch the waist in a little (the gathers are hidden when I fold the yoga waistband down).

I also use ruching fairly often to give sleeves a quick pickup:

I’ve even used this technique to shorten a too-long tank top (adding ruching along both side seams).

Ruching fabric the easy way

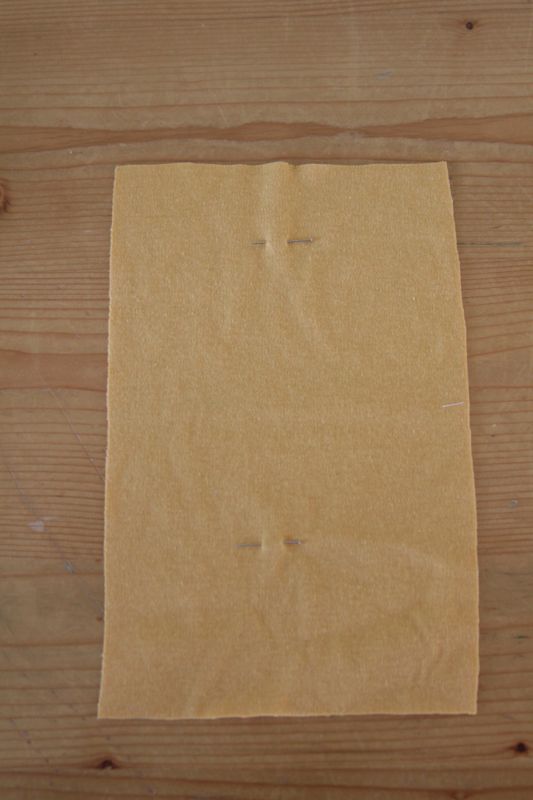
Start by marking the top and bottom of the area you’d like to ruche (or gather) with pins.

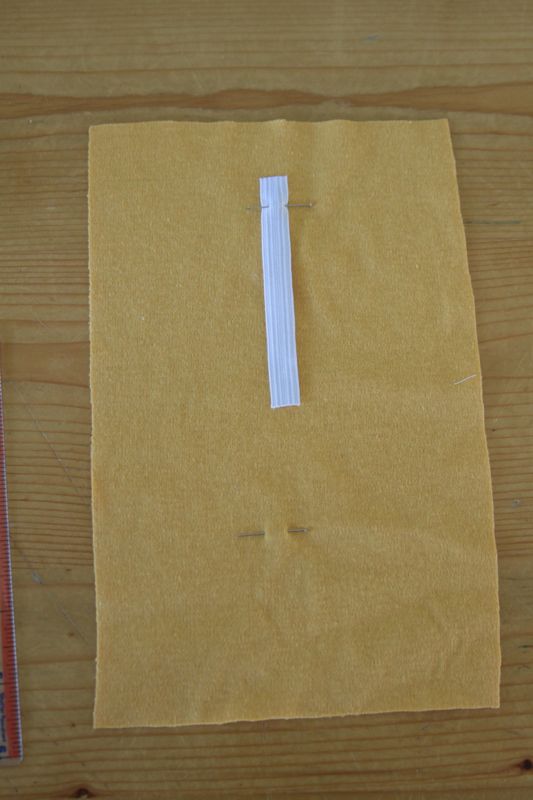
Measure the length of the area, divide by 2 and add one inch. That’s how much elastic you’ll need. (My area here is 5 inches, so I cut 3.5 inches of elastic.) You can use 1/4 inch or 1/2 inch elastic, but 1/2 inch is easier to work with.

Pin the elastic down using your top pin, keeping the pin in the same spot. Make sure half an inch of elastic is above the pin.

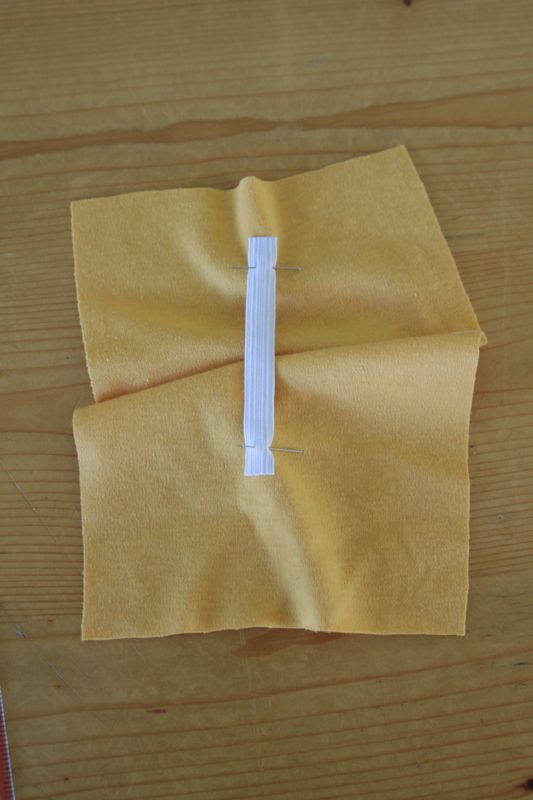
Now bunch up the fabric enough that you can pin the bottom of the elastic down where the bottom pin is. Make sure half an inch of elastic is below this pin.

Place your fabric on your machine, starting right at the first pin. Backstitch a few stitches, then forward stitch back down to the pin. This will secure the elastic. The fabric will be all bunchy in between the pins:

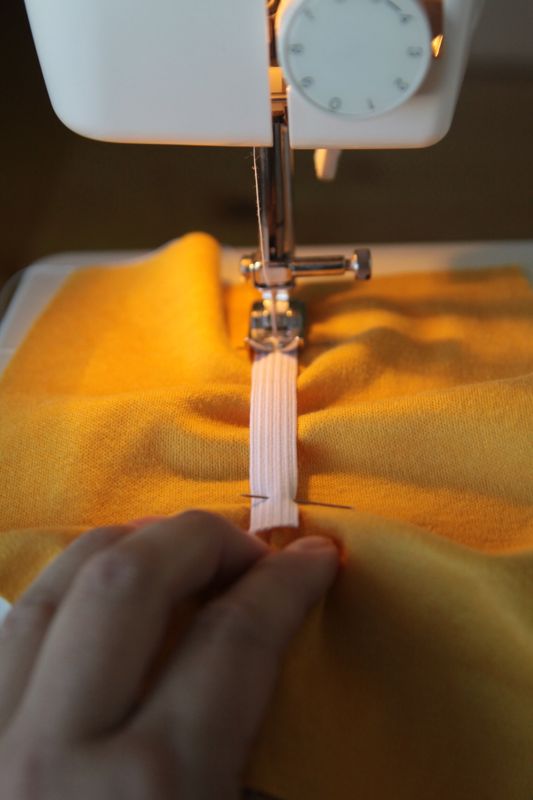
Grab hold of the elastic at the bottom pin and pull, stretching the elastic until the fabric is smooth.

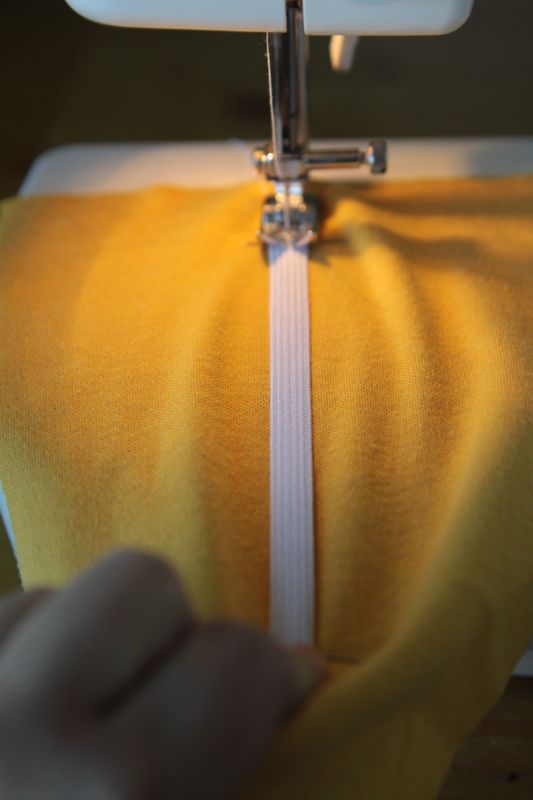
Sew slowly in a straight line down the middle of the elastic. You may need to use your other hand to gently pull on the top of the fabric to keep it smooth as you sew. When you get to the bottom pin stop stretching and sew right past the pin for a few stitches, then backstitch to secure the seam.

Your elastic will return to it’s normal length, ruching or gathering your fabric. It will look like this on the other side:

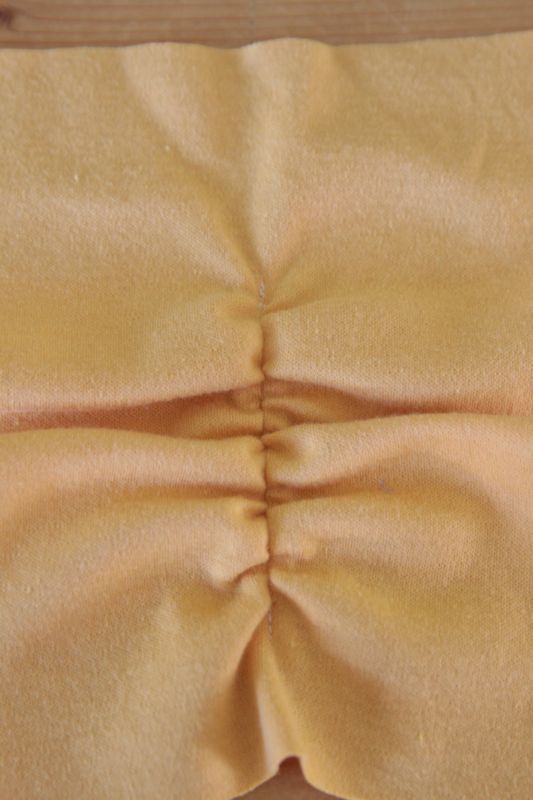
Naturally, you want to make sure to sew the elastic onto the wrong side of your fabric, so only the gathers will be visible on the right side.

Now you know how to sew ruching (and you also know that it’s super, super easy!).

Ruching fabric the easy way - how to sew ruching on a yellow maxi skirt.

PS – this method is the easiest for ruching fabric, but there are other methods as well. Check out this post to learn more about ruching.

Share this:

  • Tweet
  • Print

Home » sewing » how to sew » Ruching fabric the EASY WAY! {how to sew ruching}


19 Comments

free email series

NO FAIL CRAFTS + RECIPES

Get my favorite EASY craft and recipe ideas straight to your inbox!

« Side ruched maxi skirt with subtle chevron print
How to make a skirt out of an old shirt {easy refashion} »

Comments

  1. Michele Ciola says

    June 2, 2012 at 12:06 am

    Oh look out Ciola household . . . let the rouching (how do you spell that?) begin!!! So fun. I’m definitely trying it!

    Reply
  2. katie says

    June 8, 2012 at 12:06 am

    What a fantastic tip! I want to make a dress with a rouched top and wasn’t sure how to go about doing this–now I know how I’m going to tackle it!

    Reply
  3. Mary Jo Smith says

    January 26, 2015 at 1:52 pm

    I can’t believe how simple this is. Great way to shorten sleeves a bit. Can think of many uses for this.

    Reply
  4. Mary Jo Smith says

    January 26, 2015 at 1:53 pm

    Love it. Never would have guessed it was this simple.

    Reply
  5. jennifer says

    January 28, 2015 at 9:20 pm

    I love this. I’m just starting to learn to sew and this trick will fancy up something plain..

    Reply
  6. Nola bogart says

    February 12, 2015 at 12:04 pm

    Easier than I would have guessed! Leaving now to buy the elastic!

    Reply
  7. Robbie says

    August 23, 2015 at 2:11 pm

    Some use a zigzag stitch with thinner width elastic. Why is your preference a straight stitch.

    Reply
  8. Marsha says

    September 11, 2015 at 8:33 am

    Does it matter what color thread you use? Can you see the bobbin thread from the right side of the fabric after ruching? Is that ever an issue?
    Thank you! You have the best tutorial for this I’ve seen. 🙂

    Reply
  9. doris wilson says

    June 14, 2016 at 2:11 pm

    I had this blouse mad and don’t wear it because its too big. Been looking for ideas…But I could do this to sleeves and add a belt.. Thanks

    Reply
  10. Amanda Jensen says

    July 6, 2016 at 2:36 pm

    If trying to create a ruched belt for a skirt or dress made with charmeuse, would it be better to use a lighter elastic? I think that the waist would be either elastic or a yoga-style waist. Thanks!

    Reply
  11. Lori Bea says

    July 15, 2016 at 5:25 am

    Thank you very much. Your instructions were clear and easy to follow. I do not have a lot of experience sewing. I did not have to guess about anything. I followed your instructions and accomplished the task?!

    Reply
  12. Gillian sealey says

    October 31, 2016 at 6:18 am

    I always found curved hems of tops are flattering so I gather a few inches of the bottom side seams with elastic. This creates a curved hemline which disguises my tummy bulge! Have saved a few previously unworn tops in this way!

    Reply
  13. Gillian sealey says

    October 31, 2016 at 6:25 am

    I always found curved hems of tops are flattering so I gather a few inches of the bottom side seams with elastic. This creates a curved hemline which disguises my tummy bulge! Have saved a few previously unworn tops in this way! (UK)

    Reply
  14. jeanne says

    March 6, 2017 at 4:11 pm

    Thank you! I have some turtlenecks that will fit again.Bravo!

    Reply
  15. Melissa says

    March 1, 2018 at 8:35 am

    Oh wow, that was so easily explained and much easier to do then other tutorials on ruching!! Thank you so much for sharing! 🙂

    Reply
  16. anna says

    April 13, 2018 at 3:08 pm

    I am happy I read this article. Pictures help a lot. It is step by step way

    Reply
  17. Julia says

    February 3, 2019 at 9:36 pm

    Oh my gosh, thank you so much for this! This has been the ONLY sewing tutorial I’ve read that is actually so clear and easy to follow. SERIOUSLY. I hope you continue making small tutorials like this, I’m definitely a fan.

    Reply

Trackbacks

  1. Fringe Blog says:
    June 23, 2017 at 3:17 pm

    Ruched Sides And Sleeves

    […] n stop stretching and sew right past the pin for a few stitches, then backstitch […]

    Reply
  2. A Belated Thrift Flip – Natter says:
    August 12, 2020 at 8:05 am

    […] followed this tutorial, hoping that all the bunched fabric would take in the sides enough to give me the silhouette I was […]

    Reply

Leave a Reply Cancel reply

Your email address will not be published. Required fields are marked *

Recipe Rating


Hey, glad you’re here!

I'm Autumn, a mom of five who loves ice cream, Masterpiece Theatre, and clothes that hide the fact that I eat so much ice cream. When I was 18 I got a job at a craft store and told everyone (regularly) how much I hated crafts. Well, things change! Read More…

Find me here

  • Facebook
  • Instagram
  • Pinterest
  • Twitter

free email series

NO FAIL CRAFTS + RECIPES

Get my favorite craft + recipe ideas straight to your inbox!

Popular Posts

101 Fun + Easy Activities kids can do AT HOME

50 easy crafts and activities kids can do indoors! Perfect for cold or rainy days.

50 best indoor activities for kids: easy crafts + games

Gorgeous art projects for kids! Easy art that turns out amazing.

20 easy art projects for kids that turn out AMAZING!

How to make GORGEOUS paper flowers

How to make mini donuts! {baked cake mix donuts recipe}

Blog policy

All posts and pictures are copyrighted by Autumn Baldwin and blog content may not be reposted elsewhere. However, linking back to my content is just fine. You may use one photo as long as you link directly back to the specific post. Thank you!

Please view our Privacy Policy here.

Also, please note that this blog is a participant in the Amazon Services LLC Associates Program, an affiliate advertising program designed to provide a means for sites to earn advertising fees by advertising and linking to Amazon.com.

Copyright © 2021 · Divine theme by Restored 316192.168.1.1 router login

Copyright © 2021 · Divine Theme on Genesis Framework · WordPress · Log in

free email series

NO-FAIL CRAFTS + RECIPES

Get my favorite EASY craft + recipe ideas straight to your inbox!

x