It's Always Autumn

creative tutorials for everyday life

  • Holidays
  • Holidays
    • back to school
    • birthdays
    • Christmas
    • Easter
    • Halloween
    • July 4th
    • Mother’s Day/Father’s Day
    • teacher appreciation
    • Thanksgiving
    • Valentine’s
  • Crafts
  • Crafts
    • crafts + DIY
    • handmade gifts
    • photo crafts
    • kid crafts + activities
  • Recipes
  • Recipes
    • bread
    • dessert
    • main dish
    • side dish
  • Sewing
  • Sewing
    • free sewing patterns
    • sewing for women
    • sewing for kids
    • how to sew
    • gifts
  • Photography
  • Photography
    • beginning photography tips
    • posing tips
    • photo editing tips
  • Tips
  • Tips
    • parenting tips
    • travel tips
    • books I love
  • FAQ

how to sew sewing sewing for women
May 1, 2018

Easy half circle skirt sewing tutorial – make a pattern in any size!

In today’s post: Learn how to make a half circle skirt in any size! Follow the simple steps to create your own pattern and sew a new skirt.

I’ve mentioned before how much I love skirts, especially in warm weather. People think I’m all dressed up, but what they don’t realize is that skirts with elastic waists are just my warm weather version of sweats. And skirts are super easy to sew, especially when you use a stretchy knit fabric so you don’t even have to bother with zippers or buttons.

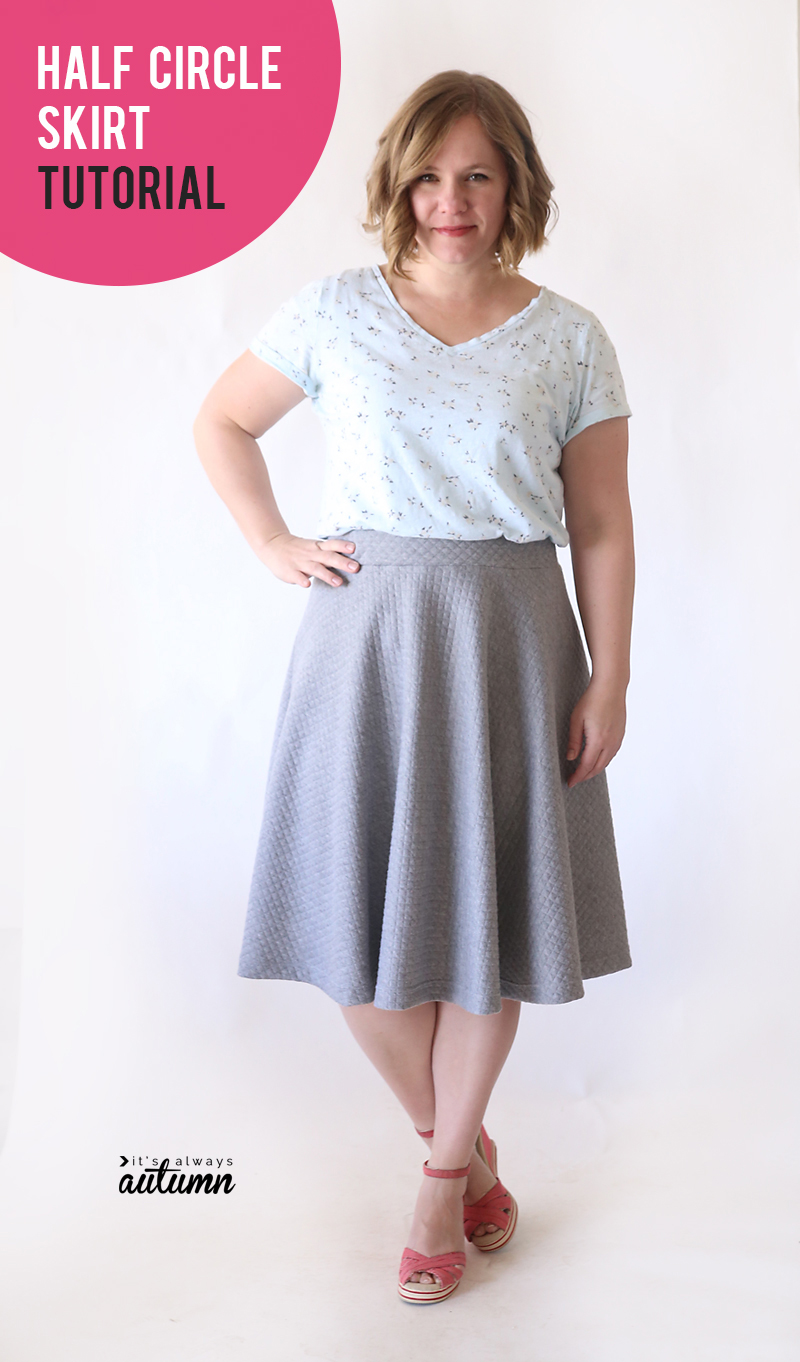
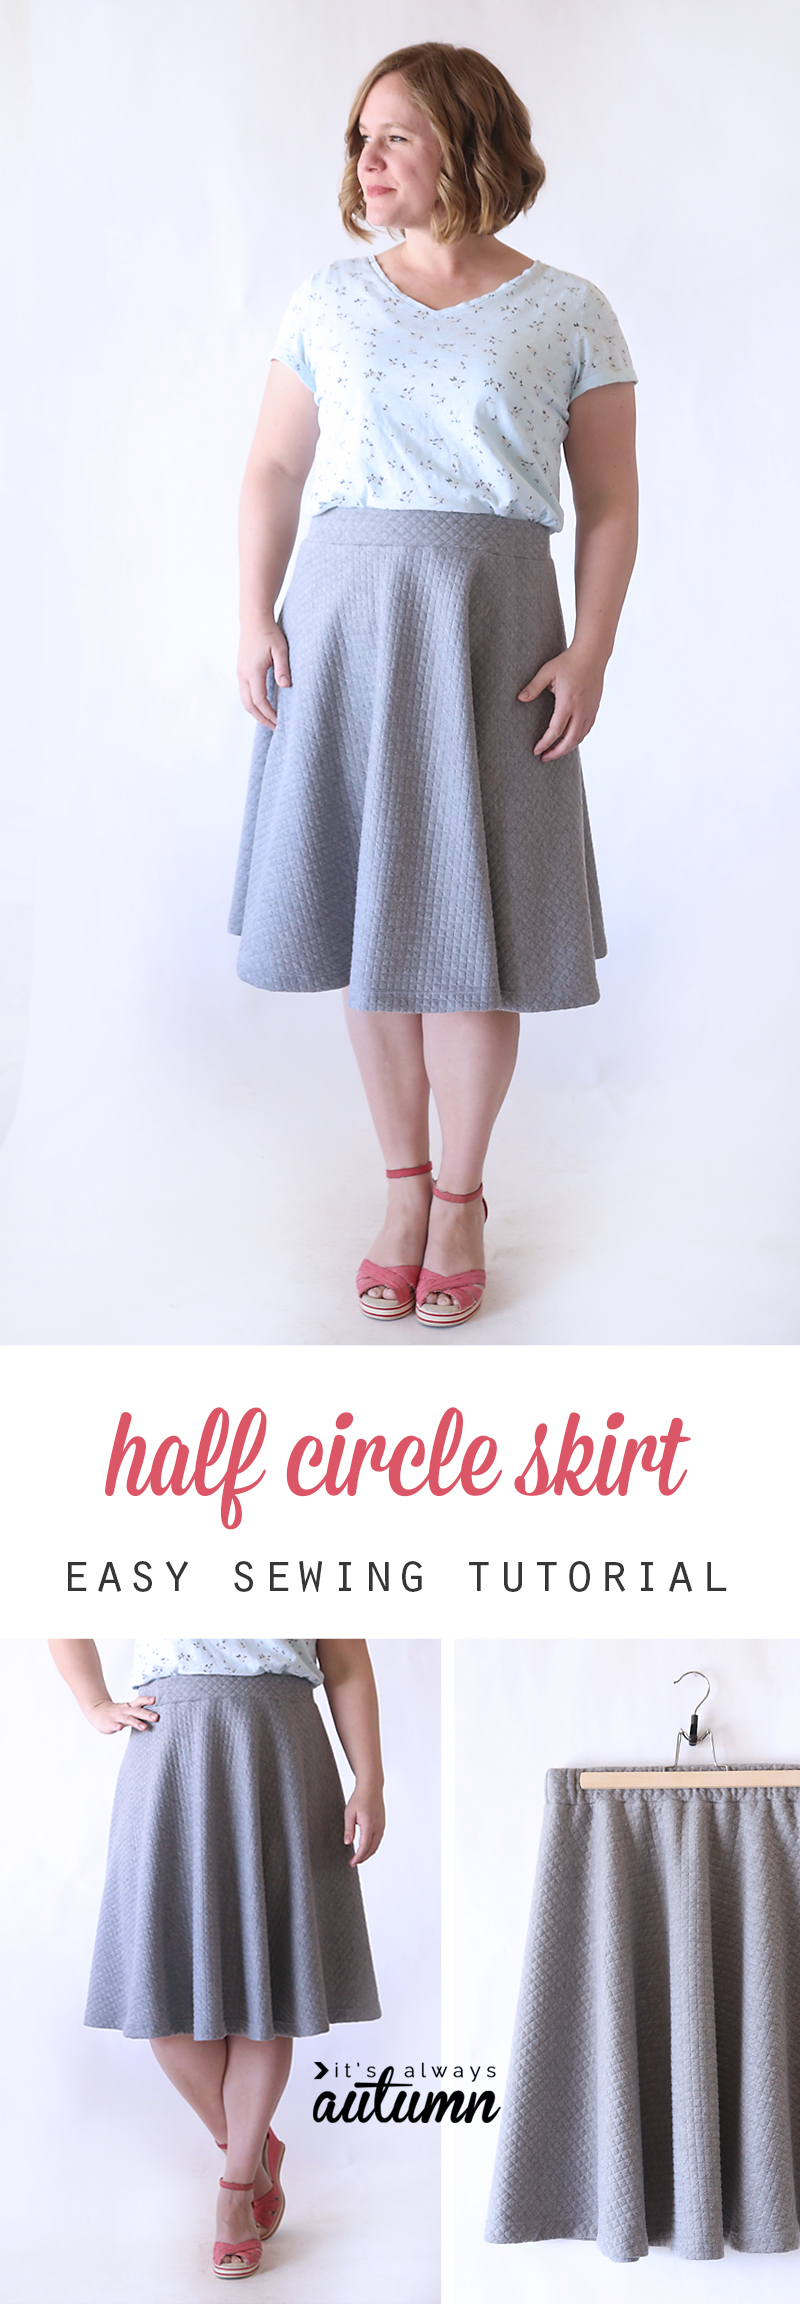
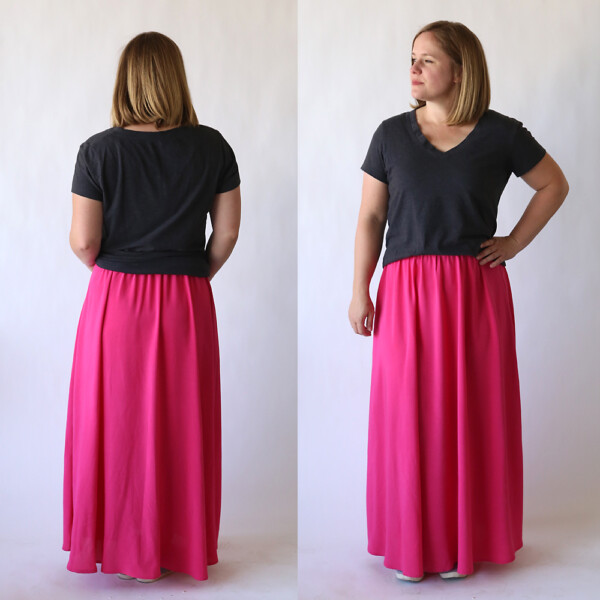
Learn how to make a half circle skirt in any size! This skirt is easy to sew and flattering on everyone.

If you’ve made a circle skirt before, you know they are pretty darn easy. This skirt is actually a half circle skirt, which means it’s not quite as full. That’s a good thing for a more casual skirt: it takes less fabric, is even easier to sew, and is less likely to give you a Marilyn Monroe moment while you’re chasing your kids at the park.

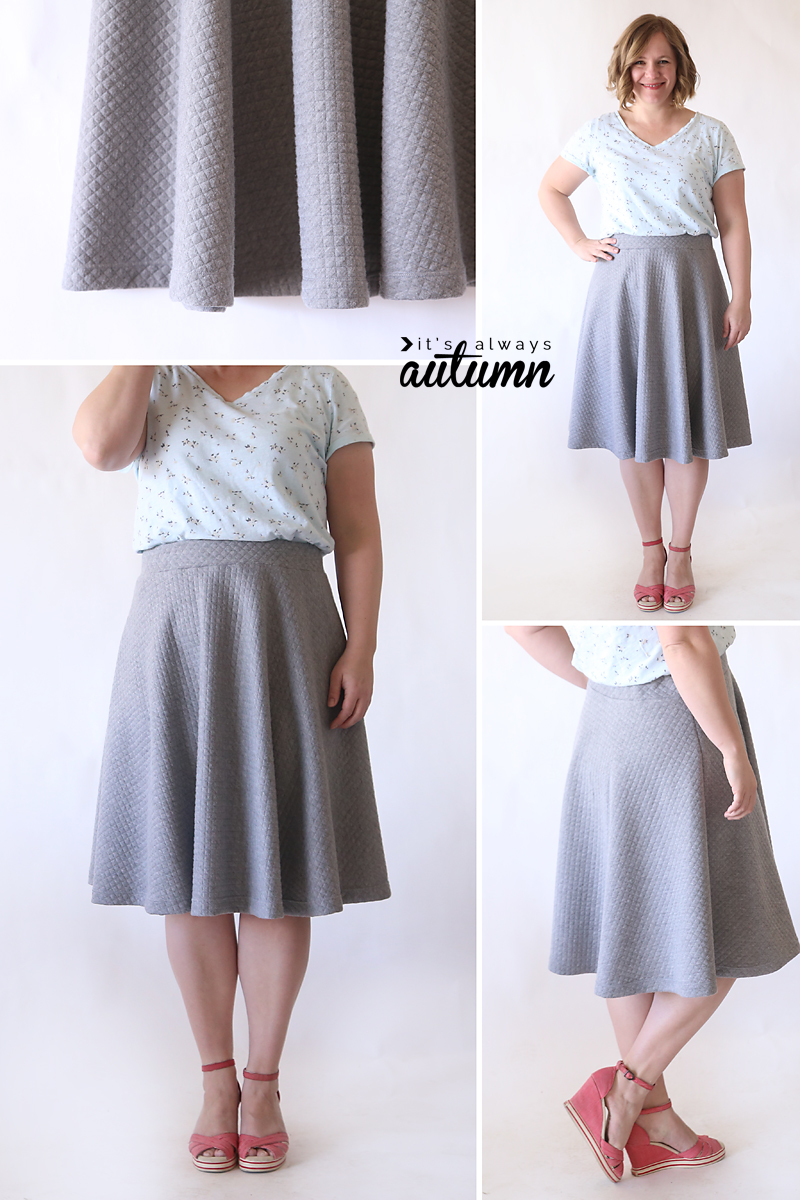
A woman wearing a half circle skirt

How to sew a half circle skirt

To make a half circle skirt, you do need to start with just a teeny bit of math, but don’t worry, it’s easy. You need two measurements: your waist measurement, and a skirt length measurement (the total length you want the skirt to be, from top of waistband to bottom of hem).

Take your waist measurement and divide by 3.14 to get the waist radius. So if your waist is 31 and a half inches, you’ll end up with a waist radius of 10. If you get a weird decimal, just round to the nearest quarter inch.

Then take your length measurement and add it to the waist radius to get the hem radius. I wanted my skirt about 25 inches long, so 10 + 25 = 35.

NOTE: Ok, I have to stop here and add a little more explanation because some people are getting angry at me and telling me I don’t know how to do math 😉 Yes, I am aware that dividing your waist measure by 3.14 gives you the diameter of a circle, not the radius. But that’s ok, because we are making a HALF circle skirt, so the diameter is the measurement we want (you only use the true radius if you are making a FULL circle skirt which requires a lot more fabric)! I am referring to this measurement as a waist radius because you will use that measurement as a radius when you cut out the skirt (see photo below). I promise it works – this is how you make a HALF circle skirt – so please don’t leave me a mean comment about my math ability. Thanks!

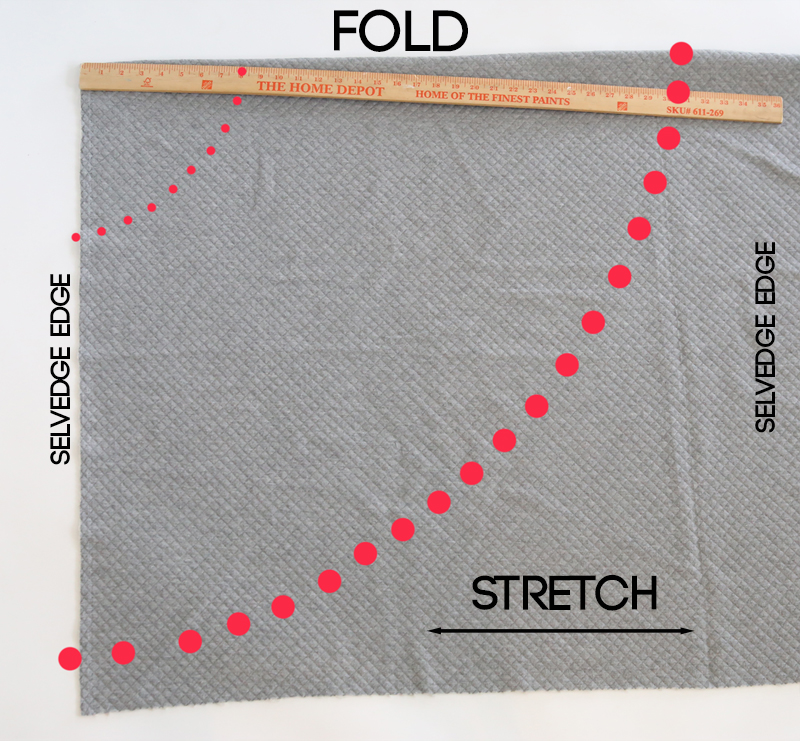
You’ll likely need 2 yards of knit fabric, although if the measurements you just got are bigger than mine, you may need a little more than 2 yards. Fold the fabric in half (hamburger, not hot dog) and place it on the ground with the fold going along the top and the selvedge edges running down each side. Measure out from the top corner using the waist radius, moving the yardstick and pinning right at the radius number to create a curve, as shown:

Diagram for cutting a half circle skirt pattern

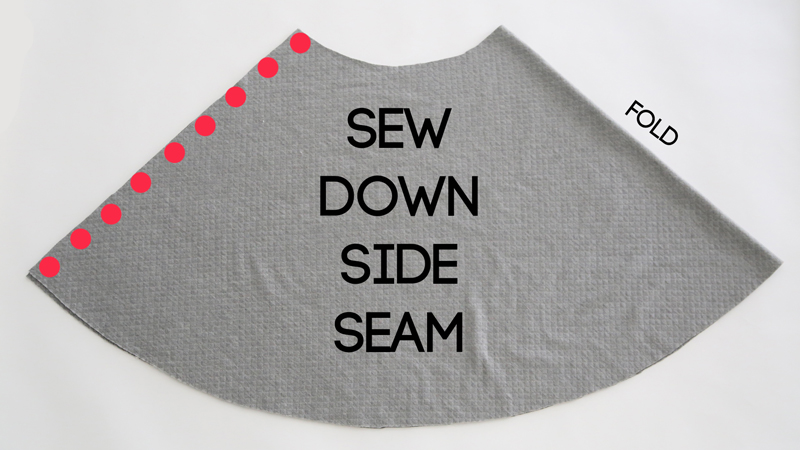
Measure again to create a hem curve, this time using the hem radius number. Cut along the pins…

Sew down side seam of half circle skirt

…then sew down the side seam (make sure fabric is RST at this point).

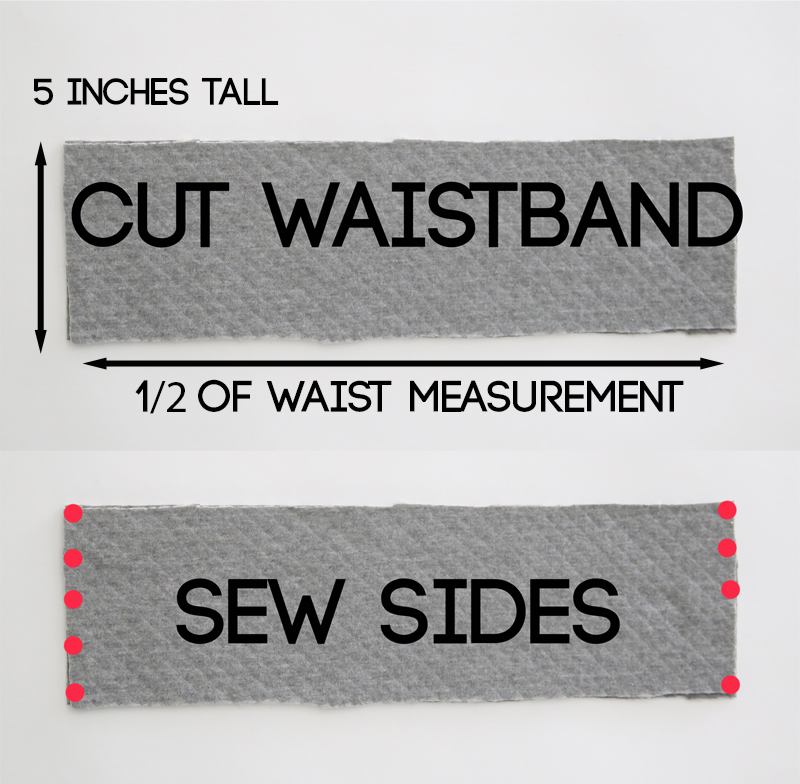
Next you’ll want to cut 2 waistband pieces from some of the extra fabric. The waistband should be 5 inches tall, and half your waist measurement wide. Make sure the long edges of the waistband pieces go with the stretch in the fabric (side to side as seen below). Place the pieces RST and sew all the way down one short side. On the other short side, sew down a little more than halfway, then leave an opening, and sew the bottom half inch, as shown by dots below.

Cut waistband and sew together sides

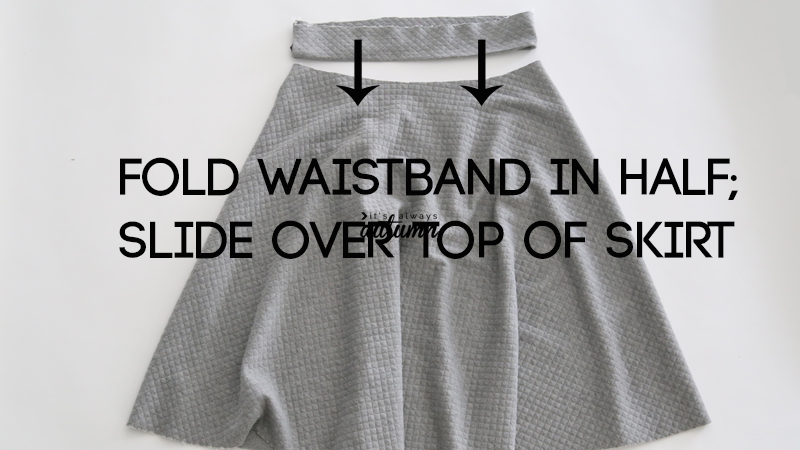
Fold the waistband in half (right side out) and press. Now you have a skirt piece and a waistband piece, as you see below.

Slide the waistband over the top of the skirt and pin the raw edges together. ***One of the waistband seams has an opening; make sure that opening is facing out at this point.***

Waistband folded in half, slide it over top of skirt

NOTE: this skirt will only have one seam, so you can decide if you want it to go down the back, or down one of the sides. When pinning the waistband to the skirt, remember you’ll wants the seams in the waistband to be on each side, so either match up the skirt seam with one of them, or center it in between them.

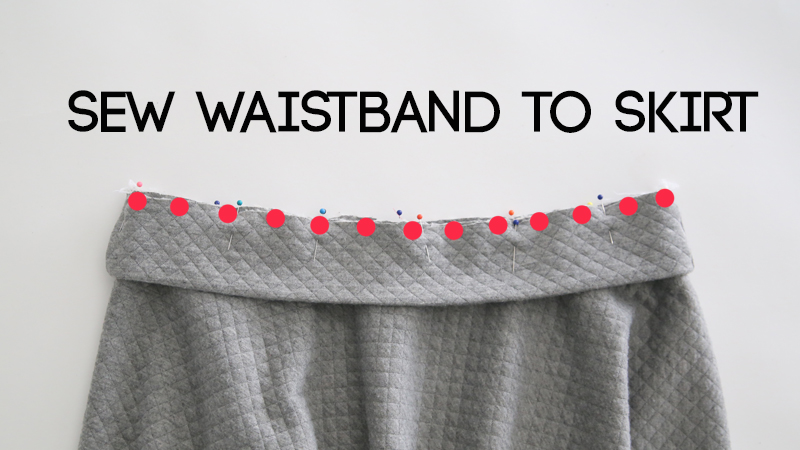
Sew waistband to skirt, being sure to use a stitch that will stretch. I use my serger here and give the waist a tiny stretch as I sew. If you don’t have a serger, be sure to use a zigzag or stretch stitch here, so the waistband will stretch over your hips when taking it on and off.

Waistband sewn to skirt

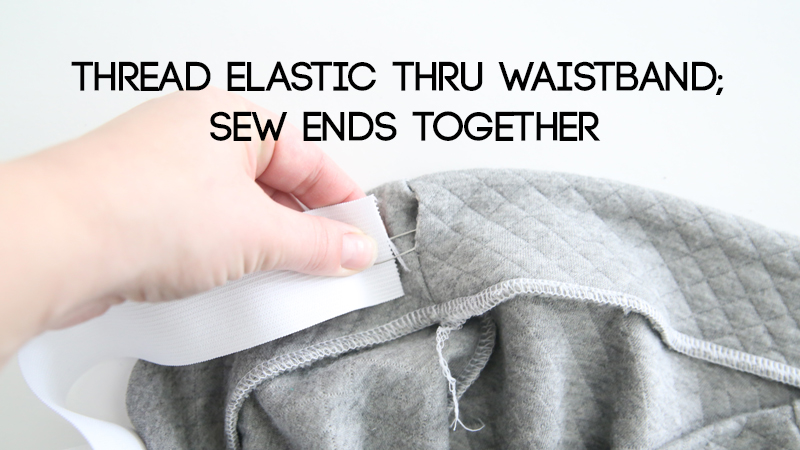
Flip the waistband up and press. Cut 2 inch wide elastic to your waist measurement and thread it through the waistband, using a large safety pin. Try on the skirt and figure out how tight you want the elastic, then sew the ends together and trim.

Hand using safety pin to thread elastic through waistband

At this point all you have left is to hem the skirt! Make sure to pin and press up the hem before sewing. On knit half circle skirts I fold up only once, and then use a double needle to sew the hem.

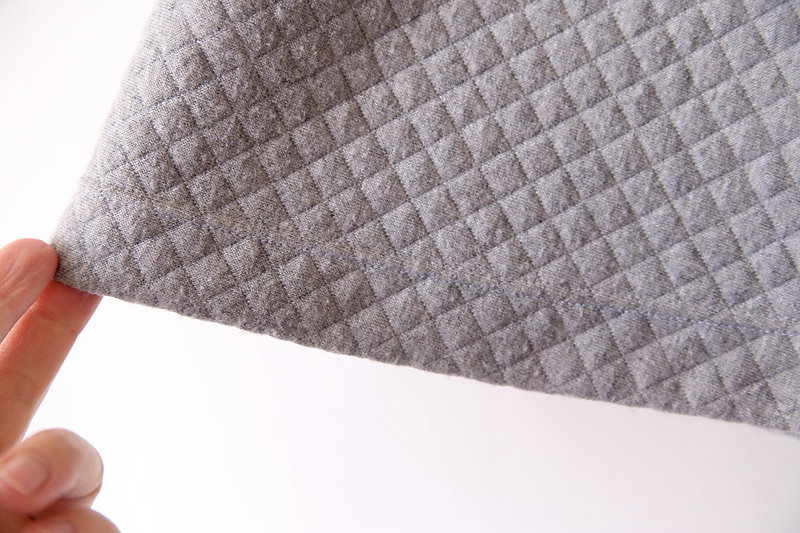
Hem of skirt

NOTE: If your fabric is very stretchy or very heavy, it’s a good idea to hang up the skirt and let it drape for 24 hours before hemming. Since part of the skirt is cut on the bias, it’s possible that some portions will stretch out and hang a little lower than others, which you’ll want to take note of before hemming.

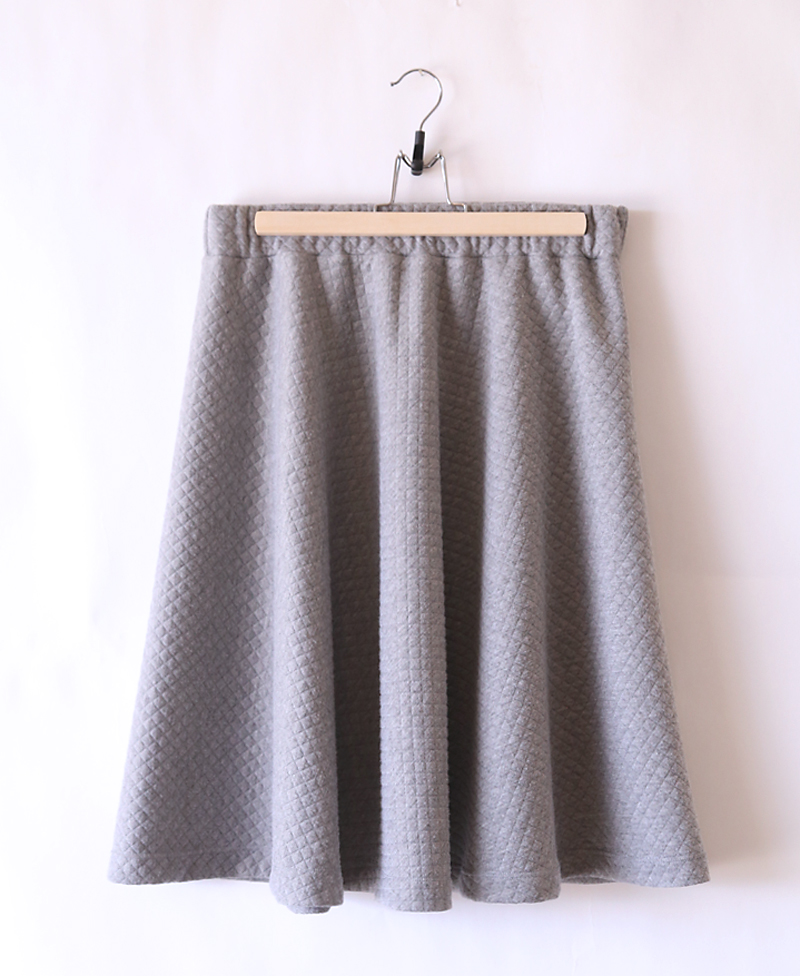
Half circle skirt on a hanger

And that does it! One more comfy skirt for spring.

One more resource you might appreciate is this circle skirt calculator, which can help you figure out how much fabric you will need and calculate the radii for your for different types of circle skirts.

Looking for more skirt sewing tutorials? Try these posts:

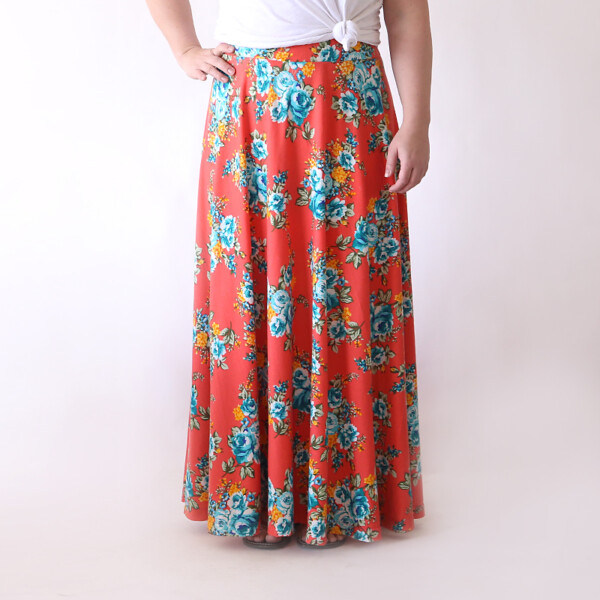
The half circle skirt in a maxi length

The perfect flattering gathered skirt

The easy everyday skirt tutorial

The everyday skirt in maxi length

Sweatpants to cozy skirt refashion

Pleated midi skirt tutorial

Girls reversible pompom skirt

Easy to sew girls’ skirt with attached shorts

A woman wearing a half circle skirt


Share this:

  • Tweet
  • Print

Home » sewing » how to sew » Easy half circle skirt sewing tutorial – make a pattern in any size!


60 Comments

free email series

NO FAIL CRAFTS + RECIPES

Get my favorite EASY craft and recipe ideas straight to your inbox!

« Adorable PRINT + COLOR Mother’s Day card for kids
10 easy photo poses for boys to help you take great pictures »

Comments

  1. Vian says

    March 19, 2021 at 10:54 pm

    I impulse bought the most beautiful soft knit fabric today. It is 58″ wide and i got 2.5 yards. I got home and searched for how to make a skirt pattern and found your page. However, according to the calculator my fabric isnt wide enough for a half circle on the fold (seems wierd, 58>45) I am tall and curvy, so my waist radius is 13.5 and i want my length to be 29″. Also, my fabric has a directional print that doesnt orient right for this method. Would it be possible to make two 1/4 circles and put them together to make the half circle with a seam on each side? Thank you!

    Reply
  2. Lina says

    March 5, 2021 at 4:49 pm

    Thanks for the tutorial!! I have one question, how do you attach the waistband if you don’t have a serger? Thanks

    Reply
    • Autumn Baldwin says

      March 8, 2021 at 9:32 am

      You would need to use a stretch stitch on your normal sewing machine. Good luck!

      Reply
  3. Jessica says

    November 13, 2019 at 6:48 pm

    Thank you! I made the skirt for my 12 year old daughter exactly as you instructed and it came out beautifully. My waistband is a bit tight and I had to stretch it while sewing so I will likely redo with a longer waistband to fit the skirt properly so it’s easier to slip on. Nonetheless my daughter has already worn the skirt and received many compliments from her fashion-forward friends. It’s a hit! Thanks again.

    Reply
  4. Astrid says

    August 16, 2019 at 8:45 am

    Thank you for the tutorial! I’m new to sewing and I thought this would be a fun piece to start with. Can you please clarify how you attach the waistband to the skirt? Do you sew in a giant loop? I’m able to follow along up until this point. Thanks.
    Astrid

    Reply
  5. Jess says

    May 14, 2019 at 5:37 pm

    Hello! I just made this skirt and I’m having trouble lining up the waistband to the skirt. Is there an easy way to make the pleats even? Thanks so much!! You broke this down beautifully!!

    Reply
  6. Cynthia says

    March 8, 2019 at 2:24 pm

    This is an exceptional tutorial resulting in a wonderfully easy and attractive half circle skirt. Thank you! Thank you! Thank you! I had a piece of ponte de roma medium weight knit in a pretty light gray similar to the color in your tutorial. I had not done any sewing with knits in quite a while and was a bit apprehensive, but the skirt turned out beautifully and my confidence definitely is boosted. Your directions are clear and accurate. I plan to make a couple more skirts and now I am thinking about the leggings. Great website! 🙂

    Reply
  7. Michelle Fel says

    February 28, 2019 at 5:20 pm

    Hi,

    I want to make this into a petticoat and I will be using cotton. Actually I think I will use sheets. Will it still work? Thankyou 🙂

    Reply
  8. JP says

    December 23, 2018 at 4:17 pm

    Thank you for the great tutorial for the half circle skirt. I followed your instructions exactly and my skirt turned out perfectly! The math works, I don’t know what others were talking about.

    Reply
  9. Cindy says

    November 29, 2018 at 10:29 am

    Thanks for a fun and easy tutorial! I was actually looking to confirm my theory on how to cut fabric for a half-circle skirt, having just made a full-circle one (for a dance costume) and needing to line it with a layer that’s less bulky. I think I’m on track now . . . and bookmarking your site to revisit for fun sewing ideas!

    Reply
  10. Stephanie says

    October 31, 2018 at 11:50 pm

    I’ve lost track of how many of these skirts I’ve made! The only alteration I’ve done is adding pockets, which I love. This tutorial got me back into sewing and I’m so grateful because these skirts are fantastic and so much better than the ones I used to buy from stores. Thank you!!

    Reply
  11. Melissa Hansen says

    October 8, 2018 at 10:42 am

    Thank you so much for the easy beautiful pattern. I made my skirt with no problems as a beginning seamstress with no problems and the fit is perfect. Wonderful directions and visuals.

    Now my mom wants one!

    Reply
  12. Madeline says

    August 14, 2018 at 1:18 pm

    I just made this skirt out of upholstery fabric with a zipper in the back and it’s perfect. Thanks so much for the tutorial!

    Reply
  13. Maria says

    August 11, 2018 at 5:50 am

    Your tutorials are awesome. I can’t wait to try this. Many thanks

    Reply
  14. Bryn says

    July 10, 2018 at 7:55 am

    So i’m kinda confused how this makes a circle, do you cut 2 pieces? you folded it once and cut a quarter circle so unfolding it should make a half circle? Do you cut 2 of those pieces and then sew them together?

    Reply
  15. Mimi says

    June 23, 2018 at 9:26 am

    Can I use this as a pattern for a cape?

    Reply
  16. Kalliopi from Greece says

    May 25, 2018 at 6:01 am

    thanks for your useful tutorial, do i have to leave extra room for the waist if i use a wooven fabric instead of a knit one? im anxious to try making one of these!

    Reply
  17. Heidi says

    May 2, 2018 at 8:23 pm

    Great directions, and the skirt turned out beautifully! Thanks for the careful explanation on the radius v diameter for a half circle vs a full. I would have walked right past that otherwise and cut it wrong! Everything came together just right on this.

    Reply
  18. Picky Stitch says

    May 1, 2018 at 9:13 am

    What a lovely, sophisticated, and classy skirt! I can’t wait to try this out, I also even love the color and the texture of it!

    Reply
  19. Cosette says

    January 3, 2018 at 12:55 pm

    If the length of the skirt is the same all around, wouldn’t it be lower in the front than in the back? Perhaps it is the same if you have a small butt, but mine definitely takes up more room than my front. I have bought cheap skirts that do this and had to donate them to charity.

    Reply
    • Sharlyn says

      May 2, 2018 at 10:59 am

      Cosette, you could make the skirt longer, then while wearing it, have someone mark the hem for you measuring up from the floor. You could use a ruler, yardstick, or anything else that has a mark where you want your hem to be. That way it will already be draping over your backside, and will be just right. Good luck?

      Reply
  20. Amy Snipes says

    December 17, 2017 at 6:34 pm

    Thank you so much fro this tutorial! You made it so simple to understand!!! I used a cotton fabric with no stretch and it still came out great!!! Thank you, thank you, thank you!!!!

    Reply
    • Dionn says

      May 17, 2020 at 8:17 am

      How did you manage to waist can I ask? The skirt without the band will stretch over my hips because the waist is cut on the bias by the waistband just WILL NOT STRETCH at all.

      Reply
  21. Gabrielle says

    December 10, 2017 at 2:19 pm

    Hi! I’m just curious because I’m a bit of a tall girl(5’10”), what is the length of the finished skirt? Thanks!

    Reply
  22. Claire Hodgkinson says

    April 29, 2017 at 2:47 pm

    Just made this skirt today and I love it!!!! Thank you so much ?

    Reply
  23. Maria says

    February 27, 2017 at 3:15 pm

    Is the waistband cut on the fold or just flat? Do I need to to leave room for a seam allowance?

    Reply
  24. Lauren says

    February 11, 2017 at 2:48 pm

    Hi! I used your math to figure out my waist radius and hem radius but when I checked on By Hand London it said that I would need fabric wider than 60 inches. I was wondering if it would work on 43 inch or 45 inch fabric (this is the only width the fabric store carries). How wide was your fabric? I was just wondering about this because I don’t want to go out and buy fabric if it wouldn’t work. Thank you!

    Reply
  25. Nyah says

    February 8, 2017 at 3:24 pm

    Love this tutorial! Just wondering… do you know where you got the shoes??? Love the whole outfit!

    Reply
  26. Hannah says

    January 19, 2017 at 10:10 am

    hi, i am making a long infinity dress and the fabric which uses a half circle skirt although i was not intending to use elastic for the waist. The fabric i have only has a 2 way stretch and i am making it to fit the high waist (just under the bust). the high waist measurement in 73cm (28 inches) – would i still use the same calculation for the radius – i.e 28/3.14 = 9 inches?

    All infinity dress patterns that i can find seem to use 4 way stretch and i am finding it hard to know which measurements to use. I am making 4 dresses for my bridesmaids and whilst i am fairly good at dressmaking i usually work from a pattern and this one is foxing me! any help will be much appreciated 🙂

    Reply
  27. stella says

    January 10, 2017 at 12:19 pm

    I”m excited to try this! I just made my first thing for MYSELF this past weekend and it was not as pleasing as I thought it would be. I’m a plus size and have a “i’ve had large twins belly” and this very full skirt just did not do me any favors. I think this is exactly what I need!

    Reply
  28. MARY-ANN CALVERT says

    November 20, 2016 at 1:20 am

    Thank you so much for the detail on how to add the waist to the skirt, being a beginner (100%) I couldn’t figure it out, and your illustration was amazing! Beautiful skirt!

    Reply
  29. Sara says

    October 30, 2016 at 8:47 pm

    Just made this beautiful and easy skirt! Well….mostly. I got the waistband on and decided to try it on, and it’s quite a struggle. I suspect the problem is that I forgot that it had to be a knit fabric and bought a polyester – although there is some stretch, maybe it’s significantly less than a knit would have? Also, in off-the-rack clothing, my waist is a full size smaller than my hips, so maybe I am someone who needs to take that into account (as you mentioned in a reply to comment above). All that being said, this is for a Halloween costume, so it didn’t need to be perfect. I can just barely wiggle my way in and out of it and it fits perfectly at my waist without even using elastic. Easy peasy for a quick costume, and I’m certainly not going to complain about a free tutorial! I’m sure you’re well past responding to comments on this older post, but if anyone does read this, please let me know if you have thoughts about where I went most wrong: fabric choice or needing accommodations for my especially hippy hips? Thanks for sharing your tutorial!

    Reply
    • E Moore says

      April 24, 2018 at 8:15 pm

      I would say both. If there is no zipper it needs to be pretty stretchy. I would add at least a couple inches to waist then use elastic in the waistband.

      Reply
  30. KIMMIE gESSLER says

    October 21, 2016 at 10:47 pm

    Just made this today. Awesome tutorial. Very easy to follow. My skirt came out perfect. Thank you.

    Reply
  31. Kate says

    September 26, 2016 at 1:45 am

    Absolutely wonderful sewing tutorials with free patterns to boot! I love it! ???.

    Reply
  32. Katy says

    August 4, 2016 at 5:11 pm

    I thought this at first too, but quickly realized the tutorial is correct. Since we are only making a half circle, not a full circle the waist measurement divided by Pi gives the radius used to draw a half circle with a curve length equal to the waist measurement.

    Reply
  33. Jenn says

    July 24, 2016 at 7:02 pm

    Thanks so much for the wonderfully clear tutorial! For a 5/8 seam allowance, one would add 2.5 inches to the waist measurement, correct?

    Reply
  34. KAYLA SCHMIDT says

    April 12, 2016 at 1:42 pm

    Did you use 60 inch fabric here? Trying to figure out how to make my skirt a decent length, and failing.

    Reply
    • Charlotte Phillips says

      June 11, 2016 at 1:25 pm

      i also need this information. I am 5’8” and 70 years old. I want my skirt below my knees. I would also like to make a maxi.

      Don’t see how this pattern would work unless you had really wide fabric.

      Reply
  35. Joanne B says

    April 10, 2016 at 10:20 am

    Made this today! First clothing item I ever made, your instructions & pictures were awesome! My question is that it’s shorter in the back than the front when I put it on due to my behind =) can you explain how to account for that???

    Reply
    • Darcy says

      March 3, 2019 at 2:15 pm

      Hi. When this happens, it’s because (pardon the bluntness) your rear is pleasantly prominent and thus it raises the back of skirts higher than the front. I’m like this, and I learned how to combat it: Take two measurements from your waistband to your knees – one in front and one behind. The difference between those two numbers is the amount you’ll need to add to your desired skirt length (plus 1-2″ for hemming) before cutting. Then when the skirt is made, put it on and stand on a level surface (a platform or a non-carpeted floor), then have a friend use a yard stick and pins to mark every few inches from the floor the finished length desired of the skirt. In other words, if you want it just below the knees, the friend would measure that from the floor and pin at that number all the way around. Make sure that is done from the floor to get the hem even all the way around. 😀

      Reply
  36. MKEgal says

    April 8, 2016 at 9:49 pm

    “Take your waist measurement and divide by 3.14 to get the waist radius”

    ACK!!!
    Wait, everyone. Don’t cut your fabric yet.

    The circumference of a circle (distance around) is pi [3.14] x the _diameter_, not the radius.
    Either [pi x d] or [2 x pi x r].
    (Go Bing it.)

    So if your waist is 31, the _radius_ (what is shown being marked on the folded fabric) would be about 5.
    Look at it this way to ballpark double-check: are you closer to 10″ thick on average, or 20″?
    If the radius (halfway across the circle) is 5″, you’d be about 10″ thick, with a waist (circumference) about 31″.
    If the radius is 10″, you’d be about 20″ thick, your waist would be about 63″

    On a slightly different note, unless the fabric is very stretchy,
    or your hips aren’t much bigger than your waist,
    it might be better to use the hip measurement (or maybe halfway between the two?) to make the radius,
    then cut the elastic to the right size for the waist.

    Reply
    • autumn says

      April 12, 2016 at 11:36 am

      Hi! The way you’ve explained it is correct if you are making a circle skirt (with the fabric folded into four layers), but this tutorial is for a half circle skirt (with only two layers of fabric). So the “waist radius” that we mark isn’t actually the radius of the circle, it’s twice that. It gets pretty confusing, but I promise it works as written 🙂

      Also, you’re right that this tutorial is written for knit fabrics with some stretch. Even a pretty stable knit without a ton of stretch will work when using the waist measurement instead of the hip measurement because fabrics cut on a curve have a lot of give. But for those whose waists are quite a bit smaller than their hips, using something in between the waist and hip measurement might be a great idea – thanks!

      Reply
      • shujindakara says

        April 16, 2017 at 9:25 pm

        I made the skirt, for myself and my daughter. Thank you for this great tutorial!

        http://shujindakara.blogspot.jp/2017/04/menjahit-rok-flare-sangat-mudah.html

        Reply
      • Taz says

        December 31, 2017 at 9:24 am

        Yes the comment was right but unfortunately I cut my material before I asked someone who does maths teaching for a living! My material was ruined and he couldn’t believe I was so stupid to have followed the instructions thanks for not knowing the difference between the diameter, radius and pie which now thankfully I do.

        Reply
        • autumn says

          January 1, 2018 at 10:38 am

          Hi, Taz, sorry you’re frustrated, but if you followed the instructions in the post what you cut will work just fine for a HALF CIRCLE skirt, which is what we mare making in this post. When making a skirt like this, you are cutting HALF a circle, not a full circle. That means the “waist radius” or measurement from the corner of the fabric must be TWICE as long as the actual radius of a circle (so in essence, yes it will be the diameter) or the waist will not be big enough to fit on you. The person you consulted is probably not familiar with the construction of a half circle skirt, and I”m sorry he thought you were stupid to follow the instructions that have worked great for everyone else who has commented here.

          Reply
          • Dani says

            July 29, 2018 at 1:33 am

            You all are ridiculous ? making it way too complicated and I see no one taking ownership once you realized the nice lady who shared her pattern for free was right and was always right. Thanks for sharing your pattern lady and for being a good sport with some salty sewers!

    • seetal says

      March 29, 2019 at 4:07 am

      did you try to make this skirt? I used cotton non stretch fabric and loved it. this is half a circle not full circle. if u measure radius your skirt won’t fit. and if using diameter is so wrong, then you would’ve cut way extra fabric which can be fixed easily only by cutting away some fabric from one side of it assuming you cut your length correctly the first time.

      I was confused too (for 10secs) then realised this is half a circle. u have less fabric and therefore need diameter measurement otherwise your skirt won’t fit.

      another easier way is to measure your waist n seam allowance and just eye ball a curve with half of that measurement. there! easy peasy.

      ps:

      thank you for a beautiful tutorial. youre awesome.

      Reply
  37. Sarah says

    April 2, 2016 at 9:27 pm

    Awesome! Thank you so much! ! I need to make many of these (and the maxi ones too!) Your tutorials are always awesome!

    Reply
  38. Sylvia says

    April 2, 2016 at 10:39 am

    Beautiful skirt, and EXCELLENT instructions!!! However, if this is YOU in the pictures, goodness, you really don’t have anything to “hide”…..I bought 2 knit maxi skirts for Easter, and although I usually HATE wearing skirts or dresses, these two both fit me well (I’m a plus size) and they are super comfortable, so I went and got some wide elastic to make some more of them!
    Thank you so much for this tutorial! Your work is fantastic!

    Reply
  39. Leeanne says

    April 2, 2016 at 7:32 am

    Thanks so much!!!! Really like all your sewing tutorials!!!

    Reply
  40. Renee Janssen says

    March 20, 2016 at 6:29 pm

    Thanks for your generosity in sharing both the pattern and your tutorial which is very easy to understand. I shall try to make one for myself and one for my baby granddaughters too.

    Reply
  41. Sorahart says

    March 14, 2016 at 10:04 am

    I absolutely love your women’s clothing tutorials and this is no exception. The clothes are cute but very functional and not fussy at all to sew. I will be trying this for sure. Thanks for sharing!

    Reply
  42. Christine DANNEELS says

    March 14, 2016 at 9:10 am

    Thank you so much for that tutorial !

    Reply
  43. Amy says

    March 14, 2016 at 8:14 am

    Where did you get the antic for this adorable skirt?

    Reply

Trackbacks

  1. 70 DIY Skirt Sewing Tutorials | Spring & Summer Outfits | | Nexbie TV says:
    March 9, 2019 at 8:00 am

    […] Not only custom for the summers the skirts are super fun and stylish to be worn in the winters too, and for that, you can choose some thick fabric to work on. Here is how you can create this lovely winter styled circle skirt in an easy and fun way. You can style it up so damn nice and easily as we got you all the details and the dimensions here itsalwaysautumn […]

    Reply
  2. Are basics boring? – Of Cotton and Wool says:
    March 12, 2018 at 10:01 am

    […] Pattern: Half Circle Skirt tutorial from It’s Always Autumn […]

    Reply
  3. Shorts Blog says:
    July 30, 2017 at 6:59 am

    Lole Justine Skort Sun Women Skort

    […] which measurements to use. I am making 4 dresses for my bridesmaids and whilst […]

    Reply
  4. 25 DIY Half Circle Skirt Patterns - Free Sewing Patterns says:
    June 7, 2017 at 8:38 pm

    […] Half circle skirts are just love for being super comfortable, stylish and classy at the same time and now you can make one yourself at home and here we have the complete tutorial to sew this knit fabric grey half circle skirt that is just a perfect pick up for the warmer days. itsalwaysautumn […]

    Reply
  5. Ten Easy Peasy Sewing Projects for Beginners » Modern Home Pulse says:
    March 18, 2017 at 9:48 pm

    […] Half circle skirt pattern by It’s Always Autumn ,all you need to do is measure your waist and measure how long you want the skirt. Skirt looks […]

    Reply

Leave a Reply Cancel reply

Your email address will not be published. Required fields are marked *

Recipe Rating


Hey, glad you’re here!

I'm Autumn, a mom of five who loves ice cream, Masterpiece Theatre, and clothes that hide the fact that I eat so much ice cream. When I was 18 I got a job at a craft store and told everyone (regularly) how much I hated crafts. Well, things change! Read More…

Find me here

  • Facebook
  • Instagram
  • Pinterest
  • Twitter

free email series

NO FAIL CRAFTS + RECIPES

Get my favorite craft + recipe ideas straight to your inbox!

Popular Posts

101 fun activities that kids can do at home list on a colorful striped background

101 Fun + Easy Activities kids can do AT HOME

50 easy crafts and activities kids can do indoors! Perfect for cold or rainy days.

50 best indoor activities for kids: easy crafts + games

Gorgeous art projects for kids! Easy art that turns out amazing.

20 easy art projects for kids that turn out AMAZING!

Collage of different paper flowers tutorials

How to make GORGEOUS paper flowers

Various flavors of baked mini donuts made from cake mixes

How to make mini donuts! {baked cake mix donuts recipe}

Blog policy

All posts and pictures are copyrighted by Autumn Baldwin and blog content may not be reposted elsewhere. However, linking back to my content is just fine. You may use one photo as long as you link directly back to the specific post. Thank you!

Please view our Privacy Policy here.

Also, please note that this blog is a participant in the Amazon Services LLC Associates Program, an affiliate advertising program designed to provide a means for sites to earn advertising fees by advertising and linking to Amazon.com.

Copyright © 2021 · Divine theme by Restored 316192.168.1.1 router login

Copyright © 2021 · Divine Theme on Genesis Framework · WordPress · Log in