It's Always Autumn

creative tutorials for everyday life

  • Holidays
  • Holidays
    • back to school
    • birthdays
    • Christmas
    • Easter
    • Halloween
    • July 4th
    • Mother’s Day/Father’s Day
    • teacher appreciation
    • Thanksgiving
    • Valentine’s
  • Crafts
  • Crafts
    • crafts + DIY
    • handmade gifts
    • photo crafts
    • kid crafts + activities
  • Recipes
  • Recipes
    • bread
    • dessert
    • main dish
    • side dish
  • Sewing
  • Sewing
    • free sewing patterns
    • sewing for women
    • sewing for kids
    • how to sew
    • gifts
  • Photography
  • Photography
    • beginning photography tips
    • posing tips
    • photo editing tips
  • Tips
  • Tips
    • parenting tips
    • travel tips
    • books I love
  • FAQ

free sewing patterns how to sew sewing
September 5, 2018

how to pattern draft and sew a raglan tee in any size

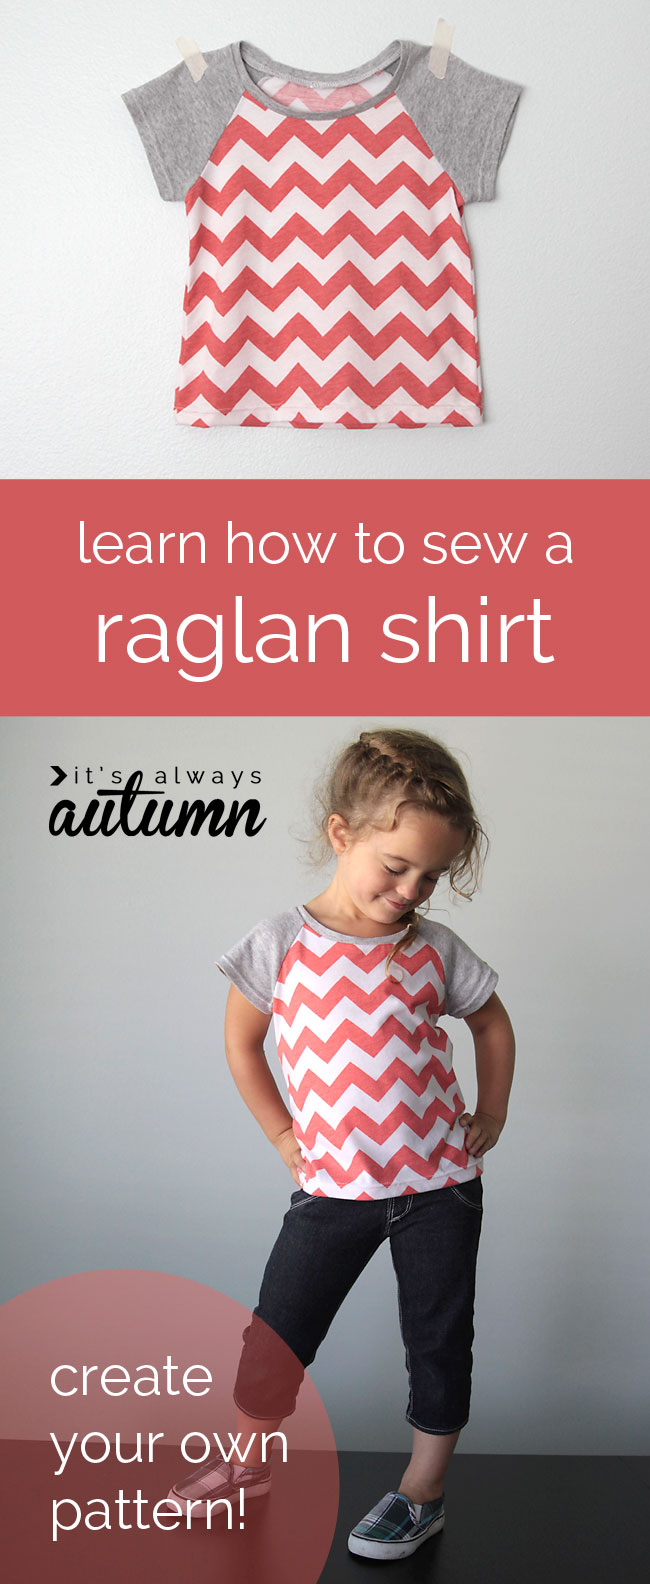
In today’s post: Learn how to make your own raglan sleeve pattern in any size!

Every year when it comes time to do our school shopping I’m amazed at how much it costs to outfit each child…and when you have 5, it really adds up! To make the cost a little less painful I do a lot of thrift store shopping and try to sew a few things using fabrics from my stash. Raglan tees (baseball style tees) have been very popular for a few years now and they’re super easy to sew. In addition, when you mix and match colors and patterns they look a little cuter than a plain t-shirt.

Learn how to create your own raglan shirt pattern in any size! How to sew a baseball sleeve top.

In today’s post I’ll show you how to draft your own raglan tee pattern in any size, and then I’ll show you how fast and easy it is to sew one up.

learn how to draft a pattern for a raglan shirt, then how to sew it up - it's easy!

How to make your own raglan sleeve pattern

Once your pattern is all set and you’ve made one shirt so you’re familiar with the process, you can whip out additional tops in about 45 minutes each. Raglans for younger kids are a great way to use up scraps of fabric left over from other projects.

raglan-shirt-how-to-sew-make-pattern-draft

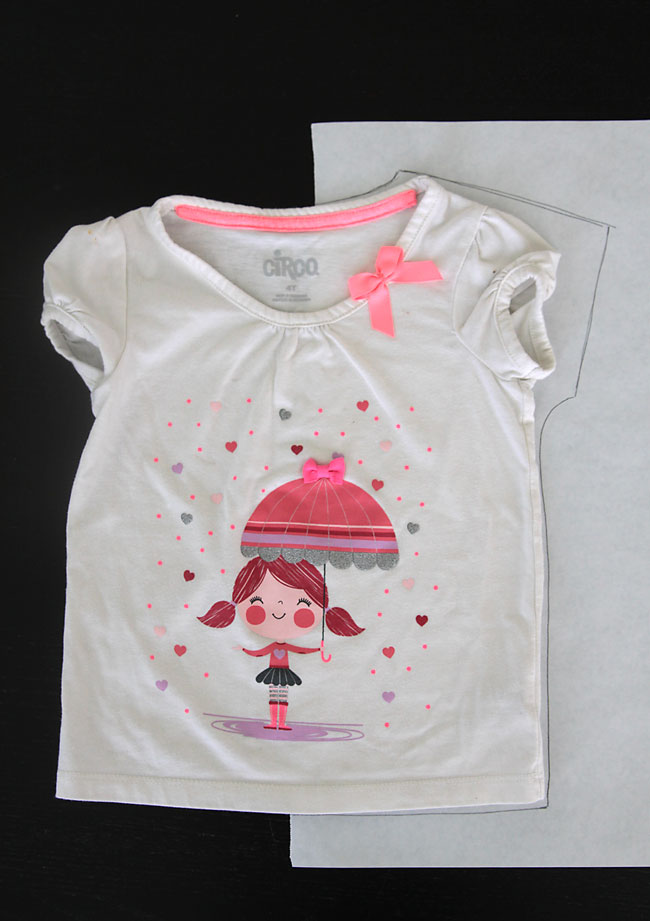
To draft your own pattern, you’ll need a t-shirt that fits your child well. Don’t make the mistake of grabbing a t-shirt from last year – you’ll end up with a shirt that doesn’t fit! Not that I’ve ever done that before…

I like to use freezer paper to trace patterns – it’s cheap and comes in rolls that are wide enough for almost any child’s pattern piece.

raglan-shirt-how-to-draft-pattern-sew-make

Place your t-shirt on the freezer paper, with the straight edge of the paper going through the exact middle of the shirt. Trace around the shirt as you can see in the photo above. For the sleeve, you want a straight line from the neckline down over the shoulder. I made the sleeve opening on my pattern a little larger than the one on my t-shirt because the t-shirt I was using had a gathered sleeve.

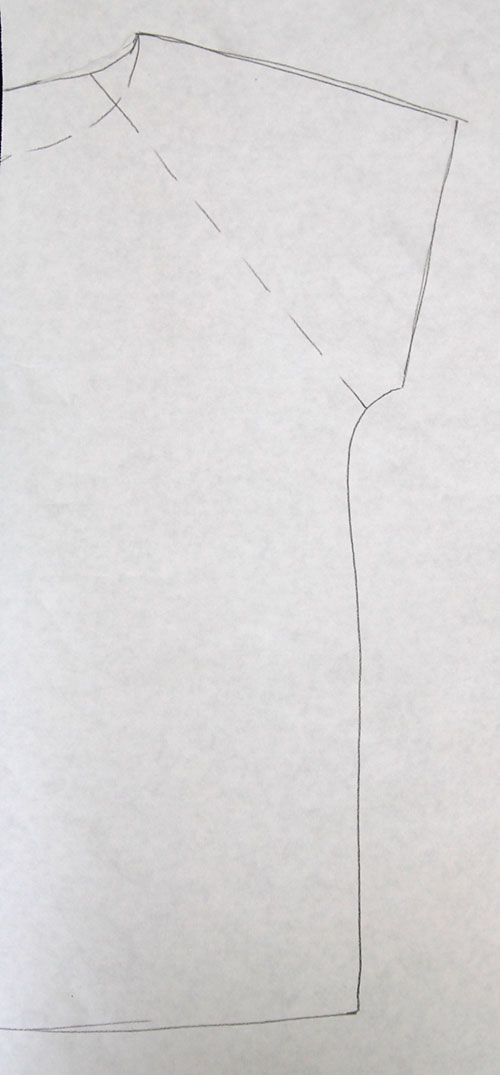
Once you move the t-shirt, you’ll have a basic shirt outline, like the one you see below. Draw a slightly lower neckline curve for the front of the shirt. Also draw a straight line from the armpit to the neckline, as you see below.

raglan-shirt-how-to-draft-pattern-sew-make-2

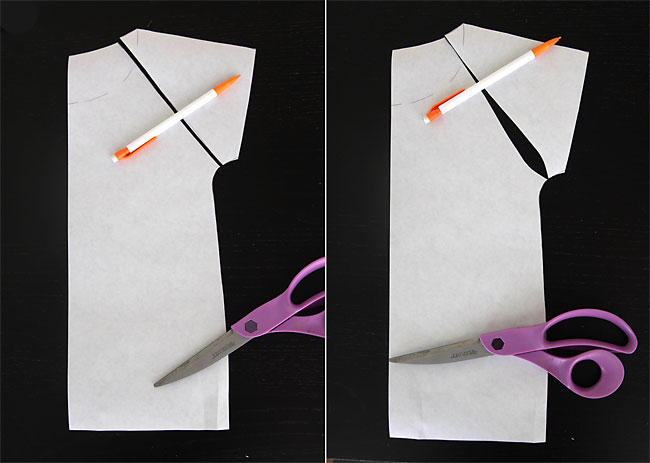
Cut the pattern piece out, and cut it apart at the armpit-neck line (1st photo below). The next step is optional, but I think it gives the shirt a little better fit. Cut a very slight curve into the line where you just cut the two pieces apart – you only need to take about 1/4 inch out of each pattern piece. It should look like the 2nd photo below.

raglan-shirt-how-to-draft-sew-make-3

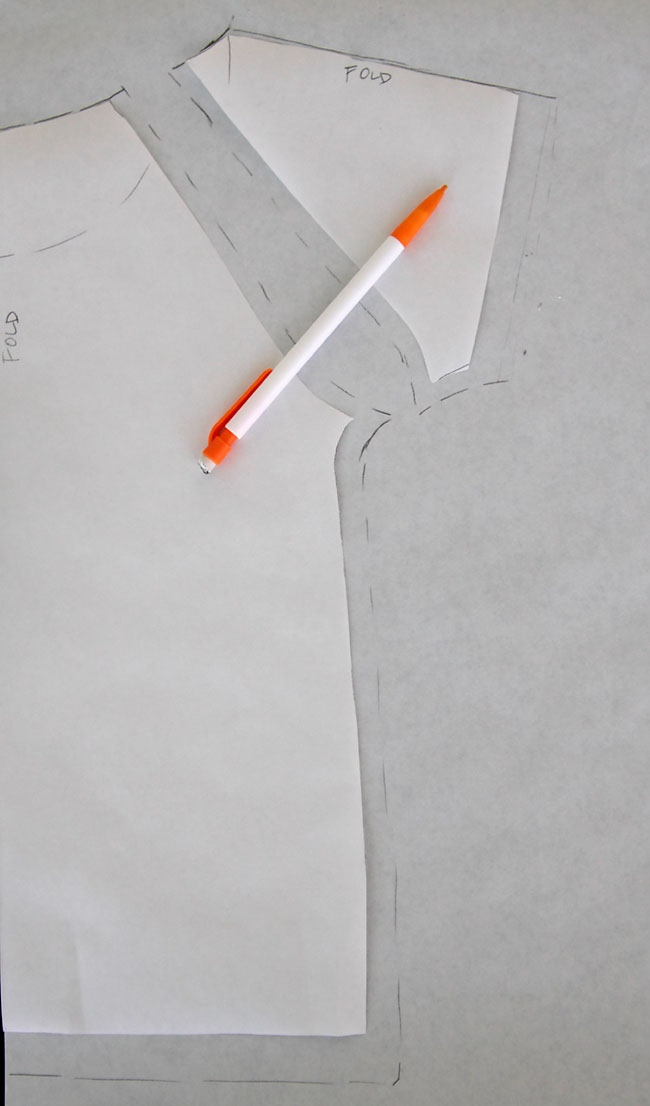
Now we’re going to retrace each of our two pattern pieces, this time adding whatever seam allowance and hem allowance you like to sew with. (You can see that I didn’t add seam allowance at the neckline, but I should have!) Remember to transfer the front neckline markings onto your new pattern pieces. Cut them out, and throw the old ones away so you don’t get mixed up!

raglan-shirt-how-to-draft-pattern-sew-make-3

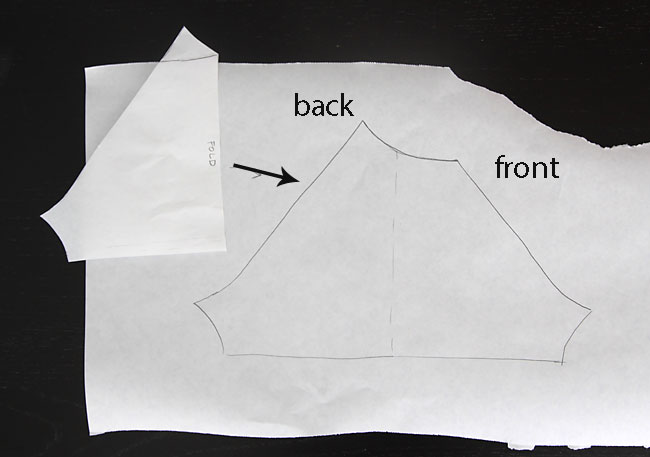
Just one more quick step to finish the pattern: right now the sleeve piece would have to be cut on the fold. Trace around the sleeve pattern piece, then flip it over and trace around it again to get a full pattern piece. On one side of this pattern piece you’ll trace the back neckline (higher) and on the other side you’ll trace the front neckline (lower). Be sure to add a little room for a hem if you haven’t done so already.

raglan-shirt-how-to-draft-sew-make-pattern-4

How to sew a raglan sleeve shirt

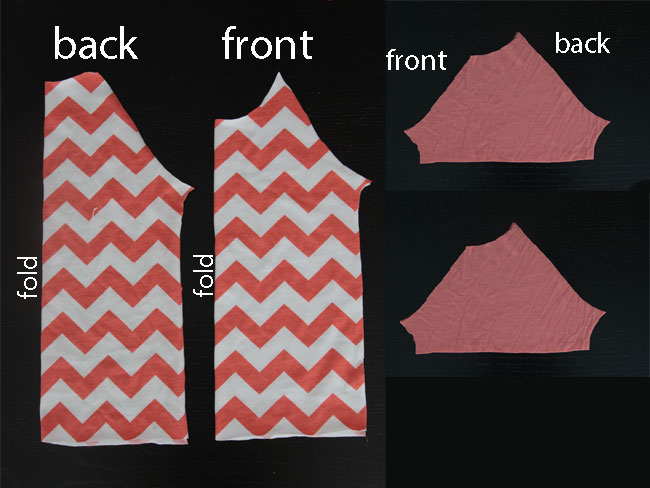
Ok, now you can cut out your fabric. Cut one front and one back bodice piece ON THE FOLD, as shown below. Remember, the back piece will have a higher neckline. Cut two sleeve pieces. (You must use knit fabric, which is stretchy. The stretch should go side to side on all pieces.)

raglan-shirt-how-to-draft-pattern-sew-make-5


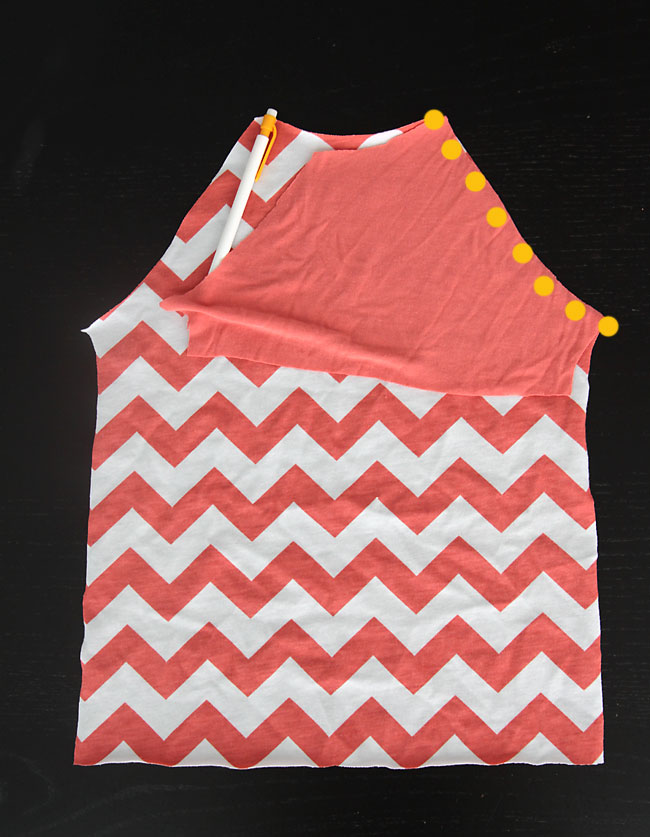
Alright, the hard part’s done! This shirt sews up extremely quickly. Start by unfolding the back bodice and laying it down on a table. Grab one of your sleeve pieces and lay in on top of the bodice, right sides together, as shown (make sure you’re using the taller side of the sleeve here). Stitch as shown.

raglan-shirt-how-to-draft-pattern-sew-make-6


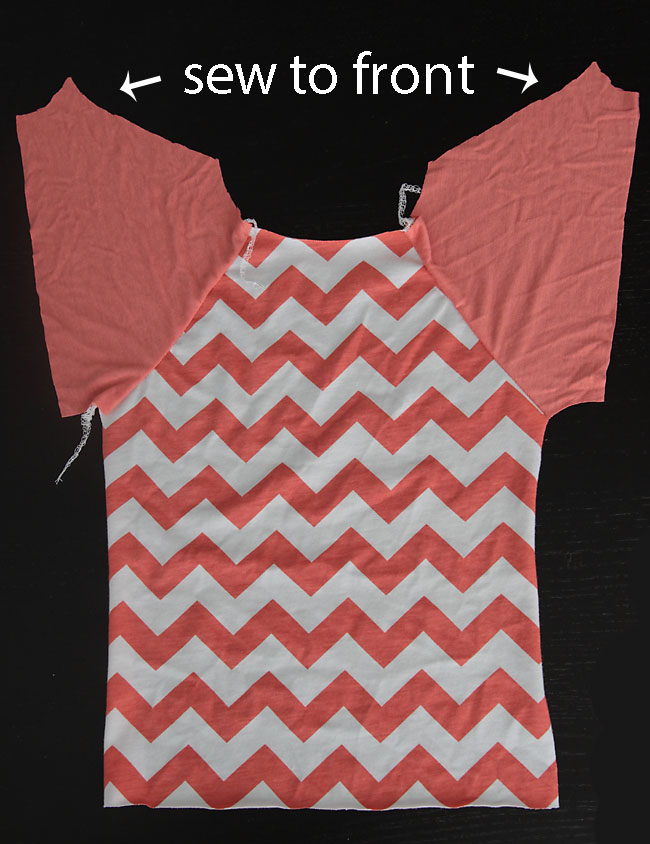
Repeat with the other sleeve on the other side. Your shirt will look like this:

raglan-shirt-how-to-draft-pattern-sew-make-7

Next you want to match up the front bodice with the front (shorter) sides of each sleeve and sew them, again right sides together.

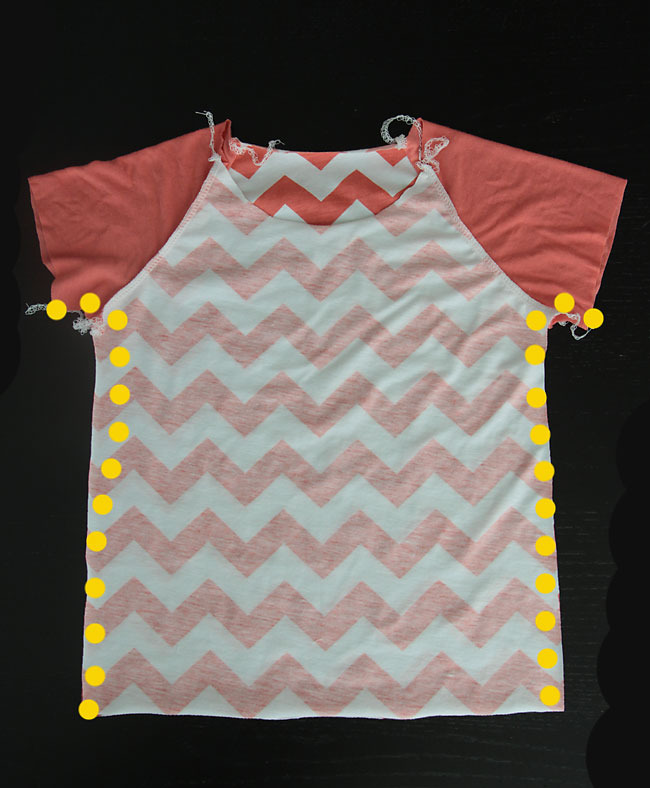
Once the sleeves are attached, you can pin and sew the side seams:

raglan-shirt-how-to-draft-pattern-sew-make-8


Start at the bottom of the sleeves, sew up and under the arm, then back down the side. I like to give the fabric a gentle stretch as I’m sewing under the arm to make sure this seam won’t pop when the child lifts her arms.

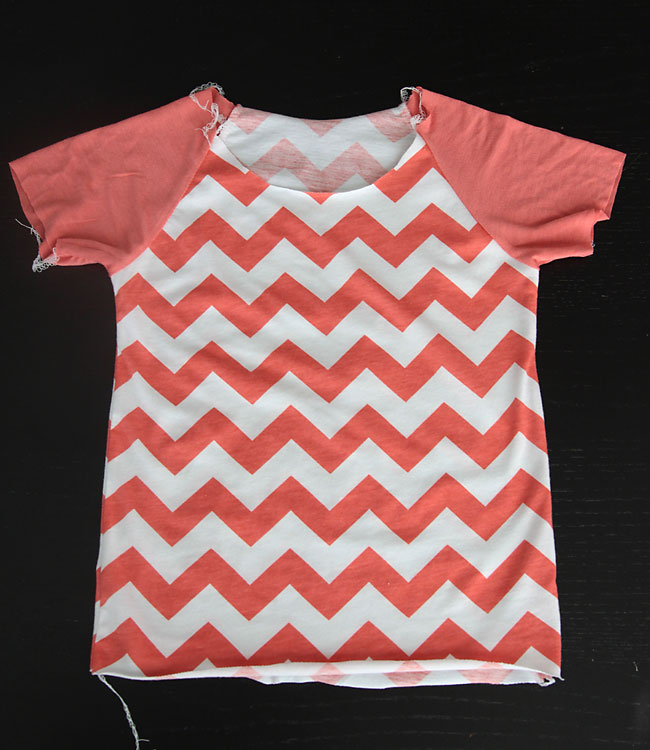
Turn the shirt right side out, and it looks like this:

raglan-shirt-how-to-draft-pattern-sew-make-9


Then you just need to finish the neckline as desired and hem the shirt and sleeves. My favorite method for finishing necklines on t-shirts can be found in the original easy tee post.

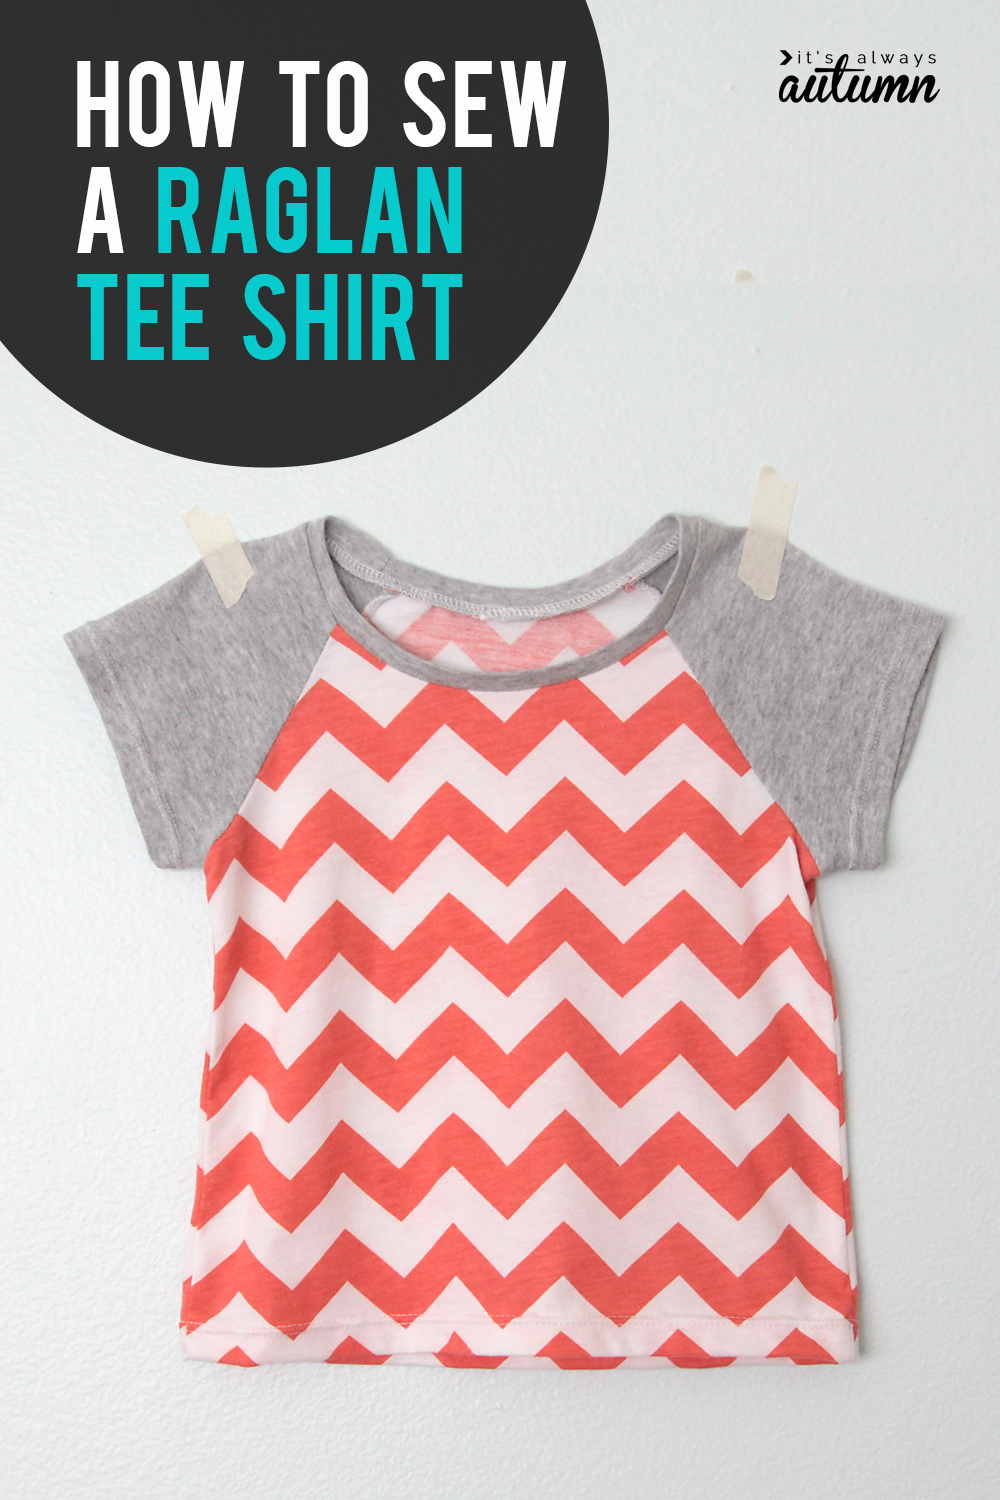
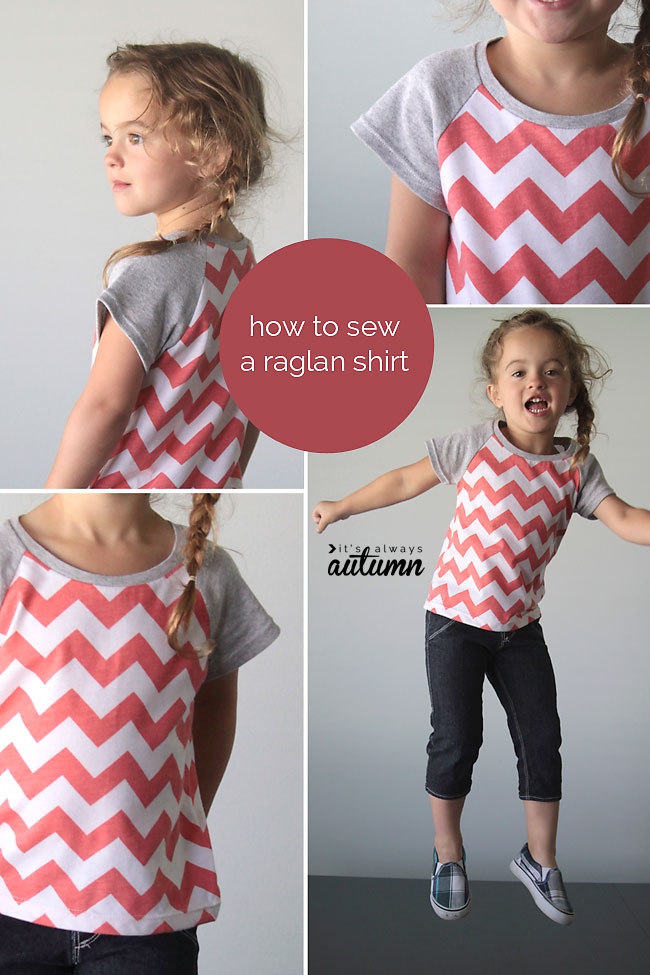
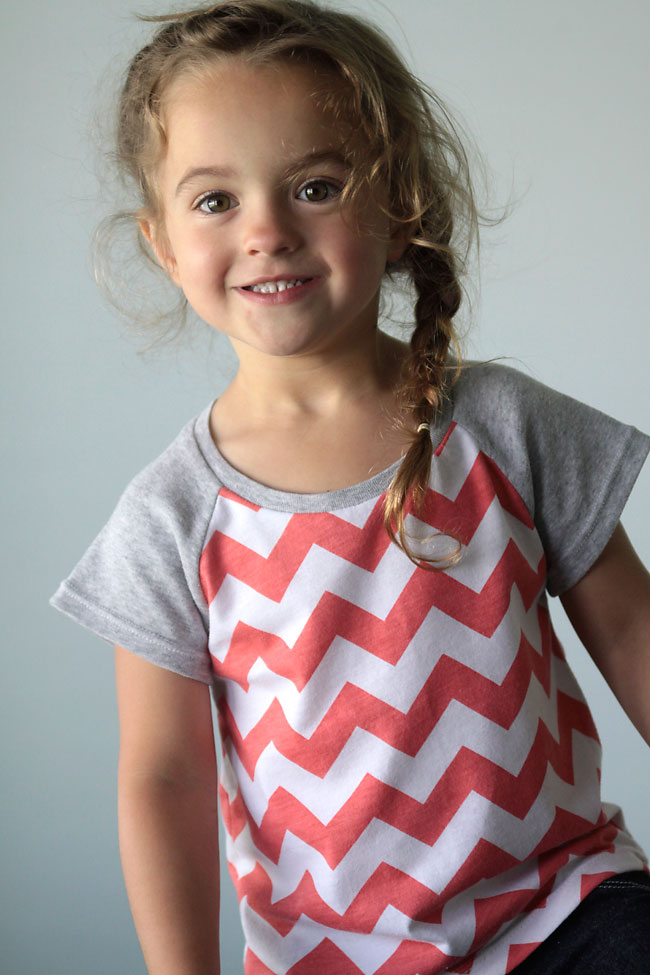
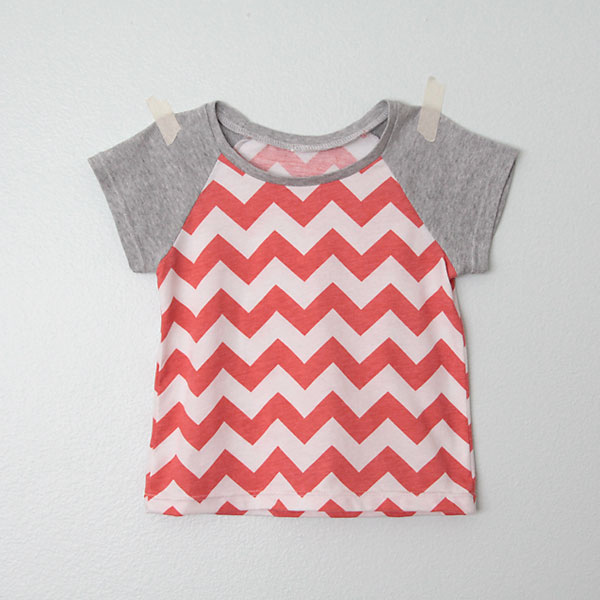
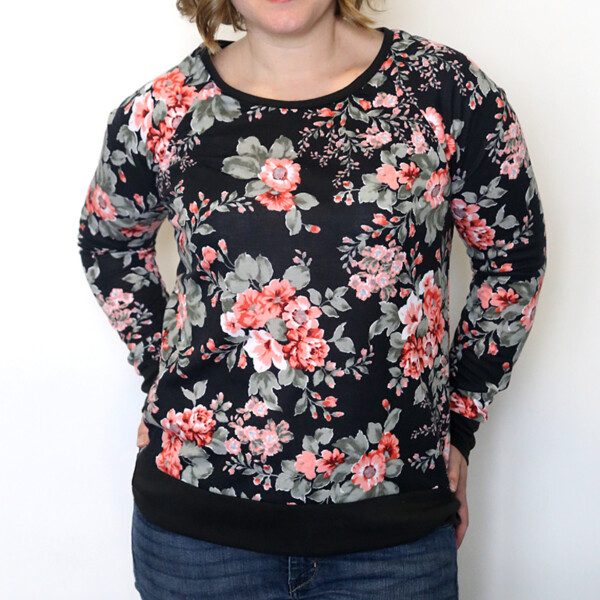
Here’s what the finished shirt looks like:

learn how to draft a pattern for a raglan tee in any size, and then how to sew it up!

(Yes, the sleeves are suddenly a different color 🙂 I just didn’t like how the matching coral color looked on the sleeves, so I took them out and added gray ones instead.)

learn how to draft a pattern for a raglan shirt, then how to sew it up - it's easy!

For more raglan sleeve sewing projects, visit this post:

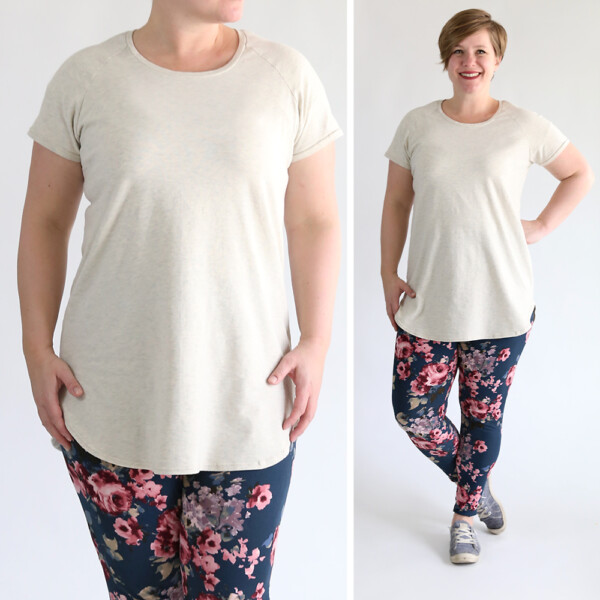
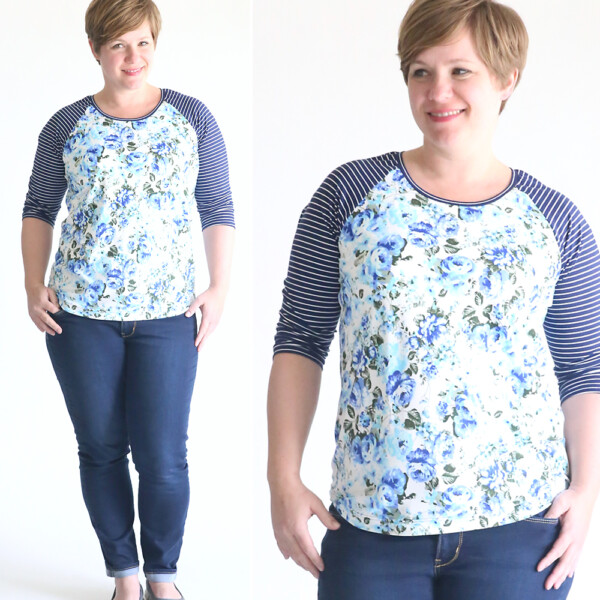
Free pattern for women’s raglan sleeve tee

Girls’ raglan sleeve (baseball sleeve) play all day dress

Women’s flutter sleeve raglan

Long sleeve raglan sweatshirt for women


Share this:

  • Tweet
  • Print

Home » sewing » free sewing patterns » how to pattern draft and sew a raglan tee in any size


64 Comments

free email series

NO FAIL CRAFTS + RECIPES

Get my favorite EASY craft and recipe ideas straight to your inbox!

« Easy 5 ingredient pumpkin chocolate chip cookies
The very BEST creamy chicken and rice soup »

Comments

  1. KristyLouT says

    September 3, 2014 at 6:56 am

    This is such a great tutorial. Thank you! Where do you buy your cute t-shirt fabrics? I cannot seem to find any in the big fabric stores that is cute, and I cannot find anything decently priced online…

    Reply
    • autumn says

      September 5, 2014 at 2:20 pm

      I order lots of knits online from girlcharlee.com – their prices are pretty good. It can be hard to order online since you can’t feel them first, so I wrote a post about the different types of knits and what they are best suited for: https://www.itsalwaysautumn.com/2014/07/11/different-types-knit-fabric-explained-fabric-giveaway.html

      I also use lots of thrifted men’s and women’s tees for fabric!

      Reply
    • Ash says

      October 19, 2016 at 6:18 pm

      Hello, I was wondering if you could use fabrics other than knit or stretch kin of matrial?

      Reply
  2. KMCC says

    September 3, 2014 at 7:40 am

    Hi, I love your tutorials – and your ideas! I was wondering if I could actually sew long-arm shirts in the same way just by adding length to the arms? Any advice appreciated. 🙂

    Reply
    • Leslie says

      September 3, 2014 at 7:41 am

      I’d like longer sleeves too please.

      Reply
      • autumn says

        September 5, 2014 at 2:16 pm

        I’ll work on it! In the meantime, you should be able to just lengthen the short sleeve without too much trouble.

        Reply
    • autumn says

      September 5, 2014 at 2:17 pm

      Yep! I just made a long sleeve one – just lengthen the sleeve lines down and tape them in slightly. I’ll see if I can’t get an example posted soon. Thanks!

      Reply
  3. Leslie says

    September 3, 2014 at 7:40 am

    You are a true blessing. I haven’t sewn in many years but this takes out some of my fear to start up again.
    Thank you very much for sharing your great talent. Thanks for making modest clothing too.

    Reply
    • autumn says

      September 5, 2014 at 2:16 pm

      Thank you so much! You’ve made my day 🙂

      Reply
  4. Kristie says

    September 3, 2014 at 8:11 am

    thanks for posting this! I need to work on a different style of shirt for my girls. I have been making them a bunch of dolman type shirts, and while it is cute I really wanted a new pattern! thanks for the help!

    Reply
    • autumn says

      September 5, 2014 at 2:15 pm

      You’re welcome!

      Reply
  5. kt Hom says

    September 3, 2014 at 2:54 pm

    Oh! My! Your tutorial is terrific — thanks so much for sharing it with us! I know how long it takes to do one like this and your readers appreciate it greatly. Nice switch on the sleeves, too — it enhanced the style factor for sure!

    Reply
    • autumn says

      September 5, 2014 at 2:15 pm

      Thanks! I’m glad you like the tutorial – and yes, the sleeve switch helped! I was ready to scrap the shirt because I just didn’t like it, but the grey sleeves saved it!

      Reply
  6. Sarah Helene says

    September 3, 2014 at 4:14 pm

    I’VE ALWAYS LOVED RAGLAN SLEEVES . . .your tutorial on how to draft and sew a raglan sleeve tee in any size is FAB! So detailed with sharp photos showing steps clearly. Shows your talent for design. I love this chevron front & back with plain fabric for the raglan short sleeves. Once a pattern is drawn, ONLY 45 minutes to sew a T-shirt. CUTE, practical & can be coordinated with many skirts & pants. Thanks for sharing. Sarah in Minneapolis

    Reply
  7. Marta says

    September 3, 2014 at 5:06 pm

    What a lovely tee! And what a great tutorial! Thanks!
    I’ve just started sewing with knits and I can’t wait to sew a bunch of raglan tees for my daughters. I know they will love it!

    Reply
  8. SHarlyn says

    September 8, 2014 at 3:40 pm

    fabulous! Thanks for taking the time!

    Reply
  9. Shelley says

    September 12, 2014 at 4:48 pm

    Oh Thank you thank you thank you so much for providing the perfect raglan tee tutorial, you have no idea how much trouble I’ve had finding the perfect pattern and now you’ve helped me create it!! Thank you 🙂

    Reply
  10. shantel says

    September 30, 2014 at 9:38 am

    I love this so much! Thanks for making a great tutorial!
    I featured on my Sew Boy feature
    seemesew.blogspot.com

    Reply
  11. Tess says

    October 4, 2014 at 5:24 pm

    This is such a fab and easy project, even a novice like me want to try this. I don’t have a serger though :(. What setting do you recommend to use on normal sewing machine?

    Reply
    • autumn says

      October 5, 2014 at 8:25 am

      Any part of the shirt that’s going to stretch (such as the neckline) needs to be sewn with a stitch that will allow for a little stretch, so a narrow zigzag is a good way to go. Depending on your machine, you might even have a “stretch stitch” you can use. For side seams and other seams that won’t get stretched while wearing, and plain old straight stitch will work!

      Reply
  12. Patricia Espinoza says

    October 8, 2014 at 7:29 am

    would look cute with tiered raglan sleeves too! Love it

    Reply
  13. SunGold says

    November 2, 2014 at 7:28 am

    Thank you for the great tutorial.

    Reply
  14. Melanie says

    December 2, 2014 at 7:46 pm

    Hi!
    I just did a raglan tee for my daughter. It’s not bad, the only problem is that the neckline is too wide and ends up “pointing” upwards instead of lying on the shoulder. What did I do wrong? And how can I fix it? Thanks!

    Reply
  15. Sue Ireland says

    January 2, 2015 at 8:14 pm

    I can’t get the pattern to print out with all the lines for sizes. I think I can get them marked right so just an FYI for you. Thanks

    Reply
  16. chloe says

    May 15, 2015 at 7:50 pm

    This is so cute i’m going to try to make this for my niece!

    Reply
  17. maria says

    August 31, 2015 at 5:29 am

    Gracias por este tutorial

    Reply
  18. Allison says

    September 2, 2015 at 1:15 pm

    I love this! It was so easy to make. The only problem was the neckline came out floppy and stretched (I don’t know why since I didn’t have to work with it enough to stretch it out) and the sleeves were too tight. I’d love to use this pattern again. Any advice on how to fix it for next time??

    THANKS!

    Reply
  19. suc khoe says

    September 13, 2015 at 7:00 pm

    magnificent points altogether, you just received a
    brand new reader. What could you suggest in regards to your post that you made
    some days ago? Any positive?

    Reply
  20. Bonnie says

    November 1, 2015 at 1:37 am

    Thank you!! Lovely, clear, complete tute.

    Reply
  21. scatterbrainedseamstress says

    January 20, 2016 at 3:52 pm

    Love the tutorial! Great, easy to make shirt!

    Reply
  22. Taylor Cooper says

    March 22, 2016 at 8:51 am

    This is a PHENOMINAL tutorial!!!! Thank you so much for sharing!!!

    Reply
  23. Dianna loftis says

    May 2, 2016 at 4:19 pm

    Could this be done the same way for adult size.

    Reply
  24. eva andrew says

    August 13, 2016 at 7:24 pm

    Thank you for these clear directions..I have been looking for something on the simple and easy side….I’m going to try it tomorrow for myself…and if it works out then I’ll definitely will be making more!
    Eva
    http://www.mypaperrosegarden.wordpress.com

    Reply
  25. Monika says

    August 22, 2016 at 1:48 pm

    Very simple and direct instructions!

    Reply
  26. Didi R. says

    August 25, 2016 at 11:17 am

    What a he

    Reply
  27. Didi R. says

    August 25, 2016 at 11:33 am

    What a helpful tutorial as a basic technique to adapt to other design ideas! Mine is a terry beach cover for my 6 y.o. granddaughter from a bath towel, hand towel (for hood) & wash cloth (for pockets) with other “girlie” embellishments (TBA).

    I was stuck until I came across this tutorial…I so appreciate the the time you took to post simple instructions & great pics for those of us who would rather spend the $12 (?) saved (from purchasing a pattern) on her ice pops & sunscreen! LOL ?

    Reply
  28. neila M. says

    November 2, 2016 at 3:57 pm

    Muchas gracias por el TUTO… ya puesto a prueba con geniales resultados!!!…

    Reply
  29. maryanne @ mama smiles says

    January 16, 2017 at 1:14 pm

    Brilliantly simple! Thank you for this!

    Reply
  30. Connie says

    April 10, 2017 at 3:41 am

    Thank you very much, this is gorgeous! And you are very kind for sharing it with all of us for free!

    Reply
  31. Sharon Gough says

    June 26, 2017 at 2:27 pm

    Frankly you are a genius! I sew and have sewn for years but never felt able to adapt patterns to the kids growth spurts, I am now a grandma with a quiver of grands and have some with unique fitting issues, your tutorials are heaven sent. TY so much

    Reply
  32. Anna says

    December 7, 2017 at 3:18 pm

    Thanks for this great tutorial! I was able to use your method to draft raglan sleeved nightgowns for myself and my daughter.

    Reply
  33. Heather Westberg says

    March 1, 2018 at 10:23 am

    Hello! Just a tip for those that don’t like hemming the sleeves or bottom of the shirt. I couldn’t find the color knits I needed at any of the fabric stores, and didn’t have time to wait for them to be shipped in. So I bought a 2XL mens t shirt for $3 and a 5x womens camisole that was on clearance for $2 at walmart. If you line the bottom of your pattern up with the bottom of the shirt, then you can use the existing hem from the purchased shirt, and you don’t have to hem it yourself. Same with the Sleeves! Just line the end of the sleeves up with the existing hem! I was able to get two 4T shirts out of those shirts! I even used the collar from the mens shirt as the collar on one of my shirts. Saves time and looks like a store bought shirt!

    Reply
  34. Allan April says

    June 27, 2020 at 10:04 am

    The greater I read typically the more impressed I am along with your content material.
    Your vocabulary is usually so vast, You need to know
    studied the matter detailed. There is usually so
    much average content out presently there, the sole good creators left are a person and https://ateliertheater.ch/. Say thanks to you!

    Reply
  35. Amy says

    September 29, 2020 at 2:51 pm

    I came here looking for the gathered tulle shirt tutoring, and it redirected here. A quick search of your site doesn’t yield anything. Did you have to take it down for some reason? Do you have any tips/instructions for adding tulle to the front of the shirt?
    Thanks!

    Reply

Trackbacks

  1. 25 Sewing Gifts For Kids - Lil' Mrs. Tori says:
    October 6, 2014 at 5:02 am

    […] Raglan Shirt // It’s Always Autumn […]

    Reply
  2. Upcycling Old T-Shirts | Amanda Nygaard says:
    April 15, 2015 at 8:28 pm

    […] for the waist and cuffs, which would cut down on the time spent making it.  I found a very helpful tutorial about how to make a raglan sleeve shirt from scrap fabric that I used as a starting point.  But […]

    Reply
  3. 12 Back to School DIY Clothes You Can Make For Kids DIYReady.com | Easy DIY Crafts, Fun Projects, & DIY Craft Ideas For Kids & Adults says:
    August 7, 2015 at 1:01 am

    […] via It’s Always Autumn […]

    Reply
  4. Superhero Art Smock - Two Kids and a Blog says:
    October 16, 2015 at 10:20 pm

    […] adapted this Raglan Tee Tutorial to create the smock. Follow her directions to make the sleeves and the front of the […]

    Reply
  5. My Tornado! – Swimming In A Sea of Estrogen says:
    December 30, 2015 at 8:37 am

    […] the end, I made a simple raglan pattern following this tutorial on It’s always Autumn, and it was a great tutorial with detailed instructions.  We have […]

    Reply
  6. Catching Up… – Scatterbrained Seamstress says:
    January 20, 2016 at 3:44 pm

    […] made the shirt using It’s Always Autumn’s Raglan Tee. It was great tutorial, although the ribbing for the neckline wasn’t clear. I ended up using […]

    Reply
  7. Overslagjurkje met raglanmouwen zelf maken! – YeRaSi says:
    August 3, 2016 at 1:41 am

    […] van beide patronen is met raglan mouwkes. Hier en hier zijn geweldige tutorials om raglan mouwen te […]

    Reply
  8. refashion lessons learned | carvingtimefromlife says:
    September 20, 2016 at 3:46 am

    […] rapidly to the top of the possibles list. I found excellent instructions from Autumn on how to draft a raglan sleeve from a standard tee shirt and downloaded her breezy tee pattern to work from. Thanks to Autumn, the […]

    Reply
  9. Plunge Blog says:
    October 16, 2016 at 3:57 am

    Short Sleeve Raglan Knitted T Shirt

    […] edge of the paper going through the exact middle of the shirt. Trace around the […]

    Reply
  10. Camiseta manga ranglan… con patrón DIY – Artesanadora says:
    November 2, 2016 at 7:03 pm

    […] Sacar tu patrón de acuerdo a las indicaciones que tiene la pagina web aqui, que aunque está en inglés, se entiende muy bien por las fotos que tiene, en mi caso saque el […]

    Reply
  11. Spaghetti Blog says:
    May 4, 2017 at 10:51 am

    Raglan Sleeve Cut Out

    […] on my pattern a little larger than the one on my t-shirt because the t-shirt I w […]

    Reply
  12. Sleeve Less Blog says:
    May 13, 2017 at 3:24 am

    Plus Size Side Slit Raglan Sleeve

    […] made the sleeve opening on my pattern a little larger than the one on my t-shirt […]

    Reply
  13. Woven Blog says:
    June 9, 2017 at 3:11 am

    Melanie Mix Print Tunic Dress

    […] oulder. I made the sleeve opening on my pattern a little larger than the one on […]

    Reply
  14. Trouser Blog says:
    June 13, 2017 at 4:07 pm

    Farah The Zemlack Raglan Long Sleeve Tshirt

    […] e the sleeve opening on my pattern a little larger than the one on my t-shirt be […]

    Reply
  15. Make your own raglan t-shirt pattern - Momof5tryingtosurvive says:
    November 19, 2017 at 6:03 pm

    […] used her tutorial on How to pattern draft and sew a raglan tee in any size to sew my kids shirts.  The only change I made was to make long sleeves instead of short sleeves […]

    Reply
  16. DIY Babydoll Mini Dress – heyjudyb says:
    March 28, 2018 at 8:31 am

    […] even finished the collar as instructed within this tutorial. Another great guide for finishing collars (and armholes!) can be found here in video […]

    Reply
  17. 12 Cool Back to School DIY Kids Clothes To Make In Time says:
    August 8, 2018 at 12:29 am

    […] you love this pattern then I’m also sure you’ll love making it. So get your free pattern here and sew your school kids some raglan shirts they can rock at school. This super trendy and comfy […]

    Reply
  18. 12 Cool Back to School DIY Kids Clothes Ideas And Projects Lauren J – Hot Pomelo – Internet Portal.. says:
    August 13, 2018 at 10:45 am

    […] you love this pattern then I'm also sure you'll love making it. So get your free pattern here and sew your school kids some raglan shirts they can rock at school. This super trendy and comfy […]

    Reply
  19. 12 Cool Back to School DIY Kids Clothes To Make In Time – DIY AND SHARE says:
    August 13, 2018 at 11:24 am

    […] you love this pattern then I’m also sure you’ll love making it. So get your free pattern here and sew your school kids some raglan shirts they can rock at school. This super trendy and comfy […]

    Reply
  20. Week 4 – CatKin's Creatorium says:
    February 9, 2020 at 3:55 am

    […] found a raglan tutorial over at It’s Always Autumn , and drafted a pattern from my favourite hand knit jumper, to make a zip up cardi. It’s not […]

    Reply

Leave a Reply Cancel reply

Your email address will not be published. Required fields are marked *

Recipe Rating


Hey, glad you’re here!

I'm Autumn, a mom of five who loves ice cream, Masterpiece Theatre, and clothes that hide the fact that I eat so much ice cream. When I was 18 I got a job at a craft store and told everyone (regularly) how much I hated crafts. Well, things change! Read More…

Find me here

  • Facebook
  • Instagram
  • Pinterest
  • Twitter

free email series

NO FAIL CRAFTS + RECIPES

Get my favorite craft + recipe ideas straight to your inbox!

Popular Posts

101 Fun + Easy Activities kids can do AT HOME

50 easy crafts and activities kids can do indoors! Perfect for cold or rainy days.

50 best indoor activities for kids: easy crafts + games

Gorgeous art projects for kids! Easy art that turns out amazing.

20 easy art projects for kids that turn out AMAZING!

How to make GORGEOUS paper flowers

How to make mini donuts! {baked cake mix donuts recipe}

Blog policy

All posts and pictures are copyrighted by Autumn Baldwin and blog content may not be reposted elsewhere. However, linking back to my content is just fine. You may use one photo as long as you link directly back to the specific post. Thank you!

Please view our Privacy Policy here.

Also, please note that this blog is a participant in the Amazon Services LLC Associates Program, an affiliate advertising program designed to provide a means for sites to earn advertising fees by advertising and linking to Amazon.com.

Copyright © 2021 · Divine theme by Restored 316192.168.1.1 router login

Copyright © 2021 · Divine Theme on Genesis Framework · WordPress · Log in

free email series

NO-FAIL CRAFTS + RECIPES

Get my favorite EASY craft + recipe ideas straight to your inbox!

x