
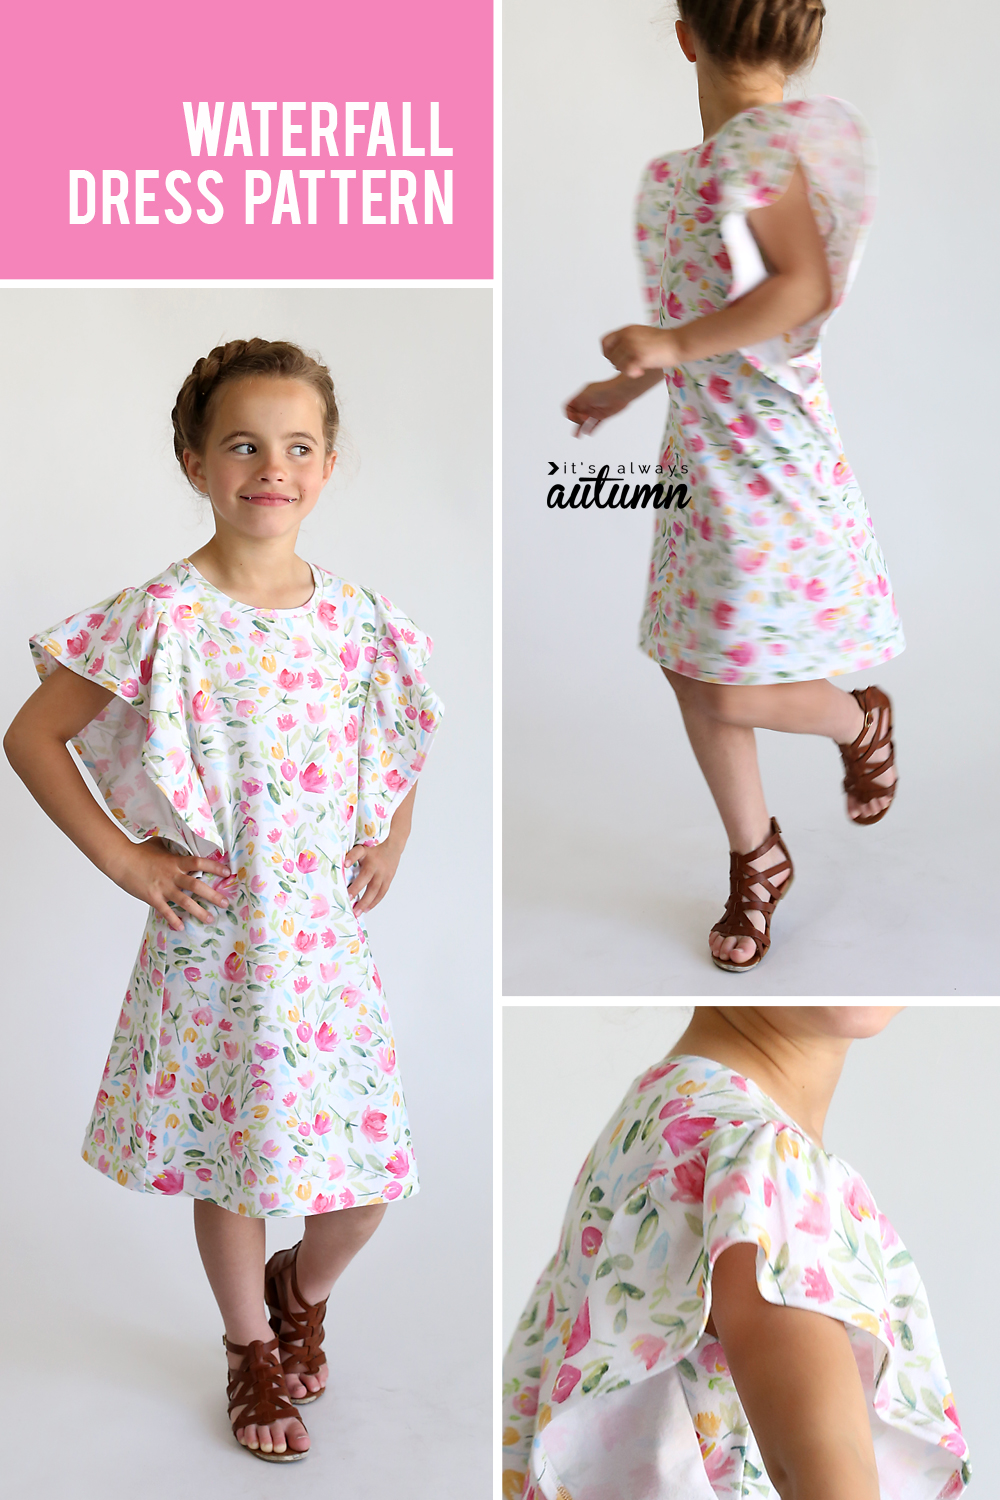
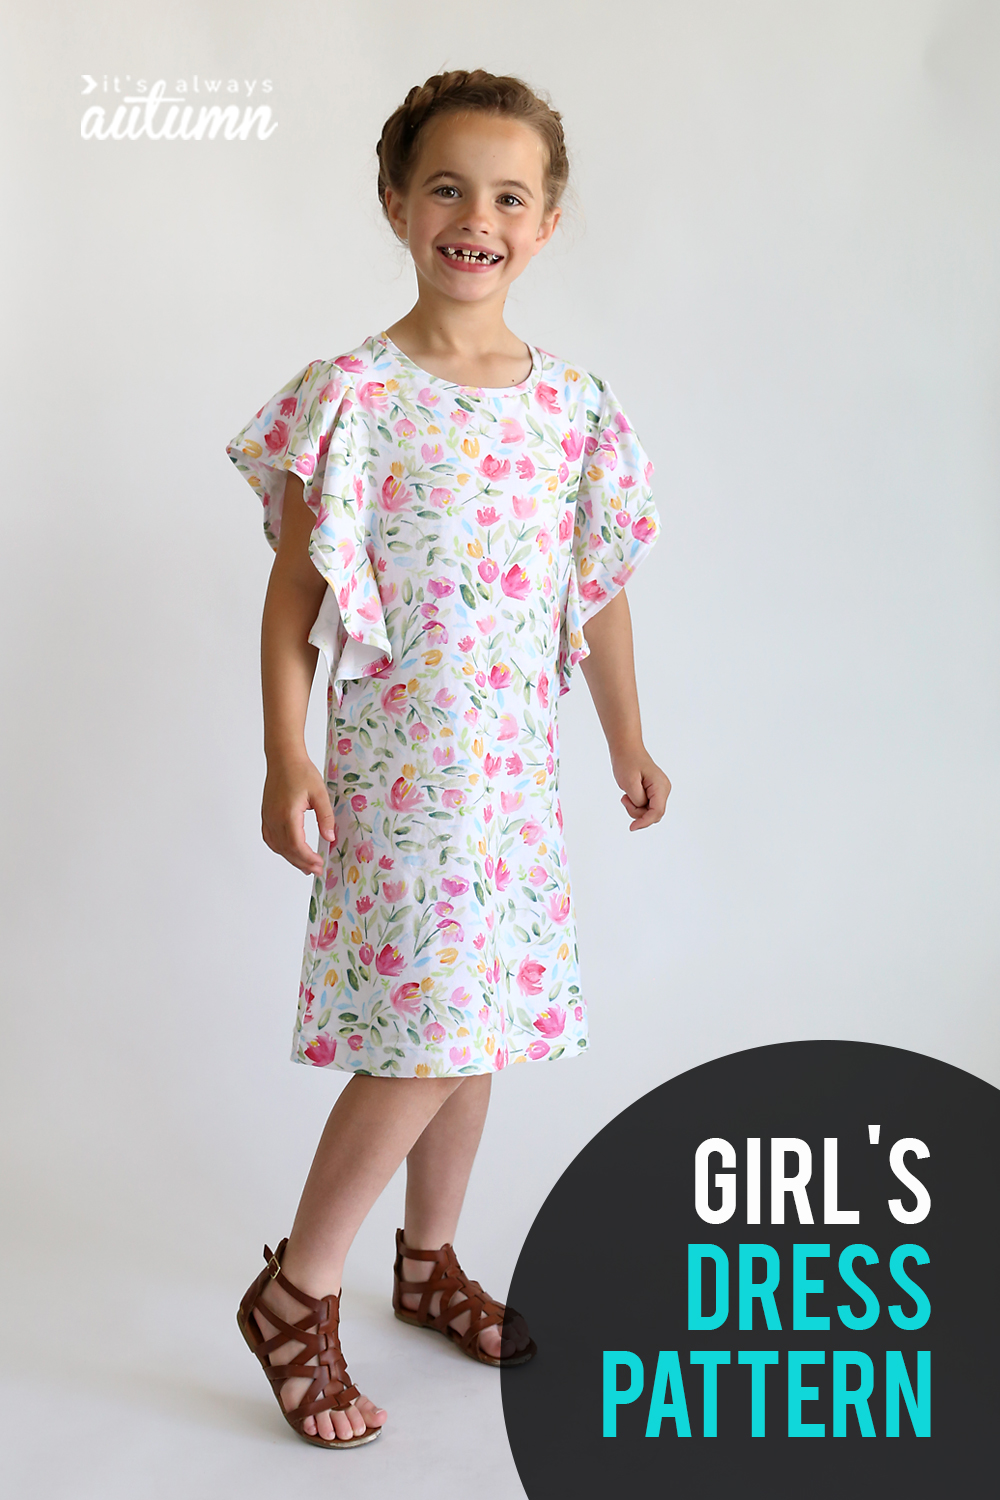
In today’s post: Learn how to turn the free waterfall top pattern into a cute girl’s dress.
Life is busy these days! It’s the end of the school year, which brings orchestra concerts and field days and piano recitals and the Pinewood Derby and all sorts of other events to get to. Plus my twins just turned 15 and got their learner’s permits which means I have 80 hours of driving practice ahead of me (40 with each one). It’s ok, we’re all busy, it’s all good, but I don’t get as much sewing time in as I used to. So when my daughter asked me to make her a new dress I said “of course” and then thought through the easiest way to make it happen. I decided to try adding some length to the last free pattern I shared here on the blog, a girl’s top with wavy “waterfall” sleeves in size 7/8.
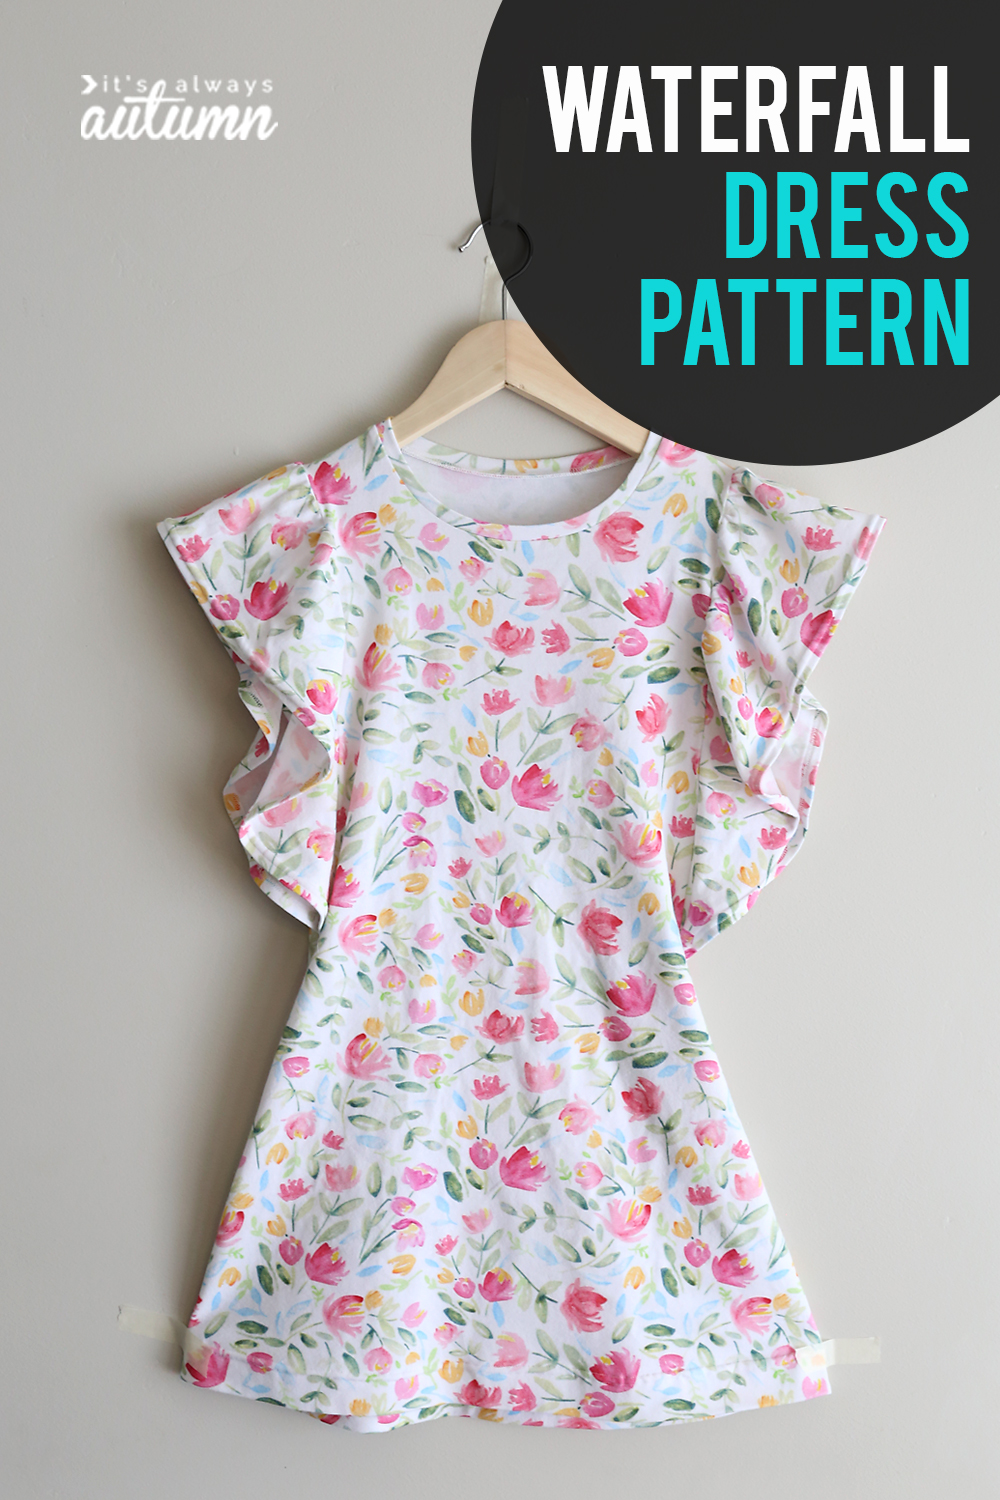
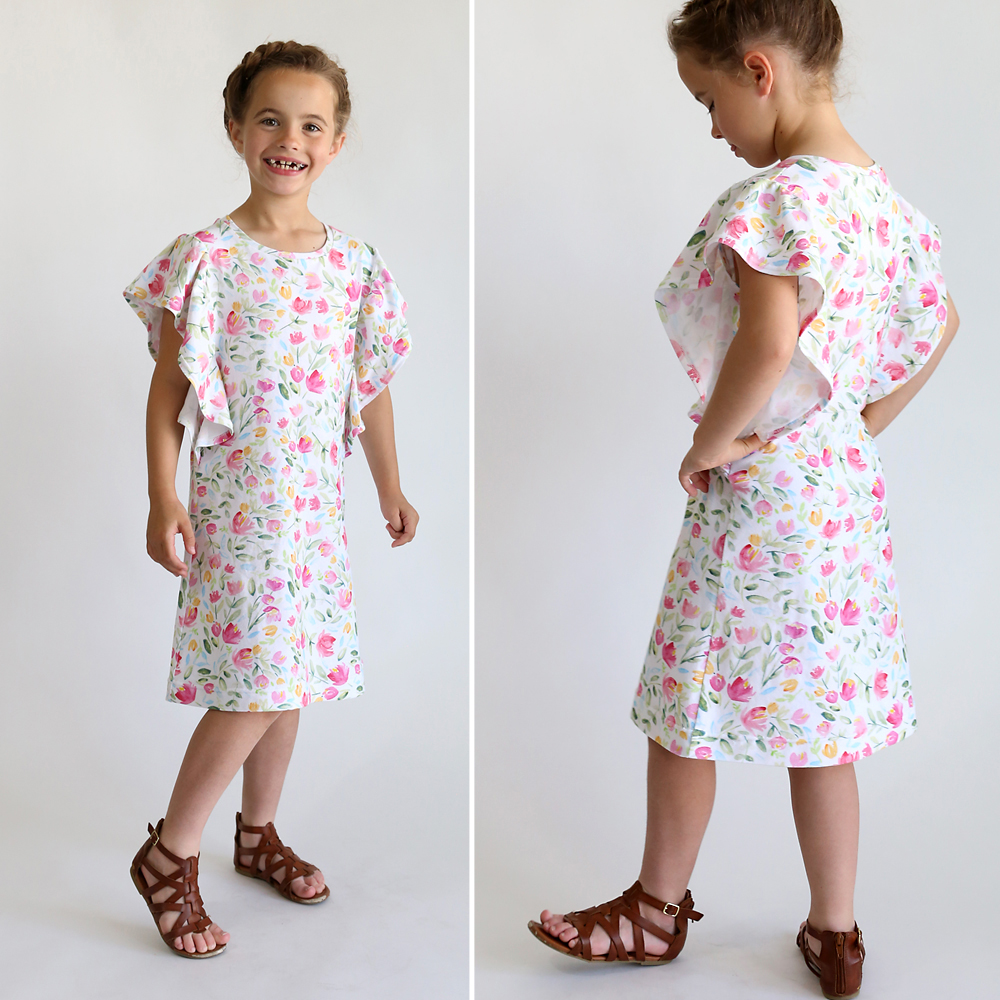
It was super easy to turn the shirt into a dress! All I did was add about 8 inches of length when cutting out the pattern, when ended up being plenty to make a knee length dress.
If you’d like to try making a waterfall dress, click here to visit the post for the Waterfall Top Pattern. You can download the pattern from that post and read through the instructions for how to sew it up.

You will need 1 yard of 56-60 inch wide knit (stretchy) fabric to make a waterfall dress in size 7/8. Wash and dry your fabric before you begin. I recommend a fairly drapey knit for this top or dress. The fabric I used here is pretty stable and not super drapey, so the sleeves aren’t quite as wavy as they could be. (The fabric was so cute and summery that I used it anyway.)
When cutting out the pieces, just add about 8 inches of length to the bodice piece, as shown below:
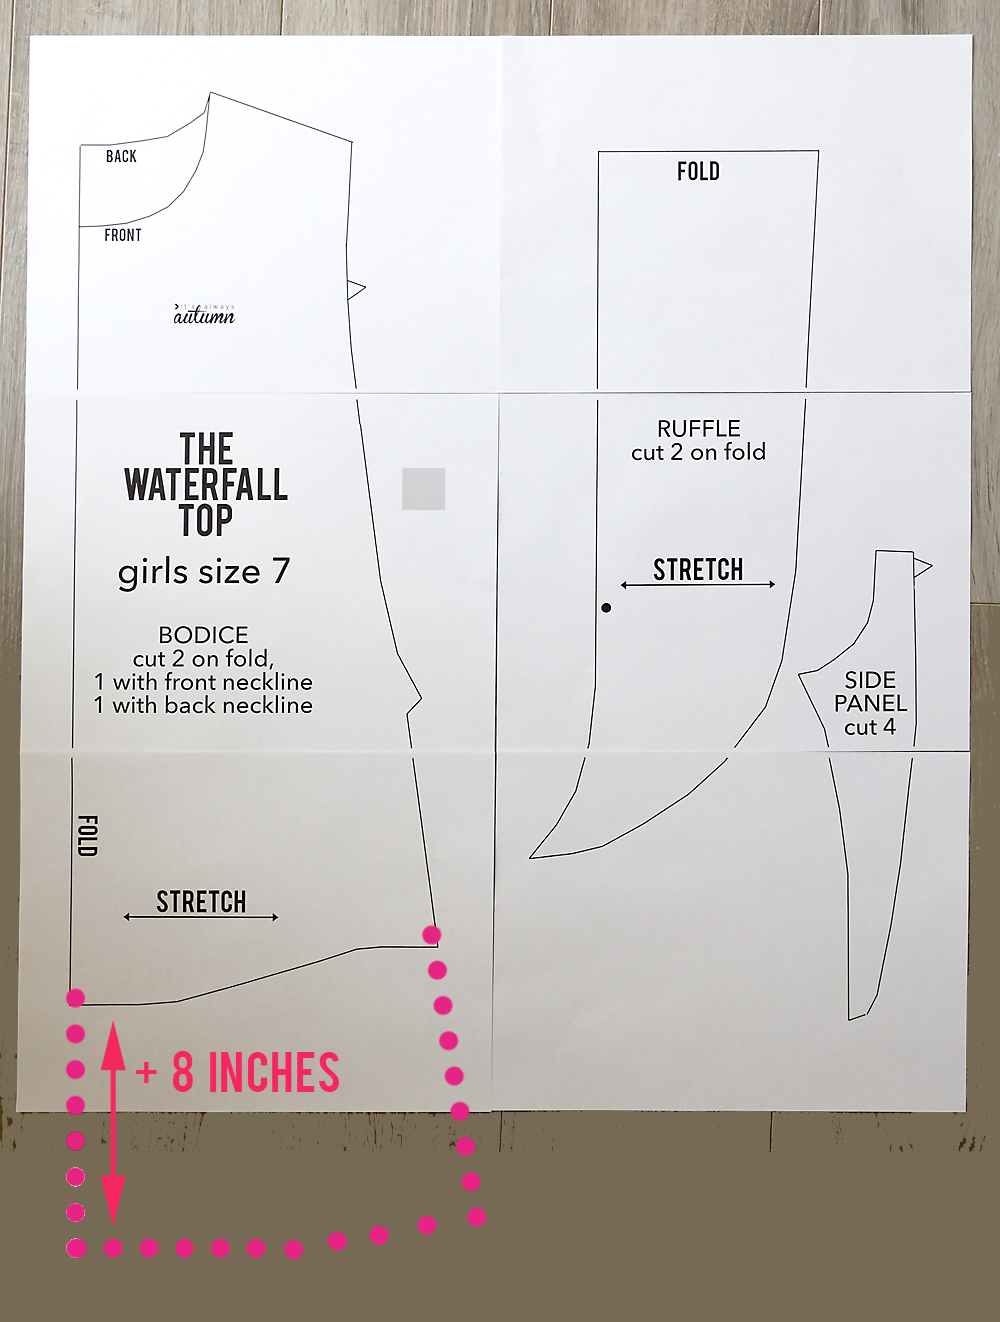
Other than that, sew it up exactly as directed in the waterfall top post.


Sharlyn says
I’ve been reading your blog for awhile, Autumn, and kinda feel like I’ve watched this little cutie “grow up”. She’s adorable, and once again, you have made magic. Well done!
Kathy says
The dress is adorable and looks comfy and cool for summer and those shoes are the bomb!!!