
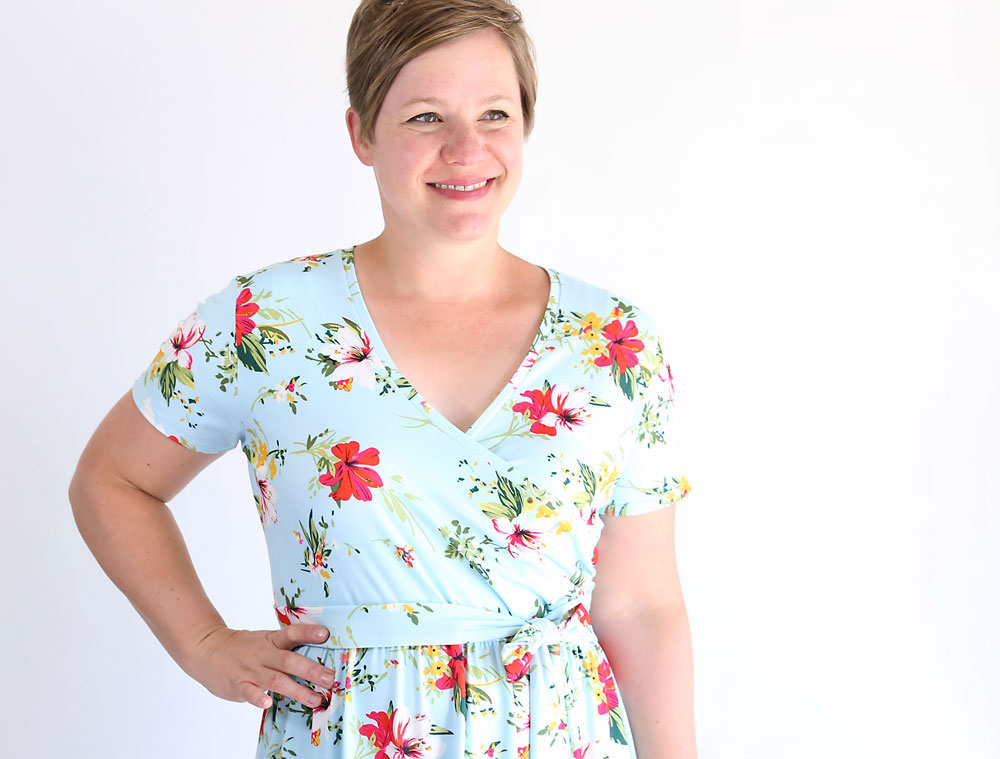
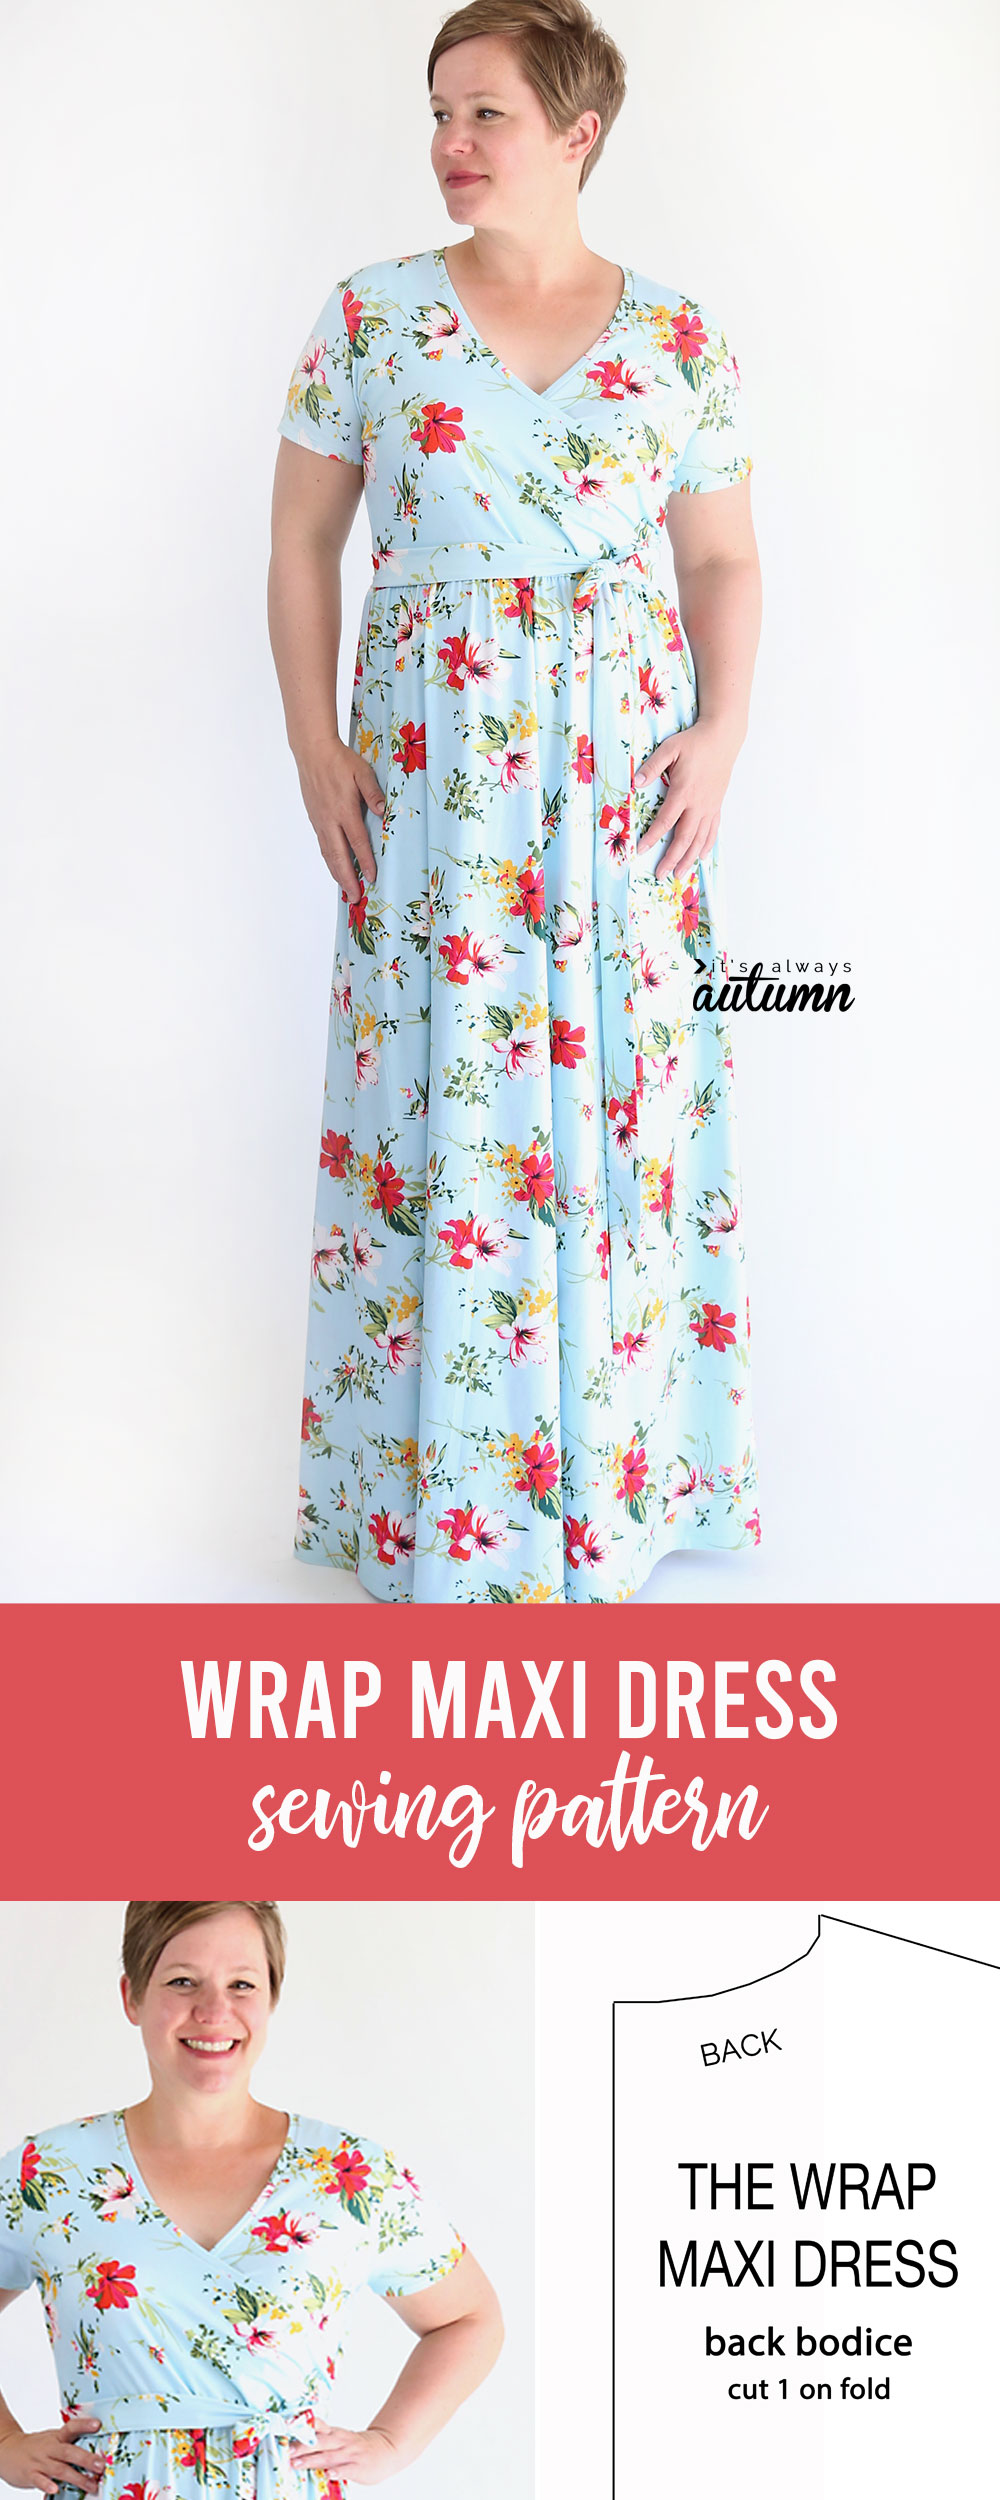
In today’s post: Download the free sewing pattern for this pretty wrap maxi dress in women’s size large.
Sewing clothing can be a bit of a gamble. Sometimes making your own clothes is fantastic, because you can adjust them to be sure they fit the way you want. But other times it can be really frustrating, especially when you realize you just put time, effort, and money into making an item of clothing that just doesn’t look good on you. I ran into this frustration often when I started sewing for myself. I’d pick a pattern that I thought looked cute without remembering to consider whether it was likely to look cute on me.
In the years since I’ve figured out what sorts of clothes look best on me, and that’s what I stick to sewing. That’s one of the reasons I’ve made so many maxi dresses (check them all out here!). Maxi dresses are flattering on so many body types. Today’s free pattern may be my favorite one yet!
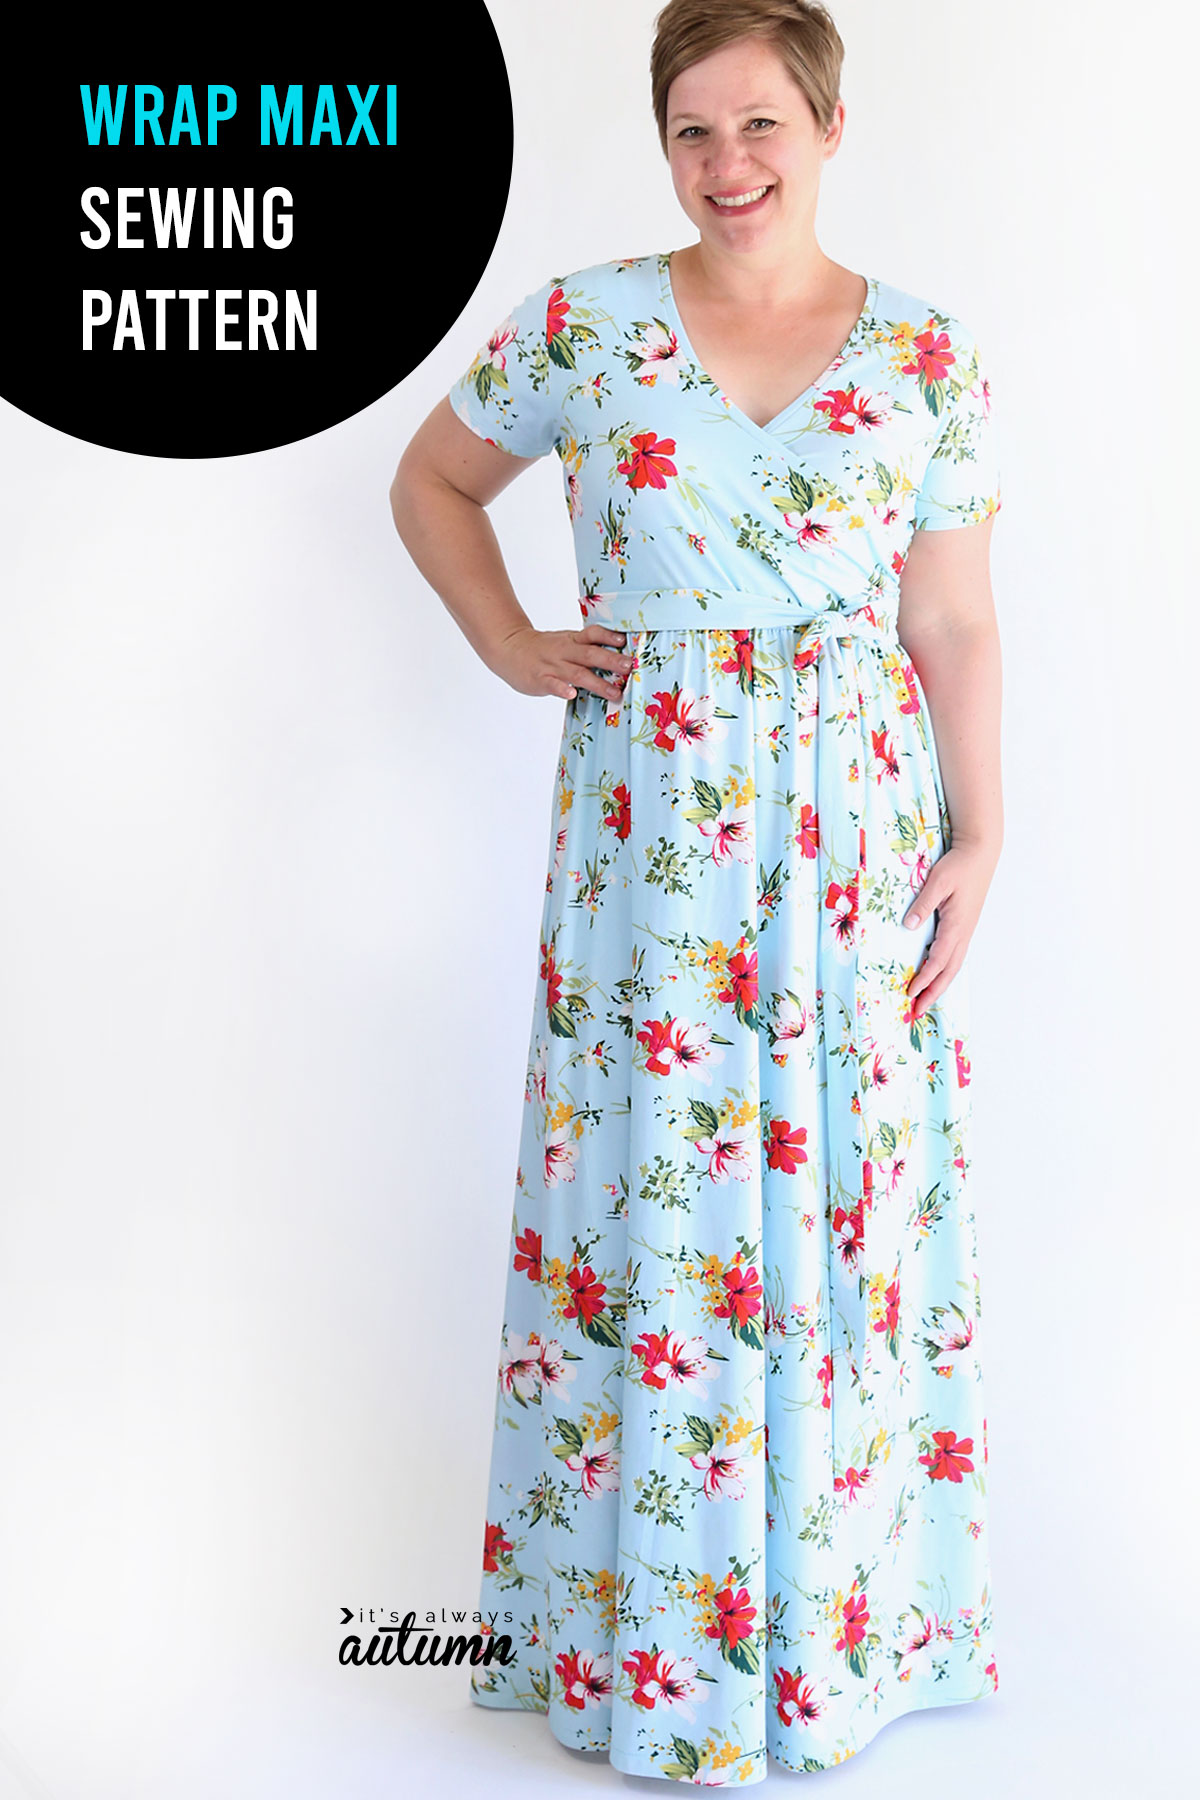
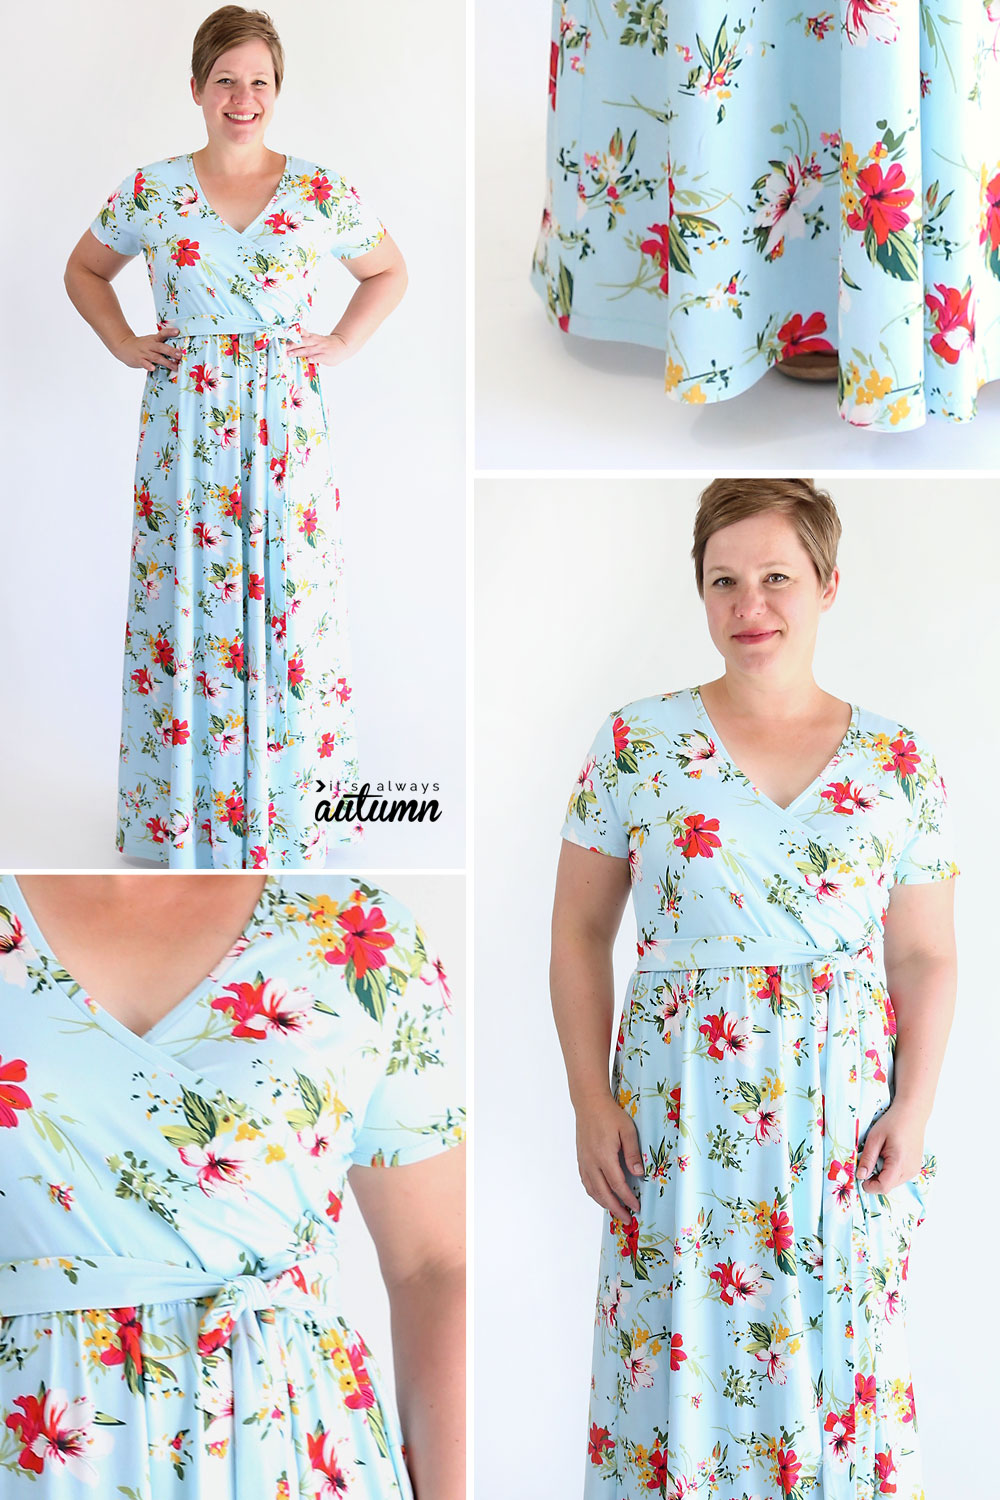
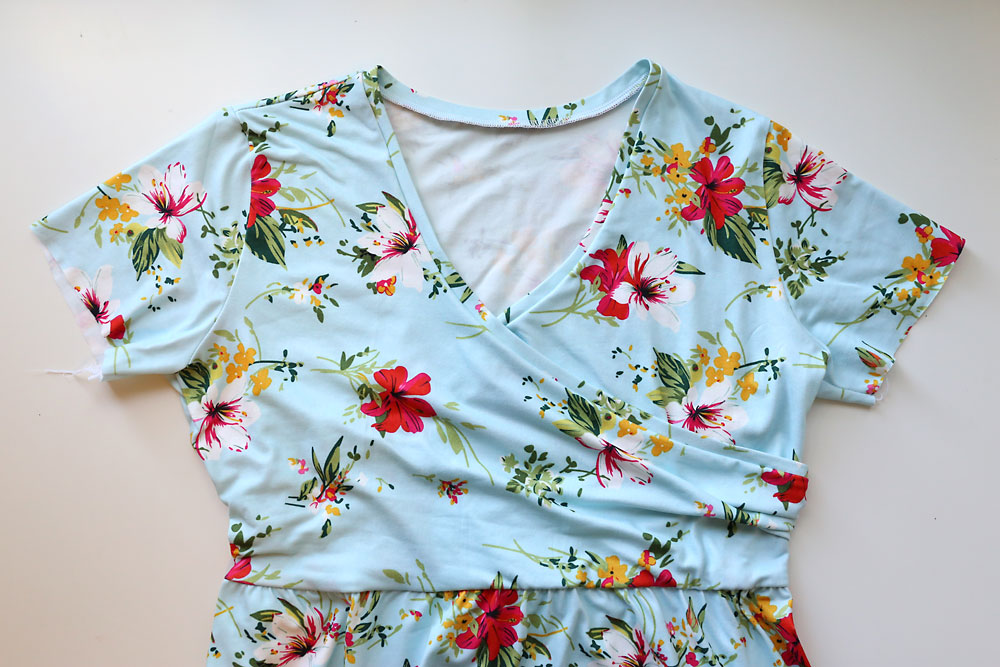
This maxi dress has a flattering criss cross wrap top and a long gathered skirt. There’s also a tie to emphasize the waist. Made from soft, stretchy knit material, it’s both pretty and extremely comfortable.
NOTE: After wearing this dress out I decided the neckline is a wee bit too low, so I adjusted the pattern to make the V about an inch higher.
The Wrap Maxi Dress sewing pattern
This pattern is available in women’s size large (38 inch bust). It has a slightly slimmer fit than most of my other women’s patterns. It takes 3 yards of 56-60 inch wide knit (stretchy) fabric. This is also a slightly more involved sewing project than most of the patterns I share. There’s nothing especially hard about it; it just has a lot of steps so if you are a beginner you may want to start with something simpler, like the cap sleeve maxi dress tutorial.
I used a double brushed poly spandex knit for this dress which you can find here on Amazon. I’m always nervous to order fabric online, but double brushed poly (DBP) is one of my favorite knits to work with, and this print is absolutely beautiful!
I modeled this dress after a maxi dress I ordered a few months ago from Amazon. If you like the look of this pattern but don’t feel like sewing it yourself, you can find the dress I ordered here for about the same amount of money as you’ll spend on fabric. My pattern corresponds to an XL for this dress listing.
Click here to download the wrap maxi dress pattern. Print it out at 100% or full size. It prints on 10 sheets of 8.5×11 paper. The test square on page 7 should measure exactly 1 inch. Butt the pages together without trimming and tape them together. The printed pattern looks like this:

You will need to cut one back bodice piece, two front bodice pieces, and two sleeves. Additionally, you will also cut one neckbinding piece and two tie pieces as directed on page 5 of the pattern. Finally, you also need to cut two skirt pieces.
I didn’t create printable patterns for the skirt pieces because they would take so many pieces of paper. Instead, follow the diagram below to cut your skirt pieces. The skirt front will be cut on the fold, and the skirt back will be cut on the selvedges. The waist of each skirt piece should be 12 inches in from the fold (or selvedge). The hem should be 18 inches in from the fold (or selvedge). The length of the skirt should be 46 inches.

Cut out the other pattern pieces as shown in the diagram above.
Wrap Maxi Pattern: Sew the skirt
The very first thing you need to do is sew the skirt together. You will have a skirt front that was cut on the fold. You will also have two “halves” of a skirt back. Place them right sides together and sew down the center seam using a 1/2 inch seam allowance. Press the skirt back open, and now you have a skirt back and a skirt front.
Place the skirt back and front right sides together and sew down the side seams.

Sew the skirt aside so you can work on the bodice, or top, of the dress.
Wrap Maxi Pattern: Sew the bodice
You will have one bodice back and two bodice fronts. Place the back down on a table, right side up. Lay one of the fronts on top of the back, right side down, and match up the shoulders. Sew the shoulder seam as shown below, using a 1/2 inch seam allowance.
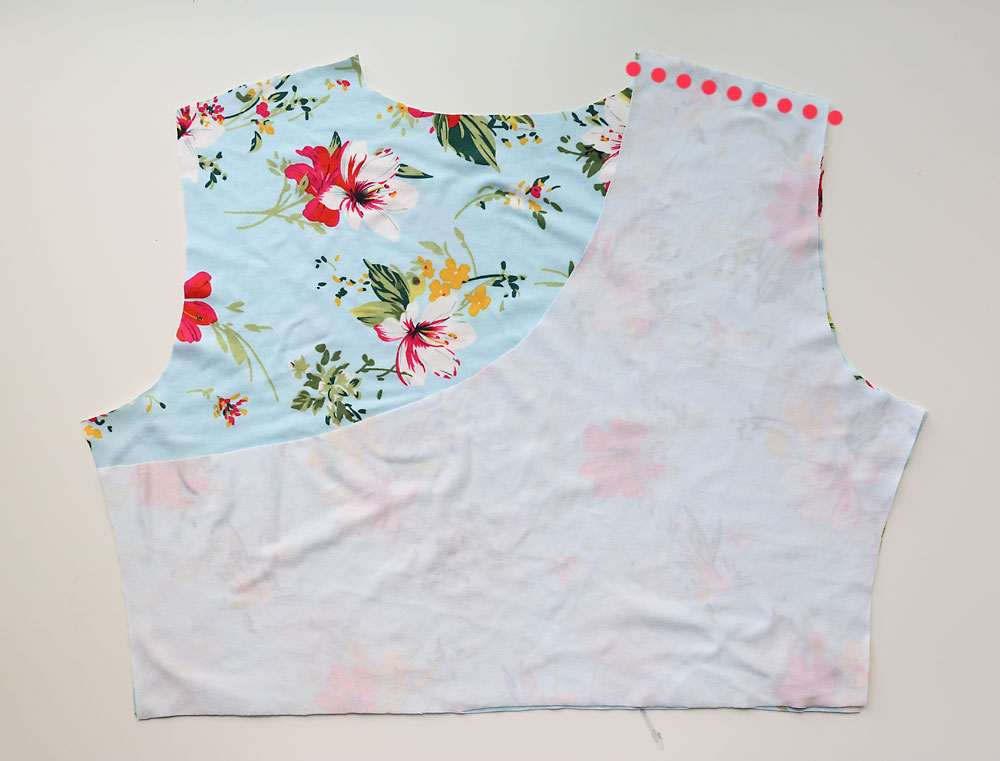
Repeat with the other bodice front. Then open up the bodice at the shoulder seams and lay the bodice down on a table, right side up, as shown below.
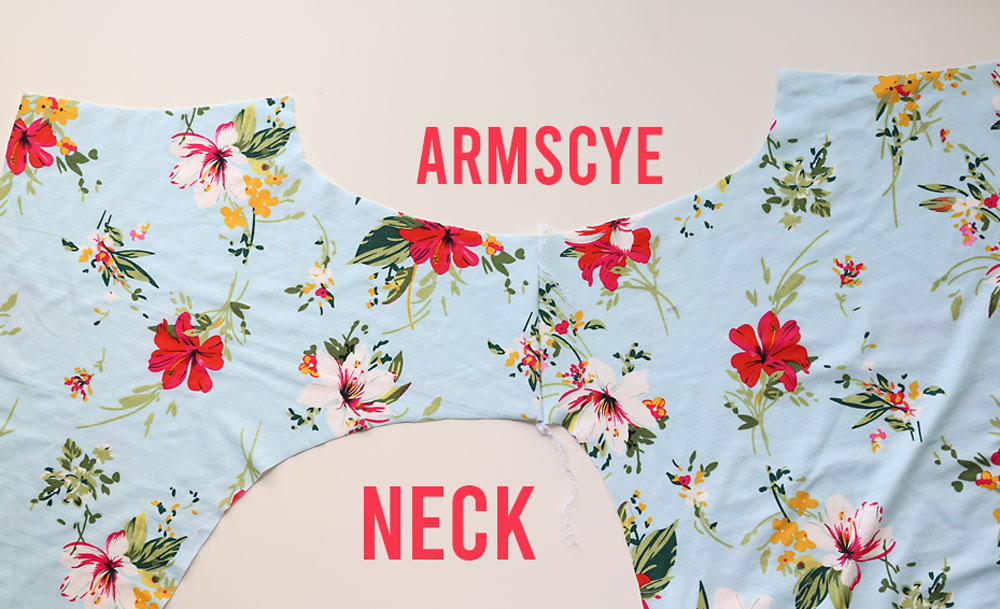
Grab one of you sleeve pieces. Match up the center of the sleeve curve with the shoulder seam and pin.
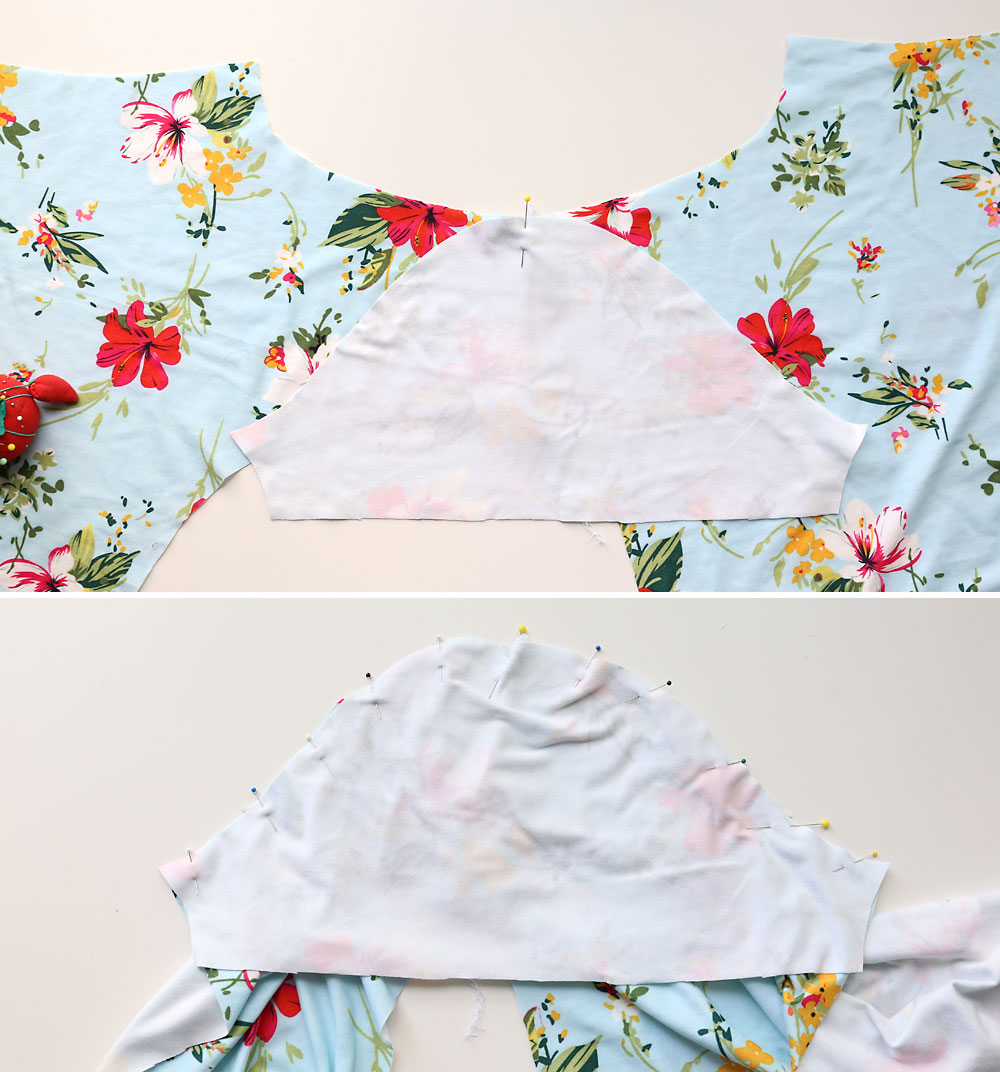
Continue to pin the sleeve into the armscye, as shown above. Sew in the sleeve using a 1/2 inch seam allowance. Repeat with the other sleeve on the other side.
Now you can see the wrap top begin to shape up. Before we sew the side seams, we need to bind the neckline. Grab your neckbinding piece and fold it in half lengthwise, right side out. Press.
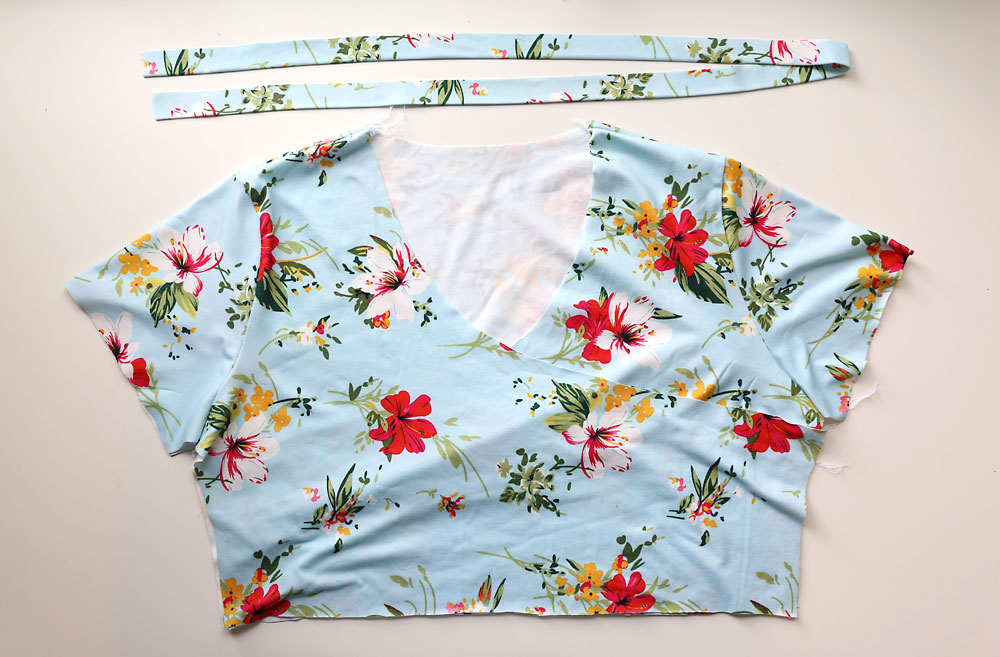
Find the halfway point in the neckbinding piece, and pin it to the center back of the neckline. Continue pinning the neckbinding all along the neckline, as shown below. You will have to stretch the neckbinding just slightly to fit.
Sew the neckbinding to the neckline. Flip the binding up and press the seam allowance down.
We’re going to add some gathers along the raw edge of each front bodice piece. Sew two rows of gathering stitches where you see the dotted line below on each front piece.
Pull on the lower threads of the gathering stitches until the edge of each bodice piece measures 3.5 inches from top to bottom.
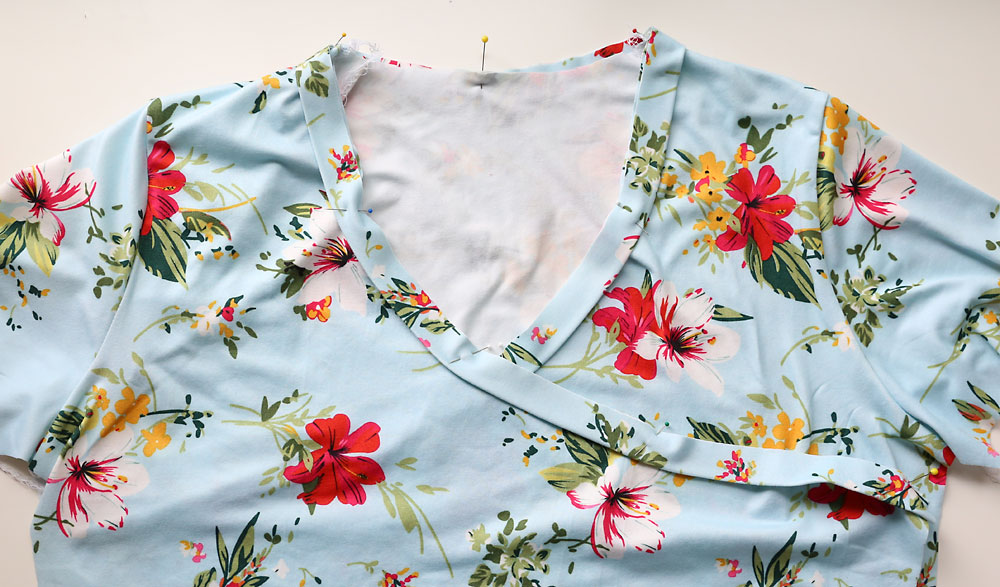
Turn the bodice inside out and lay it down flat. Fold over the bodice from the right side and match up the gathered portion of the front with the side seam on the back bodice, as shown below.
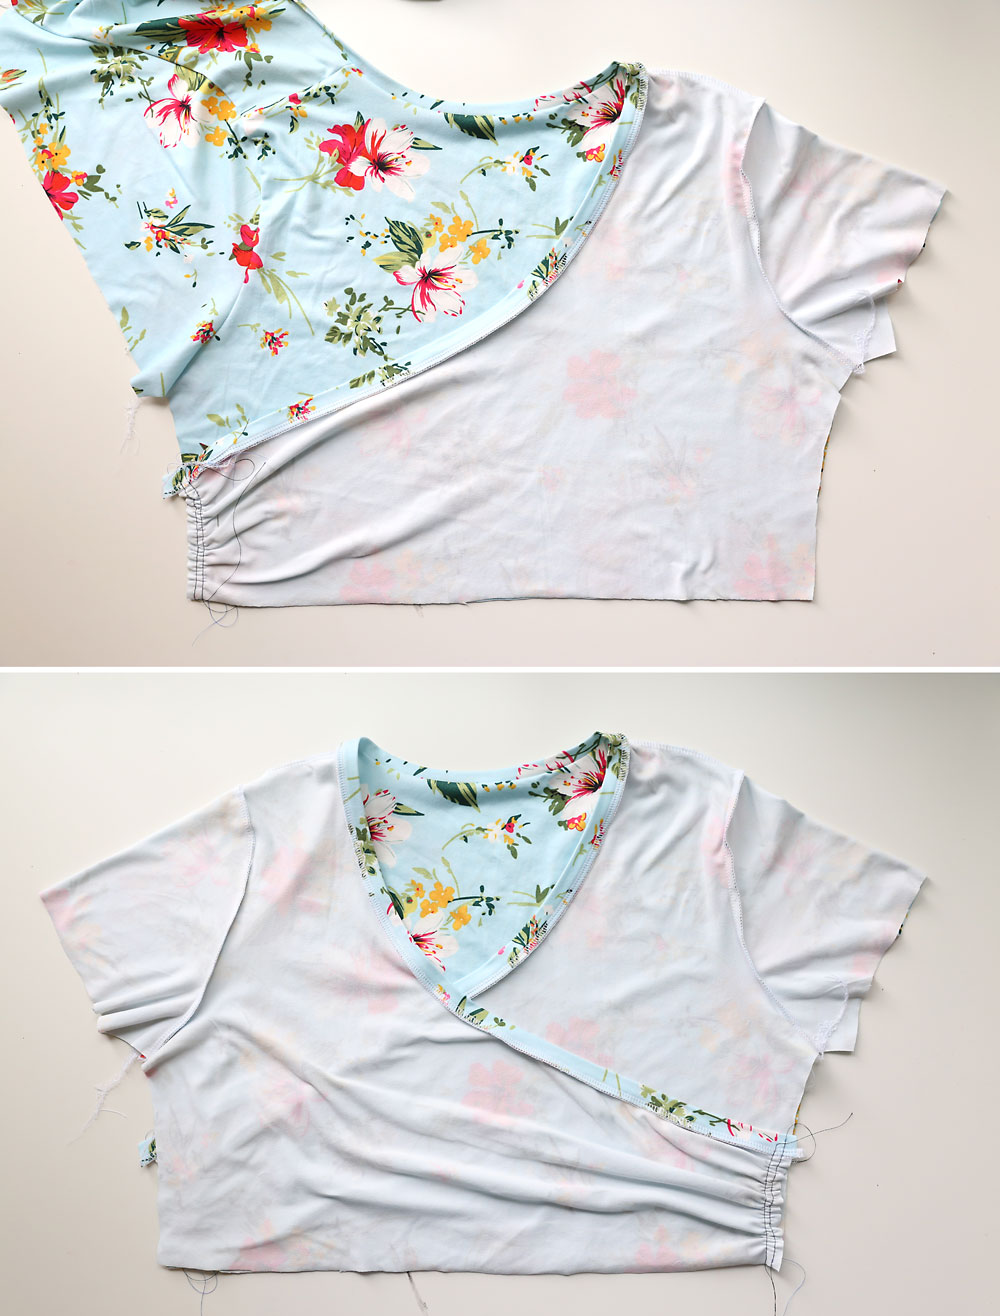
Fold over the bodice from the left side, matching up side seams. Pin well, and then sew down both side seams, starting at the sleeve.
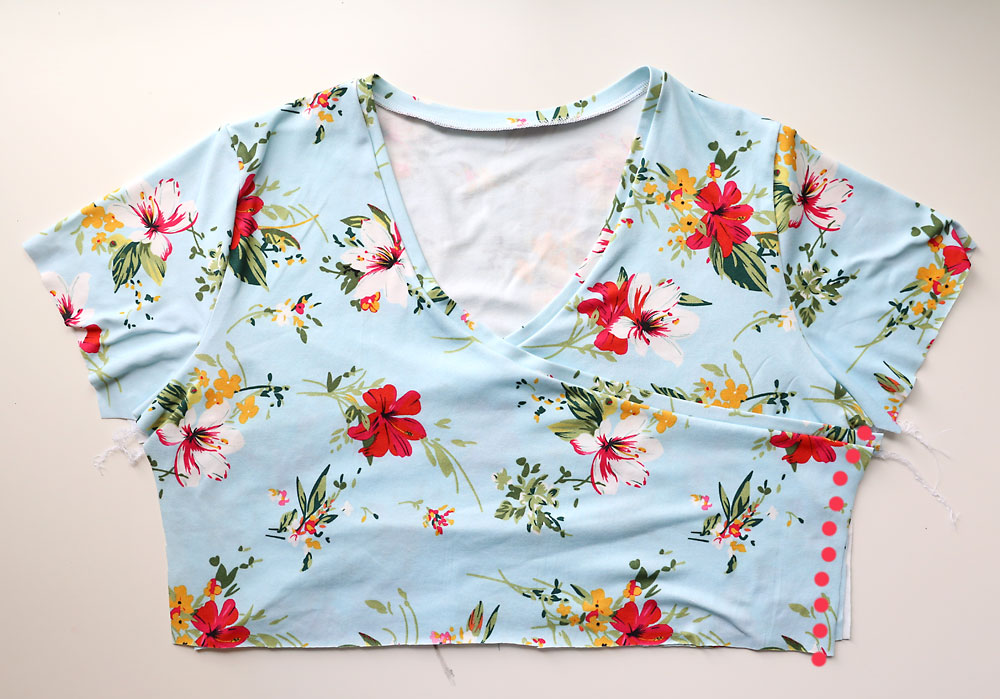
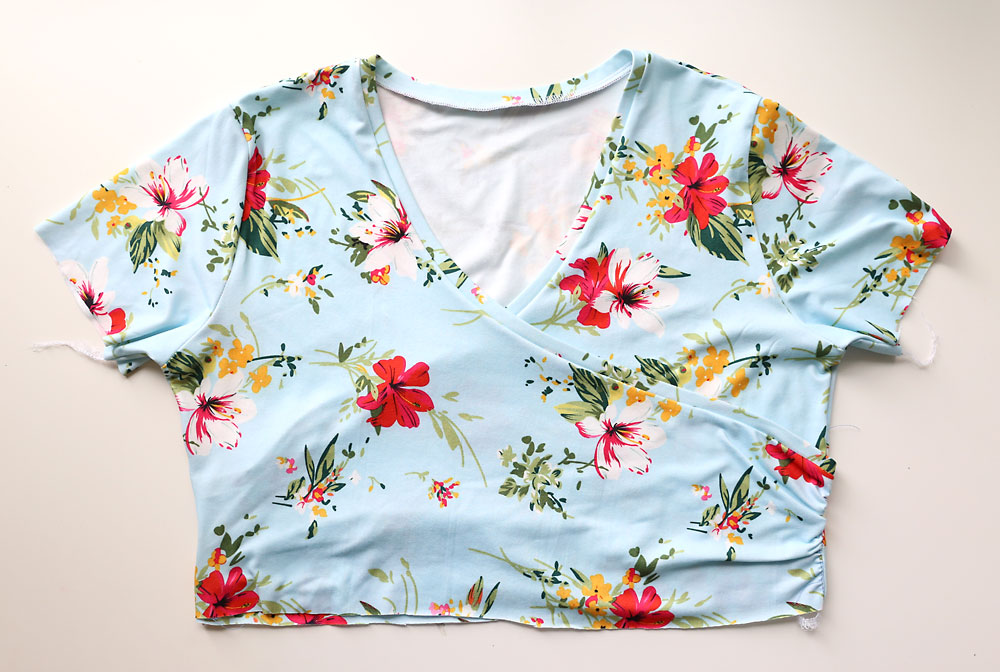
Flip it inside out and the wrap top is complete.
Wrap Maxi Pattern: Attach the top to the skirt
Next you’ll attach the top and skirt. Keep the shirt right side out, but turn the skirt inside out. Slide the top inside the skirt, as shown below. Match up the side seams and pin. Pin the rest of the shirt to the skirt, stretching the shirt to fit. Remember that you will have two layers of shirt in the front.
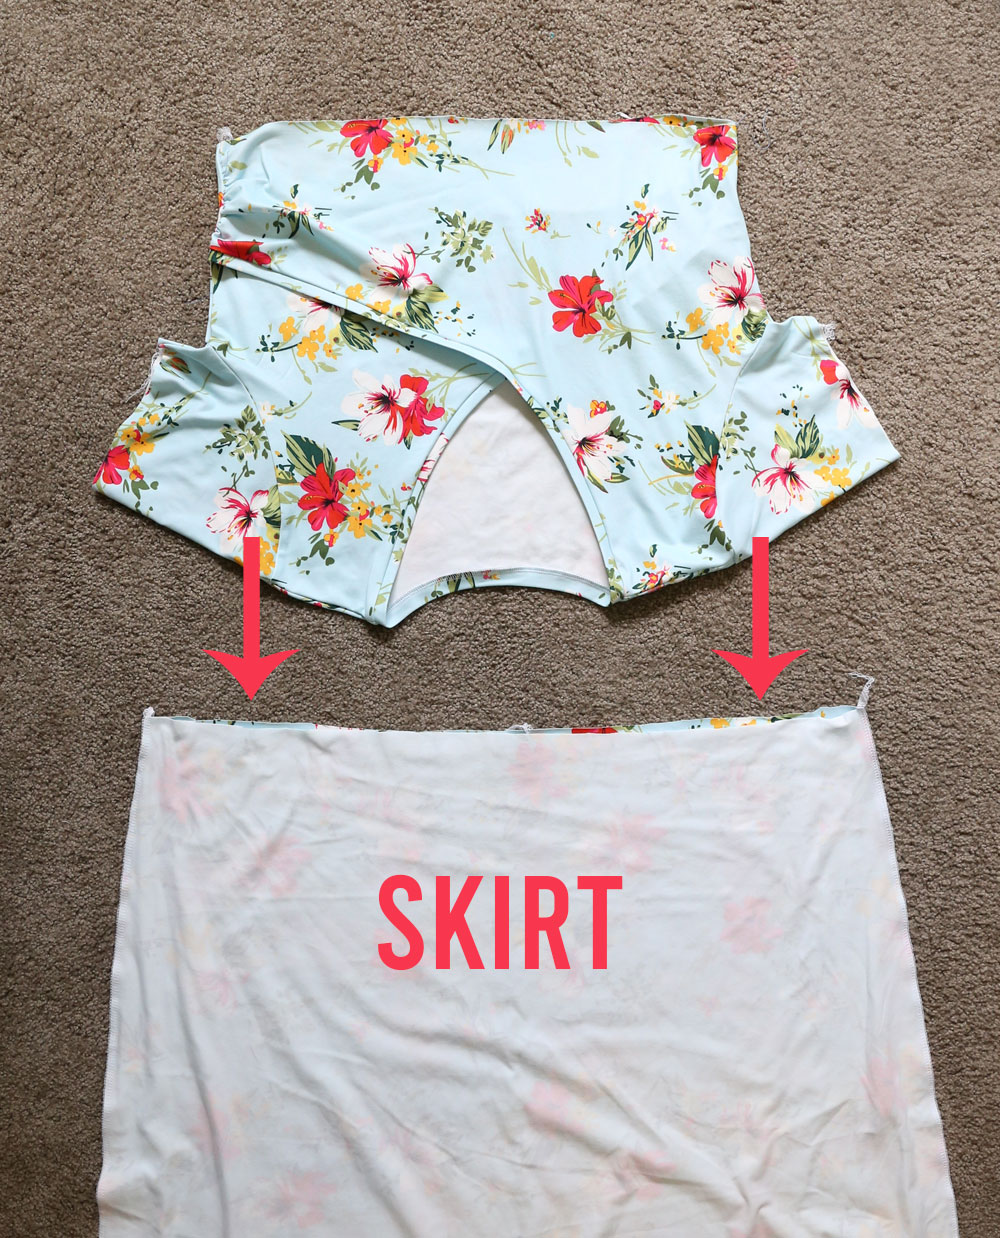
Sew along the raw edges to attach the skirt to the shirt, using a stitch that will stretch.
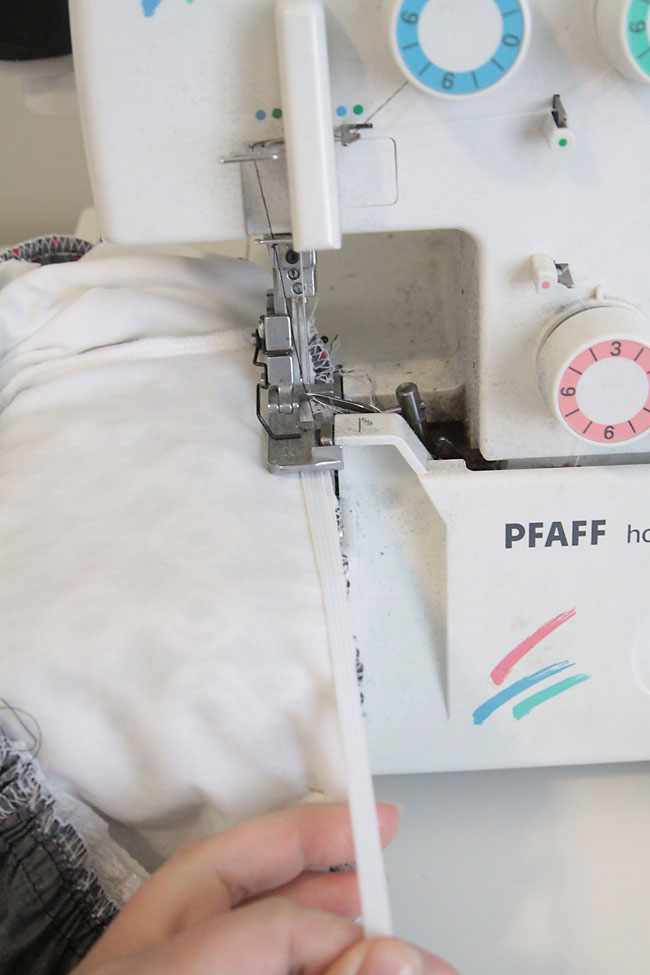
Because you had to stretch the shirt to sew it to the skirt, the skirt will naturally gather up a bit once they are sewn together. However, it will likely not gather enough to sit tight against your waistline, so you’ll want to sew some elastic over that seam allowance.
You can use 3/8 inch or 1/4 inch elastic here, and you’ll sew it right over the seam allowance of the seam that connects the bodice to the skirt. Place the seam allowance under your presser foot and tuck the elastic right on top. Start sewing, giving the elastic a good pull as you sew. Sew all the way around, overlapping the elastic when you get back to the beginning and then trimming the excess. Make sure to give the elastic a good pull as you sew, and to again use a stitch that will stretch.
The elastic will gather up the skirt. Here’s what the dress looks like now:
Wrap Maxi Dress: Finishing
Now all that’s left is to hem to sleeves and skirt and sew the tie.
To make the tie, start by sewing the two tie pieces together along one of the short ends. Then fold it in half lengthwise, right side together. Sew one short end closed, then sew all along the long edge, using a stitch that will stretch. Leave the other short end open.
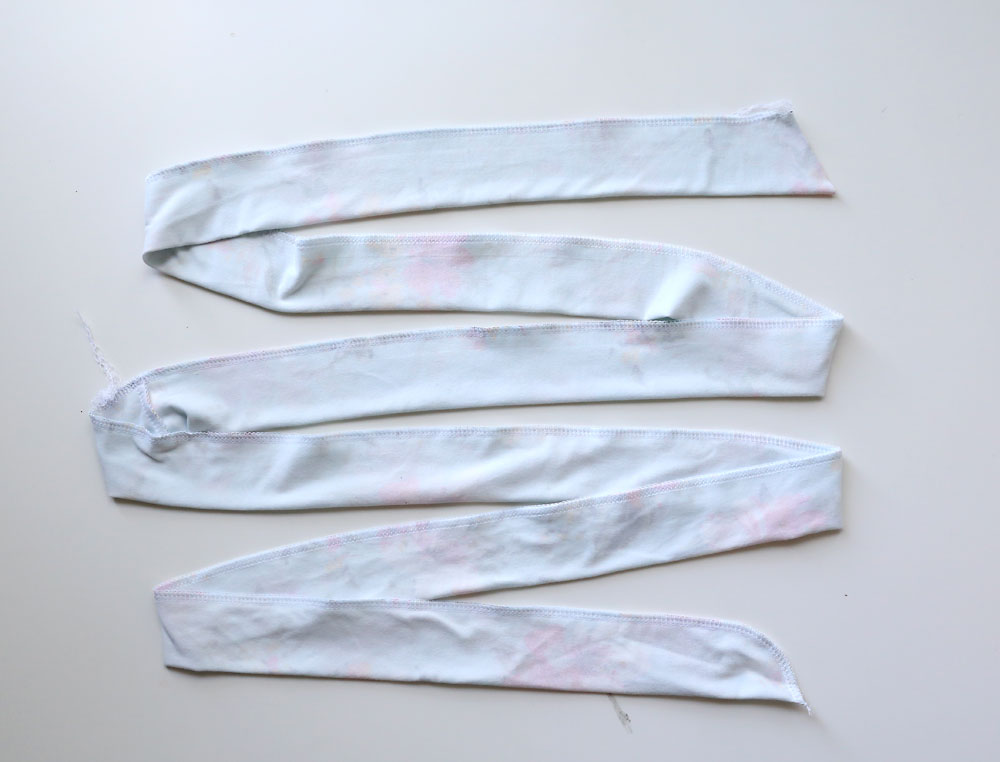
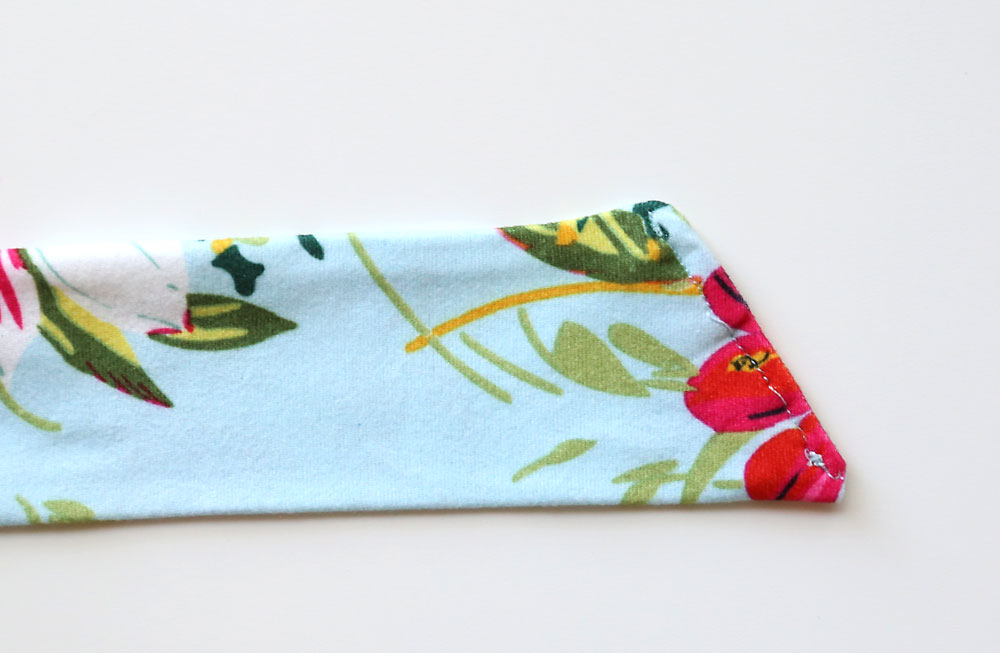
Turn the tie right side out and press. Tuck the raw edges of the open short end in and sew it closed.
Hem the sleeves by folding them up half an inch and sewing with a stitch that will stretch, like a zigzag or a double needle stitch.
Hem the skirt to your desired length. I’m 5′ 3″ and I cut about 4 inches of length off the skirt to make it nearly floor length when I’m wearing heels, so it should be plenty long for most people.
Be sure to check out the Sewing Archives for LOTS more sewing patterns and tutorials. Thanks for reading!

Sharee Woodside-Wallace says
Thank you for hour printable patterns they are a blessing. This is the first one I have used and my dress fits perfectly. I will be making a few more dresses using this pattern and a few of the other dress patterns.
Naomi F says
I am wondering how you attached the tie or is it just tied around loose?
Audra says
Thanks
Judy says
Love this but not sure what size L means…measurements would be useful.
Autumn says
Hi! Size large patterns on this site are meant for a 37-38 inch bust.
Miriam says
I made this lovely wrap dress and it has come out really well. I’m glad, though, that I had bought extra fabric this first time – as I had the dress all made and then completely messed up the elastic. 😭 Had to remake the top part, and thankfully had enough spare material, then cut the skirt off the original and turned up a tiny hem. THIS time I made a casing out of my waist seam and threaded elastic through that instead. Really pleased with myself!!!Thankyou. 😁😁
Debra Nightengale says
I love this pattern and I would love to be able to make this dress. My question is can I make it in a 2X, the pattern that you have here is smaller and I’m about a size 20 if you could help me I sure would appreciate the information. Thank you