
In today’s post: Download the free pattern for the Twist Knot Tee in size L.
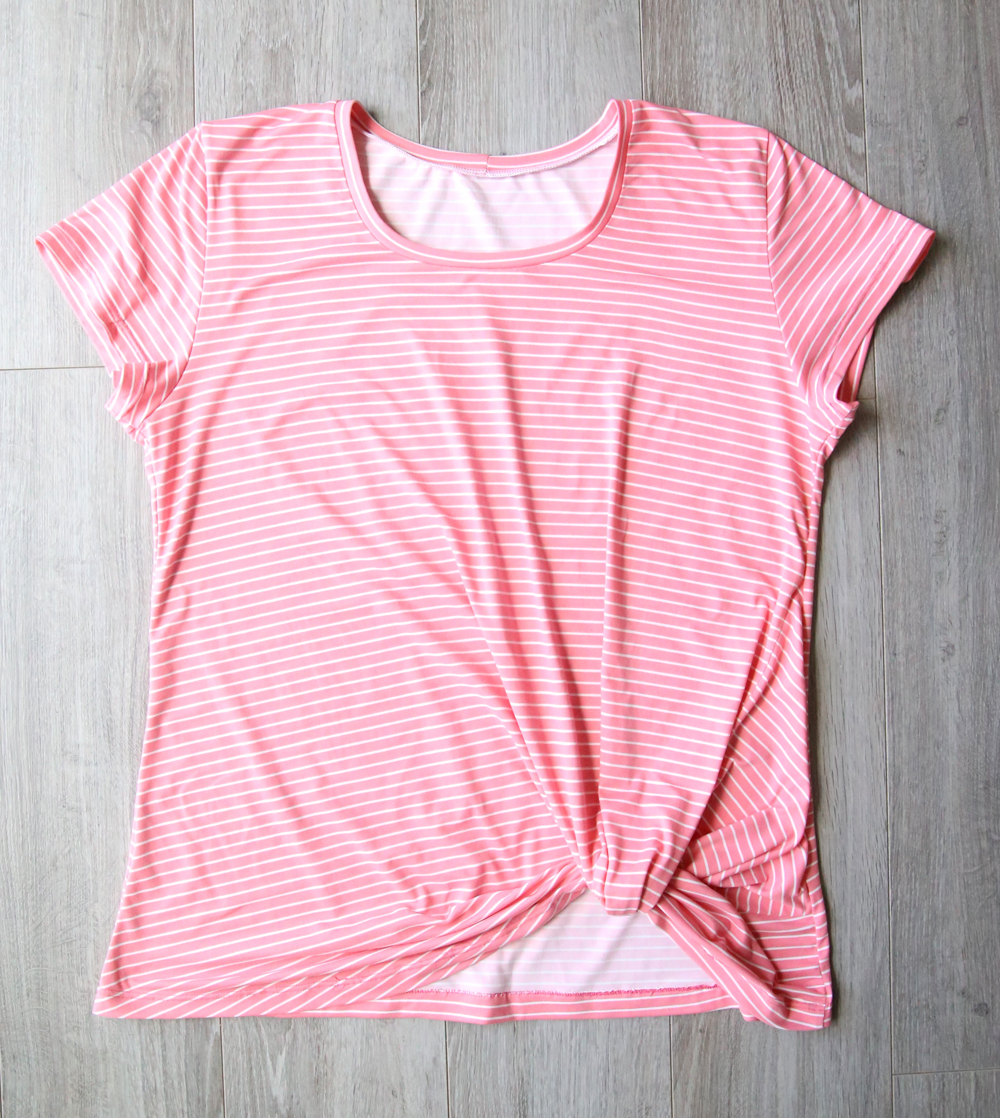
Last summer at a neighborhood barbecue I saw my neighbor wearing this cute top with a pretty twisted knot at the hemline. I made a beeline over to her and asked if I could look at the twist and try to figure out how it was sewn. Or at least that’s what happened in my head – in reality I think I just walked up to her and grabbed the hem of her shirt. The best part was she didn’t even seem surprised – I guess my neighbors know I’m a little weird when it comes to stuff like that.
Anyway, I couldn’t for the life of me figure out how this twist knot thing was happening, so I asked where she got the shirt and headed over there the next day, only to find out all the knot hem shirts were sold out already!

I wasn’t that surprised – it’s kind of a fun new style that does a fabulous job covering that infamous muffintop – so I figured I needed to know how to make one. I found a similar top on Amazon, got it here in two days thanks to Prime shipping, and promptly cut it up to figure out where that knot comes from.
Three new shirts later, and I have a pattern for a twist knot tee to share with you guys! This pattern is in size Large only.

For this tee shirt you will need 1 yard of 60 inch wide knit (stretchy) fabric. Some knit fabrics shrink more than others and you will need a full yard for this top, so if you aren’t sure whether your fabric will shrink get a yard and a quarter or a yard and half and wash and dry it before you begin. Also, be aware that a small portion of the wrong side of your fabric may show in the finished knot. Finally, different weights of knit fabric will give you a slightly different look – at the end of the post I show you the three different versions I sewed up so you can see how fabric affects the look.
You should also be familiar with the basic construction of a tee shirt. If you need help with that, you can visit my Classic Tee post here.
Twist Knot Tee Pattern
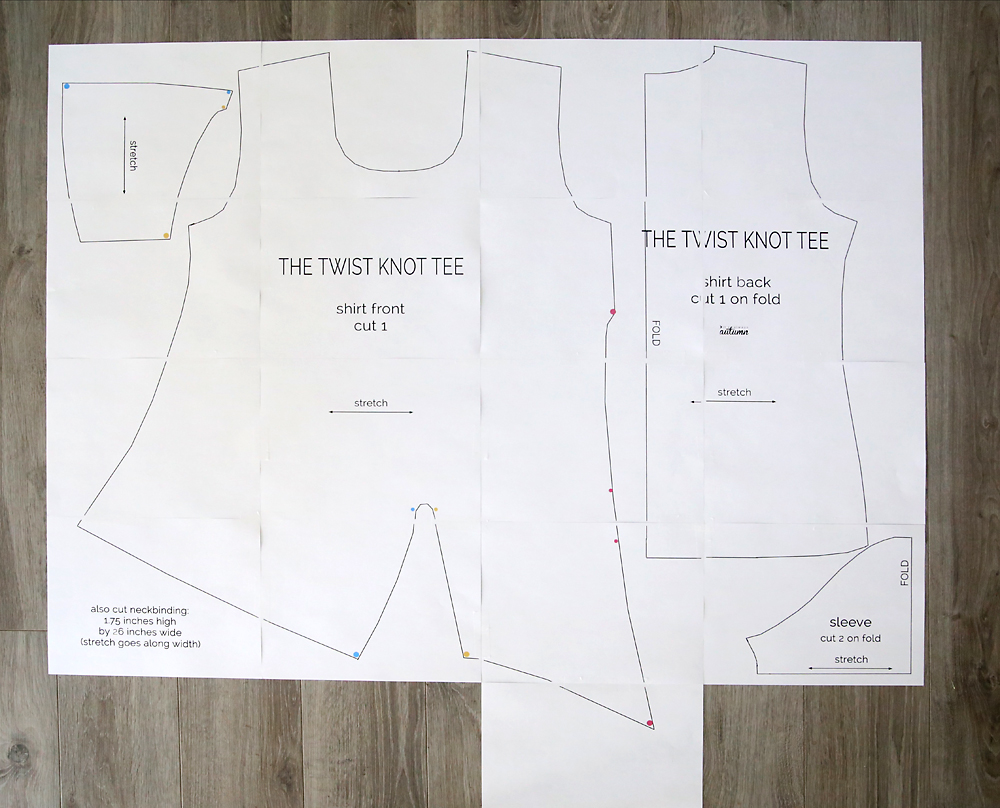
To begin, you’ll need to download the Twist Knot Tee pattern by clicking here. This pattern is in size Large (about a 38 inch bust and roomy in the waist). The pattern prints on 17 pieces of 8.5×11 paper. Be sure you are printing at 100% or full size. Butt the pages together with no trimming and tape them. It will look like this:
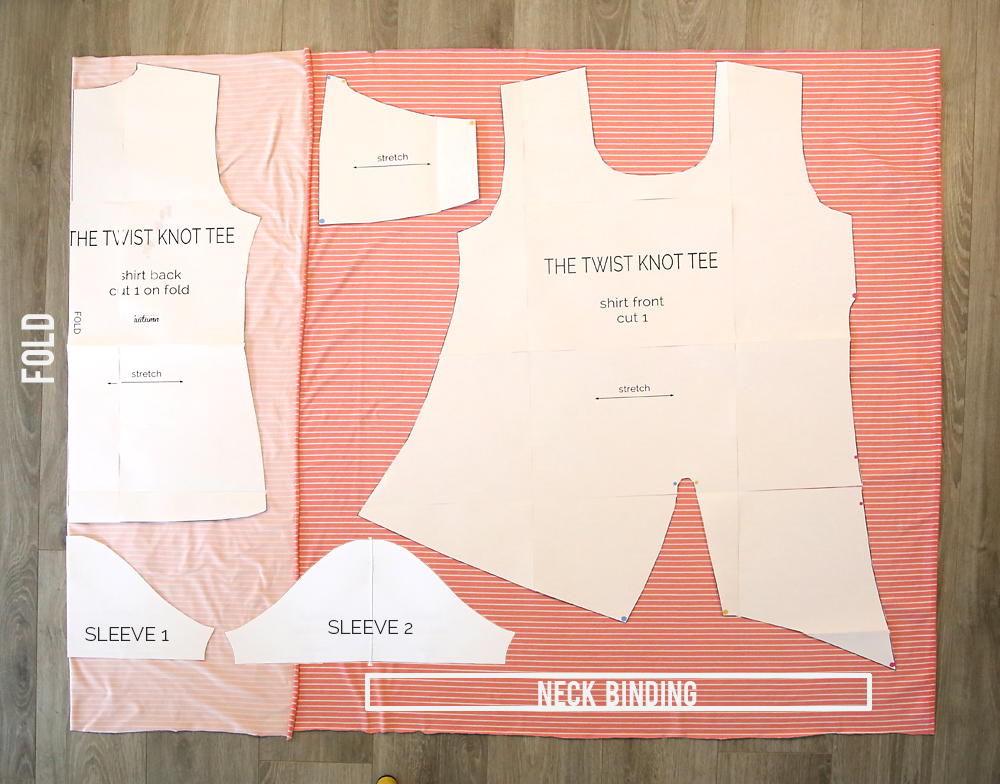
Here’s how I laid out the pattern on one yard of fabric:
How to Make a Twist Knot Tee
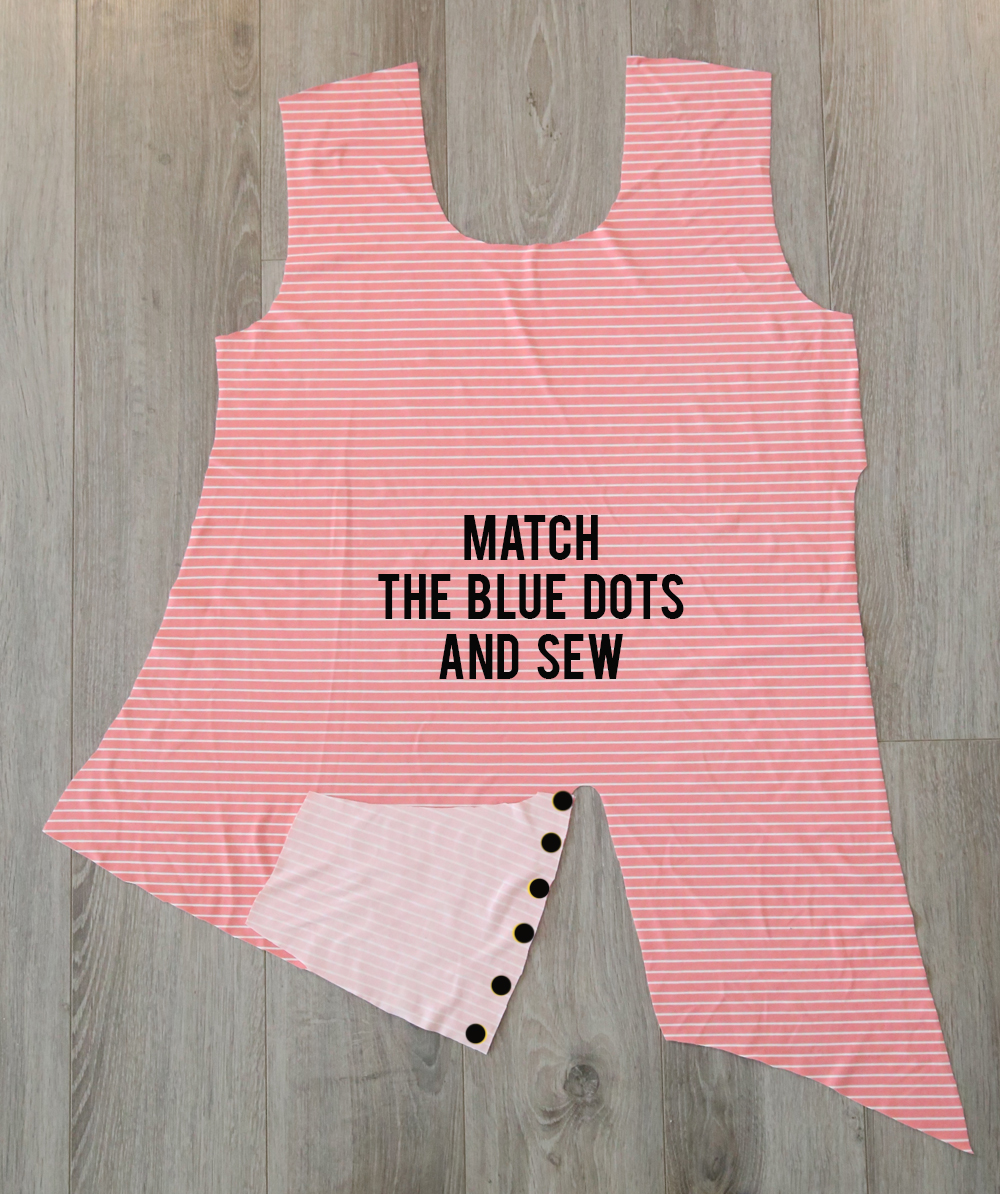
The first thing we need to do is get the twisted hem on the shirt front. If you look at the pattern for the shirt front there are colored dots which show you what parts get sewn together. So you’ll want to mark these dots on your fabric, either with pins or chalk or something like that. Note that there is a set of larger dots in each color and smaller dots in each color – so the smaller blue dots get matched to each other and the larger blue dots get matched to each other, etc. Then you will sew the pieces together between the dots. It’ll make more sense as you follow the photos below!
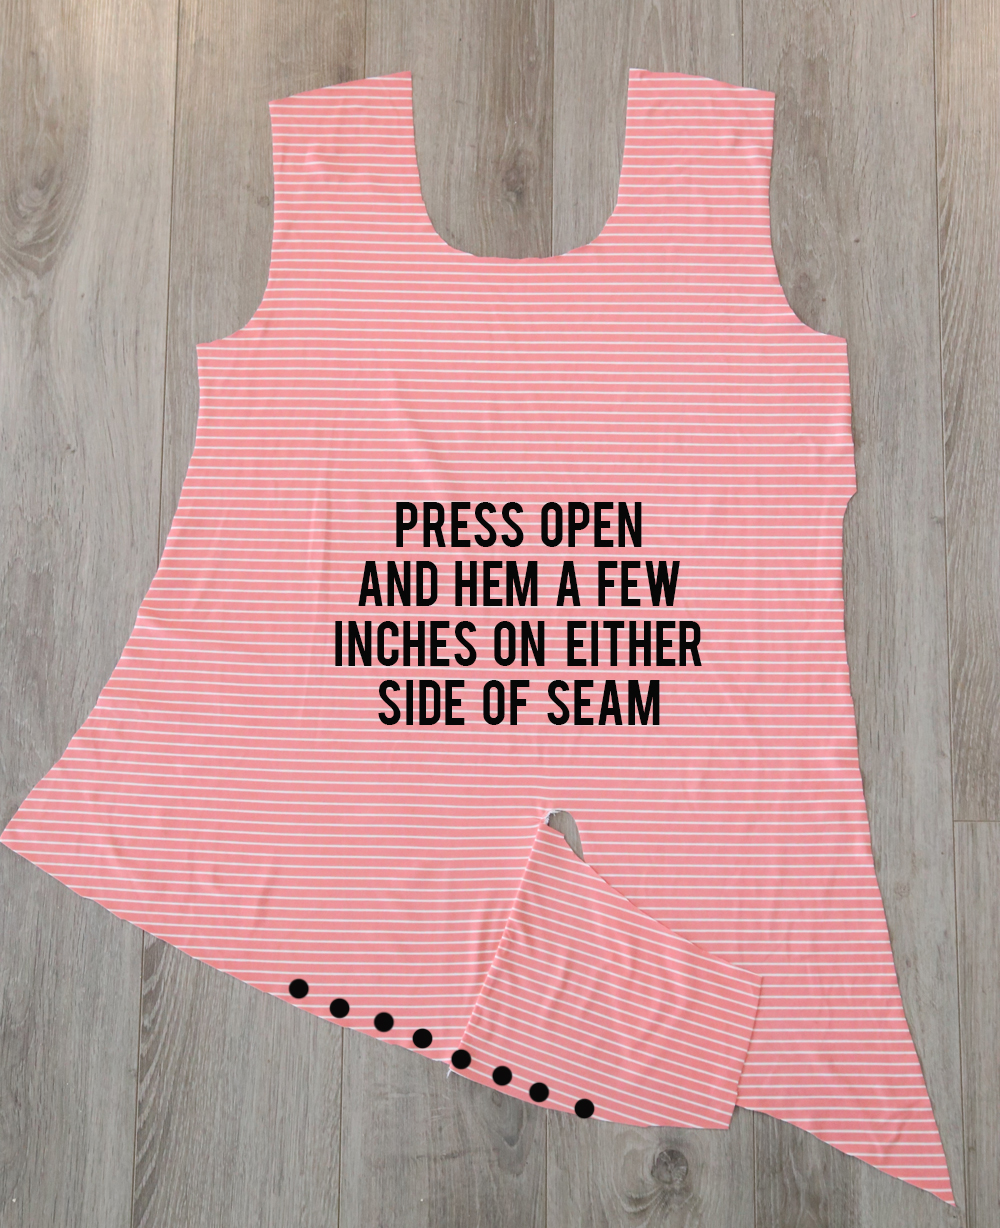
First, grab the small extra piece and match the blue dots on it to the blue dots on the shirt front, right sides together. Sew together between the dots using a 1/4 inch seam. Backstitch at the beginning and end of the seams, or use a serger and tie off the thread tails and trim right after the knot (this is what I did).
Press that seam open. This area is going to get scrunched up inside of the knot, so you need to hem part of it right now. For about 5 inches on either side of the seam, fold the raw edge up 3/4 of an inch and hem with a stitch that will stretch (I use a double needle).
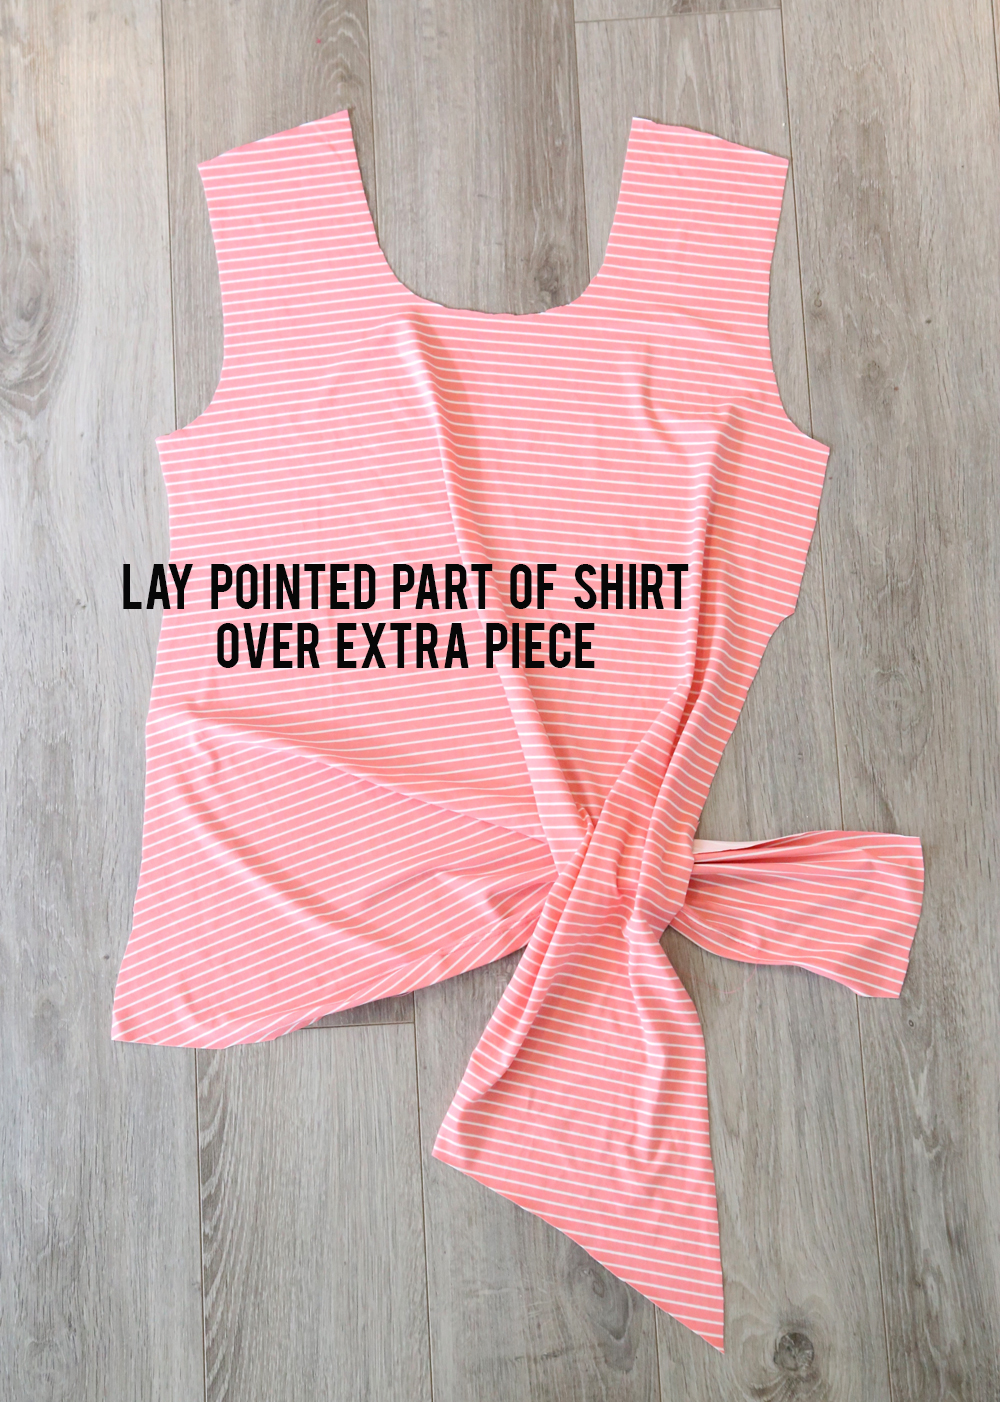
Now you’ll want to scrunch the extra piece up along that seam. Lay the pointed portion of the shirt over the extra piece, as shown below.
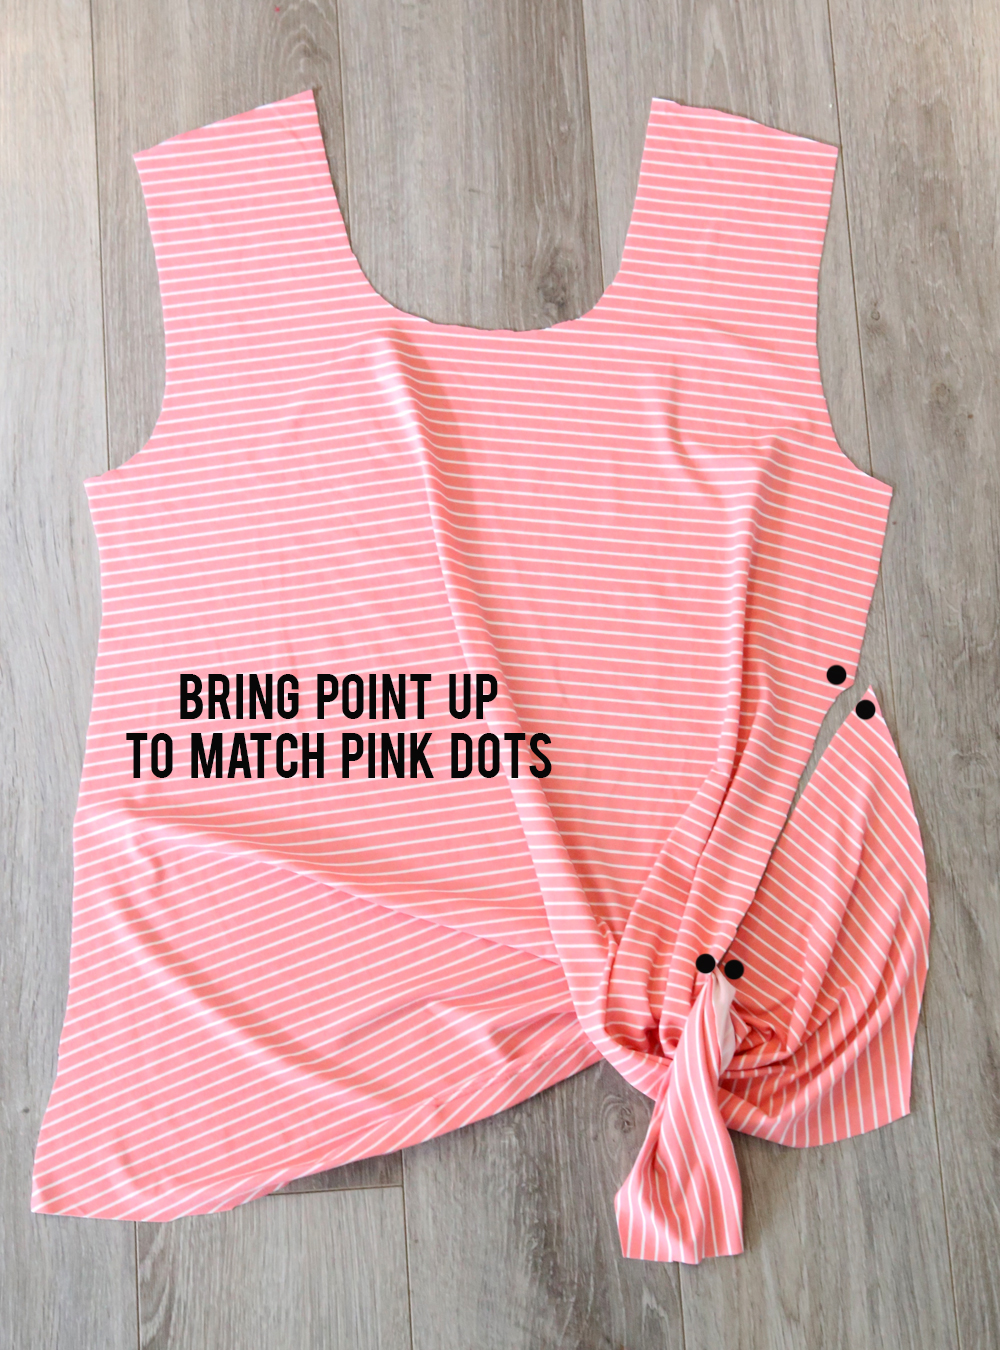
Loop the pointed part of the shirt over the extra piece, and bring the point up to match up the pink dots (shown as black dots on photo below).
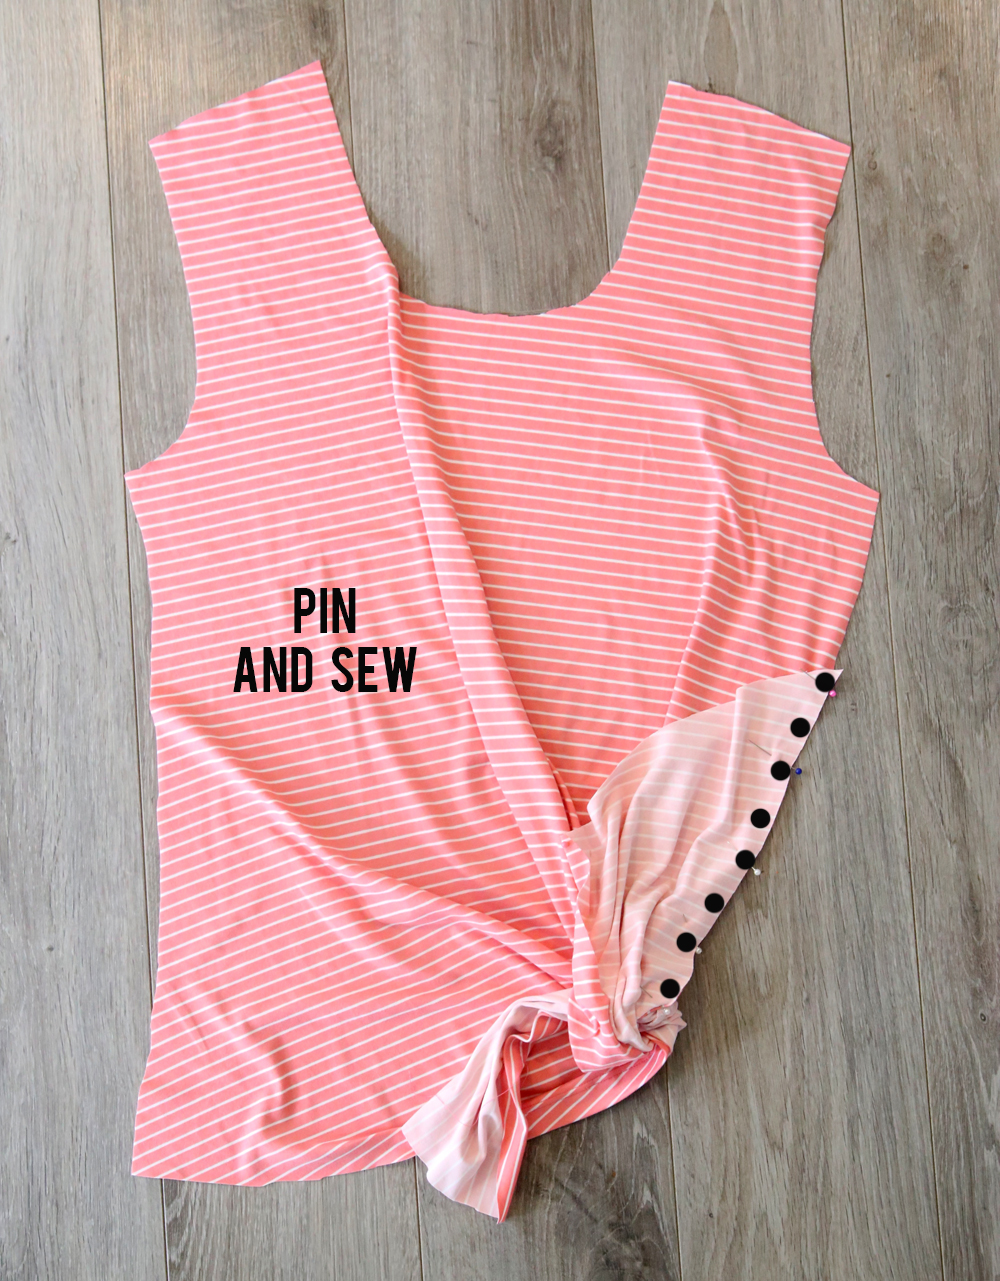
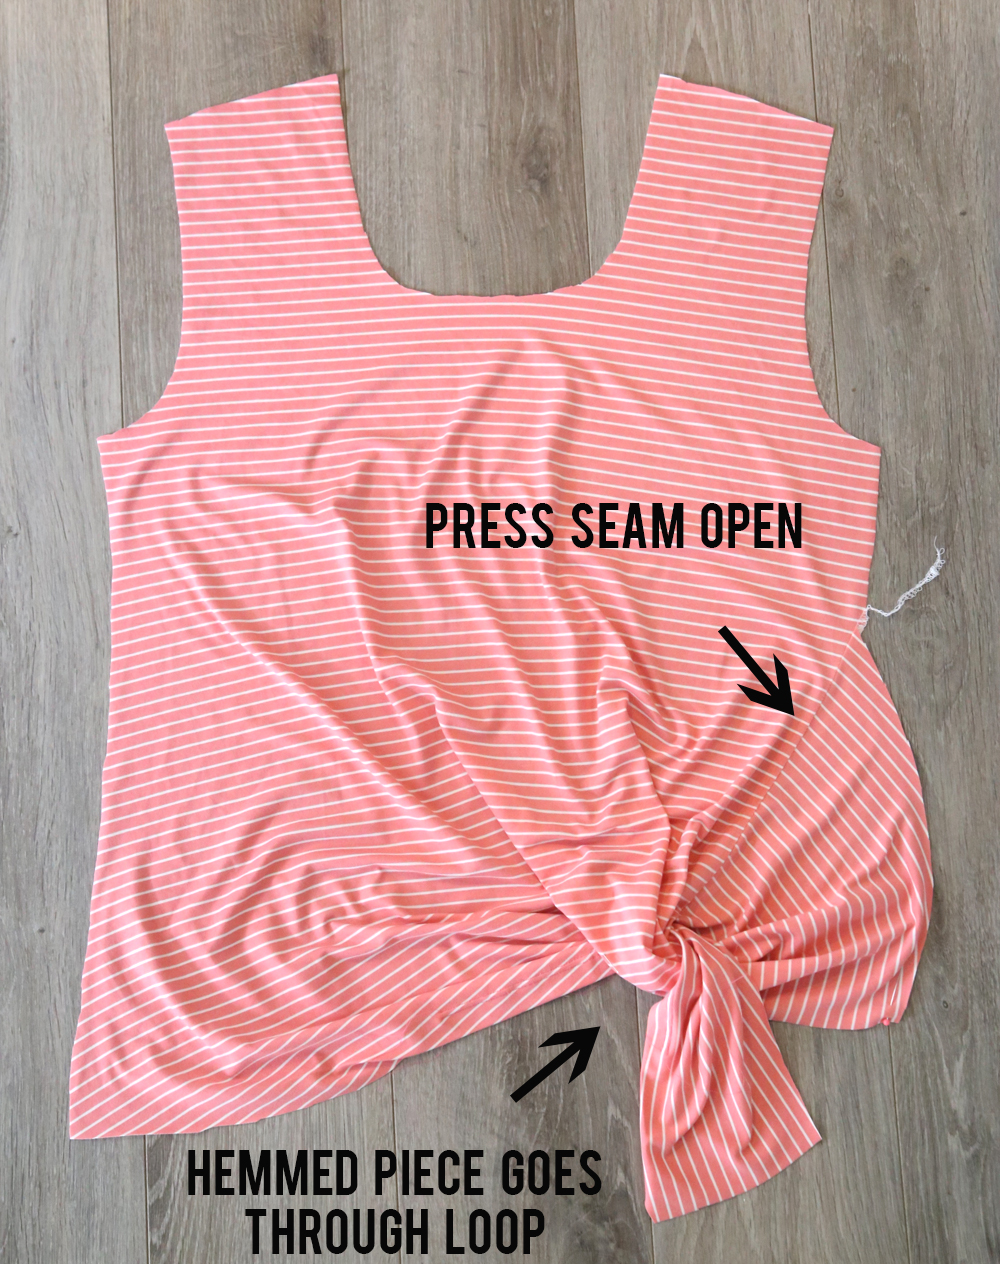
Pin right sides together between the matched pink dots and sew with a 1/4 inch seam allowance, as shown below.
Press that seam open. Now you will see that you’ve made a loop that the hemmed portion of the shirt goes through.
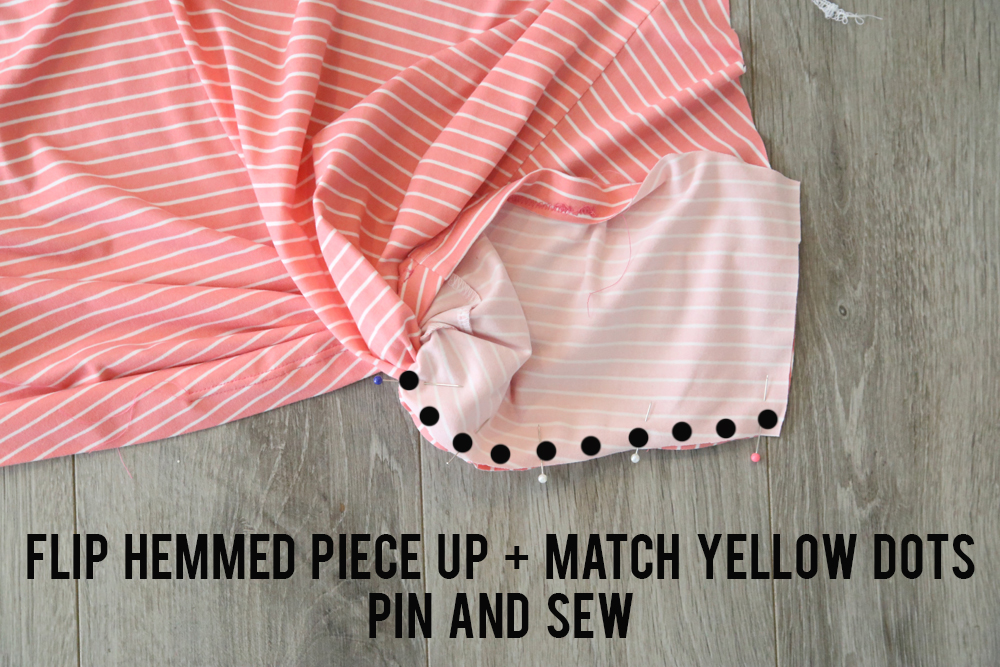
Now it’s time to match up the yellow dots. Flip the extra piece upward so you have right sides together and match and pin yellow dots. Sew with a 1/4 inch seam allowance.
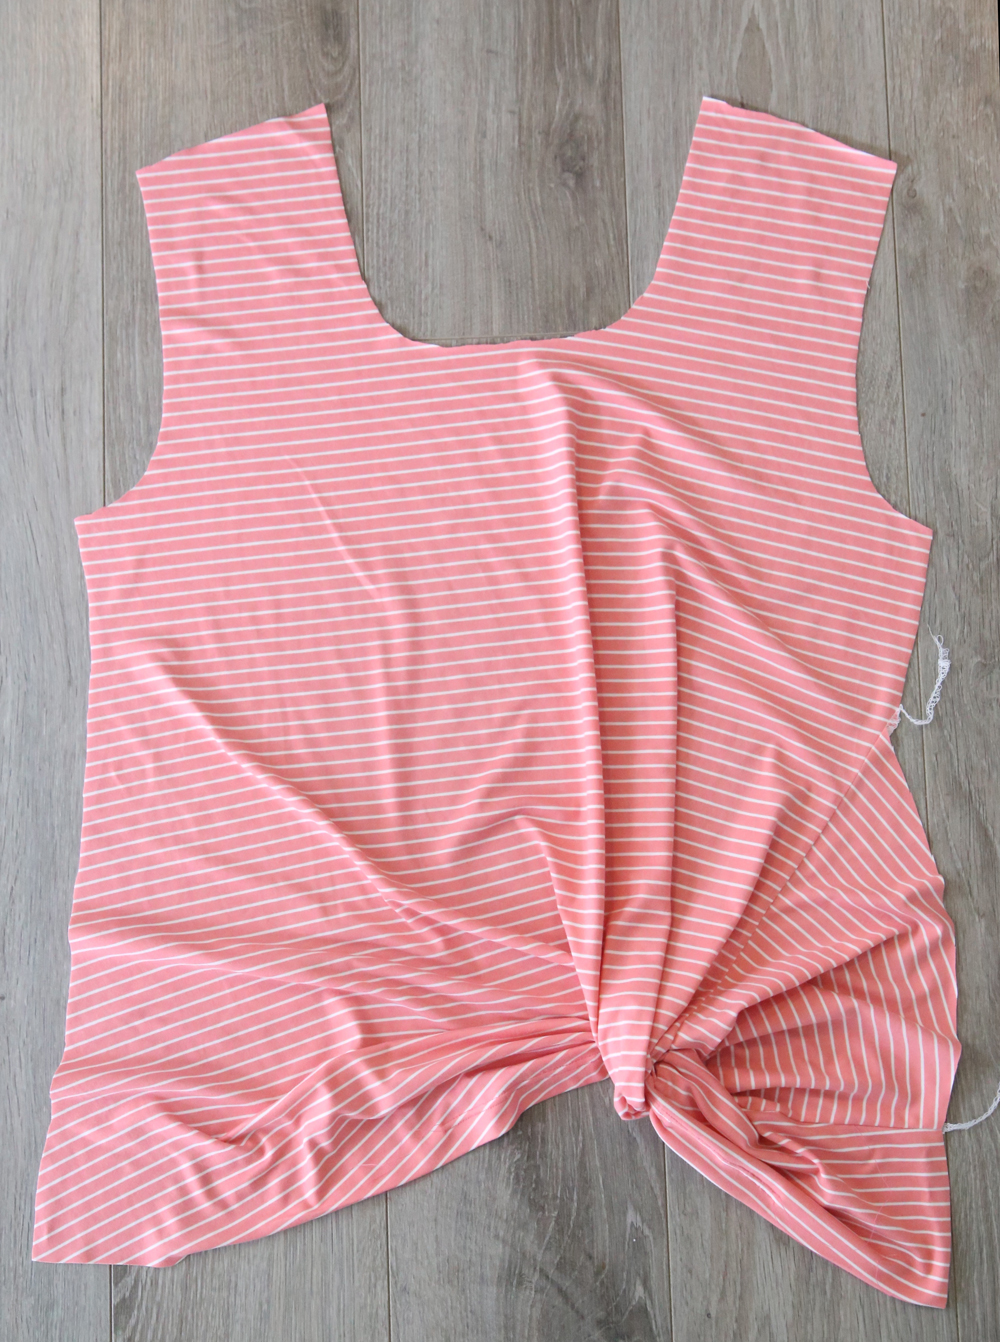
Now you have a finished shirt front, complete with a twisted knot hem.
At this point, you can sew the shirt up the same way you’d assemble a standard tee shirt (using a 1/2 inch seam allowance from now on). If you need step by step instructions for this, you can find them in the Classic Tee post.
Two more things you’ll notice as you finish up the shirt:
First, the sides of the front will be a bit longer than the sides of the back. Just stretch the back piece as you are pinning the side seams.
Second, when it comes time to hem the bottom of the shirt, remember that a few inches around the twist knot are already hemmed.
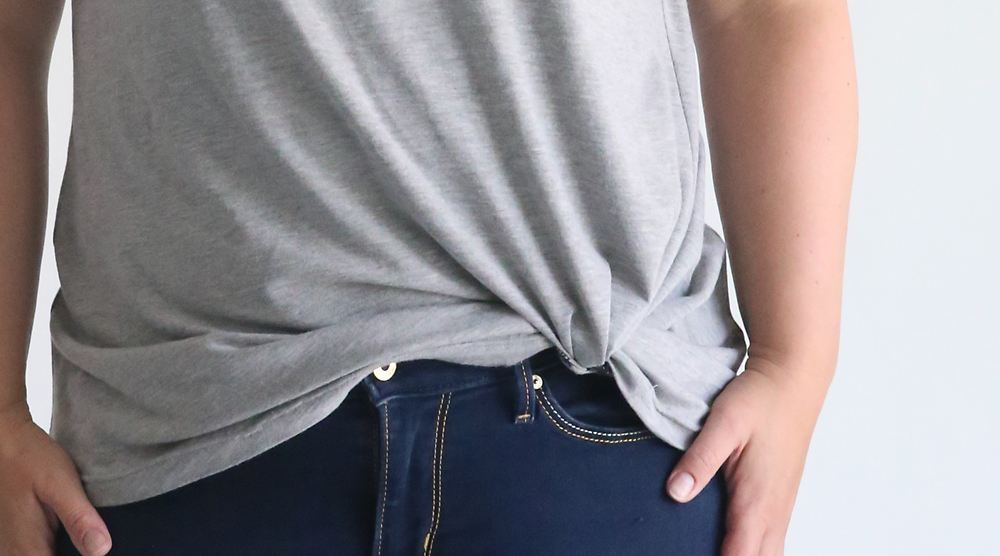
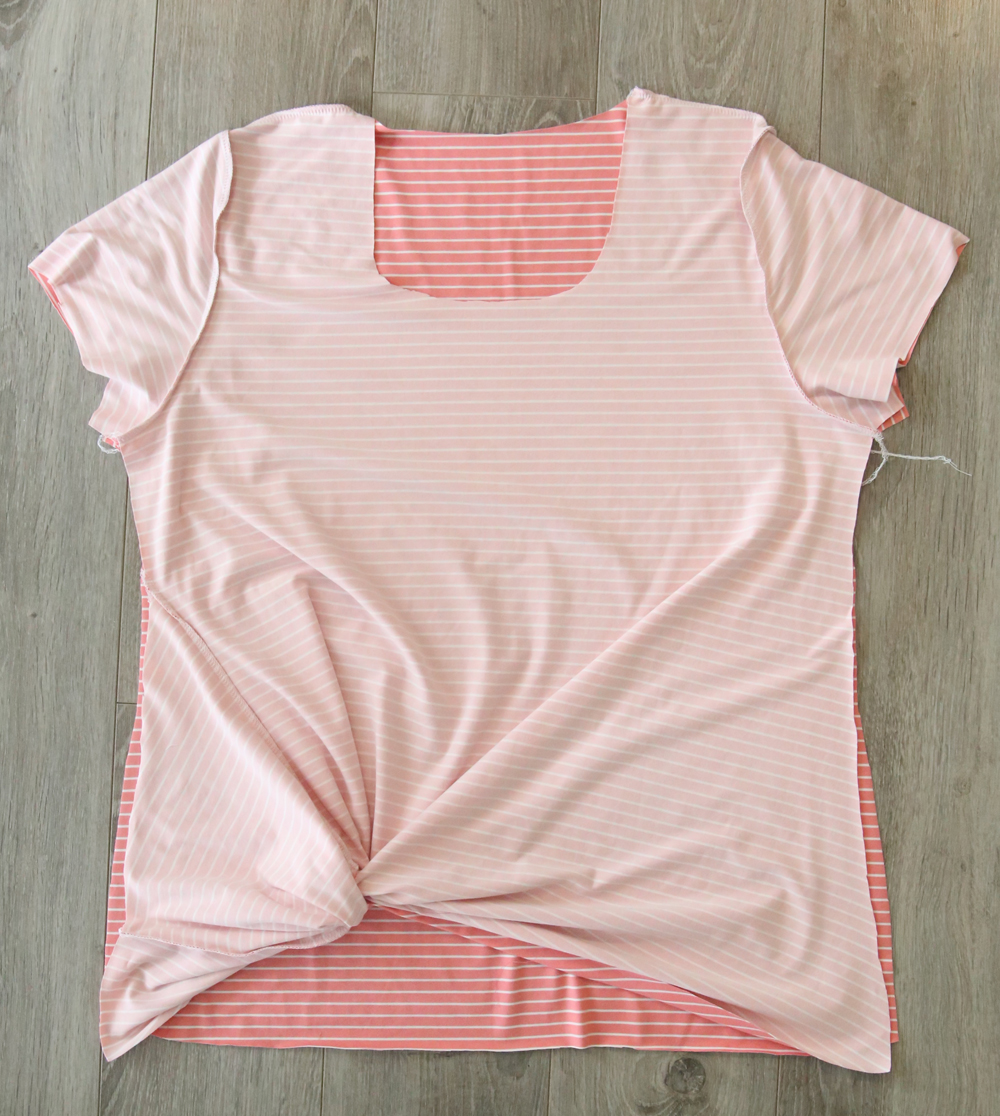
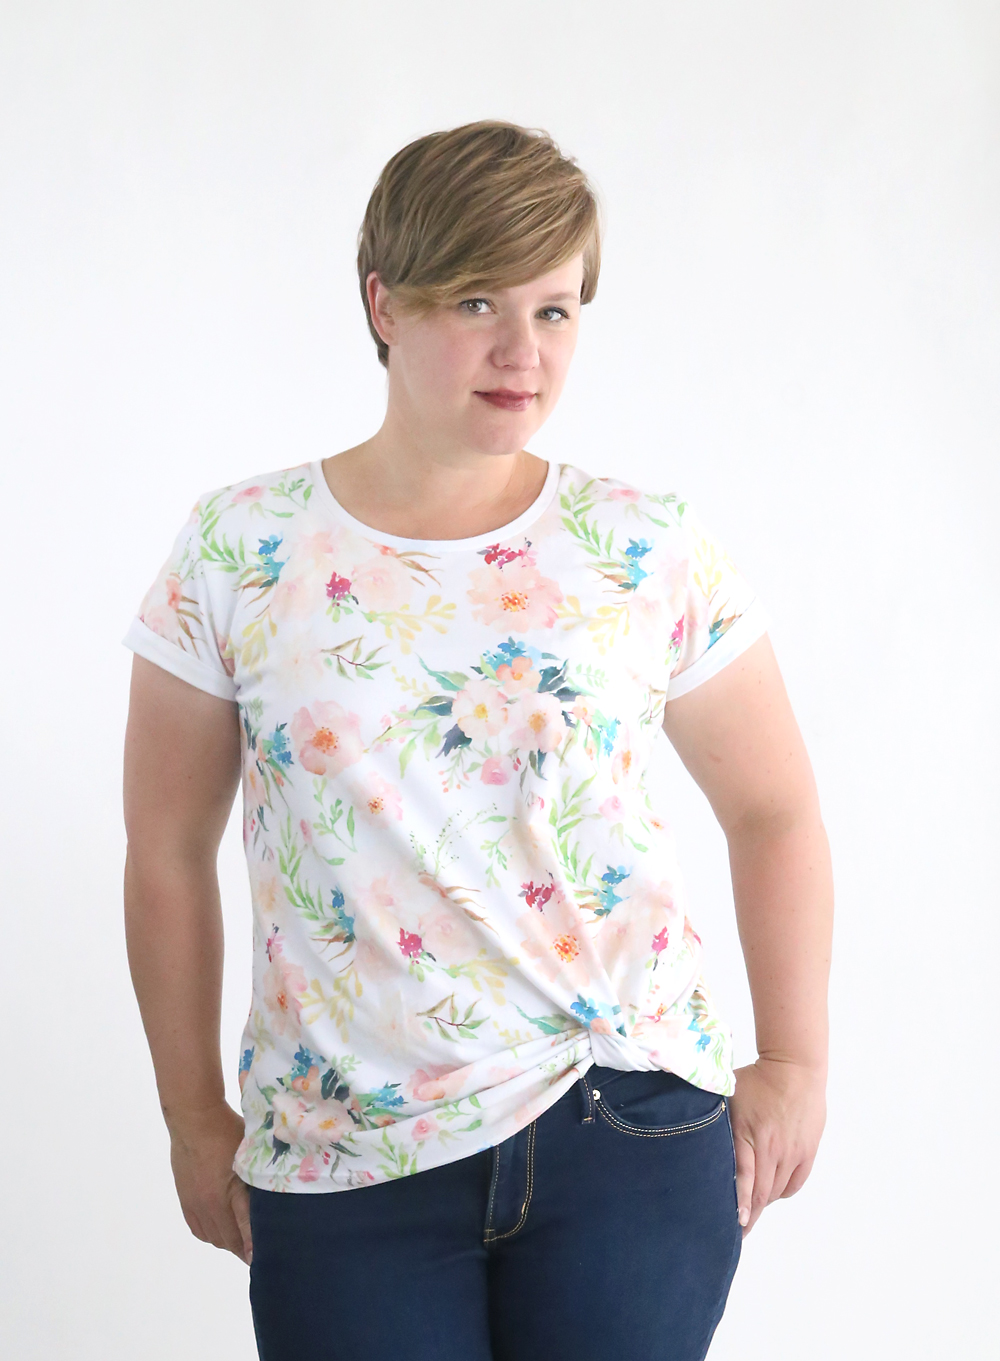
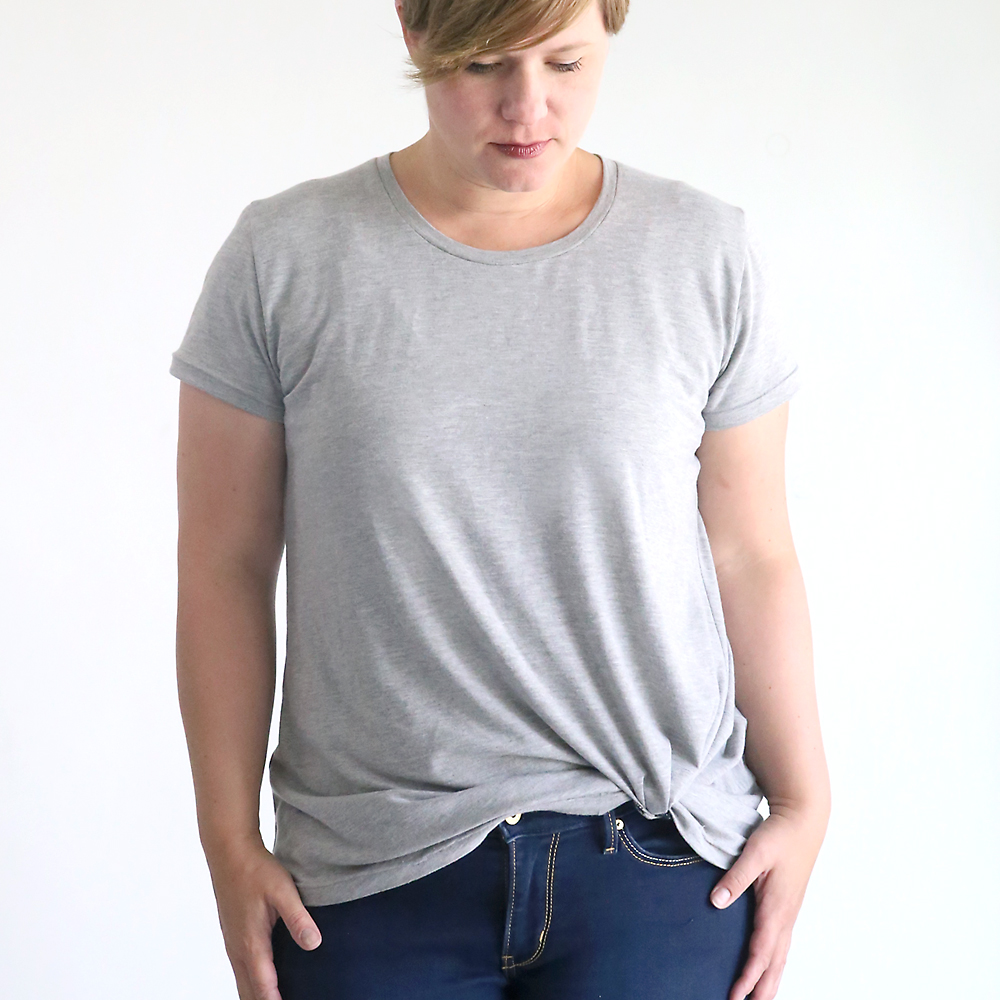
This is what the shirt looks like finished:
Play with the twist a little once you put the shirt on until you like how it looks. Different fabrics lay a little differently, so depending on what type of fabric you used you may end up seeing a little bit of the wrong side of your fabric along the twist.
I sewed this shirt up in three different fabrics, and I’ll show you each one so you can see how fabric choice affects the finished look.
First I used an inexpensive jersey that’s a bit thin and very drapey. The lightweight fabric was a little harder to sew with, but ended up working really well with the twisted knot hem because it drapes so well.

Next I used a more expensive stable knit, which was a dream to sew with. But it just didn’t have quite enough drape to look great with this pattern, so I don’t love how it turned out.
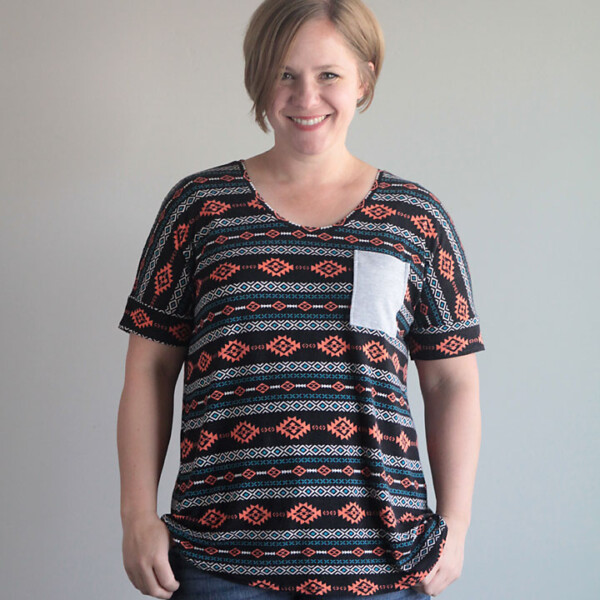
Finally, I made one more shirt out of some brushed polyester spandex, which was a pretty good middle ground between the first two fabrics – more drape than the expensive knit, but easier to sew (and will probably hold up better) than the cheaper jersey.

Honestly, I think I actually like the grey one best, so I’d recommend choosing a fabric with a lot of drape. Good luck and I’d love to see photos if you make one!


Jill says
Thanks for your patterns ! I have made the Basic Tee a few times 🙂 However, I am baffled at how to sew up the knot in this tee! Where does the end come out? I have readthe pattern over a few times and looked at the instructions several times and can’t see how the open notch gets sewn/hemmed, or how the flap gets completed. Do you happen to have a video on this? Thanks!
Kathy Missett says
Great pattern and easy-to-follow directions. It fits perfectly and I plan on making it again.
I love this style tee. Thanks for a great pattern.
Terri Reuvers says
THANK YOU! I have been trying to figure out how this twist was done by taking apart a tshirt I bought. I am usually very capable of understanding complex patterns, but I was so stumped, I couldn’t even put my shirt back together.
Now I can make a few more.