
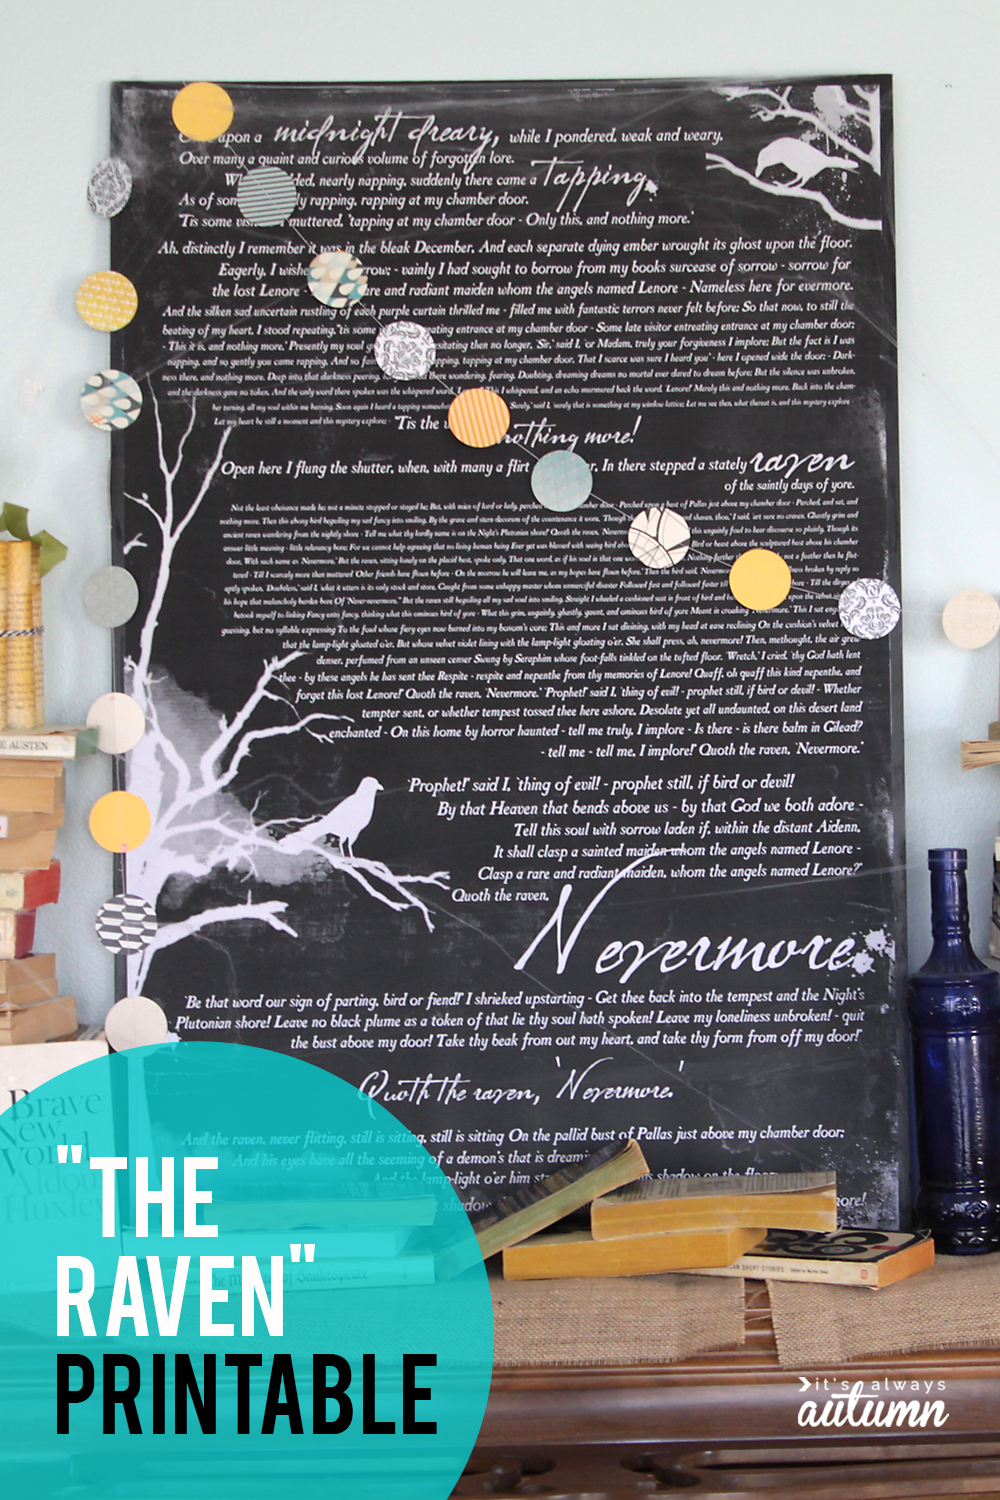
Last year before Halloween I created a 24×36 inch print of the entire poem “The Raven” by Edgar Allen Poe. I had it printed at Staples as an engineering print, so it only cost a few dollars, and then I used spray adhesive to mount it onto a piece of MDF from Home Depot. The total cost (not including adhesive) was around $12. I decided it was time to start decorating for Halloween, so I brought it up from the basement the other day and set it up on my piano, which acts kind of like a mantle. I surrounded it with towers of books, some cobwebs from the dollar store, and my book paper pumpkin.
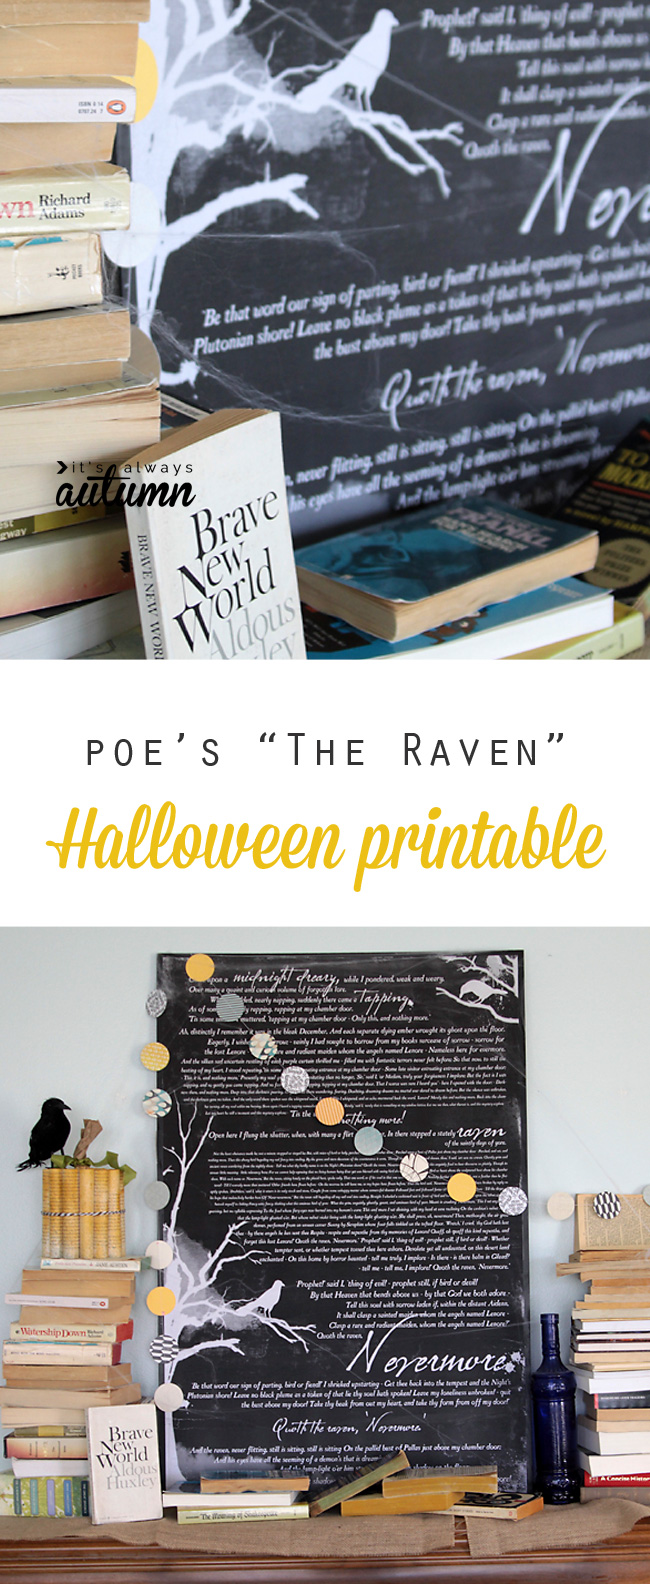
Keep reading for more photos and The Raven free printable download.
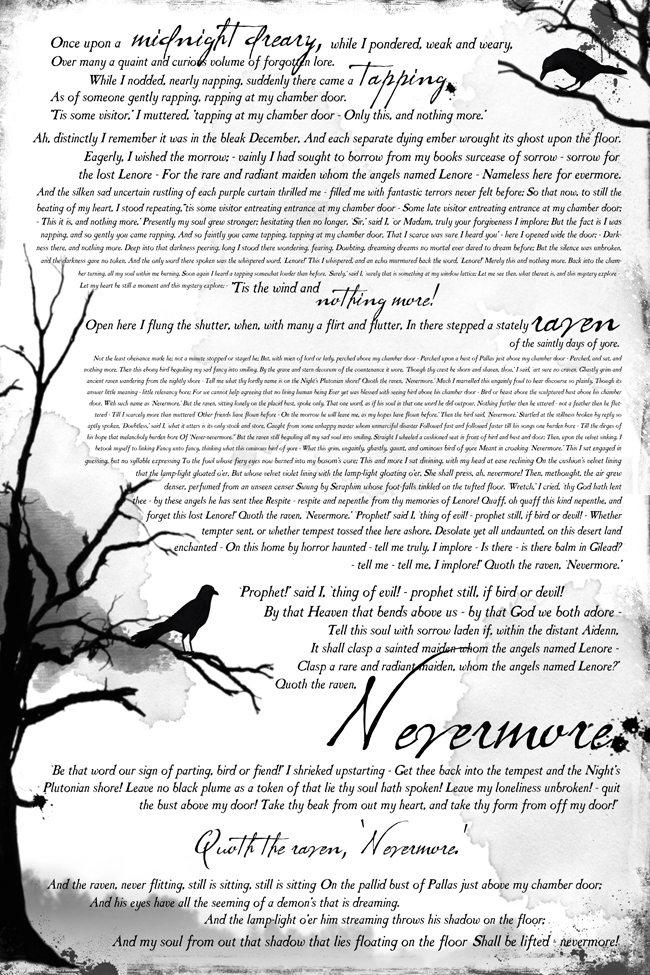
I created the printable in two options – the one that’s pictured here, which is white text on black, and then the reverse. Download the black background here. These are large files, so it might take a minute to show up.
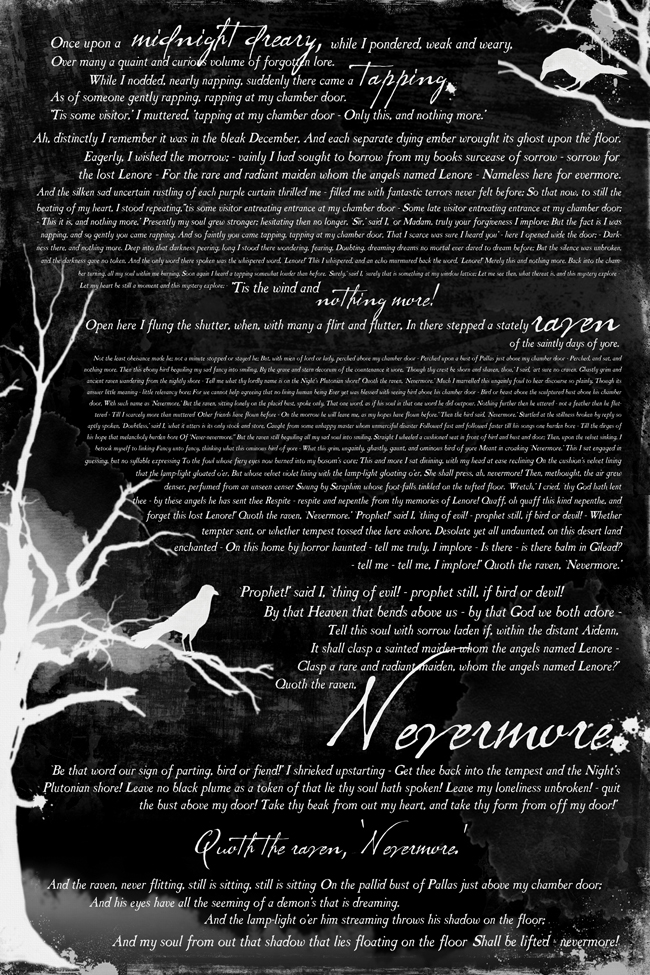
Download the white background here. ***link fixed!***
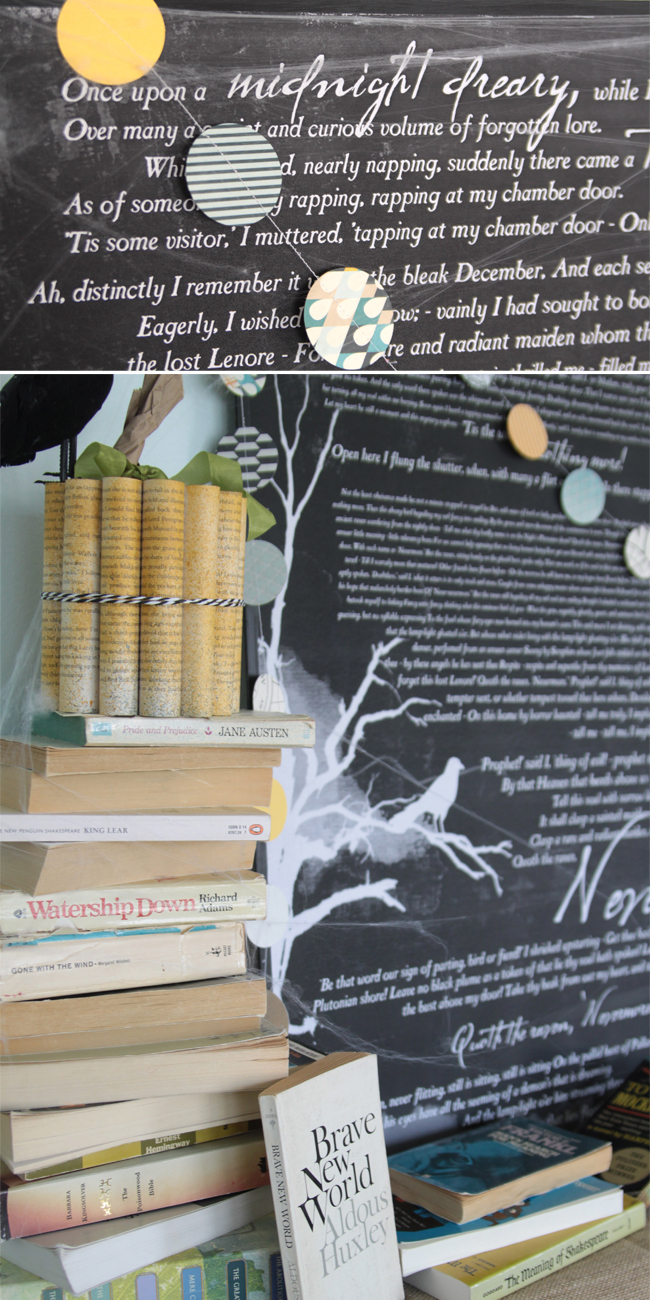
I printed the piece out at Staples as an engineering print, which only cost $3.50. Since it was so cheap, I inverted the piece (so the background is black and the type is white) and printed it that way as well. Both versions are adhered to the front and back of a 1/8 inch piece of MDF from Home Depot (under $5), so I can choose to display either side. I completed my Halloween scene with candles and a string of leaves from the dollar store (both painted black) and a few pumpkin accessories.
[credits: Fonts: Caslon Antique Italic and CK Maternal; brushes: Eerie Pack by Wyckedbrush, Crow Brushes by Zememz, Ink Splats by Shoefly, Dried Blood Splatter by Vexingart, Stains Brush by Aridane, Edgedestroys5 by Wedgewolf; Digital Overlay: House of 3; Software: Adobe Photoshop Elements 6.0]
Here’s process for putting the wall hanging together:
Most stores like Staples or Office Depot offer engineering prints, which are black and white prints on fairly thin paper, for extremely reasonable prices. My print was 2 ft wide and 3 ft tall and only cost $3.50. I purchased a 2x4ft piece of MDF at Home Depot and had them cut a foot off the top, so it ended up 2×3. when I brought my print home, it was actually a little smaller than the board, so I painted the edges of the MDF board black to create a little border (just used craft paint here).
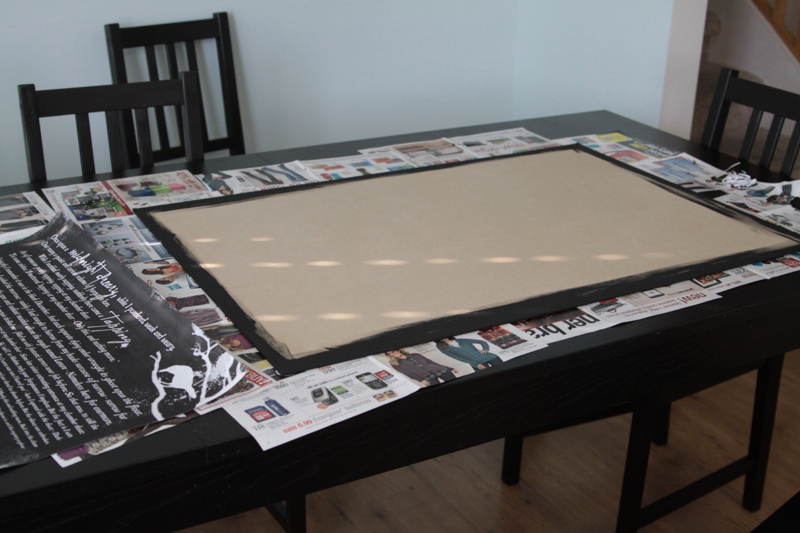
Next, I centered my print on the MDF, making sure I had a consistent border width on all sides. I put a stack of books on one side of the print to make sure it didn’t move around.
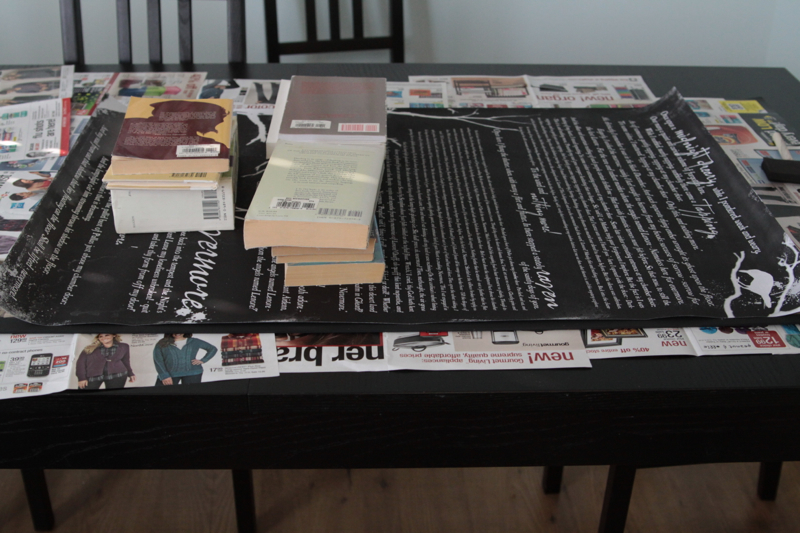
Then I lifted up the right side of the print so I could put adhesive down on that half of the MDF. (I used mod podge for the black background print and spray adhesive for the white background print and spray adhesive is much easier to work with here!)
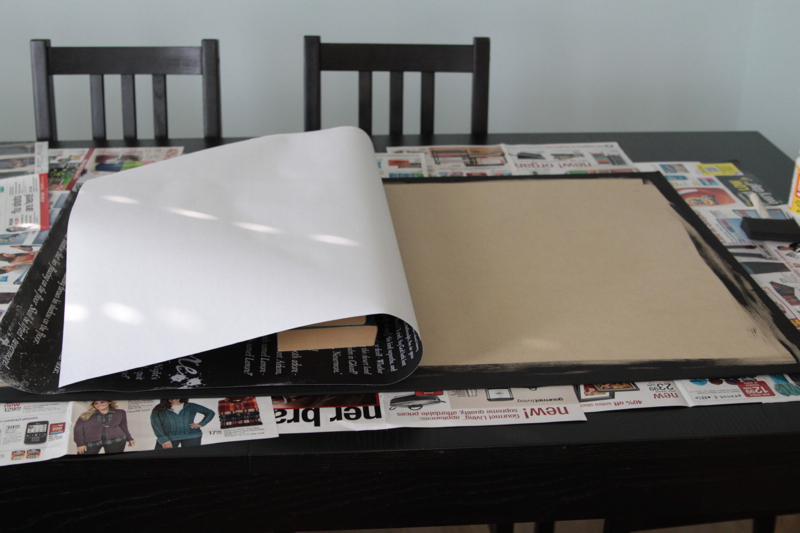
I pressed the right half down on the adhesive, making sure to press everywhere to get a good bond to the MDF. Then I moved the books and lifted up the left side so I could adhere that side in the same way.
Thin MDF is great for projects like these – it’s super lightweight so it makes it really easy to hang, and it’s not very expensive. Check the “hobby wood” section of Home Depot for it.
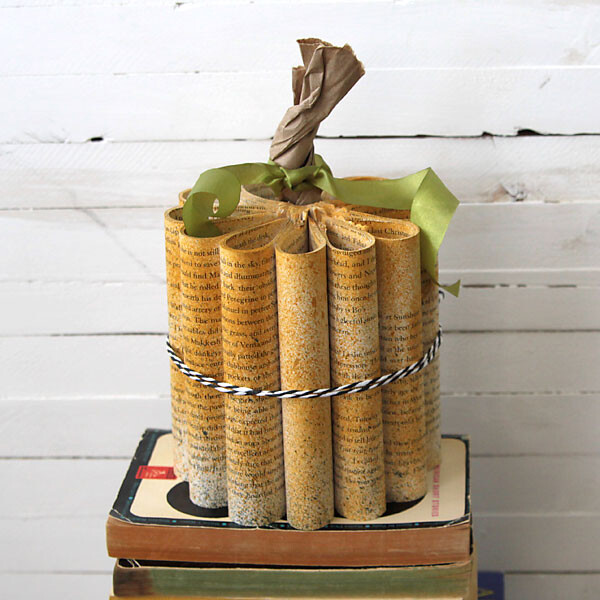
I found the little raven that’s perched on the book paper pumpkin at the dollar store. He kinda completes the scene perfectly.


Jackie Jones says
I absolutely love the book-inspired Halloween mantle decor featured in this post! The creative use of “The Raven” as a theme is both unique and captivating. As a student, I am also interested in exploring different types of research papers for my academic pursuits on this https://www.aresearchguide.com/types-of-research-papers.html resource. I am sure that it is the best idea to find inspiration in literature and bring our favorite stories to life during the Halloween season.
John Smith says
Thank you!
Amanda says
Thank you so much for this! I have been looking for something to put in my old typewriter for Halloween and this is perfect!
Tonya says
Your representation of The Raven is amazing! I can’t thank you enough for sharing this! I placed your poem in my foyer for everyone that entered to see. Everyone LOVEDit! I’m hoping I can convince you to make something along the same lines but for Christmas with the poem, ‘Twas the Night Before Christmas. ❤️❤️???#FingersCrossed