
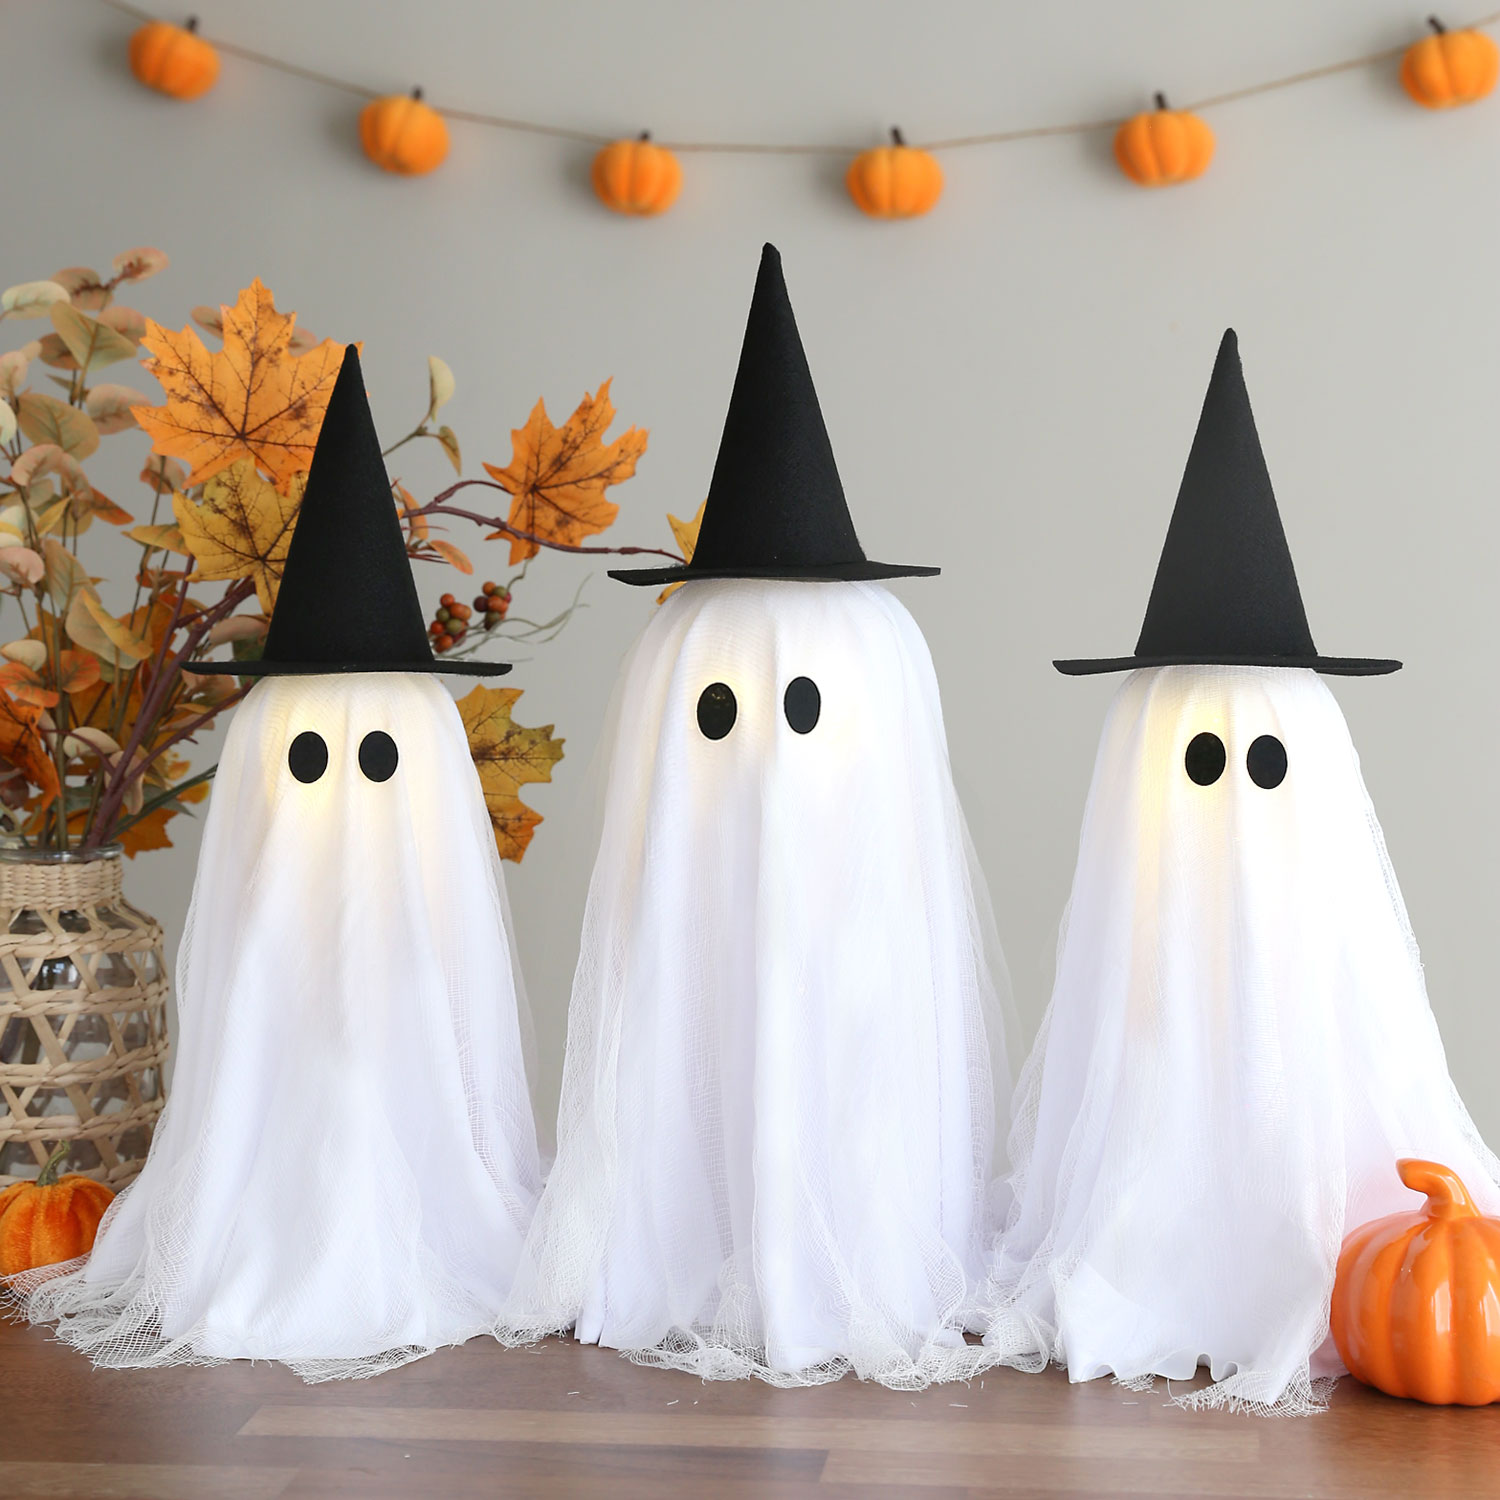
In today’s post: Learn how to make this cute Ghosts Centerpiece for Halloween – it’s inspired by the Pottery Barn version but less than half the price! This is an easy Halloween craft for adults you can complete in under an hour.

Easy Halloween DIY
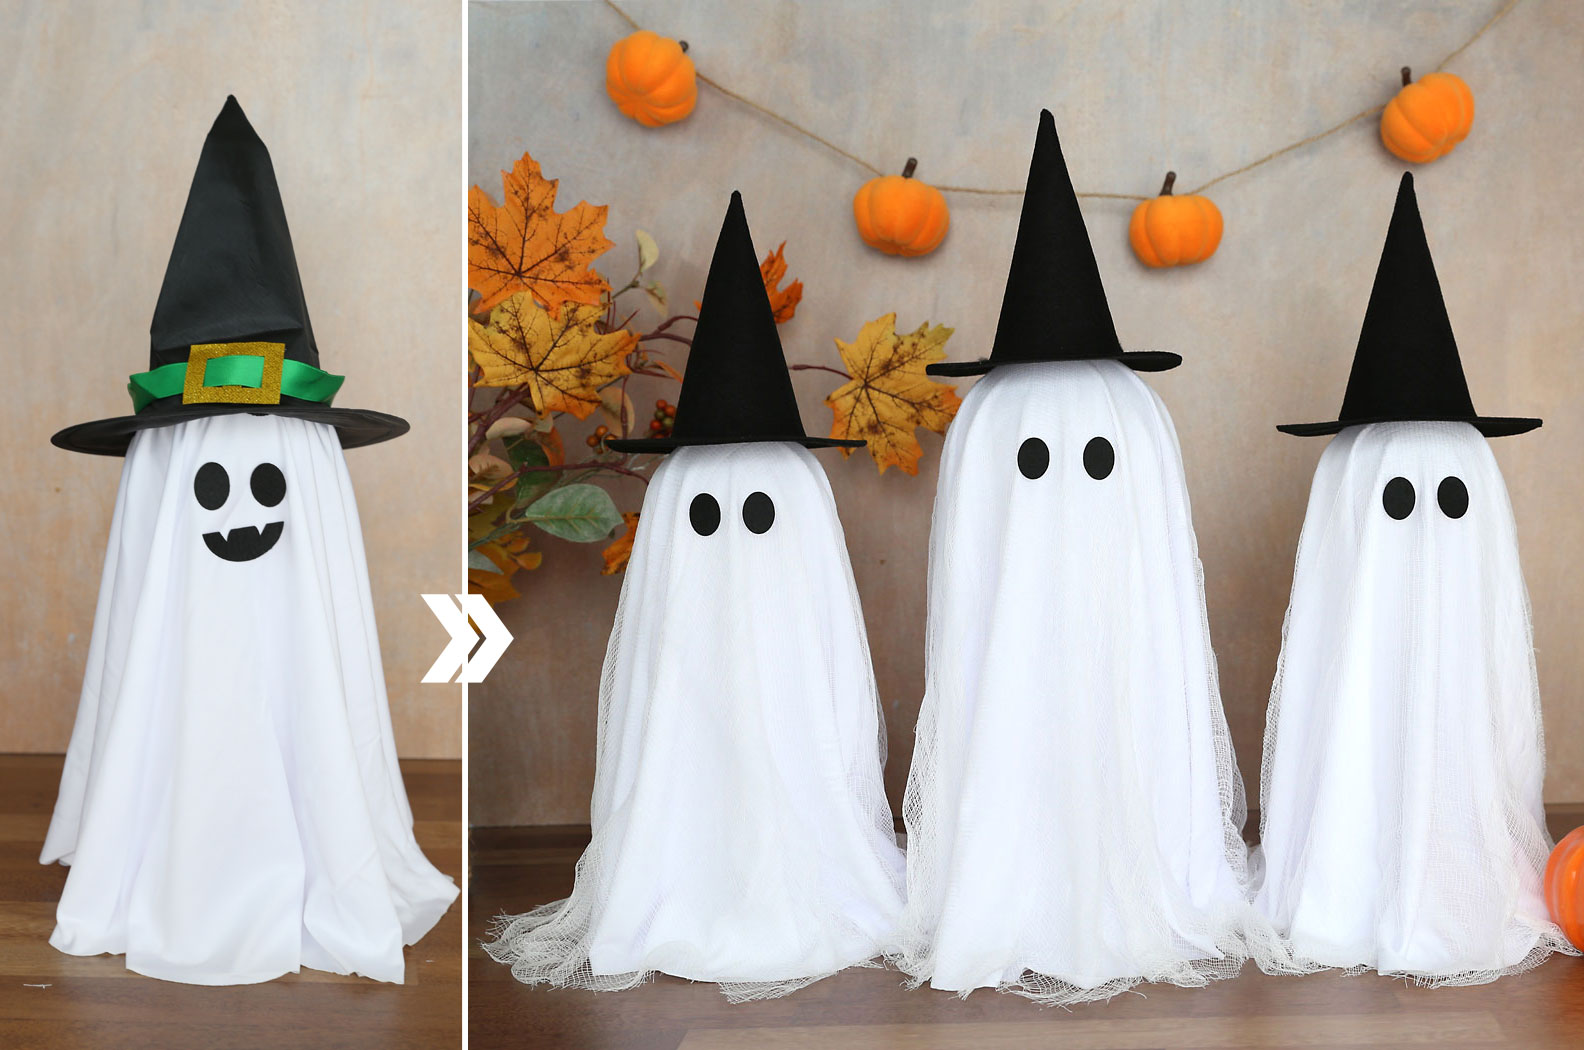
DIY versions of this Pottery Barn Lil’ Ghost Centerpiece have been popping up all over social media this year – and for good reason – it’s so cute! I knew I wanted to make my own version to add to my Halloween decorations because the PB one is out of my budget. So when I came across this cute light up ghost kit on Amazon I realized I could hack it to make an adorable dupe of the original ghost centerpiece for less than half the cost! The kit just needs a few simple changes to make it look a bit more like the inspiration – you can see the before and after in the photo below.
Light Up Ghost Halloween Centerpiece
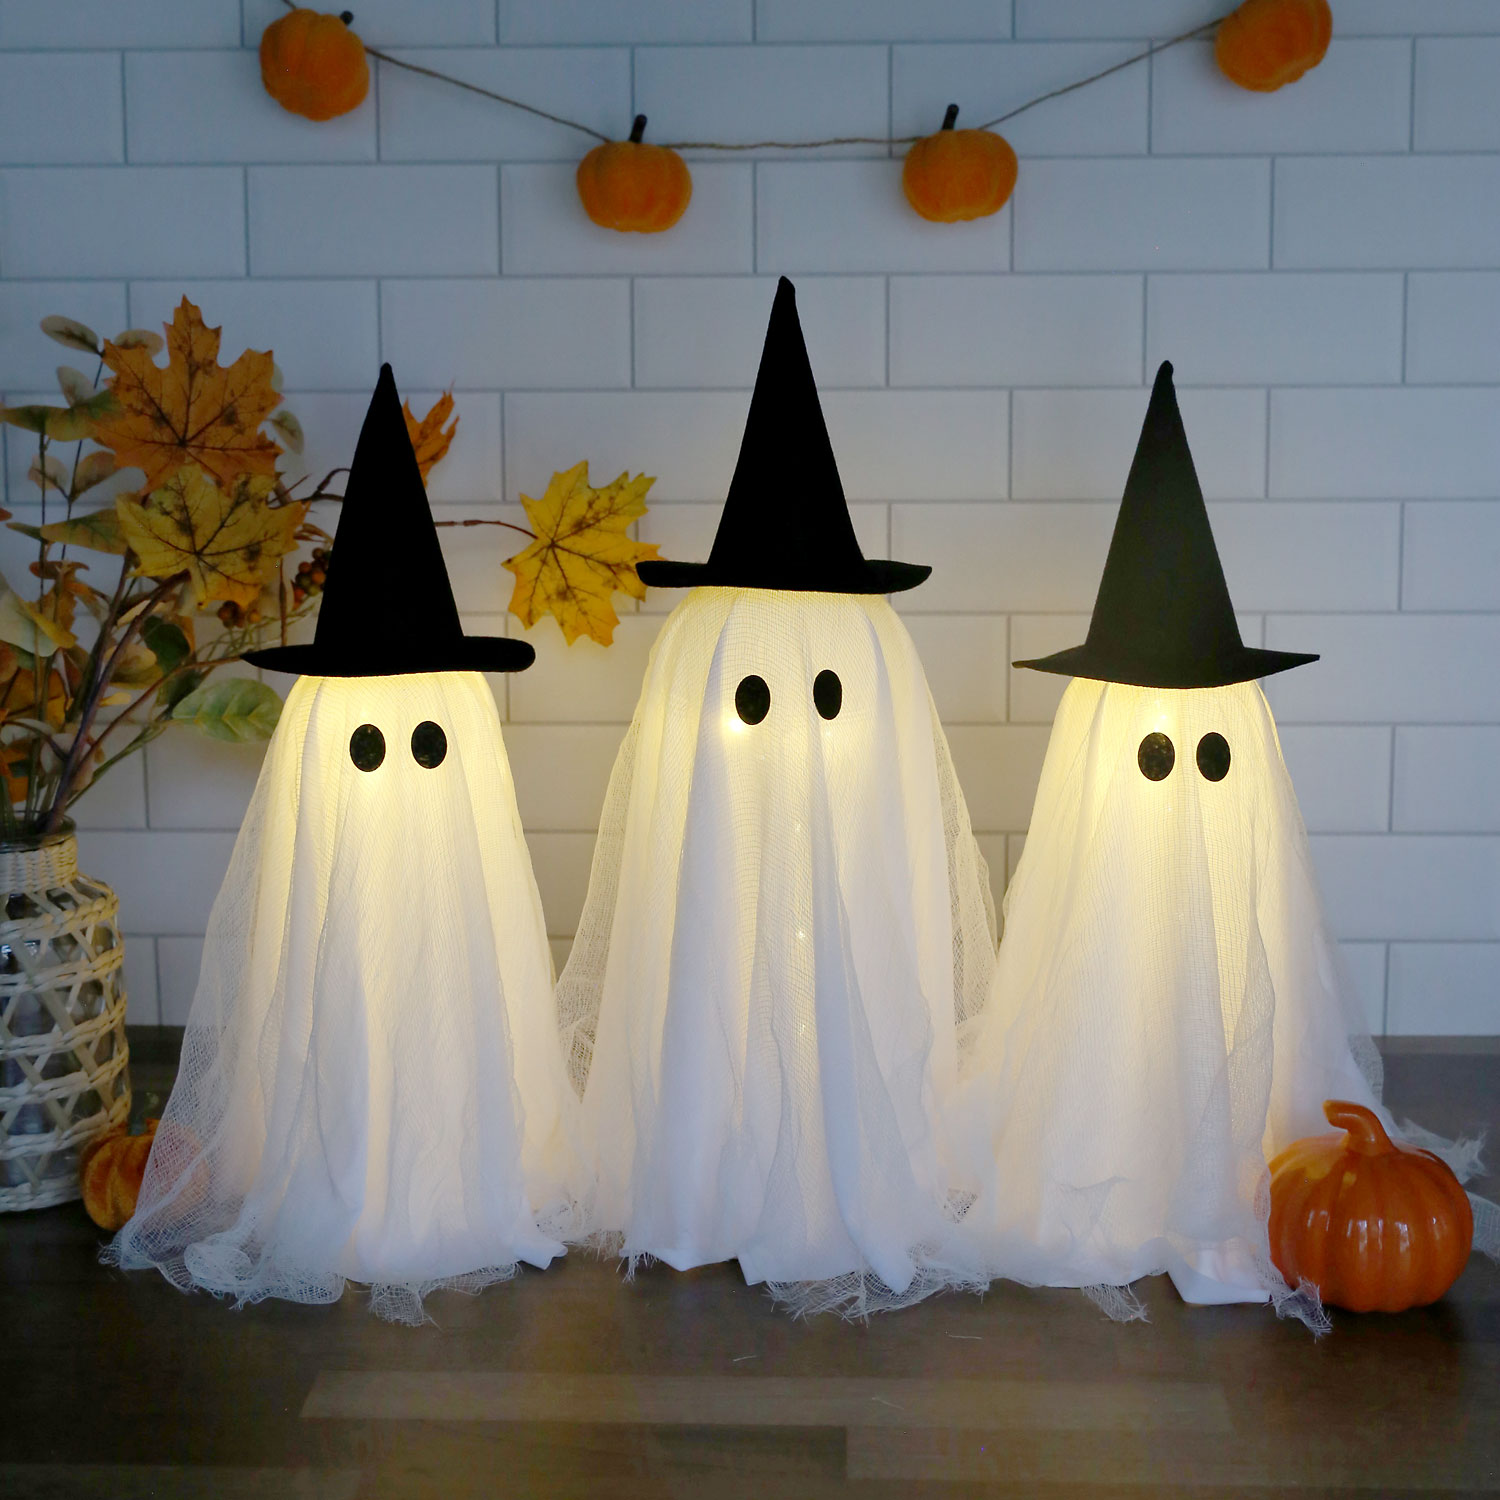
Like any great Halloween decoration, this one looks cute during the day and is even more fun at night when lit up with the included string lights. Just remember to turn the lights off when leaving the room.
Supplies
Here’s what you’ll need to make this easy DIY Ghosts Centerpiece:
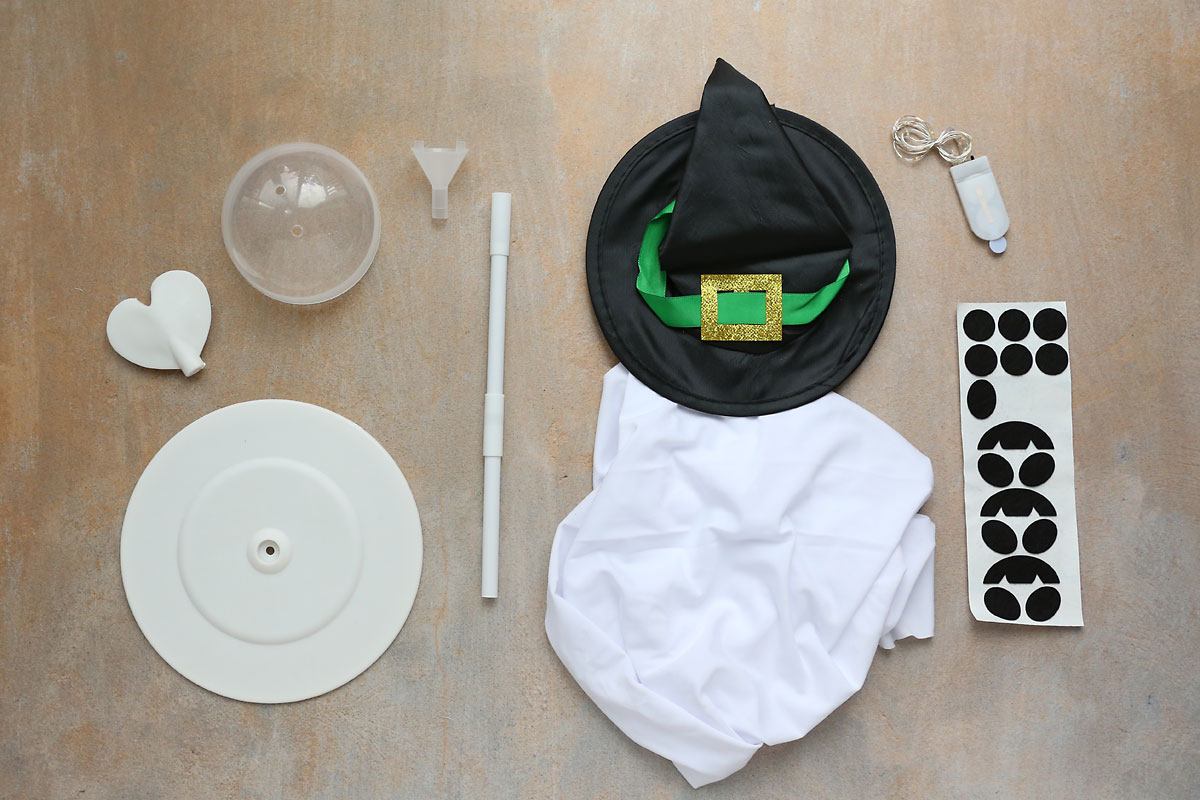
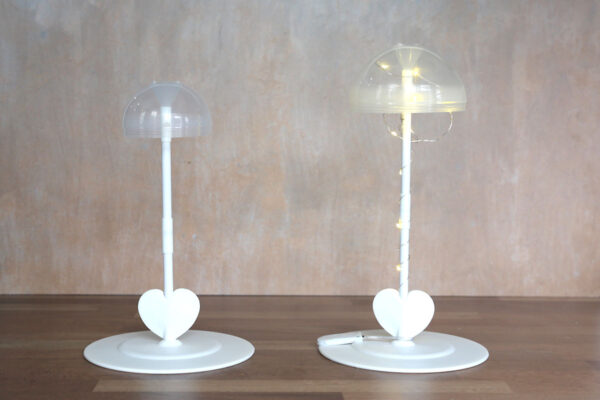
- Light Up Ghost Kit from Amazon: this is the “three small standing ghosts” option. Kit contents shown in the first photo below.
- Three 9×12 sheets of Black felt: I used the “premium” felt from Hobby Lobby that is 39 cents per sheet
- Cheesecloth: You’ll need about 3 yards of cheesecloth that is 36 inches wide, about half the amount you get in this package.
- Hot Glue Gun
- Pattern for the witch hats: Get it here or in the blue box below the supply photos.

How to Make a DIY Ghosts Centerpiece
Assemble the Supports
The first step is to unbox the ghosts kit and assemble the supports as directed. This is very easy and will only take a few minutes. You can wind one of the included strands of string lights around each post, tucking most of the lights up under the plastic dome at the top.

Add Cheesecloth
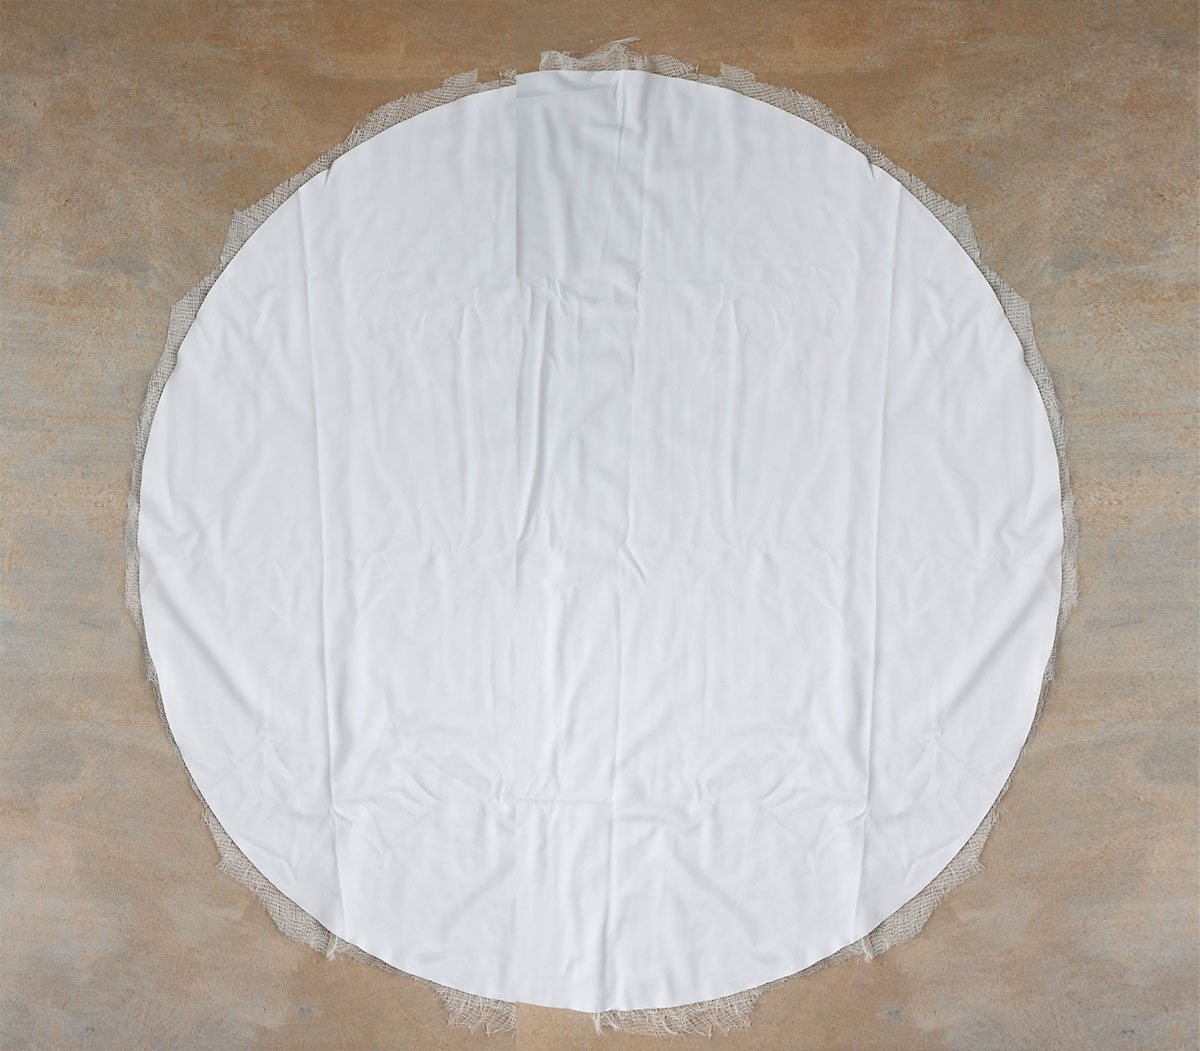
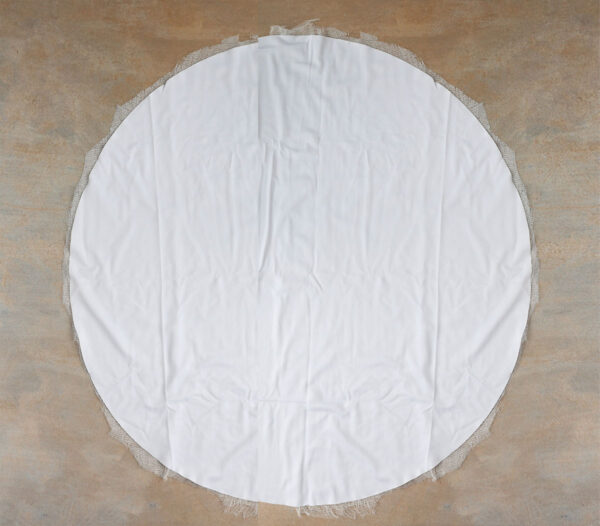
The ghost kit comes with white cloths to cover each ghost, but to get the look of the Pottery Barn version you’ll want to cover the white cloth with a layer of cheesecloth. Open up your cheesecloth and place the included white circles over them. Cut around each circle to get a similar layer of cheesecloth. Don’t worry about making the edges of the cheesecloth smooth – it actually looks better if it’s jagged.
Make the Hats
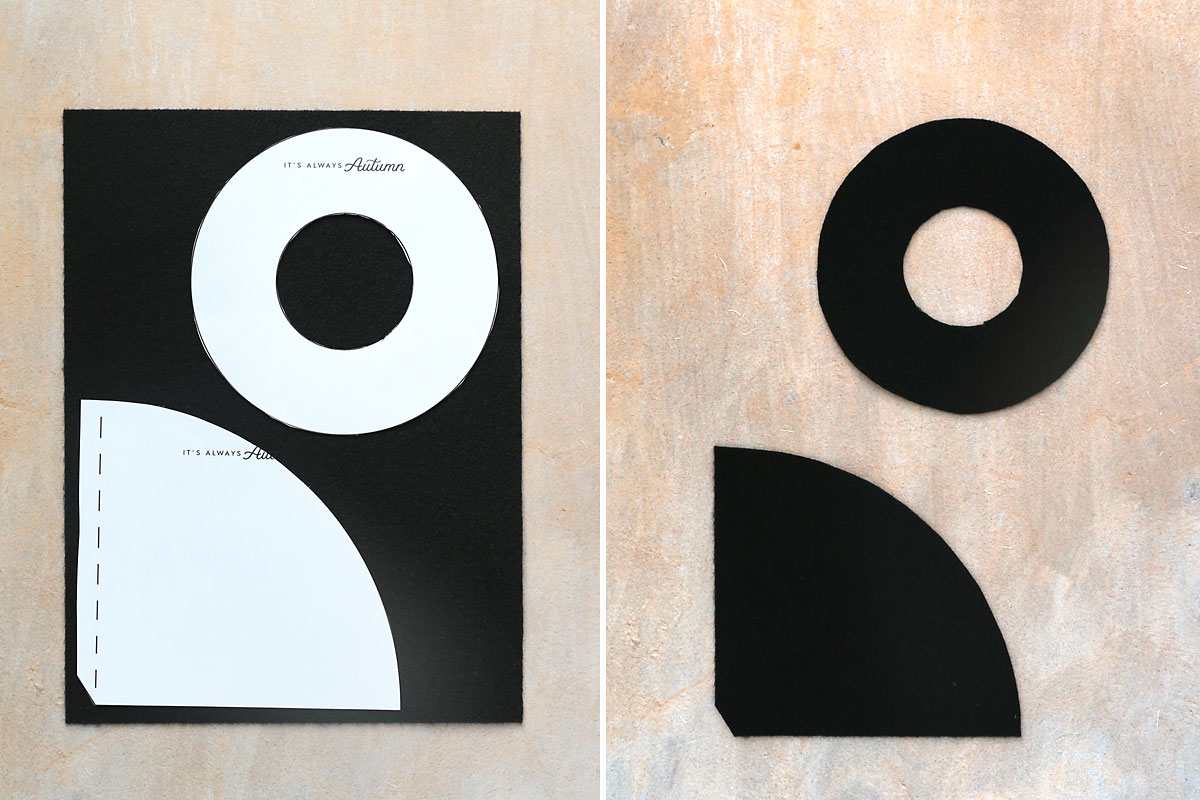
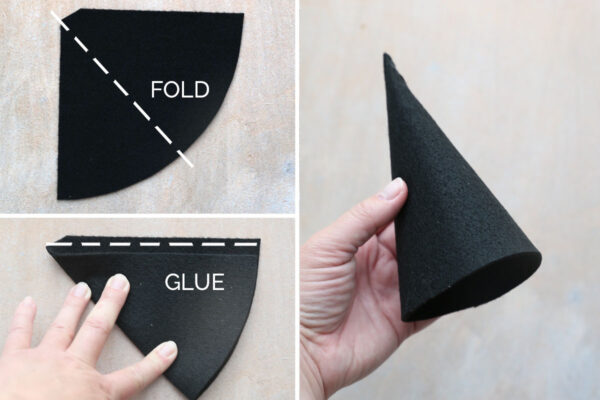
The hats that come with the ghosts kit are very cheap looking and super wrinkled, plus they’re just too big. So making new hats from felt gives these ghosts a much nicer feel. Print and cut out the witch hat pattern, then cut the pieces from your felt sheets as shown below. You should have three of the donut pieces and three of the curved triangle pieces.
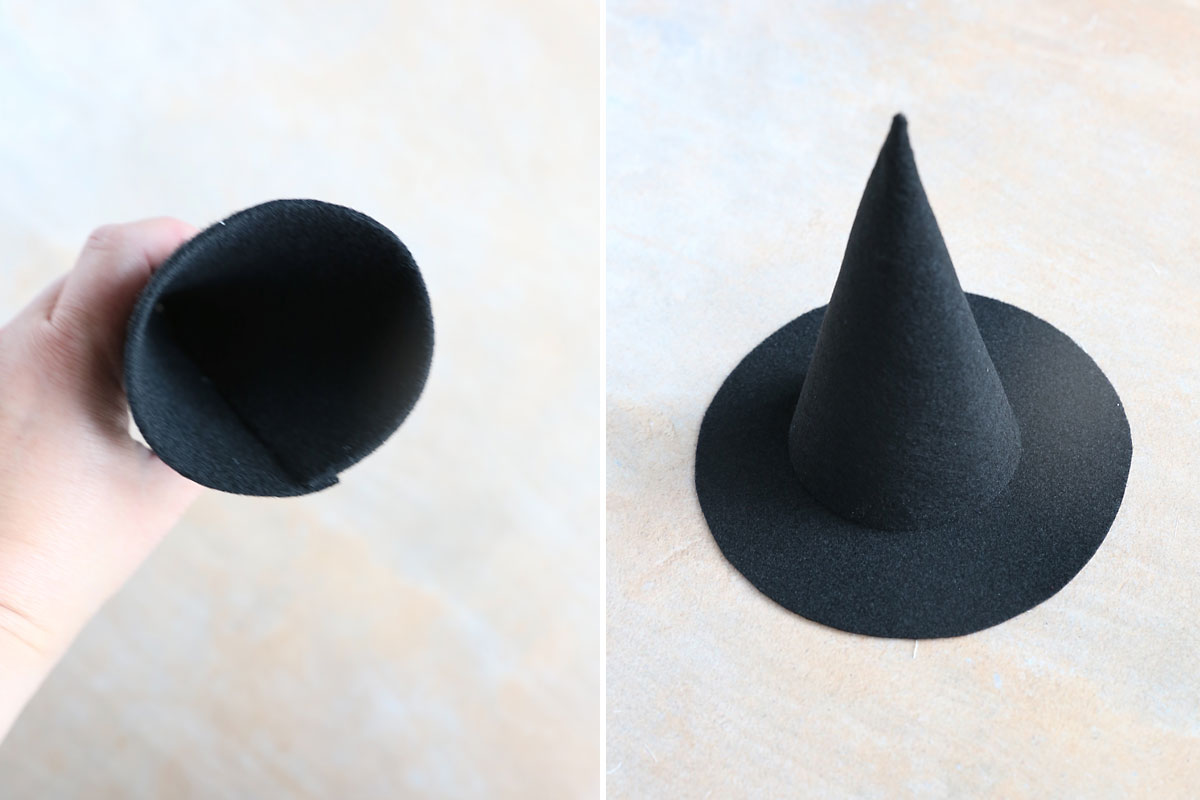
Place the triangle piece on the table as you see below. Fold it up from the bottom corner. Place hot glue along the flap, as shown in the photo below. Immediately fold the flap over to secure it and hold while the glue cools. This will create a cone.

Place hot glue all around the bottom circle of the cone, then immediately place the cone down on the donut shaped piece. Hold it there for a few seconds until the glue cools.
Finish Assembling the ghosts
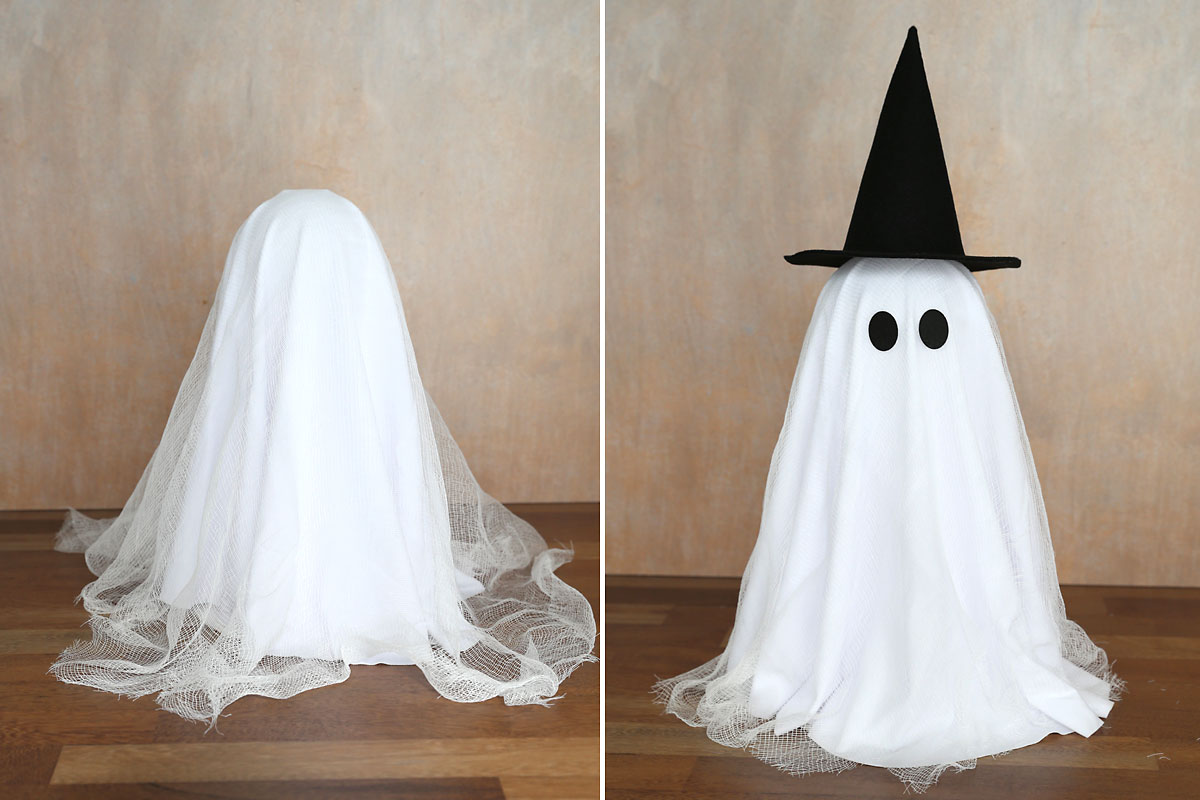
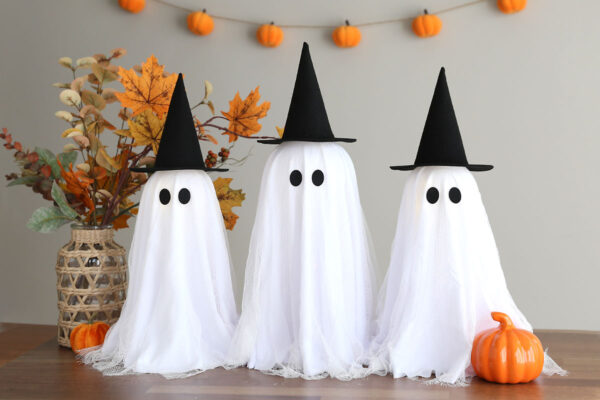
Now you can finish putting each ghost together. Cover the stand with the white cloth and the cheesecloth layer. Trim the cheesecloth to whatever length you like, making sure to include some jagged edges. Add the sticky felt eyes that are included in the kit, and top it all off with the witch hat you just made.
Place the three ghosts next to each other and add a few pumpkins to create an adorable Halloween centerpiece. These spooky ghosts would look cute on a table runner or pretty board. Enjoy your glowing centerpiece!
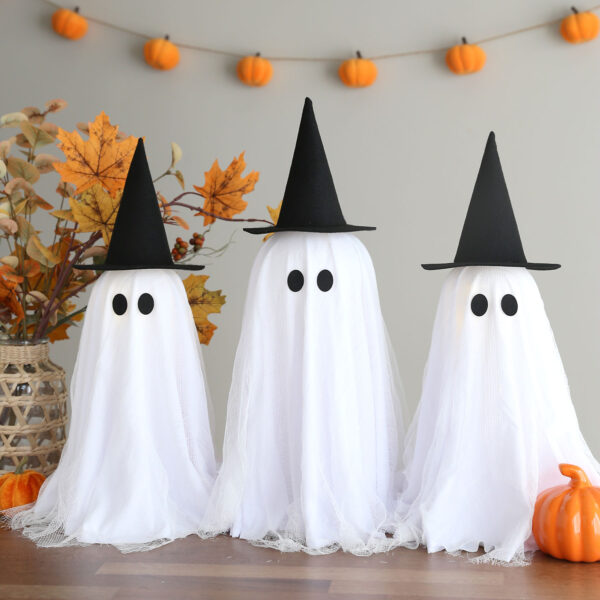
DIY Ghosts Centerpiece
Supplies
- 1 Light Up Ghosts Kit from Amazon
- 3 sheets Black Felt 9×12
- 3 yard Cheesecloth
- Witch Hat Pattern
Want more project ideas? Sign up to get my favorite easy crafts and recipes straight to your inbox!
Equipment
- Hot Glue Gun
Instructions
- Assemble supports for ghosts using the kit instructions. Add string lights from the kit.

- Use the white circles from the kit to cut similar circles of cheesecloth.

- Cut the witch hat pieces from felt using the pattern.
- Fold the triangle piece as shown, then place hot glue on the flap. Fold the flap down and hold until the glue cools. This creates the top cone portion of the hat.
- Glue the cone onto the donut piece to complete the witch's hat.
- Drape the white circle and the cheesecloth over the support. Trim cheesecloth as desired. Add sticky felt eyes (from the kit) and the hat.
- Place all three ghosts together to create a centerpiece. Be sure to turn off the lights when you leave the room.


Leave a Comment