
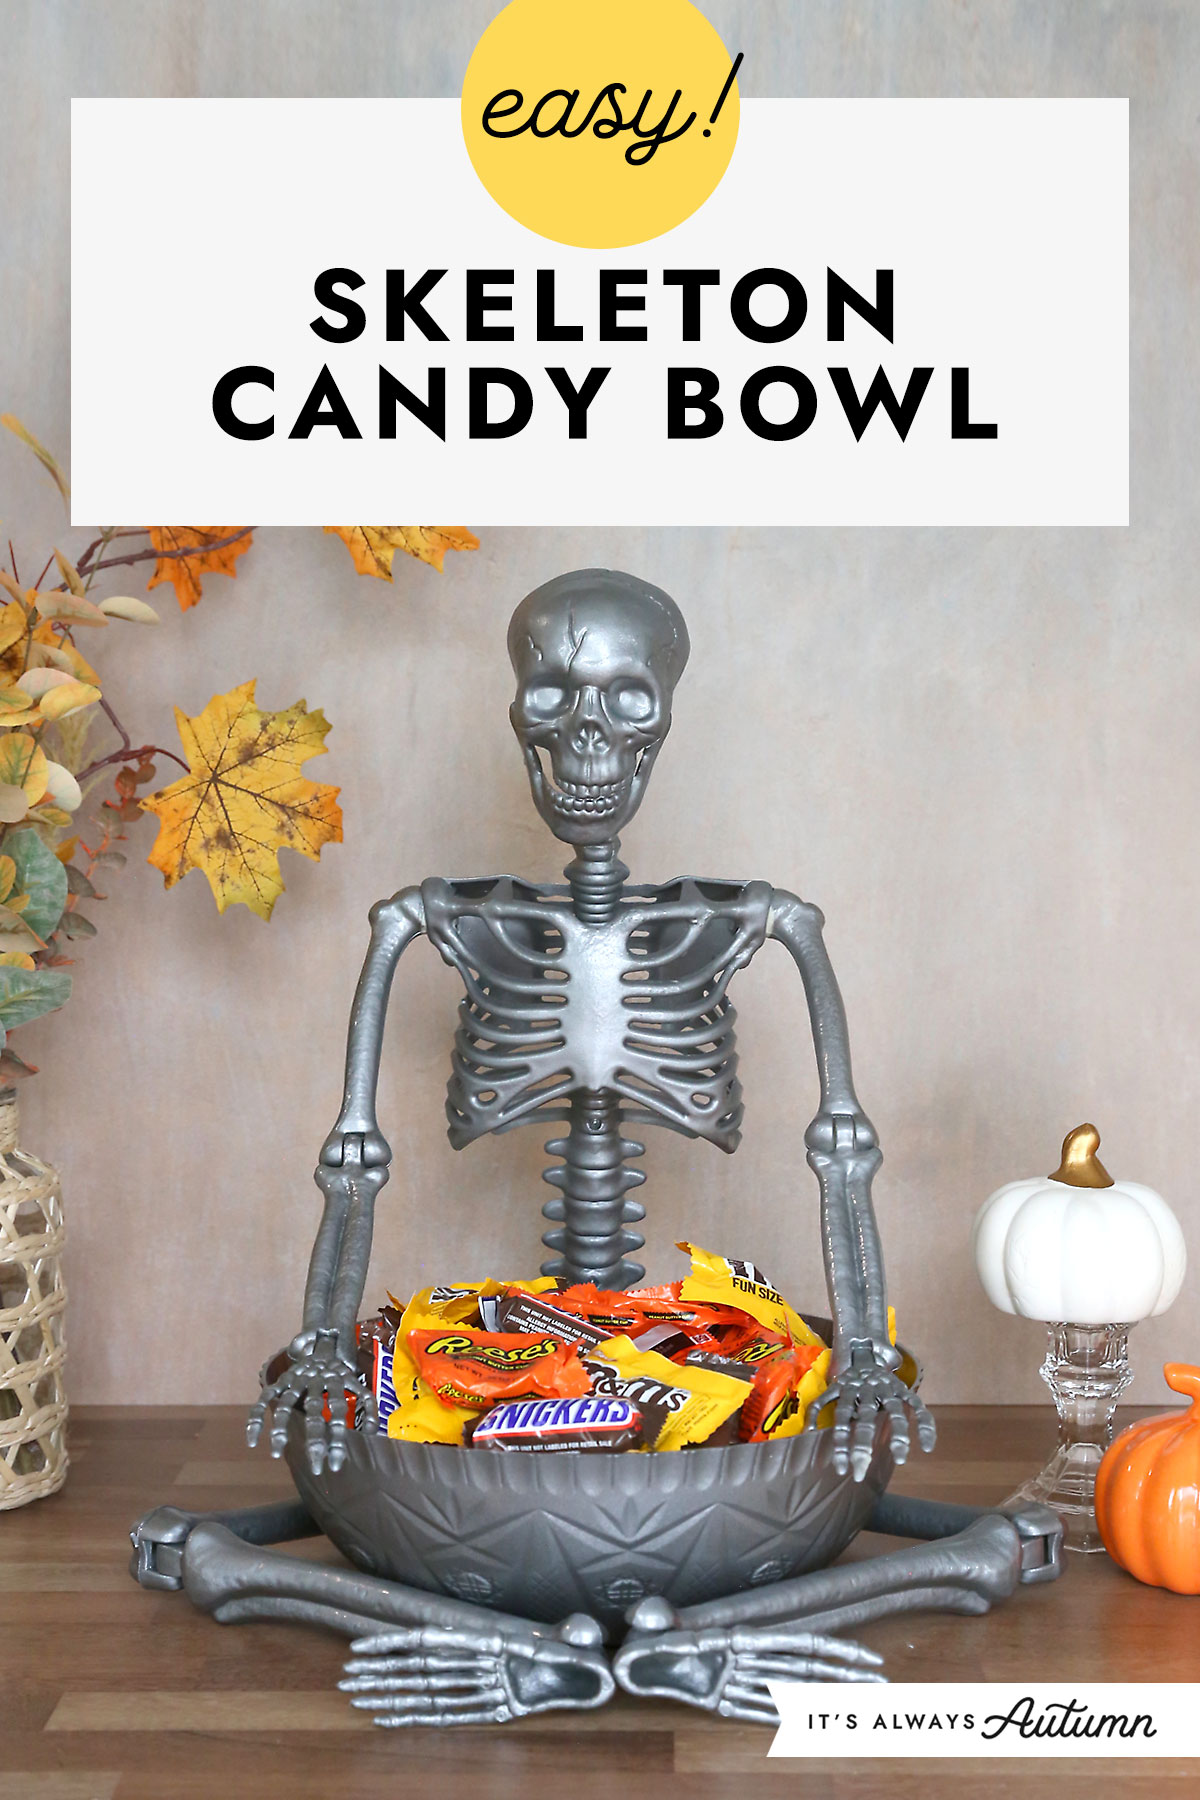
In today’s post: Learn how to make an adorable Skeleton Candy Bowl inspired by the Pottery Barn version for a fraction of the price! This is an easy Halloween craft idea for adults.
Easy Halloween Craft Idea
When I saw the Pottery Barn skeleton candy bowl I knew I needed to try making something similar. After all, there’s no way I’m spending $200 on a candy bowl. My version is obviously different, so it’s more of an “inspired by” than an actual “dupe”, but I still think it turned out pretty adorable, especially considering I spent less than forty bucks – just a fifth of the PB price.
Supplies
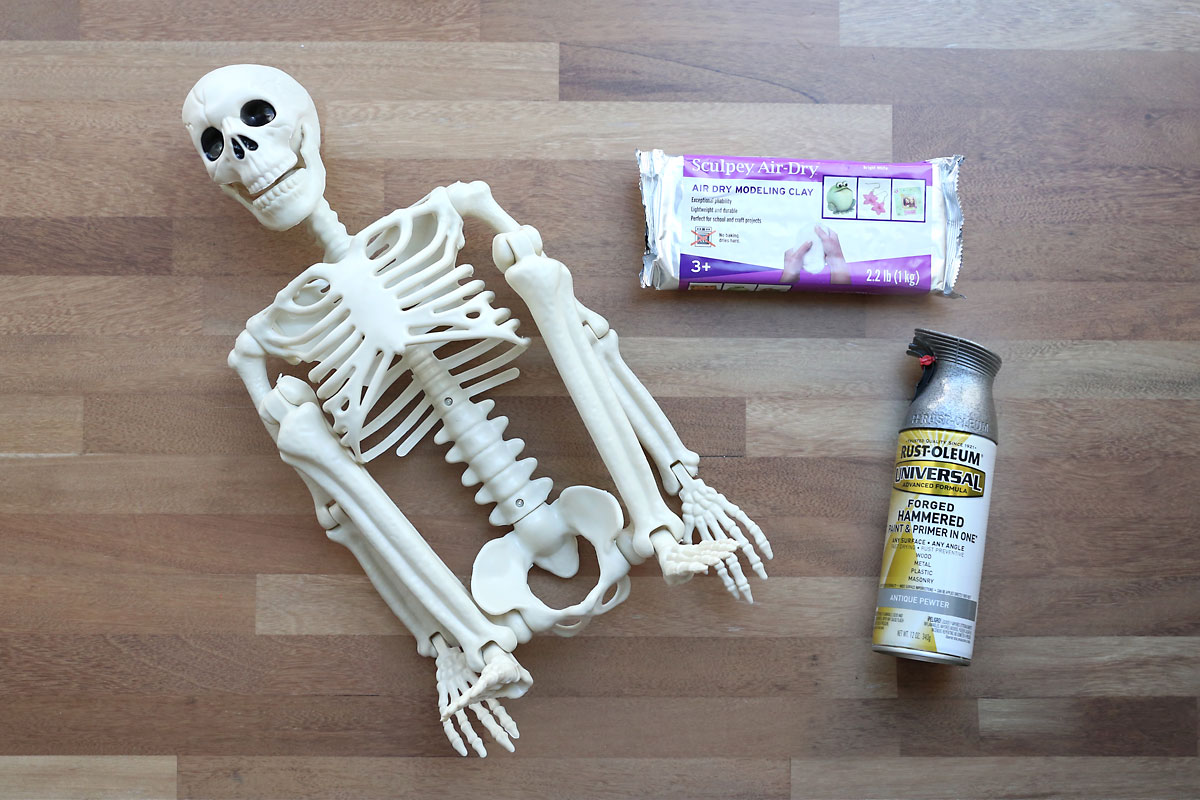
Here’s what you need to make your own Pottery Barn inspired Skeleton Candy Bowl:
- 3 ft Plastic Skeleton: I used this plastic skeleton from Amazon and I’d recommend getting the same one. If you purchase a different skeleton, make sure the joints are poseable. You’ll also need to be able to unscrew the hip joints to remove the legs.
- Air Dry Clay: I used Sculpey Air Dry Clay in white. You’ll use about a pound of clay.
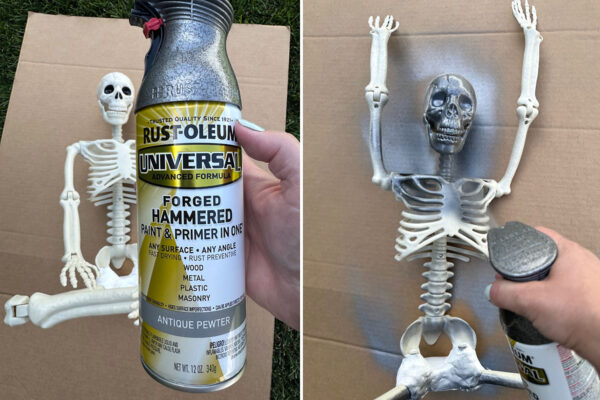
- Hammered Spray Paint: I used Rust-Oleum Hammered Paint & Primer in Antique Pewter.
- Large Bowl: I used one of the Cut Crystal Punch Bowls from Dollar Tree (not shown).
How to Make a Skeleton Candy Bowl
This Halloween craft doesn’t take a ton of hands on time. However, you will create a base for the skeleton out of air dry clay which you will need to let dry thoroughly before painting. This can take 2-3 days, so be aware there will be some wait time before you can finish this project.
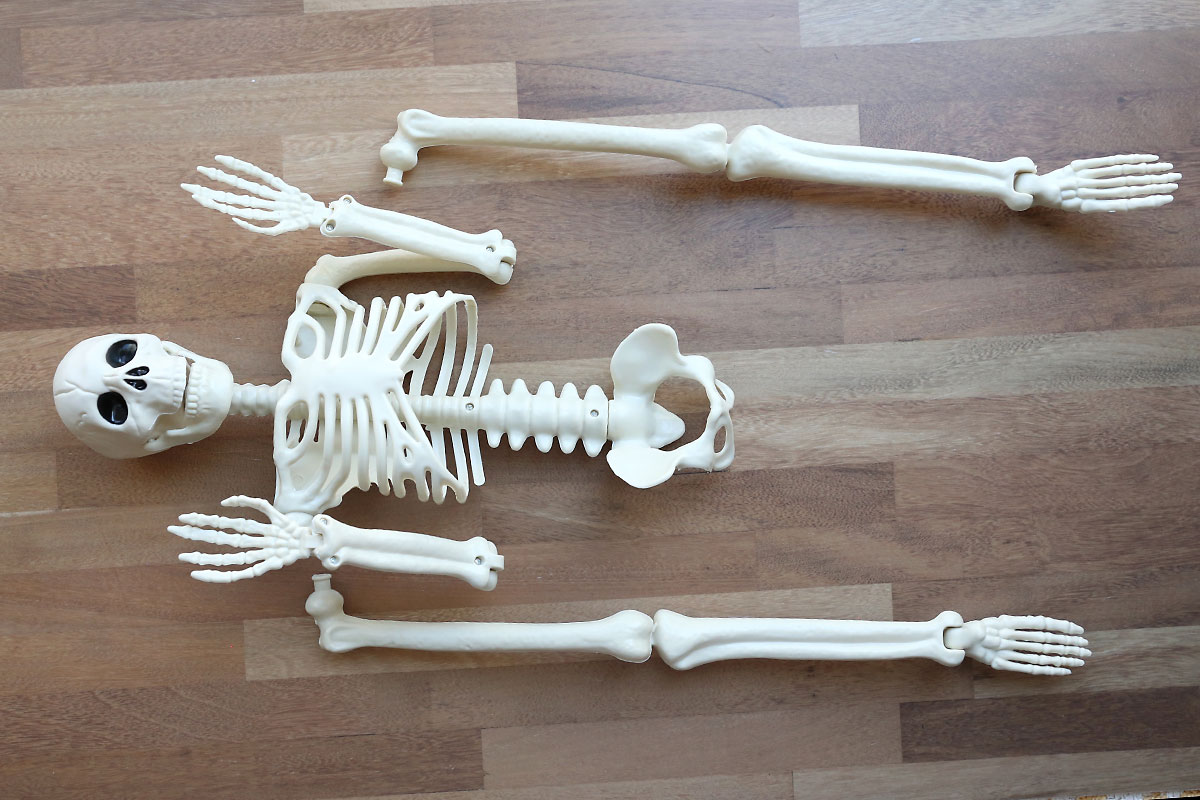
Remove the Legs
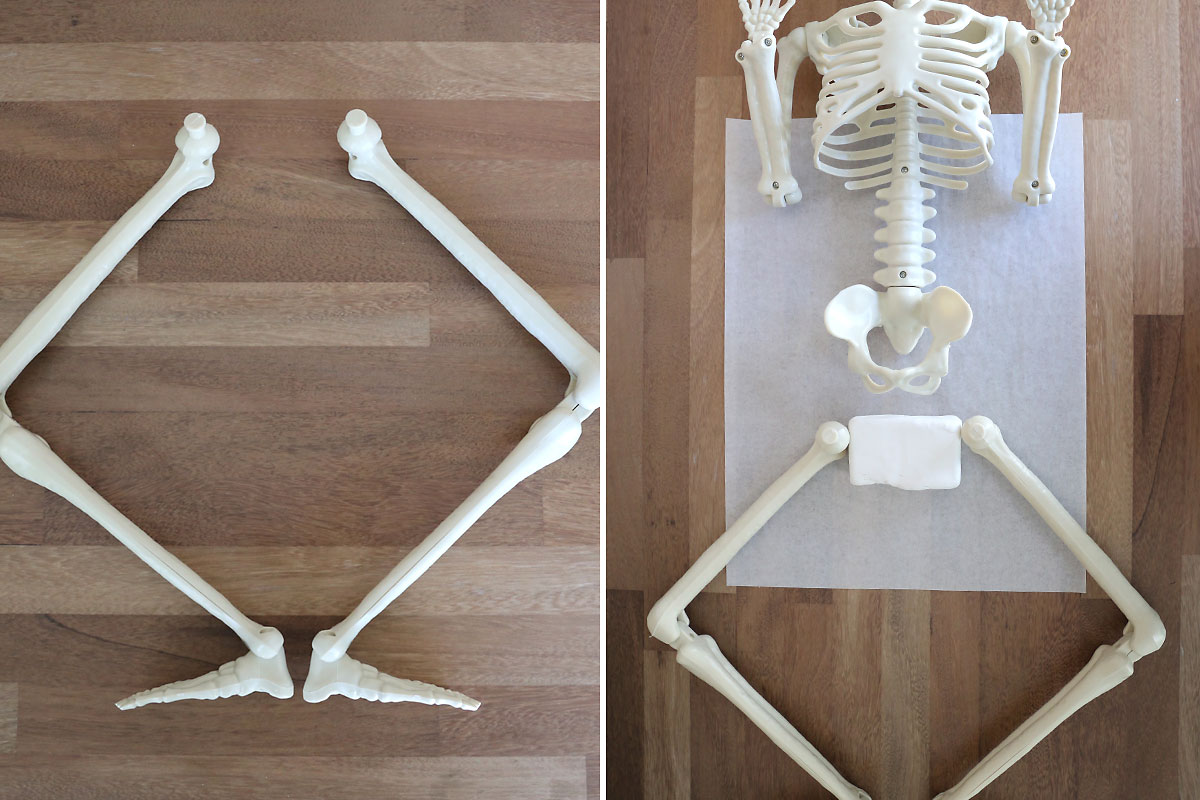
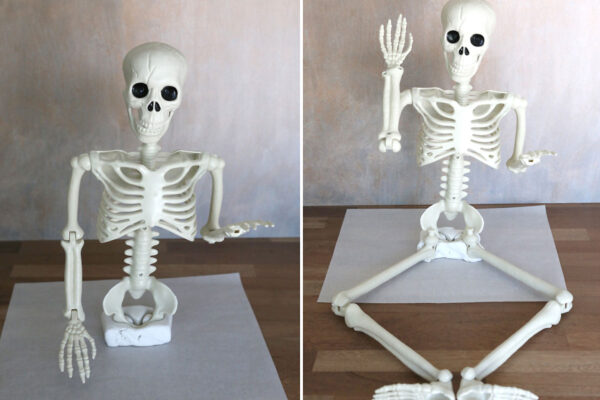
In the Pottery Barn version, the skeleton’s legs wrap around the bottom of the bowl with the knees pointed out to the side. In order to mimic that look, we need to take the legs off the skeleton so we can get them in the correct position. Turn the skeleton over, so his backside is facing you. Find the four screws in his hip bones that hold the legs on and remove the screws. This will allow you to detach the legs from the skeleton’s body.

Create a Base
Turn the legs on their sides and bend the knees to create a diamond shape with them like you see below – the joints that attached them to the hips should be facing up. Once you have them positioned, you’ll use air dry clay to attach the legs back to the body of the skeleton, and create a base for the skeleton to sit on. Protect your work surface with wax or parchment paper. Cut off a piece of clay that’s about 4×3 inches and place it in between the legs and the body of the skeleton.
Stand the skeleton’s body up and press it down into the clay block. You’ll want the skeleton to lean slightly forward. Take each leg and press the joint into the clay block as well, right in front of the skeleton’s hip bones. Make sure the legs are still in a diamond shape with the feet flexed and the heels touching.

Finish the Base
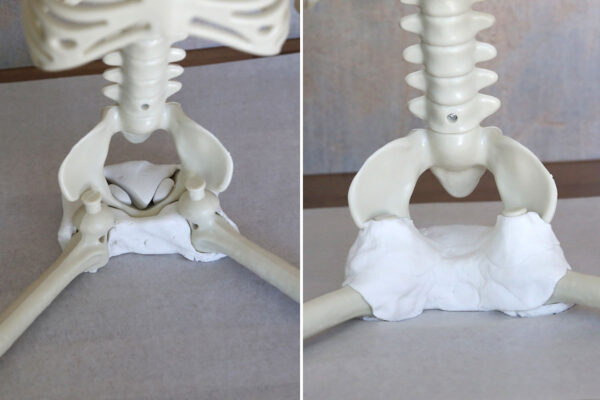
Use more clay to cover the joints at the top of the legs and secure everything together. It kind of looks like you are creating a diaper for the skeleton. Your goal is to use enough clay to keep the skeleton sitting up and secure the legs back to the body. Again, make sure the heels of the skeleton are together (you can use a loose rubber band or twist tie to keep them secured together while you work on the clay).

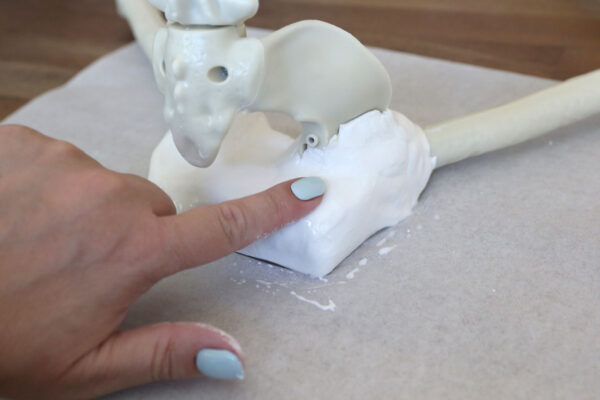
When you are done adding clay, dip your fingers in some water and smooth out the clay. You don’t need to worry about making this look perfect; this portion of the skeleton will not be visible because the bowl of candy will sit in front of it.

Allow the Clay to Dry
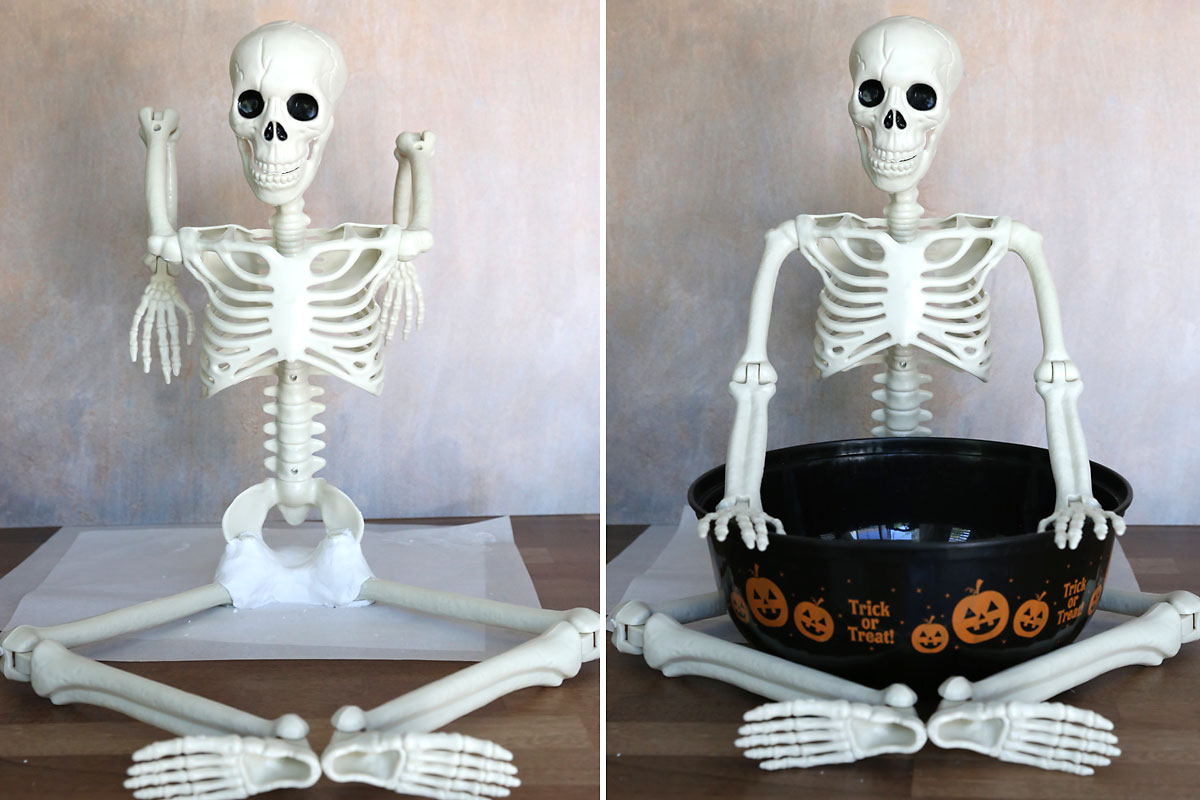
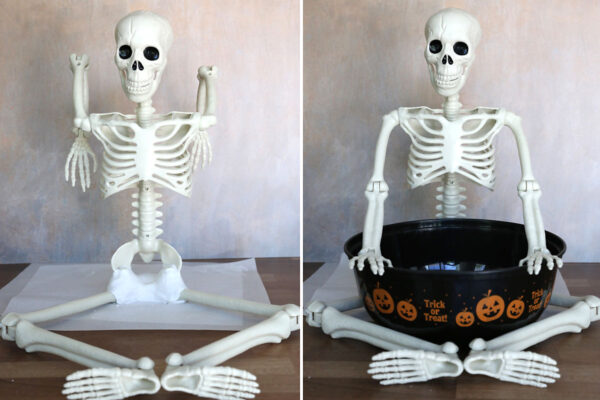
Now you need to let the clay dry THOROUGHLY before proceeding. Depending on the humidity in your area, this could take up to three full days. If the clay feels cold when you touch it, that means it’s still wet. To make sure the skeleton doesn’t lean too far forward while drying, either pull its arms up and over its head OR place a bowl under its arms as you see in the photos below. Allow the clay to dry for at least 12 hours with the skeleton sitting up, then lay the skeleton down on its back so the underside of the clay has a chance to dry as well. The clay may develop a few cracks as it dries; remember this portion won’t be visible once the candy bowl is in place.
Paint the Skeleton and Bowl
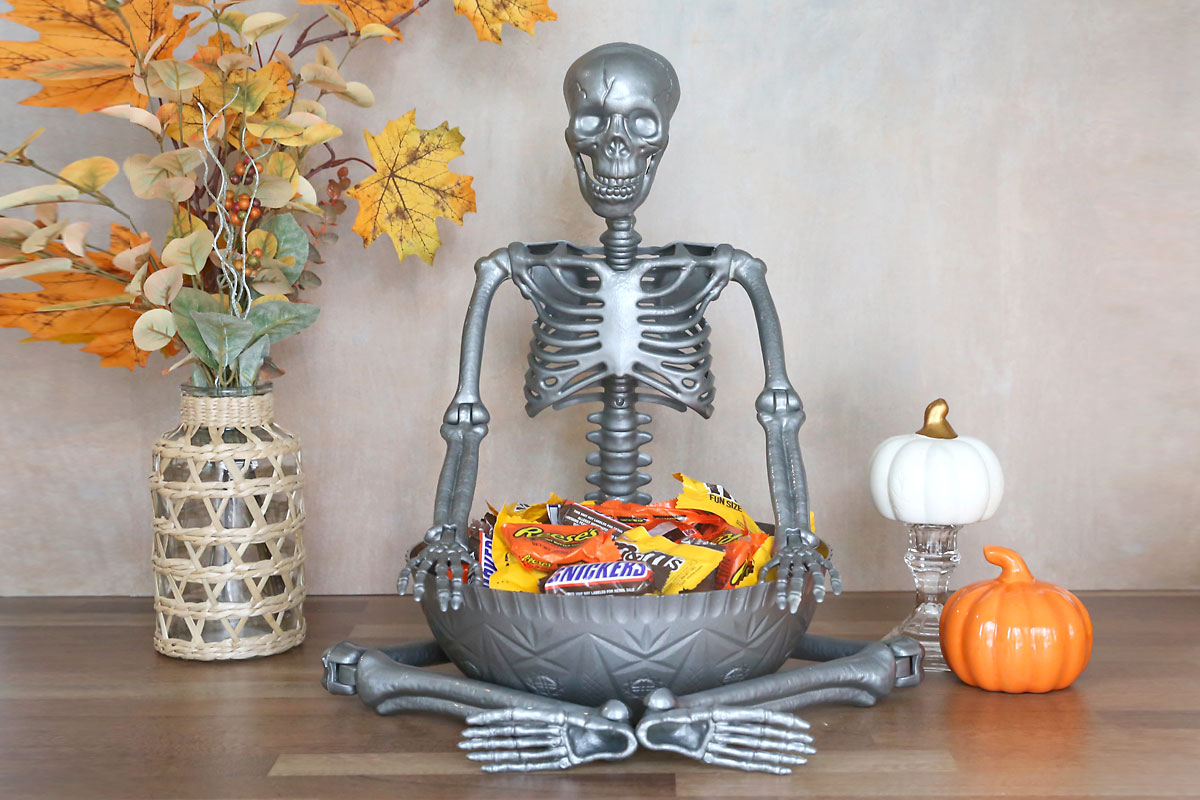
Now it’s time to paint the skeleton and whatever bowl you are using. I used a hammered spray paint in Antique Pewter because I liked the matte finish. You could use a hammered silver if you want it to look closer to the pottery barn version. Lay the skeleton down on some cardboard and paint the front and the underside. Once that is dry, sit the skeleton up and spray paint the backside and touch up any places that need it on the front. Spray paint whatever bowl you are using as well.

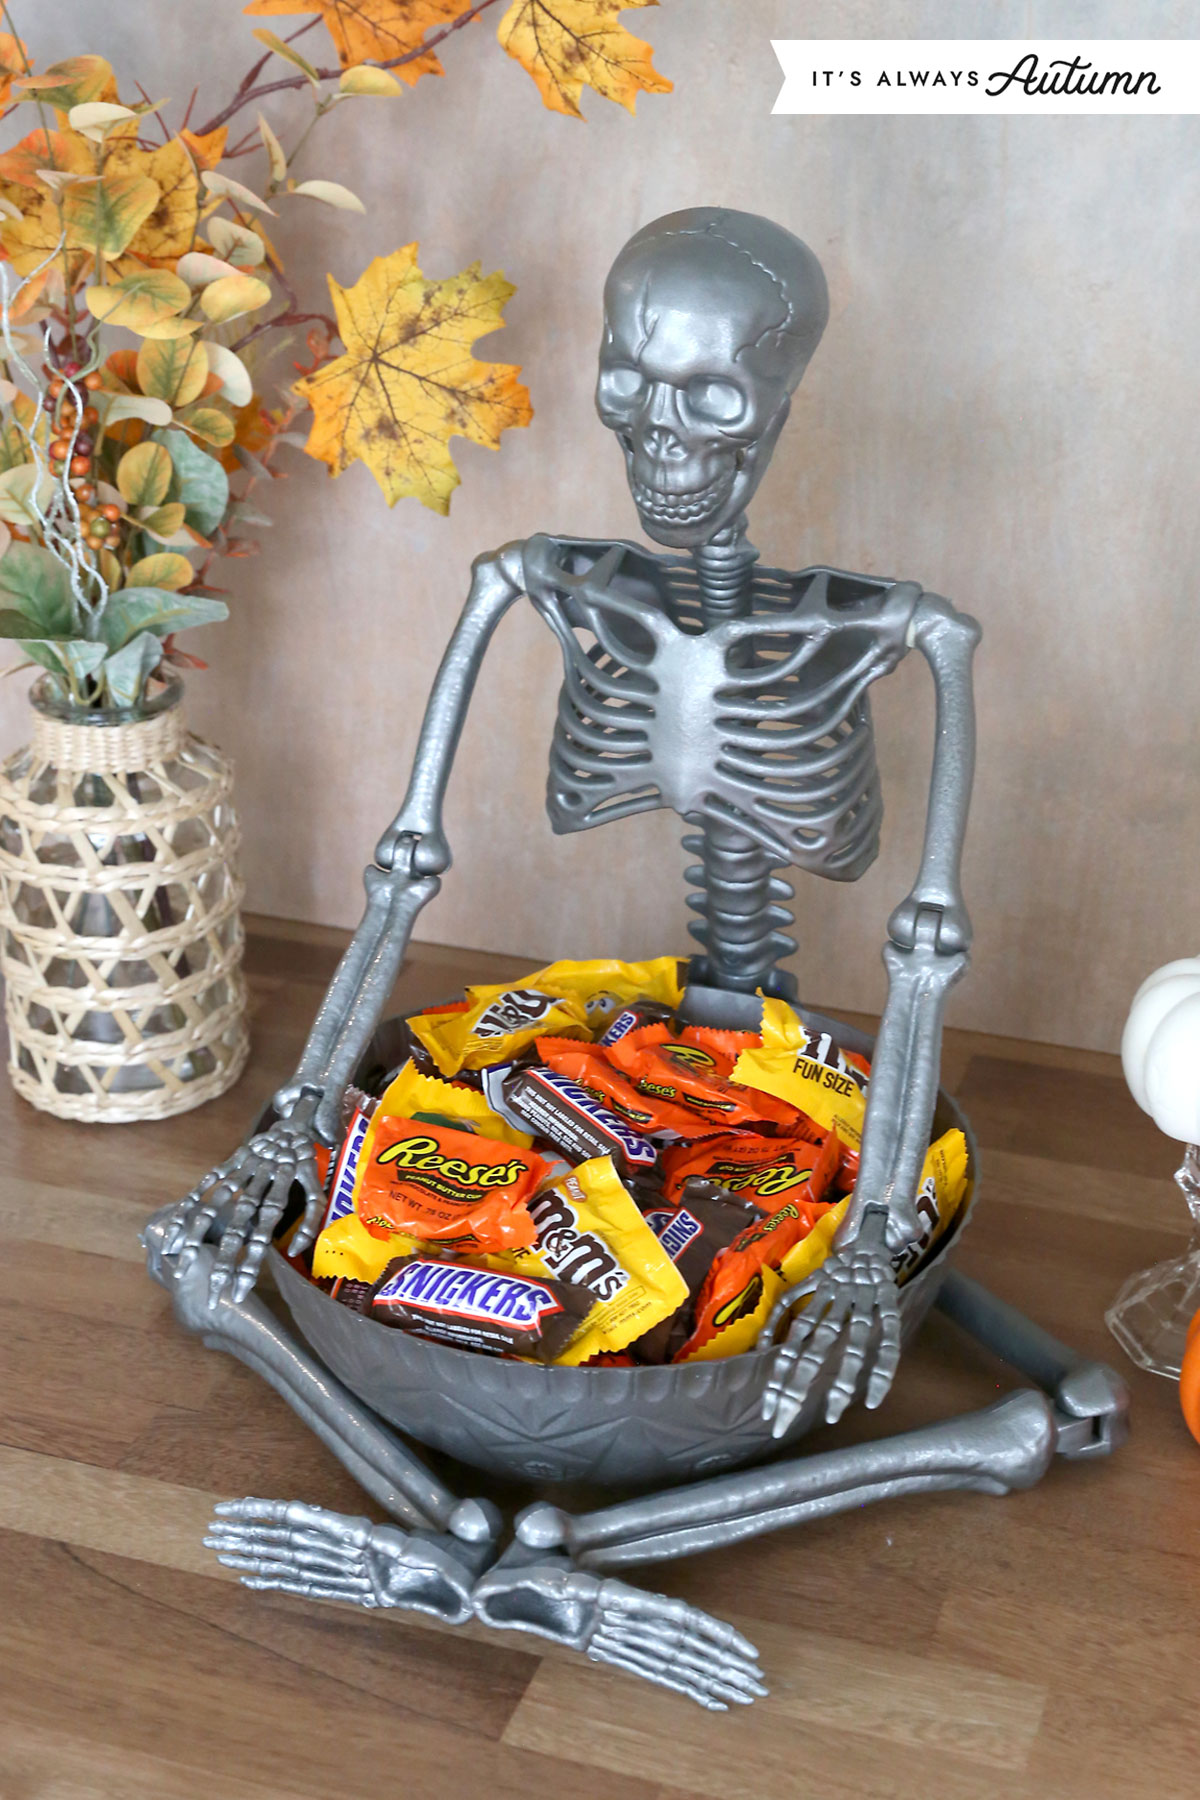
Once the paint is fully dry, you can start using your candy bowl. Sit the skeleton up and place the bowl in right in front of the base, with the legs extending around it. Rest the skeleton hands on the edge of the bowl, then fill the bowl with wrapped candy. He looks so cute!
Notes:
- Because you spray painted the bowl, it is not food safe, so ONLY use it to hold wrapped candy. You could also fill the bowl with faux fruit or small decorative pumpkins. If you want to place unwrapped food in the bowl, place another clear bowl that has not been painted inside the painted bowl to ensure the food doesn’t sit against the spray paint.
- I did not glue the skeleton to the bowl. You can do this if you like. Just be aware that hot glue will not hold a bond on plastic long term, so if you want to glue it together you’ll need to use both hot glue and a permanent glue like E6000.
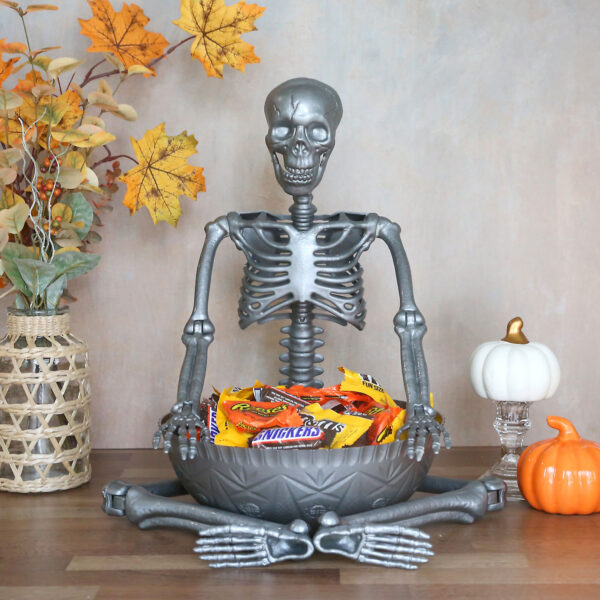
Skeleton Candy Bowl
Supplies
- 3 ft Plastic Skeleton
- Sculpey Air Dry Clay about 1 pound
- Hammered Spray Paint
- Large Plastic Bowl
Want more project ideas? Sign up to get my favorite easy crafts and recipes straight to your inbox!
Instructions
- Remove the screws in the back of the skeleton's hip joints so you can take off the legs.

- Place the legs with the knees pointing out to create a diamond shape as shown. Place a block of air dry clay between the top of the leg bones and lay the body of the skeleton above it.
- Stand the skeleton’s body up and press it down into the clay block. You’ll want the skeleton to lean slightly forward. Take each leg and press the joint into the clay block as well, right in front of the skeleton’s hip bones. Make sure the legs are still in a diamond shape with the feet flexed and the heels touching.
- Use more clay to cover the joints at the top of the legs and secure everything together. Use enough clay to keep the skeleton sitting up and secure the legs back to the body. Again, make sure the heels of the skeleton are together.
- When you are done adding clay, dip your fingers in some water and smooth out the clay. You don’t need to worry about making this look perfect; this portion of the skeleton will not be visible because the bowl of candy will sit in front of it.
- Now you need to let the clay dry THOROUGHLY before proceeding. Depending on the humidity in your area, this could take up to three full days. If the clay feels cold when you touch it, that means it’s still wet. To make sure the skeleton doesn’t lean too far forward while drying, either pull its arms up and over its head OR place a bowl under its arms as you see in the photos below. Remember to lay the skeleton down for part of the dry time so the underside of the base dries as well. The clay may crack as it dries.
- Lay the skeleton down on some cardboard and spray paint the front and the underside. Once that is dry, sit the skeleton up and spray paint the backside and touch up the front. Spray paint whatever bowl you are using as well.
- Once the paint is fully dry, you can start using your candy bowl. Sit the skeleton up and place the bowl in right in front of the base, with the legs extending around it. Rest the skeleton hands on the edge of the bowl, then fill the bowl with wrapped candy.


Amy Hunter says
Genius and so fun!