
In today’s post: Learn how to turn a dryer vent hose into a cute set of stacked pumpkins. This is an easy fall craft you can complete in about 90 minutes.

Easy Fall Craft idea
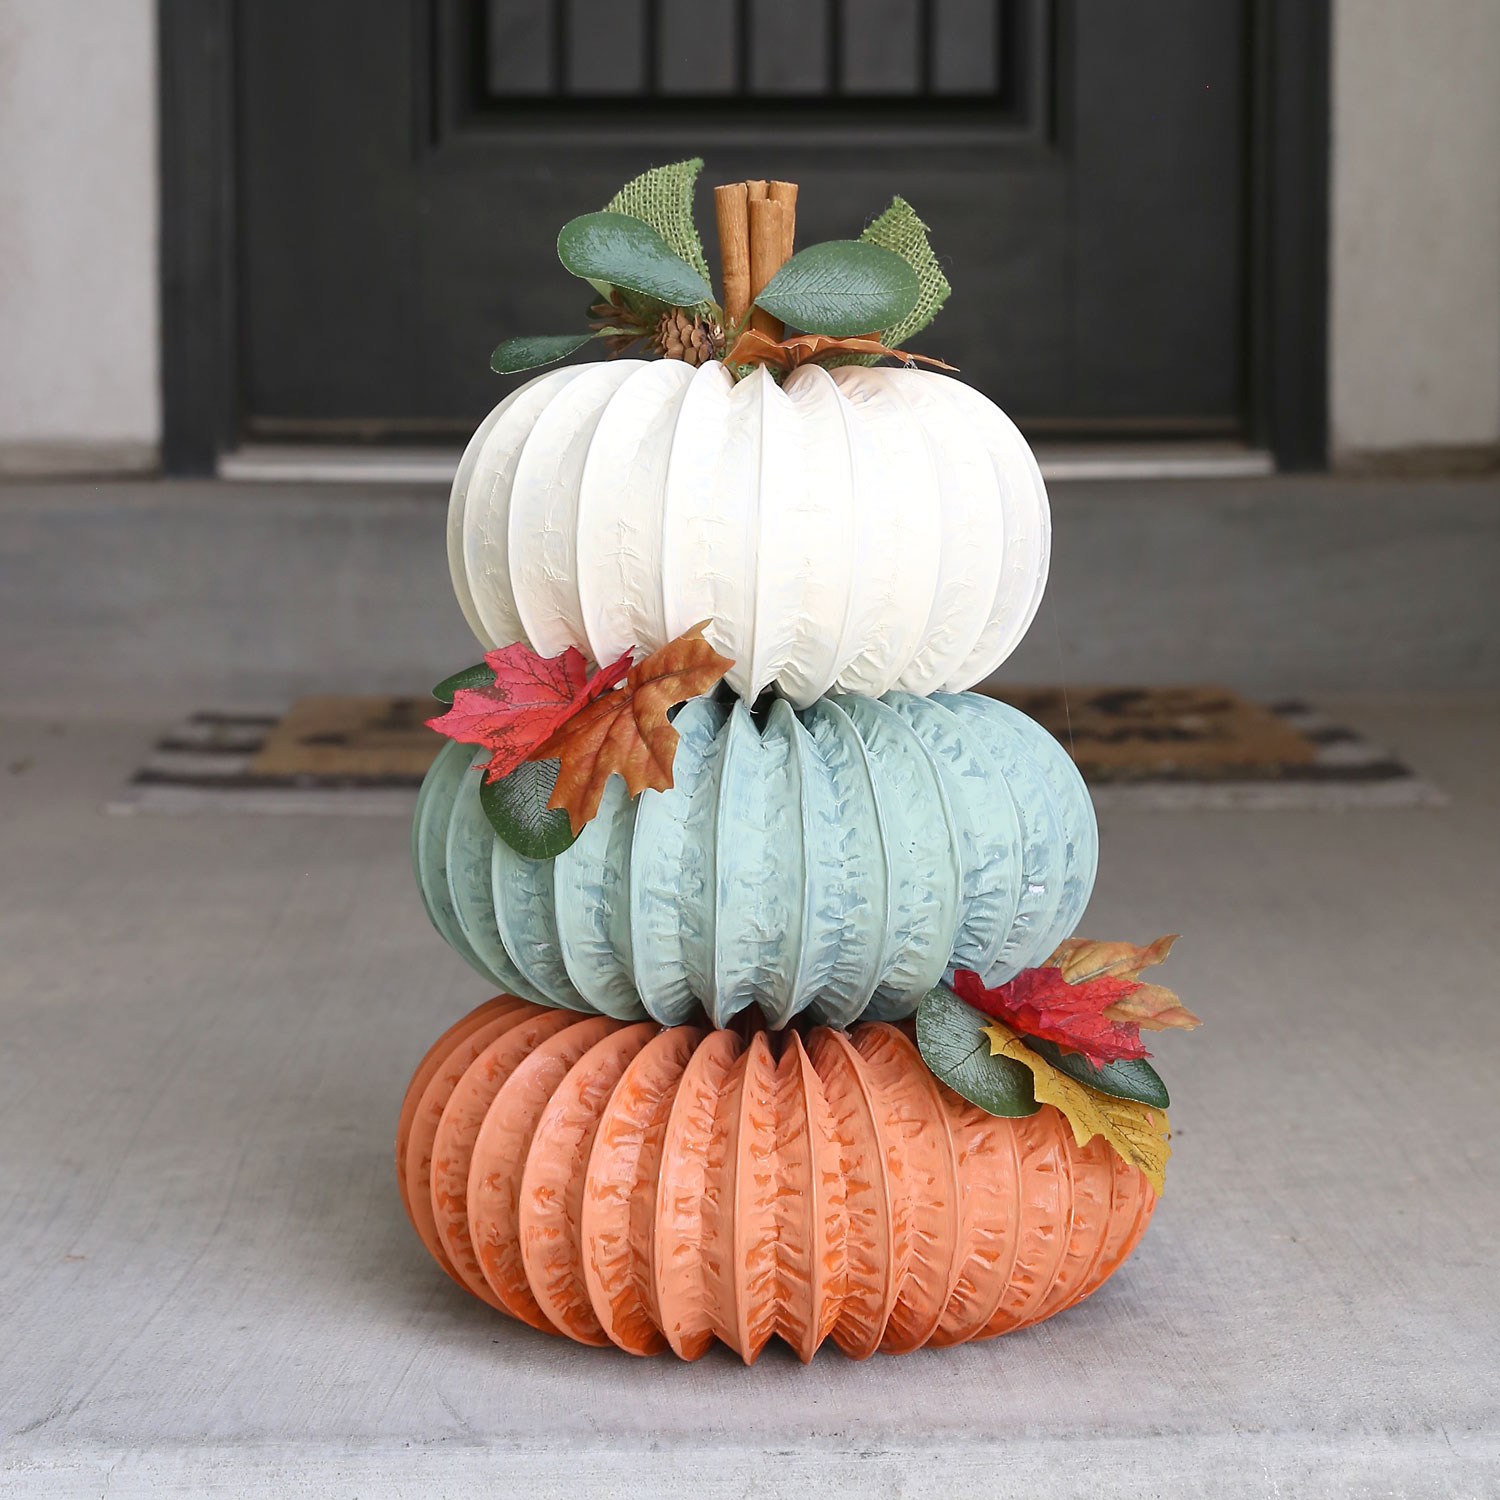
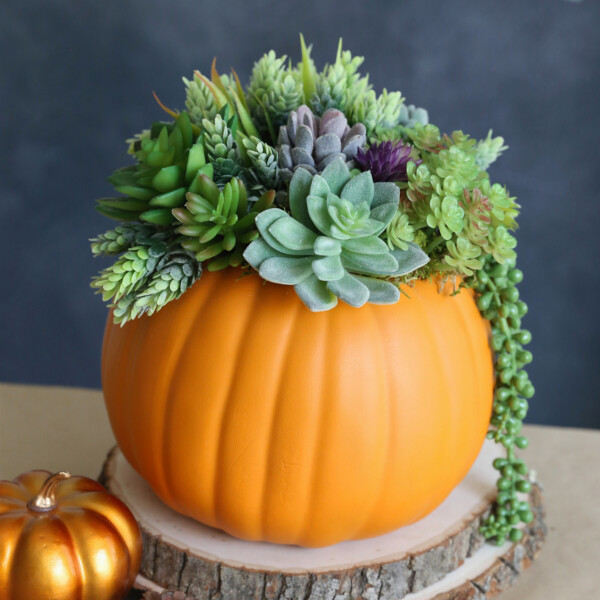
This cute set of stacked pumpkins is made from one dryer vent hose! The easy DIY fall decoration will look great inside your house or out on your front porch – it would be especially nice on top of a tall, thin planter. Make two sets and put one of either side of your door!
Supplies
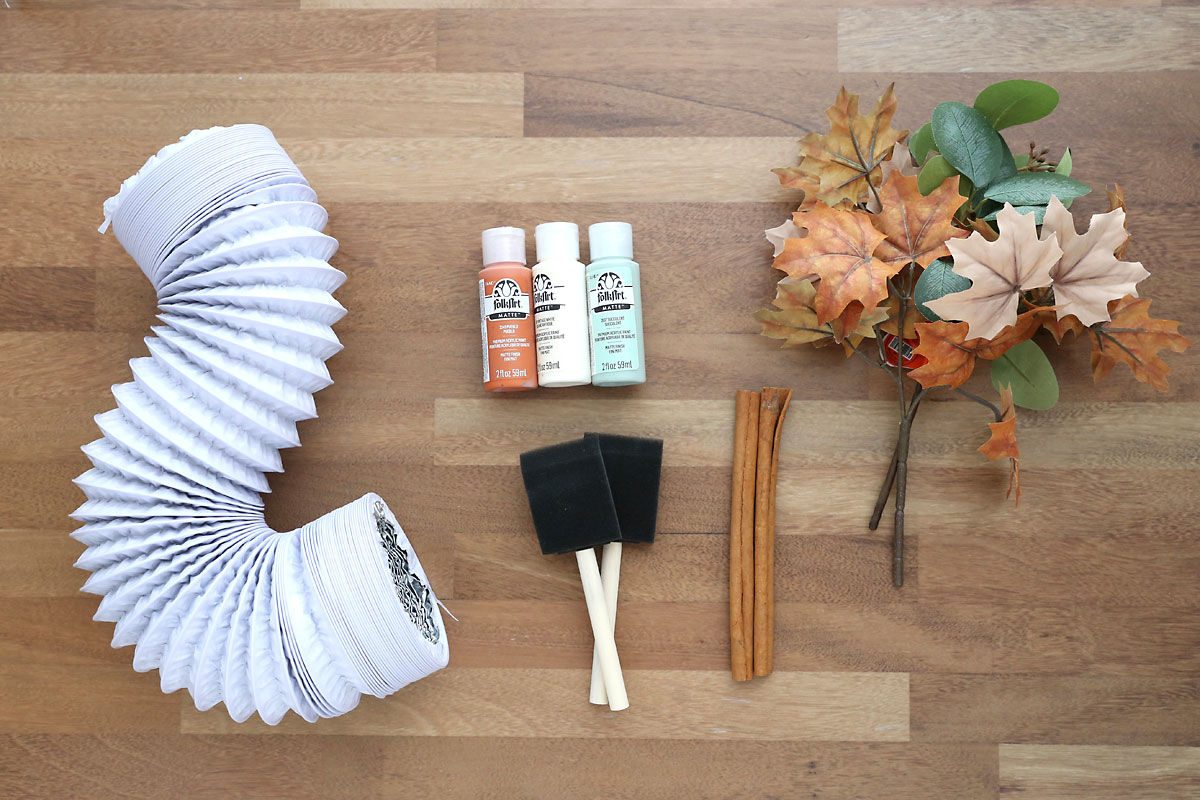
Here’s what you need to make a dryer vent pumpkin stack (or topiary):
- 8 ft dryer vent: I used this white one because I thought it would be easier to paint than an aluminum one
- Paint: I used acrylic craft paint in three different colors for my pumpkins. You are welcome to use spray paint if you prefer. Spray paint will save time and make the project easier. However, purchasing spray paint in three different colors will be quite expensive and you don’t have nearly the color options you can get with craft paint for about a dollar a color. I ended up using two different colors of craft paint on the orange and blue pumpkins to give it a more interesting look (the top pumpkin is painted cream). You will need 1-2 small bottles of paint per pumpkin.
- Foam Paintbrushes: if you are using acrylic paint
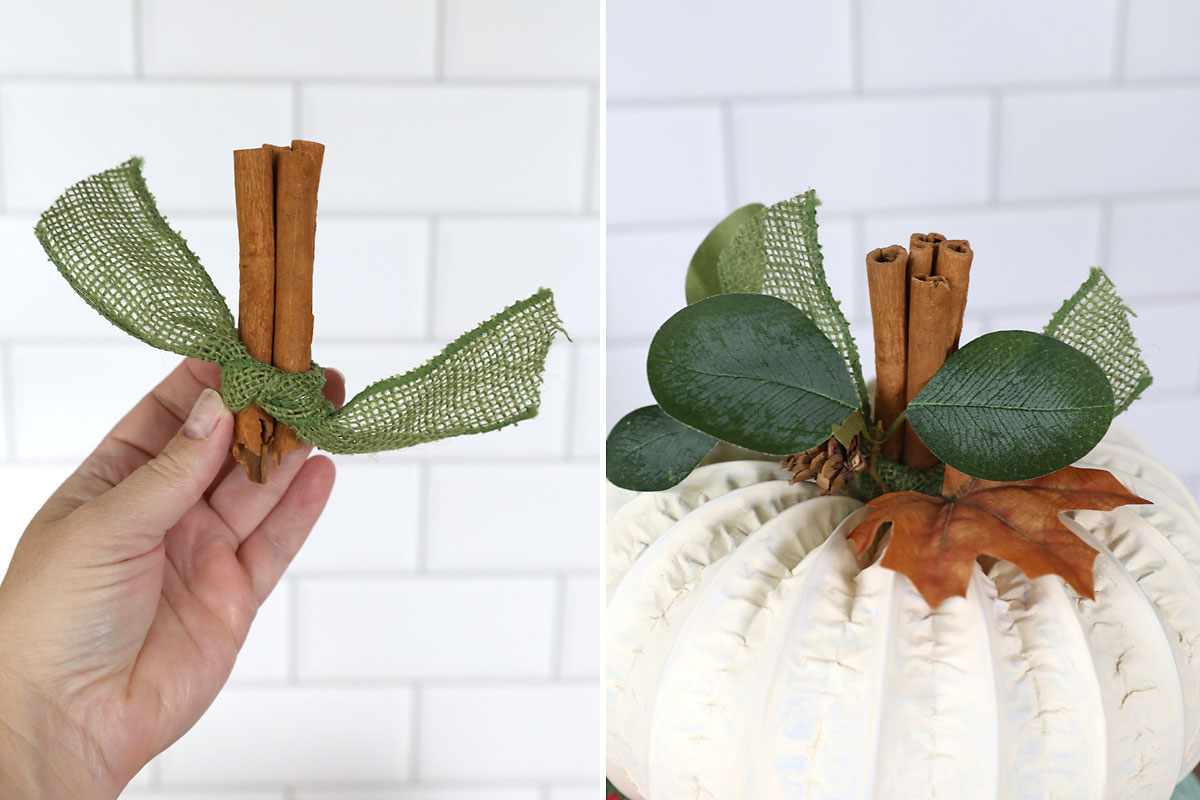
- Stem: I used two cinnamon sticks, broken in half and tied together with ribbon, for the stem. You could also use a stick from your yard.
- Faux leaves: for decorating
- Hot Glue Gun + Binder Clips: you will need the binder clips to hold the dryer vent hose together when you glue it
Note: I made my pumpkin stack for indoor use. If you’d like to display this pumpkin outside, you will want to put something heavy inside the bottom pumpkin to weigh it down OR place a dowel through the middle of all the pumpkins that you can stake into the ground or a planter.
How to Make a Dryer Vent Pumpkin Topiary
Cut the Dryer Vent Hose
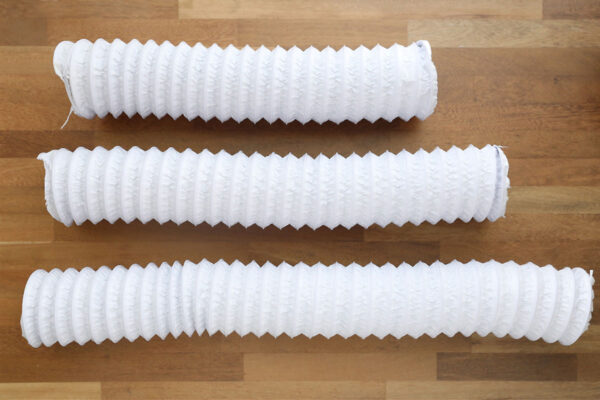
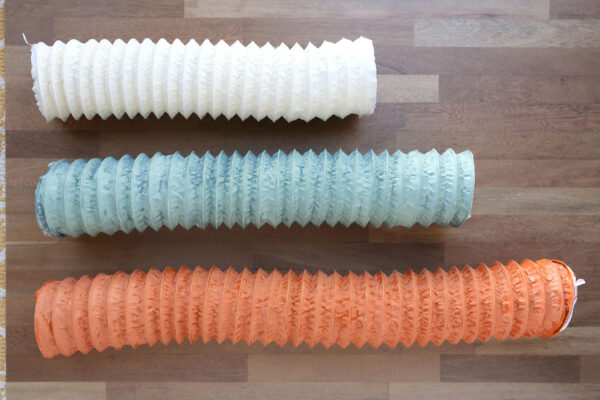
Begin by stretching your dryer vent hose all the way out. It should be about eight feet in length (you may need to have someone help you stretch it out). You want to cut it into 3 graduated lengths: 2.25 feet, 2.75 feet, and 3 feet. Use scissors to cut through the hose. Use the snips portion of needle nose pliers (or other wire cutters) to cut through the wire.

Paint the Dryer Vent Hose
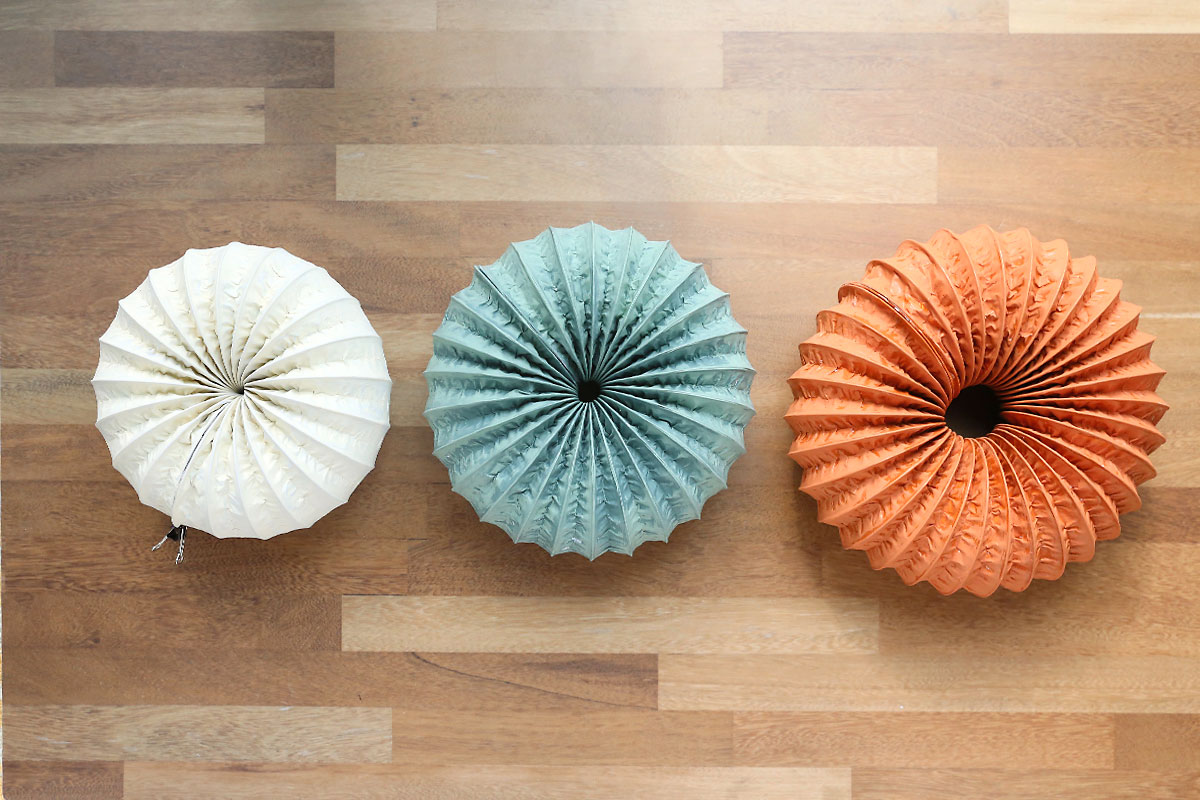
Now it’s time to paint the dryer vent three different colors. I painted the shortest hose cream, the middle hose blue, and the longest hose orange. You can use spray paint here if you would like to save time, but that will be much more expensive. I covered my table with butcher paper and painted each hose with a foam paintbrush. Allow to dry, and add a second coat of paint if needed. For the orange and blue hoses, I used slightly lighter paints on the second coat and let the darker paint show through, but this is optional.

Glue the Hose into Pumpkin Shape
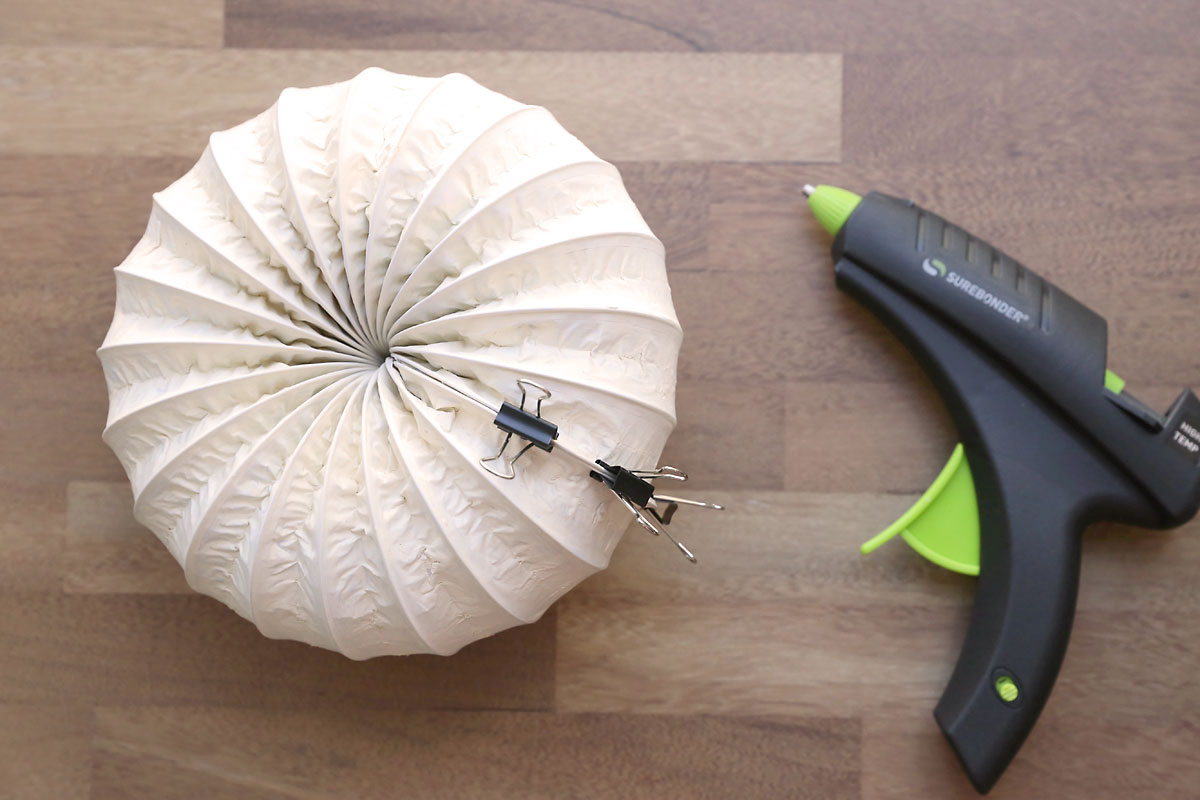
Once the hoses are completely dry, it’s time to glue them into a pumpkin shape. Curl each hose back on itself so the ends meet, and glue those ends together with plenty of hot glue. Use binder clips to hold the two ends together while the glue dries (this is especially important for the smallest pumpkin, you may want to keep the clips on it overnight). Please note that if you want to display this outside you may want to put something heavy (like floral gems) in the bottom pumpkin before you glue it together so it doesn’t blow over.
Assemble the Pumpkin Stack
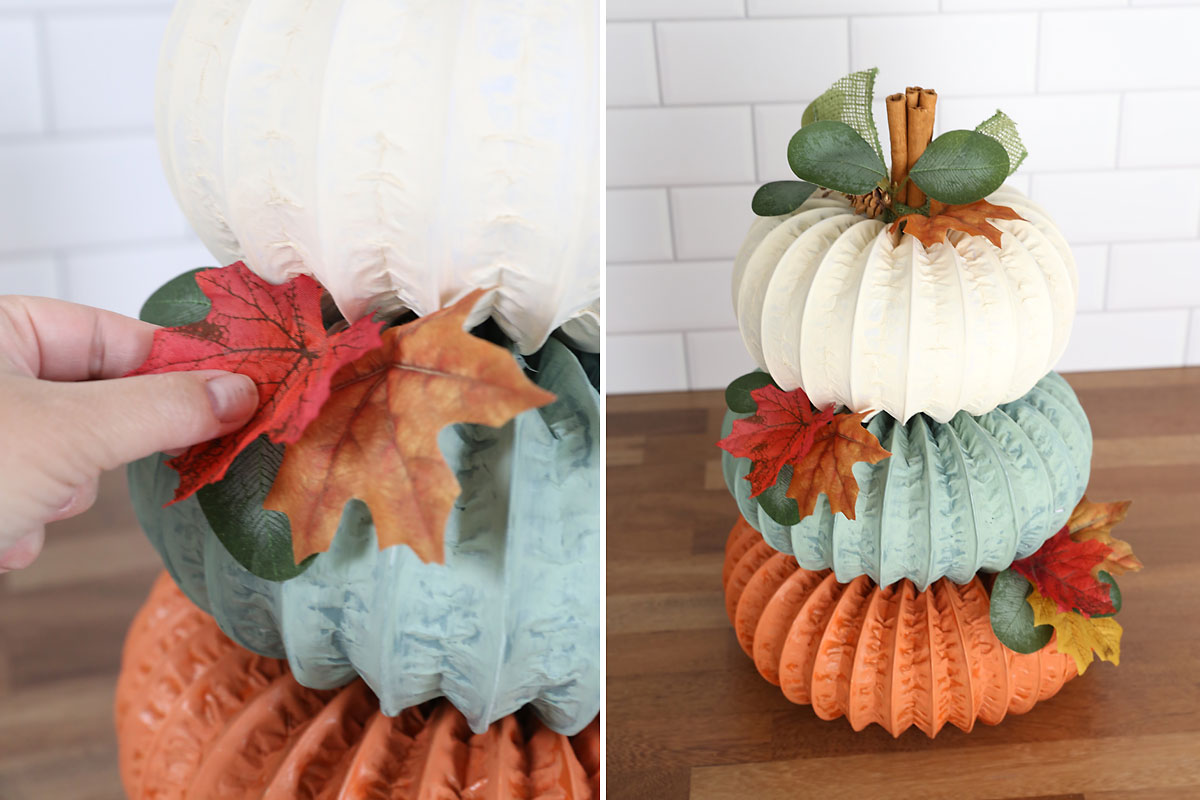
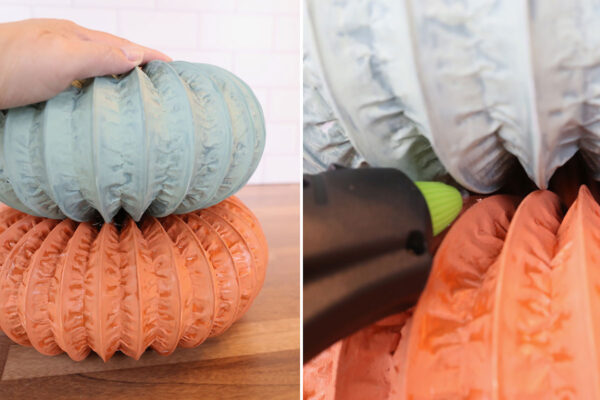
Now it’s time to put everything together! Place the middle pumpkin on top of the bottom pumpkin and press it down slightly. The “ribs” of the pumpkins will touch each other in some places. That’s where you want to add hot glue. Working all the way around the pumpkin, add hot glue where the ribs of the two pumpkins touch, then hold that area together for a few seconds to let the hot glue harden. Repeat with the top pumpkin to complete the stack.

Please note that the hot glue will secure the pumpkins together; however, if you plan to display these pumpkins outside I’d recommend you also place a dowel or long stick down the center of the pumpkin stack. You could even cut a piece of floral foam to fit inside the center of the largest pumpkin to secure the dowel into.
Decorate
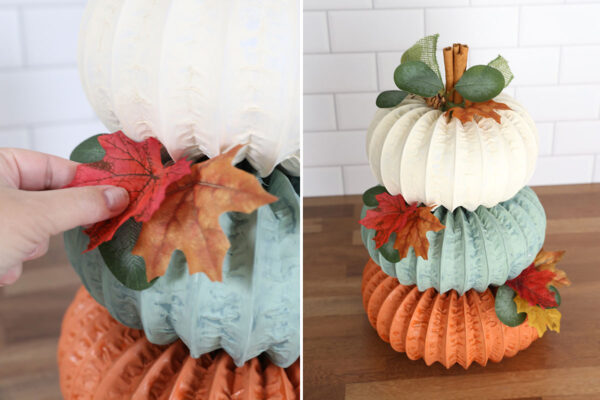
The last step is to add a stem and decorate the pumpkin however you like. I created a stem by tying together four short cinnamon sticks with green burlap ribbon and hot gluing it to the top of the stack. I clipped some leaves off a couple faux floral stems and glued them in between the pumpkins.
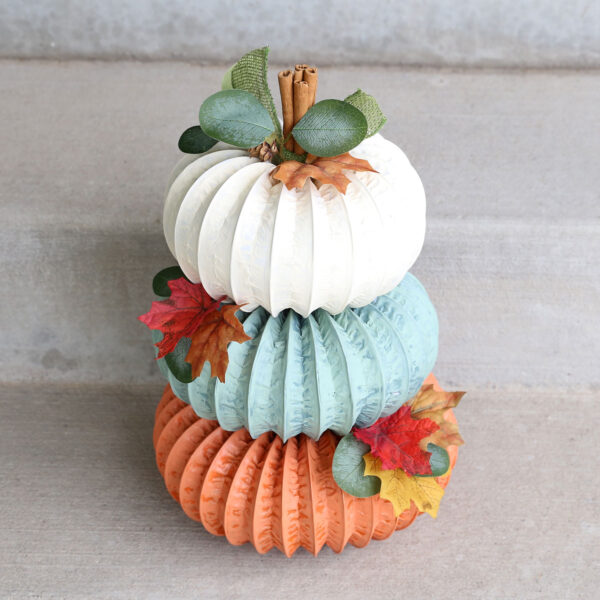
Dryer Vent Hose Pumpkin Topiary
Supplies
- 1 8 ft Dryer Vent Hose
- Paint acrylic or spray paint; in three colors
- Foam Paintbrushes
- Cinnamon sticks or other sticks for stem
- Faux Leaves, Ribbon, any other decorations
Want more project ideas? Sign up to get my favorite easy crafts and recipes straight to your inbox!
Equipment
- Hot Glue Gun
- Wire Cutters or Needle Nose Pliers with Snips
- Binder Clips
Instructions
- Cut the dryer vent hose into three different lengths: 2.25 ft, 2.75 ft, 3 ft.

- Paint each hose length a different color, using two coats if needed. Allow to dry completely.
- Curl each hose back on itself so the ends meet. Hot glue the ends together, using binder clips to hold the hose in place until the glue hardens. For the smallest pumpkin, you may need to keep it clipped closed overnight.
- Place the middle pumpkin on top of the largest pumpkin. Add hot glue where the "ribs" of the pumpkins meet to adhere them together. Repeat with the smallest pumpkin on top of the stack.
- Create a stem and hot glue it to the top of the pumpkin stack.
- Decorate the pumpkins as desired with leaves, flowers, ribbon, etc.


Tips
- Place something heavy, like floral gems, inside the bottom pumpkin.
- Place a dowel or stick down through the center of all three pumpkins. You can also place a piece of floral foam in the center of the largest pumpkin to secure the dowel into.
- Seal the paint with some sort of spray sealant.

paid backlinks for seo says
It’s onerous to seek out educated people on this topic, but you sound like you already know what you’re talking about! Thanks
Brooke says
The pumpkin dryer vent paint colors. What color of blue did you use?!
Cathy says
Hello! Super adorable!!! Could you by chance tell me what colors you used by Folk-Art?
Linda Ahrens says
Where did you find the paper duct? I can only find aluminum.
Autumn says
Hi! I used an aluminum vent hose that had a white covering. Found it on Amazon, it’s linked in the supply list – hth!
Amy says
Soooo cute! I love this!