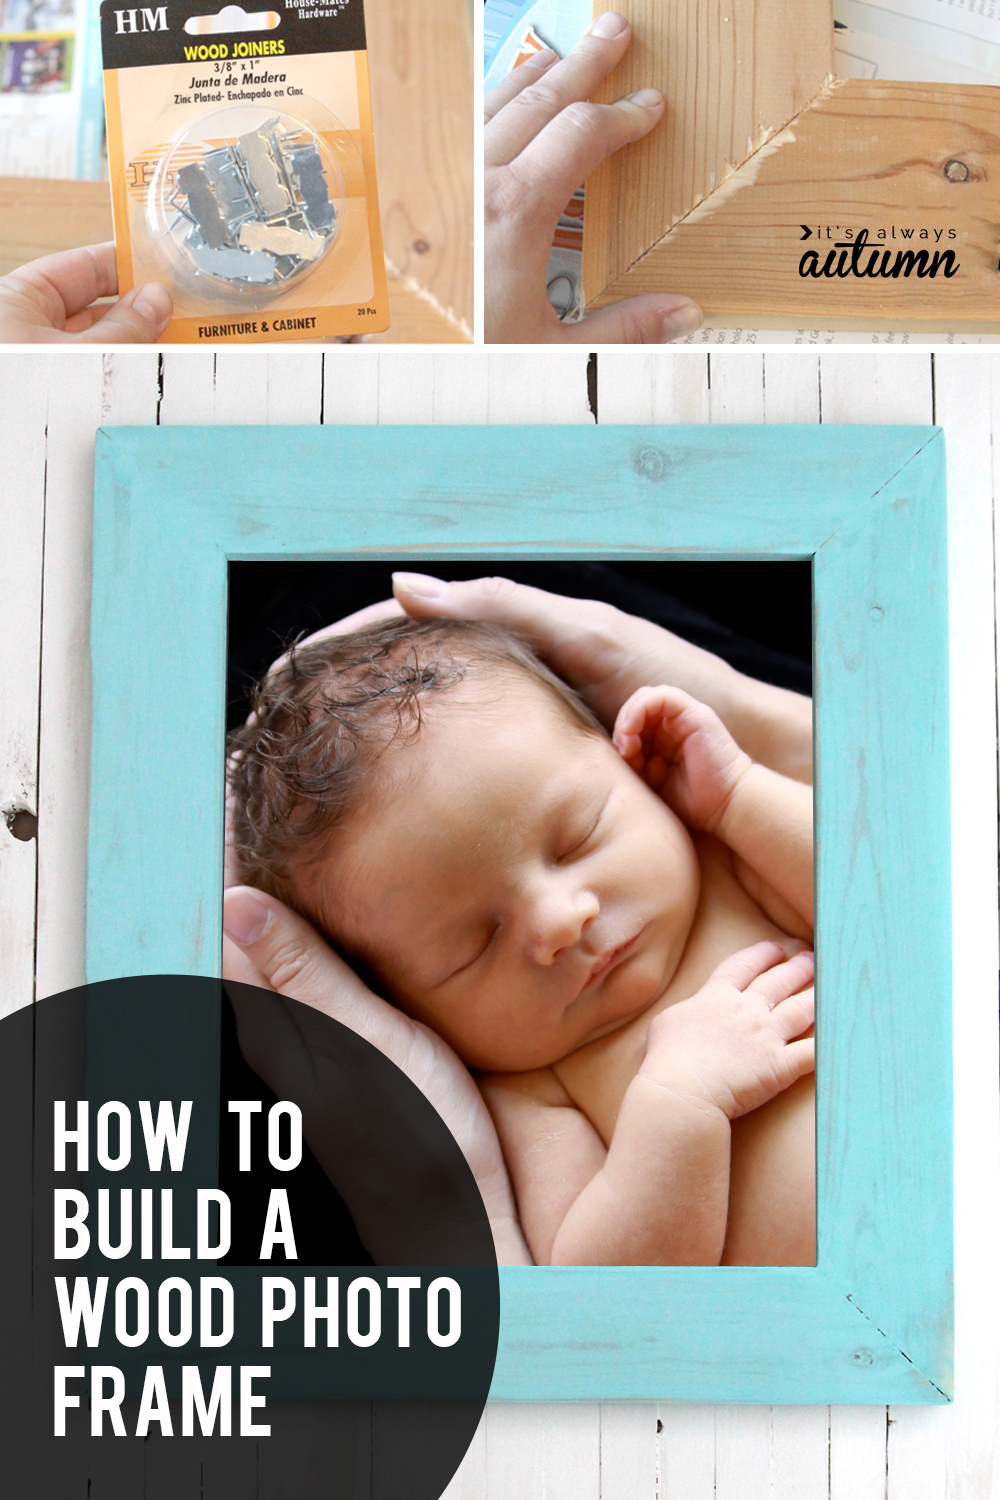
I love text art. Subway art, chalkboard art, calligraphy, awesome quotes in cool fonts, etc. There are so many free printables available now that it would be easy to find one that’s perfect for every single room is your house. What’s a little more difficult is finding cool frames that don’t cost much, especially for a large print. I figured it couldn’t be too hard to make my own using a $5 pine board from Home Depot. Turns out it’s not! Keep reading for instructions on how to make a simple wood frame.
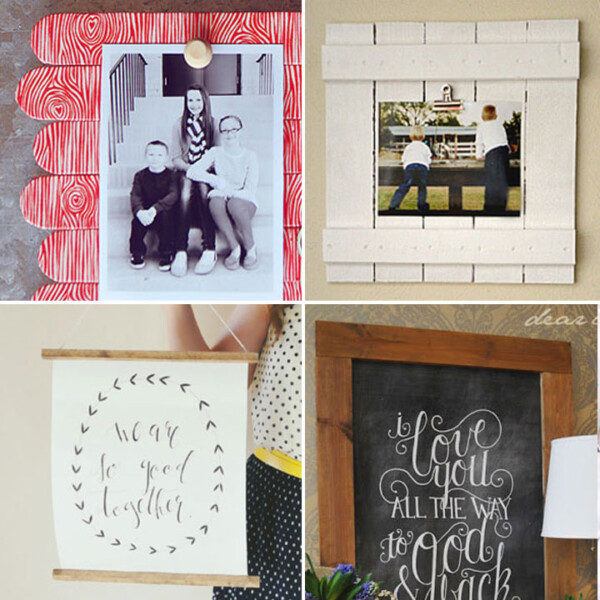
(If you’d like to find even more tutorials for building photo frames, check out 20 best DIY frame tutorials.)
I used a 4 inch wide pine board from Home Depot (which is actually about 3.5 inches wide). I got the 8 ft length for a frame for a 16×20 print. I used a miter saw set at 45 degrees to miter the corners. When cutting your pieces, remember that the short side (inside) of each board should be about an inch shorter than the height or width of your print. For a 16×20 print, I had pieces that looked like this:
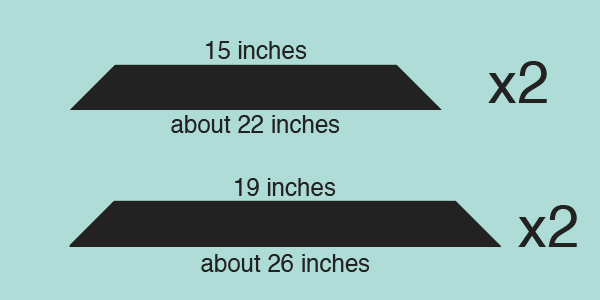
The exact dimensions are not that important; however, it IS important that both long pieces are exactly the same lenght, and both shorter pieces are exactly the same length. This will ensure that your mitered corners line up perfectly. I accomplished this by sawing through both pieces at once on the miter saw.
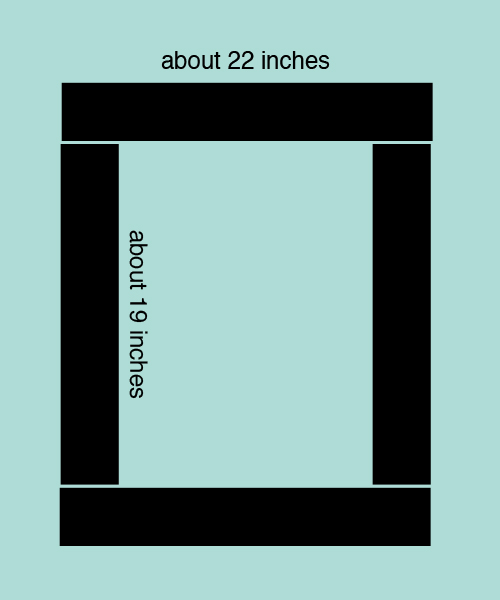
If you don’t have a miter saw, don’t worry. You can just make a frame without mitered corners. If you do that, you’ll want to cut your pieces like this:
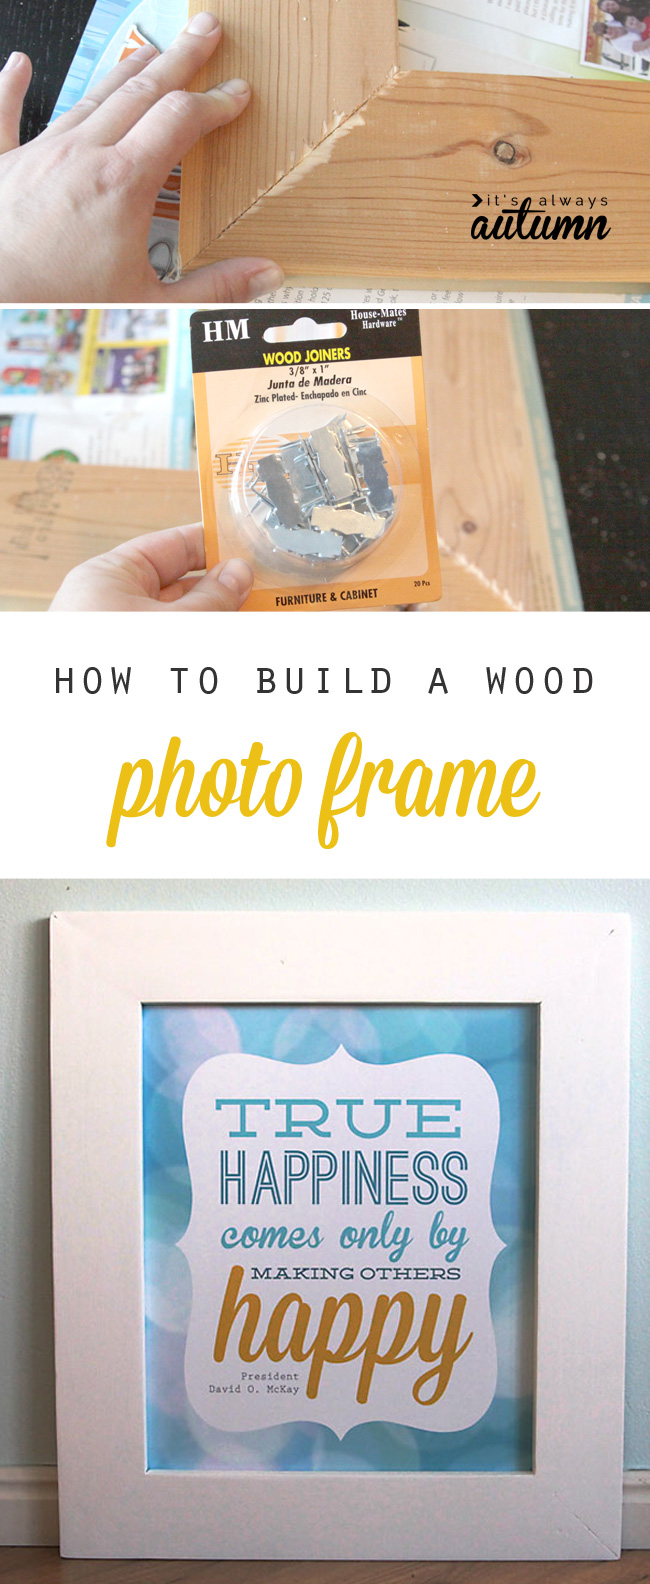
To put your frame together, you’ll need wood glue and some sort of joiner. I’ve seen v-nails recommended, but I couldn’t find them at Home Depot. You could also use a metal brace that you screw into the pieces you’re attaching together. I was looking for something inexpensive and convenient, so I found these wood joiners for a buck fifty:
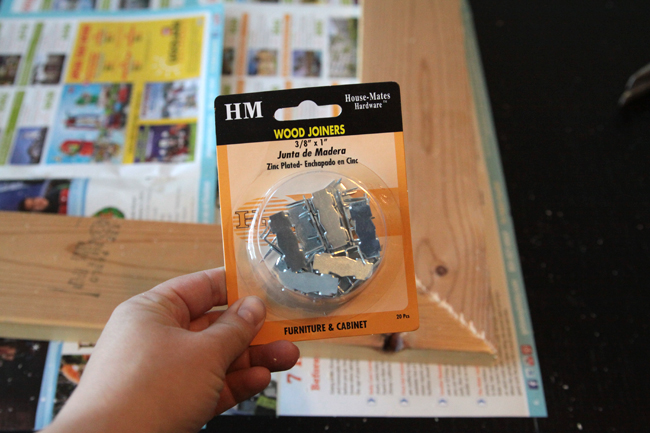
I used a lot of wood glue, pushed my pieces as close together as possible, and asked one of my boys to hammer in a couple of joiners across the seam.
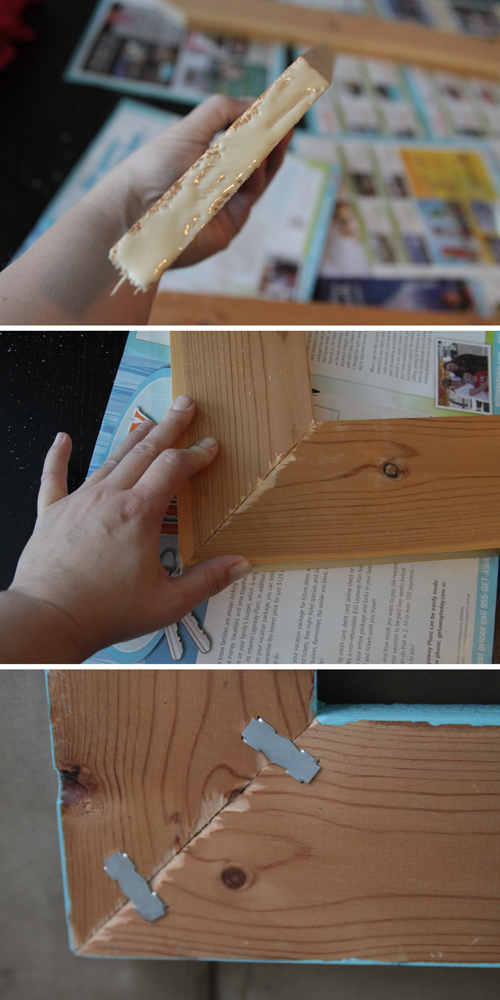
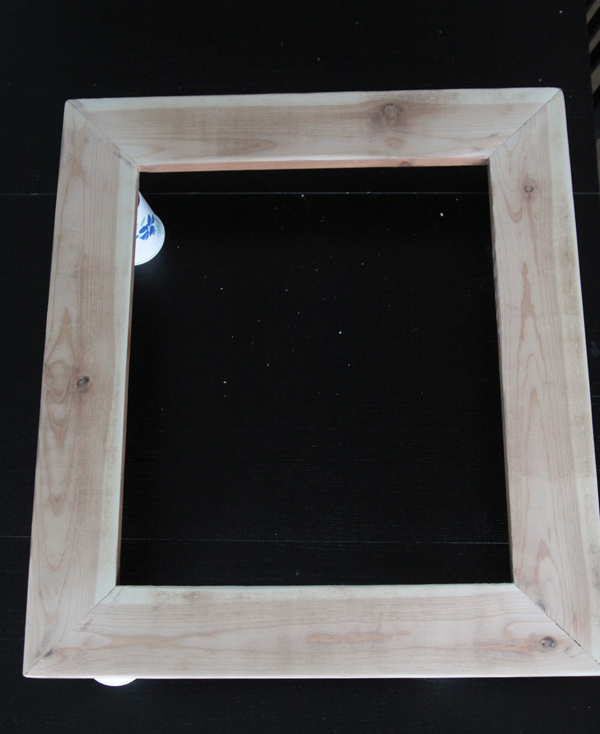
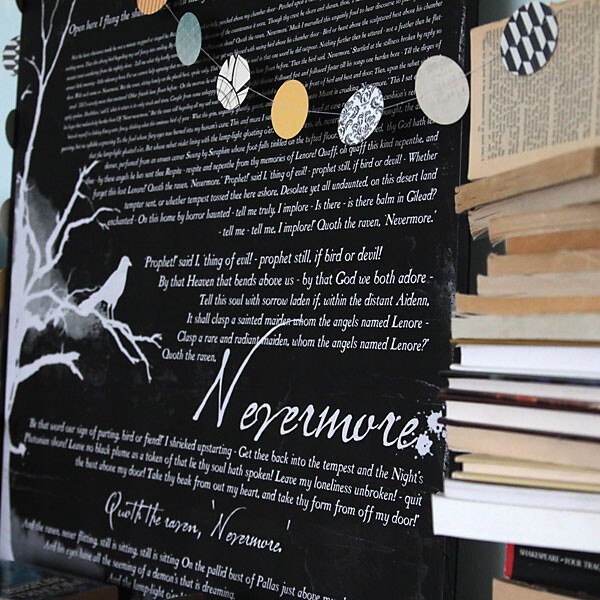
I put heavy books on it to make sure the corners all laid flat and left it to dry for a couple of hours. Here’s what it looked like finished:
I stained it, then hated how it looked, so I sanded most of the stain off and just painted it instead. I picked a robin’s egg blue because I knew that would like nice against a chalkboard printable. I used 50 cent acrylic craft paint from Walmart and mixed in a few drops of water to thin it out a bit so the wood grain would show through:
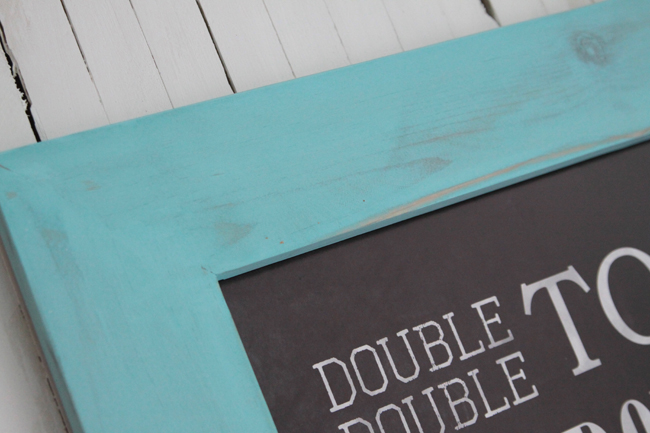
I also sanded it slightly to distress. I really want to make another one and pick a better stain, though, because I think that could be gorgeous.
I found that the easiest way to attach a print or photo was to tape it to a piece of stiff foam board (found at the dollar store) that I trimmed to slightly smaller than frame size:
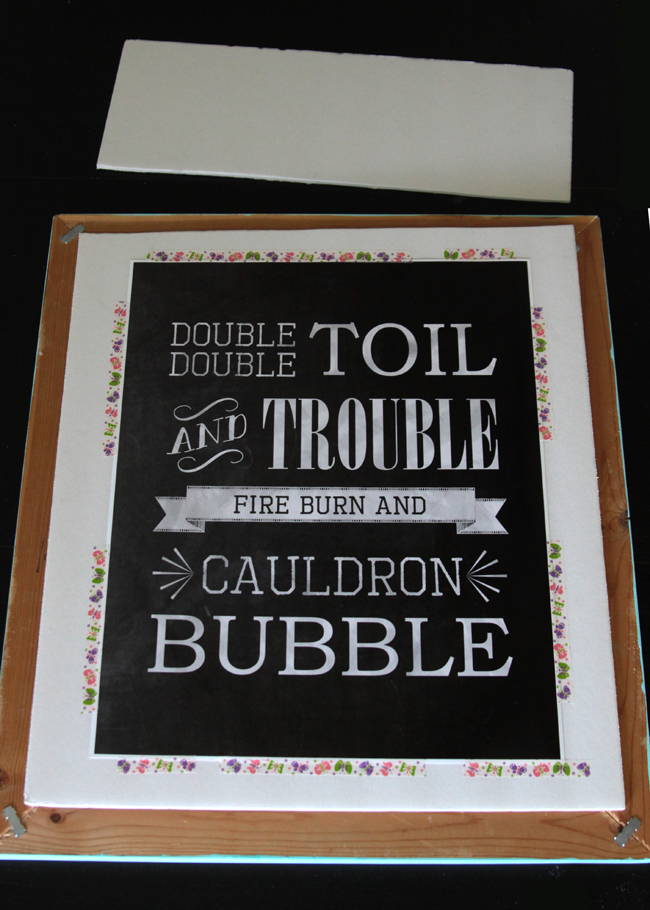
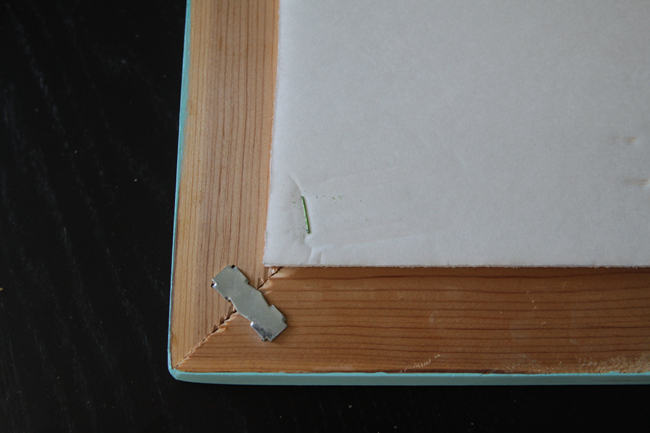
Then I just flipped the foam board over, center the print in the frame, and stapled the foam board right to the frame. When I want to change the print, it’s easy to pop the staple out, take the print off the foam board, and tape a new one in, with no damage to the print or frame. If you want to hang the frame, simply hammer in a sawtooth hanger (or two) along the top.
Want more building tutorials? Try these posts:
Shirley says
I love this! You made it look so easy. I hate looking for frames and yours is beautiful.
Mike says
These DIY wood frames are really awesome. The images helps to make our own wood frames for photos.
Thanks for sharing this!
Owen Rush says
I really like your cost minimizing DIY frame ideas. It would be great if give some more idea where we can use the bamboo.
Thanks
jonathan says
It also requires some tools, I have another way that is easy to do, that is by using cardboard, there are many video tutorials on youtube for this.
Shirley says
I love this! You made it look so easy. I hate looking for frames and yours is beautiful.
Misty @ Meet the Cottons says
This would be so much easier than trying to find a frame! Love that color! Any chance you’ll share the brand and color name?
Aliatra says
“I used 50 cent acrylic craft paint from Walmart and mixed in a few drops of water to thin it out a bit so the wood grain would show through”
Lacie says
Do you have the measurements to make an 11×14 frame? Without a miter saw? ?? Thanks so much!
vicky tomline says
You have fans in the UK here at ironmongeryOnline where we also blog about upcycling etc – these look great and would make a great gift too. Keep up the great posts
Brooke says
I’m totally in need of this tutorial. I’m constantly pinning or making printables, and I need ways to display them. Thanks so much for sharing! I love all the printables you’ve created!!! Have a great weekend.
Rachel says
Love this post, but a little confused how you got the measurements for the frame without mitered corners. Help please?
autumn says
For a 16×20 print, you want the inside opening of the frame to be 15×19. So the side frame pieces are easy: 19 inches long each. The top and bottom pieces need to be long enough to go across the width of both side pieces (3.5+3.5) and the 15 inch opening, so that’s 3.5 + 3.5 + 15 = 22. I hope that makes sense!
Jose says
I need help, do you know where I can find wood already ready to make frames. I need wood about 1/2 to maybe 1 inch wide with a back where the glass can be inserted so glass will not come out, I need to wood to cut in different sizes to make several frames. The reason I need this wood is to make glass boxes to put dolls, art figures inside.
Steven says
Hey Jose, we found ours from Amazon, Did a quick search for wooden ones on there and it brought up some nice designs with great reviews. Hope that helps!
Janice says
What wood you suggest to use for this?
Mary says
Instead of stapling the foam board to the back you could use Velcro dots for easy changing! I’ve been wanting to make some frames to use interchangeably with calendar prints I’ve saved. Your plan is perfect for my project!
Mat boards could also be velcroed in and out!
autumn says
Mary, you’re a genius!
electronic cigarette says
What makes electronic cigarette better than the traditional ones.
Use it will a nicotine patch to fight the addiction head on. They are
DSE-084, DSE-097, DSE-201, Janty Mini Fogger,
JOYE 306, KR-808, RN-4082, and also RN-4088.
Desmond says
This website was… how do you say it? Relevant!!
Finally I’ve found something that helped me.
Thanks a lot!
TOM says
great ideas
Doris Cooper says
IT ALL LOOKS SO FUN AND DO-ABLE! THANKS
SORRY, NO WEBSITE
Tina says
This is a great idea! I need frames for these gorgeous pictures I have for my bathroom and I don’t want to spend a crazy ton of money. Your idea will allow me to make unique, original frames and it’ll be extremely cost effective. Thank you for sharing!
autumn says
Yep, I love how cheap this ends up being, especially if you’re making multiple frames. Good luck – I hope they turn out great!
Lacie says
Would you happen to have the measurements for an 11×14? I don’t have a miter saw. THANKS IN ADVANCE ♥️
Christina says
That’s great. I usually picture frame decord in my home. I use miter saw that cut wood. I have problem with cutting board 90 degree. Do you have tip for me?
Leann says
I would like to know how you get “itsalwaysautumn.com” at the bottom of the frame. Is it painted on?
Lori says
Thanks for your sharing. I am going to buy miter saw cut metal and wood. I wonder two brand Hitachi with Dewalt from this site. You have many experience, give me your advice
Shannon A. Lujan says
Looks great. I like this wooden project very much. It is really great idea to make our home furnished with woods. I love furniture. I made some picture frames for my family and friends last year. But I didn’t use the miter saw, I often use the wood router for my DIY projects.
Richard Leverette says
I found this article to be very informative and helpful. Very well written and executed 🙂 Thank You!
Pepin says
Well written article. Thanks for sharing this good post with us. Keep it up.
Tonny says
Thans for sharing your tip Autumn, It looks simple and easy to do. I will try one for my parents.
simon mason says
could you give me a quote for 1 picture light wood(real wood)frame with glass/mount 3″, size 120cmx60cm and also price for 10 of the same, also include delivery if .
there is a charge.
thankyou
Simon Mason
Nancy Taylor says
These frames are so beautiful! I am redecorating my home right now and I want to try making these for the remodel! I love having family photos up around the house. Thanks for sharing!
Debbie hayes says
What shall we do tomorrow? My 10 year old’s reply – woodwork! I am doing a surprise photo booth. Result! We’ll have a go at both joints – thanks for the inspiration from a grateful mum x
James says
It looks great! I had a few more tools at my disposal, so I ended up shaping the sides with a router. The clips are a creative solution to hold it together though. I simply glued the miter joints together and held it with a cheap band clamp while it dried (http://did-it-myself.com/how-to-make-a-picture-frame/)
Micheal says
thanks for sharing the tutorials. I think it is simple yet practical that we can make it together with our kids in this weekend. 🙂
cadenaspe341 says
It’s good to see the woodprix has new instructions to save my money and energy to build it.
Sajid Bashir says
Most of the people like me love to use frames but we are unfortunately not able to make them for ourselves …
Apart from the fact that Autumn has explained it so well here.
But the best idea in this case would be to buy DIY ones from Amazon or EBAY…They are cheap and economical and you would love them
Mark B. Morse says
I really impressed with these wood photo frames. I have a lot of wool pallet but I always buy a frame from the shops.
Do I need to cut my wood sizes exactly in order to make a beautiful frame? I found it is not easy with the type of wood I have.
[email protected] says
Wow.Wow .. ^^. Great frame was created to save the photos associated with memories .. I like wooden frames rather than mechanics. it is very rustic and simple . vote 5* !
Sam Maxi says
I’m a huge fan of DIY working. I read out your article and got some good idea about building a DIY wood frame and it helps me to build a wood photo frame by DIY work.
Thanks for an amazing idea.
Noel says
I’m a big fan of getting back to real photos, especially black and white prints and with so many print shops around now these look great in a homemade frame like these. Good job!
Peter says
Wood frame are popular day by day and it looks really so nice. I make it through this blog and it awesome. Thanks for your nice post.
Miriam says
The frames look great and the guide is comprehensive and easy to follow. I am definitely making these! Thanks for your time and effort!
Jon Stephenson says
A helpful resource to choose the best wood frame for my work. As a wood worker, this explanation reduces my sorrow and ease my task. please share more in the future.
Jon Stephens says
Hello ,
Excellent guide and review of wood frame for photos.
I need to change my existing one. So, I was looking for an expert opinion. Thanks for sharing this helpful guide with us.
Liza says
Love this amazing wood design. This is really a very creative way to make photo frame. Thank you for sharing this unique idea.
ToolAim says
Great articles. But how does your canvas stay inside the frame and not fall through?
Rohit says
Thank you autumn, I finally made a photo frame by myself. And that because of you.
Mike Arthur says
Incredibly well explained and demonstrated, thank you.