
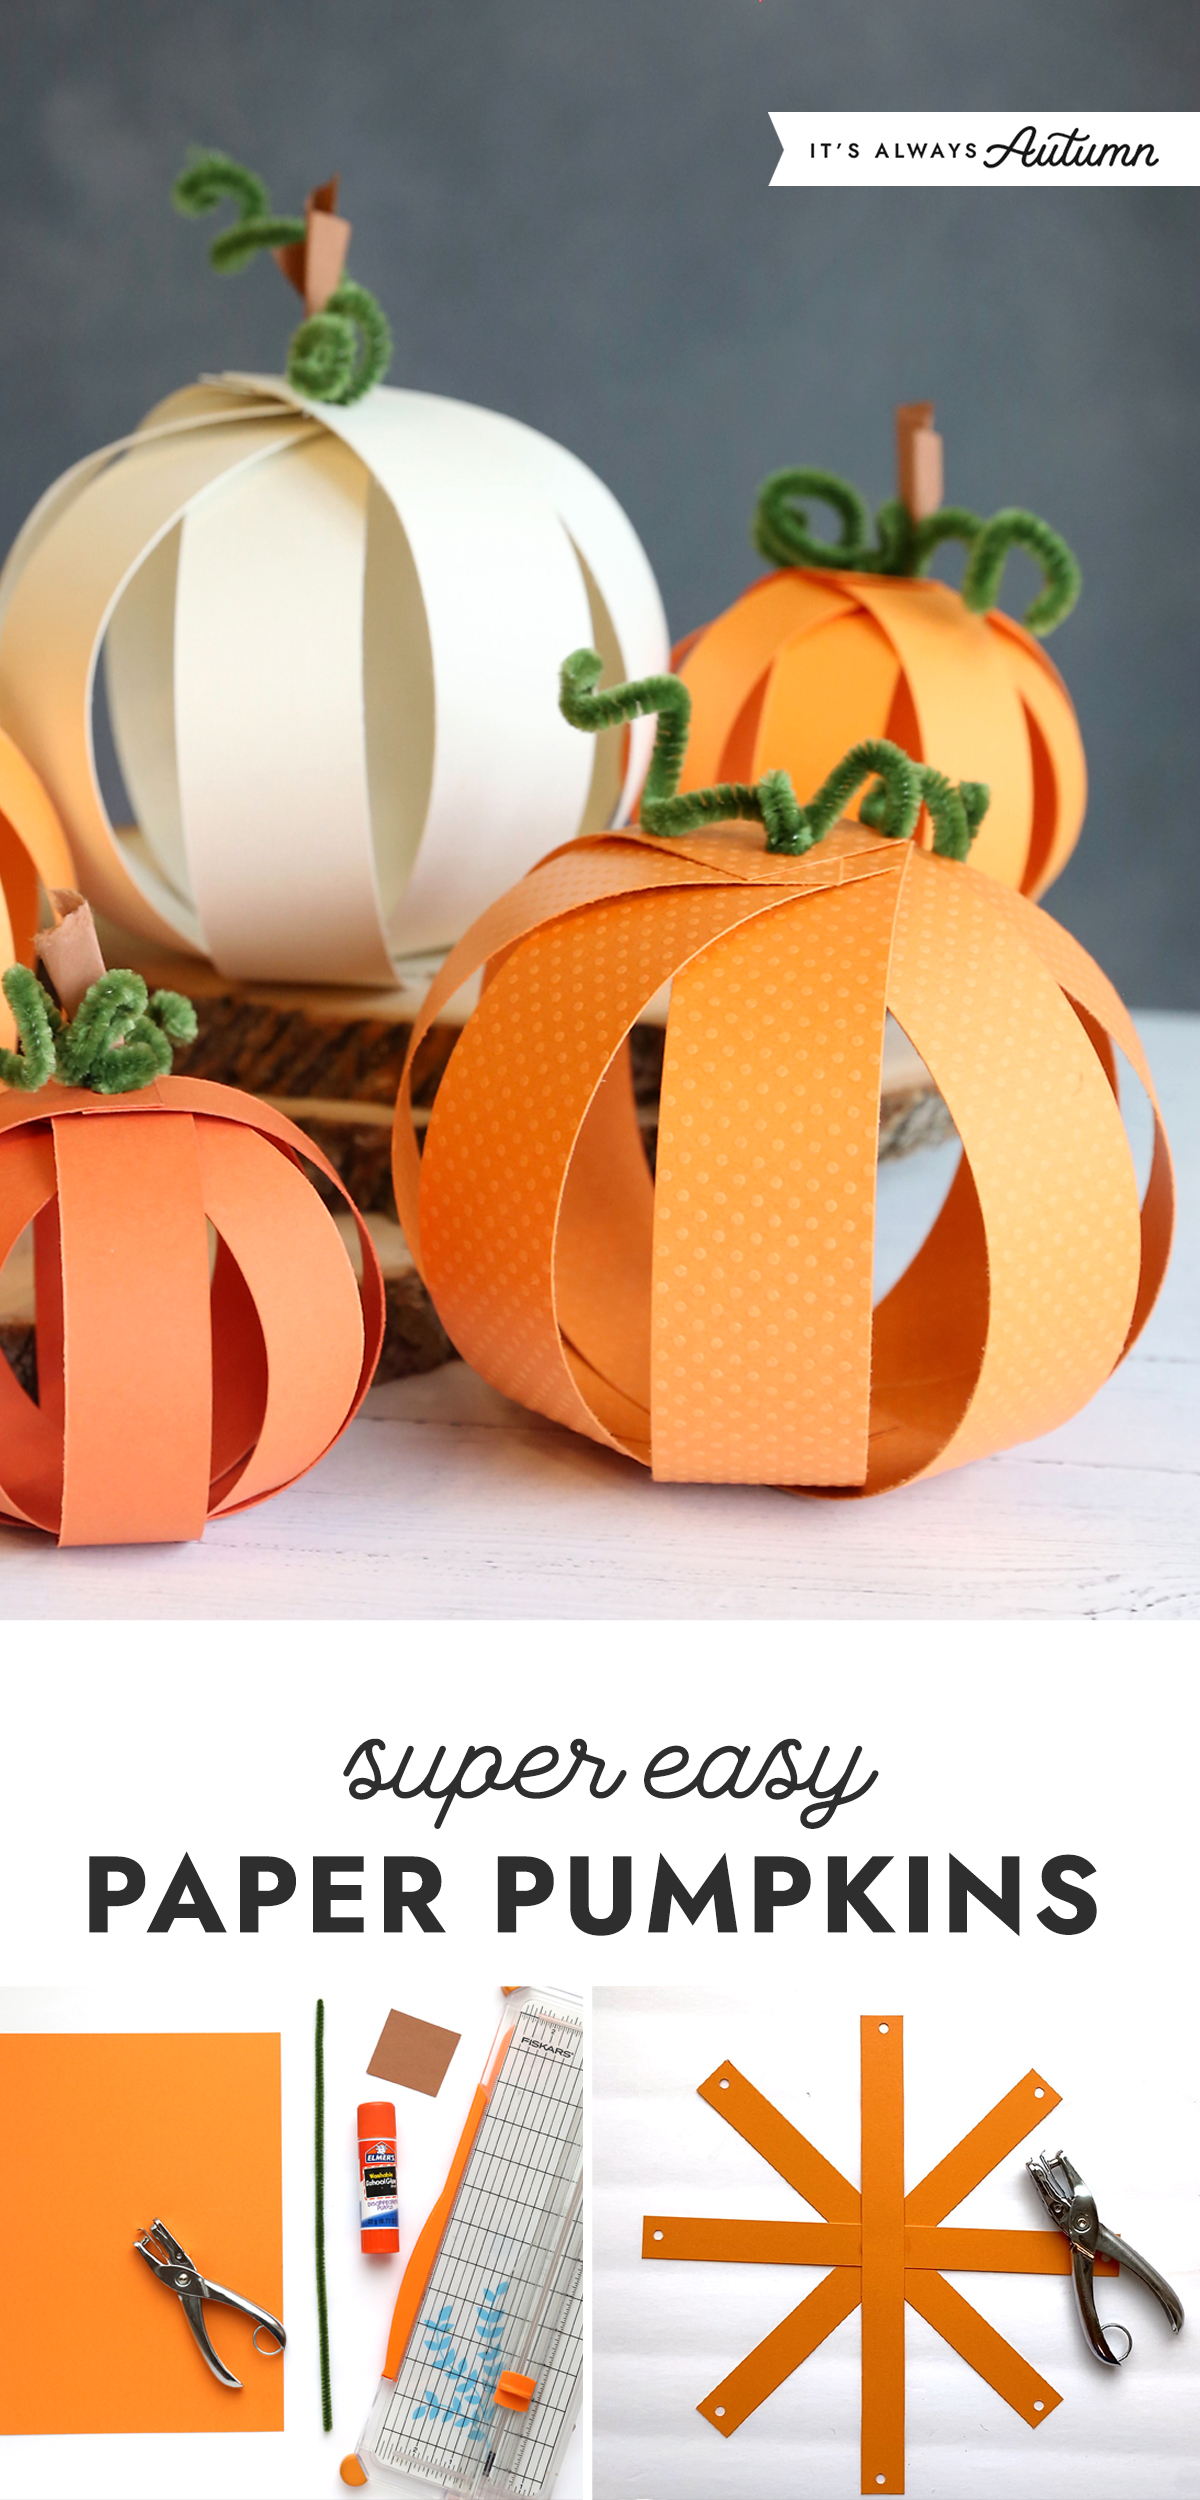
In today’s post: Find easy to follow instructions for making adorable paper pumpkins from strips of card stock or construction paper. This is a fun, quick Halloween craft for kids or adults that doubles as holiday decor.
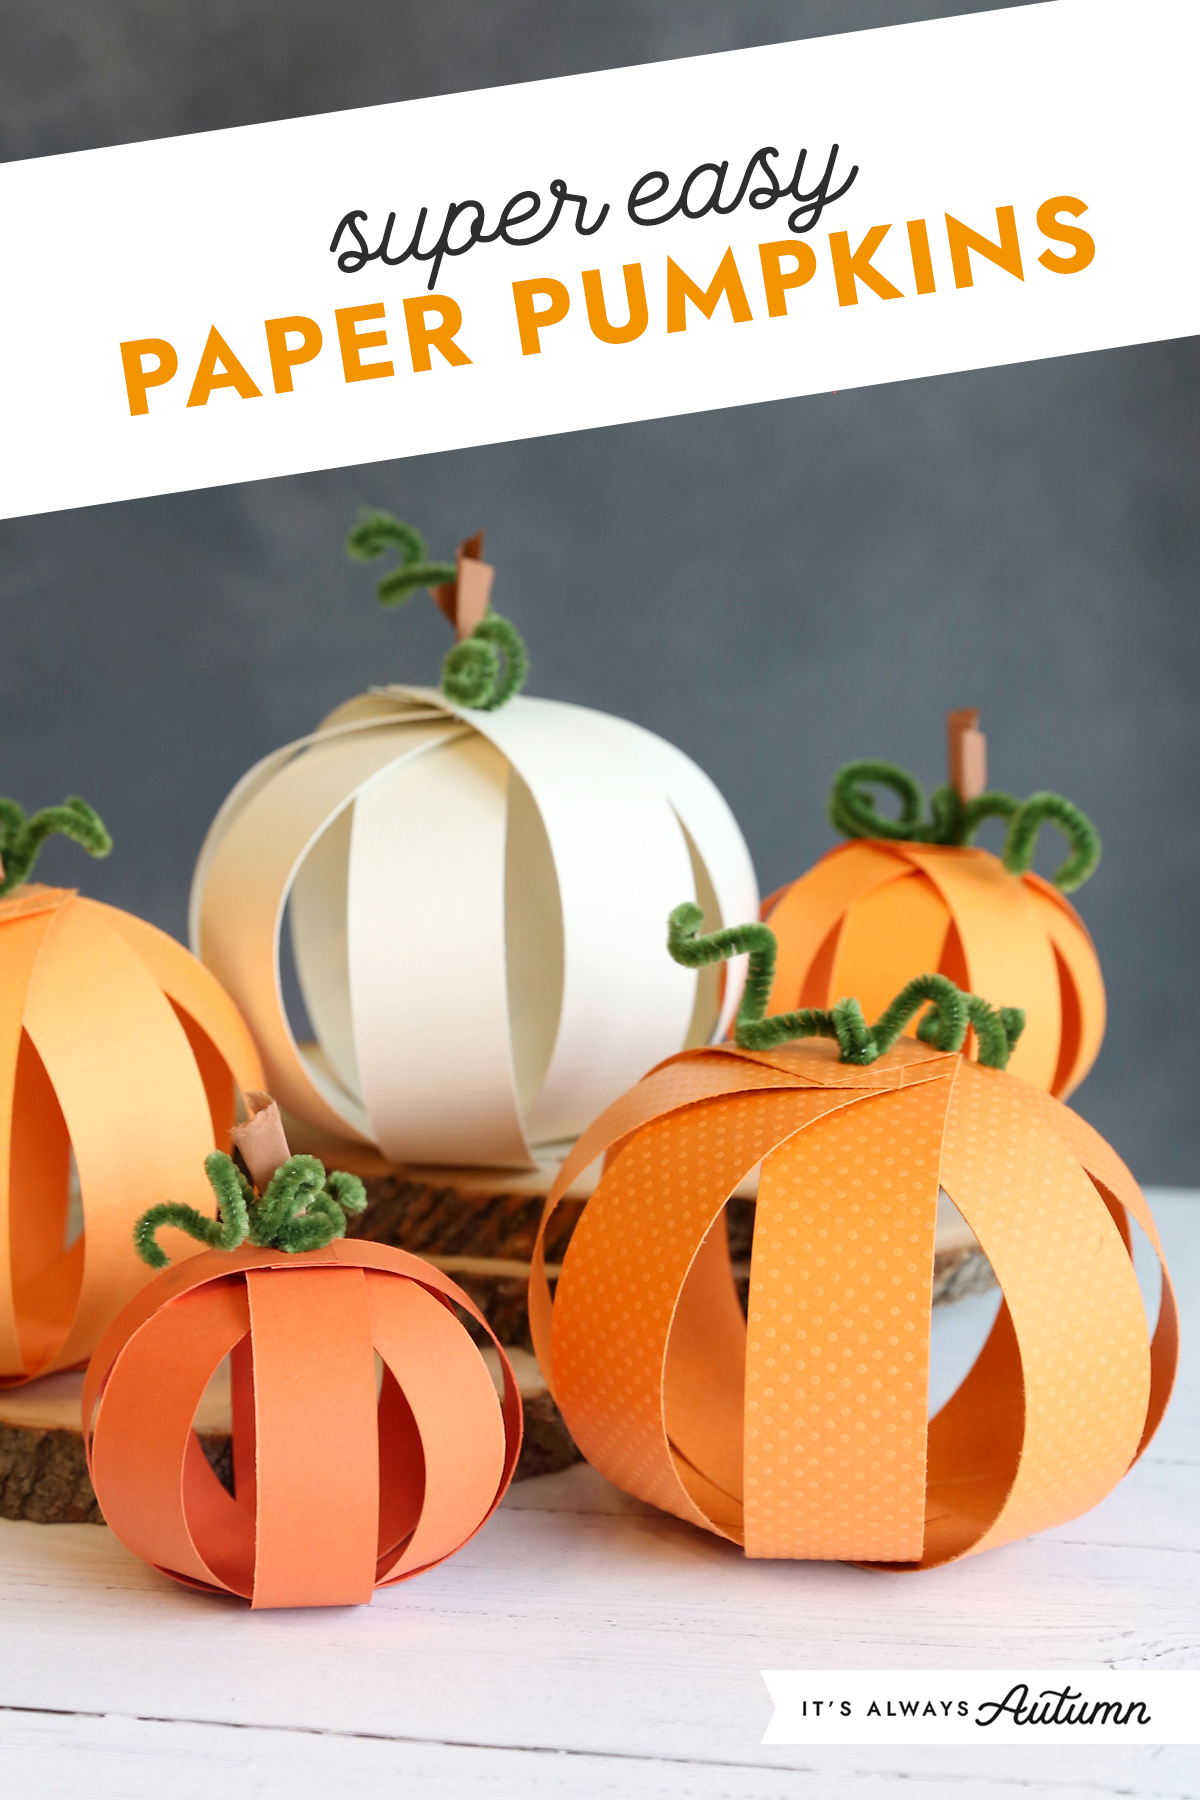
How to Make Paper Pumpkins
Paper pumpkins are easy enough for kids to make, but pretty enough to be a fun craft for adults. I made these pumpkins using varieties of orange and white card stock, and I love how they look displayed together in a group. If you’re making this as a craft with your kids, you can use construction paper instead. I’ll show you how to make them (each one takes just a few minutes!) and give cutting guidelines below.
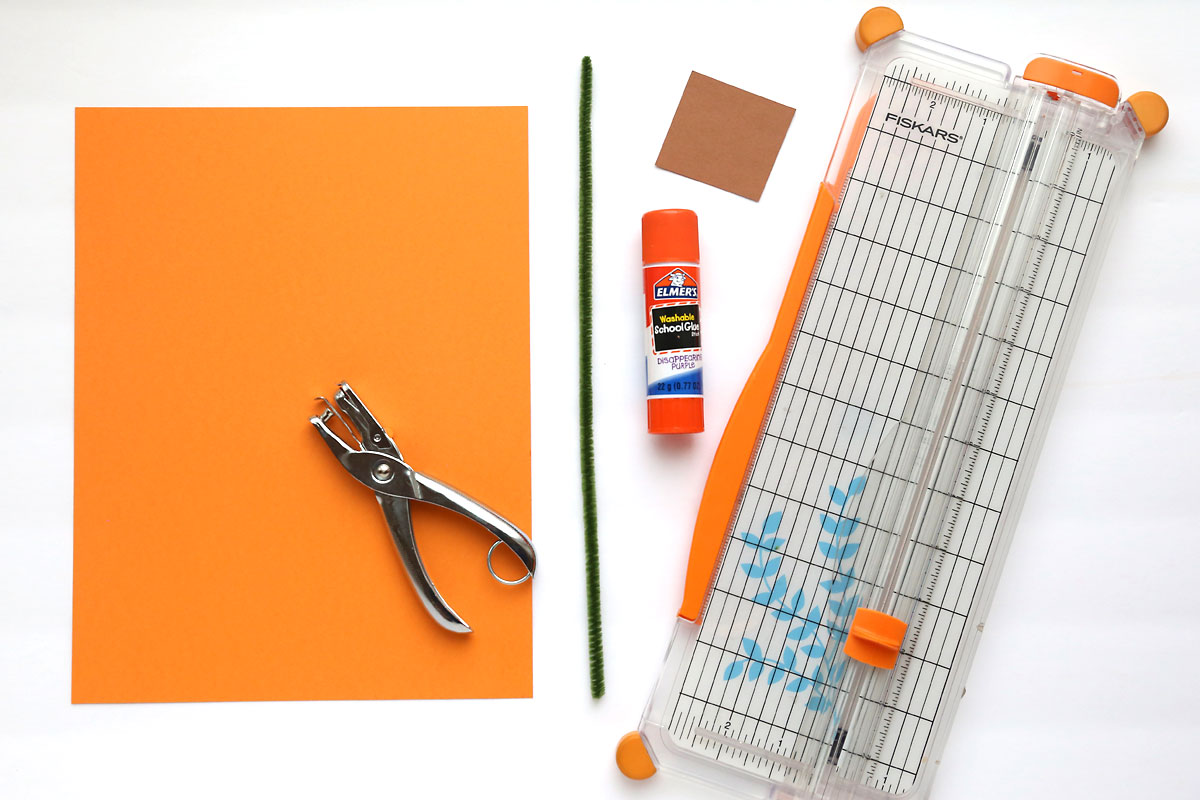
Supplies
All you’ll need to make these cute pumpkins from paper is listed here:
- Paper: one sheet of 8.5×11 card stock or 9×12 construction paper for the smaller pumpkin, one sheet of 12×12 card stock for the larger pumpkin (please note that construction paper does not work quite as well for the larger pumpkin)
- Paper Trimmer
- Glue Stick
- Green Pipe Cleaner
- Hole Punch
- Scrap of brown paper (optional, to make a stem)
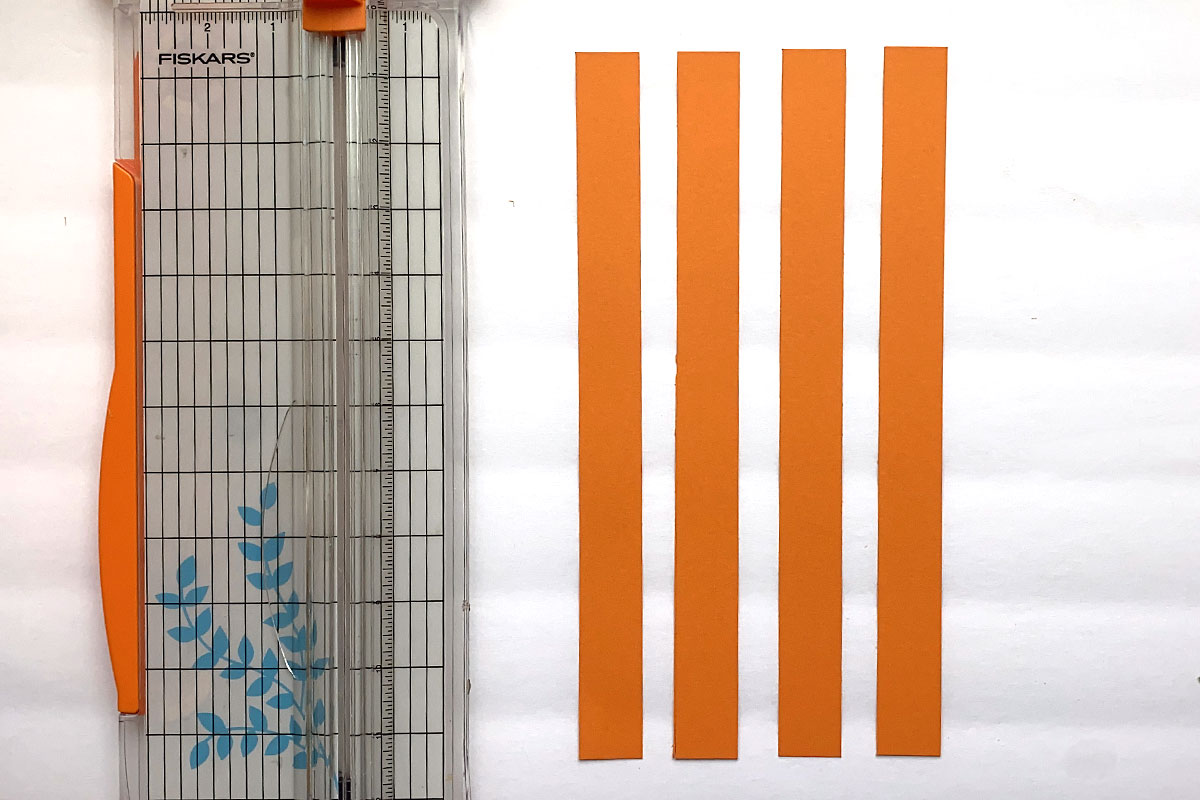
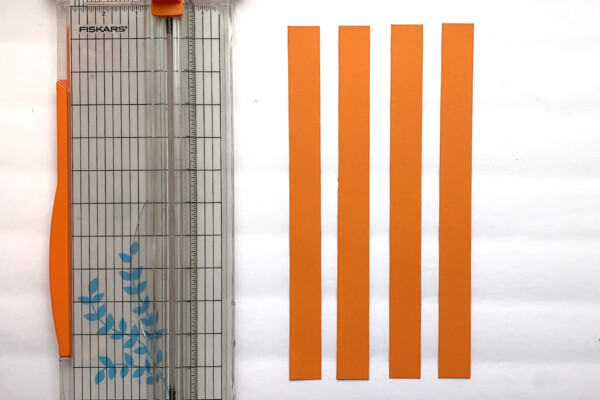
Cut Paper Strips
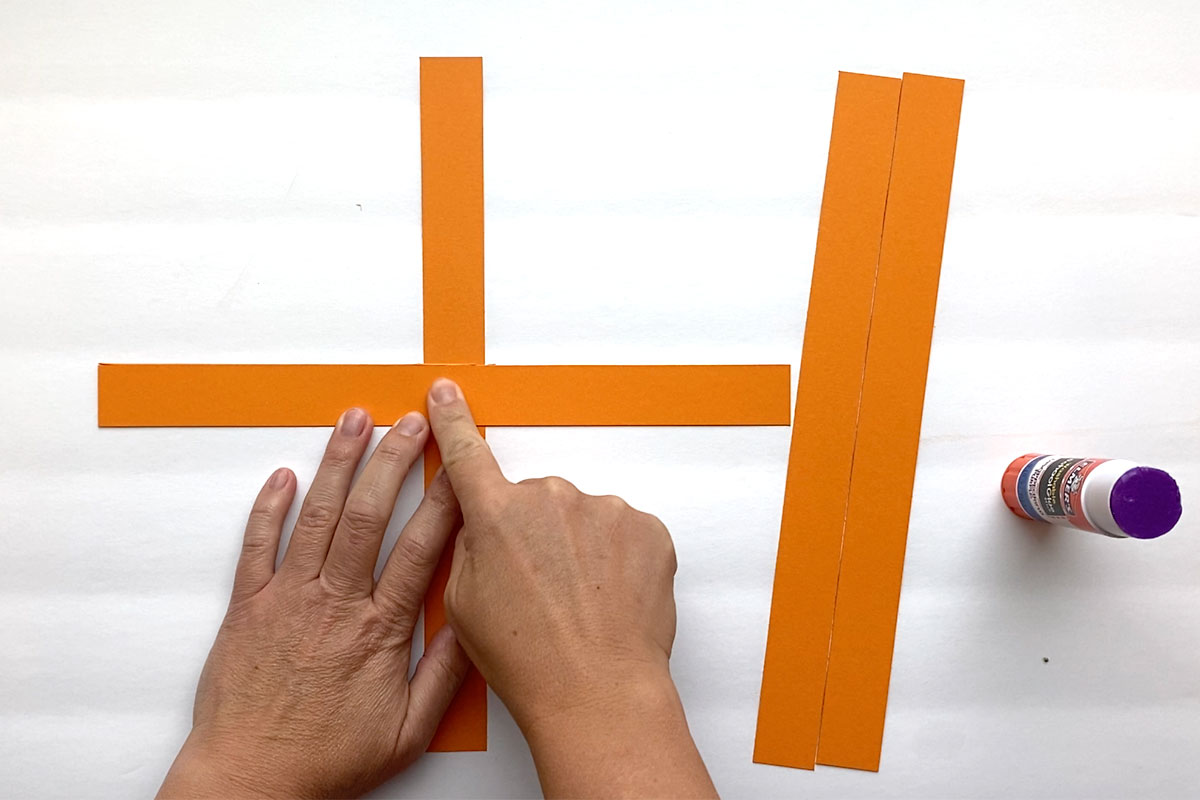
To begin, cut your paper strips. For a small pumpkin (about 4 inches in diameter) you will need 4 strips that are 1 inch wide by 11 or 12 inches long. To make a larger pumpkin (about 6 inches), you will need 8 strips that are 1.5 inches wide by 9 inches long.
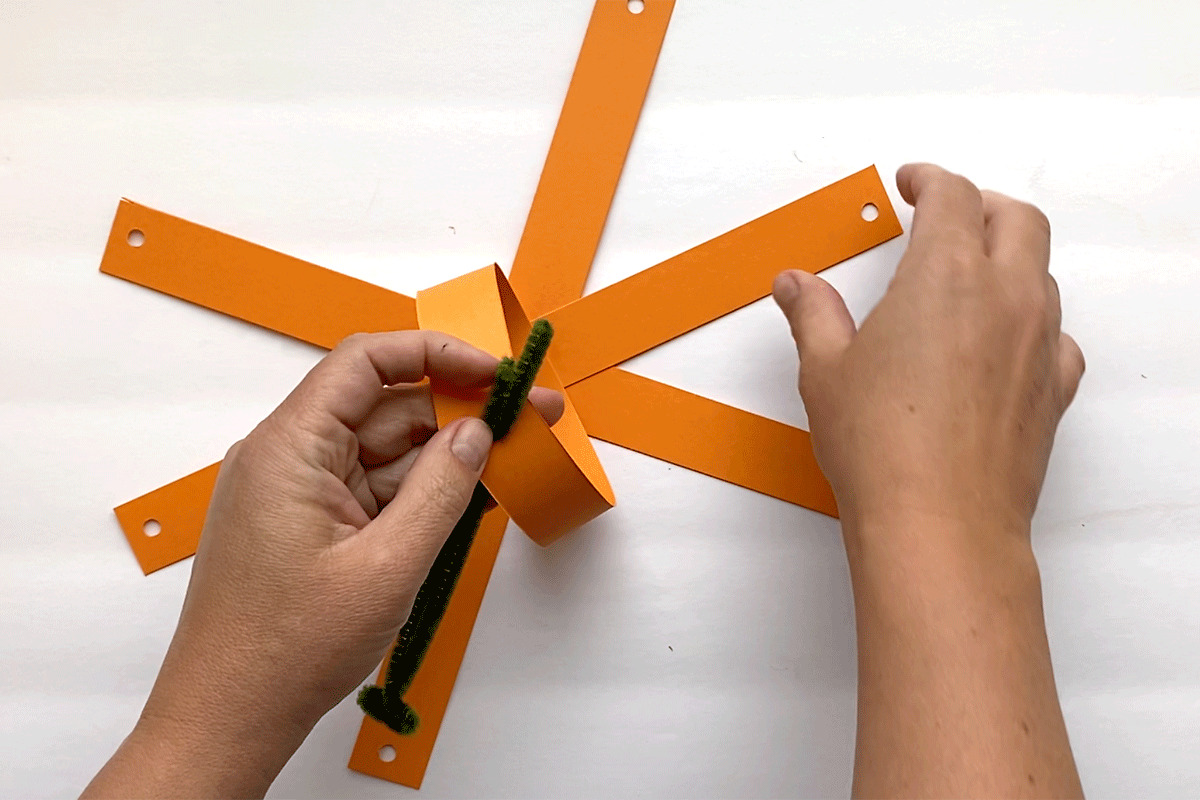
Glue Strips Together
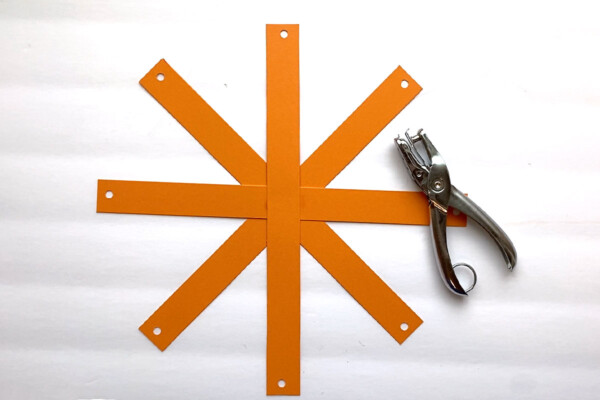
For the smaller pumpkin, glue two strips together in the middle, creating a plus shape as seen below.
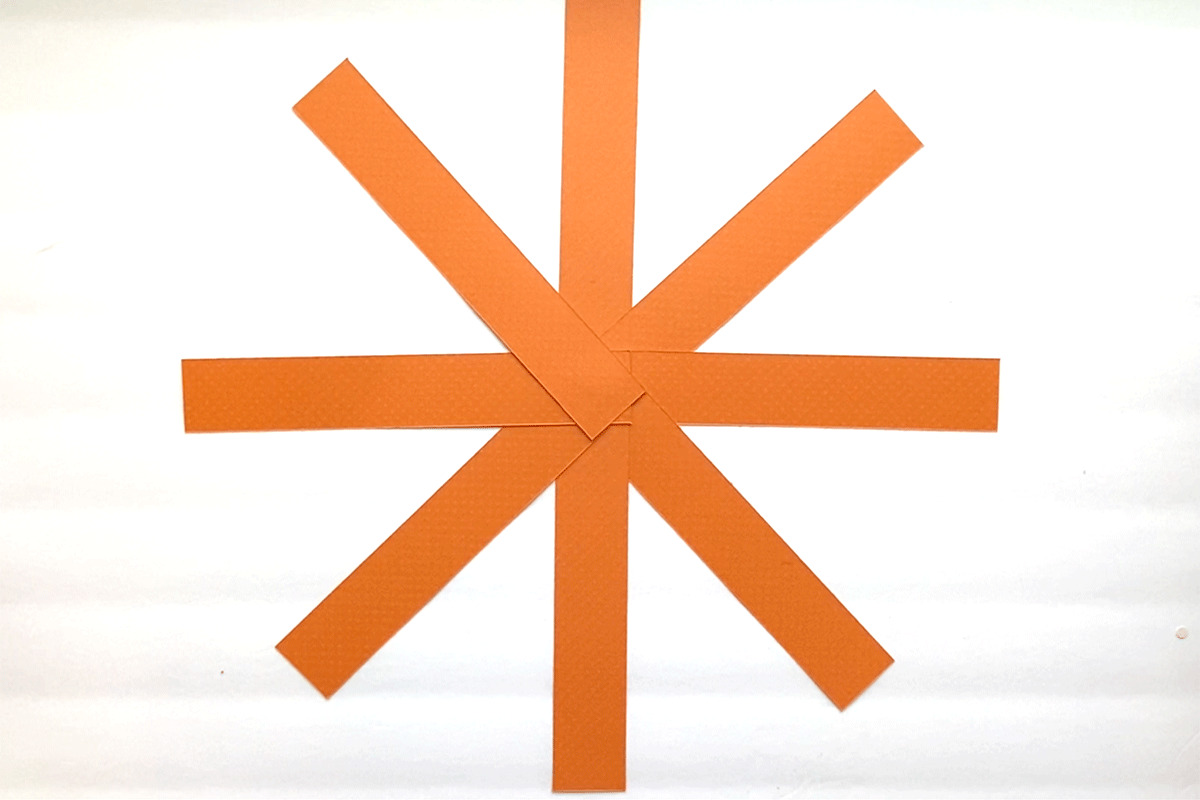
Then glue on each of the two other strips at a diagonal. The paper strips should be evenly spaced like spokes on a wheel:
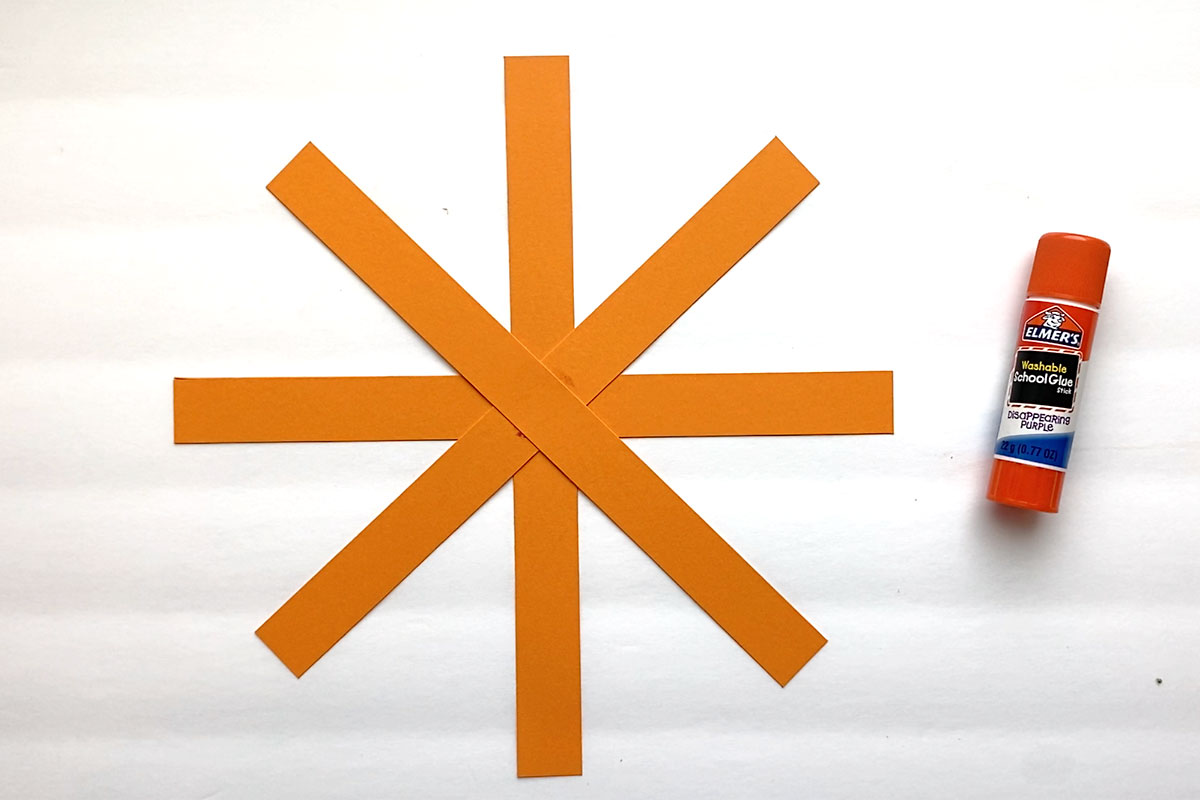
For a larger pumpkin, you will glue each of the eight strips together at one end, spiraling them out to create the same shape you see above:
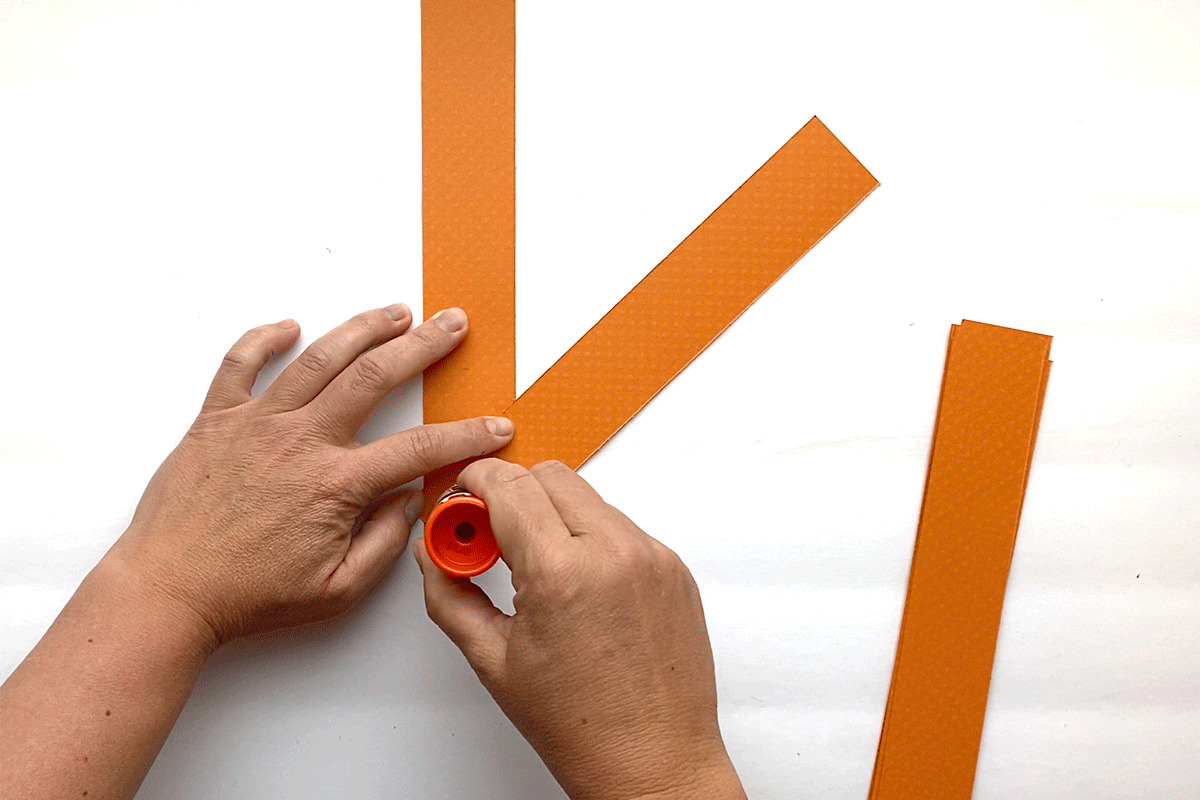
Punch Holes
Use a hole punch to punch a hole at the end of each paper strip. Leave about a quarter of an inch between the end of the strip and the hole.

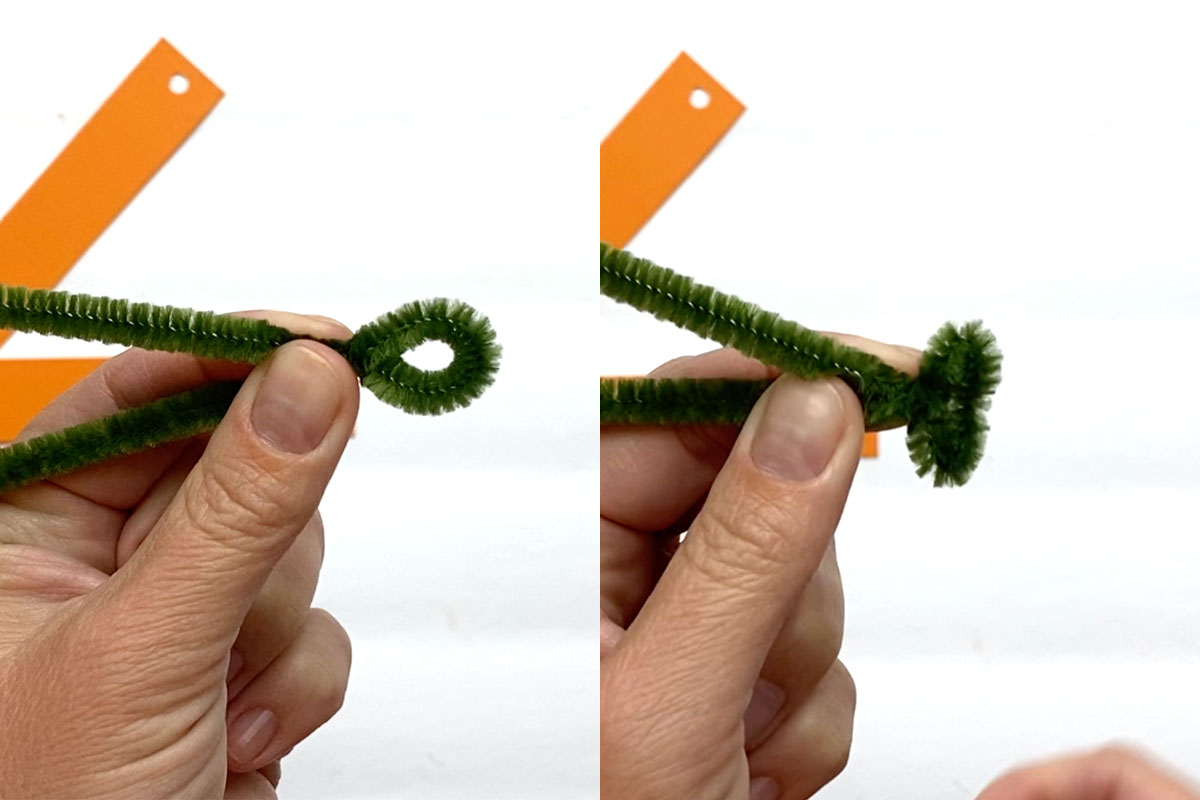
Prep the Pipe Cleaner
Fold a green pipe cleaner in half and twist it about half an inch from the fold to make a loop. Then flatten out the loop.
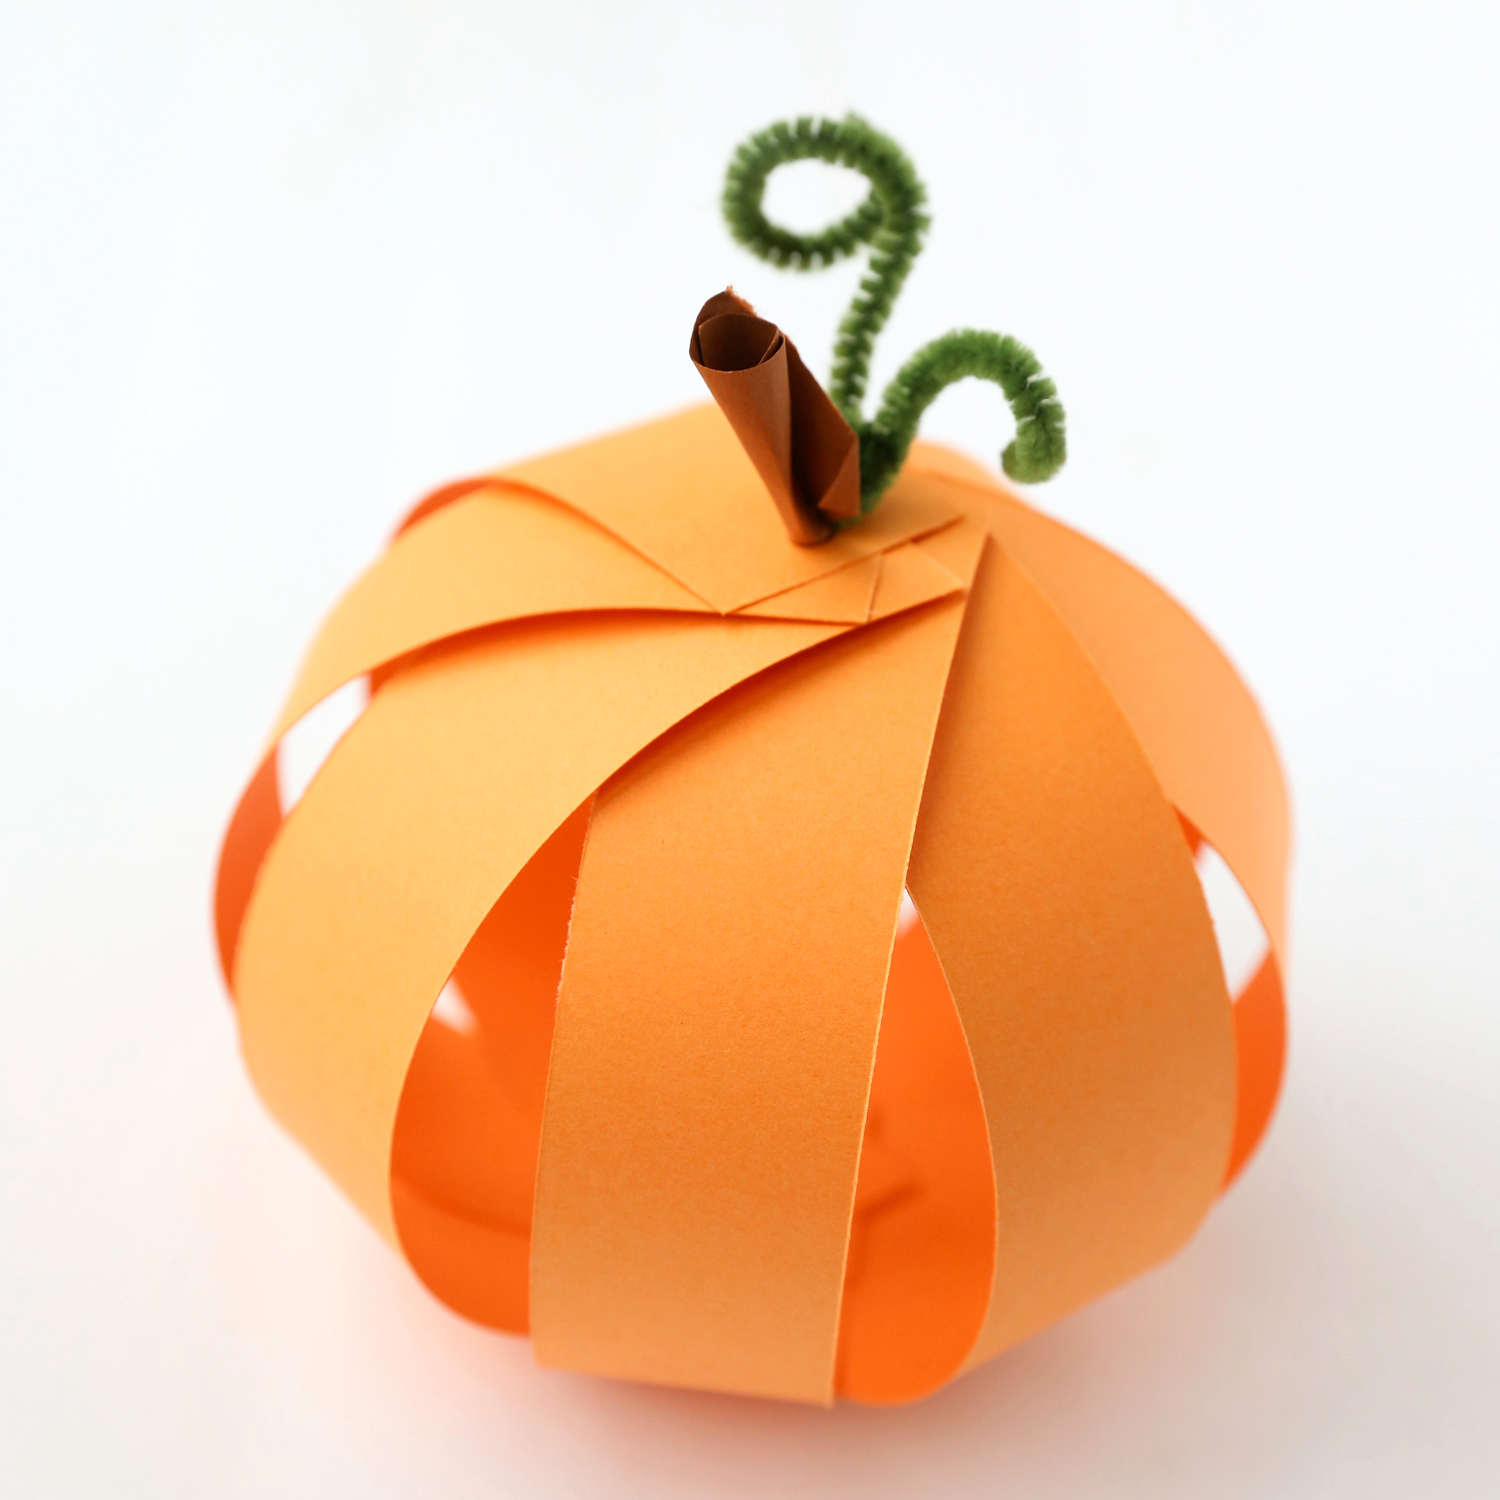
Assemble the Pumpkin
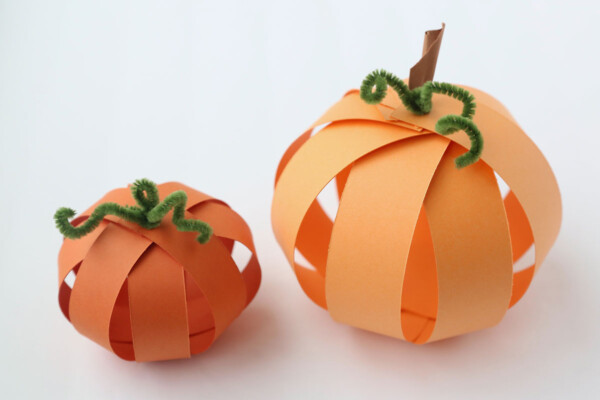
It’s time to turn the paper strips into a pumpkin! Beginning with the top strip, thread the pipe cleaner through the holes on each end of the strip. The turns the strip into a loop.
Next, you’ll continue by bringing up the ends of the next strip and threading them onto the pipe cleaner as well. Repeat with the last two strips to make a pumpkin shape. Twist the pipe cleaner and create another small loop to secure the strips. Curl the rest of the pipe cleaner around a pencil or your finger.
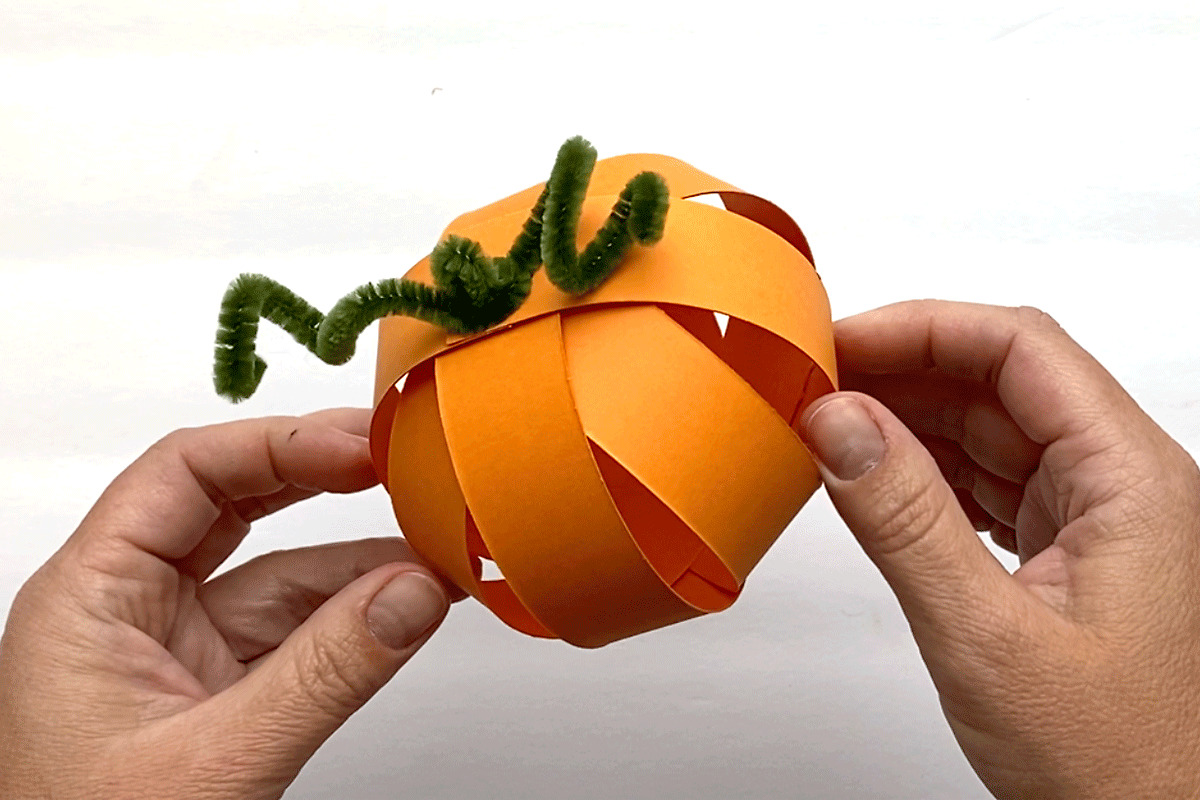
For the larger pumpkin, use the same process, but start with the strip that’s on the bottom and work your way around the “wheel” adding each strip in turn.
If you’d like, you can twist a scrap of brown paper to create a stem. Glue it to the pipe cleaner or to the pumpkin itself.

S

Paper Pumpkins
Supplies
- 1 piece Card Stock or Construction Paper 8.5×11 or 9×12 paper for smaller pumpkin, 12×12 paper for larger pumpkin
- 1 Green Pipe Cleaner
- Glue Stick
- Paper Trimmer or Scissors
- Hole Punch
- Scrap of brown paper optional
Want more project ideas? Sign up to get my favorite easy crafts and recipes straight to your inbox!
Instructions
- For a small pumpkin, cut 4 paper strips that are 1 inch wide by 11 or 12 inches tall. For a larger pumpkin, cut 8 paper strips that are 1.5 inches wide by 9 inches tall.

- Forr a small pumpkin, glue two paper strips together in the middle to create a plus shape. Glue two more paper strips on diagonally so it looks like the picture. For the larger pumpkin, glue the eight paper strips together, fanned out in a circle to look like the picture. Punch a hole in the end of each strip.
- Fold a pipe cleaner in half and twist a small loop in the end. Flatten the loop.
- Beginning with the top strip, thread the pipe cleaner through the loops on the end of the strip. Repeat with remaining strips. (For the larger pumpkin, start with the bottom strip and move up.)
- Continue threading the pipe cleaner through all the strips to create a pumpkin shape. Twist the pipe cleaner on top of the pumpkin and create another loop to secure the paper strips. Curl the pipe cleaner around a pencil.
- Roll up a small scrap of brown paper and glue to the pipe cleaners to create a stem if desired.


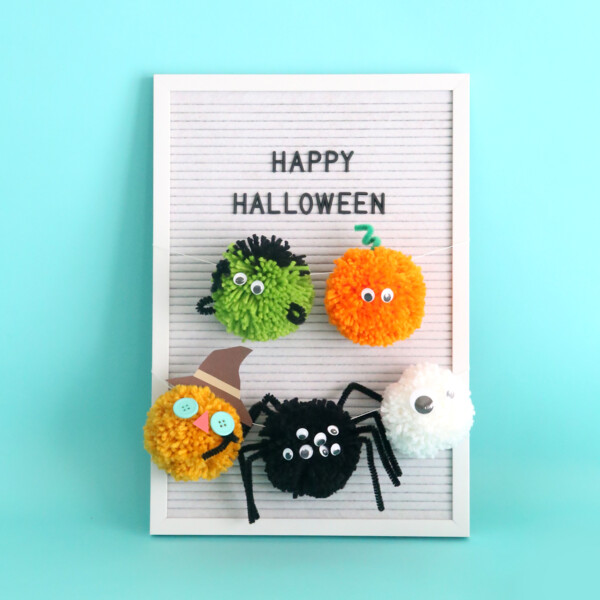
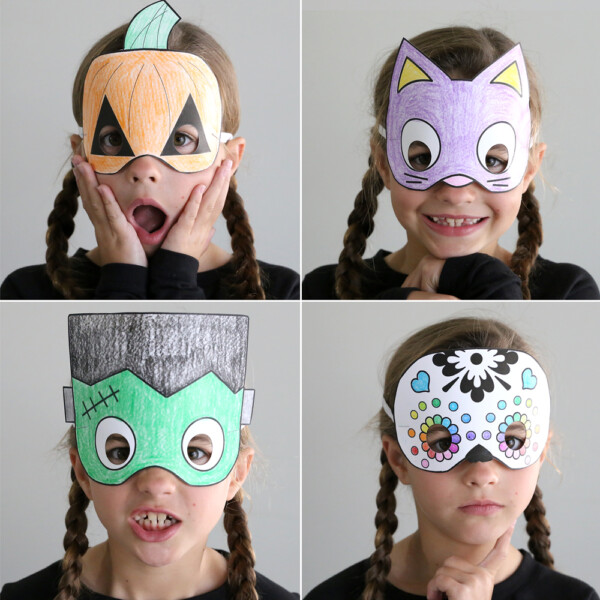
Want more fun Halloween projects for kids? Visit these posts:
Easy Halloween cookies you can make with your kids

ava james says
great work and thanks for sharing this.
https://getmyoffer.cc/getmyoffer-capitalone/
stunder112 says
Exactly what I needed! You just saved me several hours. Thanks!
https://mycardstatement.buzz/