
In today’s post: Learn how to turn a cookie cooling rack into a cute American flag using fabric strips. This is an easy Fourth of July craft for adults you can complete in under an hour.
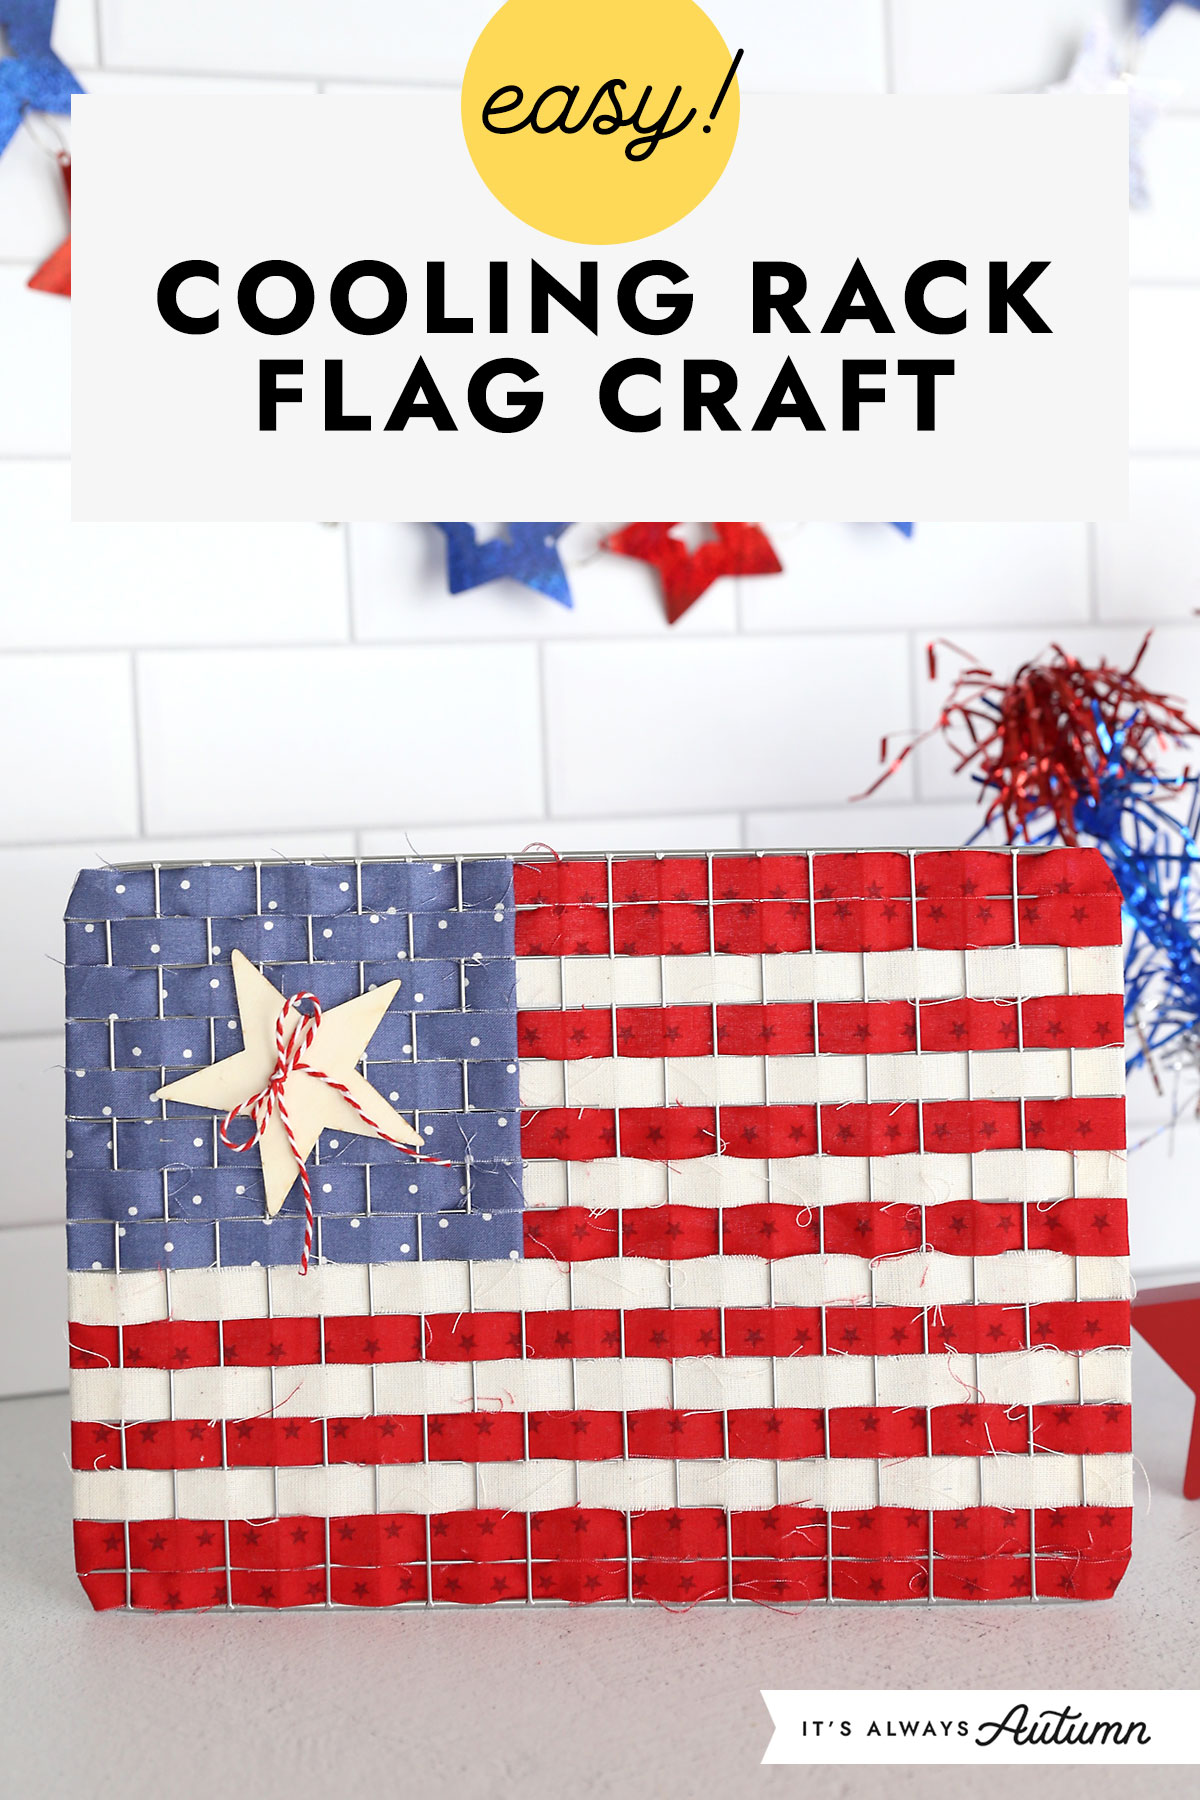
Easy Fourth of July Craft Idea
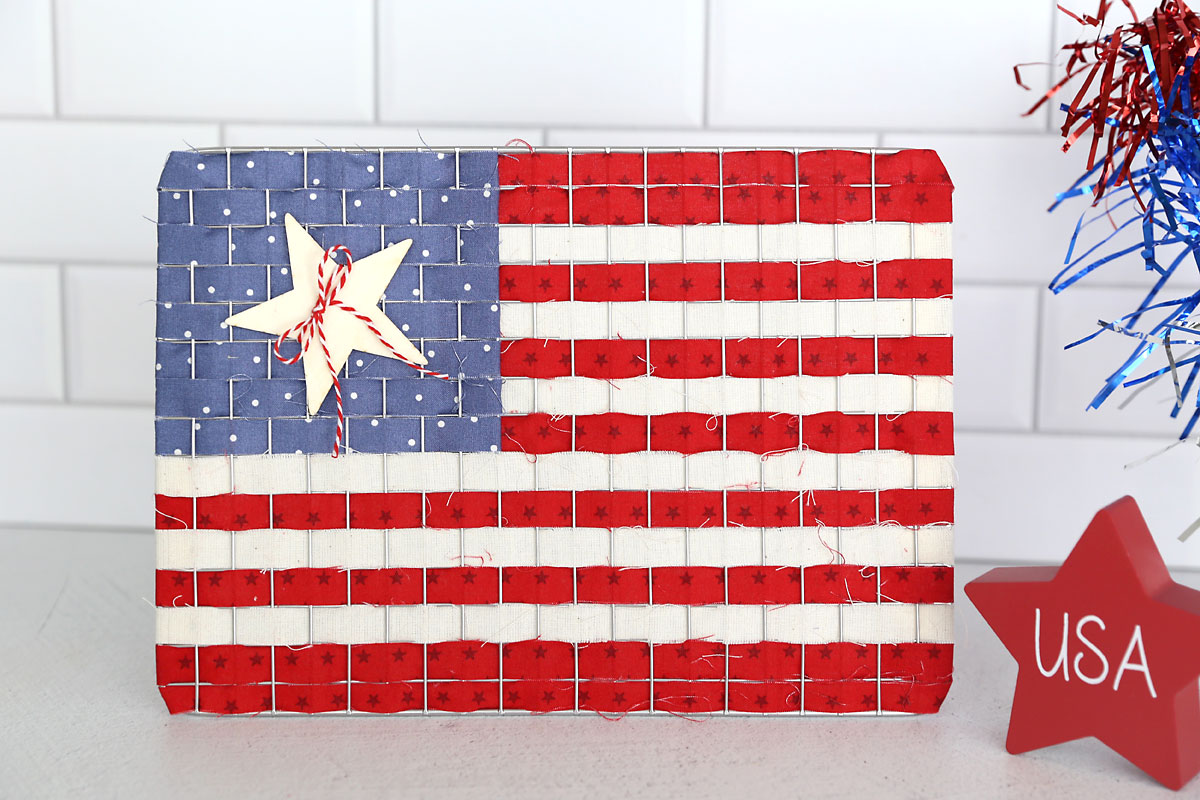
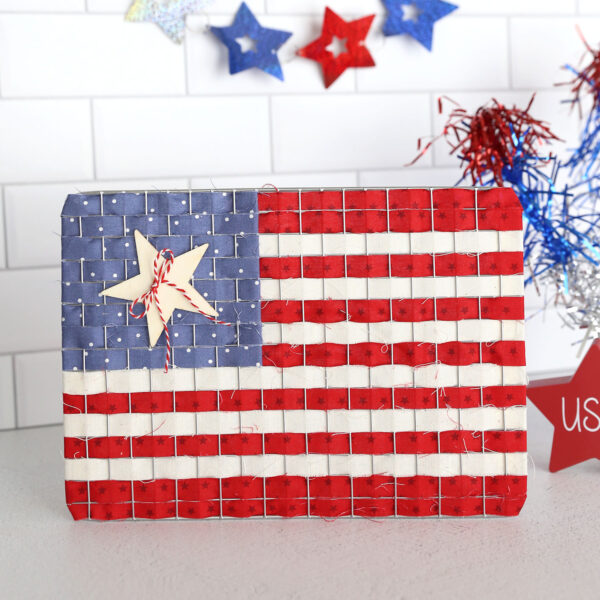
Today’s project is an easy patriotic craft you can make to display for Independence Day! I got this idea from a photo Owl B Crafty shared on Facebook of a flag she’d made from a cooling rack. I thought it was so clever I decided to make my own version. After searching high and low for a cooling rack that would work well (I’ve linked it in the supply list below) I completed my version:
Supplies
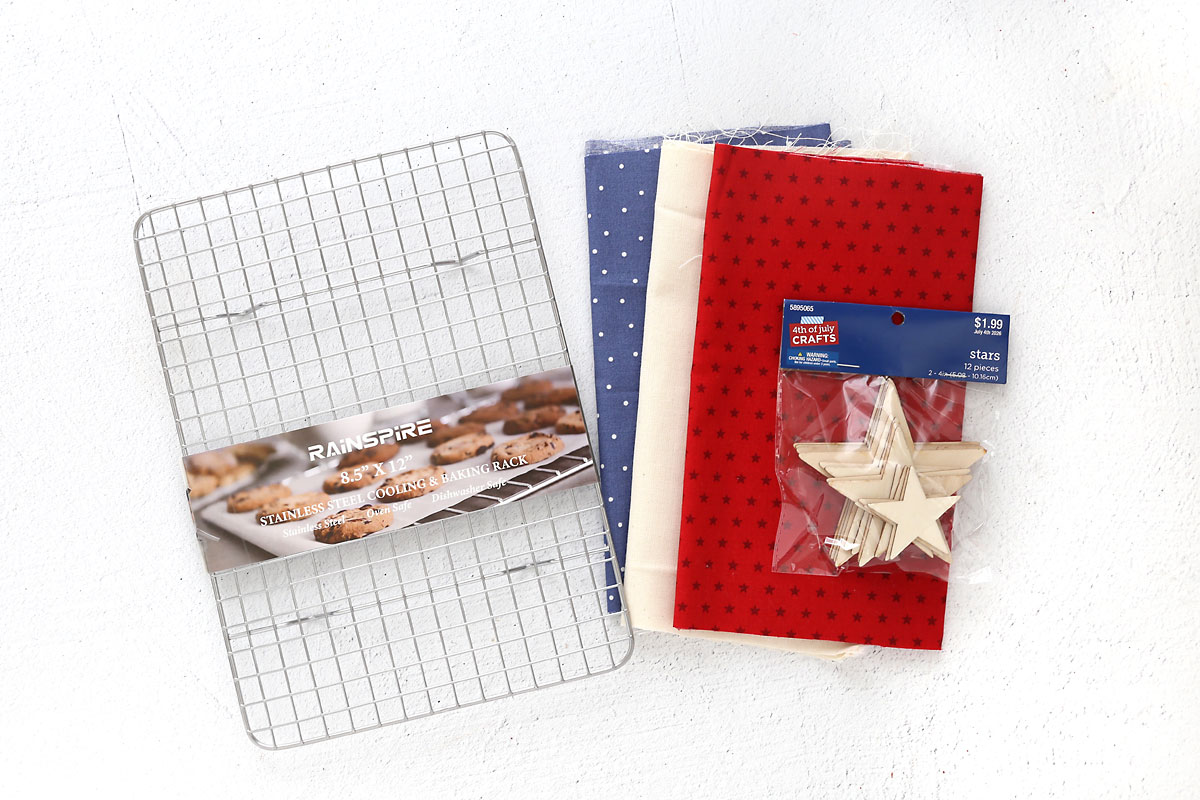
You only need a few things to make your own cooling rack flag craft:
- A metal cooling rack: Ideally the rack would have 13 rows, since there are 13 stripes on our flag, but I was unable to find any cooling racks with 13 rows. But I DID find a rack with 15 rows, so I just doubled up the top and bottom stripe and it worked perfectly. This is the cooling rack I used from Amazon. It is 8.5×12 inches, making it a nice size to sit on a shelf or mantel.
- Red, white, and blue fabric. I purchased cotton fabric from Hobby Lobby, 1/4 yard of each color, and I have plenty left over for other projects.
- Wood Star: I got a package of wood stars from Hobby Lobby as well, and only used on on this flag.
- Red and White Twine: I tied some twine around the star; you could add other embellishments if desired.
You’ll also need a hot glue gun.
How to Make a Cooling Rack Flag
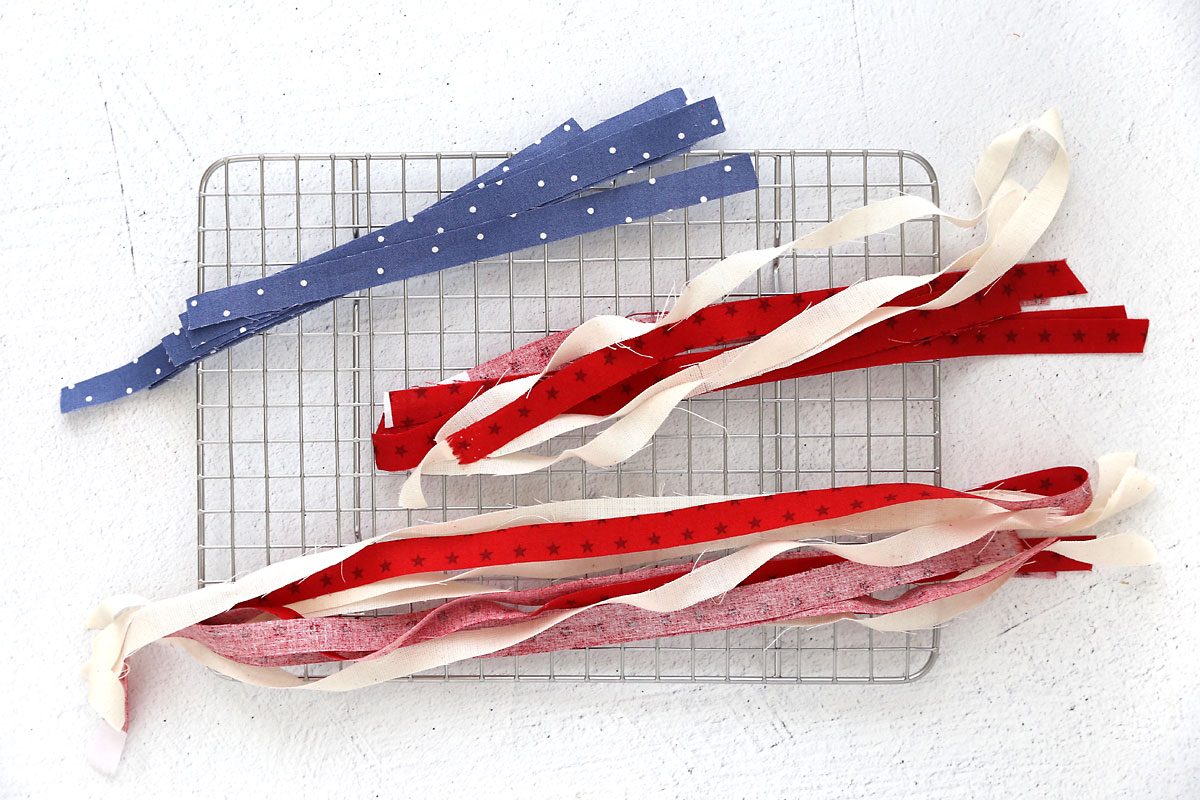
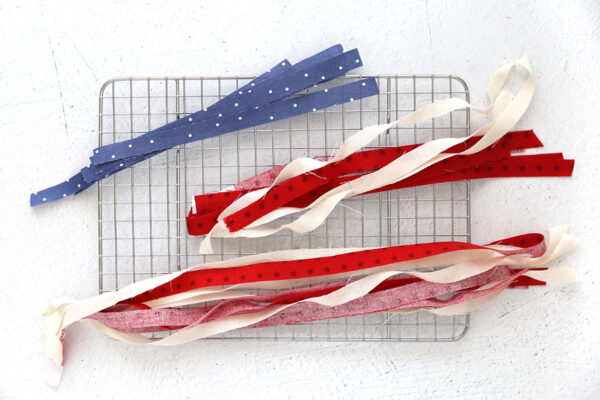
Cut strips
First you’ll need to cut strips from your fabric. If you use the same cooling rack I did, your strips should be just a smidge wider than half an inch. It’s easiest to cut strips using a rotary cutter and a cutting board, but you can cut them by hand if you needed. Just cut on the generous side of half an inch (between half an inch and 5/8 of an inch).
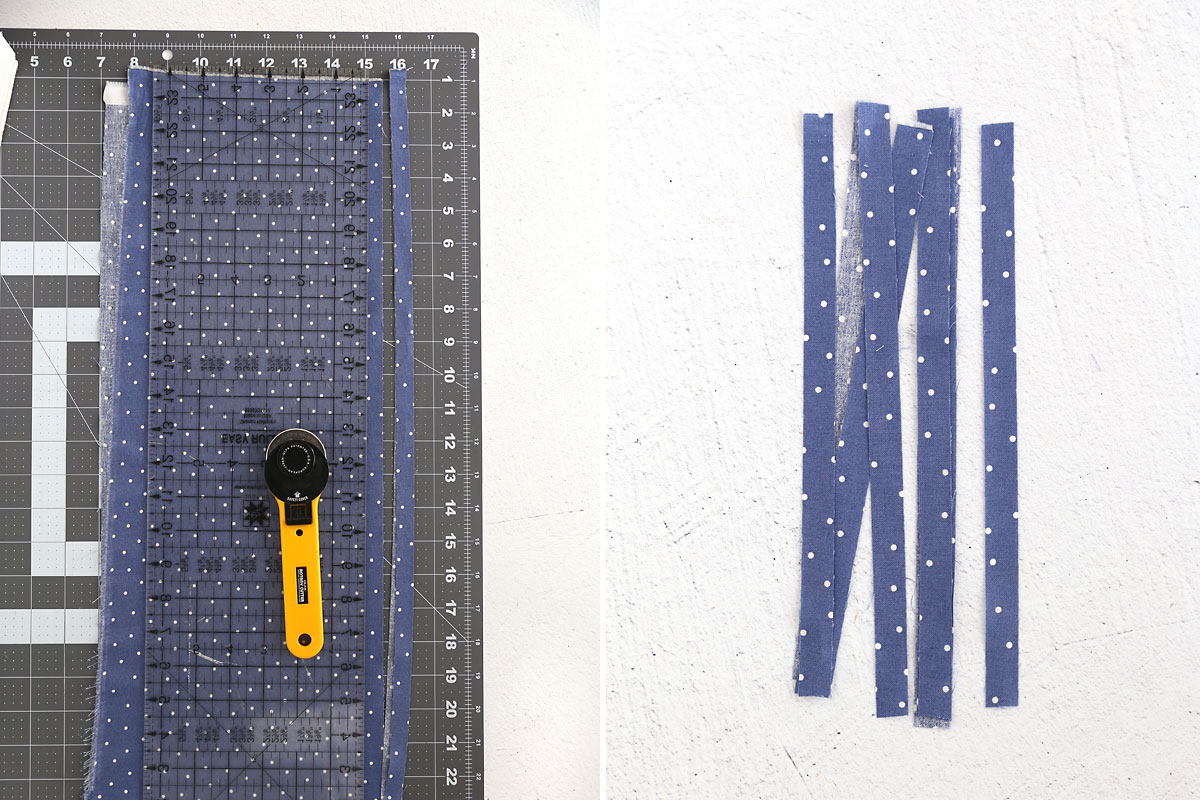
This is how many strips you’ll need of each color and the lengths:
- Blue: eight (9 inch) strips
- White: three (9 inch) strips and three (15 inch) strips
- Red: five (9 inch) strips and four (15 inch) strips
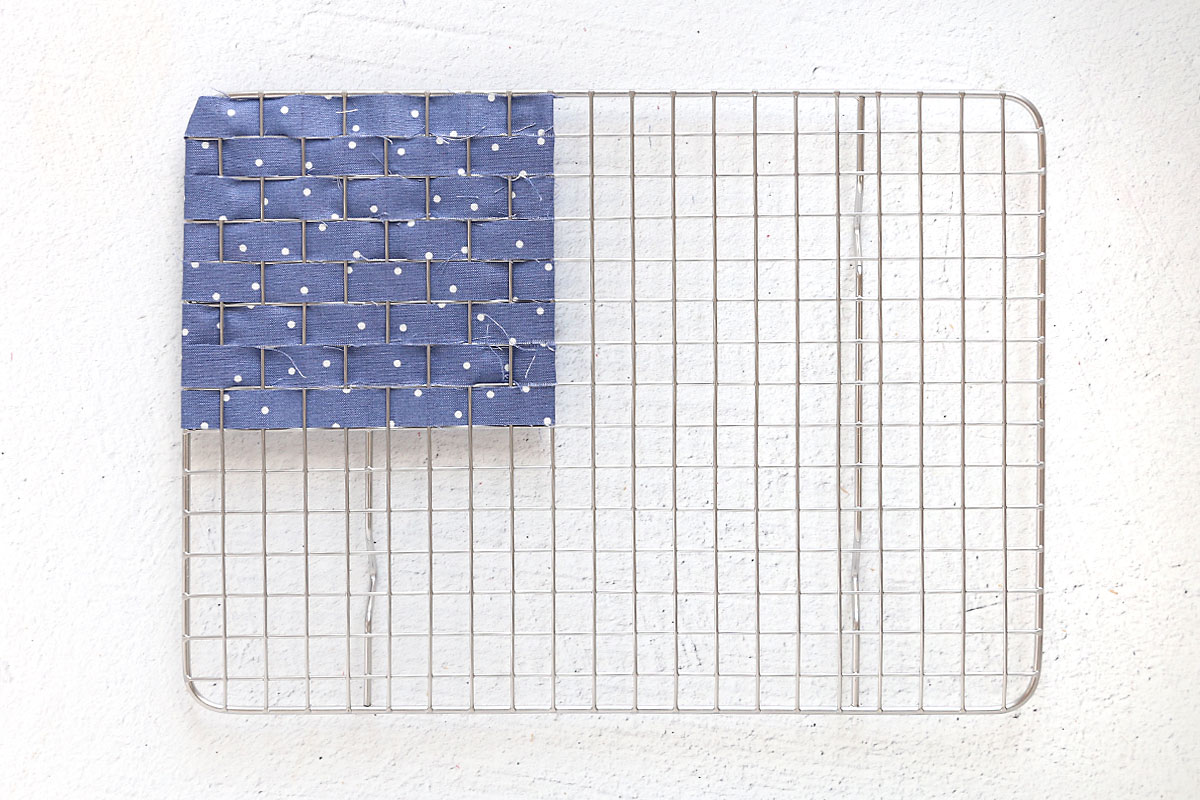
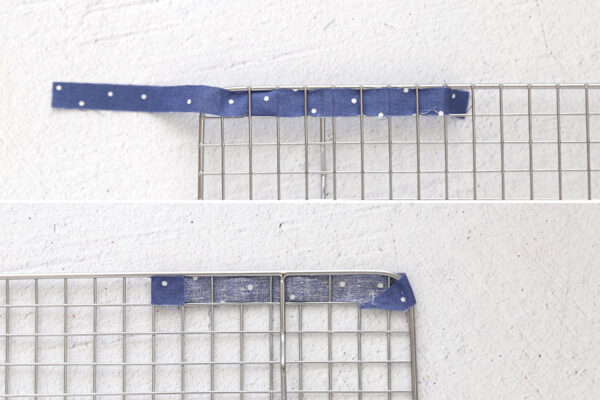
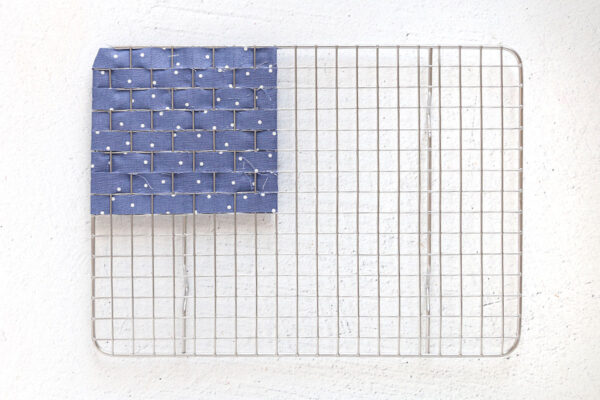
Weave in Blue Strips
Now you will start weaving the strips in and out of the cooling rack. Begin with a blue strip in the top left corner. Work the strip over and under the metal pieces as shown below until you get close to half way across. Then flip the cooling rack over, fold the strip over on itself and use hot glue to secure. (It’s actually easiest to weave in an entire section of strips, then hot glue them all.)
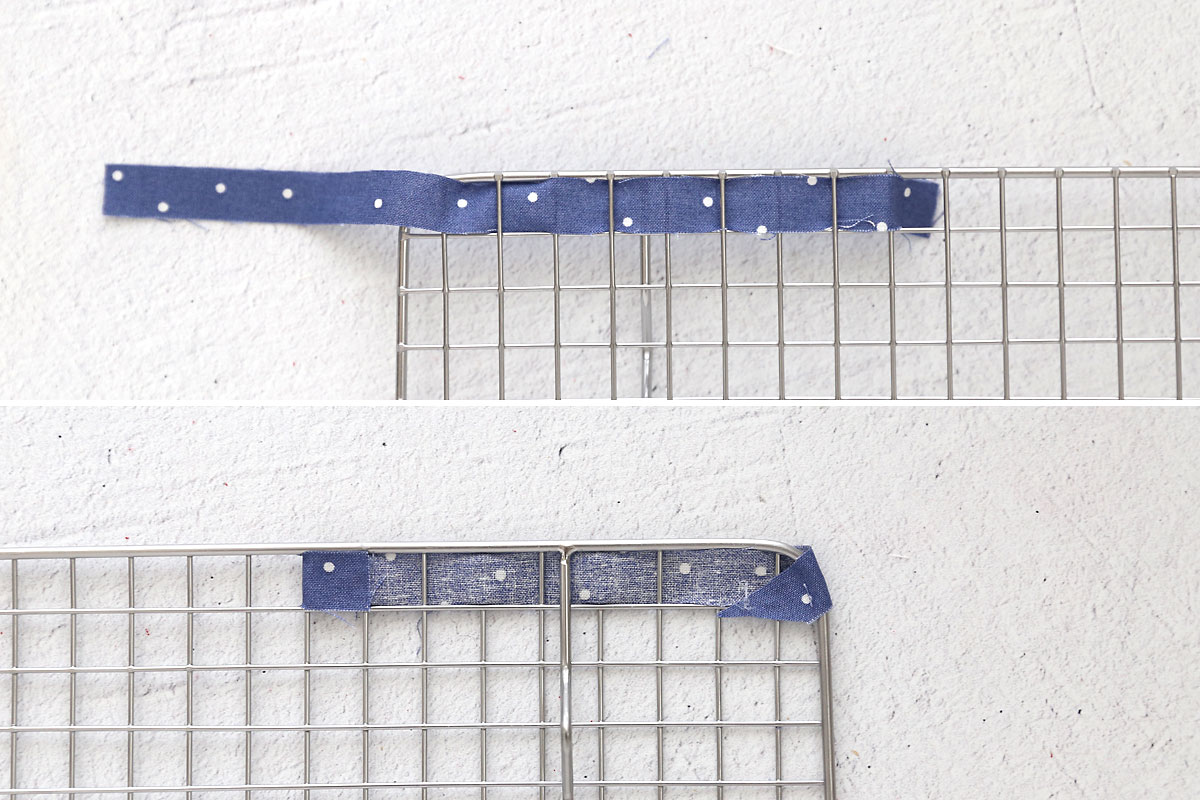
Continue weaving in blue strips; you’ll add eight total. Alternate which of the wires you go over and under on each strip. That means that some rows will cover two wires at the beginning of the section and some will cover two rows at the end of the section. Flip the cooling rack over and glue down all the strips, trimming away any excess.
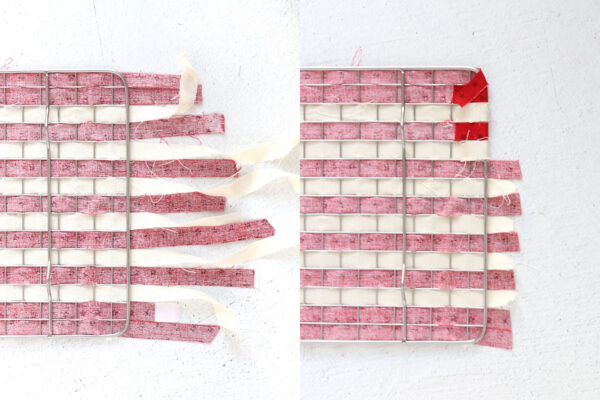
Weave in White and Red stripes
Now you’ll start weaving in the white and red fabric strips. Begin just below the blue section with one of the white fabric strips. Then a red below that, then continue to alternate. If you are using the same cooling rack I am the bottom two rows will both be red.
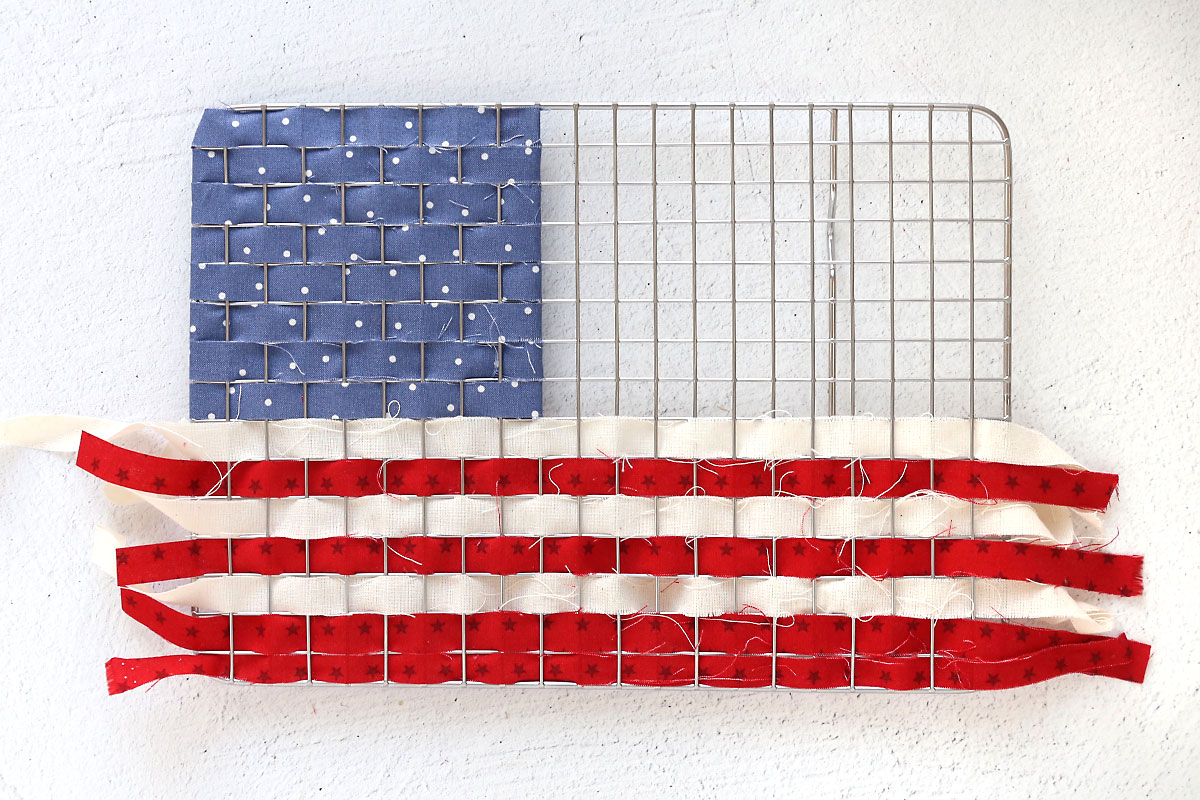
Then work up from the top white stripe, filling in the rest of the flag. Remember the top two rows will both be red. Once the entire flag is filled in, flip over the cooling rack, trim strips, fold over and secure with hot glue. Where the red and white stripes meet the blue section, glue them behind the blue section instead of folding over on themselves.

Add a Star
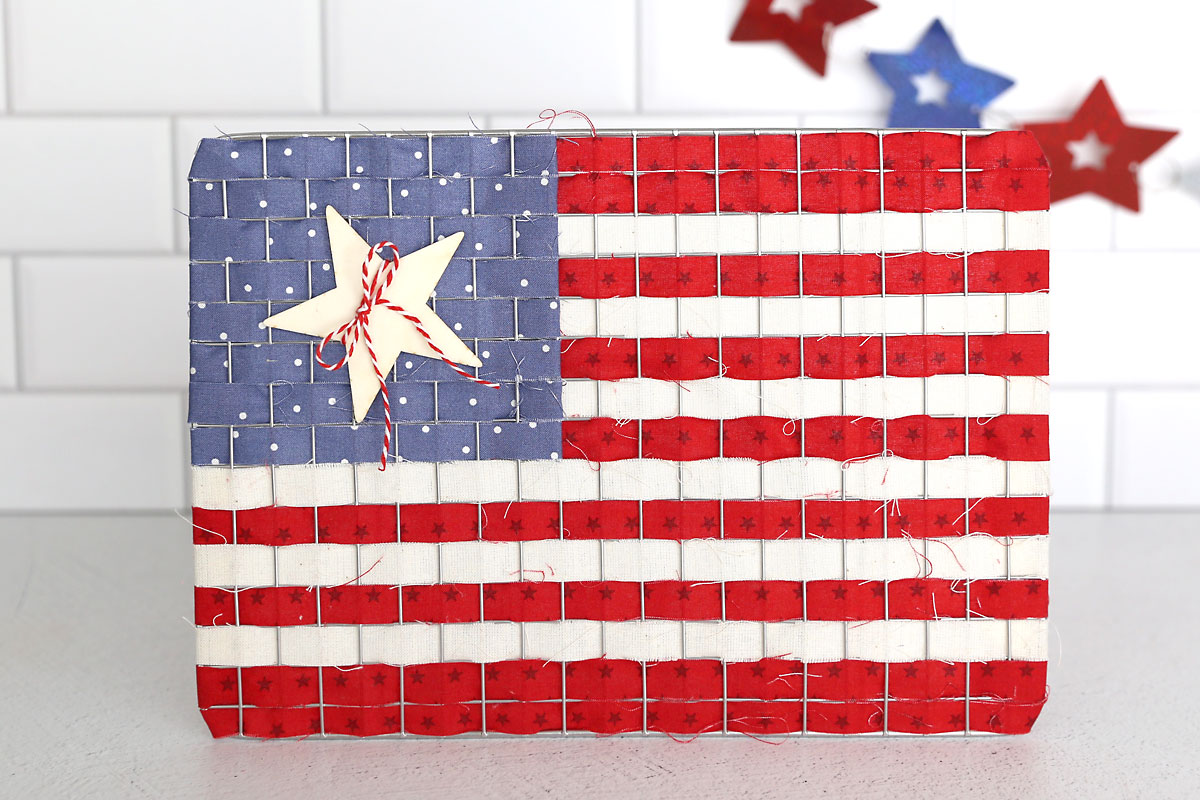
At this point the flag is created and you can embellish it however you like! I used a wood star tied with some red and white twine. You could use multiple stars, bows, ribbons, etc. To display your flag, lean it against the wall on a shelf or place something behind it that it can lean against (like a can or stack of books). Or you can add a ribbon loop at the top so you can hang it!
Cooling Rack Flag Craft
Supplies
- Metal Cooling Rack linked in notes
- 1/4 yard each of Red, White, and Blue Fabric
- Wood Star
- Twine or other embellishment
Want more project ideas? Sign up to get my favorite easy crafts and recipes straight to your inbox!
Instructions
- Cut strips of fabric that are just over half an inch wide (if you are using the cooling rack I used – if you are using a different one measure the space between each row).

- You will need strips in the following colors/lengths: Blue: eight (9 inch) strips. White: three (9 inch) strips and three (15 inch) strips. Red: five (9 inch) strips and four (15 inch) strips.
- Begin weaving in the blue strips at the top left, going over and under each wire. Go close to halfway across.
- Weave in eight blue strips, alternating which wires you go over and under. Then flip the cooling rack over, fold the strips over and secure with hot glue. Note that some of the strips will go over two wires in a row at the left side of the section and some strips will go over two wires in a row at the right side of the section.
- Starting below the blue section, weave in the longer strips of white and red. The bottom two rows will both be red. Then weave in the shorter strips of white and red. The top two rows will both be red.
- Flip the cooling rack over and secure all the strips with hot glue. The shorter strips of red and white will get glued behind the blue section.
- Finish the flag by embellishing as desired: I used one wood star tied with some twine, but you could use multiple stars, or bows, ribbons, etc.


Leave a Comment