
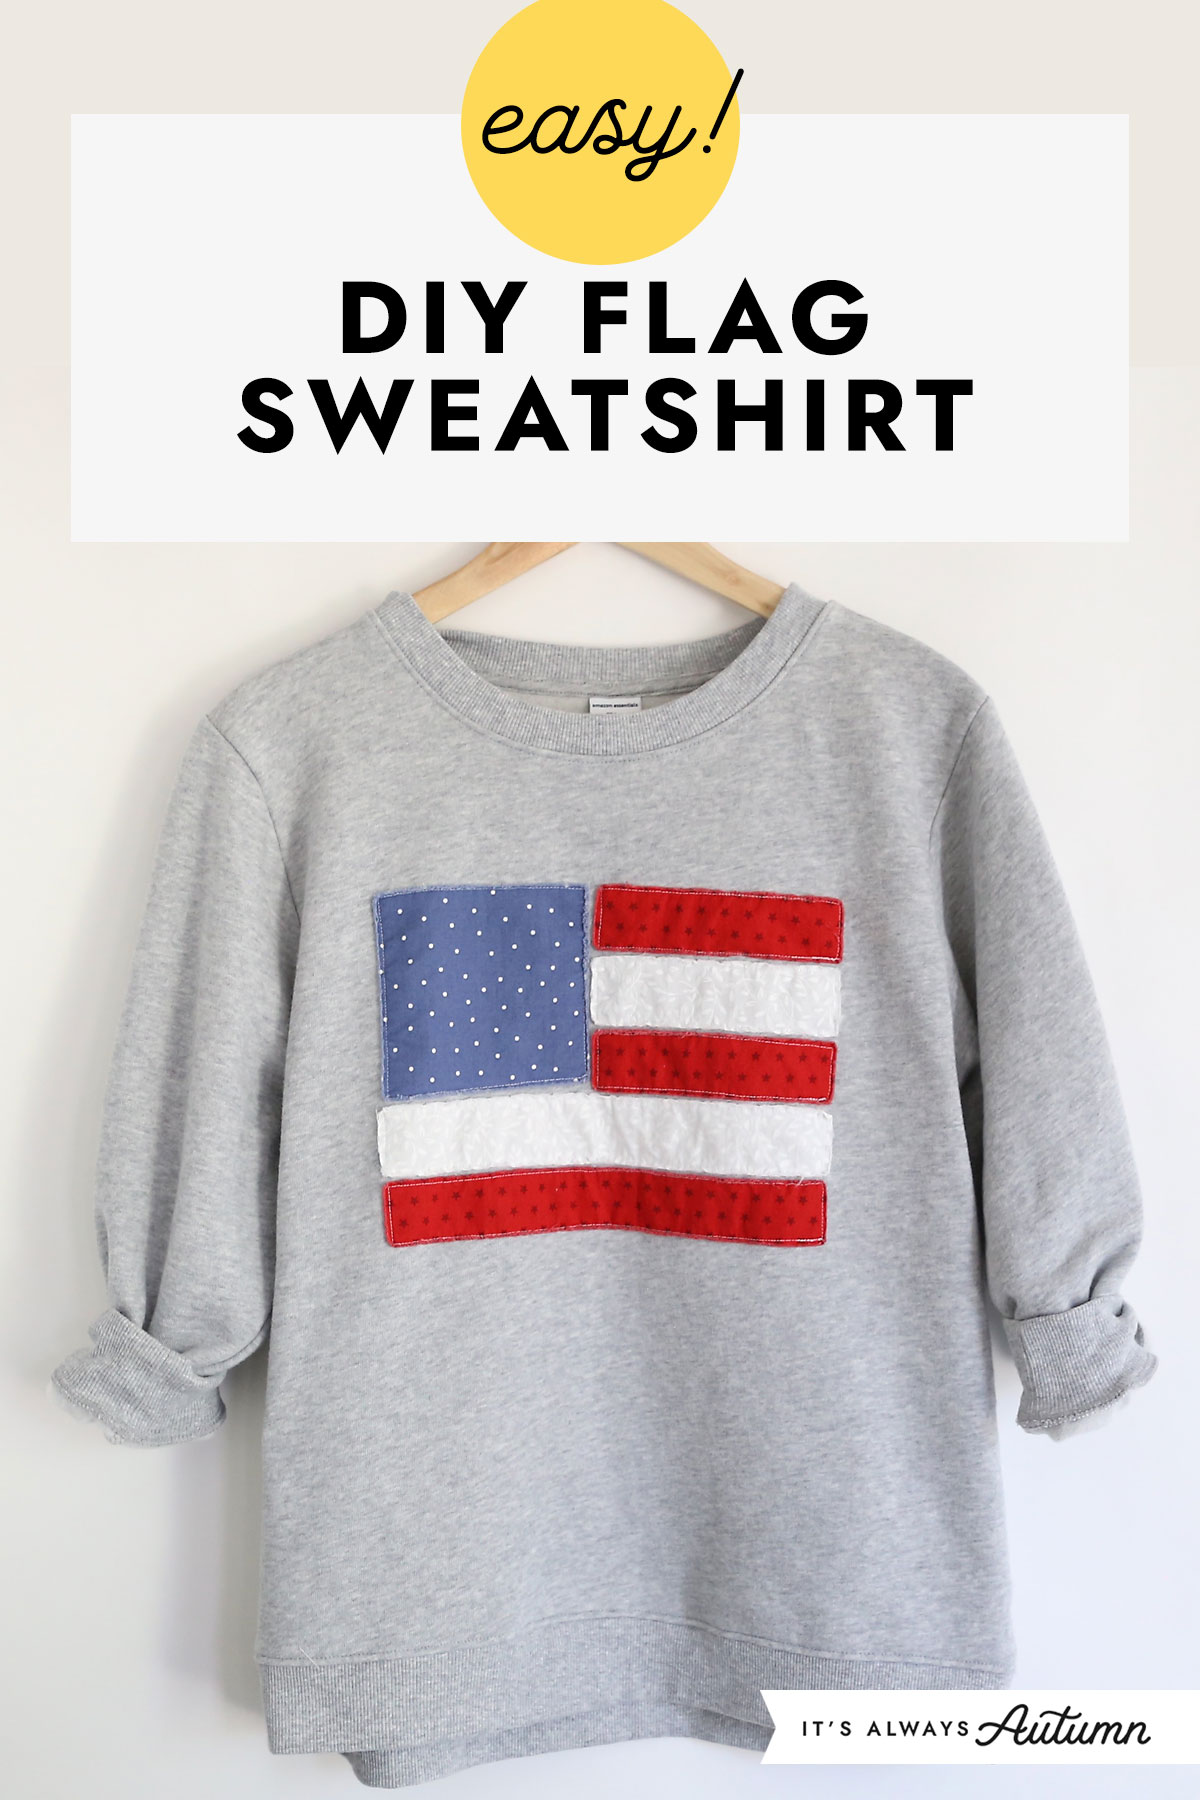
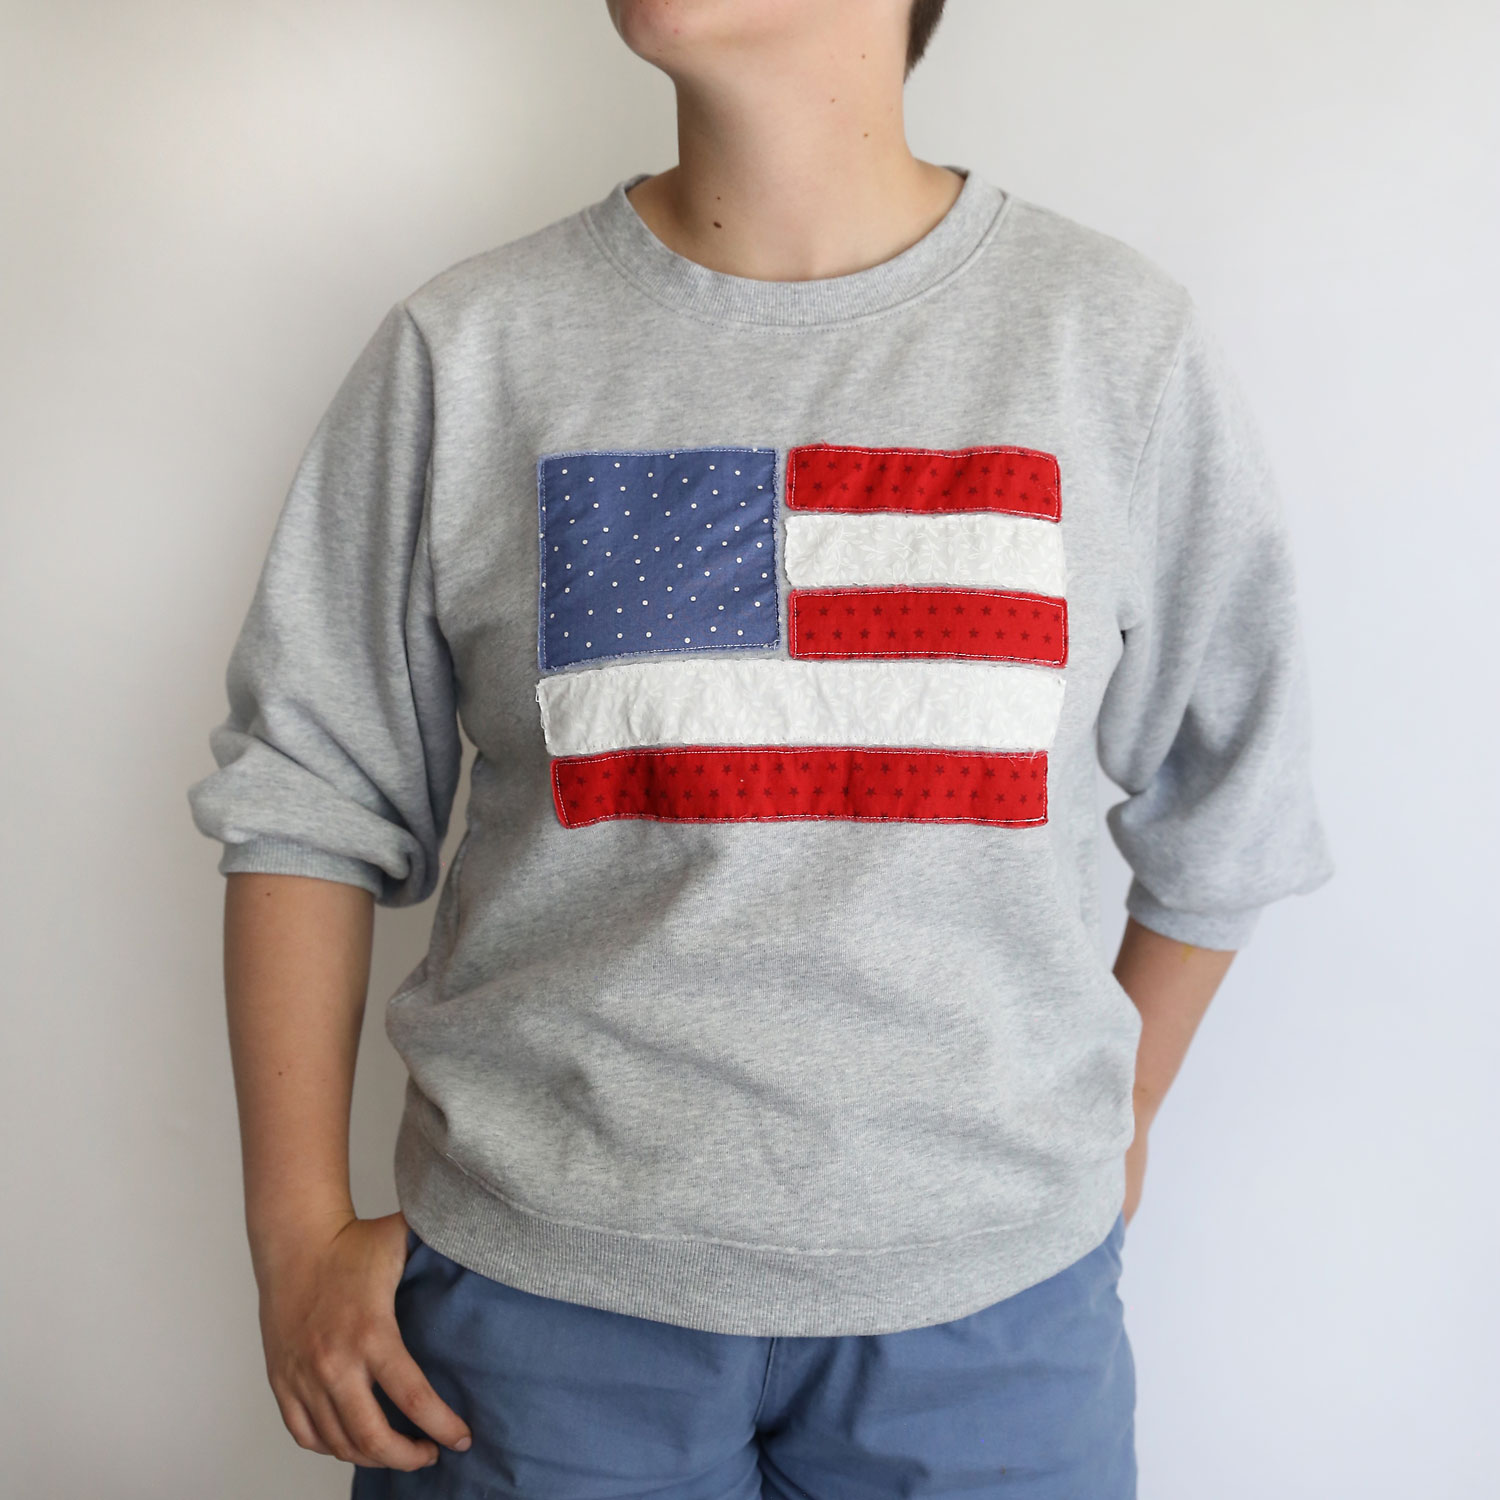
In today’s post: Make this adorable DIY American flag sweatshirt for the Fourth of July! This is an easy applique project you can complete in about an hour.
Easy Fourth of July Craft
Sometimes I have a great vision for a project and it just does not work out. Other times I’m delighted when the project ends up cuter than I imagined. Today’s project is (luckily) one of the latter! This adorable flag sweatshirt is easy to put together with fabric scraps – you only have to sew straight lines. All you do is cut out the shapes, pin them on the sweatshirt, then sew around the top. When you wash the sweatshirt the raw edges fray, giving it a cute worn look:
Supplies
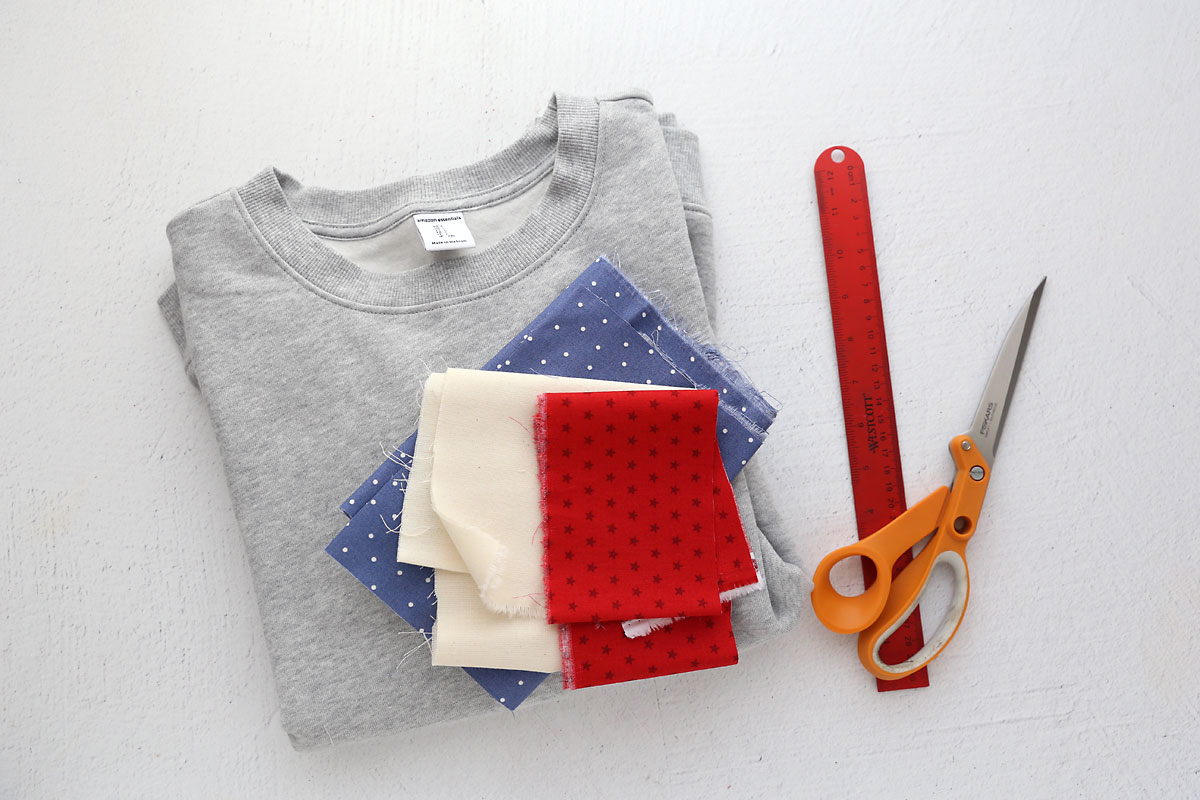
Here’s what you need to make a DIY American flag sweatshirt:
- Sweatshirt: I used this 3/4 sleeve sweatshirt from Amazon, which was so inexpensive and wonderful quality. Sweatshirts work well for applique projects because they are stable and sturdy. If you want to make a t-shirt instead of a sweatshirt, make sure to use a t-shirt that’s made from a stable fabric that doesn’t stretch very much – a soft stretchy tee will be hard to sew on.
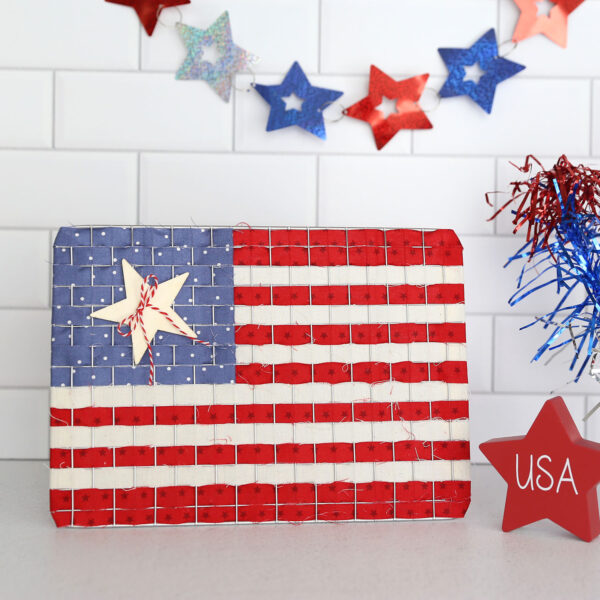
- Fabric scraps: You need just a few inches of red, white, and blue fabric, so this is a great project to use up scraps. If you need to purchase fabric, just ask what the smallest amount you can buy is; often that’s 1/4 of a yard of each color. You’ll have lots left over for other projects like this DIY cooling rack flag.
- Sewing machine and white thread
- Fabric scissors
- Ruler
How to Make a Flag Sweatshirt
Cut Fabric Pieces
You’ll begin by cutting the pieces you need to assemble the flag:
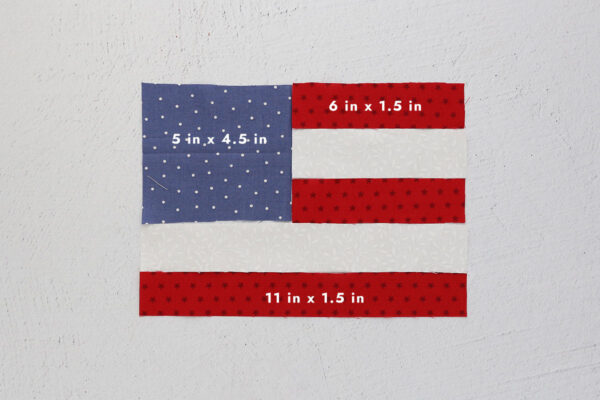
- From BLUE cut one piece that is 5 inches wide by 4.5 inches tall
- From RED cut two pieces that are 6 inches wide by 1.5 inches tall and one piece that is 11 inches wide by 1.5 inches tall.
- From WHITE cut one piece that is 6 inches wide by 1.5 inches tall and one piece that is 11 inches wide by 1.5 inches tall.

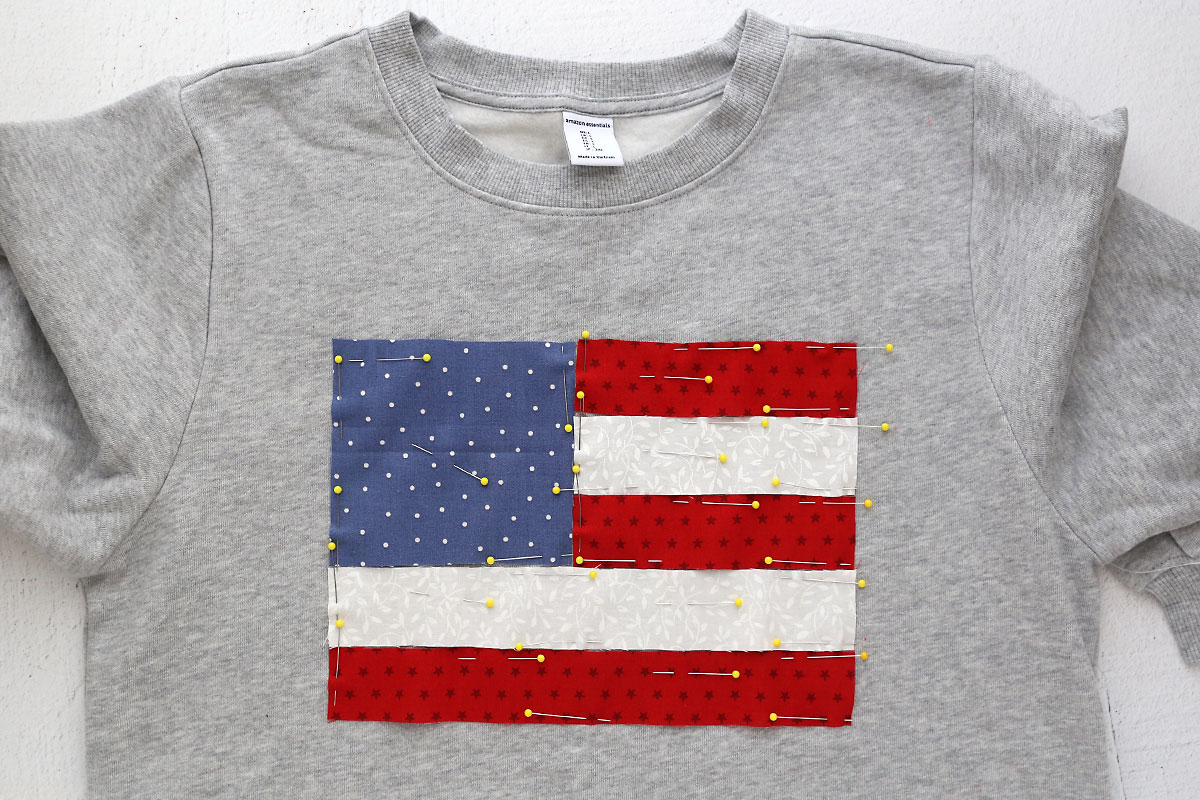
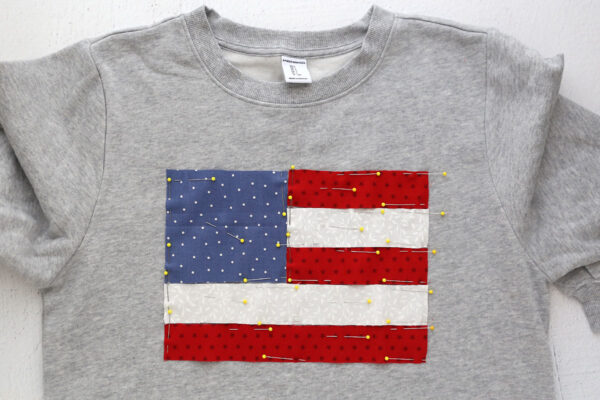
Pin Fabric to Sweatshirt
This step is important! Lay out the fabric on your sweatshirt, with the edges of each piece just touching. Then pin the pieces to the sweatshirt using a lot of pins. You are going to sew all the way around each piece, so plan what direction you will sew and pin in the opposite direction, which will make it easier to remove the pins as you sew. You don’t want the fabric to shift around as you sew, so more pins is better. NOTE: You need to pin the fabric pieces to the front of the sweatshirt only! It can be helpful to slide a piece of cardboard inside the sweatshirt while pinning to make sure you aren’t pinning through both layers of sweatshirt.
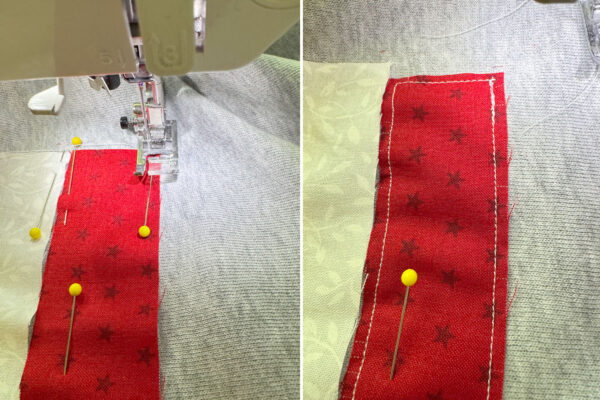
Sew Around The First Piece
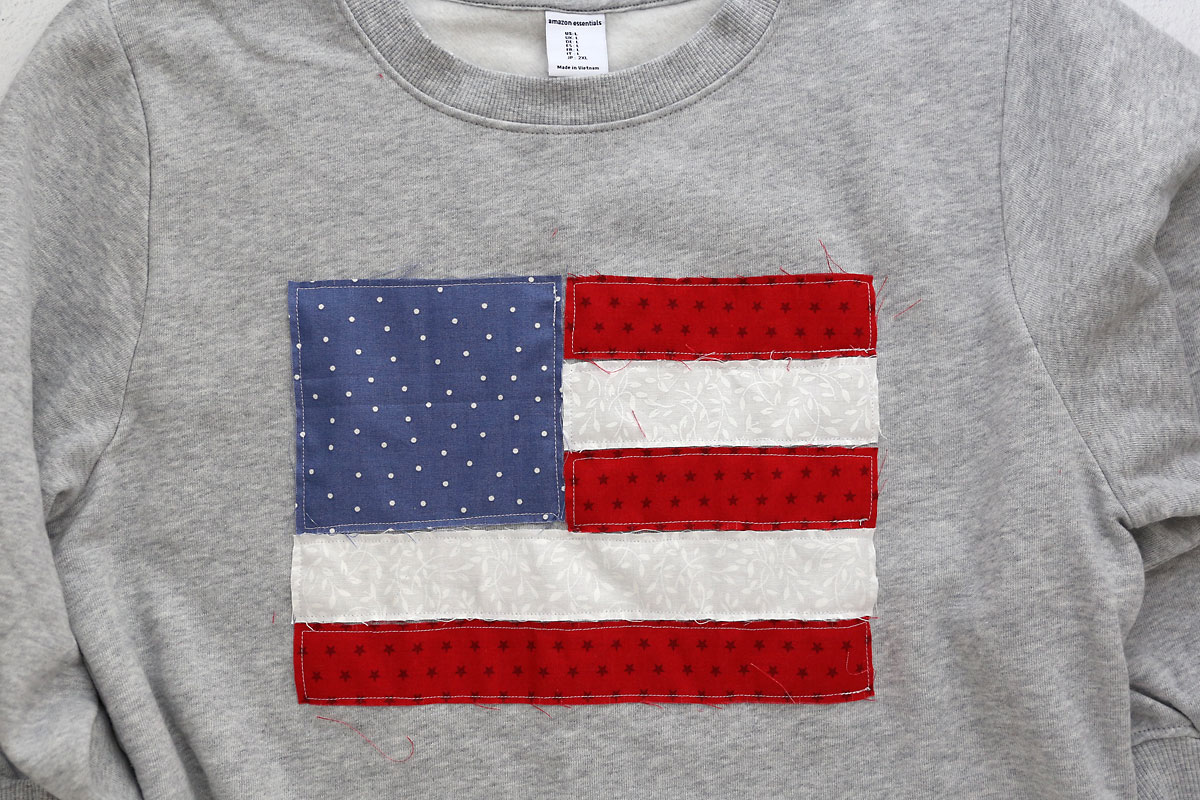
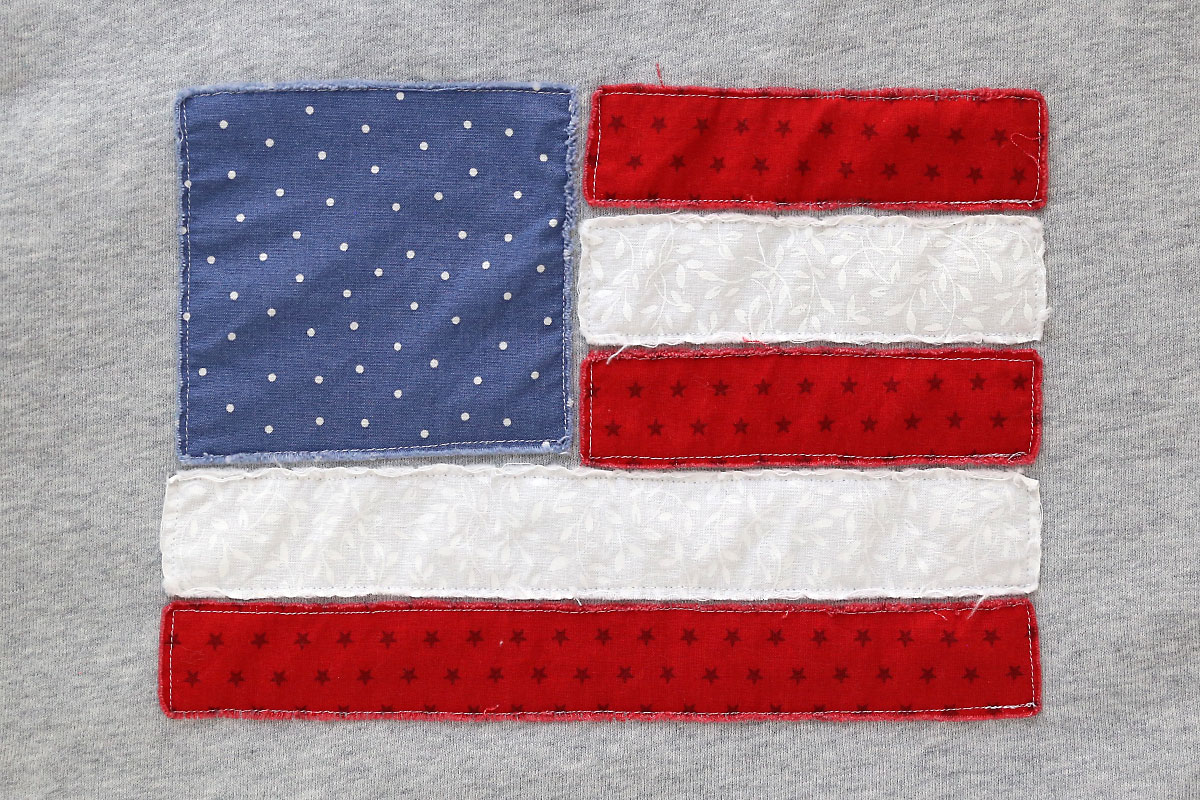
You are going to sew around each piece of fabric, sewing 1/8th of an inch from the edges. Start at the bottom right edge of the bottom stripe, backstitching a bit to begin the sew line. Sew a straight line about an 1/8th of an inch from the edge, removing pins as you get to them. When you get to a corner, stop an 1/8th of an inch from the edge and leave your needle down, but raise your presser foot. Rotate the sweatshirt 90 degrees then put the presser foot back down before you continue sewing. That will create a sharp corner. Go all the way around the stripe until you get back to where you started. Sew over the starting point for an inch or so, then backstitch to secure.

Keep the Fabric Flat
The most difficult part of this project is that you are sewing on a sweatshirt that has a front and a back. You need to sew the fabric pieces to the front of the sweatshirt while keeping the back of the sweatshirt out of the way. That means the fabric ahead of where you are sewing will get bunched up sometimes. Just sew slowly and stop every few inches to smooth out the fabric that you’ll be sewing over next. Also, try not to stretch the sweatshirt material as you sew. Finally, no need to stress about it being perfect, once it’s washed and frayed no one will notice if one of the stripes isn’t perfectly lined up.
Sew on the Other Pieces
Once you are done with the first stripe, remove the sweatshirt from the machine and clip the threads. Then reposition the sweatshirt on the sewing machine to start sewing the next stripe. As you sew, you may need to remove pins from other stripes if they end up in the way. No worries; just replace them as you finish each stripe. Continue sewing around each stripe, then finish by sewing around the blue piece.

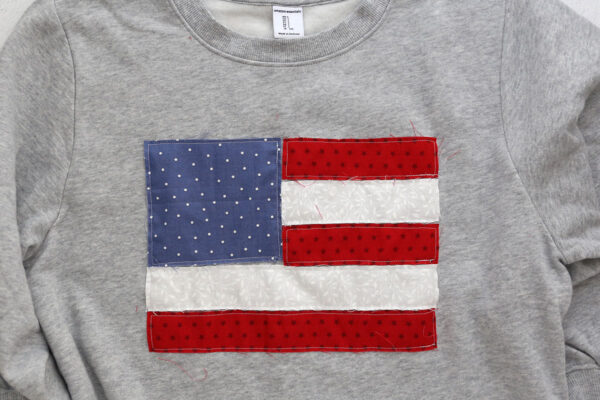
Here’s what the sweatshirt will look like once you’ve sewn on all the pieces to make the flag:
Wash and Dry
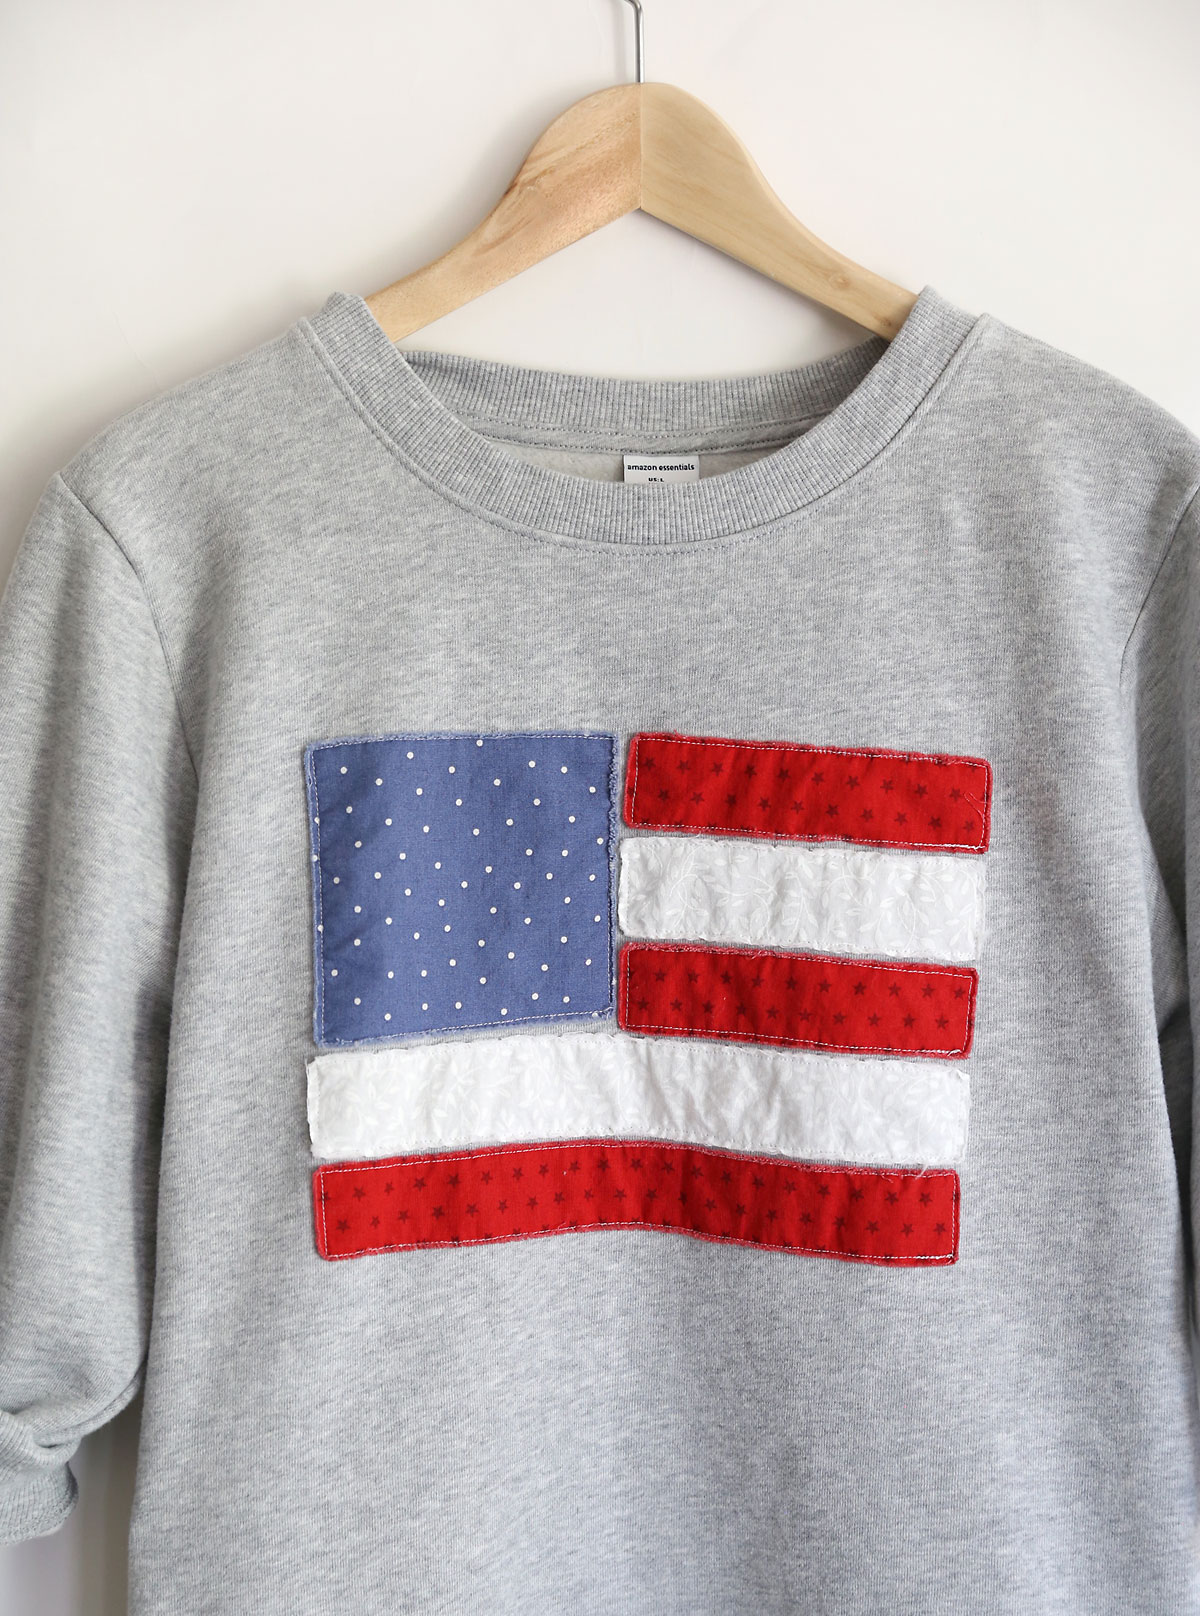
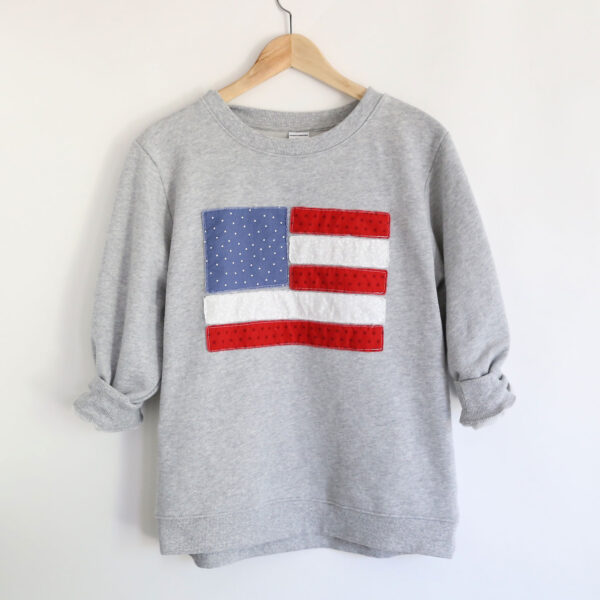
The sweatshirt looks cute already, but it looks cuter once it’s washed and dried and the raw edges have frayed. Run it through the washing machine. When you pull it out you’ll see lots of long threads; that’s great! I like to trim the long threads before putting it into the dryer. After drying there will likely be even more long threads. Go ahead and trim those as well. Now the flag design will have the worn, frayed look we’re going for. It’s ready to wear!
Further Care
The first couple of times you wash the sweatshirt you may end up with more threads that need trimming. The fabric of the flag should not fray beyond the machine stitching. However, since I just made my sweatshirt I haven’t washed it repeatedly yet, so I’m planning to turn it inside out before washing to prevent excessive fraying.
DIY Flag Sweatshirt
Supplies
- Sweatshirt
- Red, White and Blue Fabric small scraps will work
Want more project ideas? Sign up to get my favorite easy crafts and recipes straight to your inbox!
Equipment
- Sewing Machine
- Fabric Scissors
Instructions
- Measure and cut fabric as follows: BLUE cut one piece at 5×4.5 inches. RED cut two pieces at 6×1.5 inches and one piece at 11×1.5 inches. WHITE cut one piece at 6×1.5 inches and one piece at 11×1.5 inches.

- Lay the pieces out on the sweatshirt, with the edges of the piece touching to create a flag design. Pin the pieces onto the sweatshirt using a lot of pins. Be sure to pin through the front of the sweatshirt only.
- Begin sewing on the bottom stripe. Sew all the way around it, 1/8th of an inch from the edge. Create sharp corners by leaving the needle down, lifting the presser foot, and rotating the fabric. Backstitch at the beginning and end.
- Remove the sweatshirt from the sewing machine and trim threads. Then reposition and sew on the next stripe. Continue until you have sewn on each piece.
- Take care when sewing that you are only sewing through the front layer of the sweatshirt. Also take care to smooth out the fabric ahead of you as you sew.
- Wash the sweatshirt in a washing machine. Trim any long threads. Then dry in the dryer, and trim threads again. The raw edges of each fabric piece will fray, giving it a worn look.
- You may need to trim a few threads after each wash for a bit. Wash inside out from now on to prevent fraying past the machine stitching.


Amy says
super cute!!