
In today’s post: Learn how to make dimensional 3D paper stars to hang on your Christmas tree! You can use origami paper or scrapbook paper. This is an easy Christmas craft that takes about fifteen minutes to make.
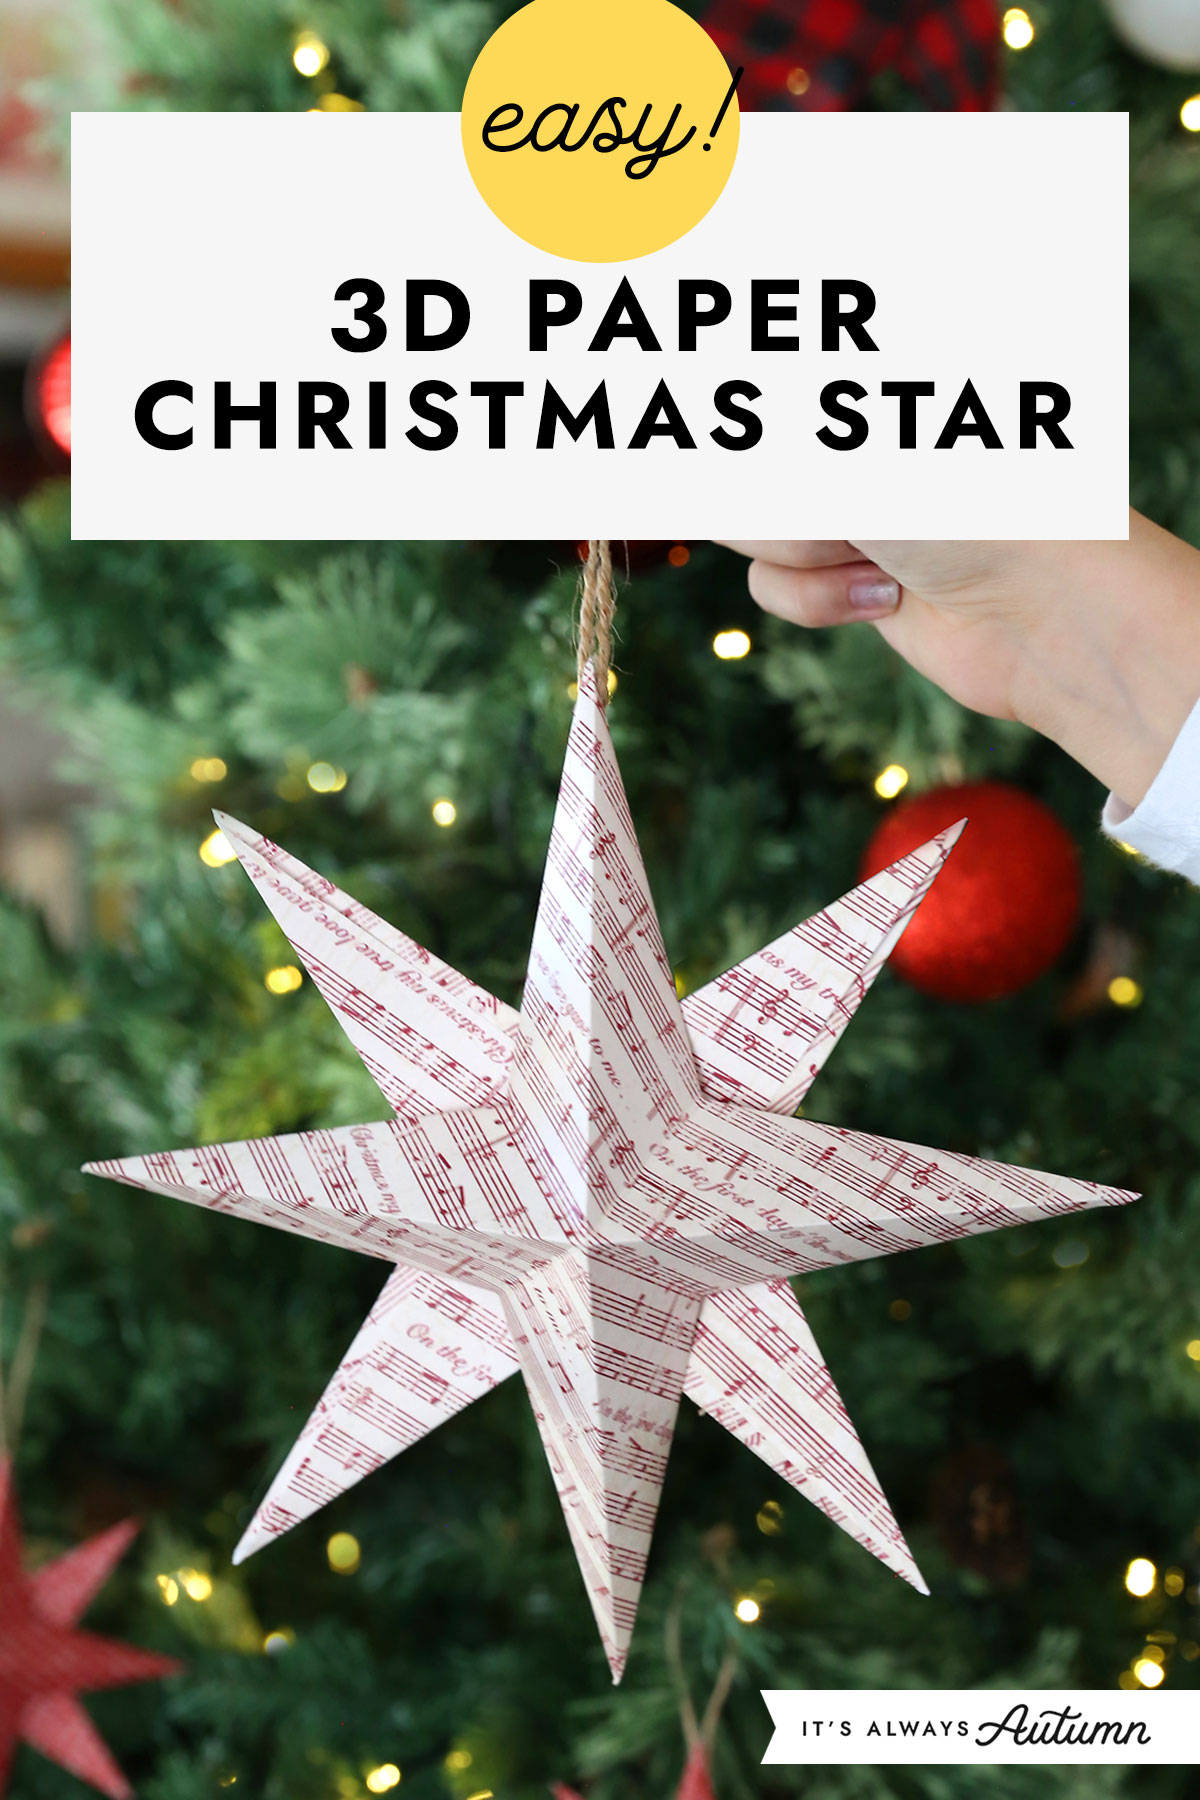
These 3D Christmas stars are easy to make and turn out so pretty! The five point origami stars I made a few years ago have been one of my most popular Christmas craft tutorials, but these are even cooler! They are cut and folded to give them dimension which makes them look complicated, but they’re not! Your first star will probably take about 15 minutes to make – although once you’ve made a few you’ll be able to do it in half the time – and this is a great DIY Christmas decoration you can make while watching a cozy holiday show.

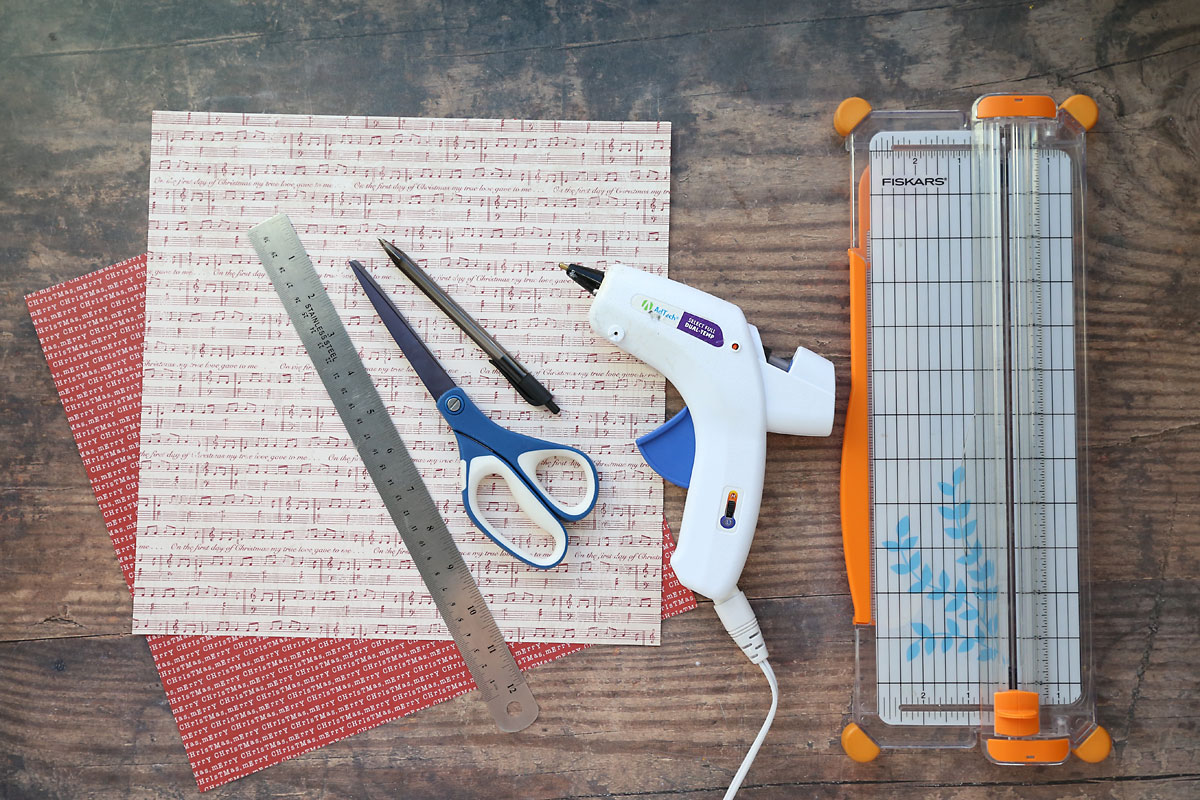
Supplies
There’s only one supply you need to make these paper stars, and that’s paper! You can use origami paper or scrapbook paper, which comes in many different colors and prints. I got the two papers I used in these photos at Hobby Lobby. When purchasing paper, be sure you are getting paper that feels thin, like copy paper, and NOT card stock or other thick paper, which will be too hard to bend.
Along with paper, you’ll need a couple of tools to make these stars:
- Ruler
- Scissors
- Pen
- Paper Trimmer
- Hot Glue Gun
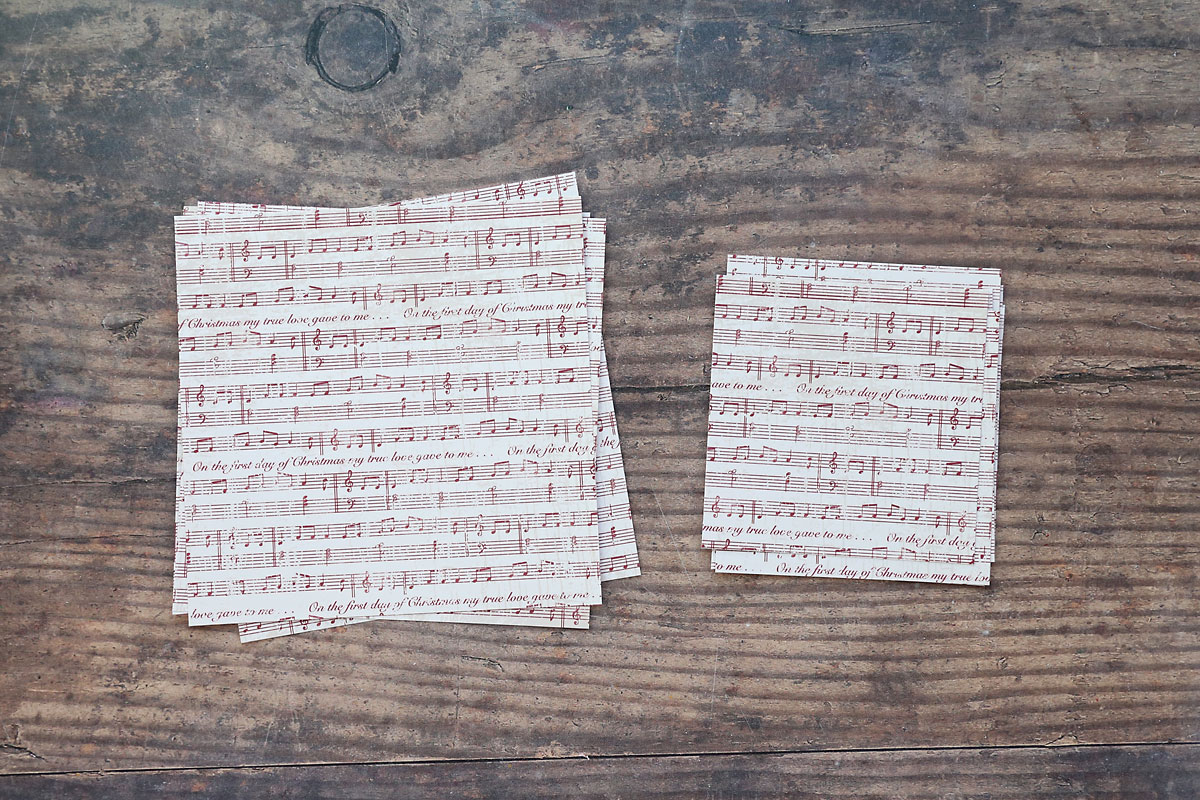
If you are using 12×12 inch sheets of scrapbook paper, you’ll need to cut them into smaller squares (this is why a paper trimmer is useful). You can cut each sheet of 12×12 inch paper into four 6-inch square or 9 4-inch squares. 6-inch squares make a star that is 8 inches tall while 4-inch squares make a star that is 5.5 inches tall. You’ll use two squares of paper for each star, which means you can make 2 of the larger stars or 4 of the smaller stars from each piece of paper! If you’d like to make different sizes, just start with larger or smaller square pieces of paper.
How to Make 3D Paper Stars Video
These stars are very easy to make! I’ve created a video that shows every step so you can watch the entire process. Additionally, below the video I’ve included written instructions as well as step by step photos.
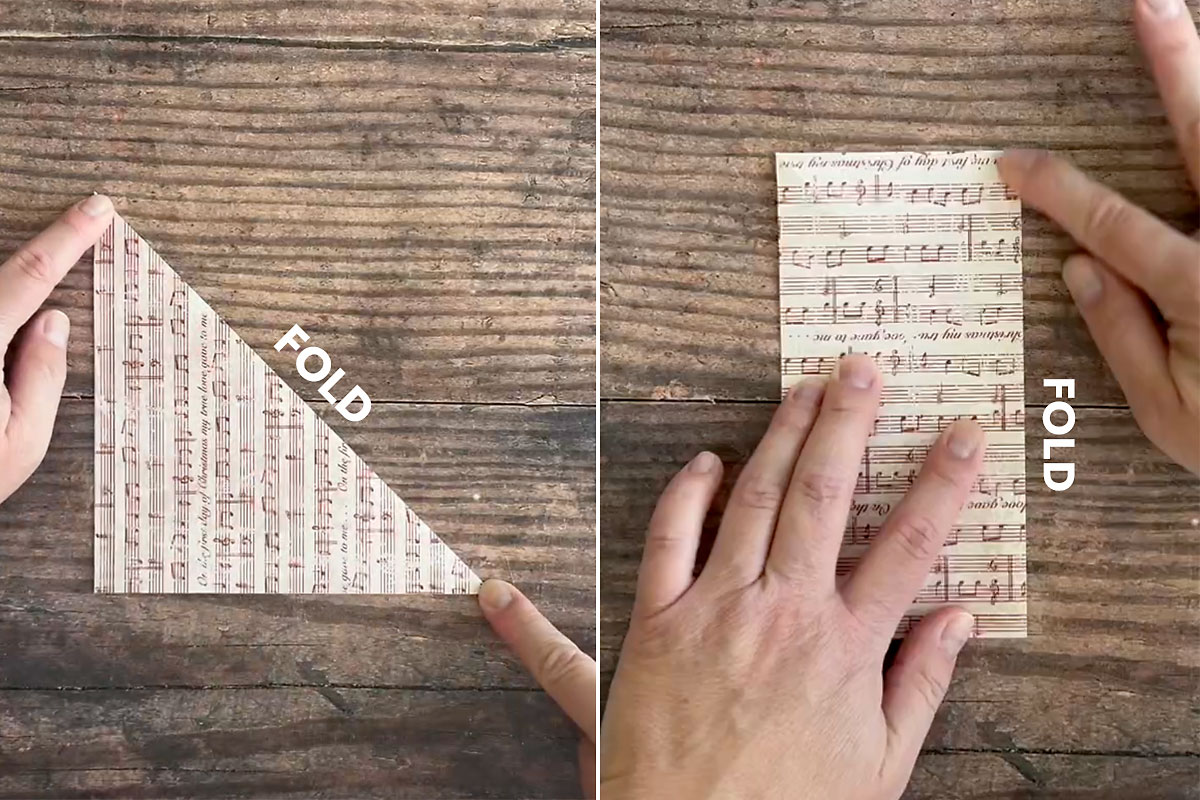
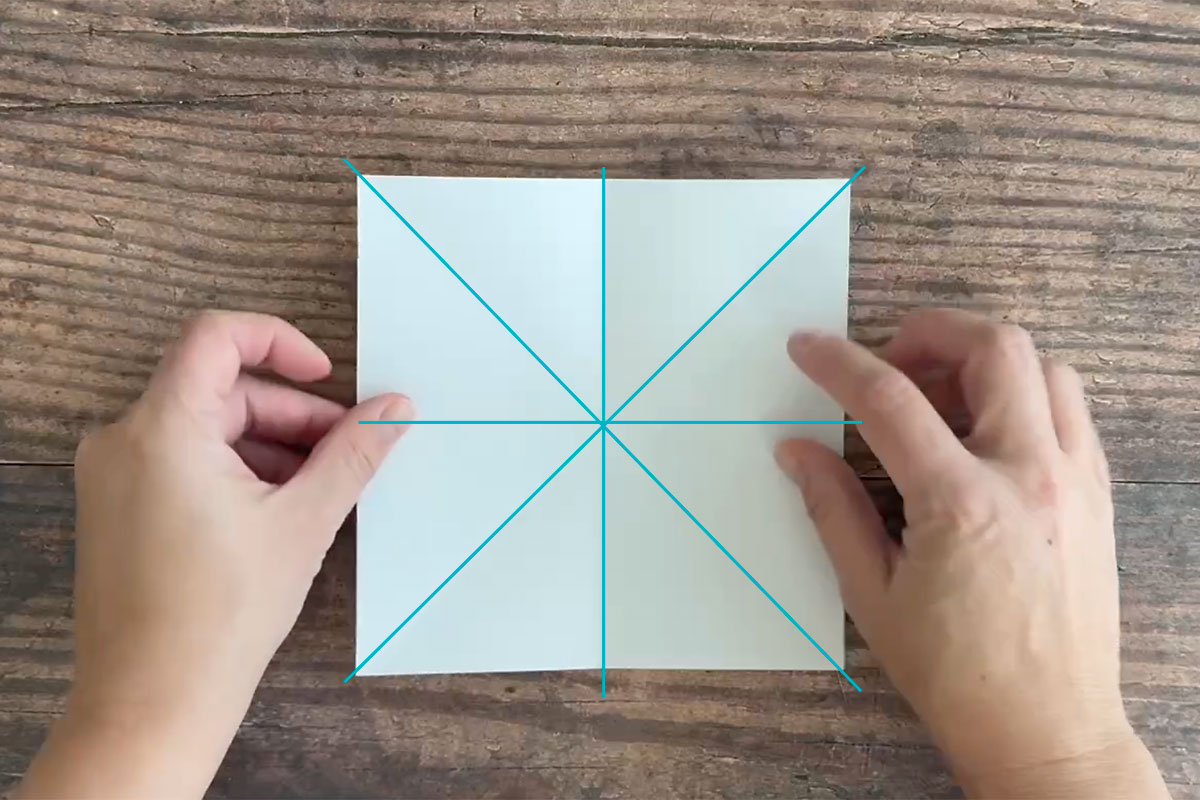
Make the Base Folds
You’ll start with your square of paper turned over so the back of it is facing up. Begin by folding it diagonally and creasing. Open it up and fold it the other way diagonally. Open it again and fold it in half side to side. Open it back up and fold it top to bottom. Press each fold thoroughly to make good creases.
Now when you open the paper square you have all the base folds completed. I’ve highlighted them in blue in this photo:
Measure and Cut
Next you’ll measure in from the outer edge of the paper on the horizontal and vertical folds. Measure 1.25 inches from the edge if you’re using a 6-inch square (7/8 of an inch from the edge if you’re using a 4-inch square) and make a mark. Then cut along the fold in to those marks.
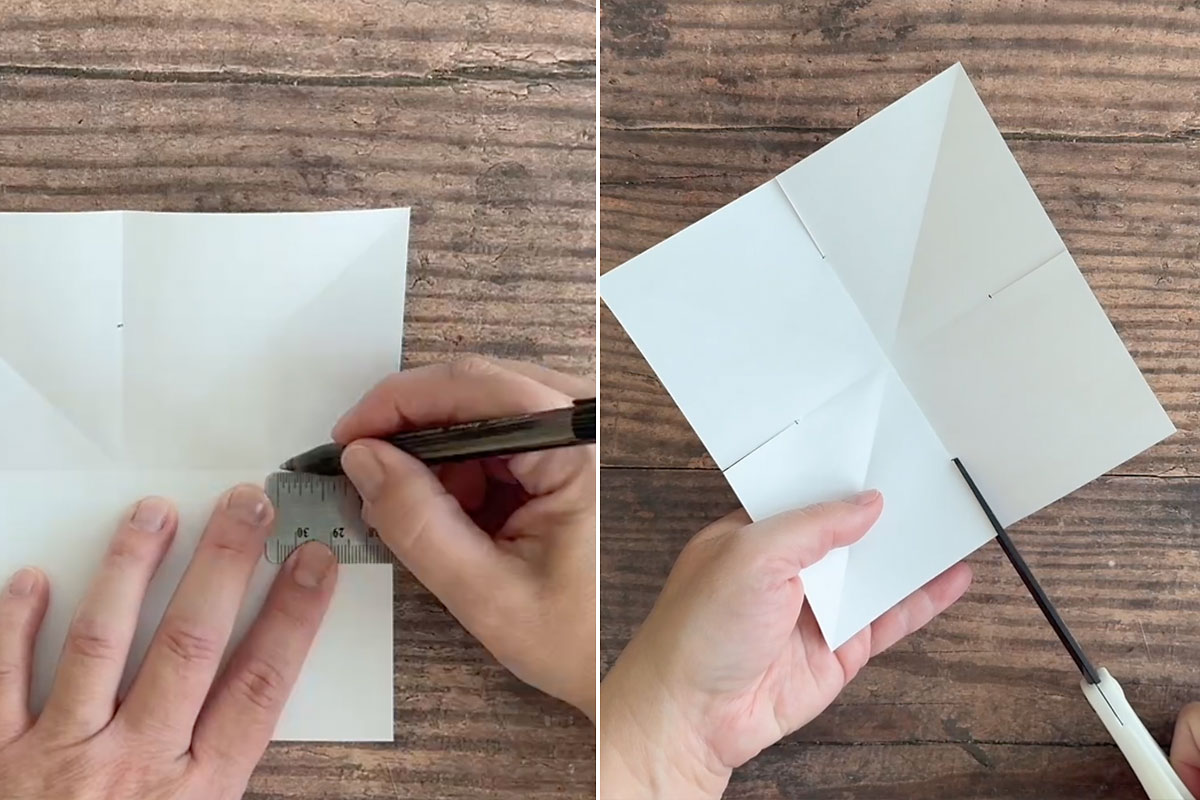
Make the final Folds
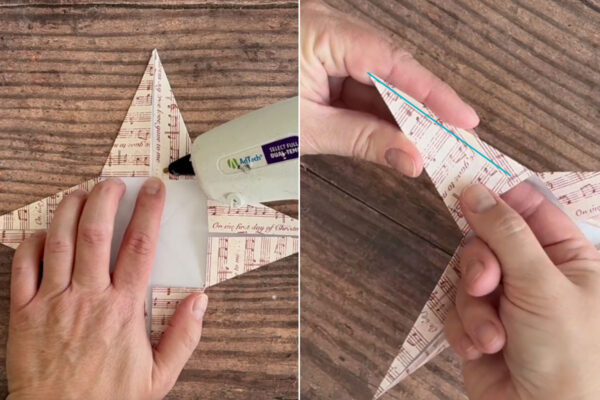
Now you’ll make the last set of folds. Place the paper with one corner up. Take the corner you just created by cutting and fold it in to line up with the diagonal fold, as you see below. The folds you make in this step are marked in blue dotted lines. Repeat on all four corners.

Create the Dimension
Now it’s time to create the dimension on our star. Each corner now has two “flaps”. Place a small amount of hot glue on the right side flap (shown with the thick blue line in the first photo below). Then bring the left side flap over the right one and overlap it about 2/3 of the way. Hold for a few seconds until secure. Then repeat with the other three corners.
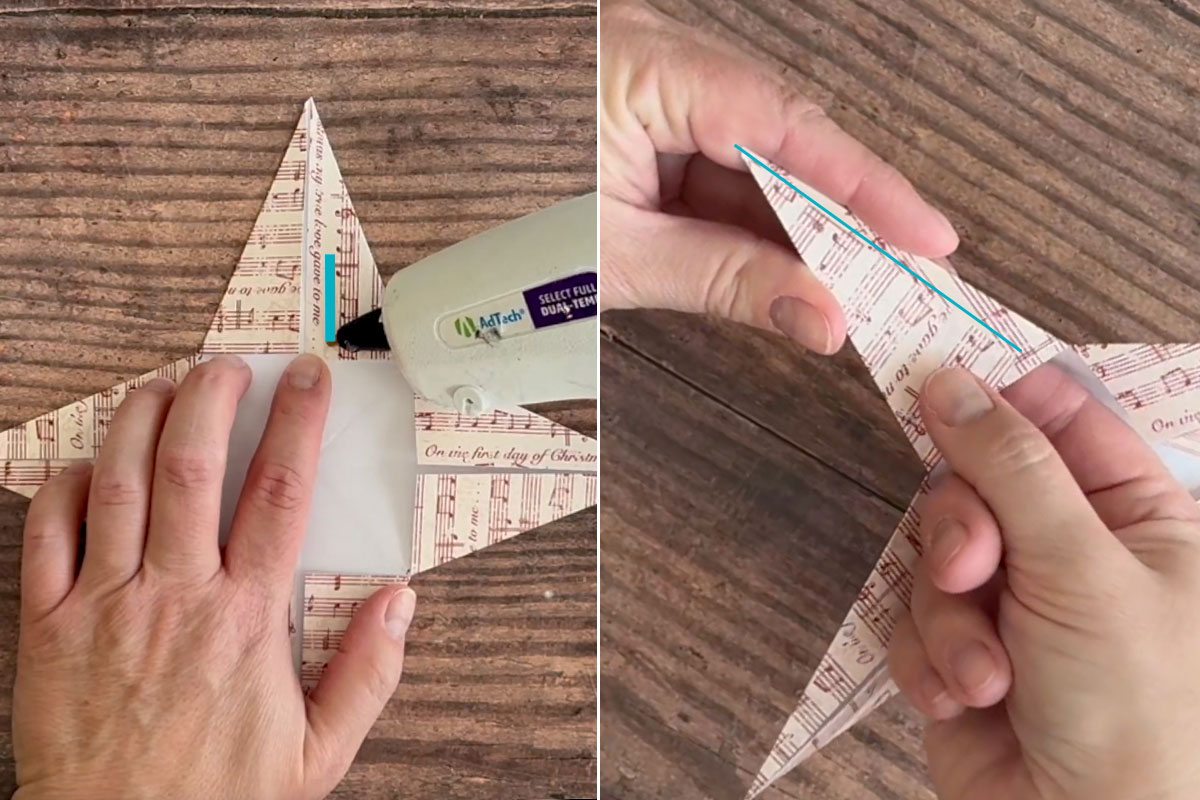
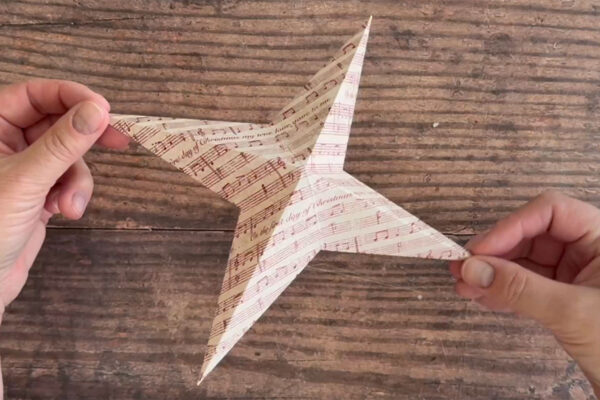
These overlaps will create dimension on the other side of the star and you’ll end up with a four point 3D star:

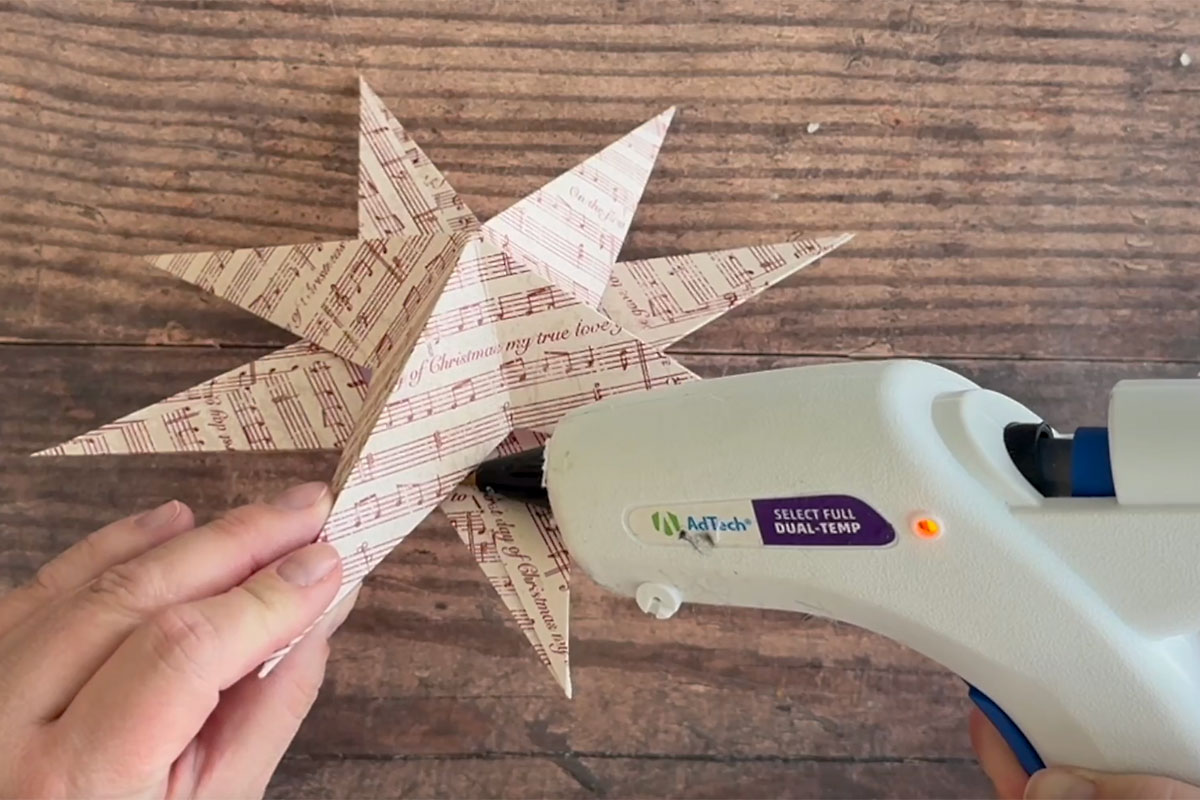
Glue two stars together
Repeat the entire process with another square of paper so you have two 4-point stars. The backs of each star will be flat with a hole in the middle. Place some hot glue on the back of one star in the places shown below:
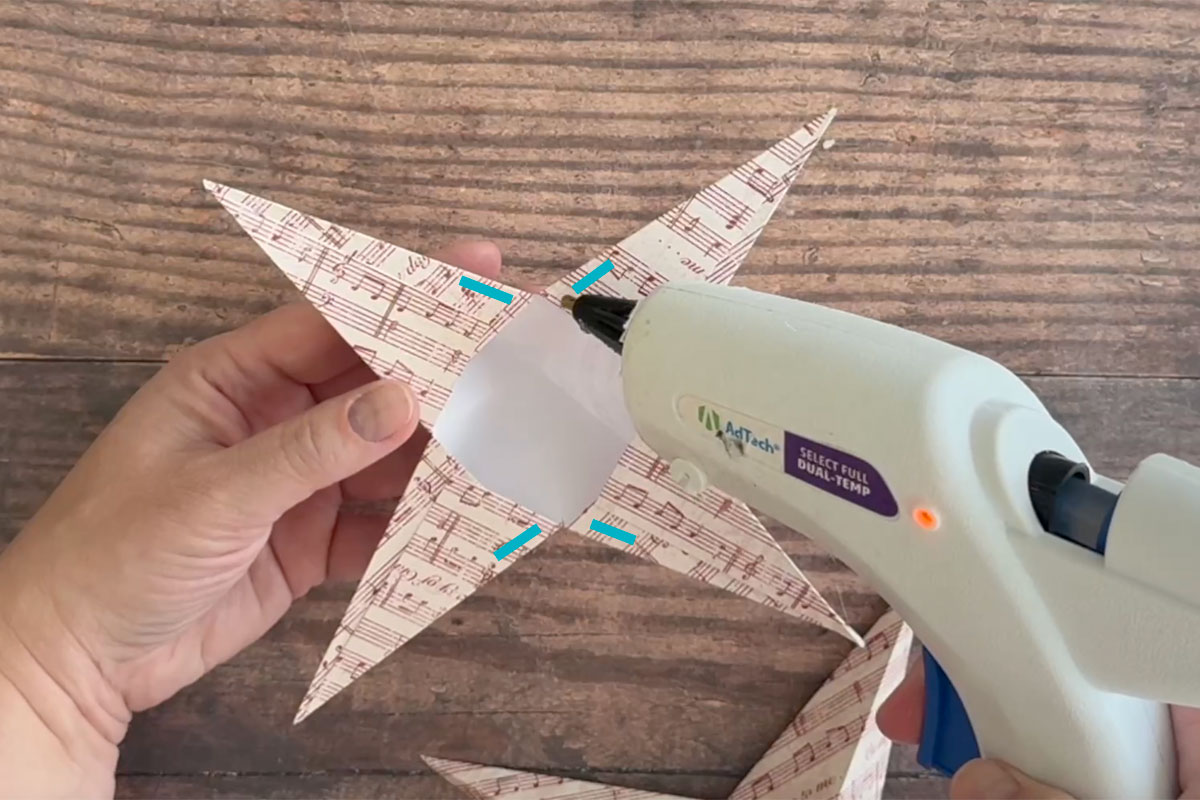
Place the other star on top of it, back to back, staggering the points. Hold for a moment for the glue to adhere.

It can be hard to get the glue in exactly the right place, especially on your first star, but don’t stress. Hot glues dries clear so it won’t be visible if there’s a little extra. Once the two stars are connected at a couple points, you can add a bit more glue at the other contact points.
Add a Hanging Loop
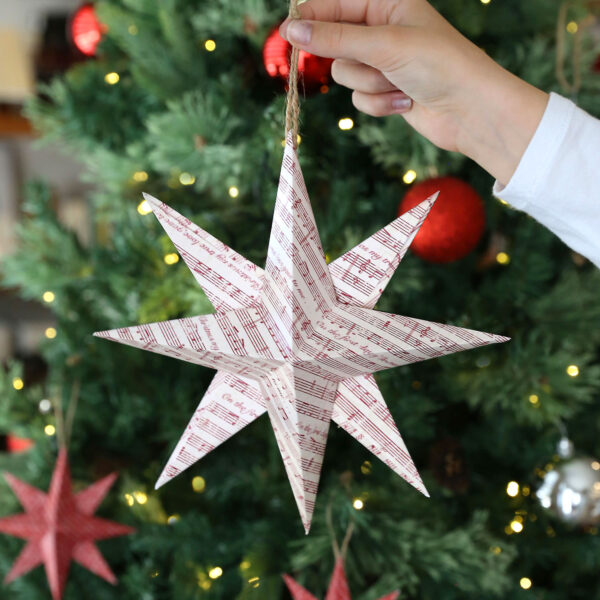
At this point your star is done! You can nestle them right into your Christmas tree. Or, if you’d like, you can glue a loop of twine or jute onto the back of one of the points of the star to turn the star into a Christmas ornament.

3D Paper Stars
Supplies
- 2 Paper Squares 6 inch or 4 inch
Want more project ideas? Sign up to get my favorite easy crafts and recipes straight to your inbox!
Equipment
- Scissors and Paper trimmer
- Hot Glue Gun
Instructions
- Begin by folding one paper square in half diagonally and creasing. Open it up and fold diagonally the other way. Open it up and fold in half vertically. Open one more time and fold in half horizontally.

- On the horizontal and vertical folds, measure in from the outside edge 1.25 inches (for a 6-inch square) or 7/8s of an inch (for a 4-inch square), and mark. Cut along the fold to that mark.
- Place the paper with one corner up. Take the corner you just created by cutting and fold it in to line up with the diagonal fold, as you see in the photo. The folds you make in this step are marked in blue dotted lines. Repeat on all four corners.
- Now each corner has two flaps, one on the right and one on the left. Place hot glue on the right flap and then overlap the left flap about 2/3 of the way. Hold flaps together for a few seconds until adhered.
- Repeat on all four corners to create a dimensional four point star. Repeat with a second square of paper.
- Place the two stars together, back to back, with the points staggered. Hot glue together at the points where the stars touch.
- If desired, glue a loop of twine or jute to the back of one point to turn the paper star into an ornament.


Sidney says
Thanks for the instructions. I just made eighteen stars from 2″ squares of origami paper. My cuts were 7/16″ and the finished stars are about 2-3/4″ across; in case anyone reading wants to make smaller ornaments.
Linda O says
Love this and love stumbling on your site. I’d also love to see measurements for a giant star, which I’ll try to make, using these instructions. This is so versatile, simple, and impressive. thank you.
Stacey says
Love your ideas and recipes! Thank you for sharing your creativity and culinary creations with us.