
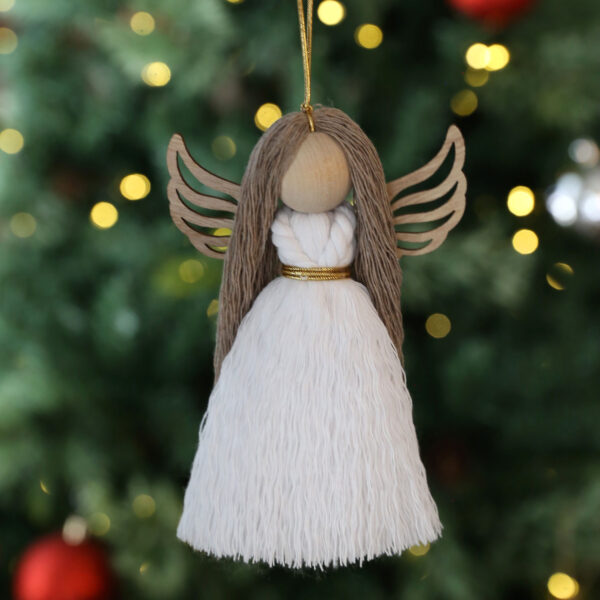
In today’s post: Learn how to make this beautiful macrame angel ornament – no macrame experience needed! This is an easy Christmas craft for adults you can complete in about twenty minutes.
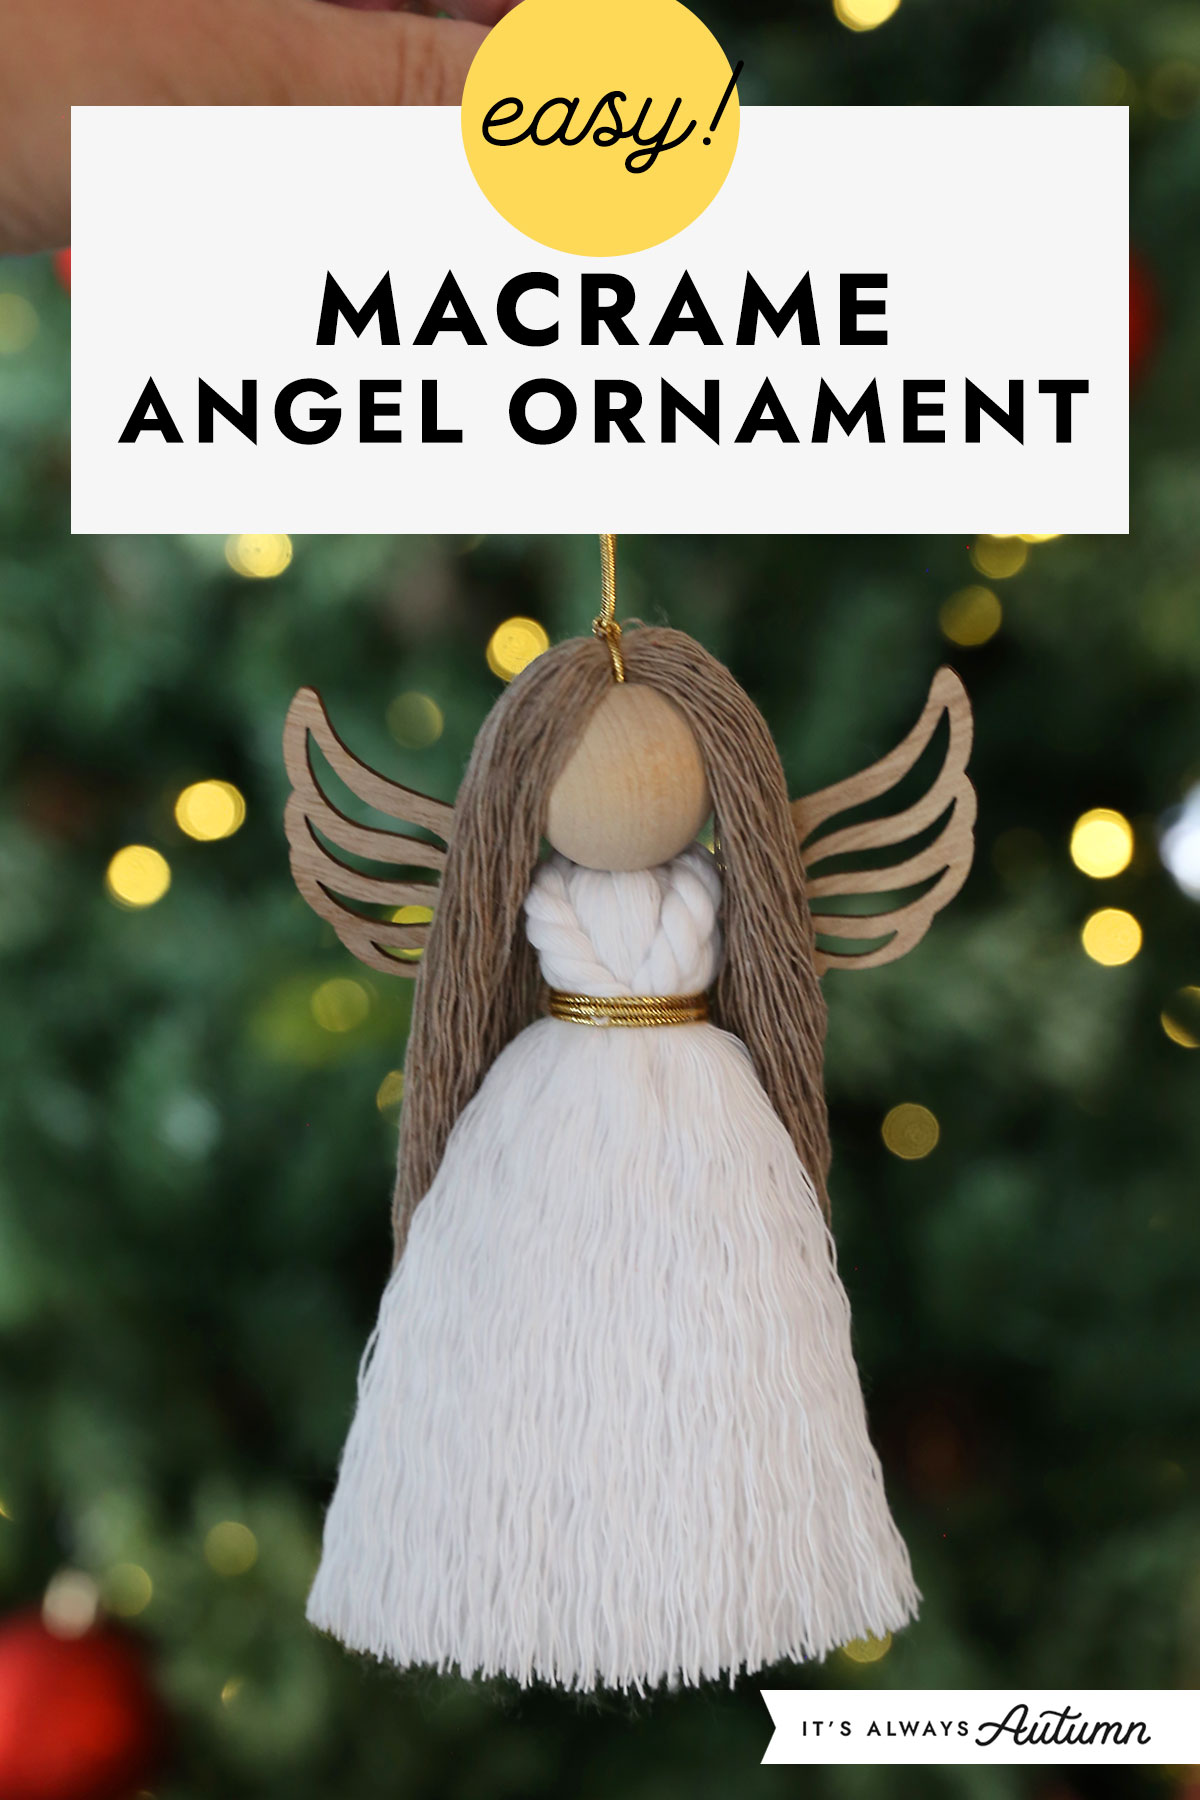
Macrame Angel
I am calling today’s project a “macrame angel” because macrame cord is the main supply, but there are no knots to tie so this technically is not a macrame project. It’s actually very easy to make and turns out super cute! This would be a fun project for a Christmas craft night with teens and adults.
Supplies:
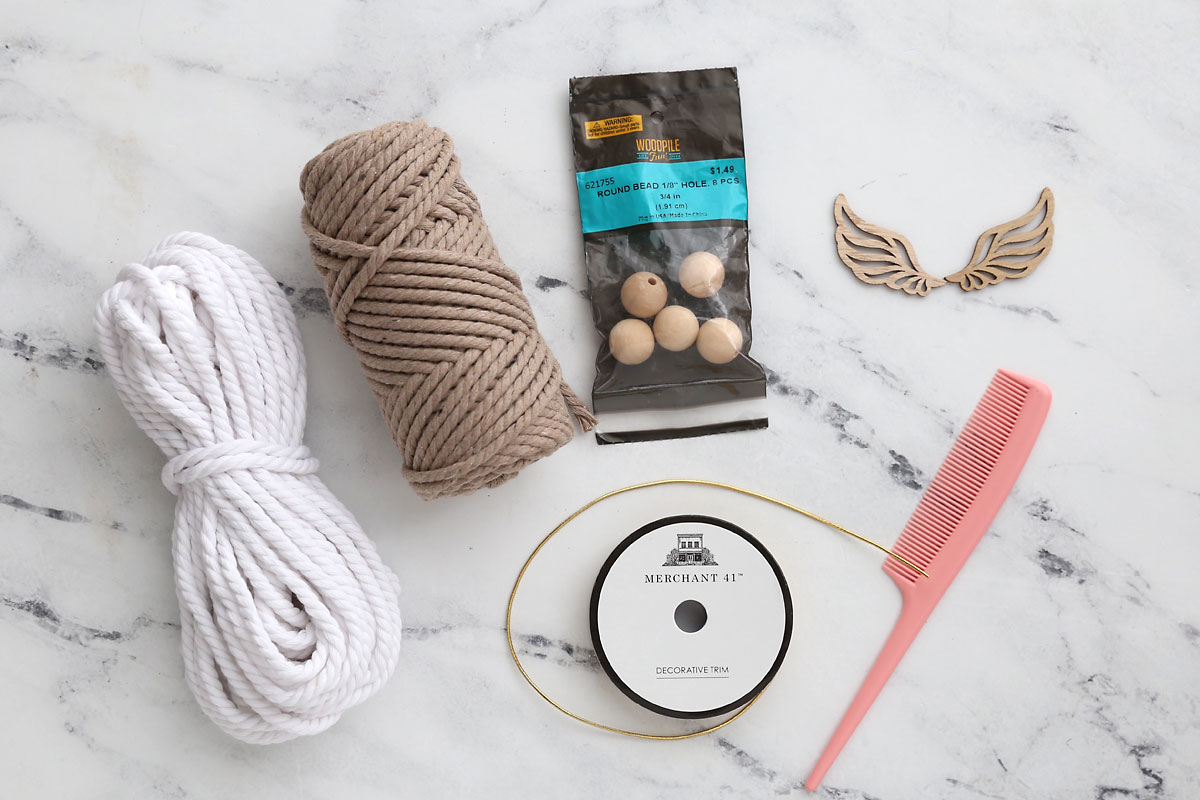
Here’s what you’ll need to make your own macrame angel. I’ve noted where I got the supplies I used, but you can find most of these supplies at any craft store or on Amazon.
- White Macrame Cord 5mm: Found at Hobby Lobby in the craft department. The white cord I used is actually labeled “craft cord” not macrame cord. You are just looking for a cord that is made up of different strands twisted together. (The cord I used and linked is also labeled 4mm but it’s definitely 5mm.)
- Light Brown Macrame Cord 5mm: Found at Hobby Lobby in the yarn section.
- 1 inch Wood Balls w/small hole: Found at Hobby Lobby in the wood craft section.
- Narrow Elastic Cord in Gold: Found at Hobby Lobby in the ribbon section.
- Angel Wings: I ordered wood angel wings from Amazon. They come in a pack of 80, which is many more wings than I’ll ever need, but they look great and were very inexpensive. If you don’t want that many wings, you could look for angel wing ornaments that might work. Or this laser cut wood scroll piece from Hobby Lobby could work to look like wings.
You’ll also need a comb and a hot glue gun.
How to Make a Macrame Angel Ornament
This is an easy Christmas craft that will only take about 20 minutes to make. Here’s a video that shows the entire process, and after the video you’ll find step by step photos and instructions.
Cut Cord Pieces
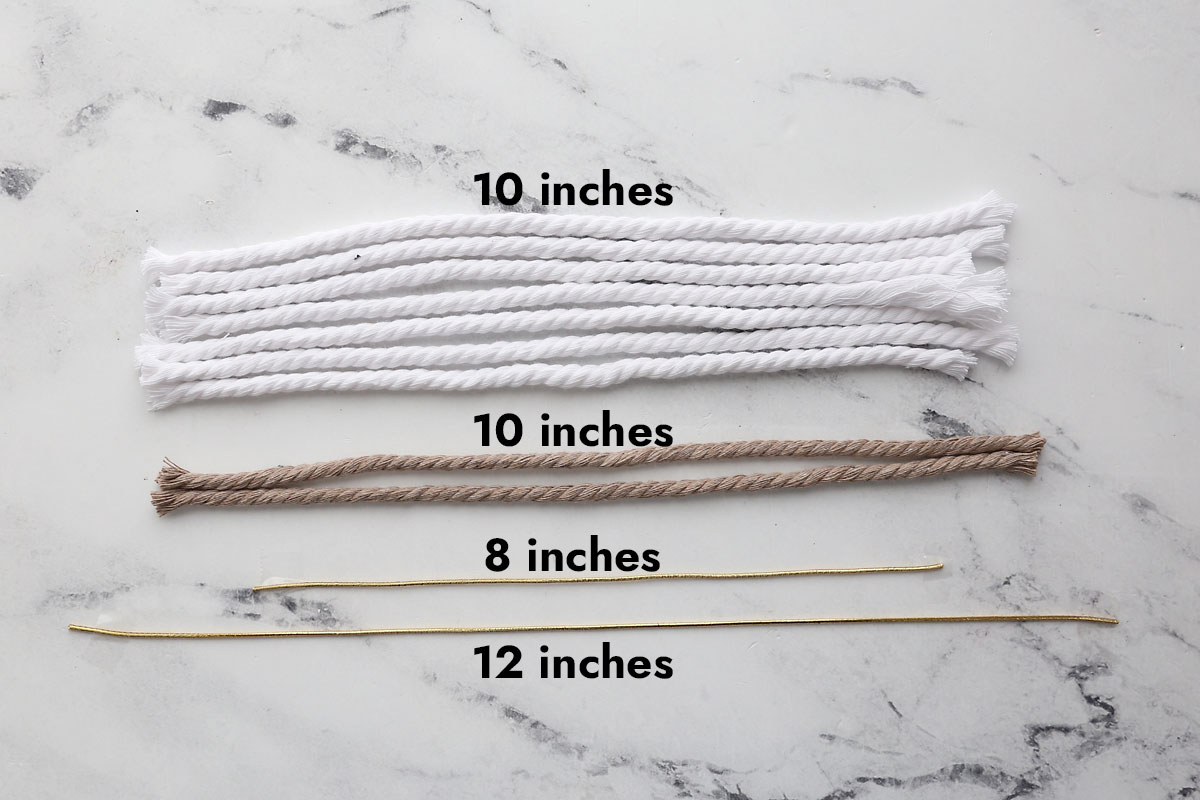
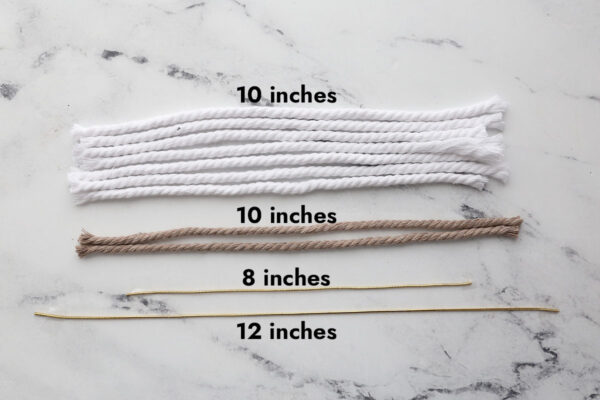
Start by cutting the pieces of cord that you are going to use.
- Cut 7 pieces of white cord at 10 inches
- Cut 2 pieces of brown cord at 10 inches
- Cut 1 piece of gold elastic cord at 8 inches and 1 piece at 12 inches
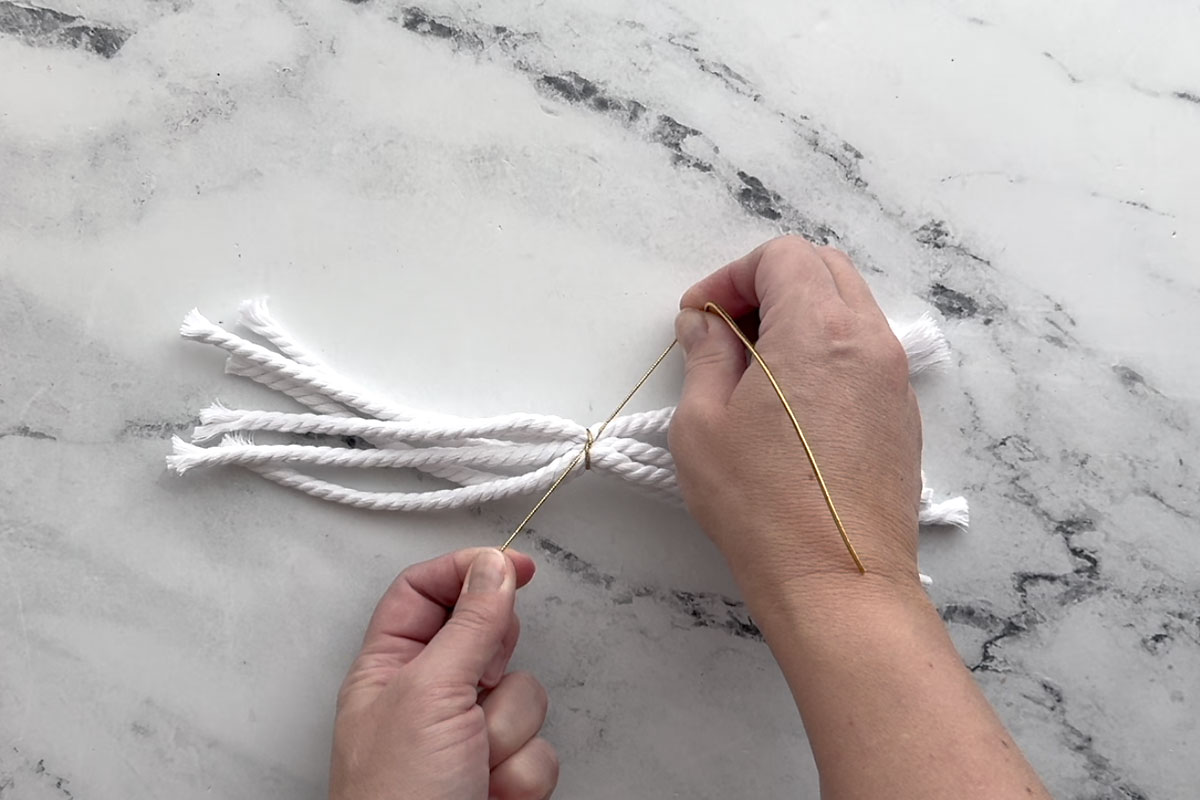
Create the Body/Dress
Lay six pieces of white cord on the table in front of you lined up together (note you are saving the seventh piece of white cord for later). Grab the 12 inch piece of gold elastic cord and tie it around the white cords in the center. Pull the knot tight and then tie a double knot, taking care that the tails of the gold cord are even.
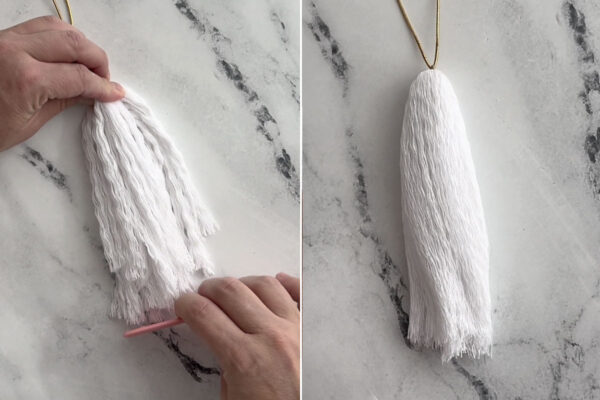
Now hold the knot of the gold cord in one hand and let all the white cords hang down. We are going to unravel these cords to make a large tassel. It’s easiest to first use your fingers to separate the three sections that make up each cord.
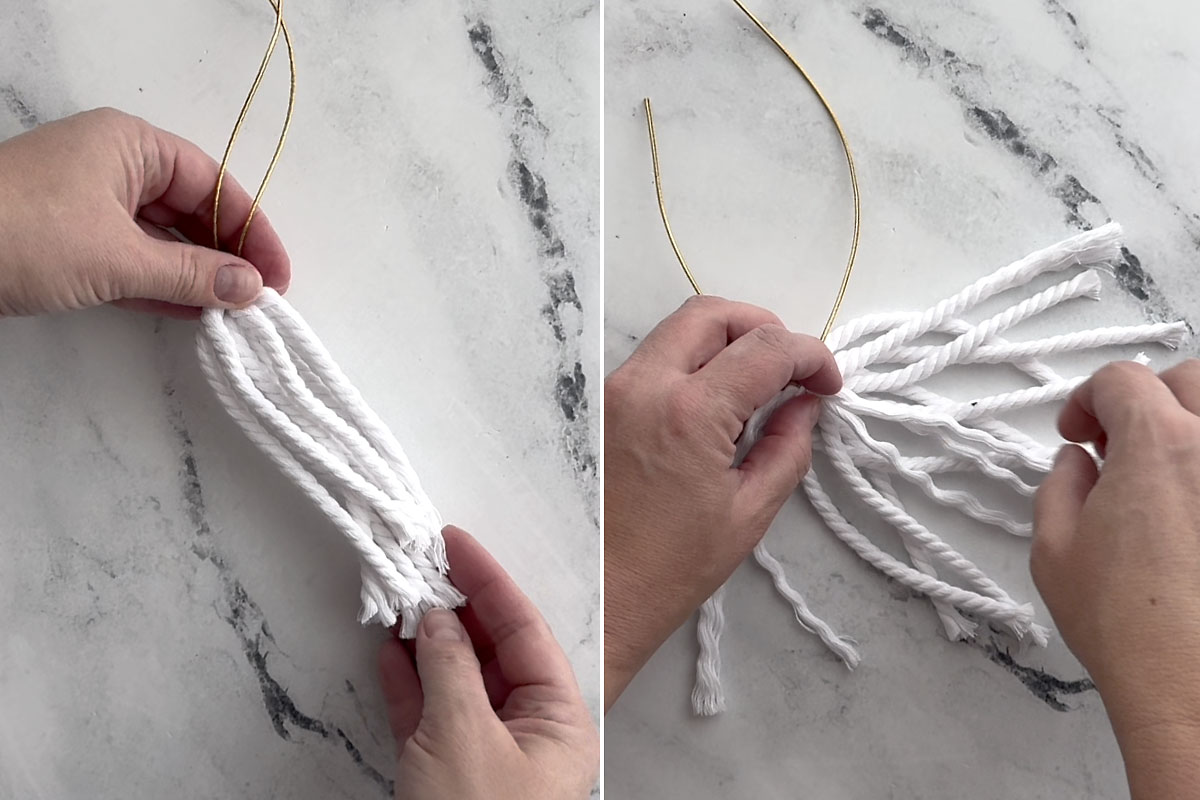
Once the sections of all the cords are separated, use a fine tooth comb to comb out the cord. This will take a couple of minutes. You’ll want to comb it out, then flip it over and comb it out again on the other side. Continue combing until the strands are nice and smooth.

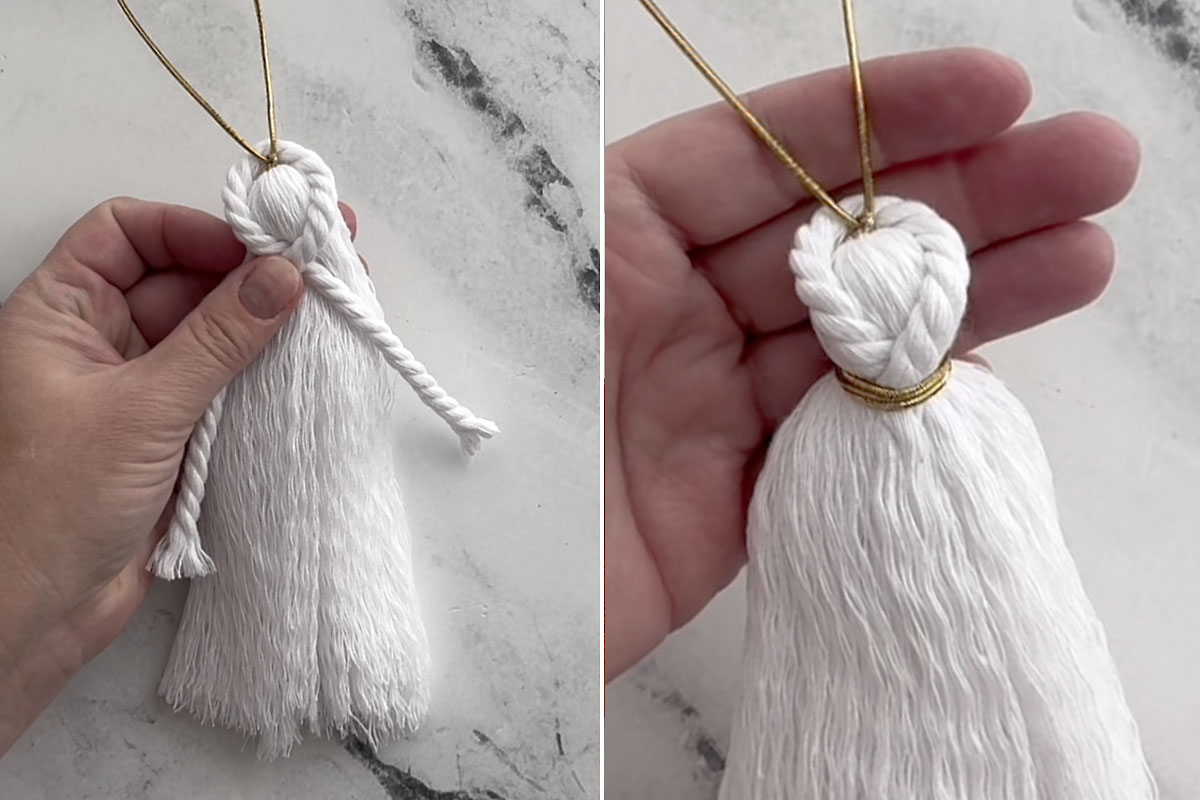
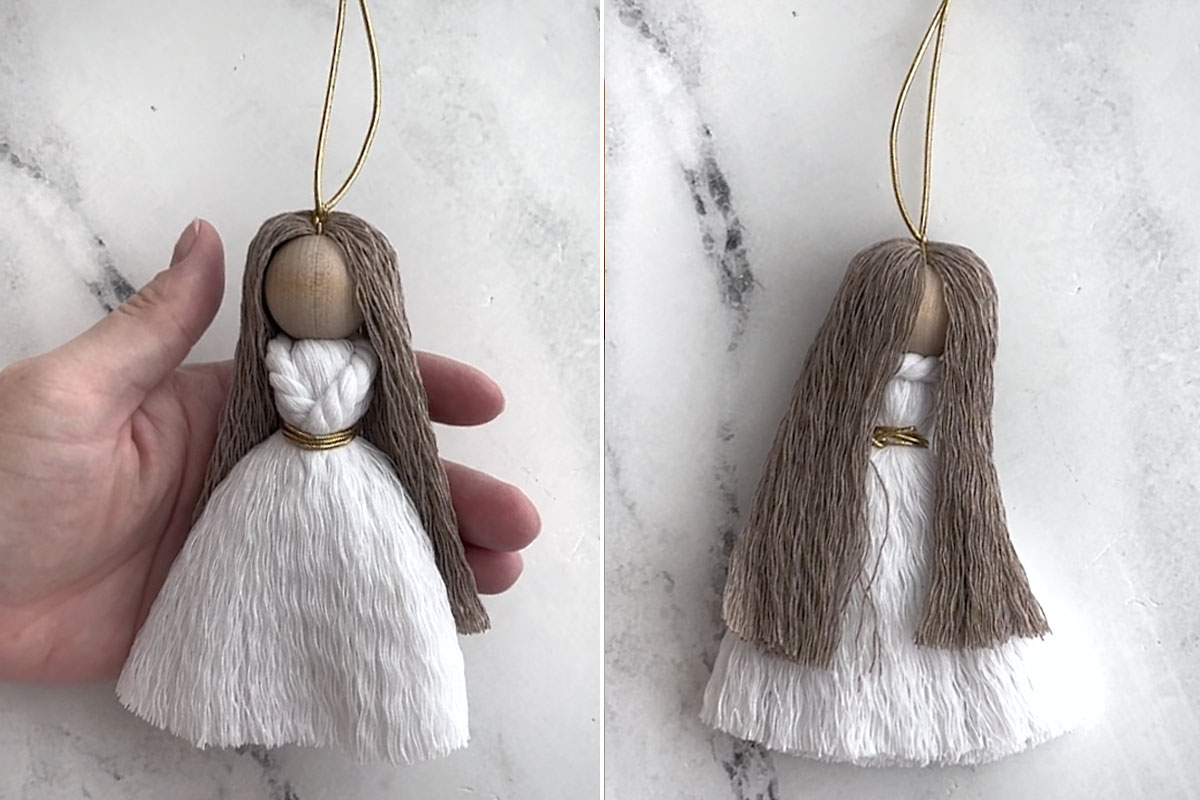
At this point you have created a large tassel. We are going to wrap the last piece of white cord around it to add a little interest and make it look more like a dress. Run the last piece of white cord behind the gold cord, then criss cross it in front as you see in the photo below. Grab the last piece of gold cord and wrap it around the tassel a couple of times and tie tightly in the back. Then unravel and comb out the tails of the white cord.
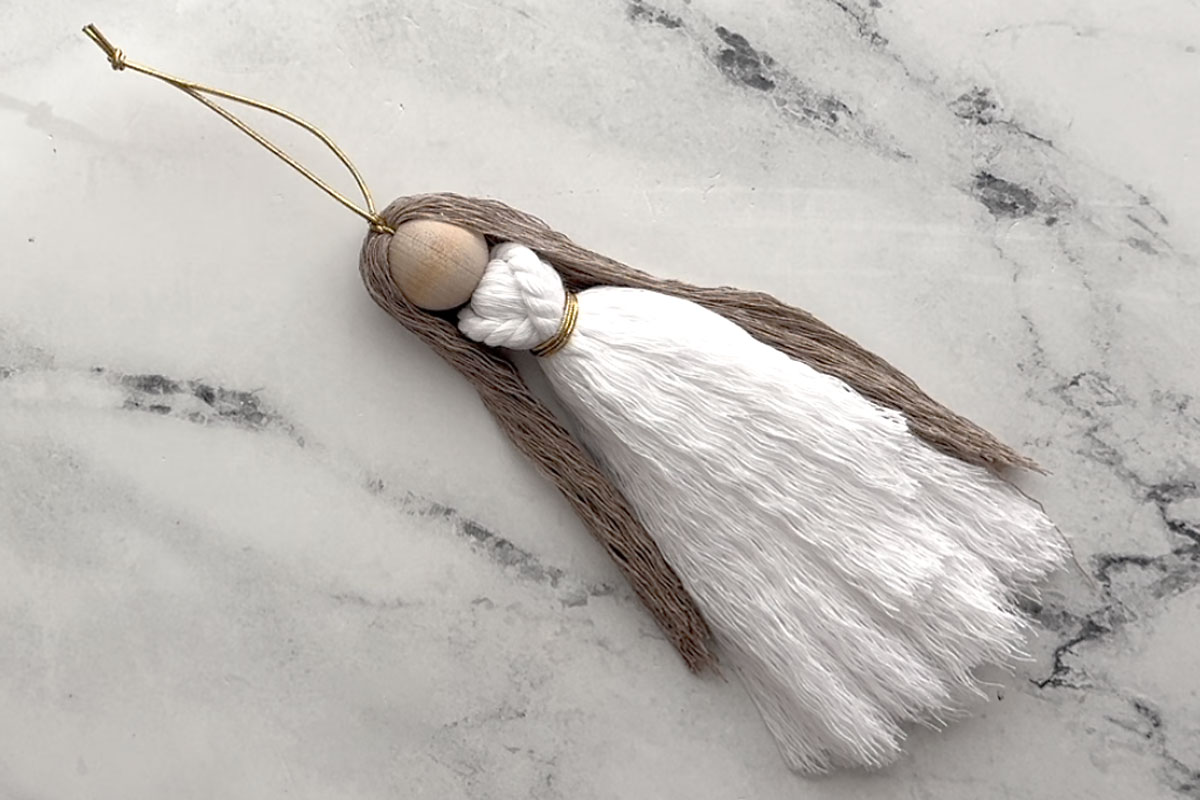
Add the Head and Hair
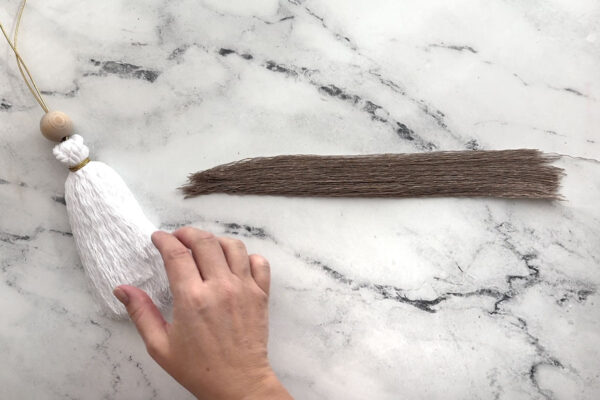
Now you can grab the wood bead and slide it onto the gold cord to look like a head. Also, unravel and then comb out the two pieces of brown macrame cord. This will be the angel’s hair.

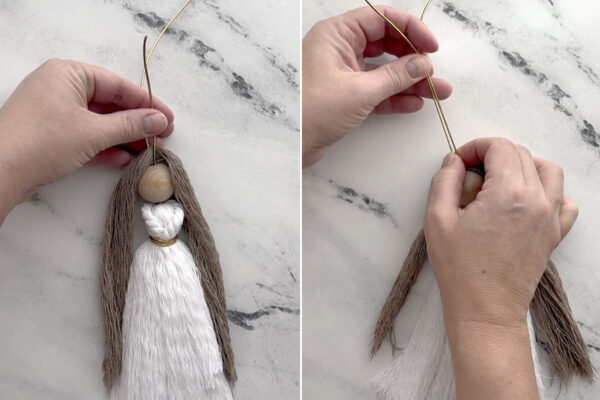
Place the hair in between the two gold cords coming through the wood bead. Pull on both pieces of gold cord to stretch it up, and then tie in a double knot over the hair.

Now you can tie a knot in the ends of the gold cord to create a hanging loop.
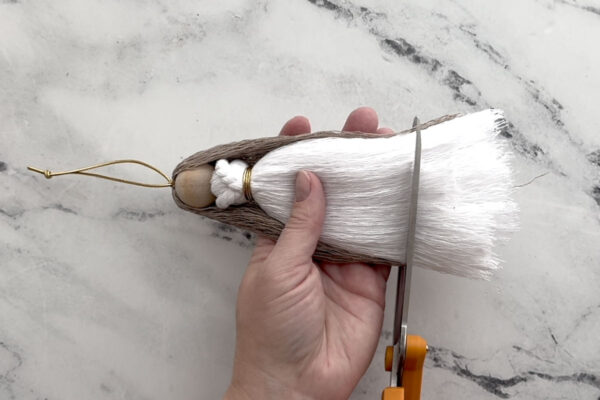
Trim
You’re almost done! Come out the angel’s dress and hair one more time, combing the hair to the back of the dress. Then cut straight across at whatever length you’d like the dress to be. You will probably need to cut once, then comb it out and cut again to get it straight. So don’t cut too short the first time.

If you’d like, you can also trim the hair a little shorter than the dress, keeping it to the back of the angel. Here’s what the angel looks like now from the front, and then from the back:
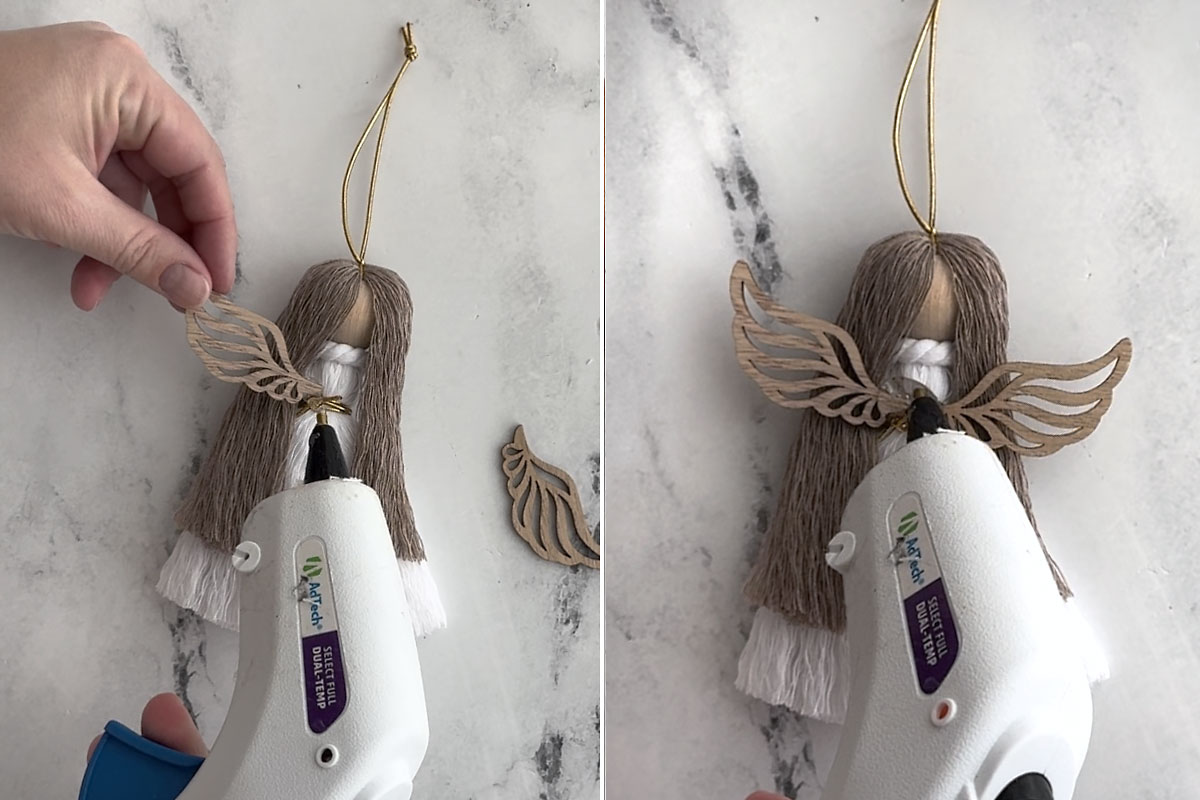
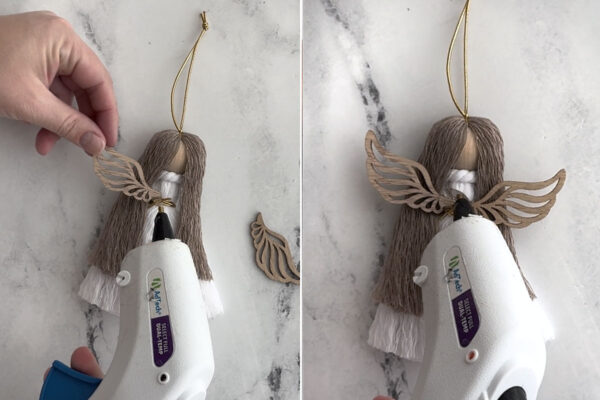
Add the Wings
The final step is to glue on the wings! Flip the angel so the back is toward you. Place a generous amount of hot glue on her back where the gold cord is tied and then press the wings down on the glue. Hold them for a few minutes until the glue cools and they feel secure. Then put even more hot glue on top of the wings in the middle to give them extra security.
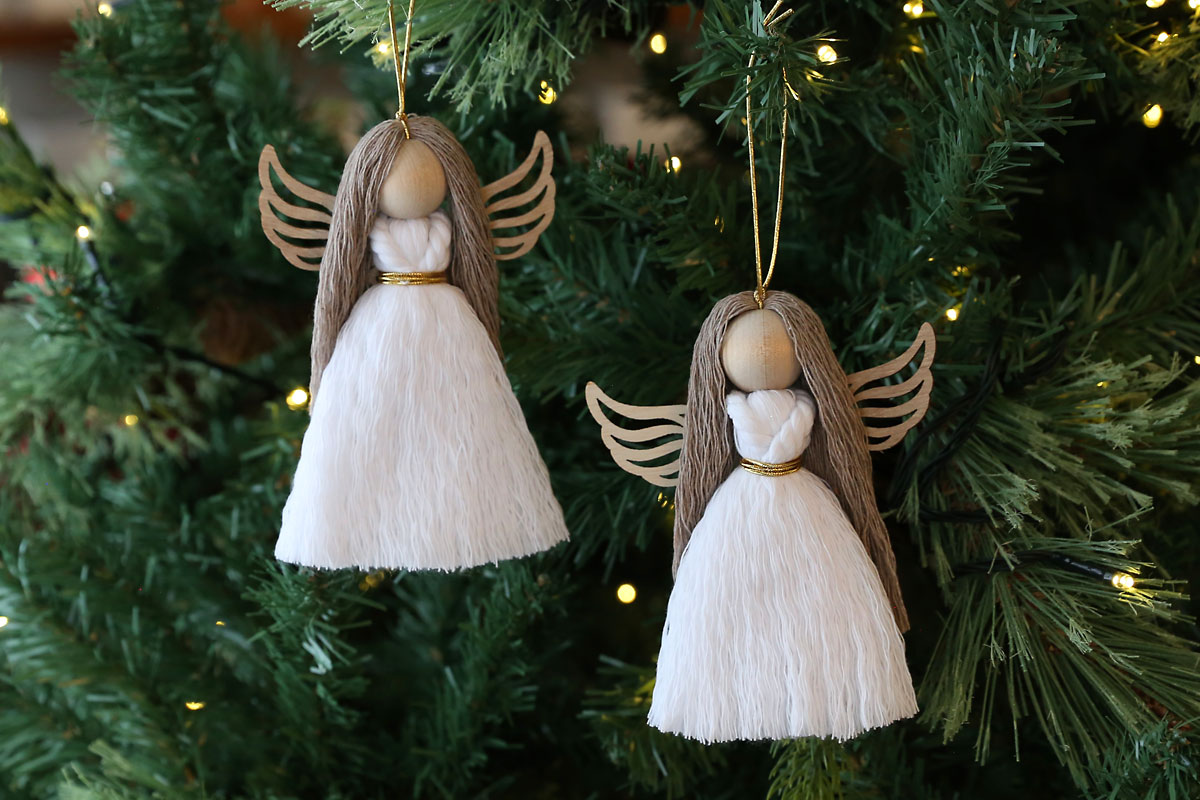
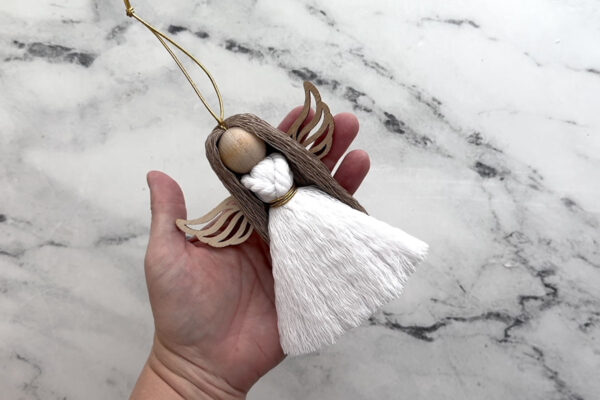
Once the glue is completely dry, your macrame angel is finished and ready to hand on your tree!
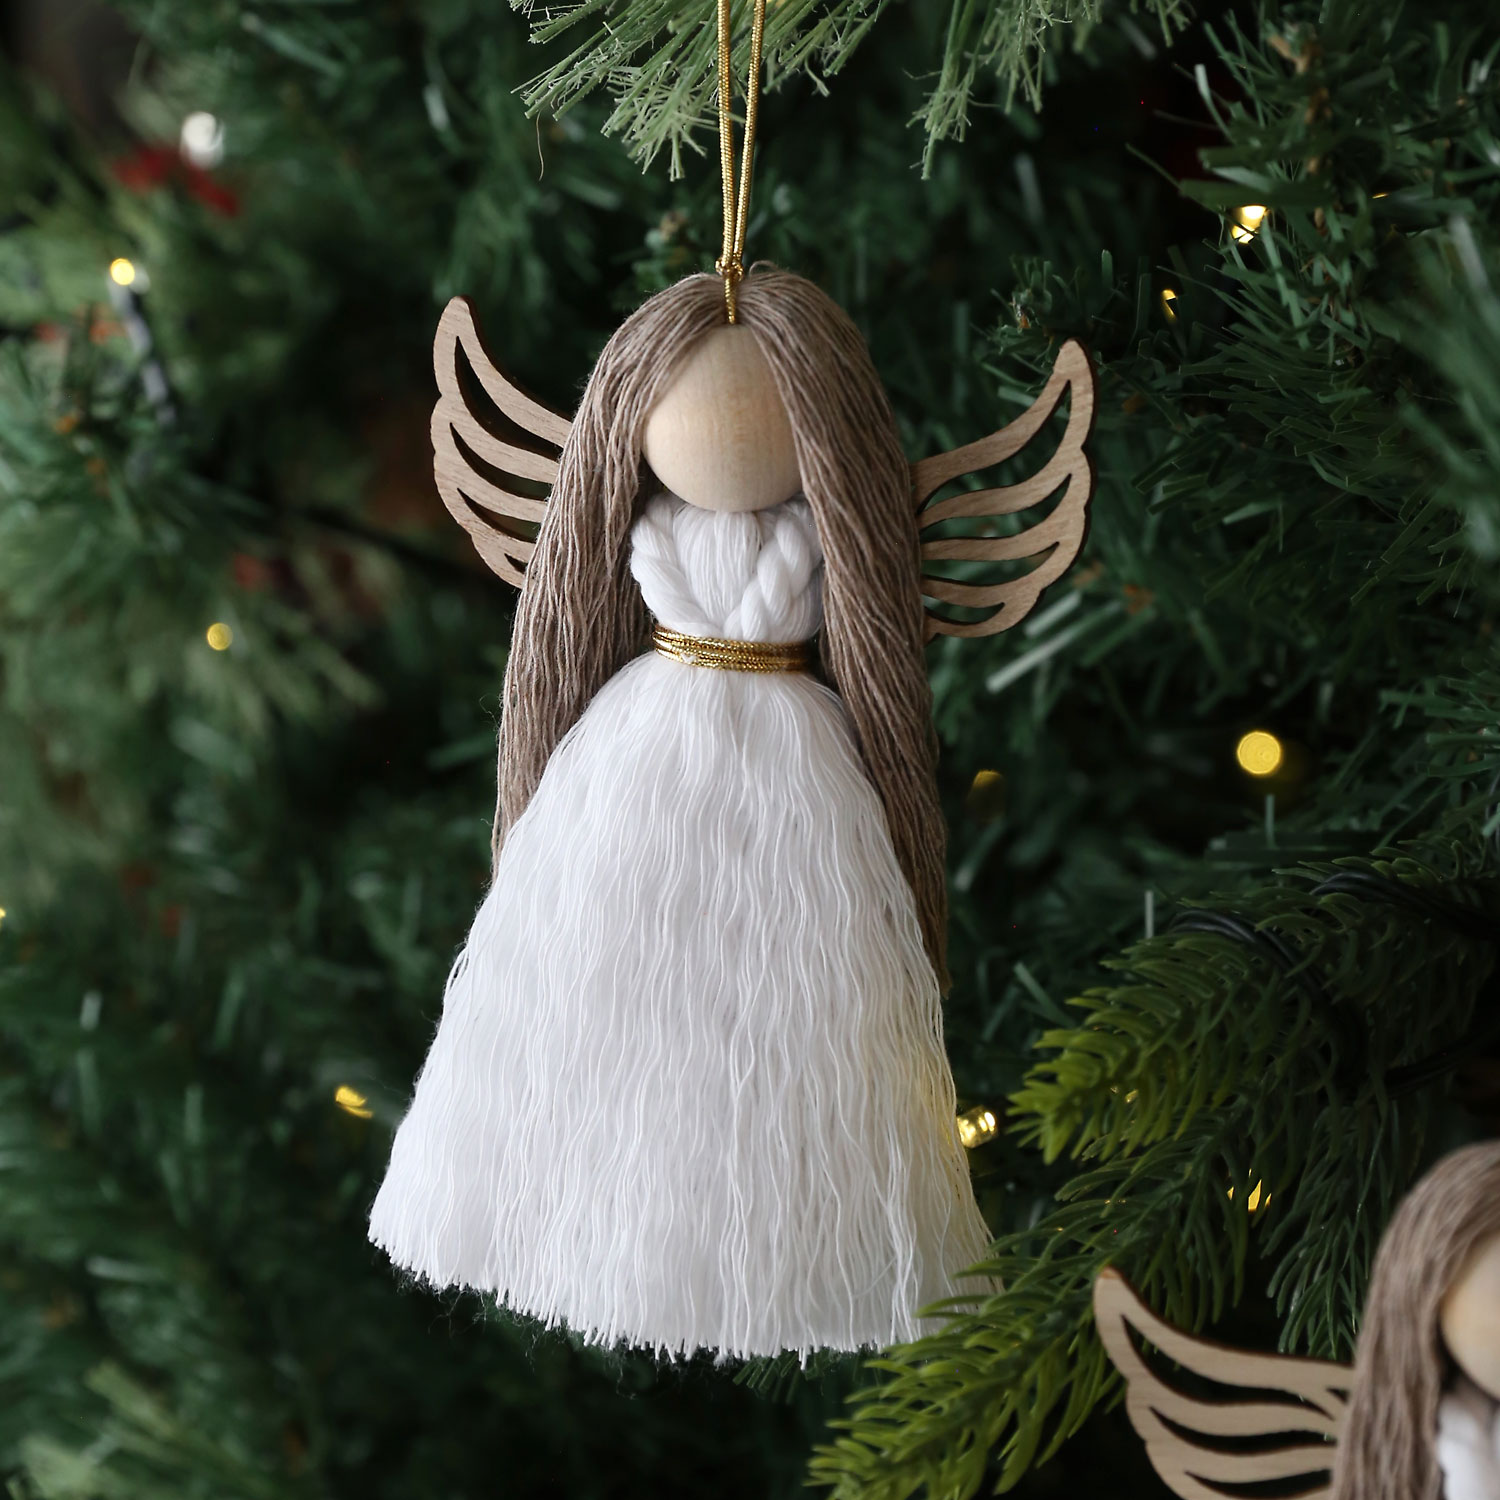
Macrame Angel Ornament
Supplies
- White Macrame Cord 5 mm
- Brown Macrame Cord 5 mm
- Narrow Gold Elastic Cord
- 1 inch Wooden Bead
- Angel Wings
Want more project ideas? Sign up to get my favorite easy crafts and recipes straight to your inbox!
Equipment
- Hot Glue Gun
- Comb
Instructions
- Cut seven pieces of 10-inch white cord, 2 pieces of 10-inch brown cord, 1 piece of 12-inch gold elastic cord, and 1 piece of 8-inch gold elastic cord.

- Lay six of the white cords down on a table. Use the 12 inch piece of gold cord to tie them together in the middle. Unravel the three sections that make up each cord.
- Once the cords are all unraveled, comb through the cord until it is very smooth, creating a large tassel.
- Wrap the last piece of white cord around the tassel as shown, criss crossing in the front. Use the 8 inch piece of gold elastic cord to tie it. Unravel and comb out the tails of white cord.
- Slide a wood bead onto the gold cord coming out the top of the dress. Also unravel and comb out the two pieces of brown cord to make hair.
- Place the hair in between the two gold cords coming through the wood bead. Pull both cords tight, then knot them twice.
- Comb out the dress and hair again. Comb the hair to the back. Cut straight across at whatever length you'd like the dress to be.
- Use plenty of hot glue to glue the wings to the back of the angle where the gold cord is tied. Add extra hot glue to make sure the wings are secure.
- The macrame angel ornament is complete.


Leave a Comment