
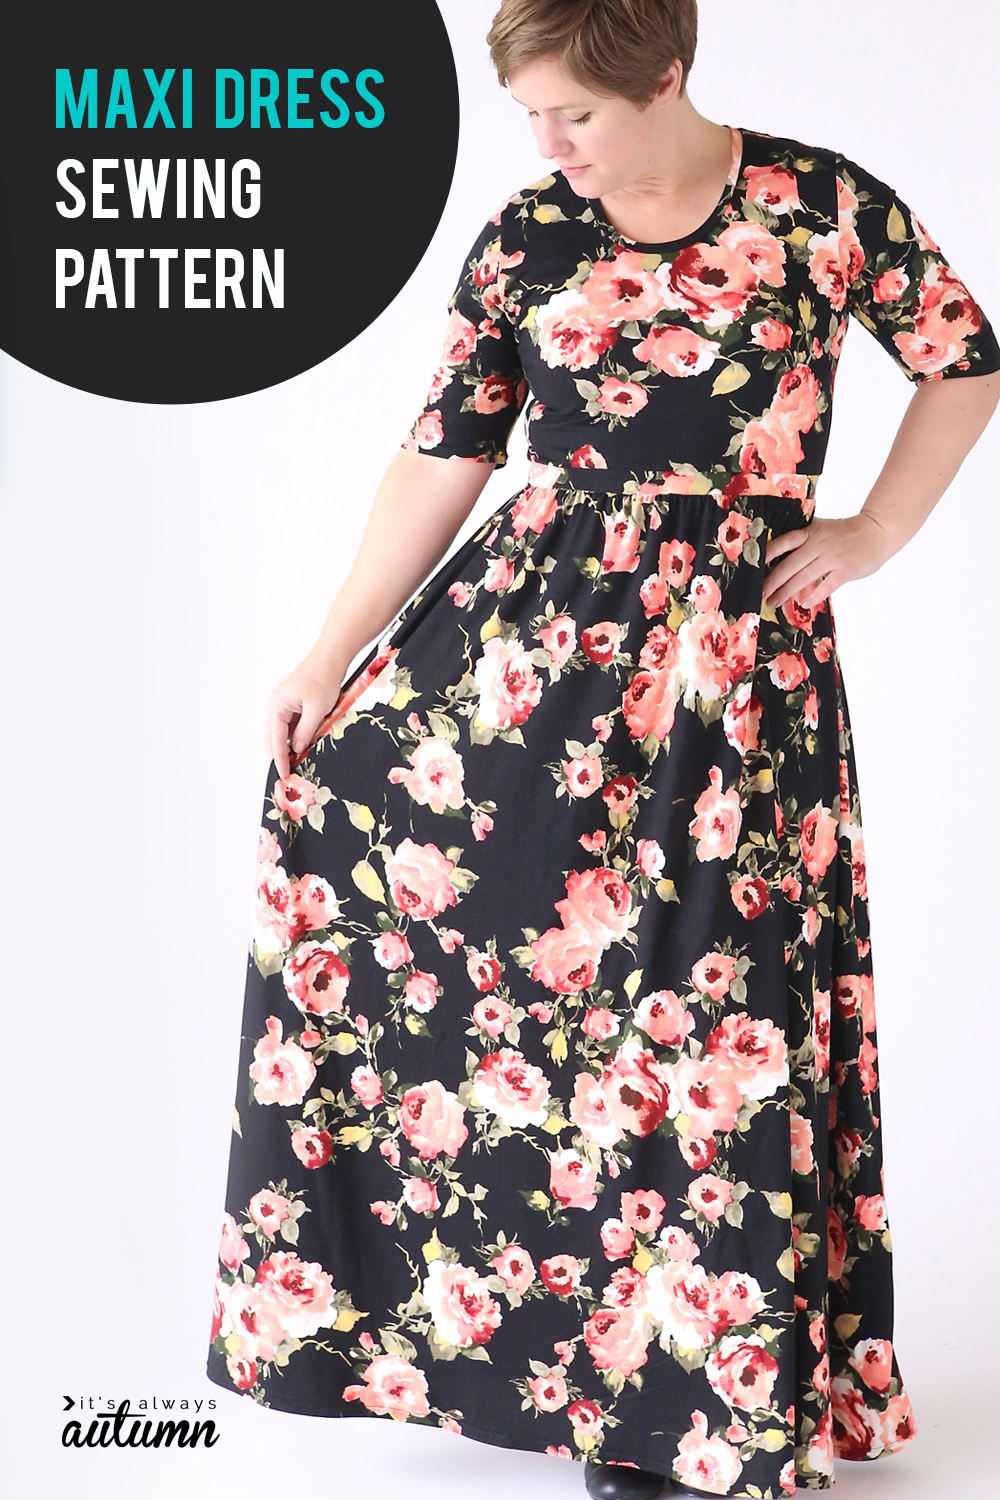
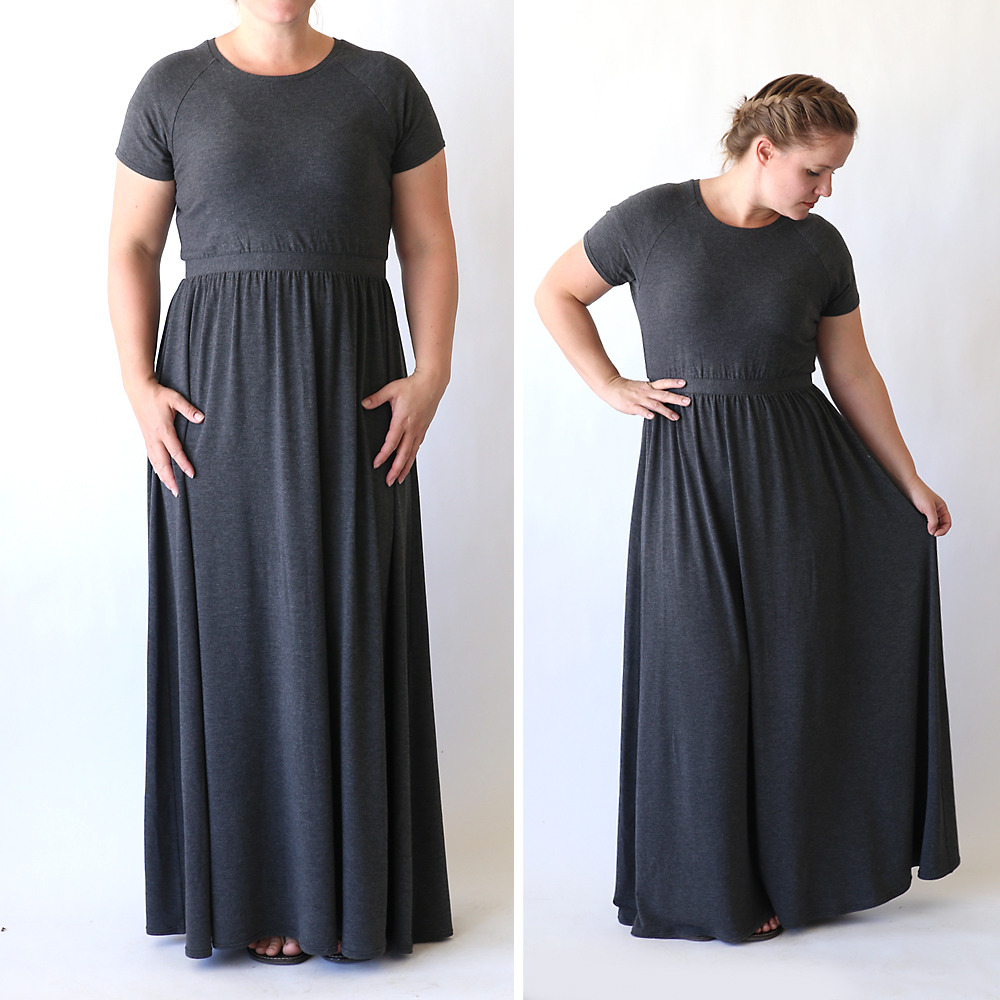
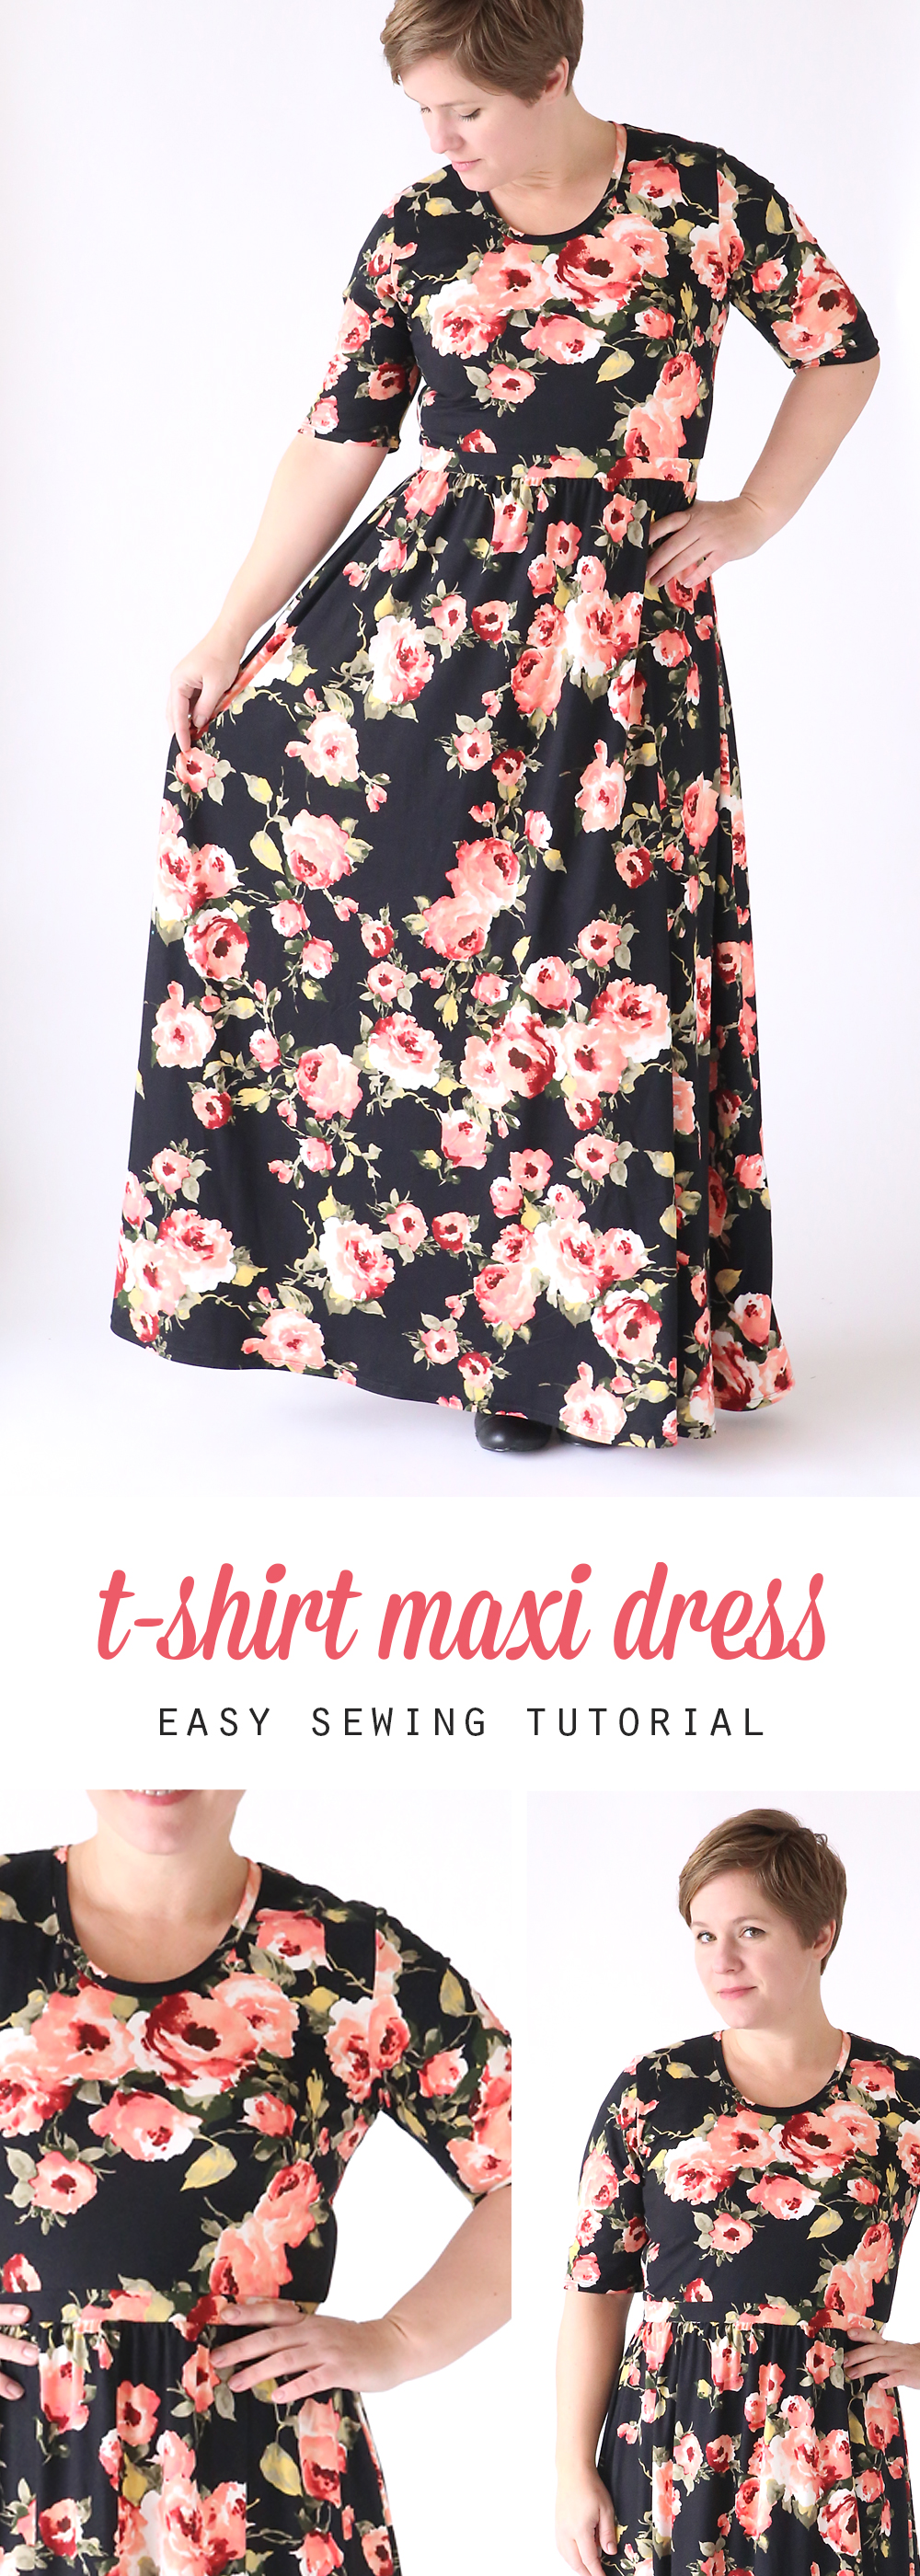
In today’s post: Learn how to hack a t-shirt pattern and turn it into a beautiful, flattering maxi dress.
Note: I made (and blogged about) this dress three years ago, and it’s still one of my favorites! Using a knit fabric makes this easy to sew up and so comfortable to wear. I’m bringing it back to the front page of the blog today for any of you who didn’t see it all those years ago.
Lately I’ve seen tons of gorgeous dresses made with super soft floral knits at the mall, but I’m not a fan of the $60 price tags. Luckily, I found a brushed polyester spandex knit at an Etsy shop and I love it! Great print, super soft, wonderful recovery, easy to sew with–I’m sold. And at $6/yd, I can make three of these dresses for the price of one at the store.
I ordered this fabric from Raspberry Creek Fabric. This online shop stocks a lot of double brushed poly knit fabric, which I love using for dresses and shirts. This post isn’t sponsored; I just really like this fabric shop. Super fast shipping, great customer service, and high quality fabric at a great price.
The construction on this maxi dress is not too hard especially if you have made one of my Classic Tees before. In fact, I’d recommend making one of the tees first, especially if you are new to sewing. As for this dress, cutting out the pieces is definitely the most time consuming part, so don’t get intimidated.

How to Make a Maxi Dress from a t-shirt pattern
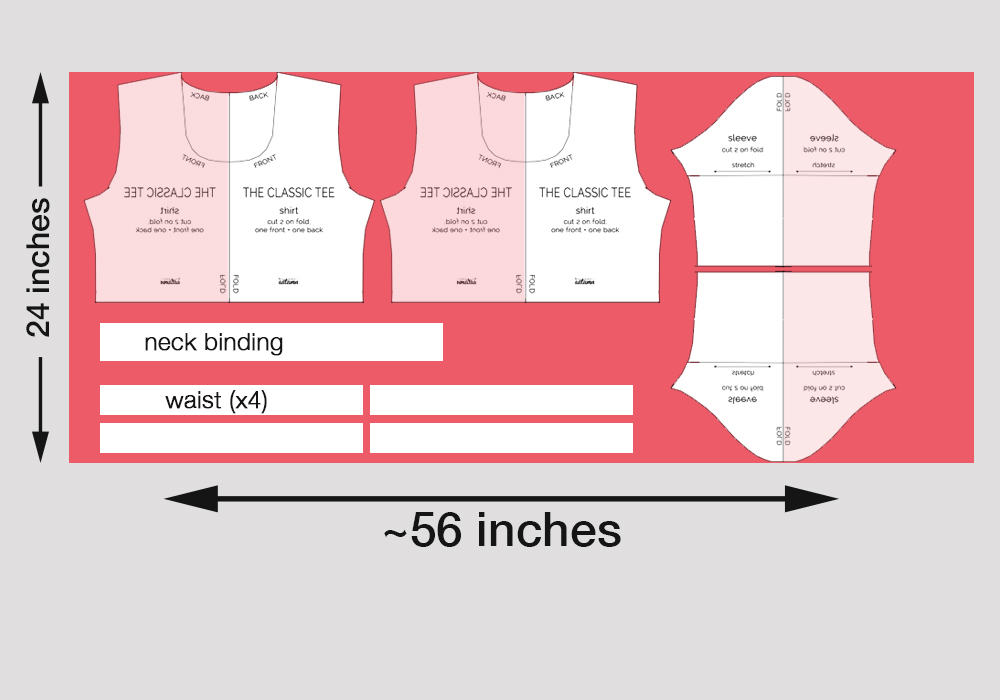
Start by downloading the free Classic Tee pattern in size large by clicking here. (Sorry, I don’t have the tee pattern in other sizes, but you can probably find another free fitted tee pattern in your size by looking through the options in this post.) Print the pattern at full size or 100% and make sure the test box measures exactly 1 inch. This is what the pattern looks like:
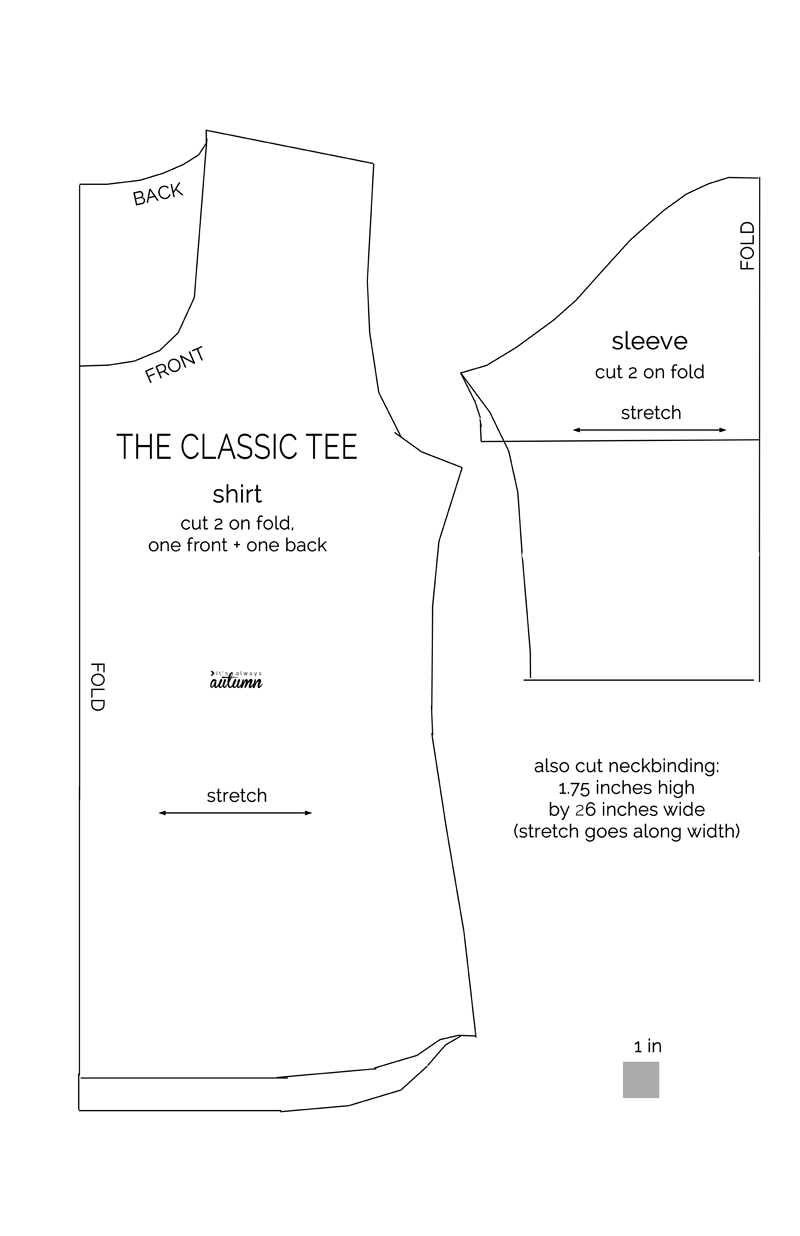
Tape the pages together without trimming or overlapping and cut out the pattern.
You need to make a few quick adjustments to the shirt pattern piece it to use it for the dress. First, cut off about 3/4 of an inch from the FOLD line to make it a bit more fitted. Next, cut the shirt pattern straight across about 16 inches down from the highest point of the pattern – right at the natural waist. That’s about 2 inches under the “it’s always autumn” logo. Cut out the sleeve pattern as is, using the elbow length.
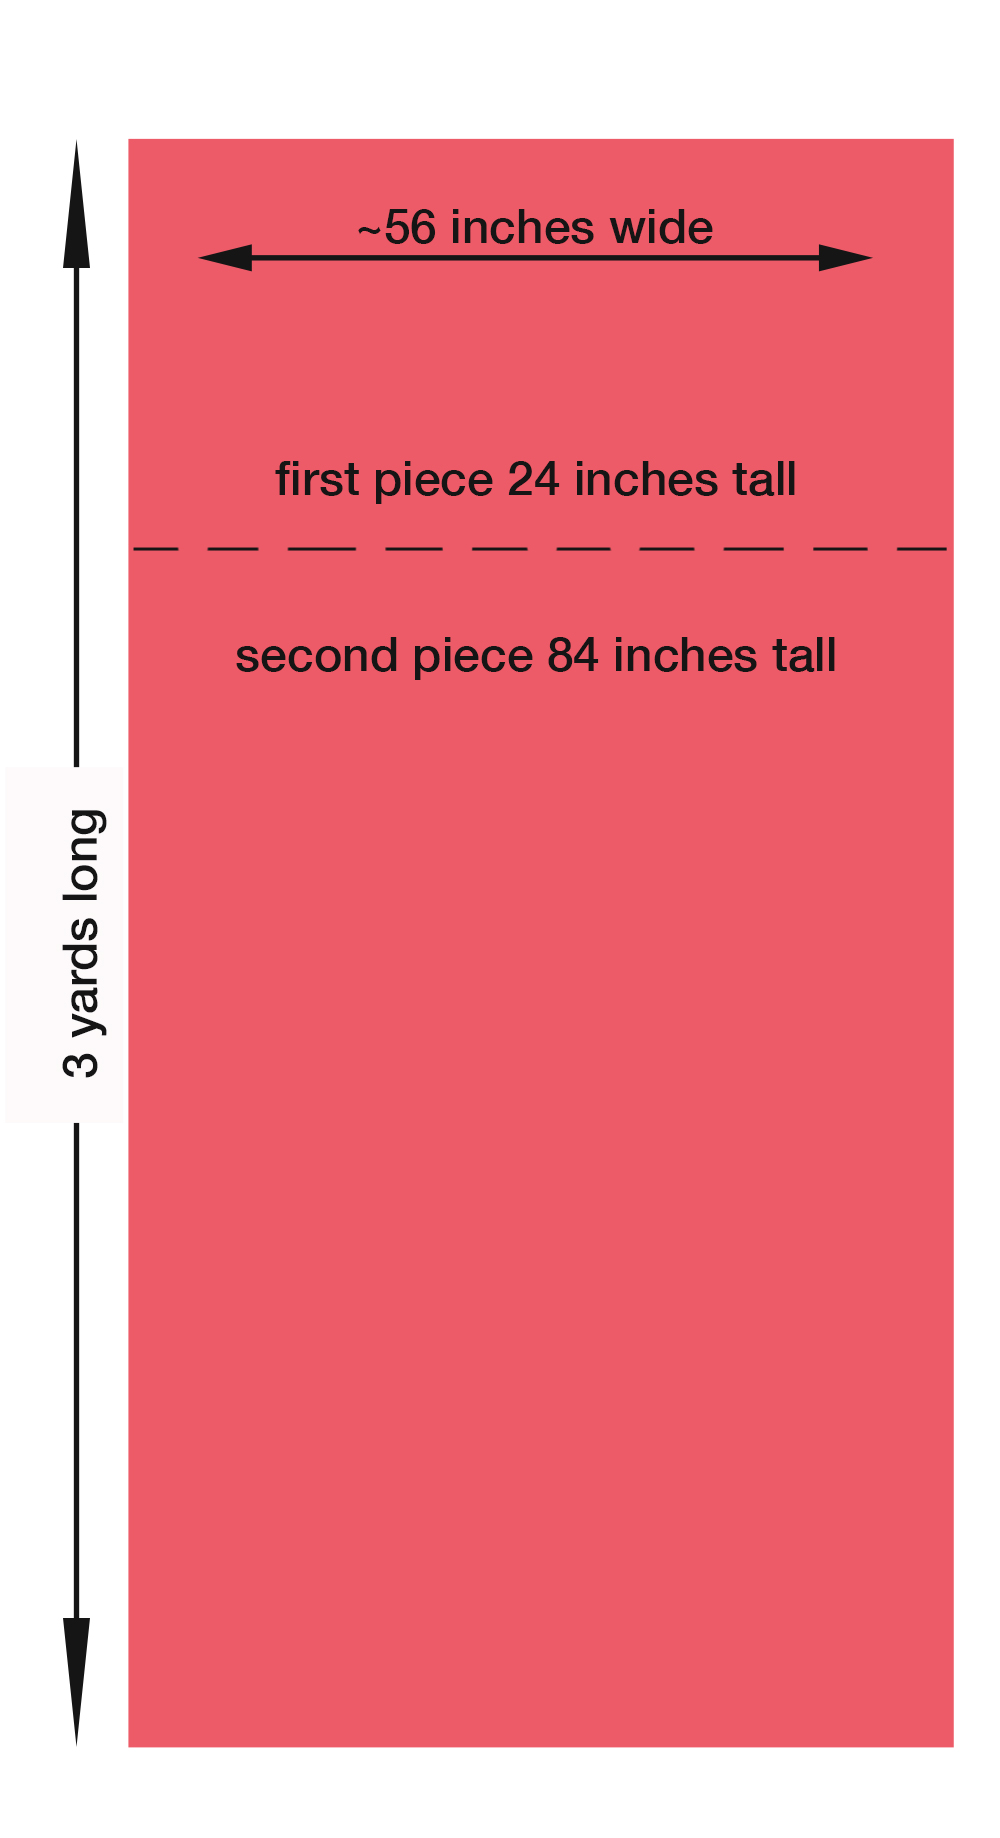
Ok, you are going to need at least 3 yards of 55-60 inch wide knit fabric. I managed to squeeze my dress out of 3 yards, but I’d really recommend 35. yards, especially if you are taller than me (I’m 5’3″). I used brushed polyester spandex knit from Raspberry Creek Fabric for my dress. Be sure to pre-wash your fabric. You will also need about a yard of 1.5 inch wide elastic.
To begin, you’ll cut your fabric into 2 pieces. If you’re working with just 3 yards of fabric, one piece should be 84 inches tall and the other piece should be 24 inches tall. (If you have 3.5 yards of fabric cut one piece 28 inches tall and the other 96 inches tall.)
Ok, start with the shorter piece of fabric. From this, you’ll cut out a shirt front and shirt back, as well as two sleeves, as you see in the graphic below. NOTE: if you are using only 3 yards you won’t be able to make the sleeves quite as long as the pattern shows.
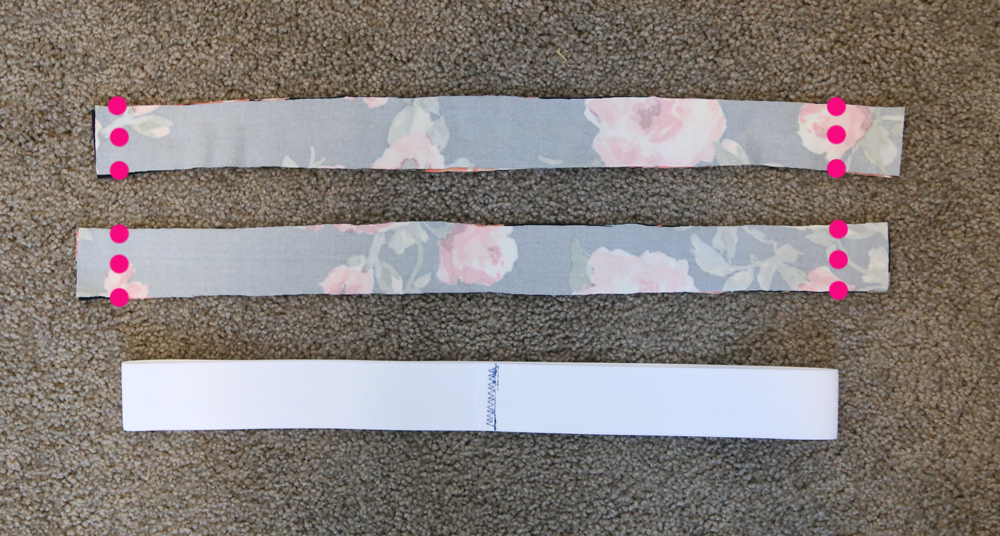
You will also cut 1 neckbinding piece and 4 waist pieces to these dimensions:
- neckbinding is 1.75 inches tall and 24 inches wide (stretch goes along width)
- waist pieces are 1.5 inches tall and 18 inches wide (or the same width as the bottom of your shirt pieces)
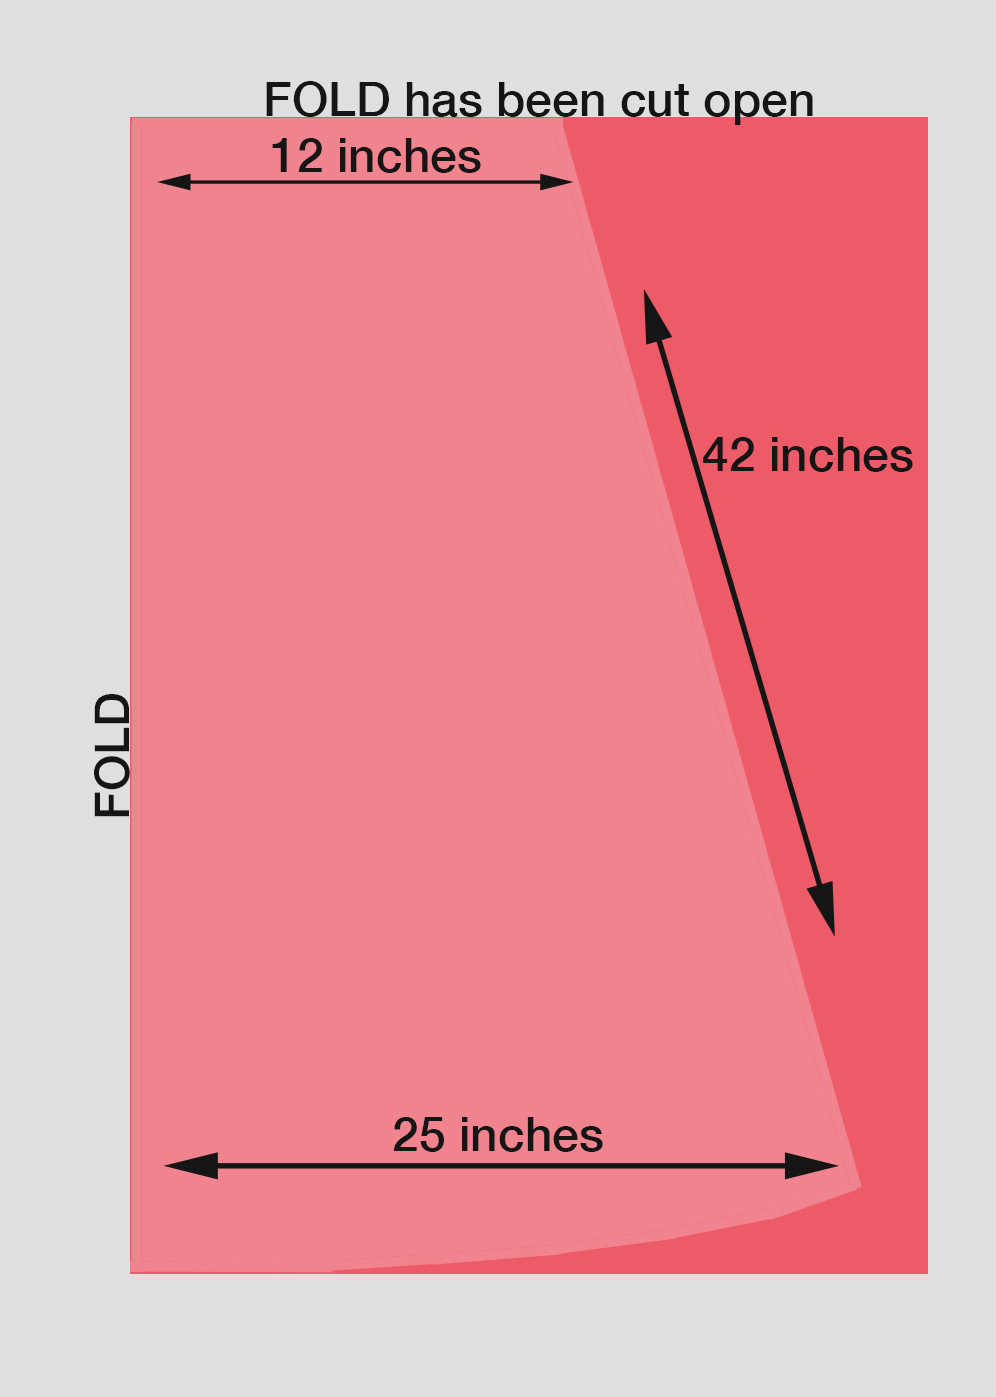
Ok, next we’ll move on to the larger piece of fabric. You’ll want to fold it in half widthwise, and then in half again lengthwise. That will give you 4 layers of fabric with a fold at the top and on one side. Cut through the fold at the top. The fabric will now measure about 28 inches wide and at least 42 inches long.
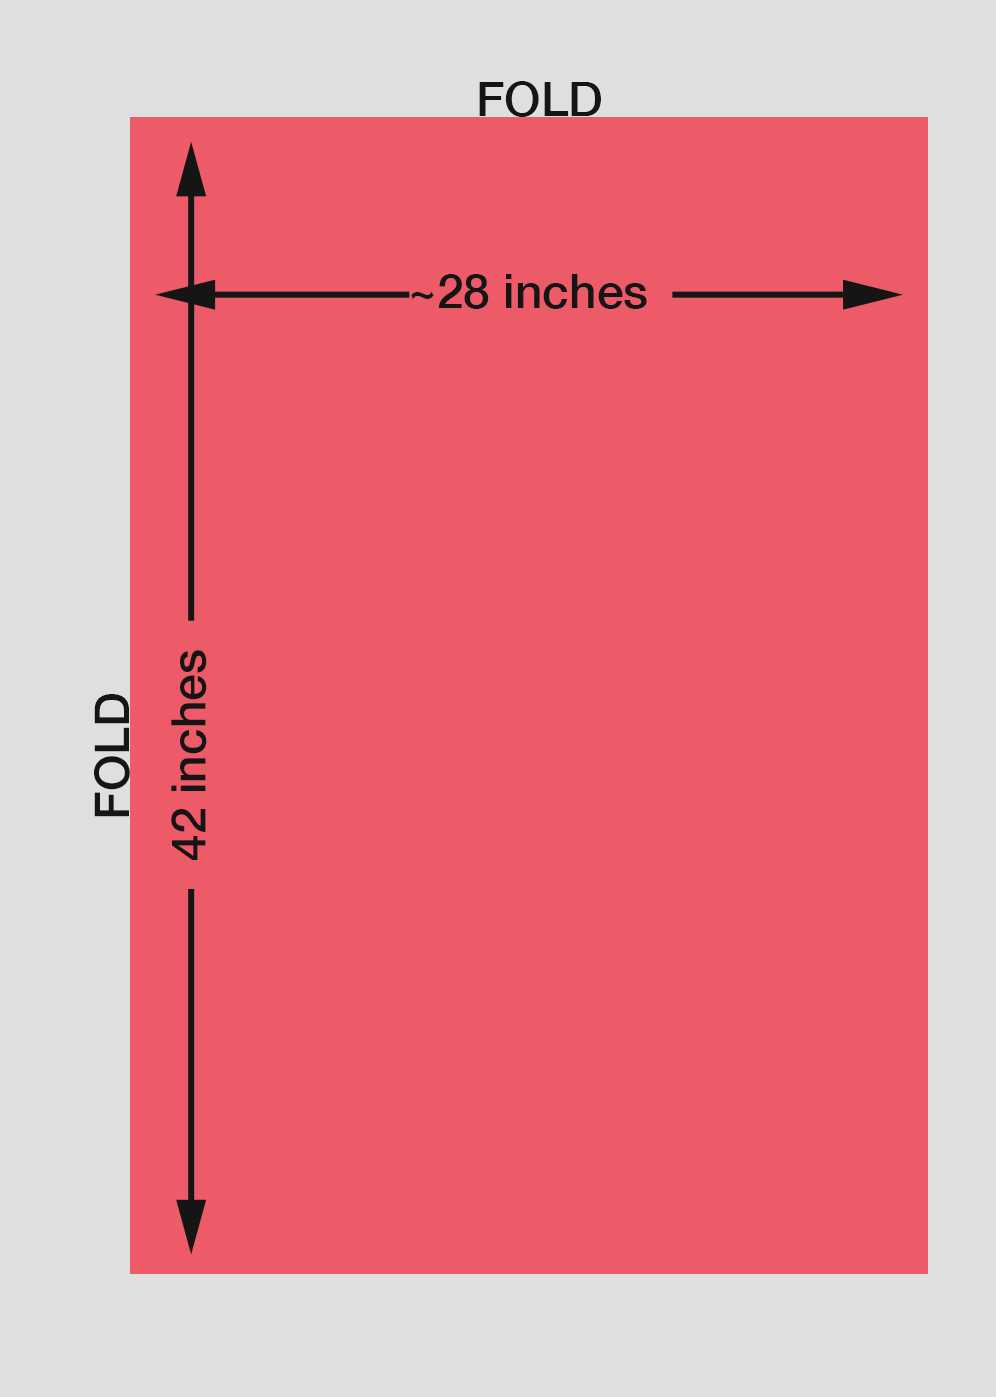
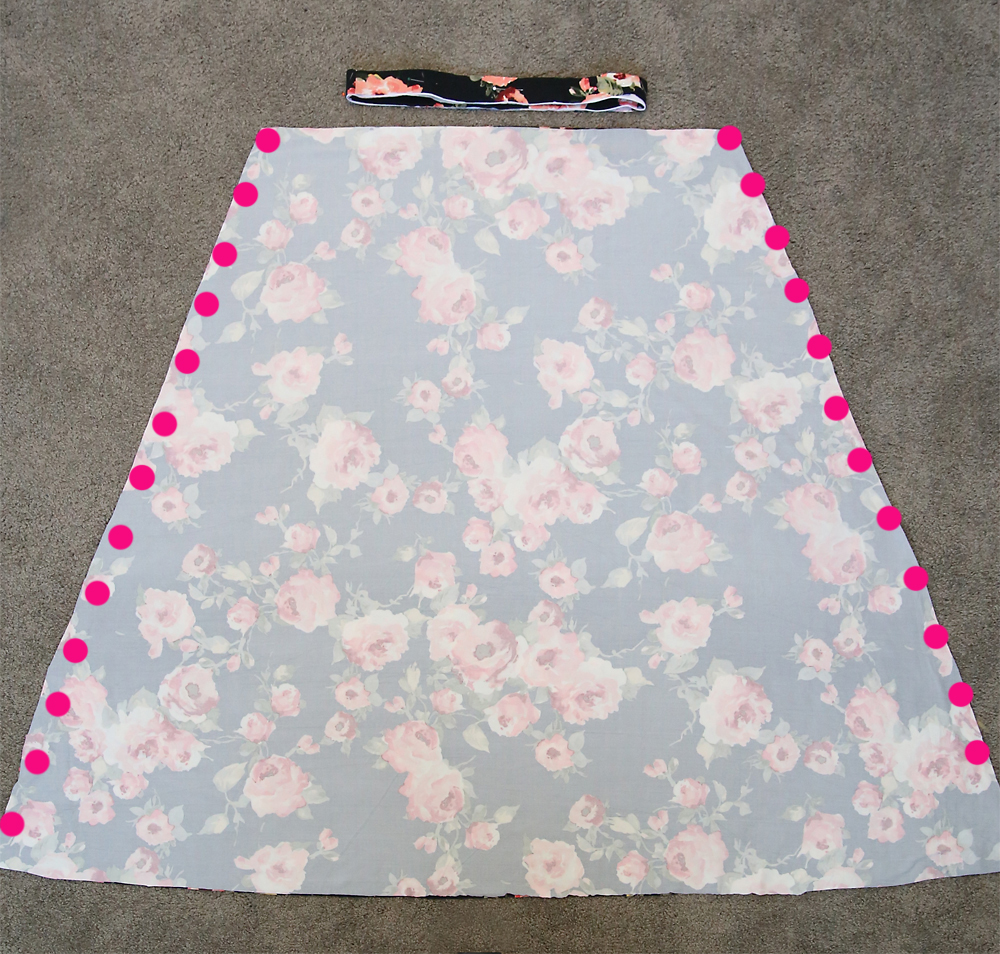
Now cut out two skirt pieces as you see below. My skirt pieces are 42 inches long, but if you are tall you’ll want to increase that length.
Ok, I promise that was the hardest part. Once all your pieces are ready, this dress sews up pretty quickly!
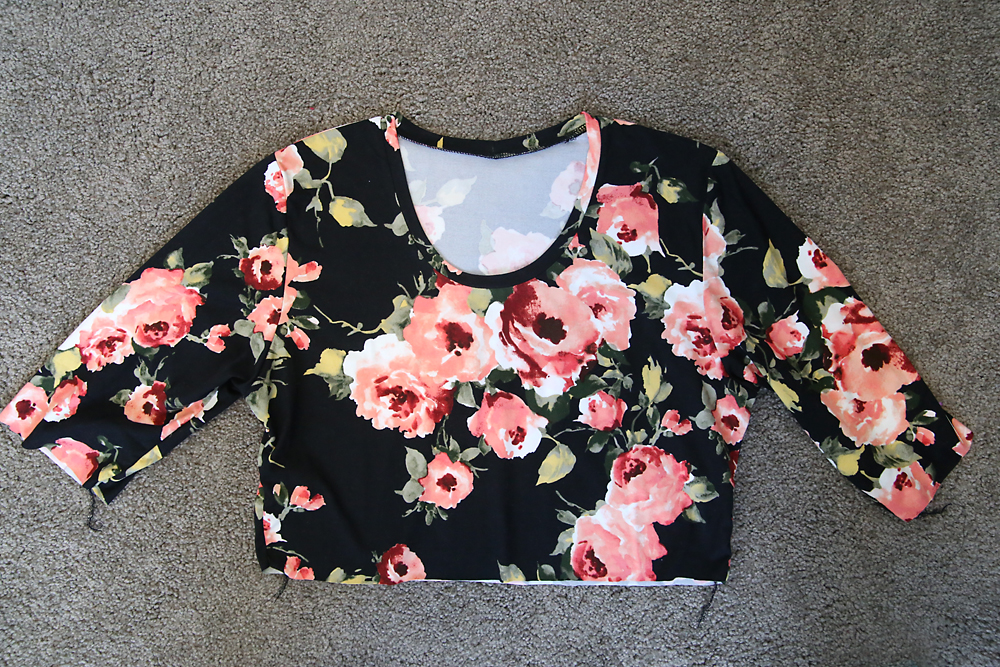
First, you’ll sew up the shirt just as described in the classic tee post. It should fit fairly close to your body. You can also add the neck binding and hem the sleeves at this point. It will look like a cropped t-shirt that isn’t hemmed along the bottom:
Now you can set the tee portion aside, and grab your waistband pieces and 1.5 inch wide elastic. Cut the elastic to your waist measurement and then sew the ends of the elastic together and try it on. It should be fairly snug around your natural waist so it’s tight enough to hold up the skirt, but not uncomfortable.
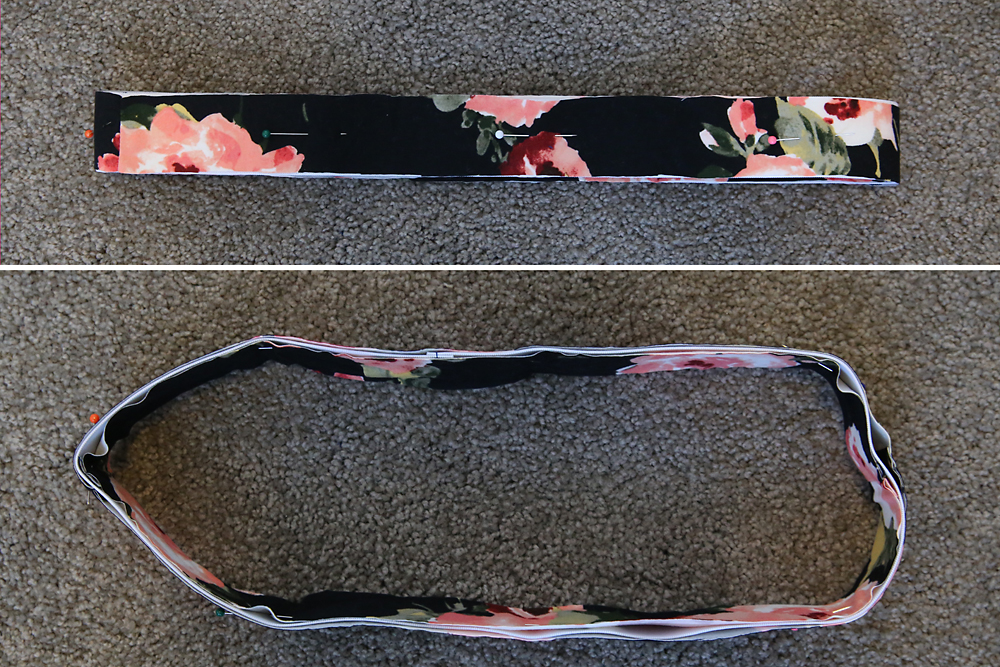
You have four waistband pieces. Place two right sides together and sew together the short ends to make a loop the same size as the elastic. Repeat with the other two pieces.
Place one knit waistband loop inside the elastic; place the other one outside the elastic. Pin all three layers together.
Now grab your skirt pieces. Place the right sides together and sew down the sides.
Use pins to divide the waistband into 8 equal sections. Use pins to divide the top of the skirt into 8 equal sections. Turn the skirt right side out, and place the waistband over the top of the skirt. Match up the pins and pin the waistband to the skirt. Since the top of the skirt is wider than the waistband, it will be all bunched up. As you sew the waistband onto the skirt, stretch it until the skirt piece lies flat. Sew the waistband and skirt together with a stitch that will stretch: I used a serger stitch, but you can also use a zigzag or stretch stitch. Sew close to the edge, using 1/4 inch seam allowance.
(The brushed poly knit curls up when you stretch it, making the method above a little bit tricky. If you’d prefer, you can gather the top of the skirt so it is the same width around as the elastic. Evenly distribute the gathers and then sew the skirt to the elastic using a stitch that will stretch.)
Flip the waistband up, and the skirt will look like the 2nd photo above.
Now it’s time to try on the tee piece and the skirt piece together. Tuck the tee into the skirt and pull the skirt up until it’s at your natural waist, or wherever you feel is most flattering. Mark where it hits on the tee piece with pins. (Photo below from the raglan sleeve version of this dress.)

Trim the tee piece if needed so it is 1/4 inch longer than where you pinned.
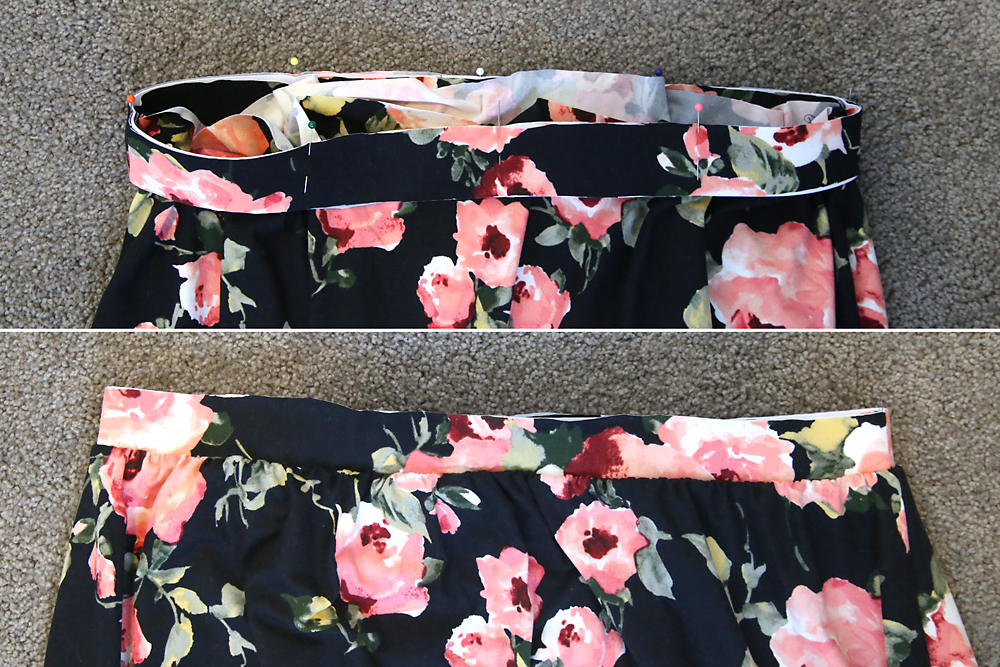
Now you’ll attach the tee to the waistband. Turn the tee right side out and the skirt inside out. Mark each in 8 places, just like you did when attaching the skirt to the waistband. Slide the tee inside the skirt and match up the raw edge with the raw edge of the waistband.
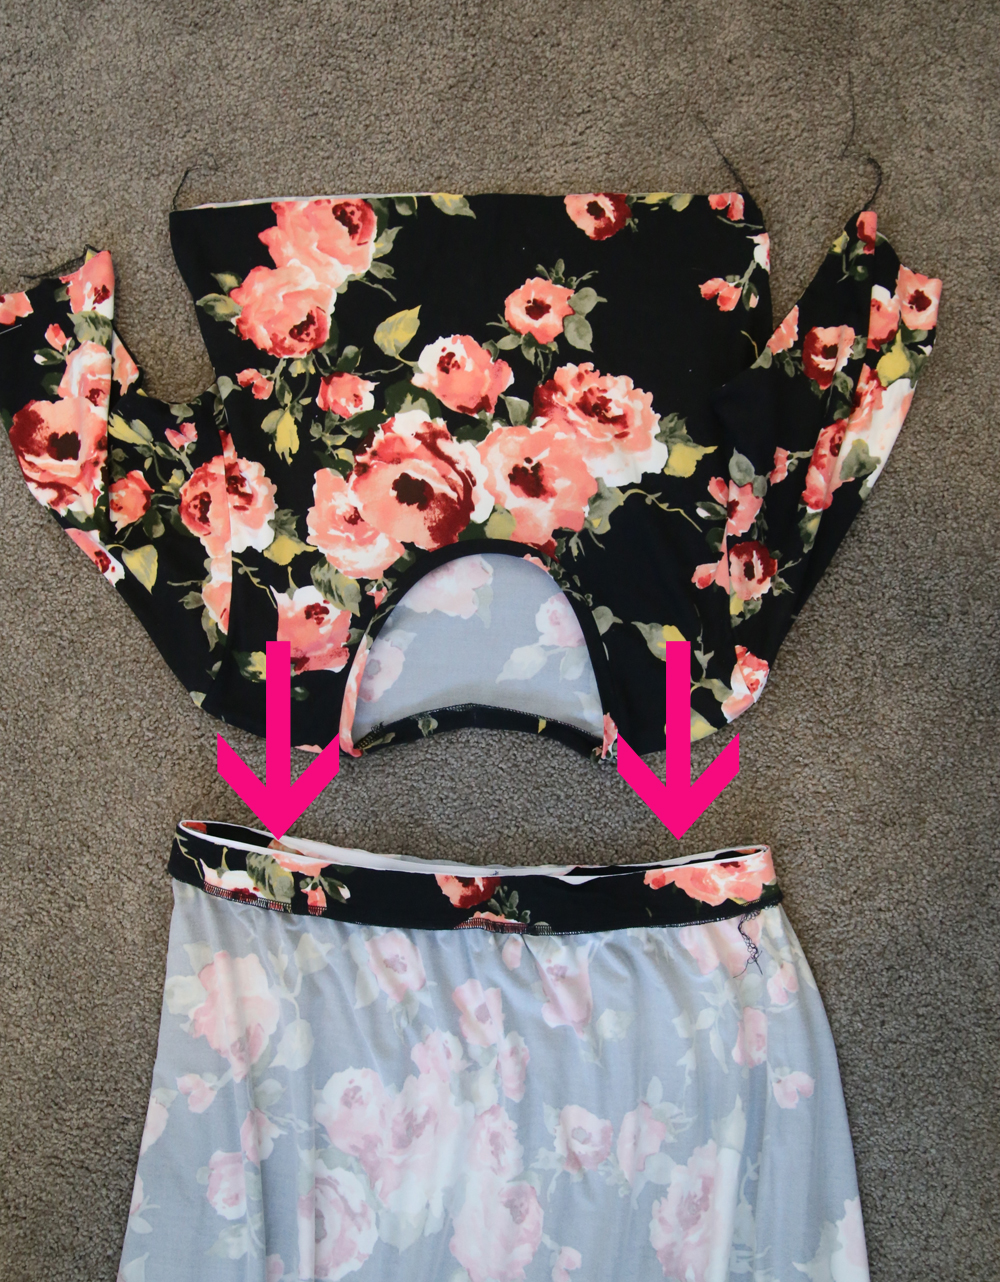
Pin together and sew, pulling the waistband until the tee lies flat under the presser foot. Again use a stitch that will stretch and 1/4 inch seam allowance.
Here’s what the waistband looks like from the inside with both skirt and tee attached:
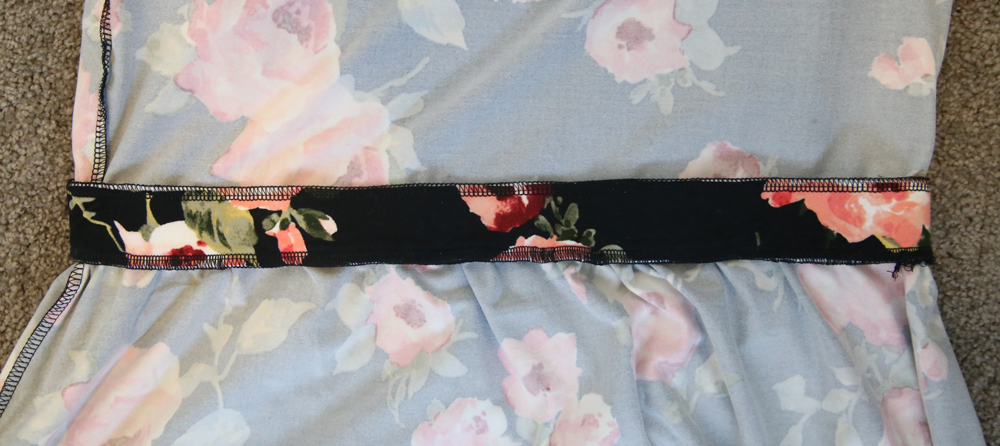
And from the outside:

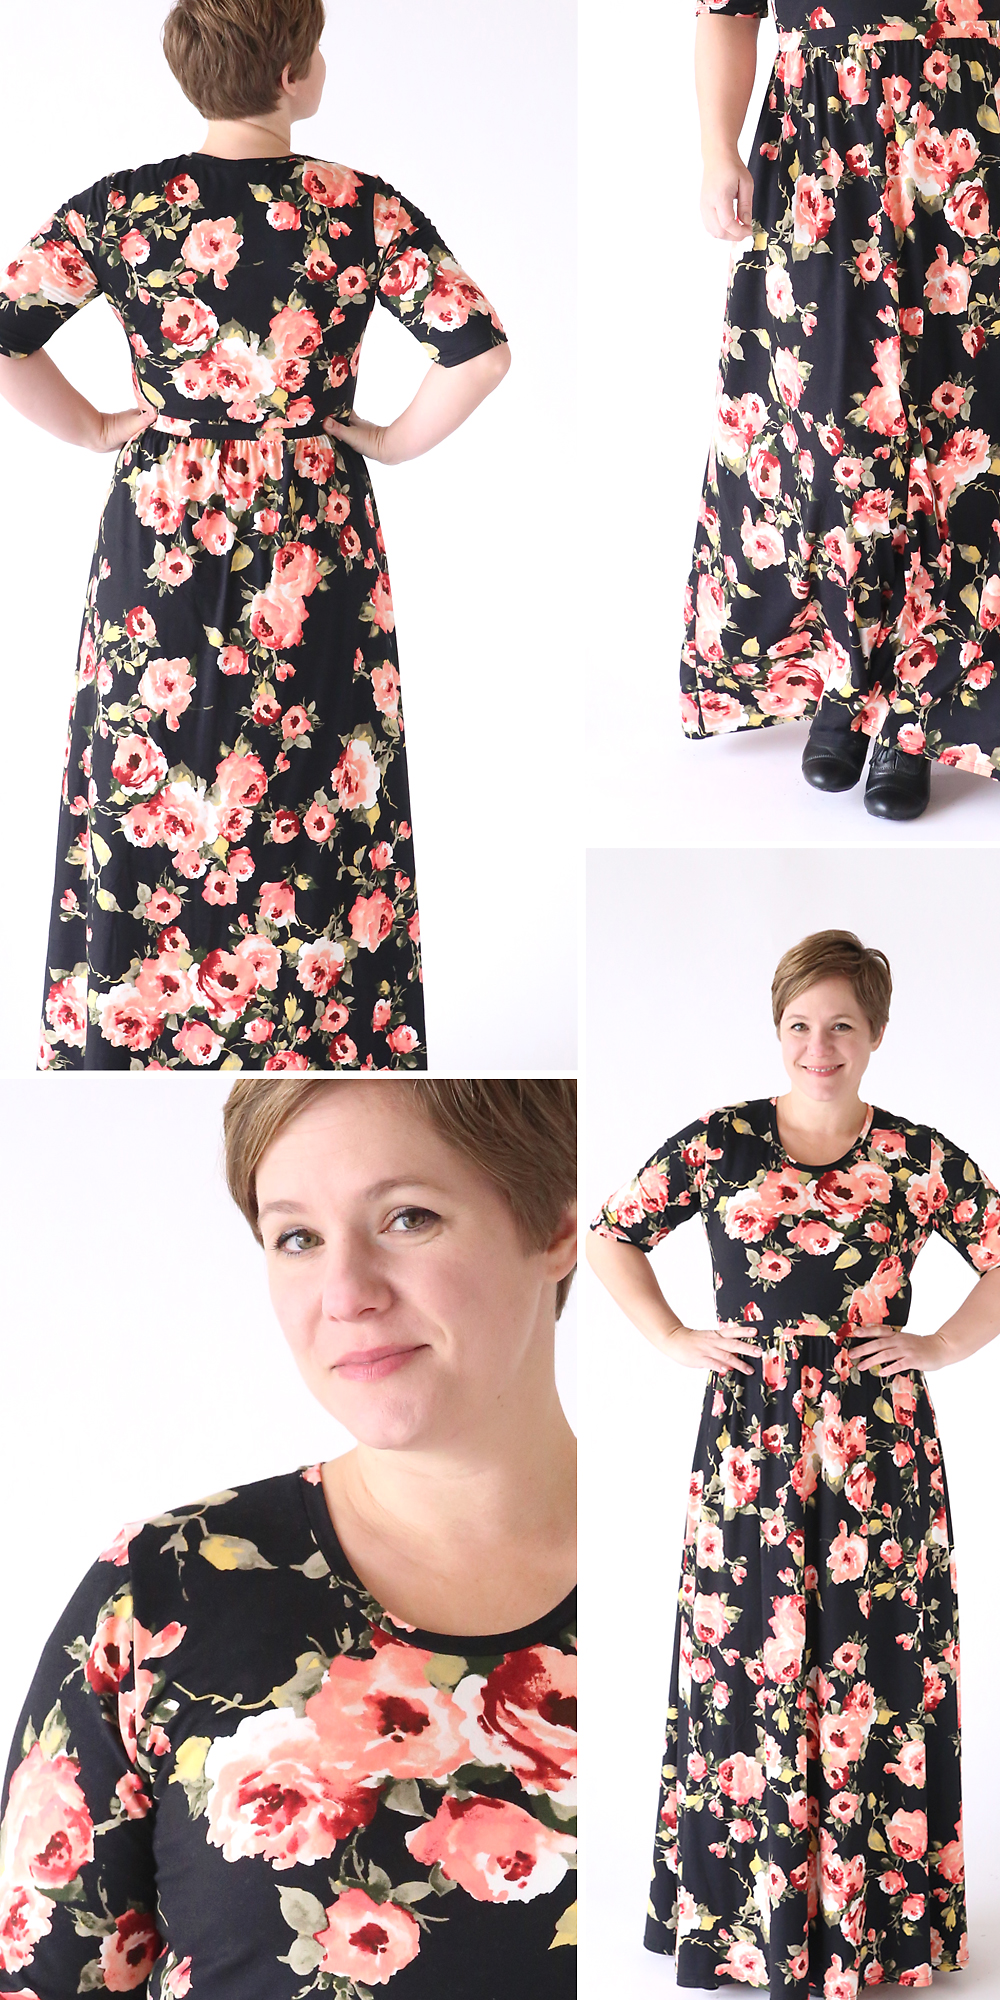
Before hemming the bottom, it’s a good idea to put the dress on and have someone else use pins to mark where the skirt hits the ground. Then you can use the pins as a guide to get an even floor length hem. For a dress that I’ll wear with flats or sandals I usually hem an inch shorter than floor length. For this dress, which I will wear with heels, I hemmed half an inch longer than floor length (I would have gone a smidge longer if I’d had more fabric!). I always use a double needle to hem knits.
Once the hem is complete, your new maxi dress is done!

You may also like:
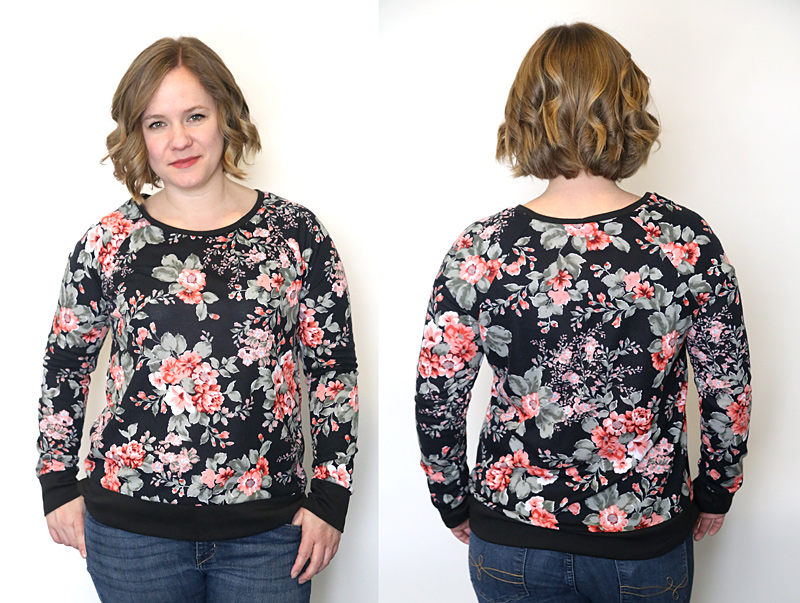
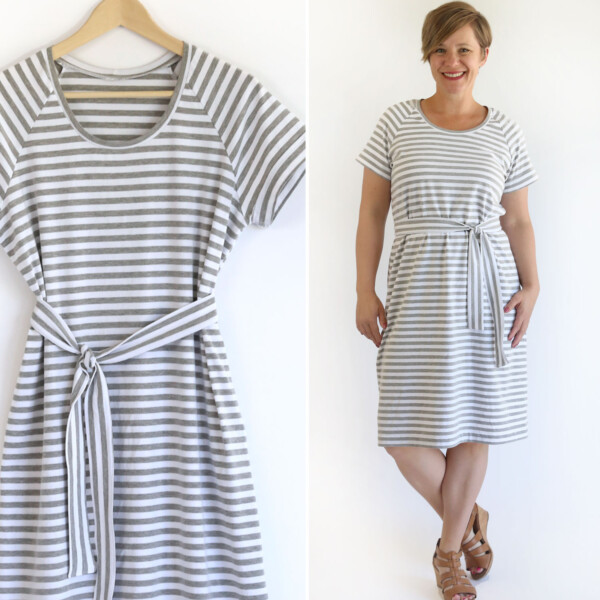
How to Sew a Raglan Sweatshirt


Margaret Namauu says
This is great. Thank you.
Carla says
I made this in two evenings, I had to tweak some measurements to get my size, but it turned out great, thanks for sharing the great pattern
Whitney T. says
Your patterns look awesome and simple enough that I feel confident that I could make one! I’m so excited! Thanks so much for making these free and available to anyone! It’s nice to find modest dress patterns. 🙂 I have one question. If I want to make the sleeves a little shorter than elbow length, like long enough that it hits halfway between my shoulder and my elbow, how do I make that adjustment to the pattern? It’s probably as simple as taking a few inches off, but I thought I’d ask because I don’t want to mess it up. 🙂 Thanks!