
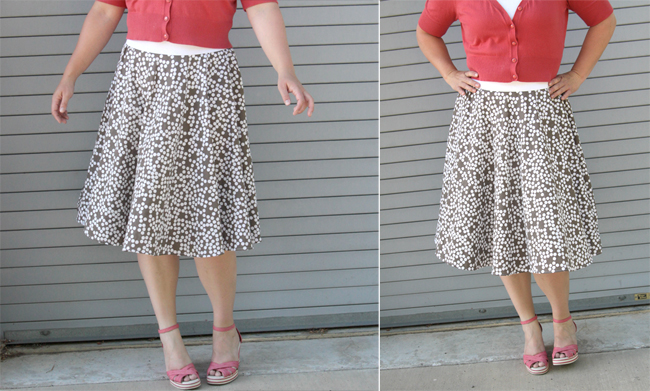
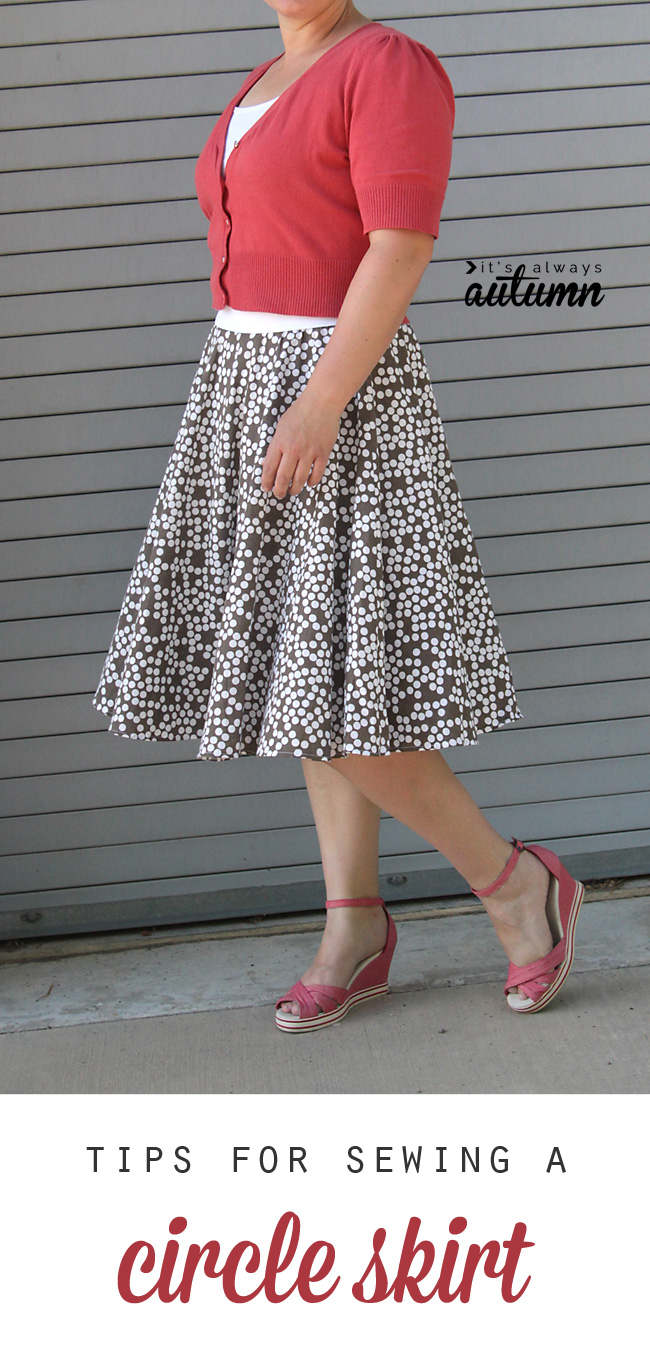
I don’t have a specific sewing area in my house, so the plan is that I put my sewing stuff away in my room when I’m not in the middle of a project, and bring it down to the kitchen when I am. Turns out I’m too lazy to walk my machine back up to my room when I’m done sewing, so it’s been hanging out on the floor in the kitchen, collecting dust and cheerios and other random junk. To help assuage the guilt I have about being unable to actually clean it up, I made a skirt the other day. And since (as I mentioned) I’m lazy, I went with a circle skirt – no seams, just one big donut of fabric, a wide elastic waistband, and a simple hem. I don’t know why I’ve never made a circle skirt before, but I’ll be making more.
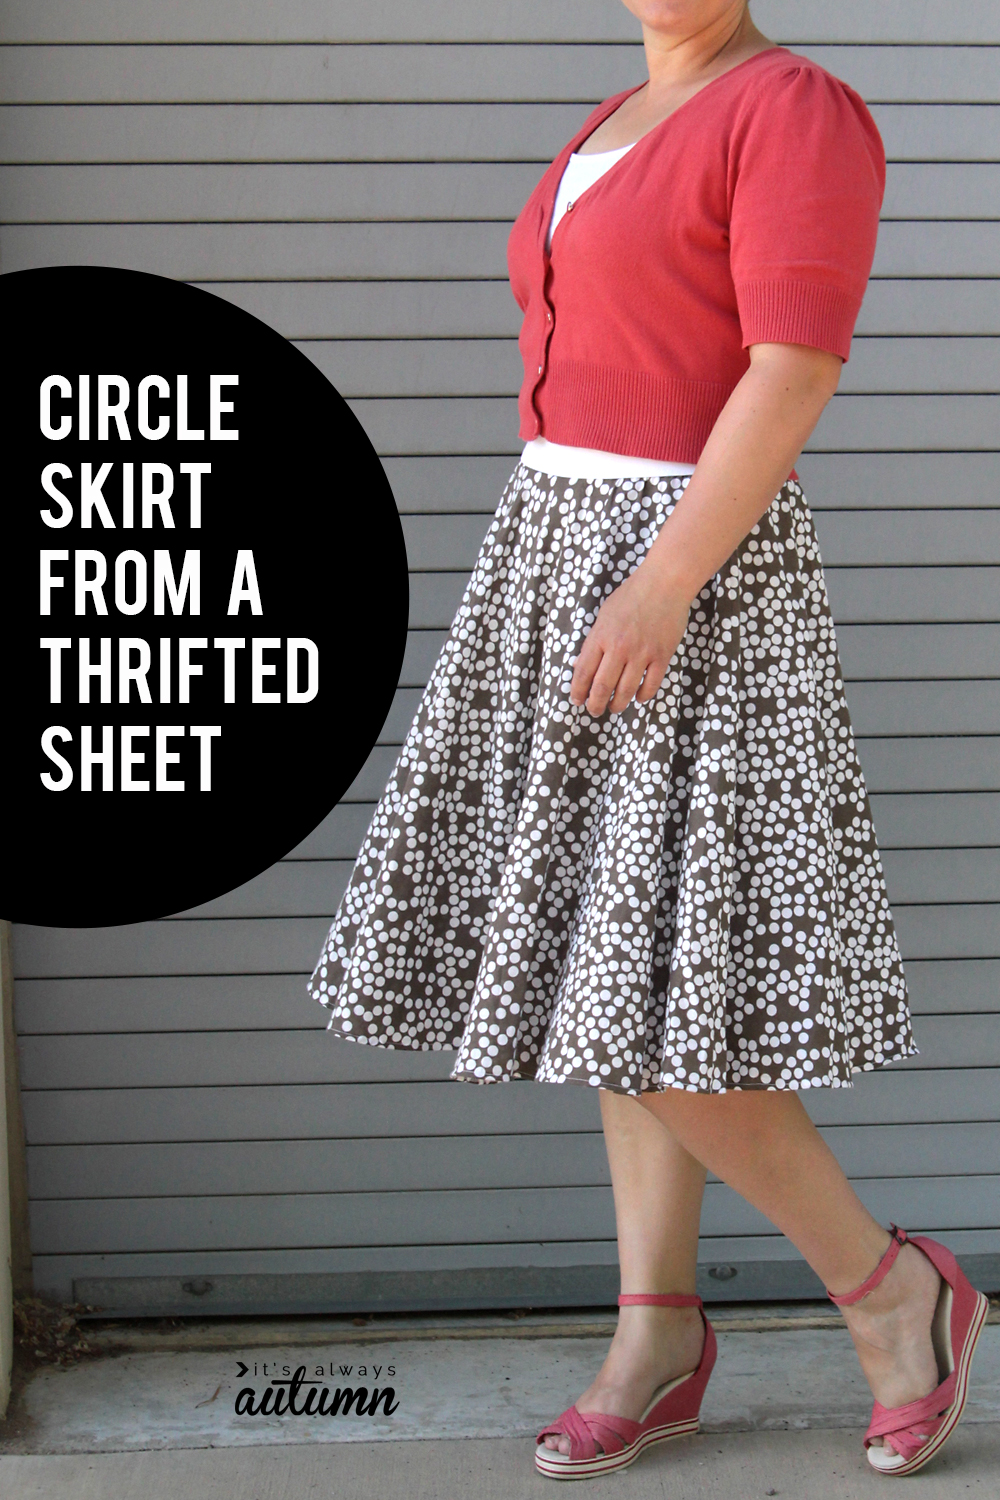
The internet doesn’t actually need another circle skirt tutorial, so I’m not giving a full how to here. I used Dana’s tutorial and it’s great, BUT I do have one small difference of opinion with it, listed in my tips below.
Circle skirt tips:
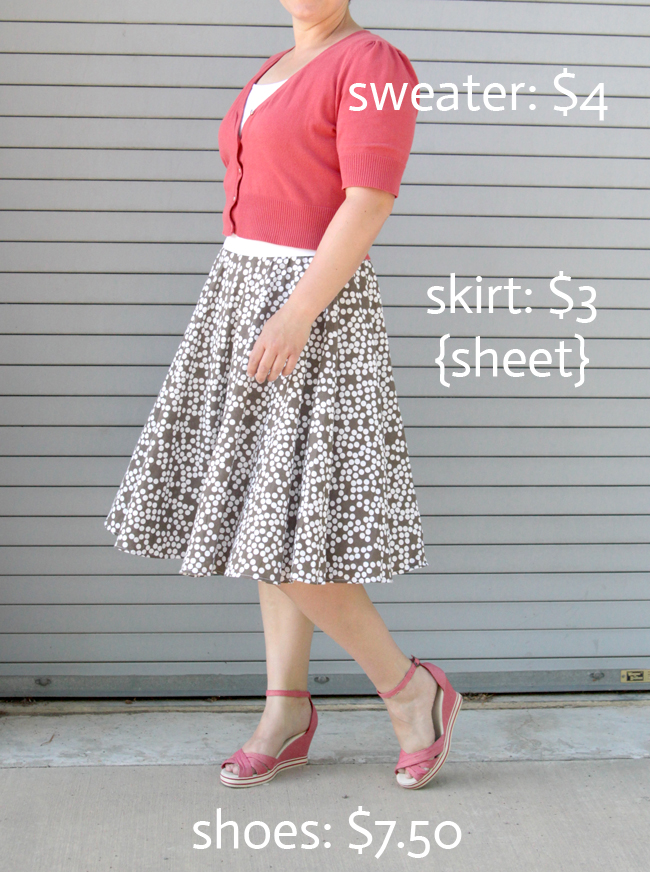
1. For a truly seam free circle skirt, you’ll want WIDE fabric, which makes this a perfect opportunity to upcycle a thrifted sheet. My skirt was made from a duvet cover I found for $3 and I actually have tons of fabric left over. I never would have been able to purchase enough fabric for my skirt for that much money. You certainly can make a circle skirt from 45 in wide fabric, but it will cost more and you’ll probably have to sew side seams (not that big of a deal).

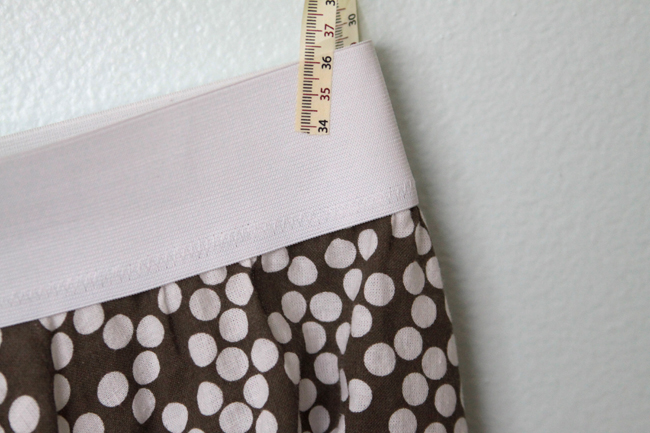
2. Dana recommends you take your waist measurement and add 2 inches before dividing to find the radius of the circle you cut in the middle of your skirt. This is a good idea, unless your fabric stretches a lot along the bias (diagonal). Even non-stretchy woven fabrics will have quite a bit of give when cut in a circle, so if you add inches to your waist measurement you may end up with a circle that’s WAY TOO BIG (what happened to me). I suggest subtracting at least 2 inches from your waist measurement instead of adding. If the circle you end up cutting is a little snug, you can cut it larger. But you can’t go back once it’s cut too large.
3. Choose a mid-weight fabric (like a nice cotton) if you have any tummy issues. As we all know by now, I love my baked goods, so skirts made from very thin, drapey fabrics tend to show just a little too much. On the other hand, a heavy fabric will just add bulk around your middle, which isn’t good either. So pull a Goldilocks and pick something nice and in between – something that hangs nicely when you hold it up in one hand but that has enough body it won’t cling to your less desirable curves.
After that, check out Dana’s tutorial for the actual how-to and you’ll be good to go.
I got dressed for church on Sunday and realized I had on a completely thrifted outfit – cool, right?

Steph @ Silver Boxes says
This is absolutely darling! I love your whole outfit! I’m a beginner seamstress & am looking for simple projects to do & this looks like it fits the bill. Thanks! Pinned.
[email protected] says
I love this!! Love the skirt…love the shoes…now I need to learn to sew…
Laura says
Such a cute skirt. I keep seeing these pop up and they seem easy enough even a novice sewer like myself could do it! 🙂 Thanks for the tips!
Melody @ Big Doll's Boomtown says
This looks like a perfect project for my mom and me to make together as she teaches me to sew! I love how you repurposed the duvet cover, too — great idea to use vintage sheets and I will keep my eye out for some jazzy patterns.
Come visit me sometime @ Big Doll’s Boomtown!
Katie Adams says
Oh I love the entire oufit!!! So cute! I would love for you to share this on my weekly link party Blog Stalking Thursday. Thanks for the inspiration!