
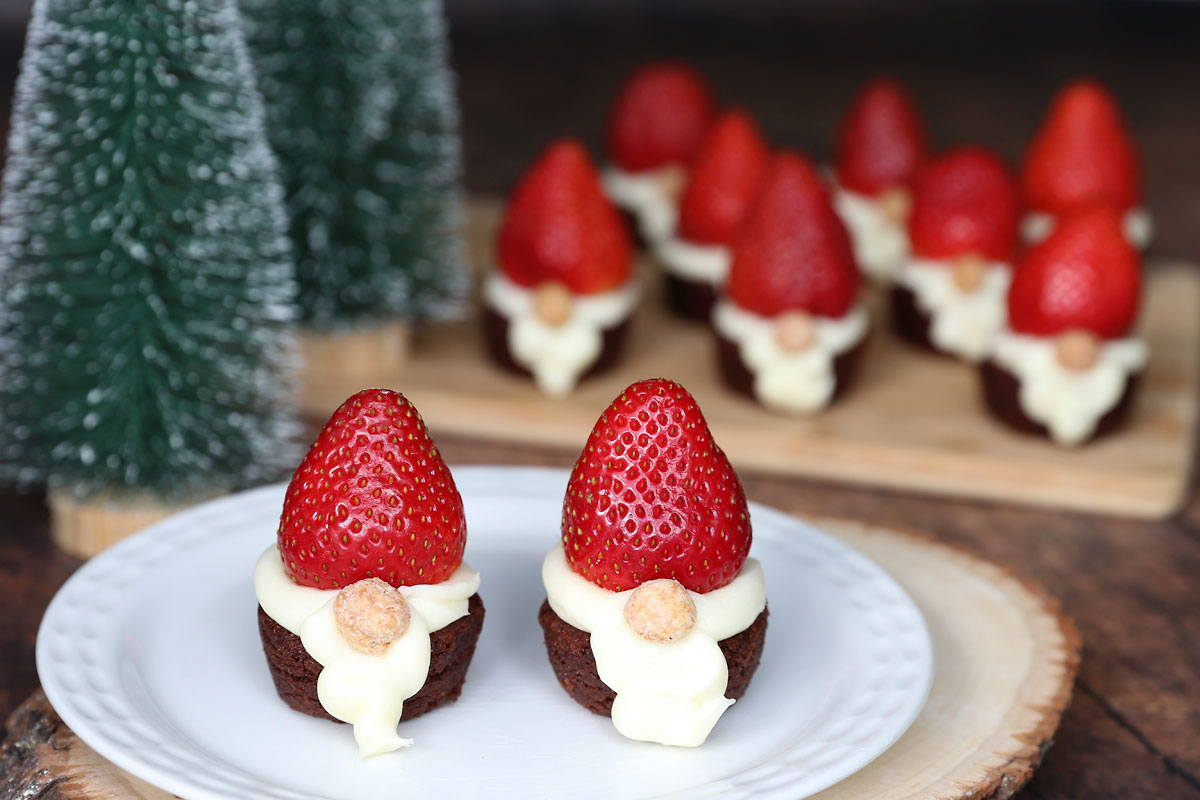
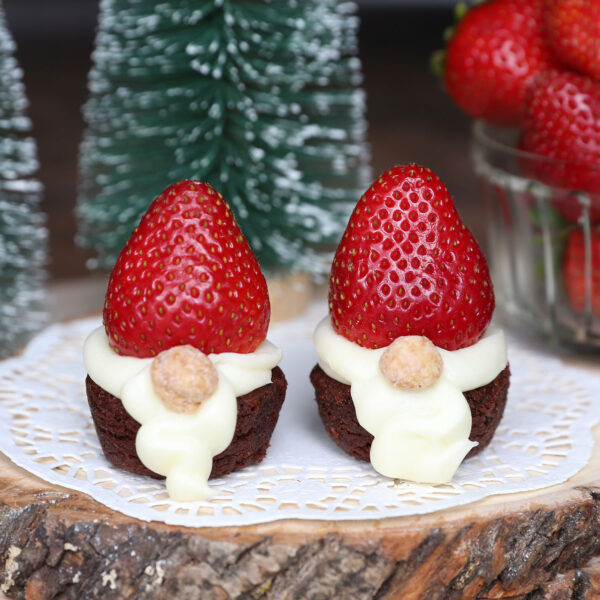
In today’s post: These adorable little brownie bite gnomes are super easy to put together with just four ingredients, and they’ll make a great addition to your holiday dessert table.
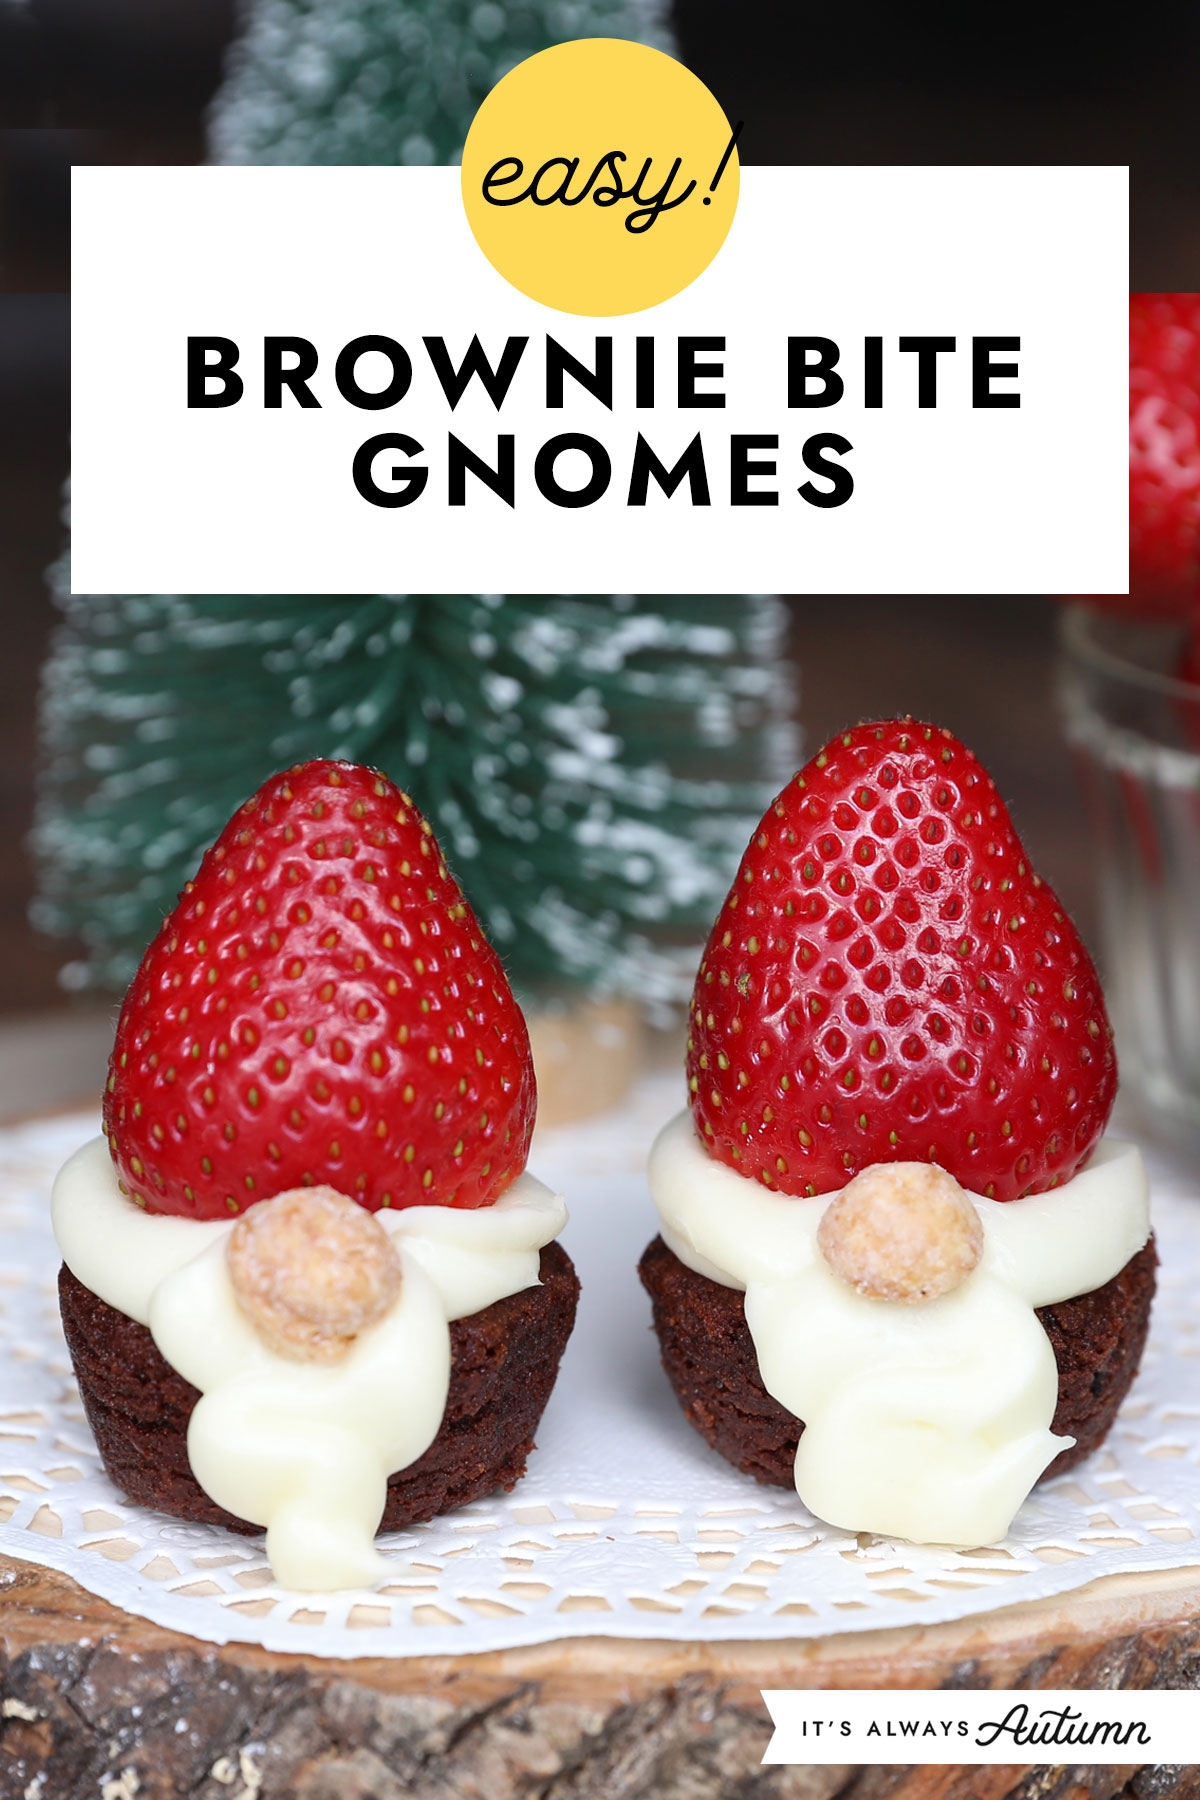
I know, I know. Does the world really need more gnomes? Well…I’m probably the wrong person to be answering that question considering I just made an army of brownie bite gnomes. Not only are these little guys ridiculously adorable, they are also delish! Who can resist a brownie/cream cheese frosting/strawberry combo?
Ingredients
You can certainly make these gnomes completely from scratch, but I used store bought products to make putting them together really easy. I used:
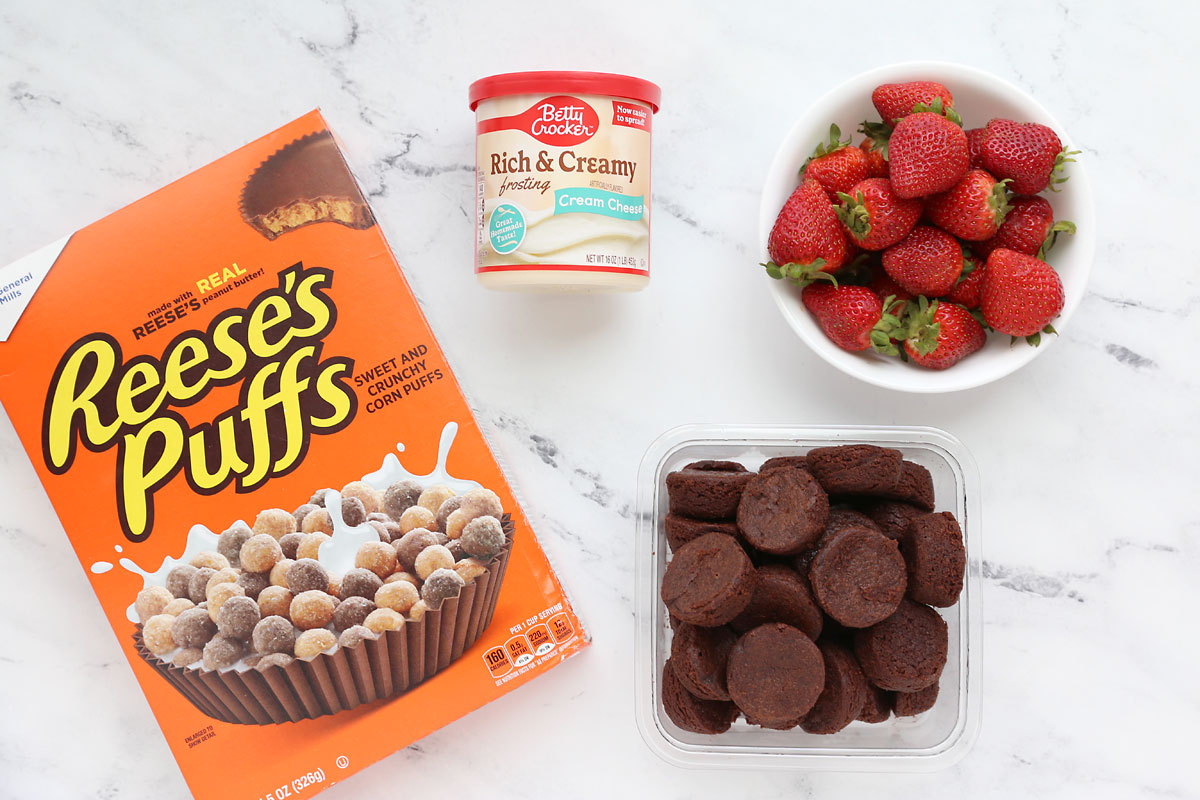
- Prepared brownie bites from the bakery section. If you want to make your own, use a mini muffin pan and your favorite brownie recipe.
- Canned Cream Cheese frosting. If you want to make your own, I have an incredible recipe right here. But if you want to keep things easy by using a can of frosting, be sure to get cream cheese frosting instead of vanilla or white because it’s much better.
- Strawberries. You’ll need one berry for each gnome. My package of brownie bites came with about 18 bites, so one pound of berries was enough, but I bought a 2 pound package so I could pick and choose the best berries for these treats. I knew we’d eat the extras!
- Reese’s Puffs cereal. This cereal is the perfect size and shape for gnome noses!
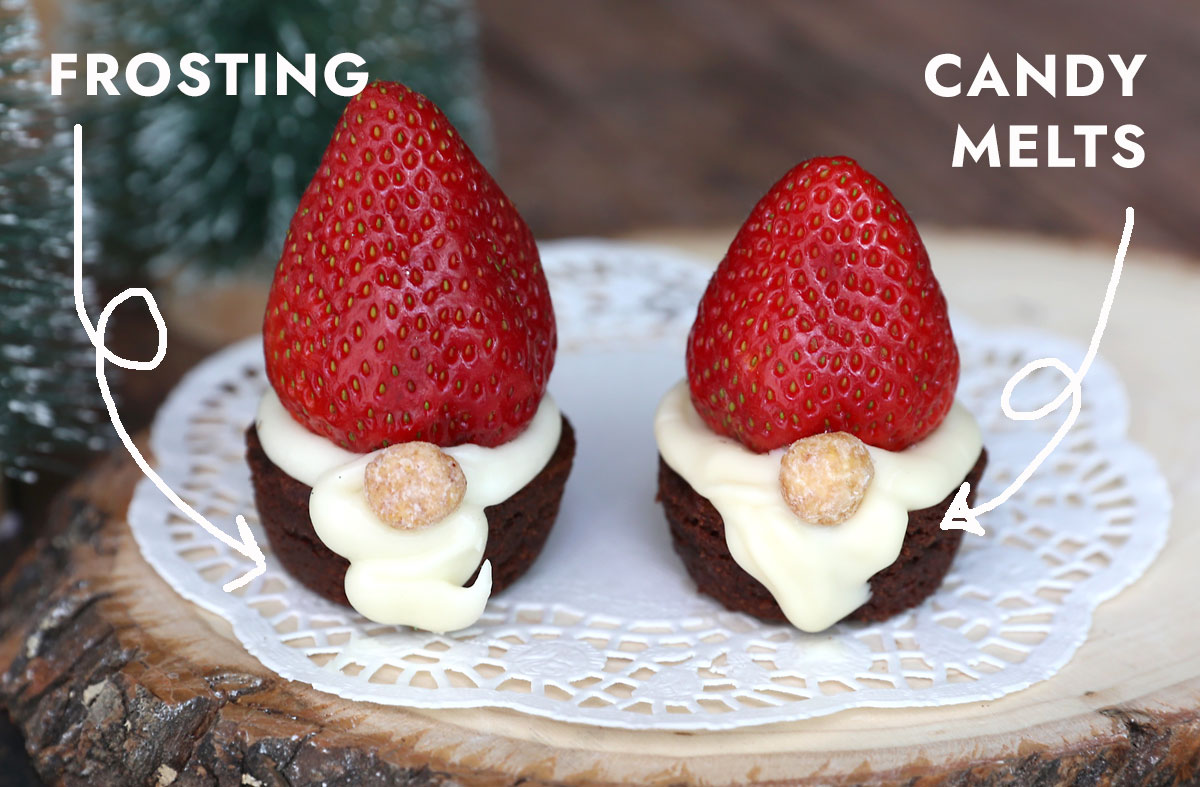
Frosting OR Candy Melts
I used cream cheese frosting to attach the strawberry hats to the brownies and create a beard, but you can also use white candy melts or white chocolate chips if you prefer. I like the taste and texture of the frosting better, but the candy melts also taste great, reminiscent of a chocolate covered strawberry. The nice thing about the candy melts is that they set up hard so they are easier to move around without messing them up. If you’ll be transporting these guys somewhere before serving, you might want to use candy melts or white chocolate chips instead of frosting.
Note: These treats are best the day you make them. You can keep them stored in the fridge for a day or two, but they look best the same day they are made.
How To Make Brownie Bite Gnomes
Brownie bite gnomes are easy to put together, but I did figure out a couple tricks when making them, so here are step by step directions. Printable recipe card follows.
Prep the Strawberries
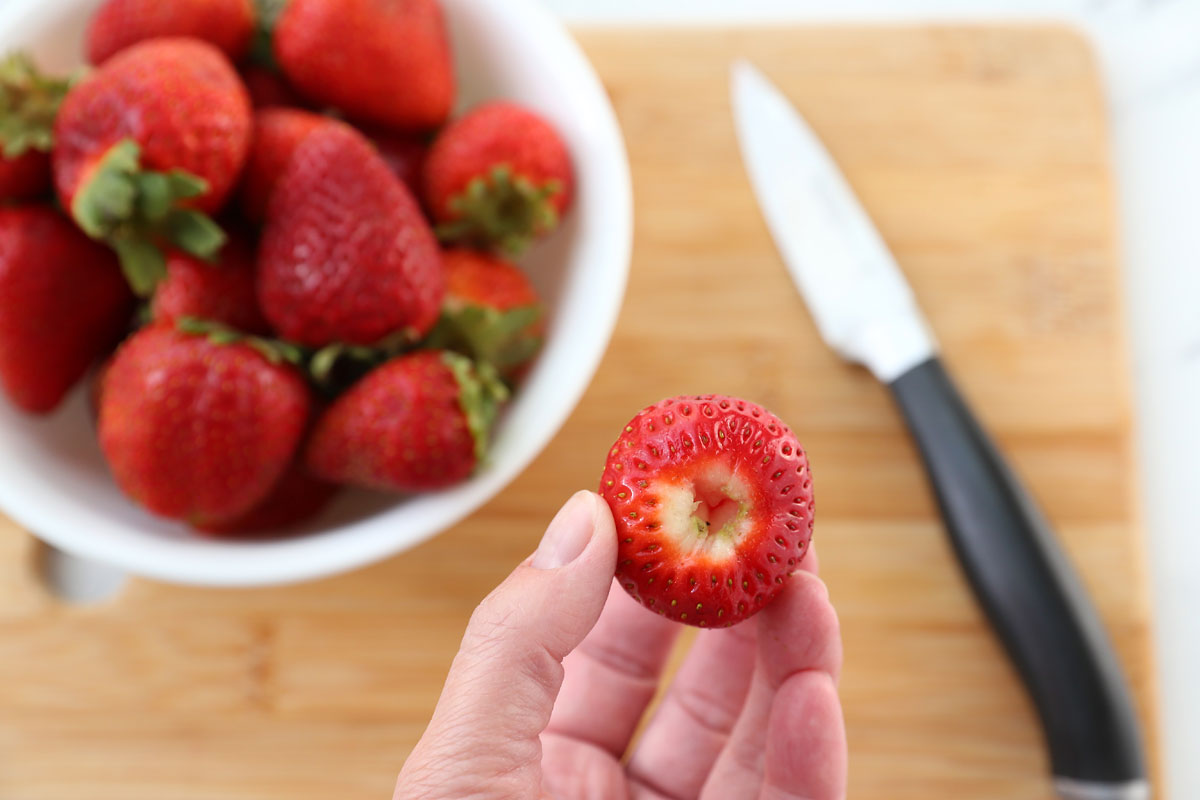
Begin by washing the berries and all allowing them to dry completely. You can speed up the process by drying them with paper towels. Then pull off the green leaves and use a small knife to cut the stem out of the berry if desired. Be careful here, because any cut area of berry will eventually start to leak a little juice. If you slice the entire tops off the berries, they will get so juicy they’ll end up sliding right off the frosting. So cut just a small hole to remove the stem, as shown below.
Prep the Frosting
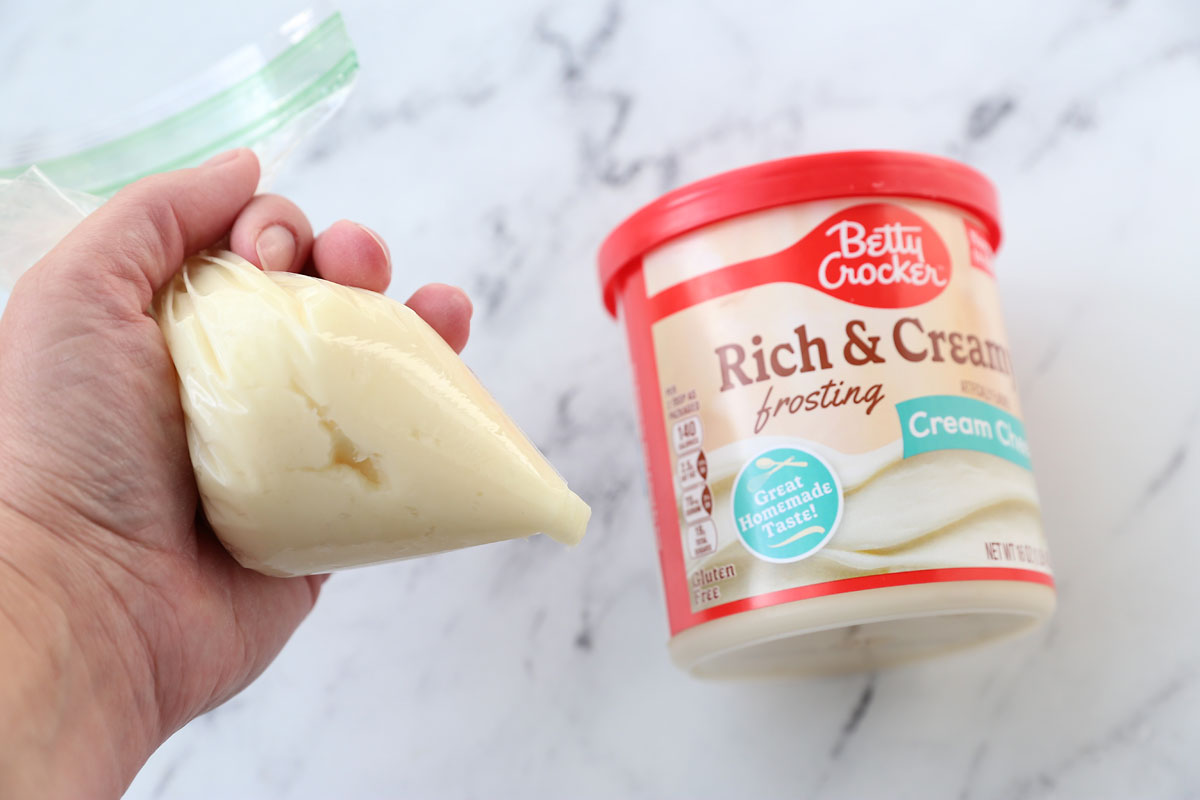
Spoon some of the frosting into a resealable plastic sandwich bag. Cut one small corner off the bag so you can “pipe” frosting from the hole.
Frost the Brownies
Pipe frosting over the top of a brownie bite, then pipe a little zigzag of frosting down one side to create a beard. Alternately, you can use a knife to frost the tops of the brownie bites and pull some frosting down one side for a beard. It doesn’t need to be super fancy; it will still look cute.

Add the Hat + Nose
Gently place a strawberry on top of the brownie bite. Add a Reese’s puff cereal to create a nose. Immediately place on a tray or board and refrigerate as soon as you’ve assembled all the gnomes. Refrigerate at least 1 hour before serving.

Brownie Bite Gnomes
Ingredients
- Brownie Bites
- Cream Cheese Frosting
- Strawberries one per brownie bite
- Reese's Puffs Cereal
Want more project ideas? Sign up to get my favorite easy crafts and recipes straight to your inbox!
Instructions
- Wash the strawberries and allow them to dry completely. Pull off the green leaves and use a small knife to cut out the stem if desired – only make a small hole. Do not cut straight across the tops of the berries.
- Place some of the frosting in a piping bag OR in a sandwich bag with one small corner snipped off.
- Pipe frosting over the top of each brownie bite and down one side to create a beard.
- Place a strawberry on top of each brownie bite and add a Reese's puff cereal for a nose.
- Refrigerate brownie bite gnomes immediately. Refrigerate for at least one hour before serving. Brownie bite gnomes look best the day they are made, but can be store in the fridge for one or two additional days.

Bunner says
Made these last Christmas and I’m making them again today for a Holiday party.
shirley chung says
what a fantastic crowd pleaser
Hdm says
Grandsons loved them. Overall hit!
Carol says
So easy & everybody wants one. I used Skittles for noses
Terry says
These are great. So easy. I use a Ghiardelli brownie mix and homemade cream cheese icing. Love the idea to use Reece’s cereal noses. They are perfect