
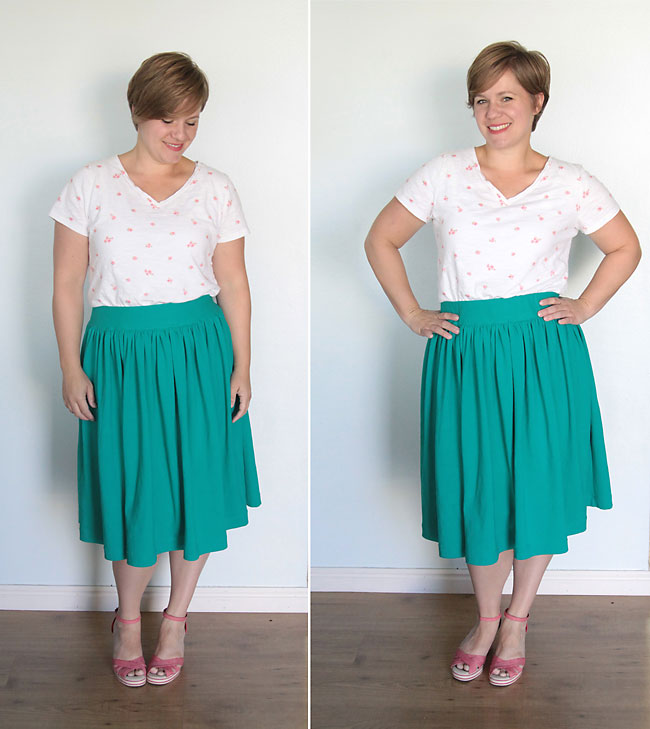
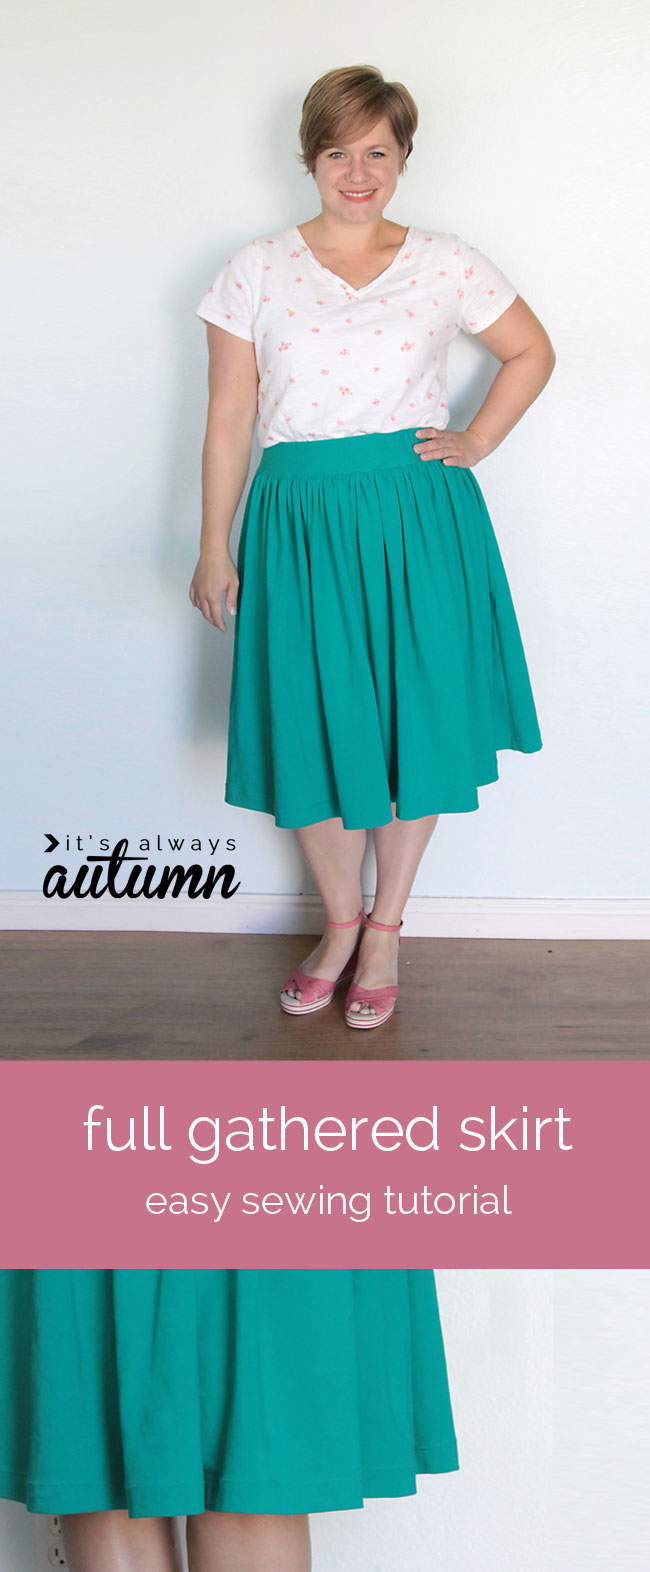
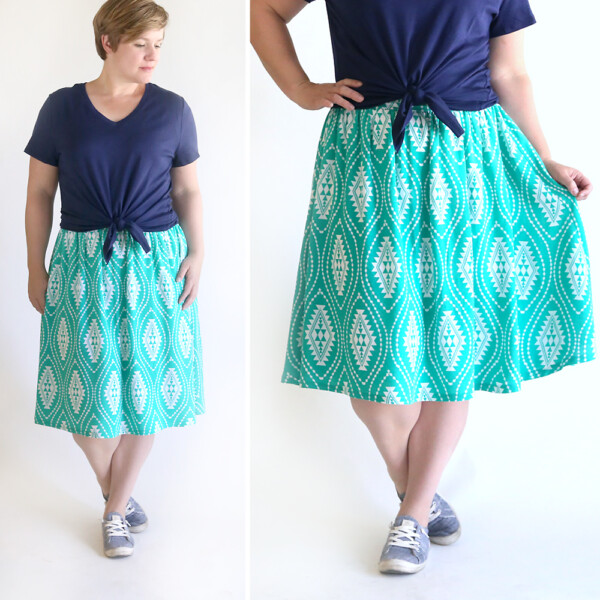
I’ve been loving the full gathered skirts I’ve seen lately, and I’ve been wanting to make one for months, but I couldn’t quite figure out how I wanted to sew it up. I didn’t want a gathered waistband with elastic running through it, because gathered waistbands tend to look frumpy on women (think mom jeans). At the same time I was worried that a flat waistband with no elastic in it would be a little uncomfortable – I wear skirts because they are more comfortable than jeans, so if it’s going to cut across my stomach when I sit down I’ll never wear it. Basically, I wanted an elastic waist that doesn’t look like an elastic waist.

So I came up with a compromise. This full gathered skirt has a flat waistband with wide elastic inside it. The entire skirt is made of knit fabric, which stretches, meaning there are no zippers or other closures to worry about, and it’s extremely comfy. But because the waistband itself isn’t gathered, it doesn’t look like the skirt equivalent of mom jeans.
To make a full gathered skirt like this one, you’ll need about 2 yards of stretchy knit fabric. Not all knits are created equal – some stretch just a little while others (like most t-shirts) stretch quite a bit. You want a knit with at least a 50% stretch (cotton lycra or cotton spandex blends are perfect). I also think knits with a little more weight tend to hang better in gathers than very lightweight knits – something in the 8-10 oz range is perfect. I used this paris green cotton spandex knit from Girl Charlee. Be sure to prewash your fabric.
You’ll also need 2 inch wide elastic as long as your waist measurement.
Start by cutting your fabric pieces as follows, 1 long rectangle for the waistband, and two large rectangles for the skirt. The waistband piece should be 5.5 inches tall and as long as your waist measurement plus one inch.
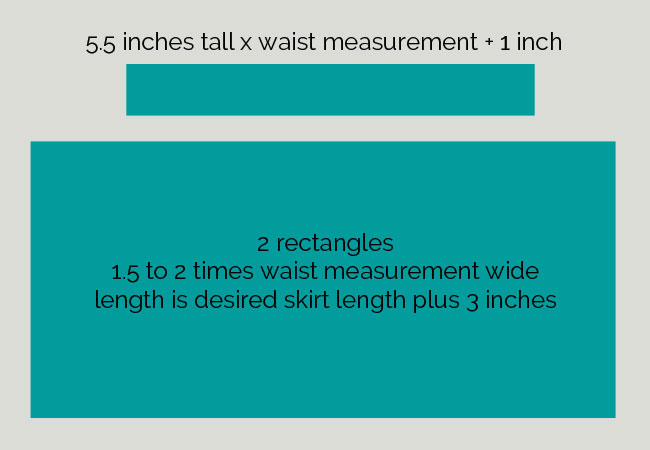
So if your waist measurement is 30 inches, you’d cut each skirt rectangle 45 to 60 inches wide. For my skirt, the width of each skirt rectangle was my waist measurement times 1.75.
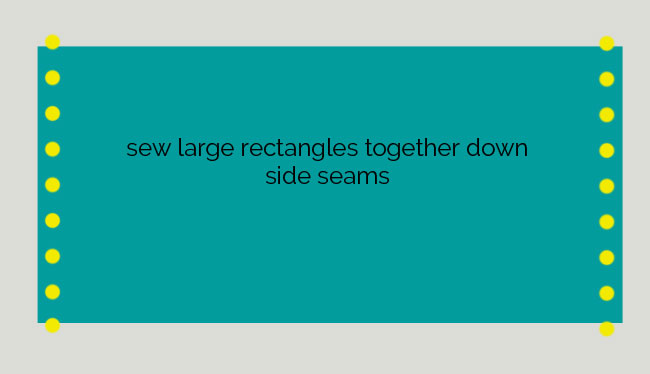
Sew the skirt pieces together down the sides as shown:
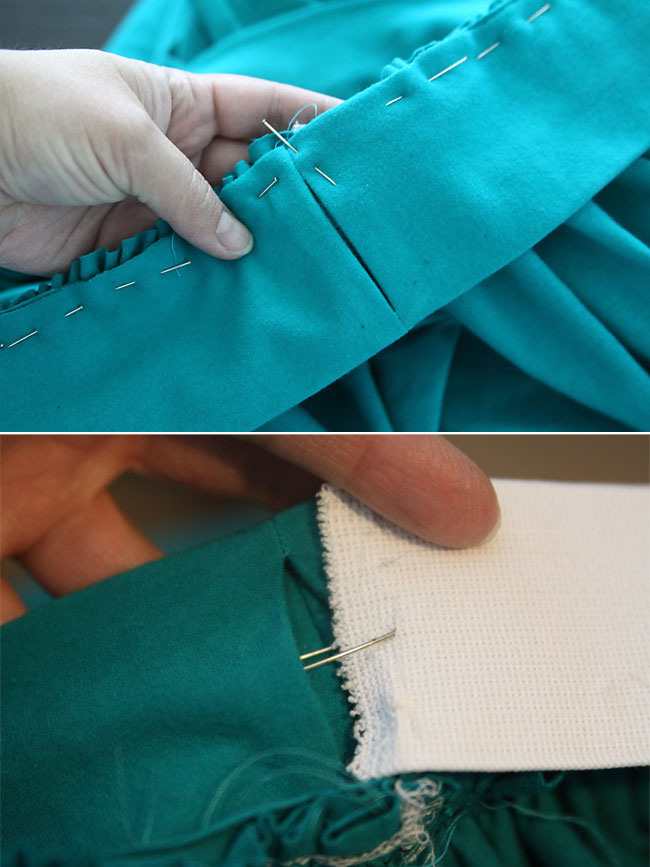
Prep the waistband as sewn:
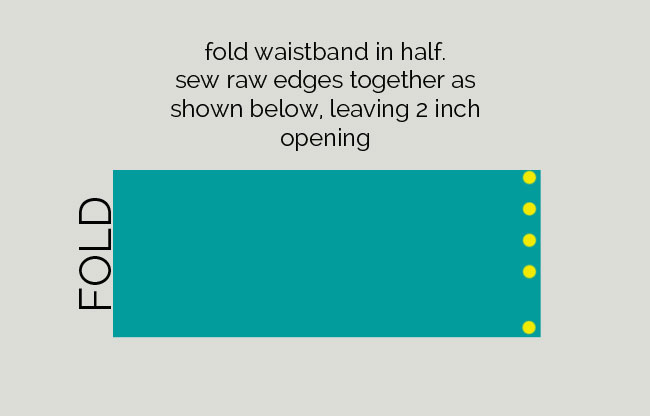
The reason you leave that 2 inch opening is so it’s easy to thread your elastic through the waistband later on. So your waistband is now a circle that’s 5.5 inches tall; fold it in half lengthwise so it’s still a circle, just 2.75 inches tall.
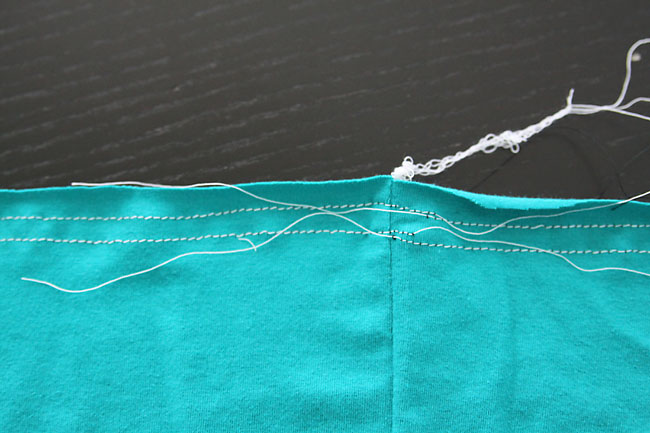
Now you want to gather the top of your skirt. Sew two rows of gathering stitches (long stitch length, low tension) around the top of the skirt. Each row of stitching should slightly overlap itself, as you can see below. I sewed the first row about 3/8 of an inch from the top edge, trying really hard to keep it nice and even. Then I sew around again, lining the first row up just outside my presser foot, so both rows are nice and even. One other thing I like to do is make sure the top thread and bobbin thread are different colors and that neither thread matches the fabric – that makes it easy to know which thread to pull to gather the skirt, and it makes it easy to pull these threads out once the waistband is attached.
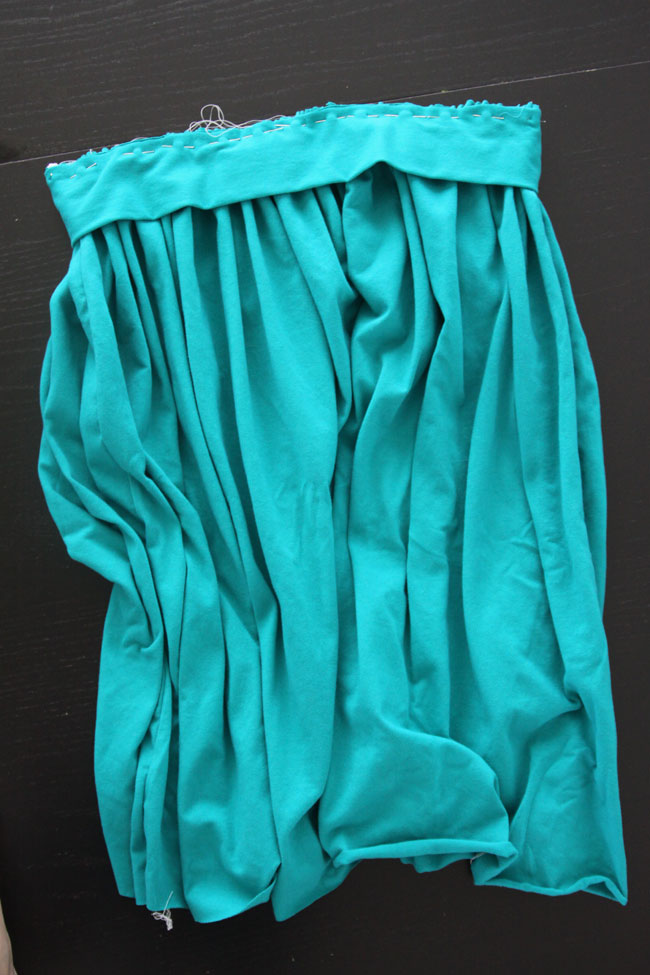
Use safety pins to mark the center front and center back of the skirt, then start pulling on those bobbin threads to gather up the skirt, moving the gathers along as you pull the threads. You need to gather the top of the skirt until it is the same size as your waistband, which is going to take quite a lot of gathering.
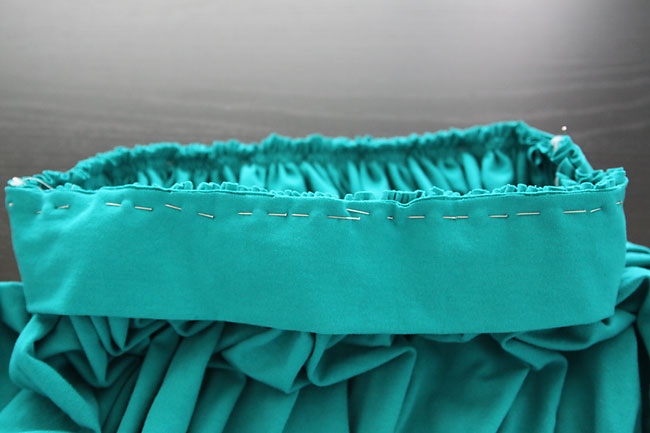
Once your skirt is gathered up, grab your waistband. Use pins to mark the opposite side from the seam, then the center front and center back of the waistband. Line those pins up with the seams and pins on your skirt, then even out the gathers in between each pin. Pin the waistband to the skirt, with the waistband on the outside (the slit for threading elastic in the waistband should be facing out right now).
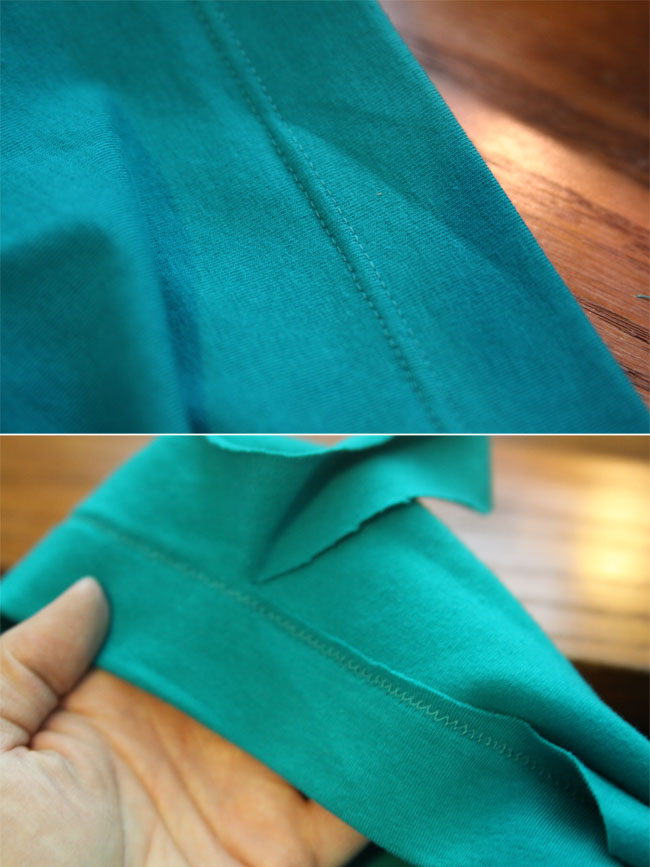
Now you need to sew all the way around to attach the waistband to the skirt. You must use a stitch that stretches here. You can use a zigzag, but I much prefer using a double needle. It’s really really easy and it’s totally worth learning how to use one if you’ll be sewing with knits very often.
When you sew the waistband to the skirt, you really want your line of stitches to run right in between your two gathering stitch lines, if possible. This will give you the cleanest looking gathers.
I sewed the waistband to the skirt with the waistband on top, and it tended to bunch up a bit in front of my presser foot, so I used a long pin to help guide the top layer of fabric under the presser foot as I sewed.
Once the waistband is attached, carefully trim the excess seam allowance to minimize bulk at the waistline.
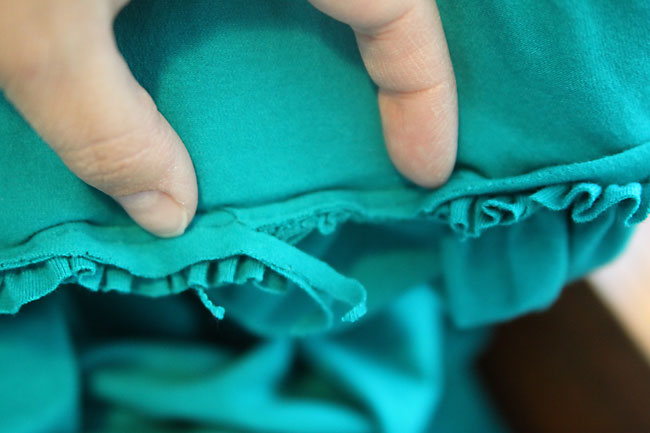
Then cut your elastic to your exact waist measurement, and use a large safety pin to thread it through the waistband. (The top photo below just shows what the slit in the waistband looks like before the waistband is sewn on.)
Pin the ends of the elastic together and try the skirt on – make the elastic tighter if needed. Then sew the elastic together and trim seam allowances. Pull out all the gathering threads. Press the waistband AND the trimmed seam allowance up and away from the skirt, using plenty of steam.
Your final step is to hem your skirt – try it on and mark where you’d like it to hit. I turned it up about two inches and used my double needle to get a nice, professional looking hem:
Then on the inside of the skirt hem I trimmed away any excess material close to the stitching. Done.
I love it! More clothes that feel like pajamas, but look pretty cute.


Charlene says
Hello I’m a beginner and I love this skirt I believe with your instructions I can do this My question is can this be made with a cotton fabric and if so would the amount of material be the same
Autumn says
No, this skirt won’t work with a cotton fabric, because the waistband needs to be able to stretch so you can put it on and off over your hips.
Kara Schreiber says
Thanks for an easy to follow pattern! Tip for threading elastic: Before folding band, tie safety pins to each end of a piece of yarn. Lay yarn on band so ends extend beyond it. Pin safety pins o what will be the outsde of the band. Fold top, be sure yarn is at top of fold. Sew band to skirt – don’t catch yarn in stitch. Once done, unpin one pin and attach that to the elastic. Slowly pull yarn. Elastic through without fuss.
Emily says
This is just a quick note to say thanks for posting this tutorial! I’m pretty experienced with wovens but I’ve had a lifelong fear of sewing knits. I recently found some jersey I HAD to have and followed your tutorial to make this skirt. It is hands-down the cutest thing I’ve ever made for myself. Thanks to you I’ll no longer have to avoid knits! 🙂
Mama de Leah y Josue says
Thank you so much for posting this! I sewed a knit skirt for my daughter that didn’t have elastic in the waistband. It’s a little too big for her waist (about 1/2 inch) and she’s very active. By inserting elasticinto the waistband I can save her skirt. Yay! You know what’s it’s like to sew something completely then it not fit right…