
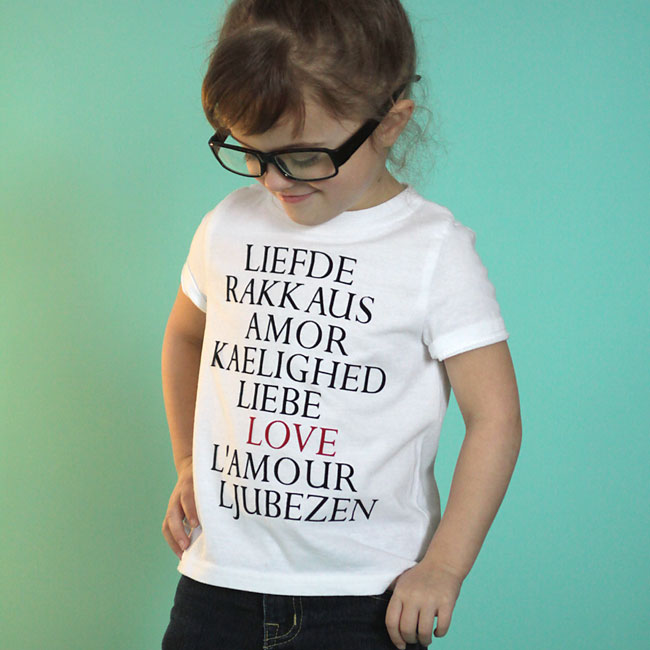
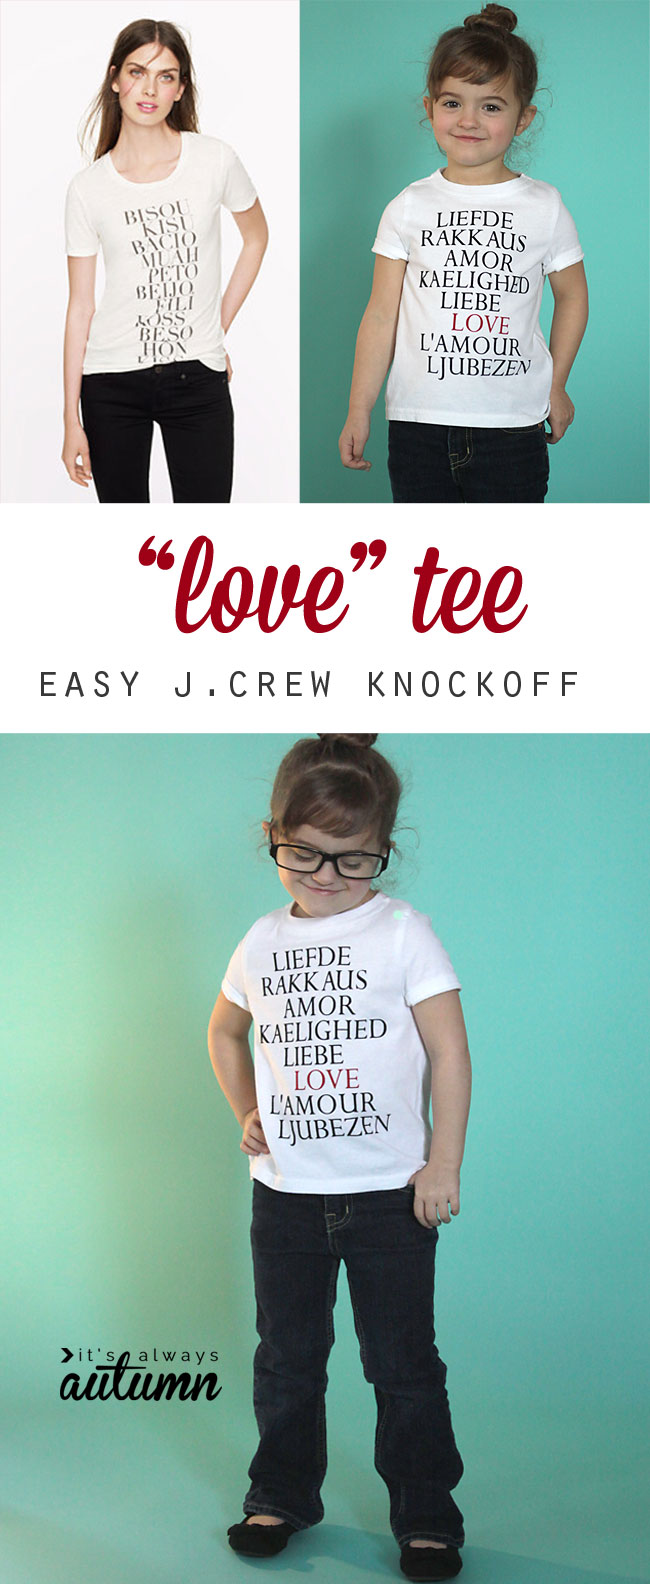
I don’t usually make special clothes for holidays, partly because it seems like a bit of a waste to make something so holiday-specific it can only be worn for a few weeks, and partly because I rarely plan that far ahead. But this year I made my daughter a couple of shirts that will work for Valentine’s Day but aren’t so Valentine-y that we’ll have to ditch them after Feb 14th. This “LOVE” tee is one of them.
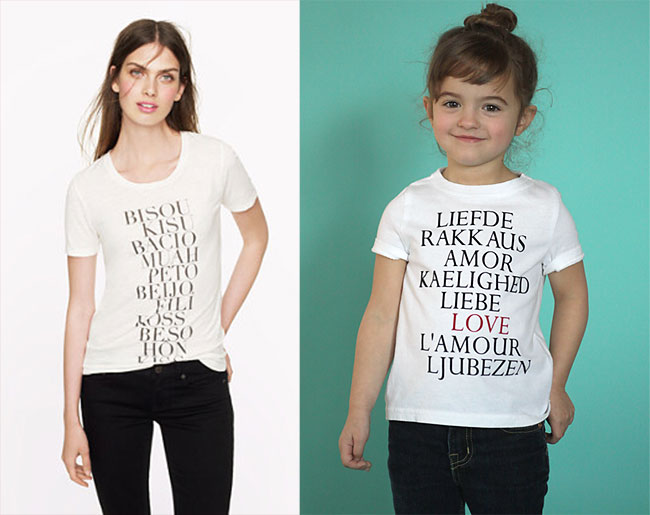
I saw this j.crew gallery tee months ago and thought it was really cool – I’m kind of a sucker for typography and I liked the repetition of the same word in different languages. I’ve been wanting to make a knockoff for a while, but the thought of making a freezer paper stencil for all those different words seemed like a lot of work.
Side note: so, why is it that models in ads always have such messy hair? Are we supposed to think she’s cool because she has hair in her eyes and SHE JUST DOESN’T CARE or something? I don’t get it.
Side note #2: no, I didn’t ask my daughter to pose just like the model on purpose. Just happened.
Side note #3: SO. MUCH. CUTENESS.
Alright, back to the project. When I figured out how cool (and easy!) it is to use heat transfer material with my Silhouette, I figured that would be a simpler way to make the shirt – and it was. Here’s how I made this easy j.crew knockoff “LOVE” graphic tee:
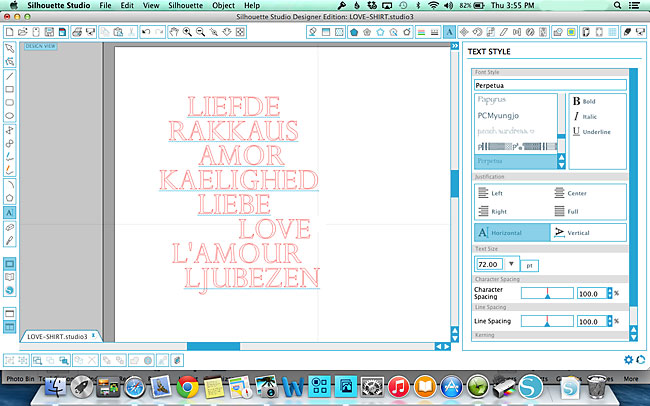
In Silhouette Studio I hit “T” for text, then typed a word (Pertpetua font). Then I clicked below it, hit “T” again, and typed another word. I repeated until I had all the words down, then grabbed each one and lined them up until I liked the design. I clicked on all the words, holding down shift, to select them all at once, then used the corner boxes to enlarge the design until it was about 9 inches tall.
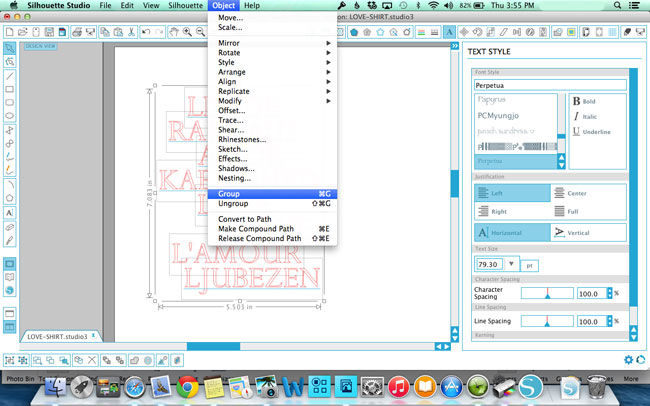
Next, I held shift and clicked all the words that I wanted to cut in black and went to object-group to group them all together.
I grabbed “LOVE” (which I wanted to cut out in red) and moved it off my canvas. Then I clicked the other words and went to object-mirror-flip horizontally.
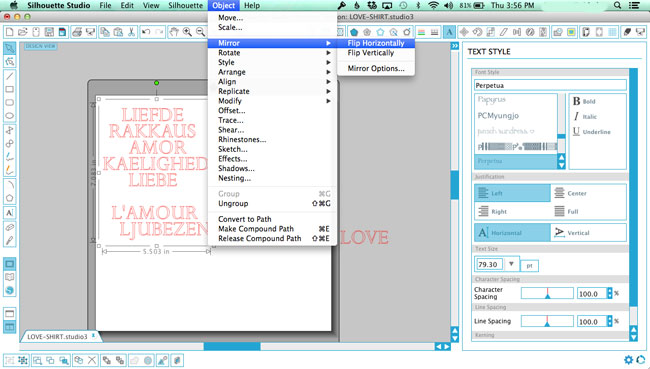
You always want to mirror anything you’re cutting from heat transfer material. At that point I sent the design to the silhouette, choosing flocked heat transfer material from the cut settings. That cut out all the black words. Then I moved those words off my canvas and moved LOVE back on. I mirrored it, then cut it from red heat transfer material. Pretty easy!
Once I cut out the design from flocked heat transfer material with my Silhouette CAMEO, I pulled away all the negative space. Because the design was fairly complicated, this took about 10 minutes.
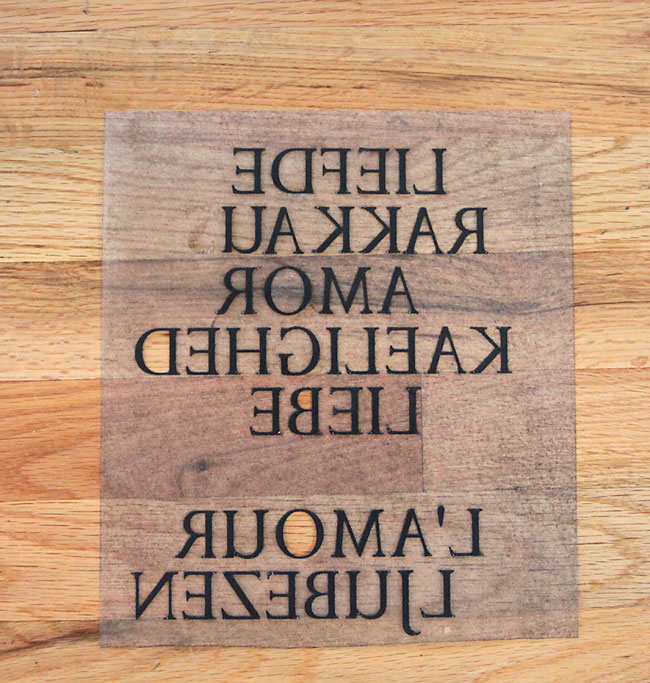
But once that was done, I had all my words ready to go on the backing paper. All I had to do was flip it over onto the shirt, then iron on as directed (after I ironed on the black words I added “LOVE” in red).
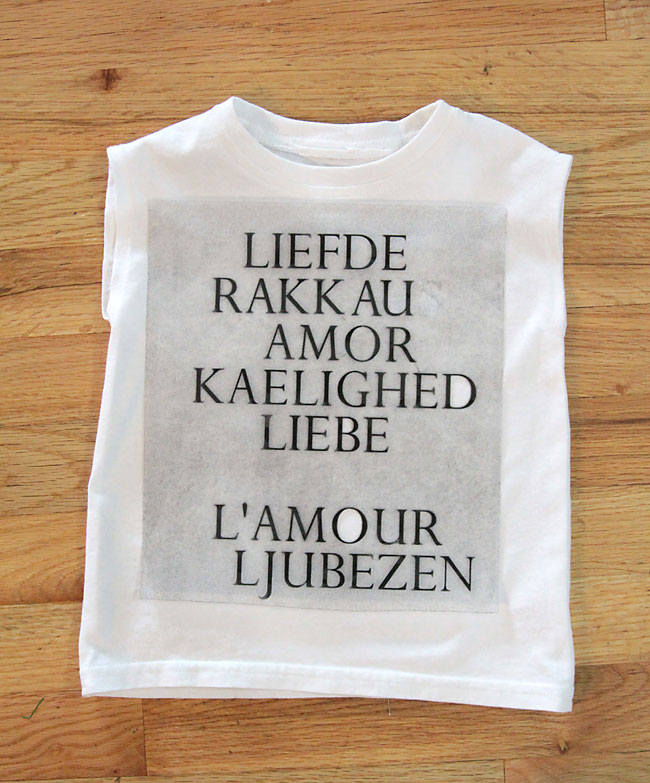
It was a lot faster and easier than painting on a design with a freezer paper stencil. Plus, the heat transfer material stands out really clearly from the white shirt, giving the words some “pop”. And I like the soft texture of the flocked heat transfer material.

One thing I’ve noticed when ironing heat transfer material on: the directions say to leave the iron in one place for 40-60 seconds, then move on to the next area. When you’re done ironing, if you try to pull up the backing immediately while the shirt is still very hot, the design often pulls up with it. If you wait just a minute or two and let everything cool down slightly, it’s easier to pull off the backing and the design stays put better.
I’ve found the flocked heat transfer material holds up well in the wash – my son has worn (and washed) his Santa shirt at least 10 times and the design is still completely stuck down on the shirt. I do turn the shirt inside out before washing. I’m glad it holds up well, because I think this shirt will get a lot of wear time too!


Uely says
Great tip!
Coumd you tell me where you found that t shirt its the perfect fit!
autumn says
I actually sewed up that t-shirt myself! I happened to have a white boy’s shirt from the dollar store, but it was too big for my daughter, so I just cut it down and sewed it back up. Thanks!
S says
Very cool! Just bought my first Silhouette! Waiting for it to arrive and lining up some projects. I love this! Where do you find flock transfer paper? I loooove the feel of flock and definitely want to try this!
Jenni says
SO CUTE!!! I really need to buy one of those fancy machines there!!!
kathy says
Wish I had a silhouette! Very cool.
Jerusha Beckstead says
I don’t have one of those machines either, but I have worked with iron on transfer paper {I am not sure if that is what is called for sure} from Joann’s fabric store before. You run it through your printer and iron it onto your shirt, just like she did. I think I might try it.
autumn says
Great idea!
KT says
Fantastic project!! Thanks for sharing your talents with us!