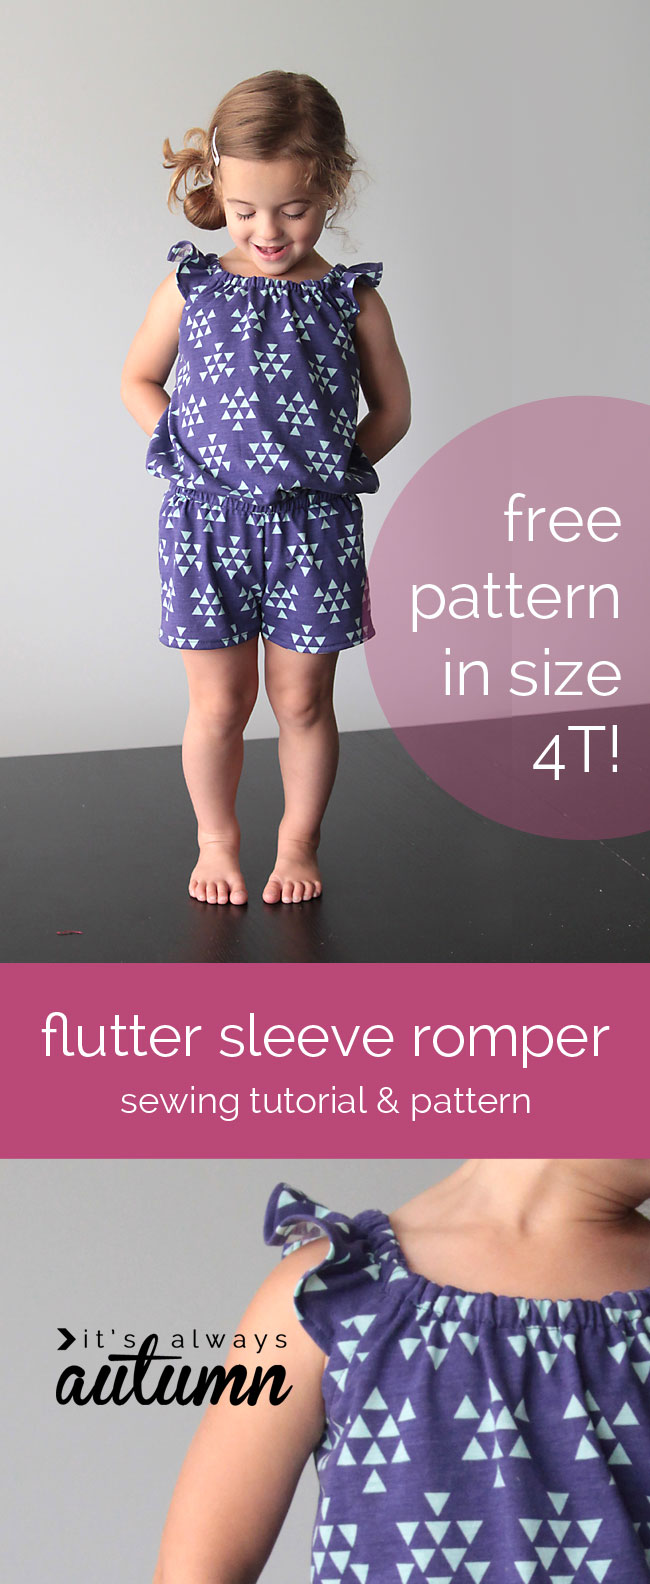
I made this little romper for my daughter over a month ago with the intention to post it right away – but I really wanted to include a free pattern download so I waited on posting for a few weeks while I got the pattern put together. Then I went on vacation and got absolutely NOTHING done for two weeks (which was wonderful), and here we are, almost done with summer already! So while it’s a little late in the season to post a summer romper, I decided to share it today anyway with hopes that you’ll keep it in mind for next year, or make one now for your little girl to wear with tights and a sweater (unless you’re on the southern half o’the world, in which case it’s nearly spring – hooray!).
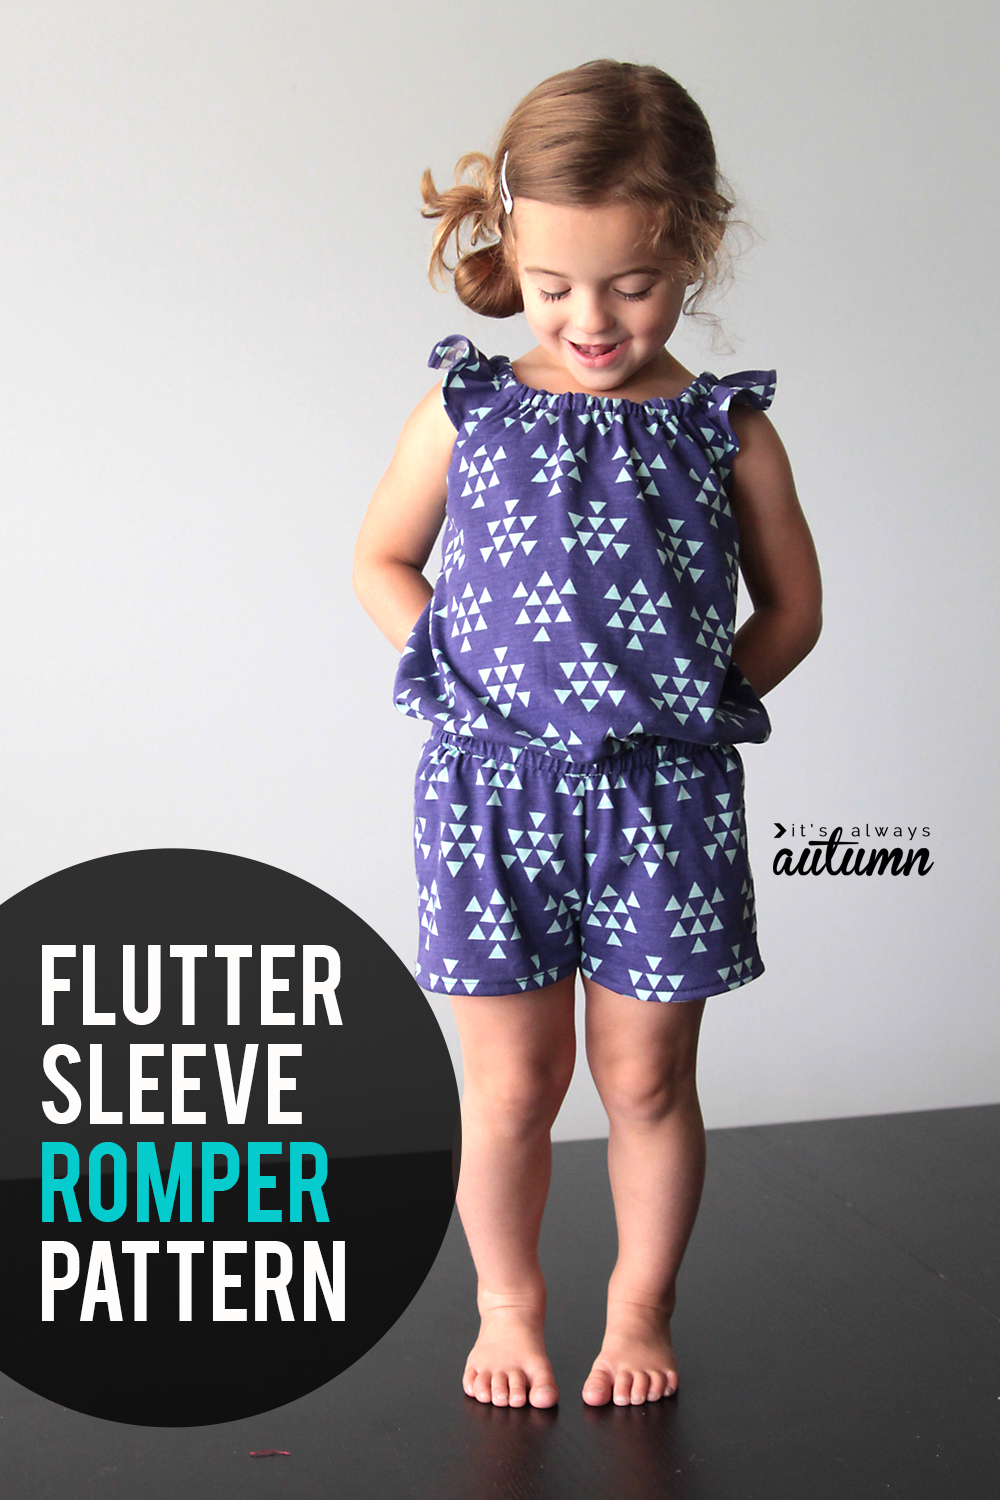
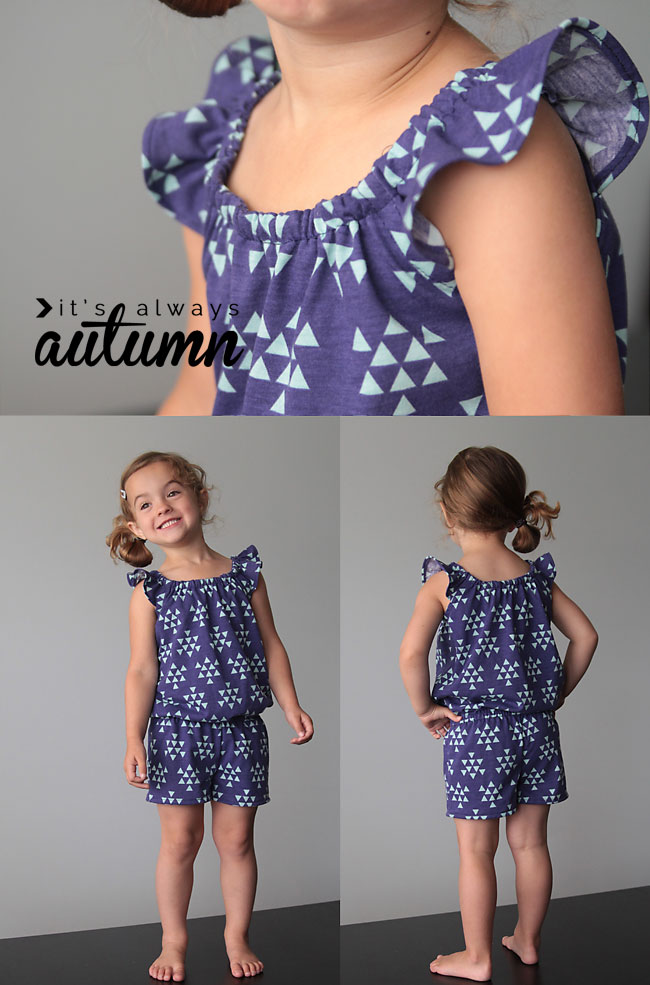
This romper is based on my flutter sleeve dress tutorial – free pattern for a top or dress in size 4T found here. The romper features the same gathered neckline and fluttered sleeves, which makes it easy to get on and off – since the neckline/shoulderline is gathered with elastic it’s very stretchy and my little girl can step into the romper and pull the sleeves up onto her shoulders all by herself, with no other closures required. This romper version is meant to be made with knit fabric so it’s soft, stretchy, and comfy. I’d recommend sewing up a flutter sleeve dress or top first, so you’re familiar with the basic process. Then try adding shorts to make a romper!
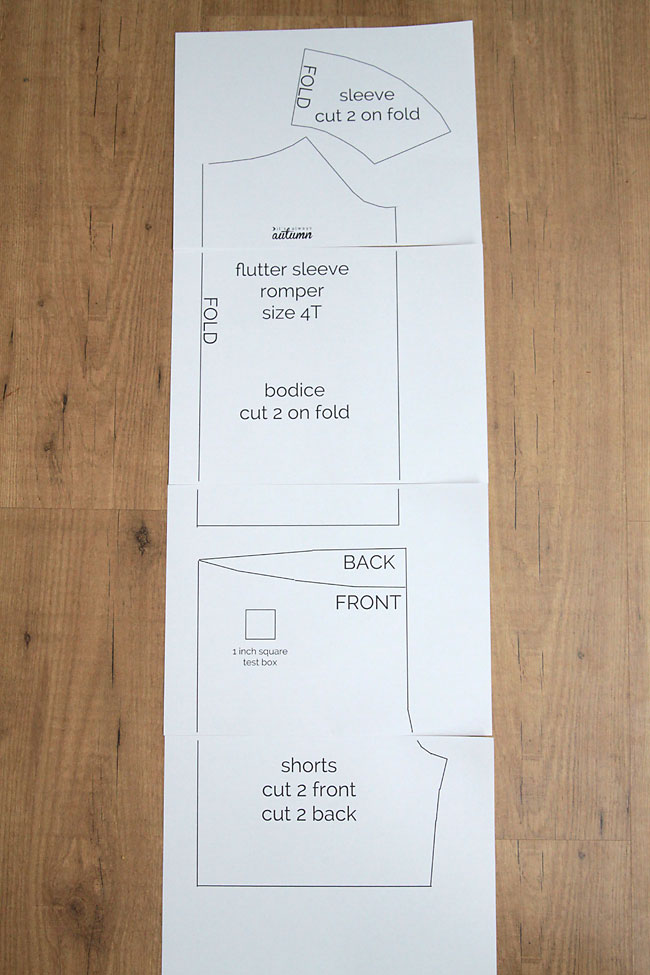
You can download the free pattern in size 4T by clicking here. When you print it, make sure your printer is set a 100% or “full size” – NOT “scale to fit”. It prints on four 8.5×11 sheets of paper, which you should line up as shown below. Don’t trim the paper at all. There is a 1 inch box you should measure to be sure it’s printed properly.
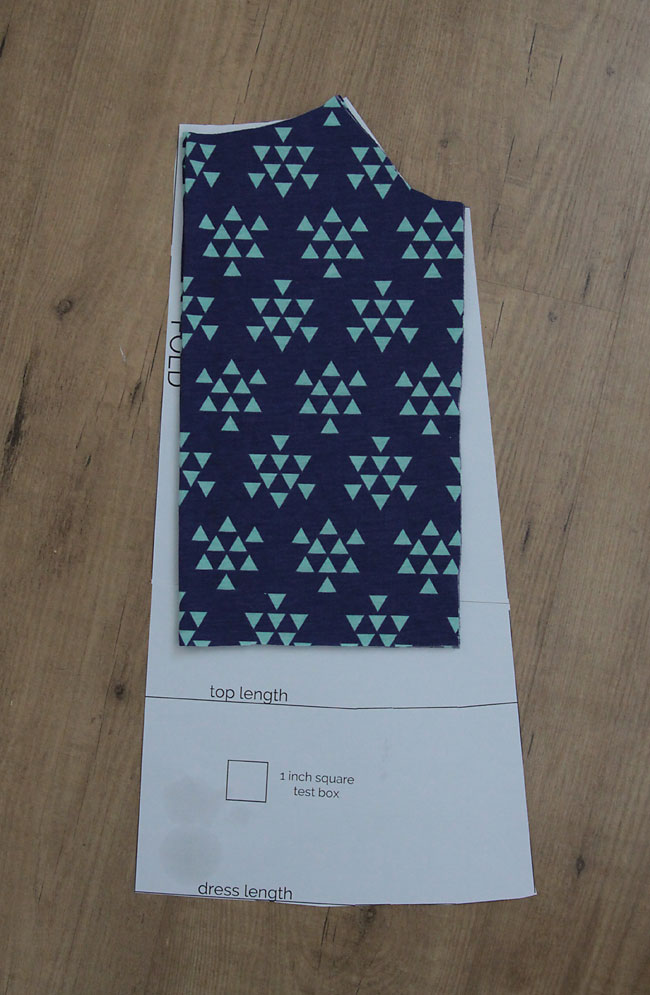
In case your little girl is not a size 4T and you’ve already drafted a flutter sleeve dress in another size, here’s how the main romper piece compares to the dress pattern:
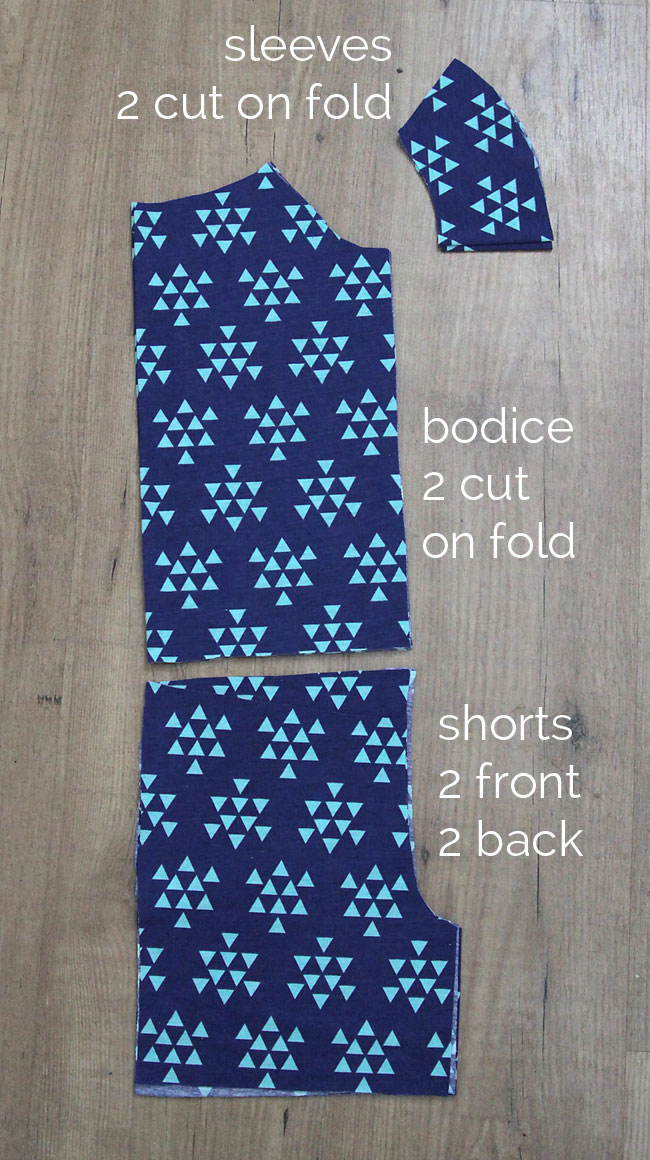
Once you’ve printed your pattern, cut out 2 bodice pieces on the fold and 2 sleeve pieces on the fold (remember to use knit, i.e. stretchy, fabric). You’ll also need 4 shorts pieces (if you’re drafting your own, just use a pair of shorts that fits well as a reference).
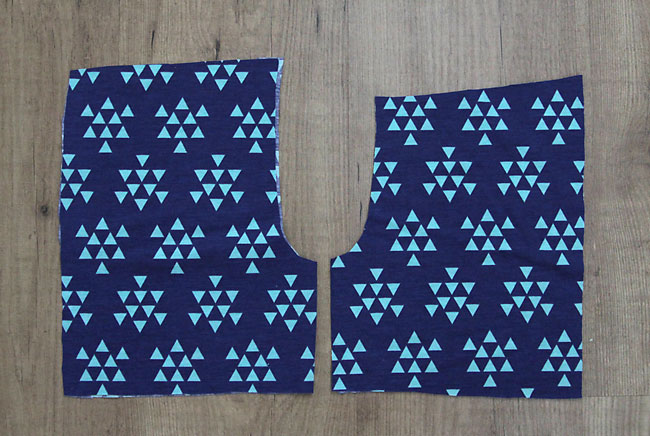
As noted on the pattern, there is a slight difference between the shorts front pieces and the shorts back. In the photo below, the shorts back pieces are on the LEFT. The top of the shorts back angles slightly up from the side to the center seam. The shorts from pieces angle slight down from the side to the center seam (as seen on the RIGHT). This gives enough extra room in the back of the shorts for them to be comfortable while sitting.
You’ll want to start by sewing up the bodice of the romper the same way you’d sew up a flutter sleeve dress – follow the directions from the flutter sleeve dress tutorial all the way through, except don’t hem the bottom. (Also, I just hemmed the sleeves on this version instead of adding pom pom trim).
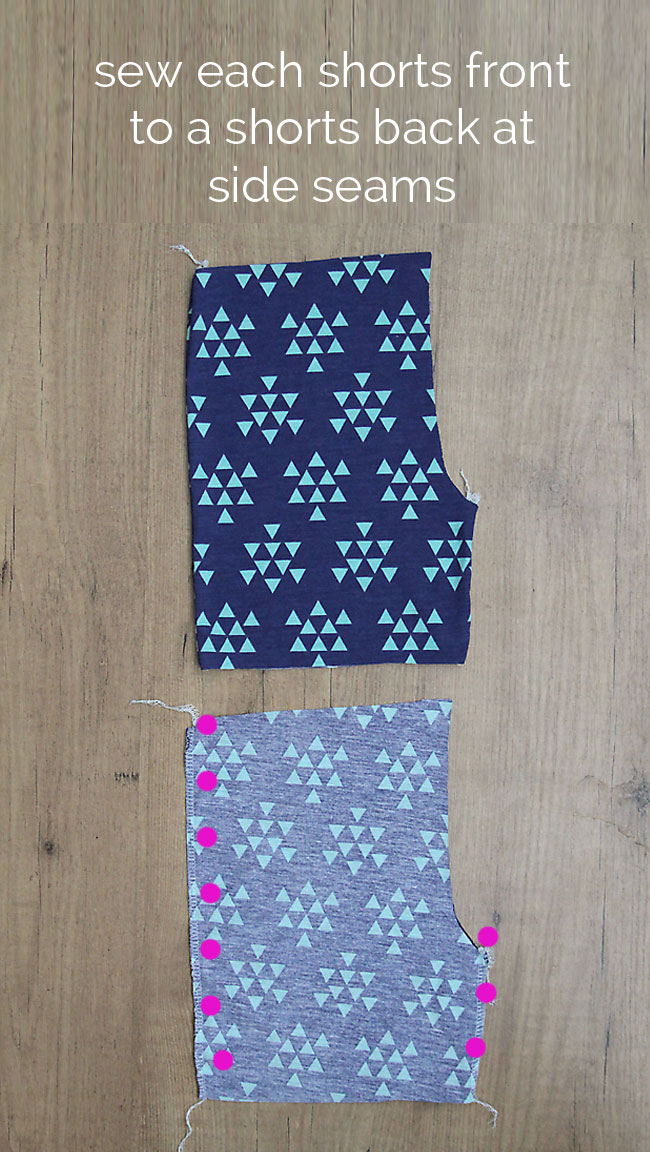
Set the top aside and grab your shorts pieces.
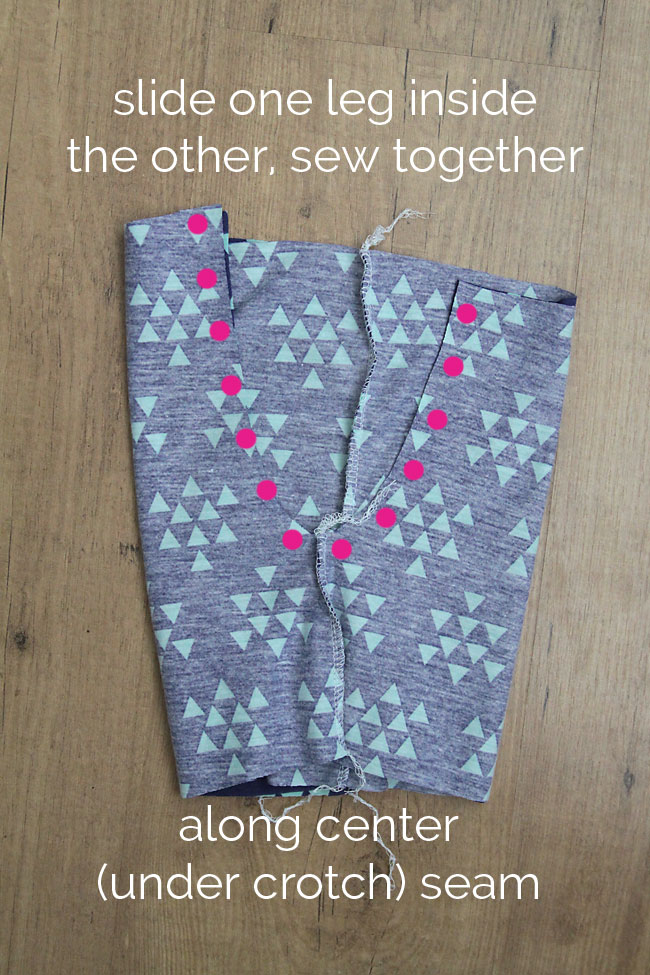
Now you have two legs. Turn one leg right side out, and slide it into the other leg, which is still wrong side out, so the right sides will be together.
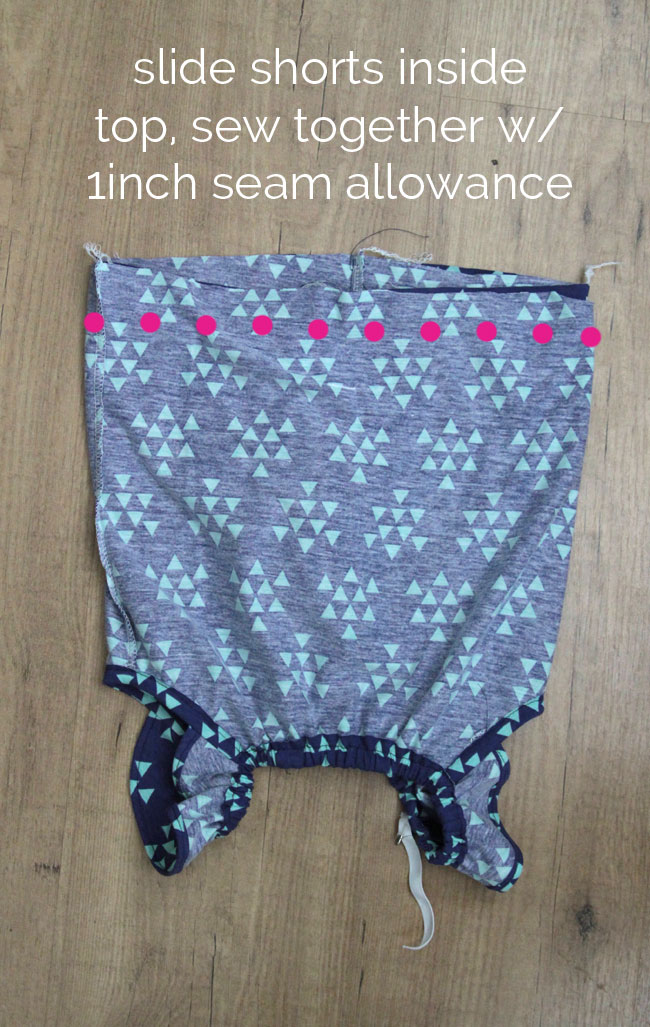
Now turn the shorts right side out. You now have a top, and a pair of shorts with now waistband. Keep the shorts right side out, but turn the top inside out. Place the shorts inside the top and right sides will be together. Sew together with a 1 inch seam allowance, stretching top slightly if needed.
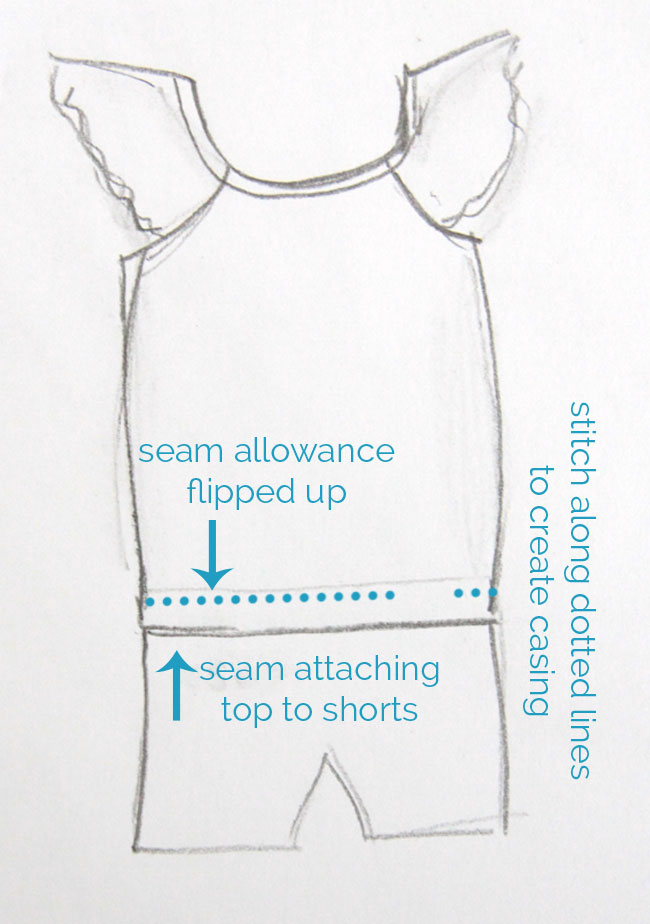
Now your romper is all attached together, and all that’s left is to add elastic around the waist. I forgot to get a photo of this step, so we have a fairly laughable illustration instead – but hopefully you can still get the main idea. With the romper inside out, press the 1 inch seam allowance you just made up, toward the top. Sew the seam allowance to the top, right along the edge of the seam allowance, all the way around, leave a 2 inch space. That creates a casing.
Cut elastic just shorter than the waist measurement and thread it through the casing. Sew ends of elastic together, then sew the rest of the casing closed. Hem the shorts and the romper is done!


Jackie says
Such a great patter! I’m making three. One is completely done and looks adorable! Thanks so much for the free pattern!
Kay says
This such a great pattern! Thank you for taking the time.
I made the little top with some shorts for my granddaughters last summer for pyjamas, and they worked out great.
Lori says
I would love to make this for my daughter, although I want to make the the flutter sleeves a little longer. would it best to lengthen the whole sleeve? or just a portion? would this affect the arm hole?
Mieke says
Heb je het vierkant gemeten ? Dat moet 1inch zijn. Of 2,5 cm. Anders is het niet goed afgedrukt
Je vindt het testvierkant in het patroon.