
In today’s post: Understanding focal length can make a huge difference in your photos! Learn what focal length is, and why being zoomed in gets much more flattering photos.
Why do some photographs we take look like snapshots, while others look like portraits? What makes professional photos look so much better than the pictures we take in the back yard? Well, there are actually a whole lot of things that go into making a great photo so good – often years of training and practice are involved. HOWEVER, there are a few easy tricks you can use to dramatically improve your photos – without cracking open a camera manual or taking your camera off Auto. One of the EASIEST tricks that will vastly improve your photos is adjusting your focal length.
What is focal length?
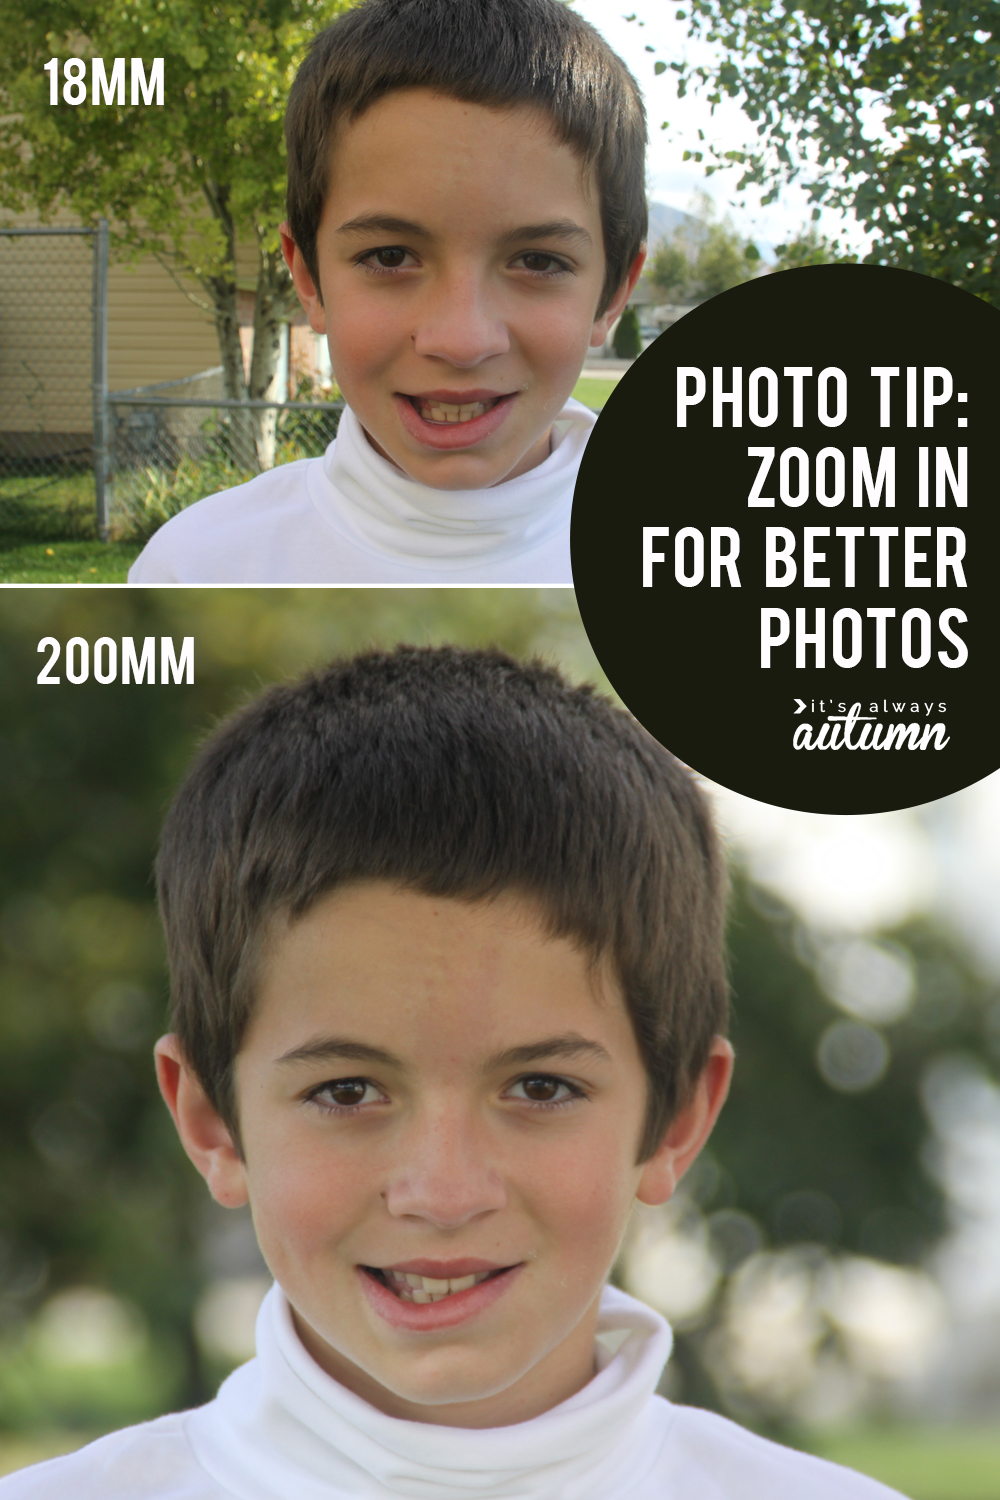
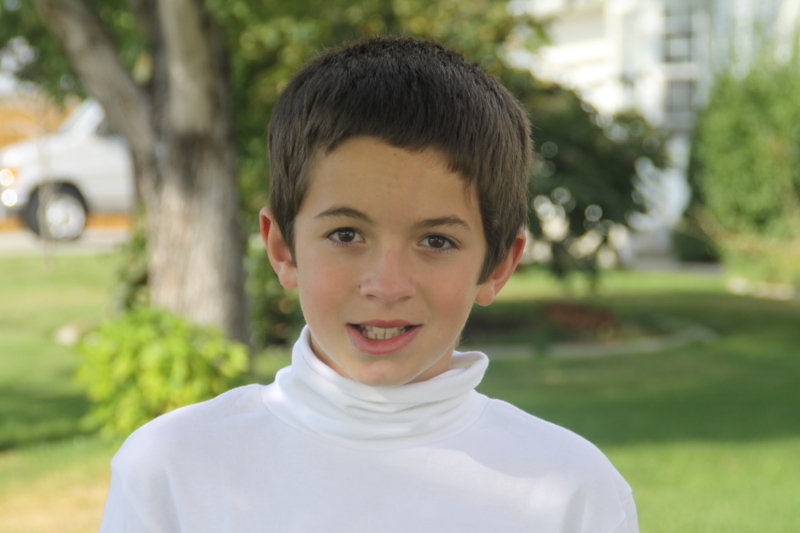
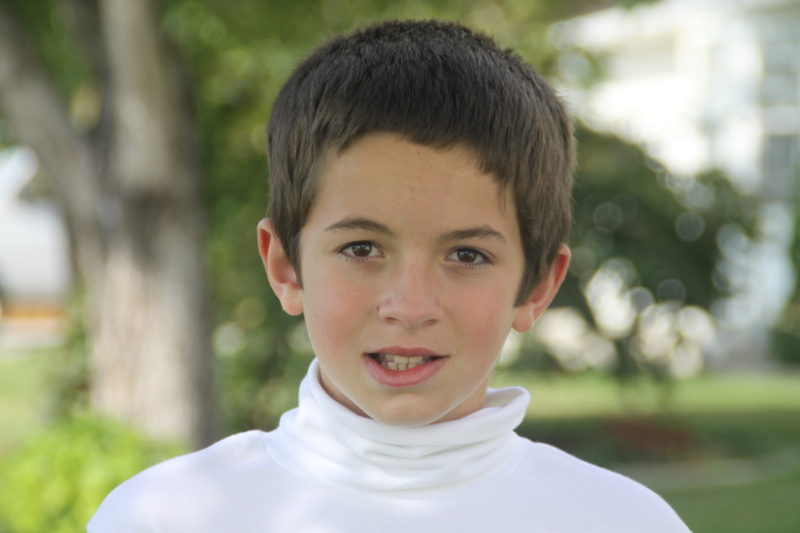
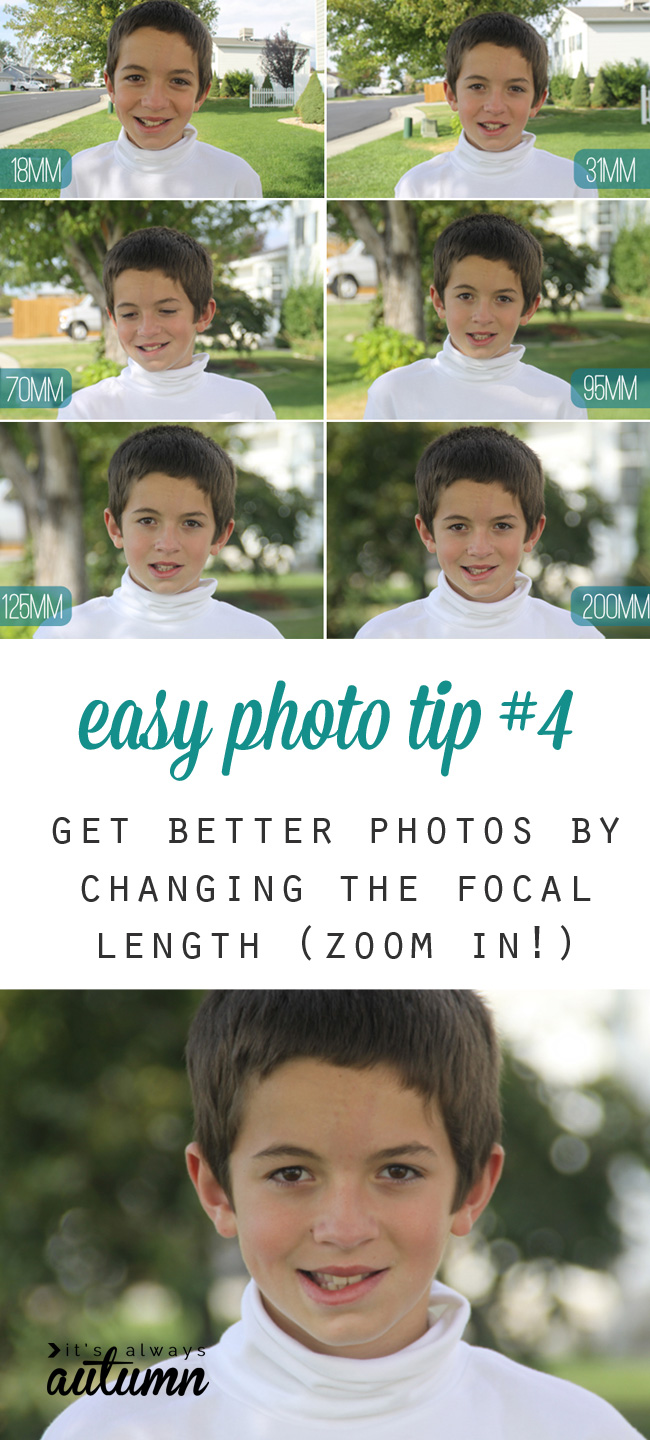
There’s a pretty dramatic difference in the two photos above. The top photo is definitely a snapshot, while the bottom photo looks more like a portrait. Both photos are unedited and were taken on Auto in the exact same conditions, just a few minutes apart. There’s only one difference between them, and it’s focal length, i.e. whether you are “zoomed in” or “zoomed out”.
Understanding focal length
Focal length is the distance between your camera’s lens and the spot it’s focusing on. Basically, it refers to whether you are zoomed in or zoomed out, and it’s measured in millimeters. A low number (like 18mm) means you are probably standing very close to your subject and you’ve had to zoom out in order to get a lot of background in the photo. A high number (like 200 or 300mm) means you are using a long zoom lens and you’ve zoomed in to get a photo of a subject that is further away from you.
Most of us don’t pay much attention to focal length when we’re taking pictures – we just zoom in or zoom out according to how close we happen to be to the person or object we want to photograph. But understanding focal length can make a huge difference in the quality of your photo, and for portraits, longer focal length is almost always better. Let’s look at some example photos that will show us why.
Focal length examples
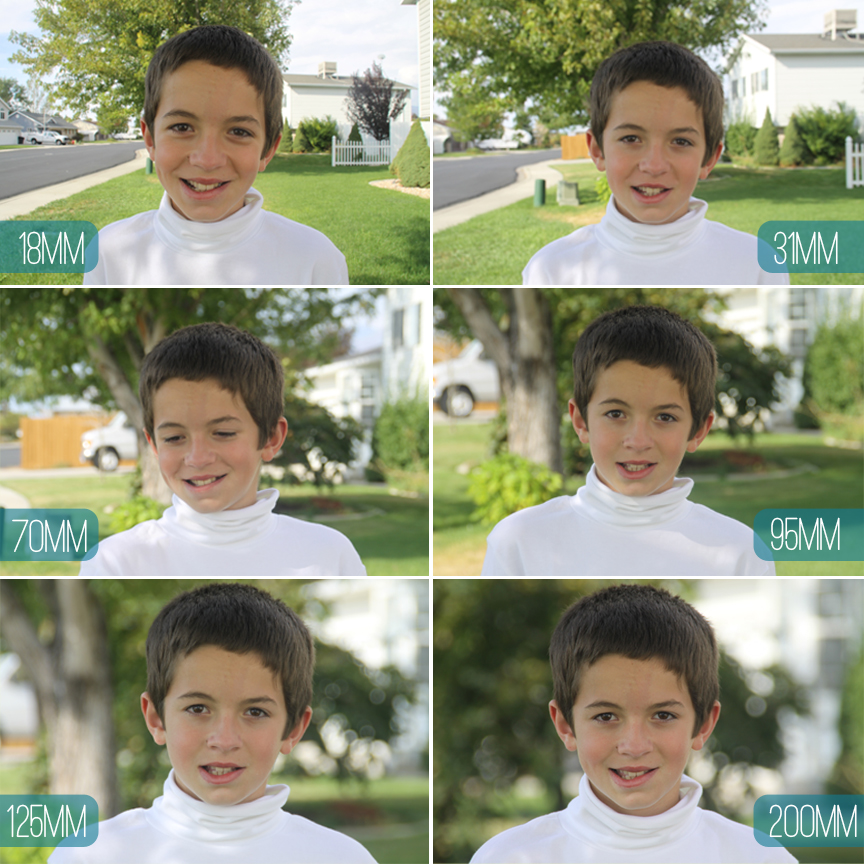
The photo above was taken with a very short 18mm focal length, or completely zoomed out. You really never want to take portraits at this focal length because it causes distortion of facial features. Noses and foreheads look bigger while eyes look a little smaller. At the same time there’s a huge amount of background visible in the photo – this might be nice if you’re trying to photograph someone in front of the Eiffel Tower, but it’s not so great when taking pictures of your kids in the front yard. That’s because short focal lengths are also know as wide angles – imagine lines from you to each side of the photograph (frame). Right now the angle in between those lines is pretty big, meaning we can see the front of the house to the right of our subject as well as houses and driveways on the left of the subject, all the way across the street.
When we take a step back away from the subject and zoom in just a bit, to 31mm, the angle of what’s in the frame gets a little narrower, meaning less of the background is visible from left to right (the car in the driveway across the street is no longer in the frame). Also, the facial distortion is mostly resolved, meaning the features look more like they do in real life.

As we continue to step back and zoom in, less and less of the background is visible. The photo above was taken at 70mm, and now all we can see behind our subject is the house he’s standing in front of – we can’t see the house to the right of him or the street to the left of him. Fewer distractions in the background make for a better portrait, and the narrower angle is starting to flatter his features.
This next photo (above) was taken at 95mm, and something cool is beginning to happen – not only is the background shrinking, it’s also getting less and less in focus. Extreme background blur, also known as bokeh, puts all the focus of the photo on your subject. Pros get background blur by manipulating their camera’s aperture, but if you usually just shoot on auto, using a longer focal length is an easy way to get bokeh.
The next photo (above) was taken at a long focal length: 135mm. The background continues to shrink from side to side – now only the tree is visible instead of the entire house, and the background gets even more out of focus, so the picture is really starting to look like a portrait now.

The final photo was taken at 200mm, and you can see that the background blur has become really beautiful. It’s definitely the most flattering of all the photos (although it does put a lot of emphasis on his hair, which needs a trim! Keep this in mind – looking like you have a very thick head of hair may be more flattering for girls/women than boys/men). Here’s all the photos together so you can compare them and see which focal length you prefer for this particular.
More focal length tips
1. Most dSLRs come with a standard “kit” lens that goes from about 24mm to 70mm (give or take). That means you won’t be able to zoom in all the way to 200mm with a kit lens. However, standing far enough away from your subject so you can zoom in as much as you can will still result in a much more flattering photo than standing close to your subject and zooming out to take the picture.
2. Many dSLRs also come with a zoom lens that goes from 18-200mm (like mine) or perhaps from 30-300mm (and they aren’t that expensive if you do have to purchase one separately). Don’t leave that lens in the camera bag until you need the zoom to get pictures at the soccer game – pull it out and use it for everyday photos. Just remember you will need to step back further away from your subject so you can zoom that lens in as far as possible.
3. Obviously it’s not always practical to be far enough away from your subject that you can zoom to 200mm for a portrait at a very long focal length. With younger kids you’ll need to be close enough to keep their attention on you, so 50mm might be as long as you can manage. But with older kids or adults you can be far enough away to zoom in and still close enough to talk with them – and adults (especially) will appreciate the more flattering effect of a long focal length.
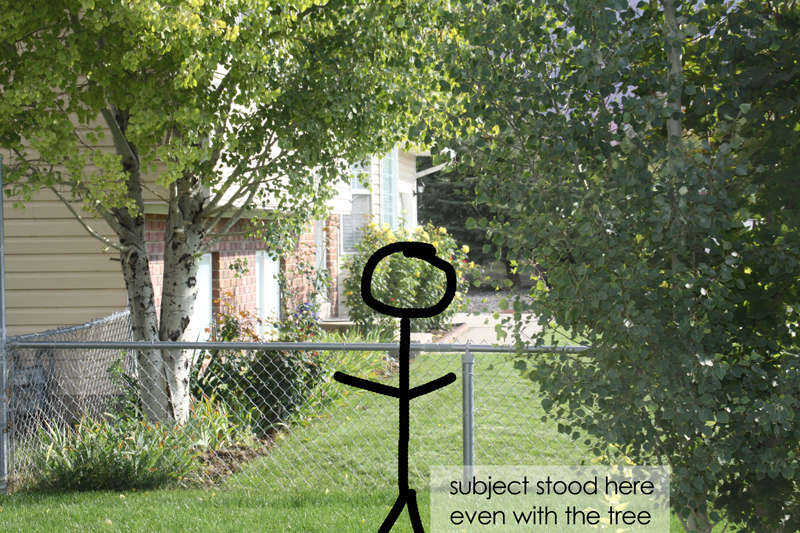
4. Using a long focal length allows you to take portraits even when you don’t have a nice “background.” The photo below shows what one part of my front yard looks like – just fine for a yard, but not very pretty as a photo background.
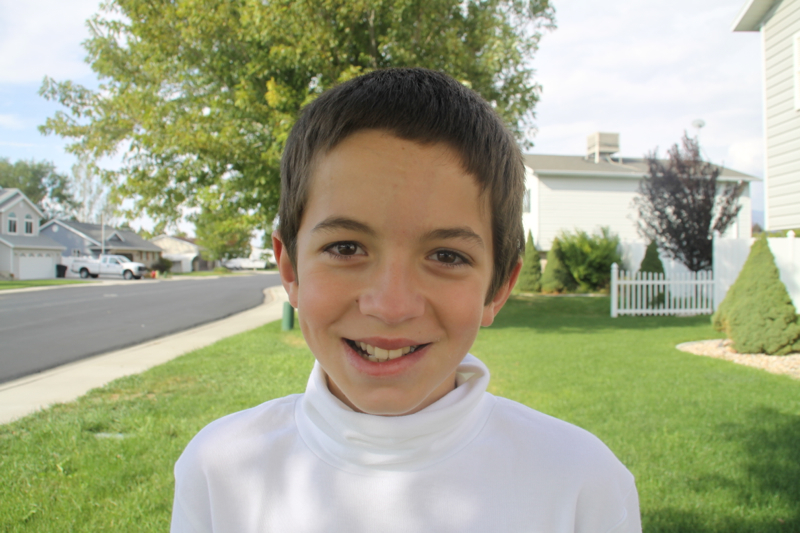
The top photo below shows what a picture taken at a normal focal length looks like in this setting. Lots of distracting background.
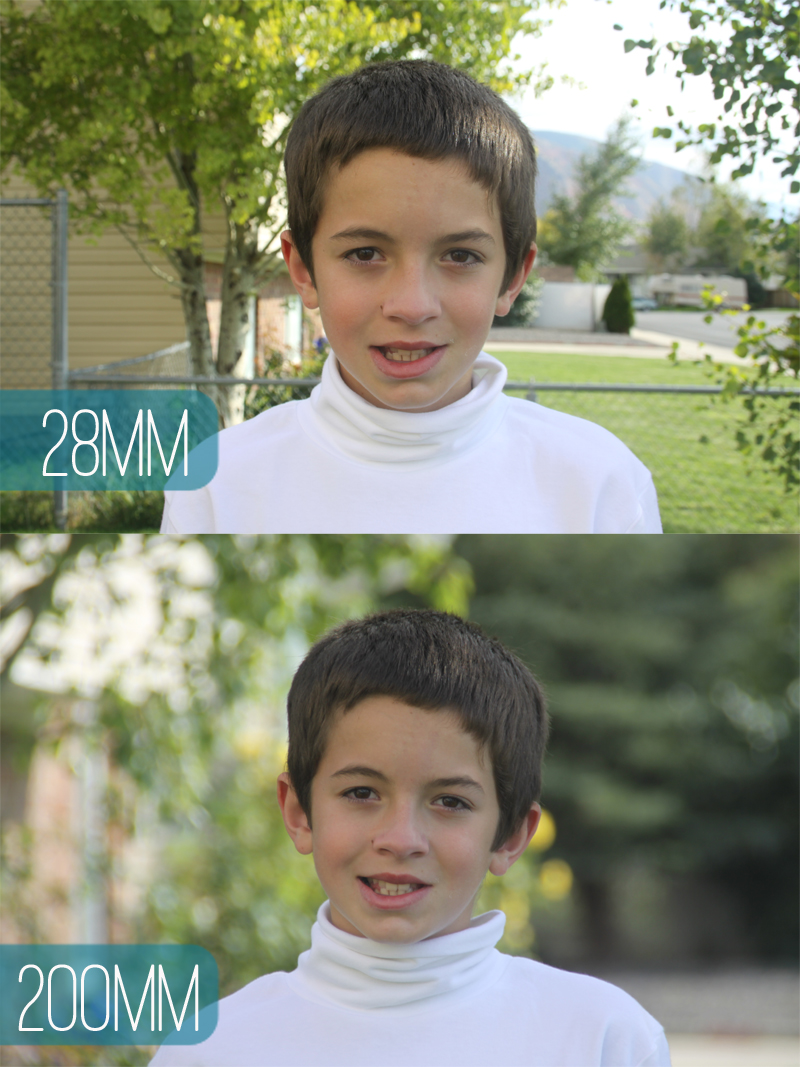
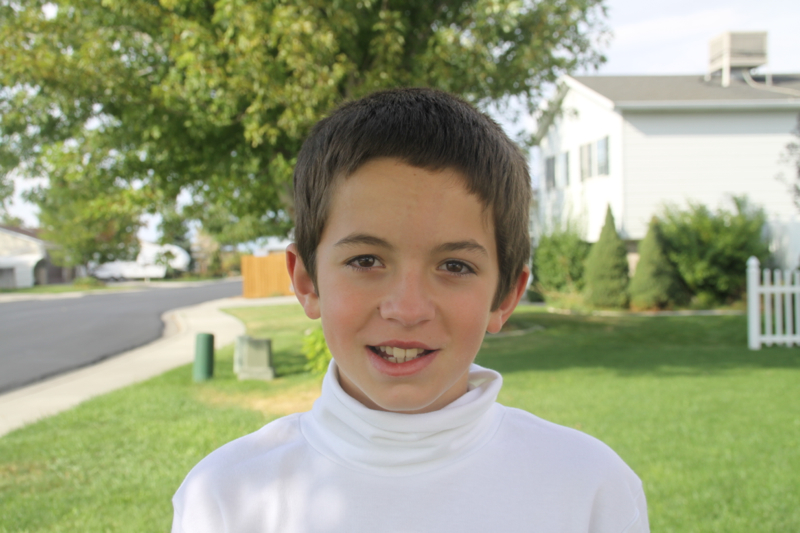
But the bottom photo shows what happens when I step back and zoom in – suddenly the pretty bush in my neighbor’s yard that’s directly behind my subject makes up most of the background AND the background is out of focus, which keeps the emphasis on the subject.
So long story short: long focal length = win win. Give it a try!
Looking for more easy photography tips? Check out these posts:
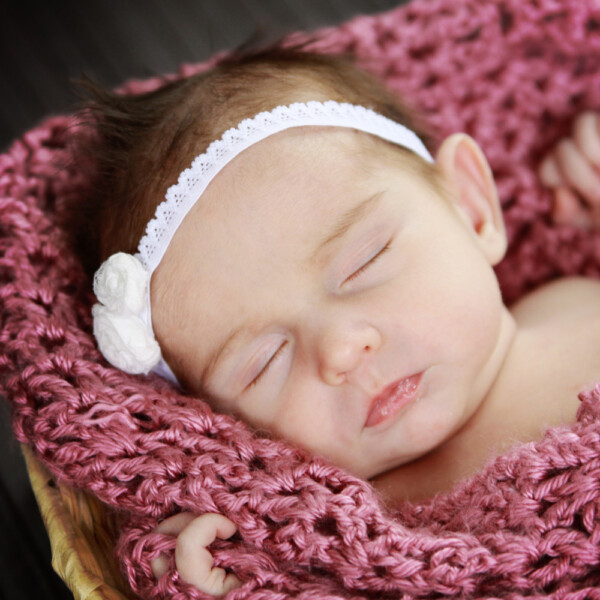
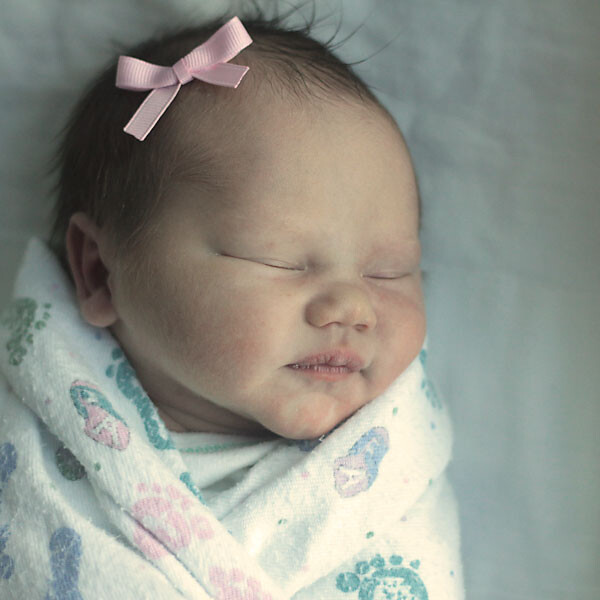
Best tips for toddler photography
How to set up a cake smash photoshoot


anne says
I just tried this at my desk with a bottle of aspirin. Worked great. Thanks.