It's Always Autumn

creative tutorials for everyday life

  • Holidays
  • Holidays
    • back to school
    • birthdays
    • Christmas
    • Easter
    • Halloween
    • July 4th
    • Mother’s Day/Father’s Day
    • teacher appreciation
    • Thanksgiving
    • Valentine’s
  • Crafts
  • Crafts
    • crafts + DIY
    • handmade gifts
    • photo crafts
    • kid crafts + activities
  • Recipes
  • Recipes
    • bread
    • dessert
    • main dish
    • side dish
  • Sewing
  • Sewing
    • free sewing patterns
    • sewing for women
    • sewing for kids
    • how to sew
    • gifts
  • Photography
  • Photography
    • beginning photography tips
    • posing tips
    • photo editing tips
  • Tips
  • Tips
    • parenting tips
    • travel tips
    • books I love
  • FAQ

beginning photography tips photography
June 13, 2017

Newborn photography tips for beginners {pt 1: the basics}

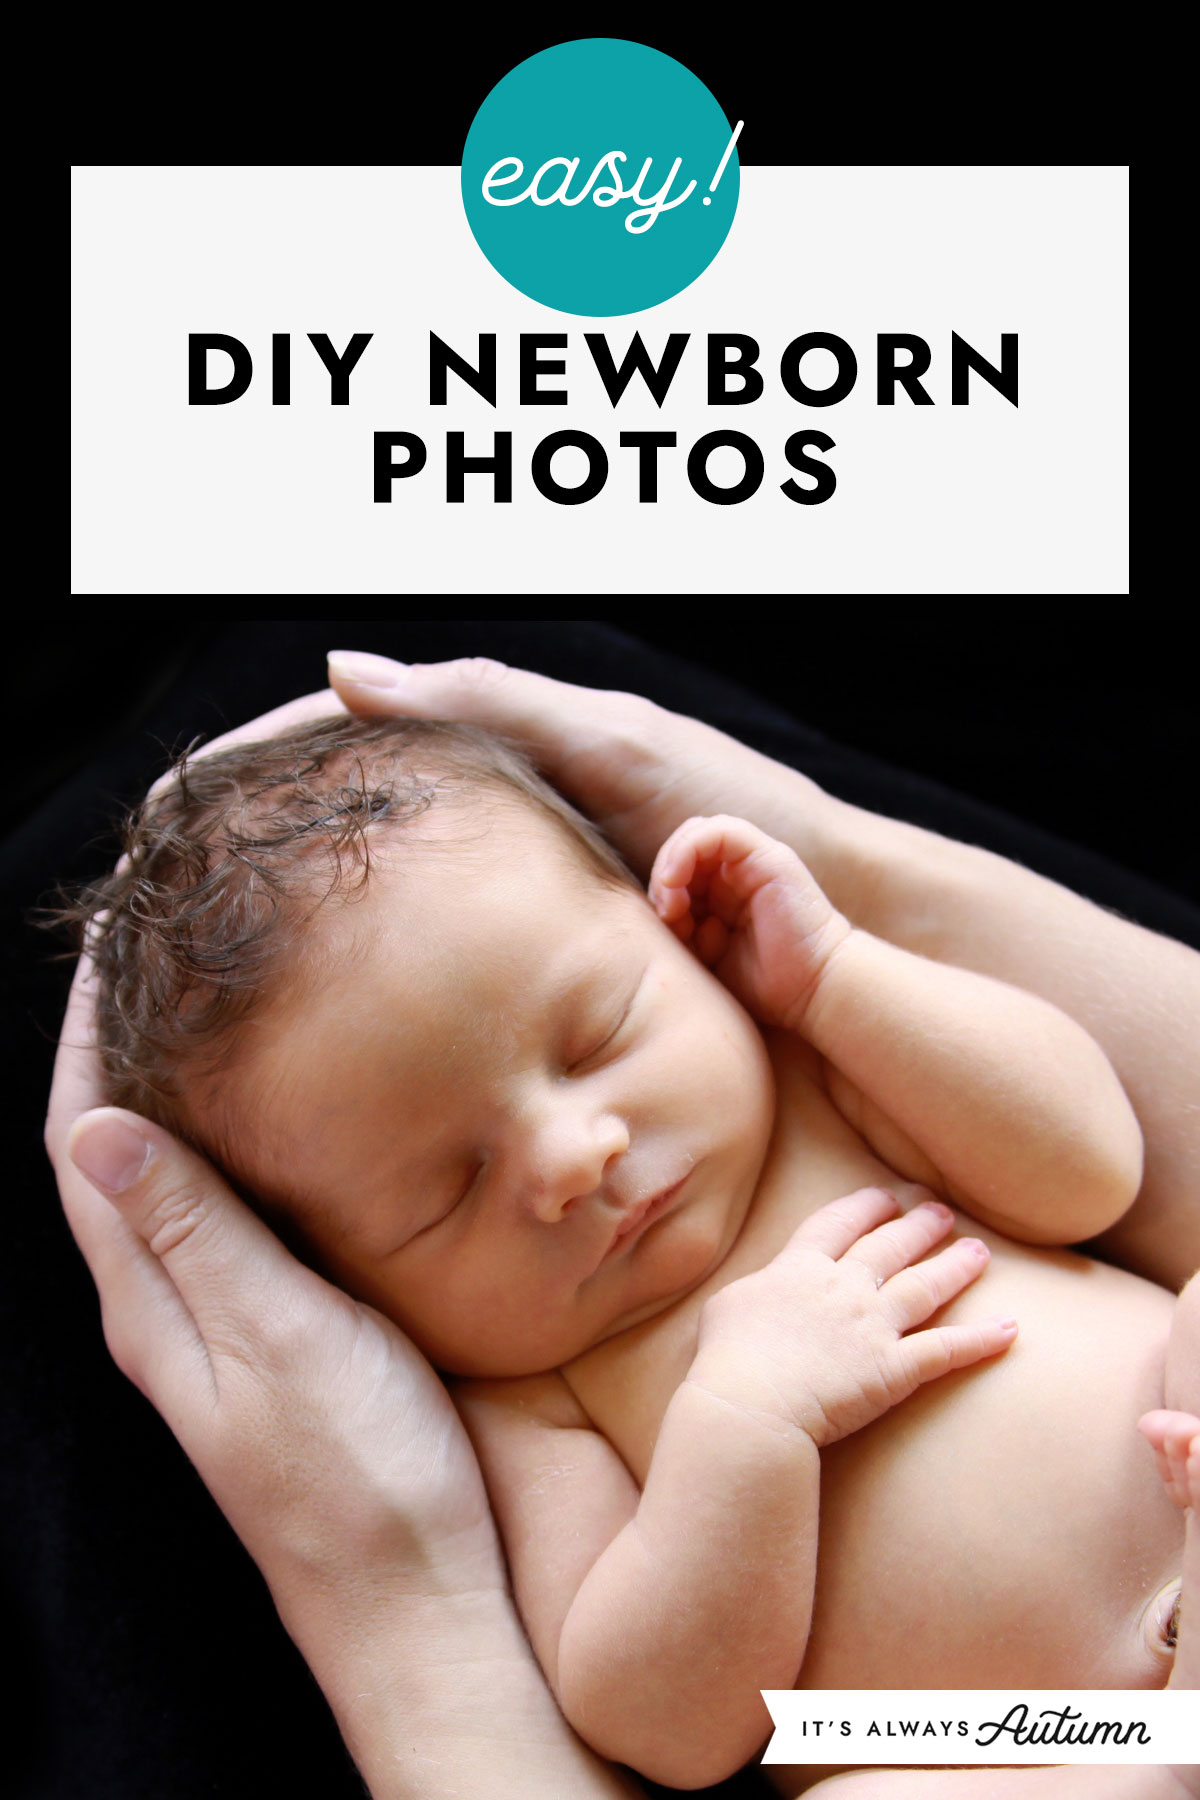
In today’s post: The is the first post in a series that’s full of newborn photography tips for beginners. Want to take great photos of your baby in your own home but don’t know how? This post is for you!

Newborn photography tips for beginners: learn how to setup a newborn photoshoot + tips about lighting, props, etc. Get better pictures of your baby!

Here’s my disclaimer for this series: I don’t claim to be a pro, and following the steps I’m outlining here isn’t going to make you a pro either. There’s a lot more to photography than props and poses. If you want amazing portraits of your newborn, your best bet is to invest in professional photos.

However, if you don’t have hundreds of dollars to spend on a newborn photo session, there are things YOU can do to get great photos of your newborn, and that’s the point of this newborn photography tips series. Here’s what you can look forward to in the next few weeks:

want to learn how to take better newborn photos? Check out this 5-part series covering setup, posing, editing, and more. DIY newborn or baby photoshoot tips and tricks. want to learn how to take better newborn photos? Check out this 5-part series covering setup, posing, editing, and more. DIY newborn or baby photoshoot tips and tricks. want to learn how to take better newborn photos? Check out this 5-part series covering setup, posing, editing, and more. DIY newborn or baby photoshoot tips and tricks. want to learn how to take better newborn photos? Check out this 5-part series covering setup, posing, editing, and more. DIY newborn or baby photoshoot tips and tricks. want to learn how to take better newborn photos? Check out this 5-part series covering setup, posing, editing, and more. DIY newborn or baby photoshoot tips and tricks.

Part 1: the basics: newborn photography tips | Part 2: DIY baby photoshoot: posing | Part 3: posing baby with family members | Part 4: How to edit baby photos | Part 5: how to get this shot (setup to post processing)

Newborn Photography Tips

When my first son was born, I had no clue as to what made a good baby picture. I ended up with a lot of shots that look like this:
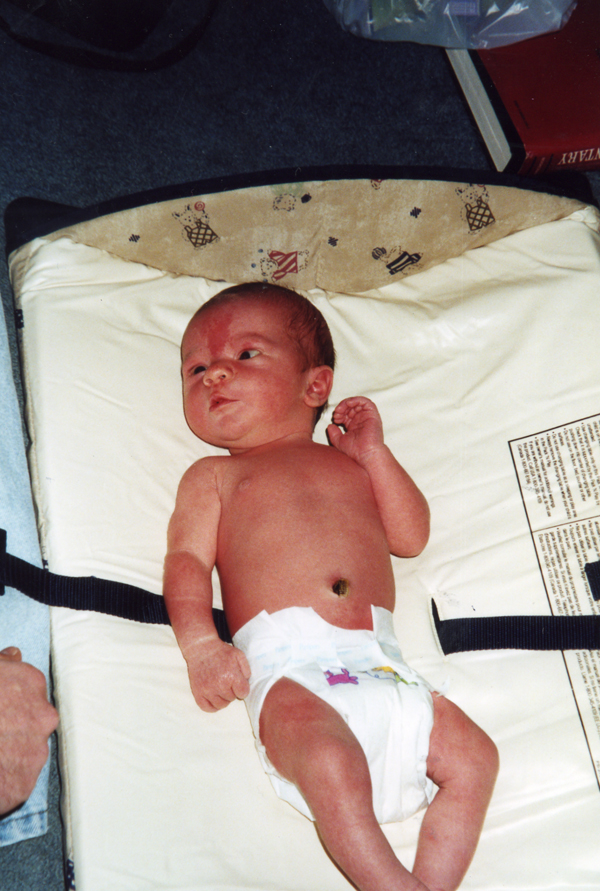
Yes, this was back before digital photography, so we didn’t have the chance to take a billion pictures and keep only the good ones – we just kind of had to take what we got. But still, it’s kind of sad that I only have pictures like this when I could have had photos that are so much better if only I’d known what I was doing.

By the time my fourth son was born, I was doing a little bit better. I had figured out a few things: 1) don’t shoot up the baby’s nose, 2) find a solid colored background to eliminate distractions, and 3) focus on the face and zoom in a bit. Using my newfound knowledge, I got a few photos like this one:

However, I still didn’t know much about newborn photography and didn’t have any idea how to best pose a newborn, which meant I got a lot more photos that look like this one:

Also, this baby was born in June, so I was able to take these pictures outside and get pretty nice light, but I still had no idea how to find good light for indoor baby pictures.

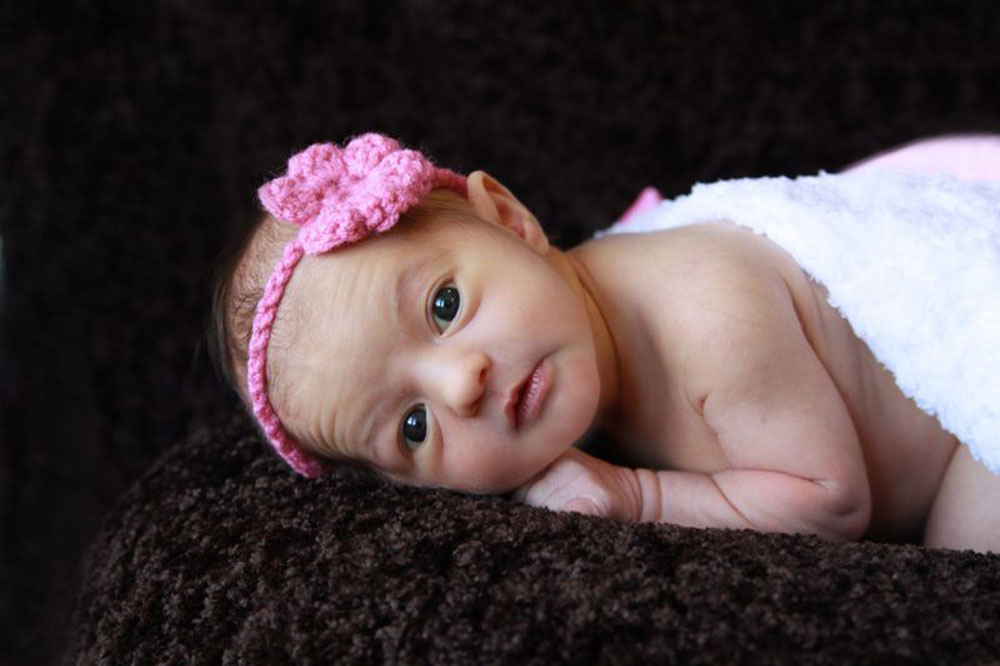
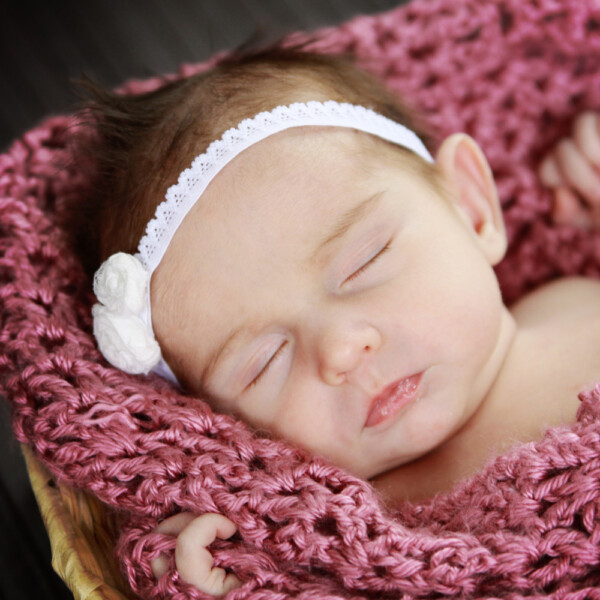
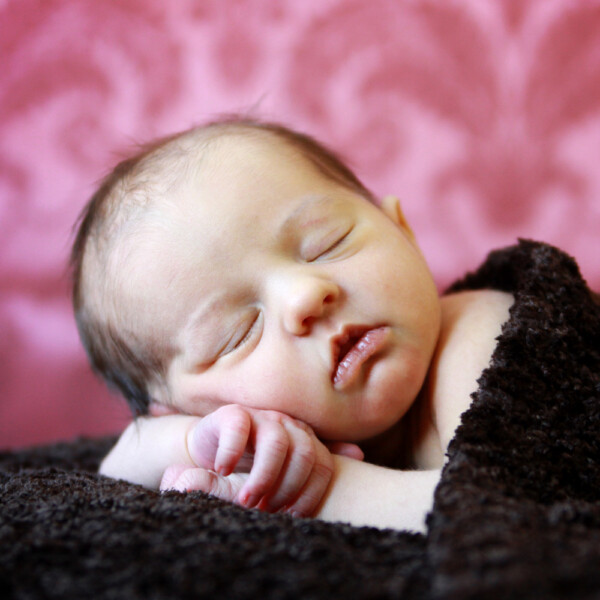
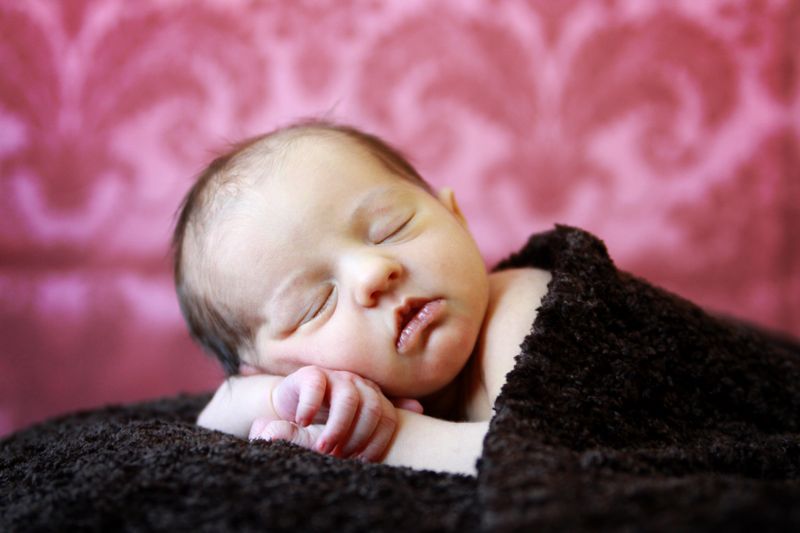
By the time our fifth baby (and only girl!) was born, I’d figured a few more things out, and was able to take photos like this:
Newborn photography tips for beginners: learn how to setup a newborn photoshoot + tips about lighting, props, etc.

Better, right? I only wish I knew eleven years ago what I know now. Hopefully the newborn photography tips I share in this series will help you avoid portraits that look like that first one, and learn to take photos you love.

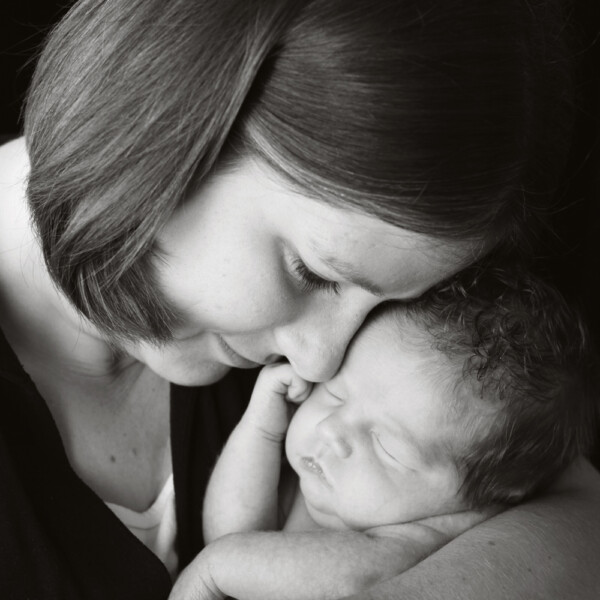
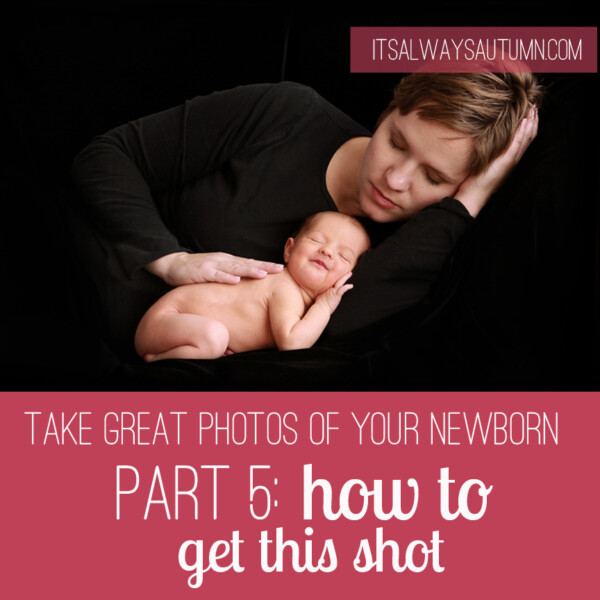
In today’s post we’ll cover lighting, setup, and general tips for a newborn photo shoot. Part 2 will cover simple poses for your baby. Part 3 will show you how to photograph your baby with other people. Part 4 will show my go-to editing techniques for newborn photos. And part 5 will be a fun “how to get this shot” start to finish discussion.

Ready to begin?

Basic tips for newborn photos

Most people recommend holding a newborn photo shoot within the first ten days of your baby’s life. When babies are this young they are generally very sleepy, which is a good thing for photos. Why? Because a sleeping baby isn’t crying, doesn’t have crossed eyes, doesn’t have a huge pacifier in her mouth, and isn’t flailing her arms about uncontrollably (all of which happen quite regularly when she’s awake). Sleeping newborns look sweet and peaceful, while awake newborns can look a little awkward. If you start your photoshoot while the baby is asleep you can get lots of sweet sleepy pictures, and then a few more when she wakes up.
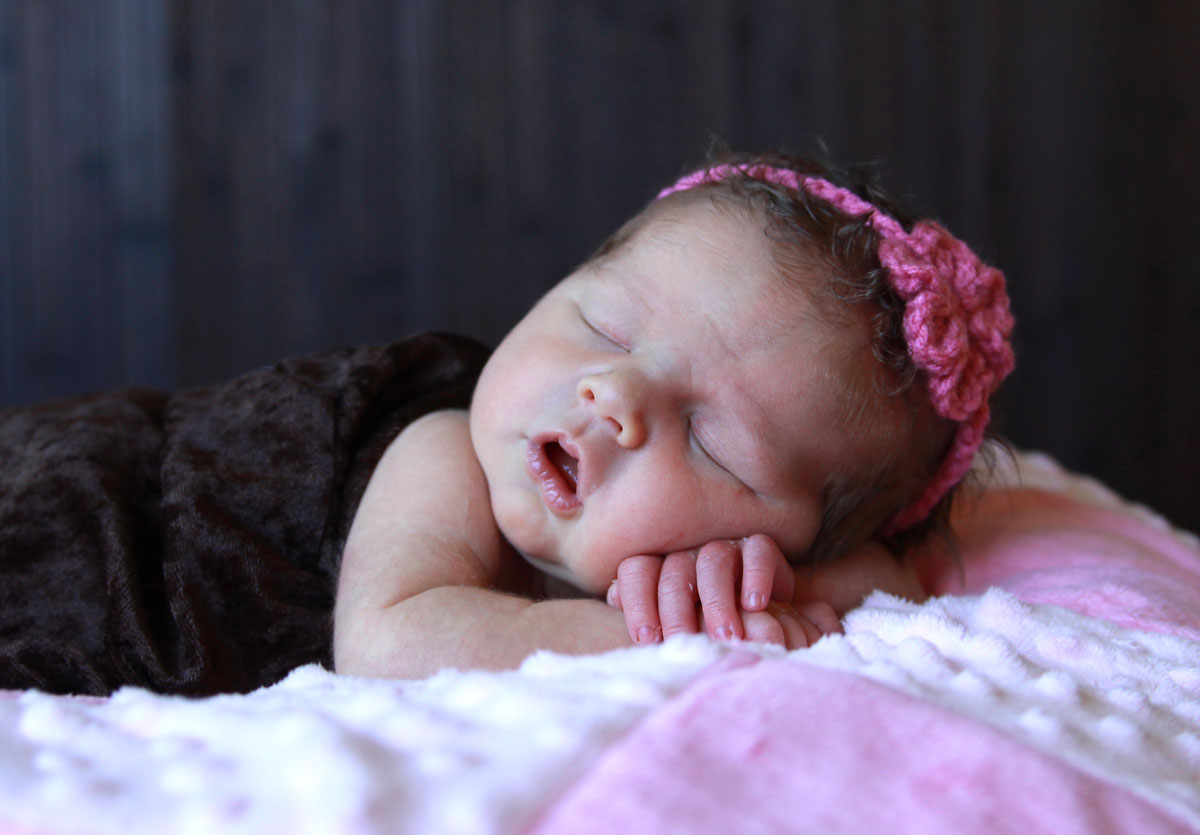
Another reason to hold a newborn photo shoot soon after birth is because babies change so quickly the first few months, and you don’t want to miss the chance to photograph that uber tiny newborn look. Does this mean you can’t get good pictures when your baby is three weeks old instead of seven days? Of course not. But earlier can be simpler, which is always a good thing.

Plan to set up everything you need for your photoshoot early in the day. Then keep your baby active and awake for a while, then feed her, then get ready to take pictures when she starts to fall asleep.

Plan on spending at least an hour to get some good shots. I generally spend two hours when I photograph a newborn (some pros spend twice that much time). If you’re taking pictures of your own baby, you could also plan to spend just half an hour but try once a day for the first week. Figure out what will work best for your schedule, but realize this won’t be a quick process. Also, the photoshoot will be much easier if you have someone to help you, so rope your husband/mom/friend into being your assistant.

I think newborns look best photographed naked, or in just a diaper, or in a plain white onesie. Most baby clothes are way too big for newborns and just don’t photograph very well. Keeping the clothes extremely simple keeps the focus on the baby. However, naked babies are cold babies, so keep a space heater going right next to your baby the whole time you are photographing him. You’ll end up covered in sweat, but your baby will stay comfortable.
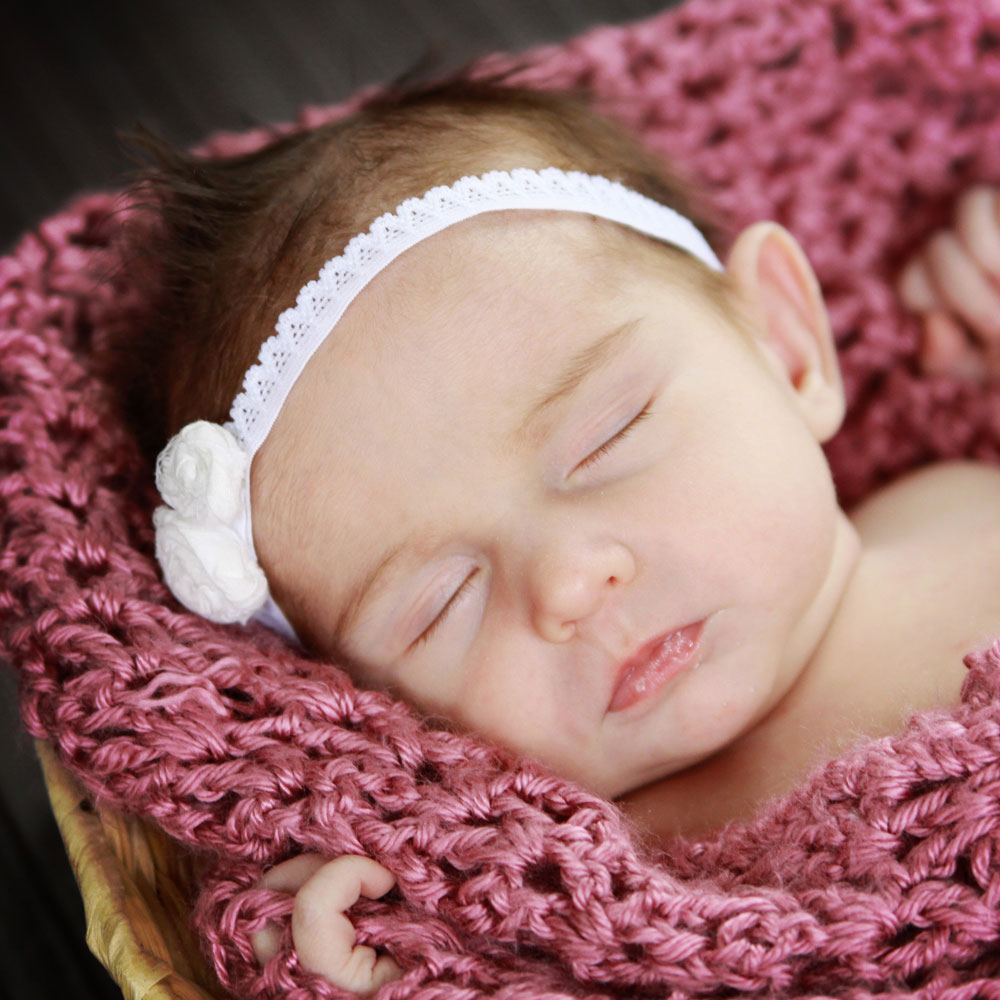
Lighting tips for newborn photos

For good portraits you must turn off your flash. Your camera’s pop-up flash does more harm than good in most photography situations, so make sure you aren’t using it when you try to photograph your newborn. Instead, find a good source of natural light, like a large window or glass door, and set up close to it. If you have enough light coming in you won’t need either your flash or your overhead lights (which are also not a good plan when taking portraits). If it’s warm enough you can even set up in your garage with the door up to allow lots of light in. Start paying attention to the light in the room in yourself with the largest window – notice when the room is bright, but you can’t see the shadow of the window on the floor in front of it (see this post for more explanation of this). That’s the time of day when you want to plan your newborn photo shoot.

Camera and equipment for newborn photos

You can get good photos of your baby using any camera, even if you shoot on auto. I find that most photos taken on auto tend to be underexposed, so if you are going to shoot on auto, read my post on brightening photos in post processing.

If you have a dSLR and any lenses with wide aperture capabilities (like a 28-70 2.8 or even a 50 1.8) I’d recommend using one of those lenses and keeping your aperture open fairly wide, around 2.8. That will help to blur the background and make the photographs look a little more professional. If not, don’t sweat it – turning off your flash will force your camera to use the widest aperture it’s got (using the portrait setting will also help here). Your camera may have a harder time keeping the shutter speed high if it’s not very bright in your house, so consider using a tripod if you have one. Better equipment sometimes makes for better photos, but knowing how to use what you have is really more important. If you have a few months before your baby is born, spend a little time getting to know your camera. If you don’t have time to practice, following my tips will still help you improve your photos.

Newborn photo setup

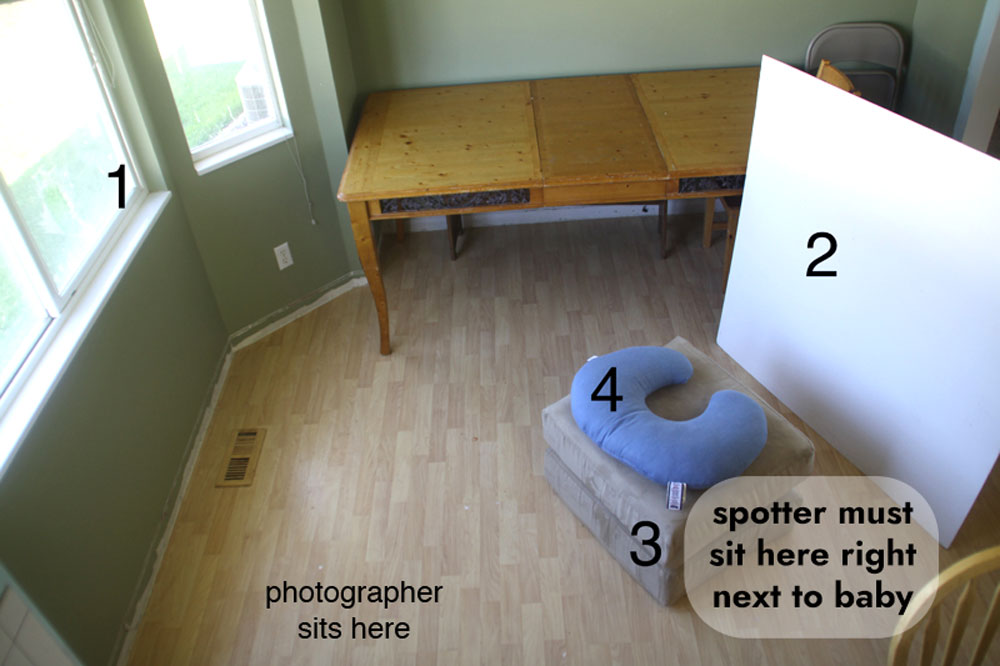
Here’s a photo of where I take newborn photos (in my dining room – please excuse the missing baseboards, we’re doing some updating). Let’s look at the important parts.

Newborn photography tips for beginners: learn how to setup a newborn photoshoot + tips about lighting, props, etc.

1. Large window. A window that goes all the way to the floor would be even better, but I don’t have one, so I make do with what I do have.

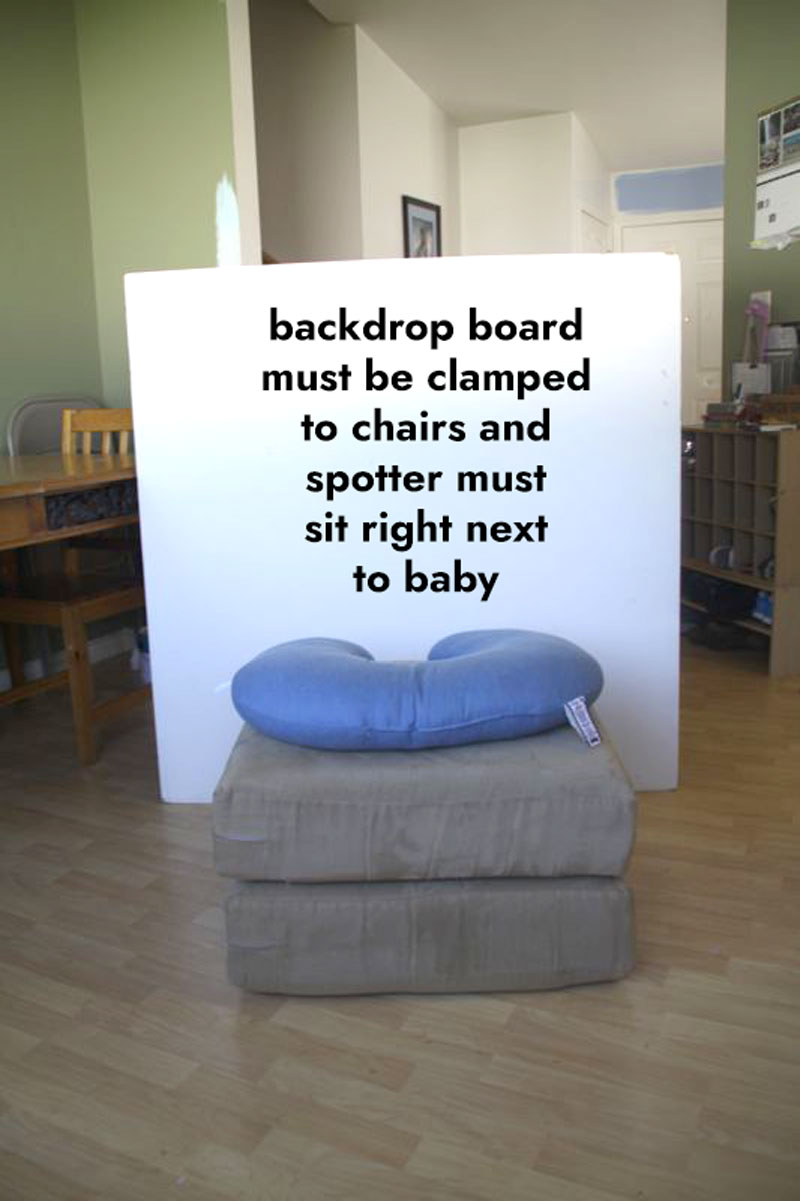
2. Backdrop board. I have a couple DIY backdrop boards that I made for about $10 each (full instructions in this post). I stand one up against the backs of two of my kitchen chairs. The backdrop boards can be used alone for a solid colored background, or can be used to drape blankets from for more background options. The background should be angled so it faces the right or left side of the window, not the middle of it, as you can see in the photo above. This will allow the baby’s head to be a little closer to the window than her feet, allowing the light to hit her forehead first, causing gentle shadows just under her nose and chin. If you don’t have a backdrop board, stand two kitchen chairs backwards here anyway so you can drape a blanket from them. PLEASE NOTE that if you use a backdrop board it MUST BE secured with clamps to the chairs it stands in front of to assure it will not fall over. You should also have another person present standing near the baby AT ALL TIMES to ensure baby is safe and secure. DO NOT do anything that could endanger the baby’s safety.

3. Couch cushions. You want the baby up off the ground so you can photograph her from all angles, not just from above. (Occasionally I do put the baby all the way down on the ground to photograph her from directly above – I’ll discuss that tomorrow.)

4. Pillow, boppie, or beanbag. It’s nice to have something a little bit soft you can lay the baby on and then move around to help position him. A small bean bag would be perfect, but I don’t have one, so I use a pillow or boppie.

5. Protective plastic (not shown). This is only necessary if you plan to photograph the baby without a diaper on. He will go to the bathroom sometime during the photo shoot (it always happens) so protect your pillow and cushions.

6. A spotter. Anytime you are photographing a baby, you really need another person as a spotter. The other person’s only job is to make sure the baby doesn’t roll off the cushions onto the floor. If you are photographing a newborn it’s extremely unlikely they’ll be strong enough to roll anywhere, especially once they are nestled inside the boppy pillow or bean bag, but you can never be too safe. So make sure your “assistant” sits on the floor within arms length of the baby.

Here’s how the set-up looks when you sit down in front of it (as noted in the photo above):

Newborn photography tips for beginners: learn how to setup a newborn photoshoot + tips about lighting, props, etc.

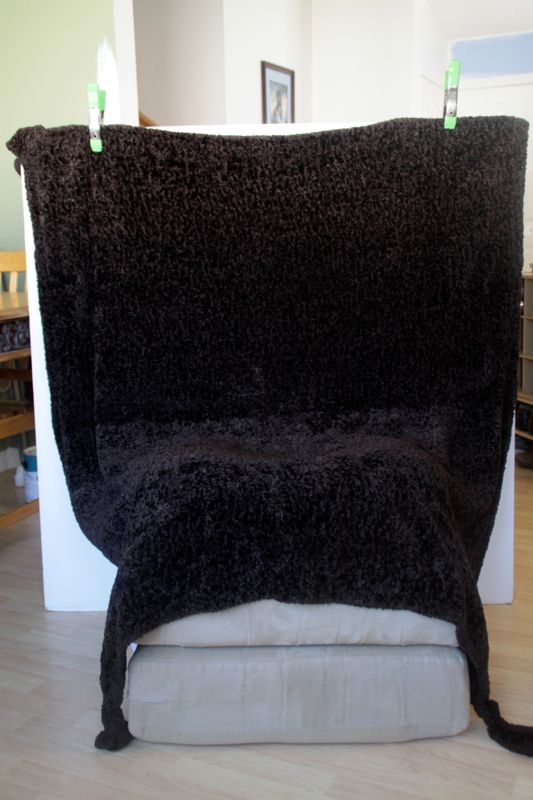
Once you have the basics set up, you can drape a solid colored blanket over it all. Use clamps to attach the blanket to the backdrop boards and make sure the clamps also attach the board to the chairs so it will not fall over (if you don’t have a backdrop board just attach the blanket to the tops of the chairs). Let it drape down the board until it is level with the pillows, then lay it over the pillows. You want to minimize wrinkles as much as possible, because they will be very distracting in the final picture, so use more clamps on the sides if you need to. Additionally, you might want to clamp the background board to the chairs it’s resting against to be sure it won’t fall during the photoshoot. It should look like this:

Newborn photography tips for beginners: learn how to setup a newborn photoshoot + tips about lighting, props, etc.

And then you can take a photo that looks like this:

Newborn photography tips for beginners: learn how to setup a newborn photoshoot + tips about lighting, props, etc.

Other newborn photoshoot necessities:

Wipes/burp rags. Chances are you’ll have to clean up something during the shoot, so keep wipes and burp rags handy.

Space heater.

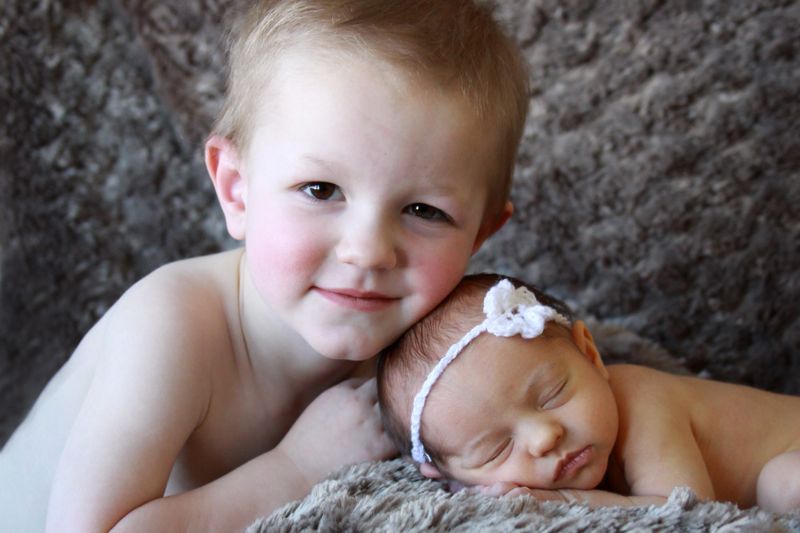
Blankets or fabric to use as backdrops. If you are going to invest in one thing, I’d say go buy a few yards of the cheapest black stretch velvet you can find (use a coupon at Joanns!). Black velvet works really well as a backdrop because it doesn’t show wrinkles and generally shows up as solid black in photos. Otherwise, walk through the house looking for any blankets you might have. Blankets with lots of texture also do a good job hiding wrinkles, like this one:
Newborn photography tips for beginners: learn how to setup a newborn photoshoot + tips about lighting, props, etc.

Extra blankets. In between poses it’s nice to have a few extra blankets to swaddle the baby in to keep her happy.

Pacifier. Keep one within arm’s reach at all times. Often when trying to pose a sleeping baby he’ll start to wake up, but a quick pacifier stuffed in his mouth will send him right back to sleep. Then you can ease the pacifier back out and take your photo.

Any other props or accessories you think you might like to use (hats, headbands, etc.) You want everything ready to go before you start taking photos. Remember, though, that you don’t need lots of props. I think newborn photos look best with fewer accessories and props and more focus on the baby herself. I’ll talk more about this in Part 2: Posing for a DIY newborn photos.

I hope that was helpful! It’s a lot of information, so it’s probably worth reviewing a few times. It’s also worth trying out your setup before you plan to take pictures – even before the baby arrives if possible.

Read the rest of the series:

Part 1: the basics: newborn photography tips | Part 2: DIY baby photoshoot: posing | Part 3: posing baby with family members | Part 4: How to edit baby photos | Part 5: how to get this shot (setup to post processing)


Share this:

  • Tweet
  • Print

Home » photography » beginning photography tips » Newborn photography tips for beginners {pt 1: the basics}


74 Comments

free email series

NO FAIL CRAFTS + RECIPES

Get my favorite EASY craft and recipe ideas straight to your inbox!

« 20 genius DIY backdrops you can make for just a few dollars!
the perfect flattering gathered skirt for summer »

Comments

  1. Denise says

    June 13, 2012 at 12:06 am

    Goodness — I’m with you. My pics of my first are on these HORRIBLE blankets of polka dots and teddy bears — very distracting. I also notice how messy my house is in the background. (Why didn’t I notice that before taking the pictures?) Great tips — I can’t wait for the rest of the series. 🙂

    Reply
    • deja says

      October 30, 2014 at 3:42 pm

      love wall

      Reply
  2. [email protected],Trust& Pixie Dust says

    June 17, 2012 at 12:06 am

    This was super helpful! I have a newborn granddaughter & I tried taking some pictures of her. It was disastrous! The little thing was sliding all over the place on my black velvet. Ha ha. Thanks for all your great tips! I read the posing article as well.
    Warmly, Michelle

    Reply
  3. Alyssa says

    August 2, 2012 at 12:08 am

    I learn so much from all your photography “How-To” blogs! I cant wait for you to do one on family photoshoots! 🙂
    Alyssa

    Reply
  4. Kasandra Mathieson says

    September 18, 2012 at 12:09 am

    What a wonderful post! I just finished taking pictures of a 5 month old friend’s baby and so wish that I had found this before! Thanks for sharing your “savvy” with us…

    Reply
  5. Kali says

    November 30, 2012 at 12:11 am

    Thank you so much for doing this! I am trying this out tomorrow! 🙂

    Reply
  6. Sarah S. says

    February 5, 2013 at 12:02 am

    This was so helpful!! Thank you thank you!!! My second baby girl will be here in 3 months and I can’t afford a photographer! I’m so excited to try this out!!!!!!

    Reply
  7. Gisele, Gatineau (Québec) says

    June 24, 2013 at 12:06 am

    Oh wow!!! Thank you! Thank you! Thank you! I’ve been looking for information like this for a while and here it is, in a 5 part series. I’ve been asked to take maternity and newborn pictures of my nephew that will be born in about 1 1/2 month…so excited…except I was a bit nervous as I had never done a newborn photoshoot before. Again thank you so much for the information…will be of great use. Great job!

    Reply
  8. Melissa says

    June 29, 2013 at 12:06 am

    Great series! Thanks for sharing and look forward to more.

    Reply
  9. Michelle Perez says

    July 21, 2013 at 12:07 am

    Hi, I’m new to your blog, but this is seriously the best, most helpful post on the internet about how to take photos of newborns. I used it to take newborn shots of my 1 week old daughter! Thank you.

    Reply
  10. emily says

    July 29, 2013 at 12:07 am

    LOVE!!! Adorable!! I’m pinning this! I don’t know if I will have any more little ones :o) But I love to take photos for others, so this is handy… thanks for always having great photo tutorials!

    Reply
  11. Amanda says

    August 3, 2013 at 12:08 am

    can’t tell you how happy i am that i came across your posts! this is a great tutorial – i am expecting our 2nd any day now and hiring a pro unfortunately is not in our budget 🙁 definitely don’t want to miss out on these great shots! about to read the rest of the series and pinning all of them! thank you so much!!

    Reply
  12. Hilary says

    August 8, 2013 at 12:08 am

    I just wanted to say THANK YOU! I am not as experienced in newborn shoots as I am with other types and my latest one just kicked my butt! I’ve been trying to edit a particular image for 2 days. And then… I found your tutorials and it made all the difference in the world. I also really needed to see that you started out shaky with your own kids and how you’d improved. Sometimes, I forget it’s ok that I don’t know everything yet. Thanks again!

    Reply
  13. Tara says

    September 25, 2013 at 12:09 am

    Thanks so much for the tips! I used them when photographing my daughter a few weeks ago. I referenced and linked to you on my blog post about it: http://spotofteadesigns.com/2013/09/25/newborn-photos-and-a-diy-baby-headband/

    Reply
  14. Connie says

    October 30, 2013 at 10:27 am

    oh my!!!!!What great info,am due in 2weeks with my second bundle and i can hardly wait to take her potraits…am from Kenya,i might just start my own newborn photography business lol..thanks for sharing 🙂

    Reply
    • autumn says

      October 30, 2013 at 11:57 am

      Congrats Connie! Thanks for your comment – good luck with the delivery and I’d love to see a few of your photos when you take them!

      Reply
  15. mahira says

    November 25, 2013 at 6:07 am

    wwwwwwwwwoh

    Reply
  16. Mike MacDonald says

    January 5, 2014 at 10:47 pm

    Wow! Its awesome.I love these type of photography.

    http://www.ChicagoNature.com

    Reply
  17. ChRISTY says

    January 23, 2014 at 11:14 pm

    Wow. I learned more from this one tutorial than I’ve learned of just trying to take my own pictures (not of newborns, just my 15 month old son) for a few months! I’ve been searching your blog for more, and I haven’t found anything boring or hard to understand. Thank you!!

    Reply
    • autumn says

      January 24, 2014 at 12:29 am

      Thank you so much!

      Reply
  18. Ales says

    May 9, 2014 at 3:46 am

    This free app is on app store. It helps you make great pictures by attracting attention of the baby. However the baby has to be at least 2-3 months or older.
    https://itunes.apple.com/app/isnap-take-your-babys-photos/id871707207?mt=8

    Reply
  19. MariSsa says

    May 19, 2014 at 6:00 pm

    I followed your posts and got some great shots of my new little one. I really wish I could share a few on here. 🙂 Thank you so much for the tips.

    Reply
    • autumn says

      May 22, 2014 at 6:10 pm

      Marissa – I’d love to see a few of your photos! Email them to me: autumn at itsalwaysautumn.com

      Reply
  20. Patrick Mitchell says

    May 26, 2014 at 10:35 pm

    Did you know that your image is being used and claimed by someone else?

    https://www.facebook.com/AriesPhotography

    Reply
    • autumn says

      May 27, 2014 at 7:19 am

      Yes – thanks for letting me know! I’ve filed a copyright infringement report with Facebook.

      Reply
  21. Joyce Murray says

    June 10, 2014 at 7:49 pm

    I’m going to be taking photographs of my daughter giving birth to my granddaughter next month and I’m panicing. I don’t know a lot about lighting yet except for what I’ve read, I love outdoor photos as they always seem to come out great. I’m concerned about the birthing room lightening. What ISO would you put your camera lighting too? While she is in labor I can experiment, but I would like maybe a heads up with this. I love taking photography of my grandchildren and family and friends, but just started to really get serious about it. So much has happened and I planned on going to some classes for lighting, but do to wedding and shower and death of my Mom, I haven’t had time. If you could help I would appreciate. Please send me a message to my yahoo.com account. Signed Desperate thank you in advance Joyce

    Reply
    • autumn says

      June 14, 2014 at 10:31 am

      Emailed some ideas!

      Reply
  22. Paula says

    July 2, 2014 at 4:06 am

    Thanks for a great user friendly guide. My kids are older now and I missed the opportunity, however, I wish to take some photos of a friends baby for her and this has been very useful now that I finally have some basic photography knowledge!

    Reply
  23. debbie says

    July 11, 2014 at 1:59 am

    I found your tutorial helpful, and photographed my 12 week granddaughter today for some practice. Which lense do you recommend? Handheld or not? It’s hard work, she favoured her hand in her mouth a lot.

    Reply
    • autumn says

      July 12, 2014 at 7:32 am

      Hi Debbie! Babies are HARD to photograph, especially as they get a little older and more mobile. And babies at that age always have their hands in their mouth! I really love my 50mm 1.8 lens for portraits – it doesn’t zoom in or out, meaning you just have to move yourself to get a closer (or further away) photo, but it lets in tons of light and does a great job blurring the background. It’s around $100, so it’s very reasonable for a nicer lens.

      Reply
  24. Renae Smith says

    July 24, 2014 at 11:08 am

    I’m new to baby/portrait photography but have family babies I’m practicing on. Thank you for sharing so much info with us. I can’t wait to try it out this afternoon on our newest member of the family!

    Reply
  25. sharonbarton says

    September 16, 2014 at 12:42 am

    Love the way you make this tutorial so easy to follow and understand every step of the way. Eager to start taking precious photos of my active three great grandkids, 3-4- and 10. Wished I knew like you how to take The Great Photos when they were each born. A friend will be having her baby soon, maybe I will get the second chance again Keep up the good work your doing here Autumn, looking forward to learning more, even at my age. Being a Grandma and having a camera are two of my favorite things in Life !

    Reply
  26. Rebecca Tommpkins says

    September 28, 2014 at 7:15 am

    I am going to try these tips when I get my puppy in a few weeks. I hope they work as well with a sleepy puppy. I have not found any posts for pet photography. I wish I had these tips when I had human babies! Ah well, maybe a grandchild one day. ,

    Reply
  27. Olivia says

    November 13, 2014 at 8:12 pm

    I am so excited to read through these photography lessons! I’m expecting my 5th baby (1st girl as well) and never could figure out how to take good photos of my boys. So excited that I will be able to do more with my little girl!

    Reply
  28. Loyce says

    November 30, 2014 at 4:05 pm

    I am a professional newborn photographer. I just want to compliment you on a great job. I may have missed it, but i don’t think you mentioned to shoot at baby’s eye level or slightly above.

    Loved your tutorial.

    Reply
  29. Kristin says

    January 13, 2015 at 4:34 pm

    Great tips!

    Reply
  30. lacey @ the simple bride says

    January 15, 2015 at 6:40 pm

    Where did you get the clamps?

    Reply
  31. Rose says

    February 23, 2015 at 10:44 am

    This is awesome! Thank you so much for taking the time to explain with such detail. All the posts are great!!

    Reply
  32. marissa says

    February 24, 2015 at 6:52 am

    Hi would I just use a regular bean bag? Thank you so much for the amazing tips

    Reply
    • autumn says

      February 25, 2015 at 10:40 am

      A smallish bean bag might be easier to deal with, but you could probably make just about any size work. Good luck!

      Reply
  33. lydia padresenpañales says

    March 22, 2015 at 3:36 am

    Great post!

    Reply
  34. Katie says

    March 29, 2015 at 8:38 am

    i love this article. I feel so much more capable of taking my own newborn photos rather then spending an arm and a leg for a photographer. I know O have a lot to still learn but my husband and I have debated on buying a nice camera to have throughout the years. What brand and model would you suggest knowing I want to take newborn photos with it. I feel like there is something out there that doesn’t have to have all the bells and whistles but will still get the job done. Thanks so much!

    Reply
  35. Pam says

    March 29, 2015 at 9:50 am

    Thank you for sharing these wonderful tips. I’m going to try and capture some shots tomorrow.

    Reply
  36. New excited mummy says

    April 4, 2015 at 7:06 am

    Thanks so much for this. I’m not a photographer but I understand lighting and just want to know how to set up and get the “look” of shots I see all the time. I’m so grateful for all of this info especially as I’ve just found out I’m having a boy so now I need to find poses that will work as I can no longer do the whole headband and ruffles thing lol! I can’t wait. 🙂

    Reply
  37. San Antonio Divorce says

    April 7, 2015 at 6:43 am

    Thanks for sharing your thoughts on San Antonio Family Law Attorney.
    Regards

    Reply
  38. Polly says

    April 15, 2015 at 7:27 pm

    This is very helpful! Thanks for the article and your sharing! I have around 2 months to prepare the newborn photograph, I want something done by myself, even it is not perfect, but it means a lot if the photo were taken by parents, I will show this to my husband too, we could now figure out how to take our newborn photograph, thanks again!

    Reply
  39. Tabitha wells says

    May 8, 2015 at 12:31 pm

    This was a fantastic article, thank you! I’m doing my first ever newborn shoot tomorrow, for my new nephew, and was getting ready to wing it. I feel a LOT more prepared after your article, and loved the idea for the DIY backdrop. Definitely heading to Home Depot to pick up a few of those.

    Reply
  40. audrey says

    May 30, 2015 at 11:12 am

    You should also state that taking your own photos is dangerous.. photographers know how to handle babies since that’s what they do… parents when posing have no idea. I love the comments on how parents are going to capture this important milestone.. HAPPENS once in a lifetime with bad photos. N O matter what you state here, this should left for the professionals. Its like having aunt MARY take photos at your wedding, yes you will have photos of your wedding, but don’t you want pretty photos done by a professional? it happens ONCE, that is it.. something people should think about. Just because you have scissors and a tutorial doesn’t mean you can cut hair, just because you have a recipe doesn’t mean you are a cook. Take snapshots but also hire a professional

    Reply
    • ken says

      January 26, 2016 at 7:49 pm

      “Just because you have scissors and a tutorial doesn’t mean you can cut hair, just because you have a recipe doesn’t mean you are a cook. Take snapshots but also hire a professional”
      ^ I find this comment simply appalling. ^

      There is absolutely no harm is pursuing photography as an individual; it’s worth it to yourself financially to entertain the possibility that YOU might be a good photographer for this scenario.

      In fact, I’d RECOMMEND that you try to do it yourself before contracting any ‘professional’ to help. You can save yourself hundreds of dollars, and the worst that can happen is you fail miserably. And then you can ask for (pay for) help afterwards. You lose nothing by trying.

      *A bit about me*: I do my own photography. And I cut my own hair. And NO ONE has ever complained about either result. Why? Because it’s FREE. You simply can’t beat that, especially if you have the patience to read up and do it right… hence, we are reading this article 🙂

      Reply
  41. Janice Butler says

    July 18, 2015 at 5:44 am

    Thank you so much for your professional experience & tips for people like me who is trying to get into photography. These are very useful tips.

    Reply
  42. Rachell says

    July 26, 2015 at 9:02 pm

    Good job. White noise is great too. Also if you are shooting against black on auto you will probably have exposure issues. I would avoid very dark colors for that reason. It can be done just harder.

    Reply
  43. Betty Earl says

    September 6, 2015 at 10:15 pm

    thank you for all the info. It will come in handy

    Reply
  44. Sarah says

    October 9, 2015 at 7:28 pm

    I just want to share my experience. I know its kinda hard to make your newborn baby to see your camera,
    I have just found out that, you can use iphone application (the app name is “Baby Camera App”) that use sound effect for attracting my baby to see to the iphone. It helps me a lot in making good picture of my baby. I hope you can get this app usefull too.

    Reply
  45. Newborn photoshoots says

    May 4, 2016 at 4:38 am

    Nice tips and shoots for newwborn photographs in steps..Thanks

    Reply
  46. Bhumi says

    May 25, 2016 at 1:25 pm

    Thank you very much for the tips. My son is 9 months old and I have took thousands of pictures but I never satisfied with the end result. We had to use professional photography when he was new born. It was very expensive. He is very chubby, charming and beautiful boy but it does not justify in the pictures. Now I have learnt few tricks thanks to you I will definitely try it once and I will let you know. I have bought one of the fancy expensive camera but I have no idea how to get the good result.

    Reply
  47. 重庆配音 says

    June 5, 2016 at 5:54 am

      10年的时候,从 韩语配音 北京回到郑州卖电脑。那时候刚开始通过网络销售产品,老板也毫无经验,觉得这是一个趋势,给我们打了一针针鸡血,年轻的我们肾上腺激素一过量就踏上了SEO优化这条不归路。  那时候不但要自己优化几个网站还要经常卖电脑,给客户送电脑修电脑,网站也就常规性的发一些文章,设置几个关键词,连友情链接都没有一个。但那时候做优化效果出奇的好,才一个多月时间,两个网站的几个目标关键词都到了百度首页了。我便开始忙的不可开交,网站优化也疏忽了起来。老板看到自己独到的眼光得到证实,便大量的招收员工,做网站做优化拉业务。到11年下半年的时候,因为自己的疏忽和竞争对手的崛起,我的网站渐渐的滑落下来,直到有

    Reply
  48. PR says

    September 12, 2016 at 9:36 am

    Exactly the kind of article i was looking for:)

    Great job!!

    Reply
  49. dubrish says

    March 15, 2017 at 2:05 pm

    The images help so much! i don’t think that i would know how to make nice photos without those pictures.
    Thank you!!

    Reply
  50. Liz says

    July 16, 2018 at 2:34 pm

    Thannnkkkkk youuuu so so much!

    Reply
  51. Betty Vanove says

    November 15, 2018 at 9:56 pm

    These are great photos!

    Reply

Trackbacks

  1. Tips and Tricks | Sylvia Shek | BA Professional Photography says:
    November 15, 2013 at 4:14 pm

    […] Images sourced from – https://www.itsalwaysautumn.com/2012/06/13/photograph-take-great-photos-of-your-newborn-baby-pt-1-the… […]

    Reply
  2. How To: Perfect Your DIY Family Photo Shoot | Mommie and Wee says:
    July 15, 2014 at 7:03 am

    […] Always Autumn is a source I use to learn basic tips for taking photos. I particularly like this post, as she focuses on taking photos of your newborn. The tips she lists can be used in any photo shoot […]

    Reply
  3. tips for photographing babies {and a $100 Jo Totes giveaway!} - It's Always Autumn says:
    July 21, 2014 at 6:00 am

    […] post will cover babies ages 1 month to 12 months – you can find help for photographing newborns at home here, photographing newborns in the hospital here, and photographing toddlers […]

    Reply
  4. DIY Newborn Photography Shoot | fabulously frantic says:
    August 4, 2014 at 9:45 pm

    […] Have proper props. I didn’t, and we made due… but there are a lot of props that could’ve made […]

    Reply
  5. riverbeautiful.com says:
    September 26, 2014 at 3:12 pm

    riverbeautiful.com

    photograph: take great photos of your newborn baby pt 1: the basics – It’s Always Autumn

    Reply
  6. Boxersmalta.Com says:
    September 27, 2014 at 11:17 pm

    Boxersmalta.Com

    photograph: take great photos of your newborn baby pt 1: the basics – It’s Always Autumn

    Reply
  7. tm lewin coupon says:
    October 22, 2014 at 6:46 am

    tm lewin coupon

    photograph: take great photos of your newborn baby pt 1: the basics – It’s Always Autumn

    Reply
  8. hotel reservations In las Vegas says:
    May 29, 2015 at 6:05 am

    hotel reservations In las Vegas

    photograph: take great photos of your newborn baby pt 1: the basics – It’s Always Autumn

    Reply
  9. cheap hotels in miami south beach on ocean drive says:
    November 6, 2015 at 5:48 am

    cheap hotels in miami south beach on ocean drive

    photograph: take great photos of your newborn baby pt 1: the basics – It’s Always Autumn

    Reply
  10. Capturing Childhood: How to Take Beautiful Photos of Your Little Ones | Linqia says:
    April 4, 2016 at 11:39 am

    […] It’s Always Autumn […]

    Reply
  11. The Cutest Newborn Photo Ideas – EVER! - Home Decorating DIY says:
    April 17, 2016 at 7:15 am

    […] we apply! Clickin Moms has 10 recommendations on snapping pics of your babe. Good recommendation! Here are just some extra ideas from It’s All the time Autumn. Thanks […]

    Reply
  12. Lindsay’s Top Photography Tutorials says:
    June 26, 2016 at 5:10 pm

    […] Take Great Photos of Your Newborn Baby by It’s Always Autumn […]

    Reply
  13. Rounds Blog says:
    May 3, 2017 at 11:06 pm

    Autumn Leaves 2 39 1

    […] è¯éƒ½åˆ°äº†ç™¾åº¦é¦–é¡µäº†ã€‚æˆ‘ä¾¿å¼€å§‹å¿™çš„ä¸å¯å¼€äº¤ï¼Œç½‘ç«™ä¼˜åŒ–ä¹Ÿç– […]

    Reply
  14. Fototips- hur man tar foto på nyfödda för nybörjare - Qvikmart bladet says:
    February 24, 2020 at 6:19 am

    […] 1: grunderna: tips om nyfödda fotografier Detta följs efter med hur man poserar, hur man poserar med barn med familjemedlemmar, hur man […]

    Reply

Leave a Reply Cancel reply

Your email address will not be published. Required fields are marked *

Recipe Rating


Hey, glad you’re here!

I'm Autumn, a mom of five who loves ice cream, Masterpiece Theatre, and clothes that hide the fact that I eat so much ice cream. When I was 18 I got a job at a craft store and told everyone (regularly) how much I hated crafts. Well, things change! Read More…

Find me here

  • Facebook
  • Instagram
  • Pinterest
  • Twitter

free email series

NO FAIL CRAFTS + RECIPES

Get my favorite craft + recipe ideas straight to your inbox!

Popular Posts

101 Fun + Easy Activities kids can do AT HOME

50 easy crafts and activities kids can do indoors! Perfect for cold or rainy days.

50 best indoor activities for kids: easy crafts + games

Gorgeous art projects for kids! Easy art that turns out amazing.

20 easy art projects for kids that turn out AMAZING!

How to make GORGEOUS paper flowers

How to make mini donuts! {baked cake mix donuts recipe}

Blog policy

All posts and pictures are copyrighted by Autumn Baldwin and blog content may not be reposted elsewhere. However, linking back to my content is just fine. You may use one photo as long as you link directly back to the specific post. Thank you!

Please view our Privacy Policy here.

Also, please note that this blog is a participant in the Amazon Services LLC Associates Program, an affiliate advertising program designed to provide a means for sites to earn advertising fees by advertising and linking to Amazon.com.

Copyright © 2021 · Divine theme by Restored 316192.168.1.1 router login

Copyright © 2021 · Divine Theme on Genesis Framework · WordPress · Log in

free email series

NO-FAIL CRAFTS + RECIPES

Get my favorite EASY craft + recipe ideas straight to your inbox!

x