It's Always Autumn

creative tutorials for everyday life

  • celebrate
    • back to school
    • birthdays
    • Christmas
    • Easter
    • Halloween
    • handmade gifts
    • July 4th
    • Mother’s Day/Father’s Day
    • Valentine’s
  • recipes
    • bread
    • dessert
    • main dish
    • side dish
  • sewing tutorials
    • gifts
    • how to sew
    • kids
    • patterns
    • refashion
    • women
  • photography
    • photo display
    • photo editing
    • photography tips
    • posing
  • printables
    • holiday
    • LDS
  • books
  • fun for kids
  • tips & tricks
  • FAQ

photography photography tips posing

how to take newborn photos at home {DIY baby photoshoot pt. 2: posing}

In today’s post: This photography series teaches parents how to take newborn photos at home. Here you’ll learn everything you need to know for a DIY baby photoshoot in your own home, including how to pose newborns.
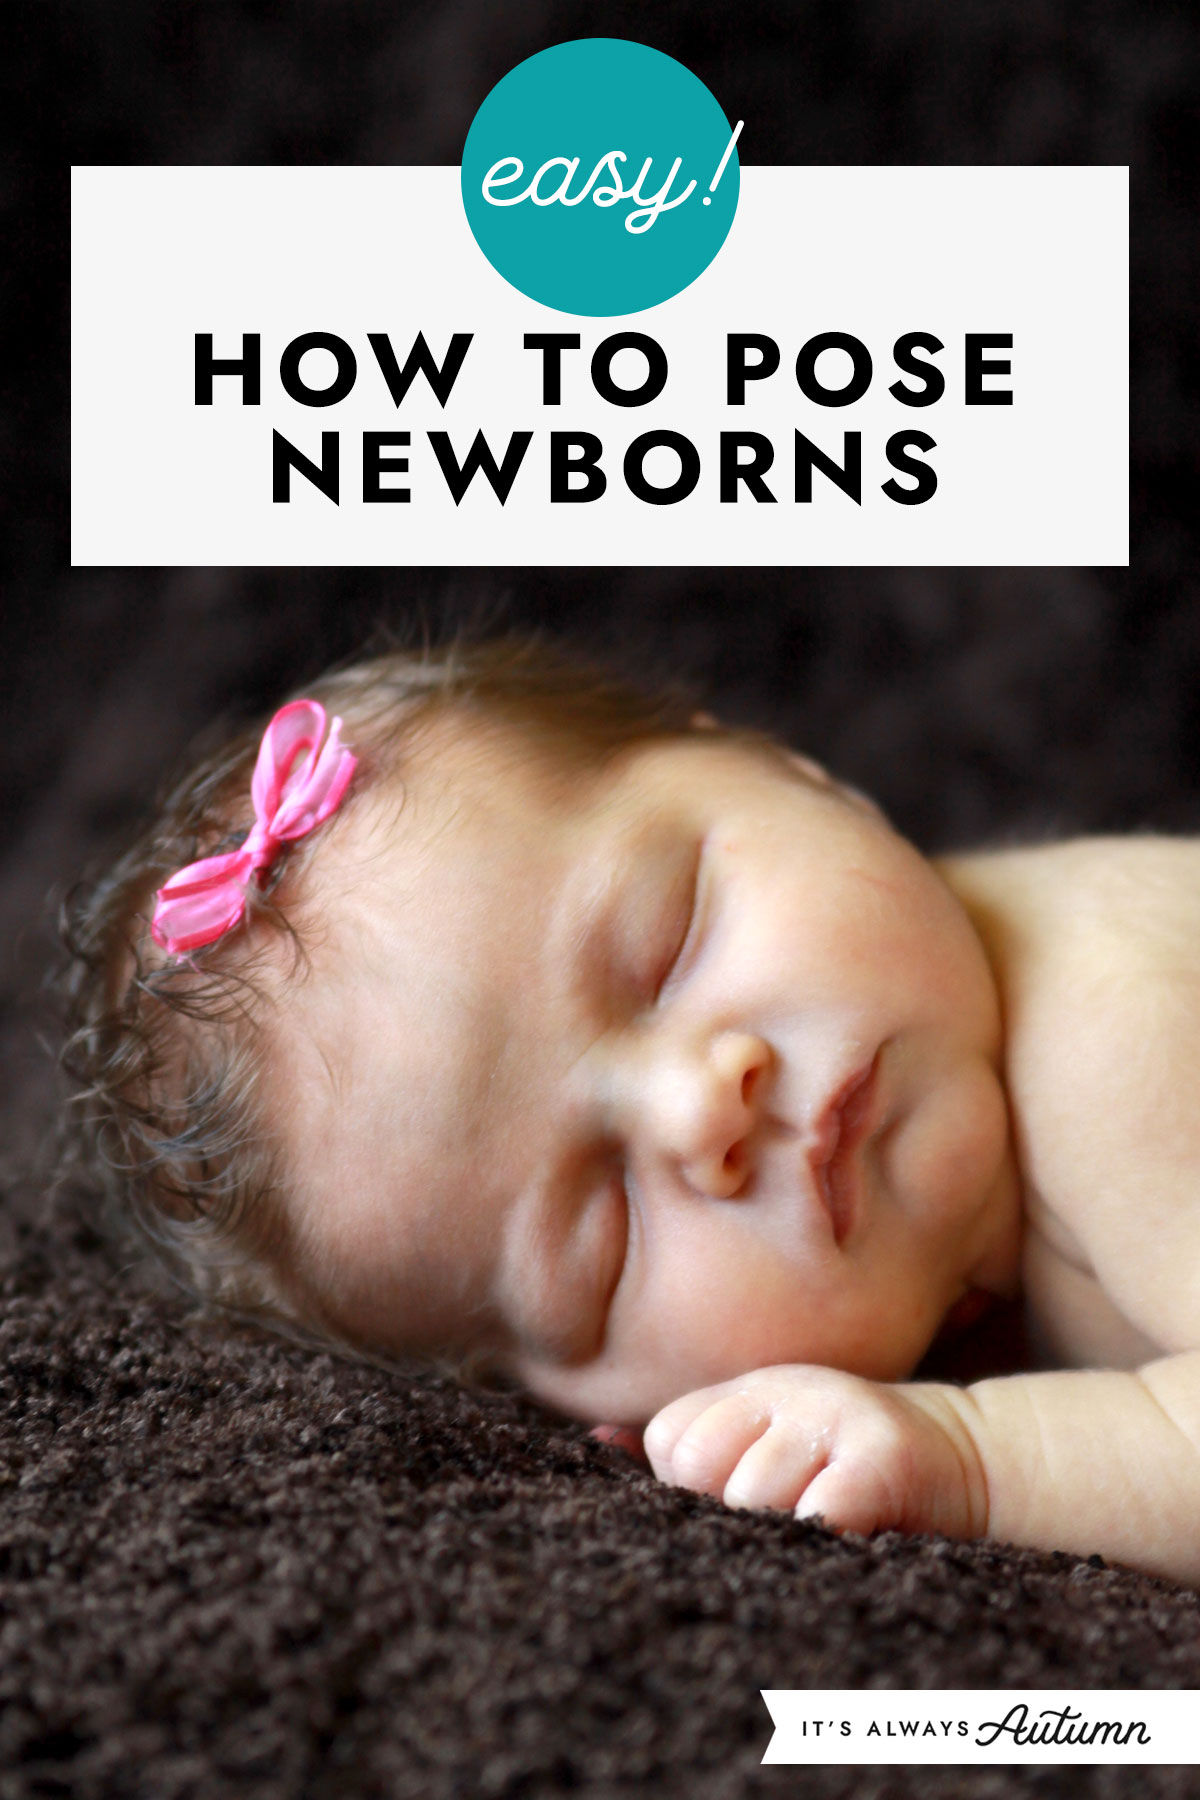
want to learn how to take better newborn photos? Check out this 5-part series covering setup, posing, editing, and more. DIY newborn or baby photoshoot tips and tricks.

If you missed part 1 of my newborn photos series, click here to learn about lighting, setup, and other newborn photography basics. And just because I think everyone should know this, I’m copying my disclaimer from that post right here:

I don’t claim to be a pro, and following the steps I’m outlining here isn’t going to make you a pro either. There’s a lot more to photography than props and poses. If you want amazing portraits of your newborn, your best bet is to invest in professional photos.

MY LATEST VIDEOS
MY LATEST VIDEOS

However, if you don’t have hundreds of dollars to spend on a newborn photo session, there are things YOU can do to get great photos of your newborn at home, and that’s the point of this blog series. Here’s what you can look forward to in the next few weeks to help you set up a DIY baby photoshoot:

want to learn how to take better newborn photos? Check out this 5-part series covering setup, posing, editing, and more. DIY newborn or baby photoshoot tips and tricks. want to learn how to take better newborn photos? Check out this 5-part series covering setup, posing, editing, and more. DIY newborn or baby photoshoot tips and tricks. want to learn how to take better newborn photos? Check out this 5-part series covering setup, posing, editing, and more. DIY newborn or baby photoshoot tips and tricks. want to learn how to take better newborn photos? Check out this 5-part series covering setup, posing, editing, and more. DIY newborn or baby photoshoot tips and tricks. want to learn how to take better newborn photos? Check out this 5-part series covering setup, posing, editing, and more. DIY newborn or baby photoshoot tips and tricks.

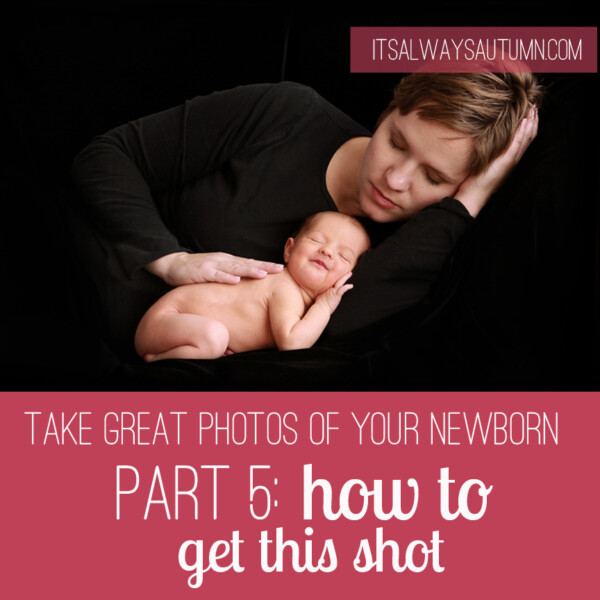
Part 1: the basics: newborn photography tips | Part 2: DIY baby photoshoot: posing | Part 3: posing baby with family members | Part 4: How to edit baby photos | Part 5: how to get this shot (setup to post processing)

How to take newborn photos at home

Posing

You’ve probably seen a wide variety of newborn baby poses, from a sweet swaddle to a baby in a basket or hanging in a sling from a branch. Lots of the poses you may have seen might take half an hour just to set up, and some actually require having an assistant hold the baby in position and then editing out the assistant’s hands in post processing. Some people love these more creative poses; some people hate them. Personally I think some (when well done) are kind of cool, but I really prefer more natural poses that don’t look contrived. Since my goal here is to help you take better photos of your own newborn at home, I’m going to share three simple, go-to poses that you’ll be able to use without extra equipment (or even extra help).

Perhaps now you’re wondering why I even bother posing newborns at all if I want them to look natural. A couple of reasons: 1) Newborns have very little control over their limbs, so they tend to flail about. Left to their own devices, their arms and hands can look very contorted. 2) Most newborns burrow their heads into whatever is nearest them, meaning they will generally hide their faces in any blanket or pillow you lay them down on. 3) Newborn’s legs are long and skinny, and they just don’t look good in photographs when they are sticking straight out. Tucking their legs up underneath them makes for a much tidier looker photo.

Poses for a baby photoshoot at home

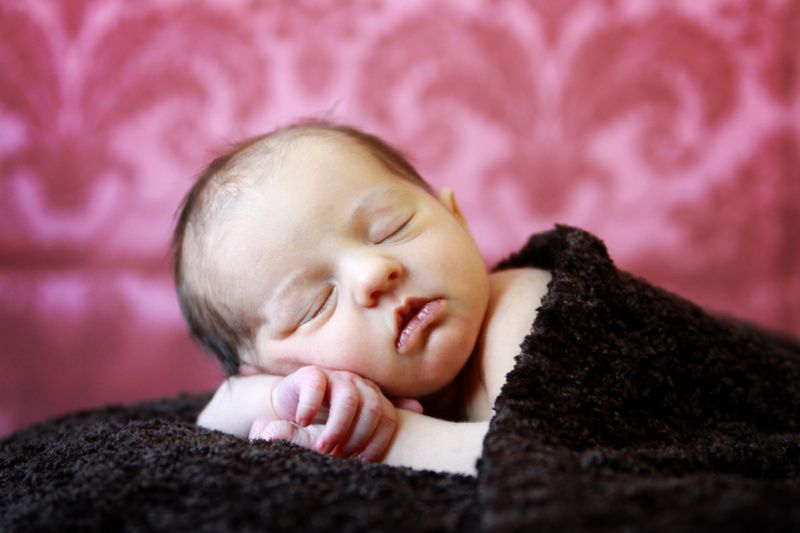
Pose #1 – On her tummy with head on hands

This photography series teaches parents how to take newborn photos at home. Everything you need to know for a DIY baby photoshoot in your own home. Posing.

This is probably my favorite pose, and is always the one I start with if the baby is sleepy (plan to feed your baby right before you try to photograph him so he’ll be more likely to fall asleep). I love how peaceful babies look in this position. It’s also a great pose if you (like me) like newborns to be naked in their photos – you can see their sweet little arms and legs, but nothing else is exposed.
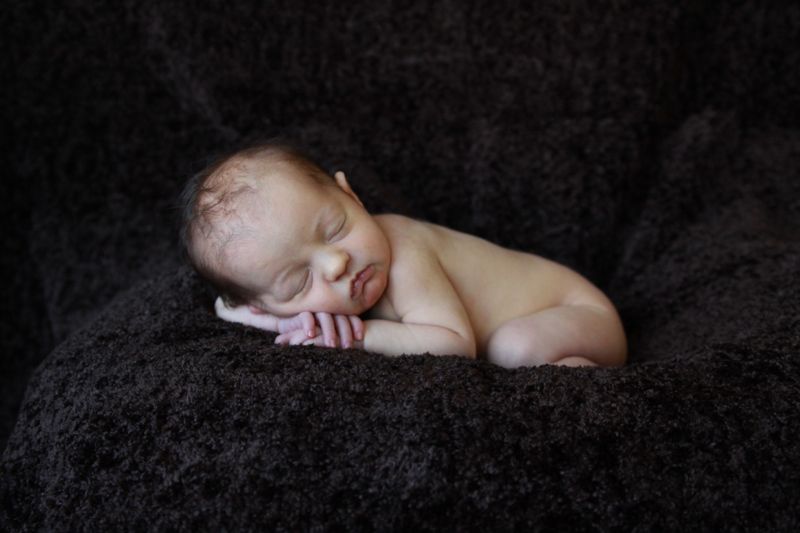
The key to posing newborns is to take your time. Really take your time. Posing your newborn takes a few steps. First, get the baby naked and wrap her up tight in a blanket, then hold her close to your chest and rock back and forth to settle her back to sleep. It usually doesn’t take long if she was sleepy to begin with, but be willing to wait a few minutes until she’s fully asleep.

Gently unwrap the baby, keeping the blanket on her back, and lay her down on her tummy on your blanket covered pillows or bean bag (use the setup I describe in part 1). Keep her covered with the blanket for right now and give her another minute to get settled. It helps to rub her back and shush softly into her ear. Again, wait until she has settled back into sleep before moving to the next step.

Next, moving slowly (and making sure you don’t have cold hands!), tuck her legs up under her body. Newborns are incredibly flexible so you can move their legs into almost any position without hurting them, but I find the cutest and easiest way is to cross her feet together, then tuck her legs up under her body, like you can see here:
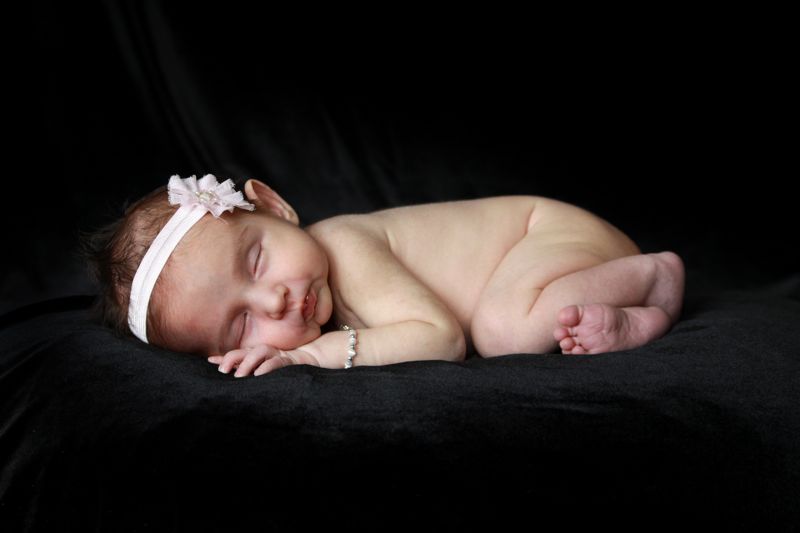
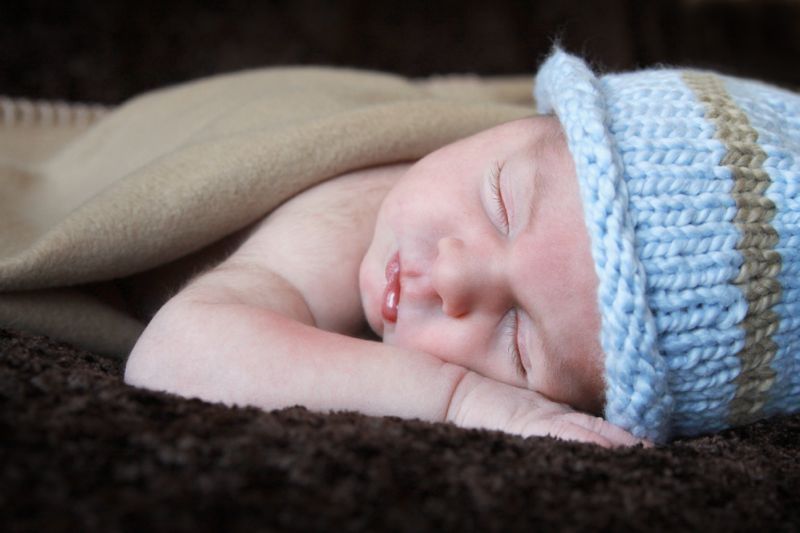
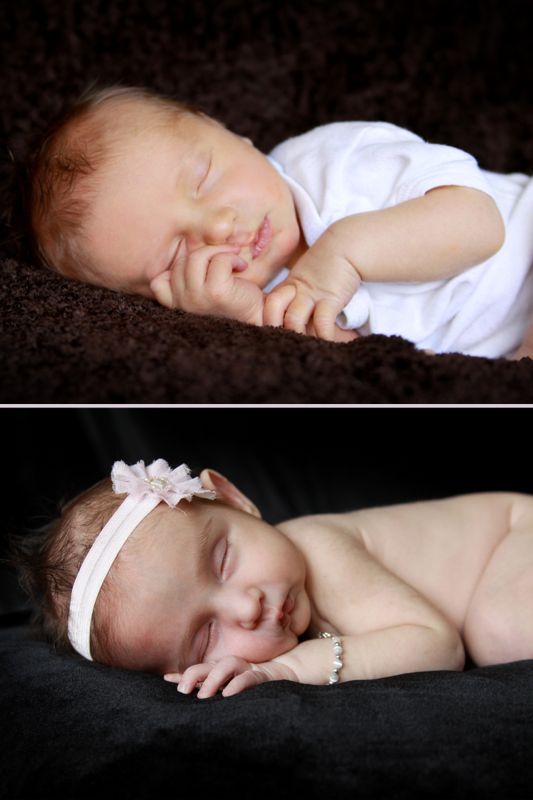
Next, gently lift her head and position her hands and arms underneath it, then lay her head back down, turning it so she’s look out at you instead of down into the pillow. The photos below show why it’s important to tuck the hands under her head – if you don’t, they’ll likely end up right in front of her face, as in the first photo. In the second photo you can still see her hand, but it doesn’t block your view of her face.
This photography series teaches parents how to take newborn photos at home. Everything you need to know for a DIY baby photoshoot in your own home. Posing.

Once you have the baby posed, step back and look at the whole picture for a few minutes, checking for details that need fixing. If her hand is visible, make sure you can see all her fingers are visible – sometimes one or two get tucked into a fist and then if the photo it looks like the baby only has three fingers. Also, be sure baby’s eyes are closed completely – in the second photo above the baby’s eyes are not quite closed. A simple stroke down the bridge of her nose will cause her to close her eyes all the way. Make sure the headband is positioned how you’d like, and the background blanket is free of wrinkles, etc. Above all, make sure the baby looks comfortable and peaceful – if not, try again.

Once the scene looks as good as you can make it, it’s time to start photographing. I start by sitting right in front of the baby (sitting down on the ground so I’m on the same level as the baby is) and get a few full-body shots. Then I start zooming in.
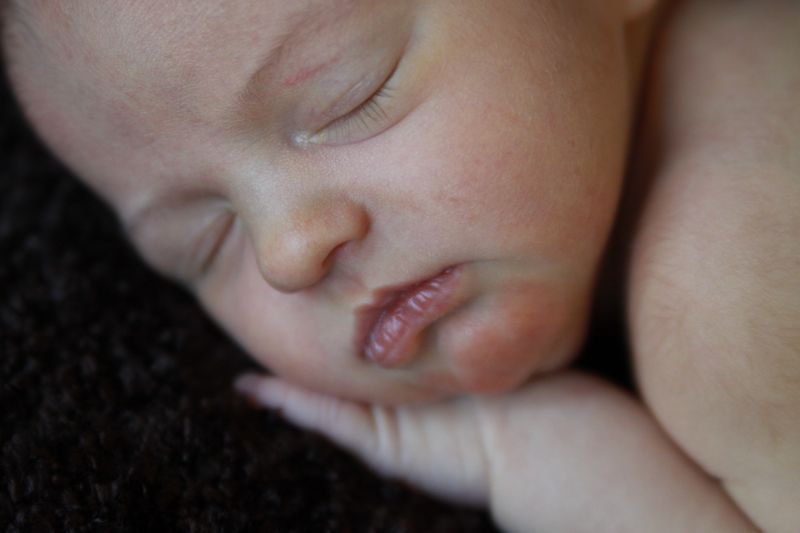
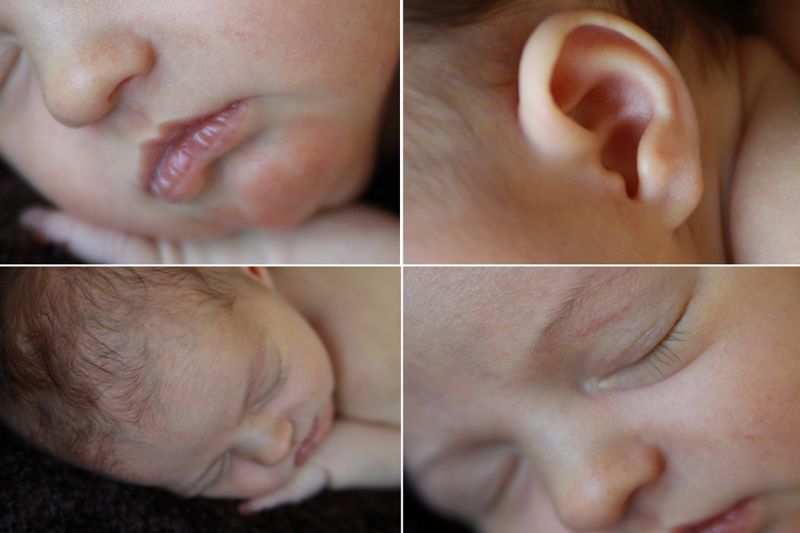
I take lots of shots for each pose. I take photos from different angles, standing up and moving around. I love details shots, like the ones below.
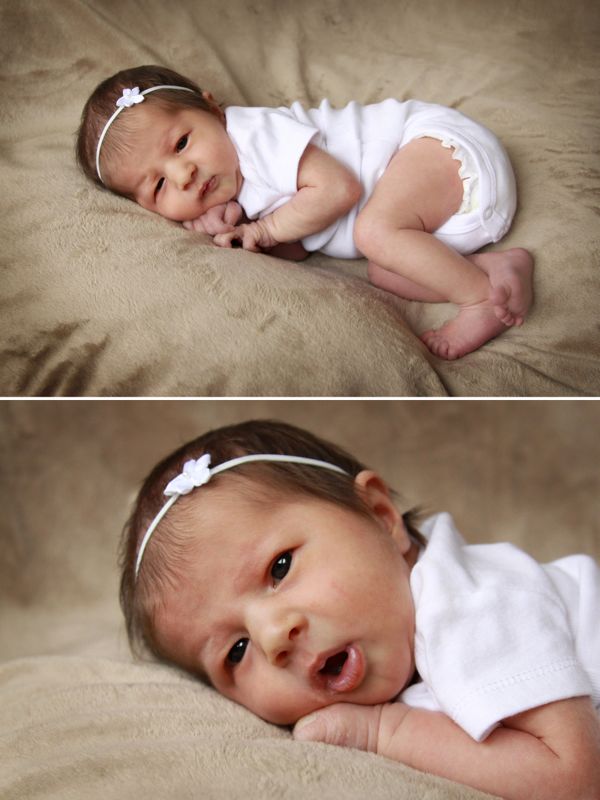
You’ll spend some time getting each pose ready, so take you time making sure you’ve taken a photograph from every angle that might work. Sometimes doing this can “save” a pose that wasn’t really working. In the photos below I made a few mistakes when posing this baby – first – I didn’t tuck her legs under her, which puts her feet closer to the camera than her head is, and second – her hands are stuck under her chin instead of under her had, making her look very uncomfortable. It makes what could have been a cute picture look kind of awkward. However, I moved closer to her head and zoomed in for the next shot, which turned out much cuter. (Note, see how her hand is in a fist in that second photo? It would have looked better had I gently pulled her fingers out so they were visible.)
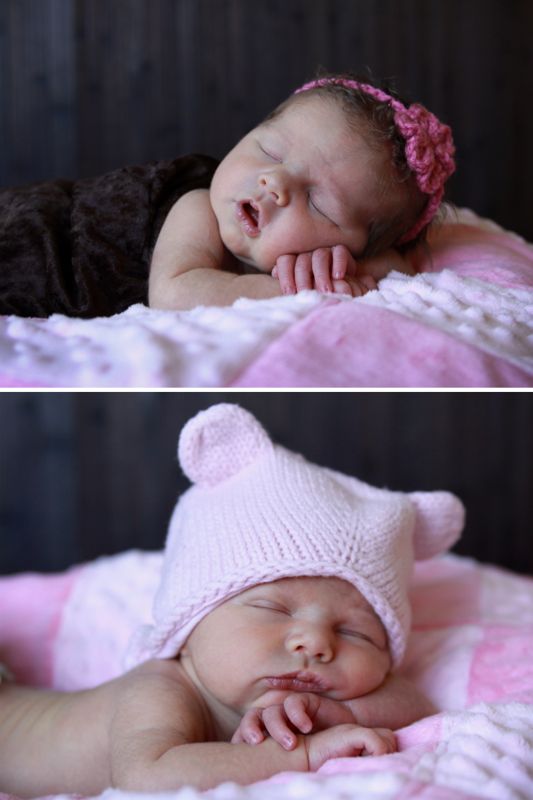
Once you’ve taken 10-15 shots of the scene, figure out how you can change the setting without disturbing the baby. This picture below is from the same pose as the first photo in this post, but it looks very different. I unclamped the blanket the baby is laying on from the backdrop board, letting it fall behind her. Then I clamped pretty pink fabric to the backdrop board. Finally, I pull the edge of the blanket the baby is lying on up over her back to make it look like she’s tucked in bed. While I was making these changes the baby was snoozing away, staying perfectly posed. I got two very different looking sets of photos from one pose. This is a great way to maximize the baby pictures you get from your DIY photoshoot.

This photography series teaches parents how to take newborn photos at home. Everything you need to know for a DIY baby photoshoot in your own home. Posing.

Here’s another example of changing up the same pose – this time I left the background the same and just changed accessories. It gives a different look with very little effort.
This photography series teaches parents how to take newborn photos at home. Everything you need to know for a DIY baby photoshoot in your own home. Posing.

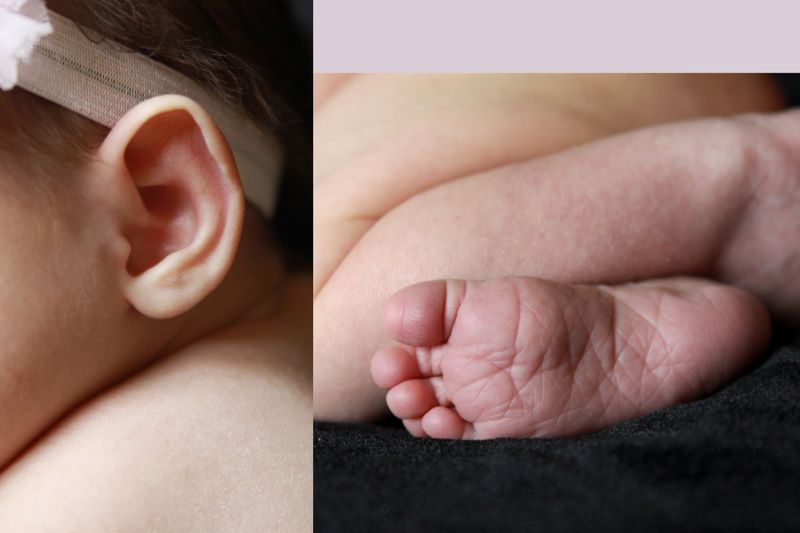
And here’s some more detail shots, just ‘cuz I love them so much.
This photography series teaches parents how to take newborn photos at home. Everything you need to know for a DIY baby photoshoot in your own home. Posing.

Sometimes the baby will wake up as you move her around. Try covering her with a blanket and rubbing her back to help her go back to sleep, OR take advantage of her first waking minutes before she starts moving around much to get a few shots with her eyes wide open.
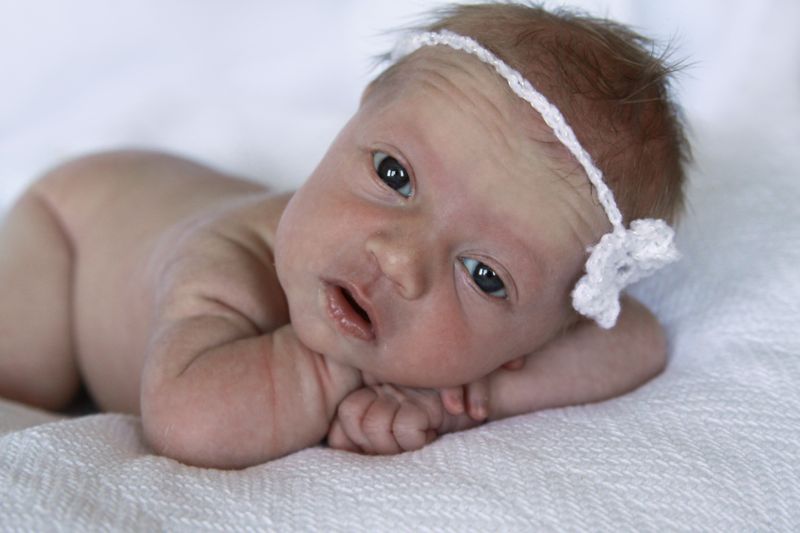
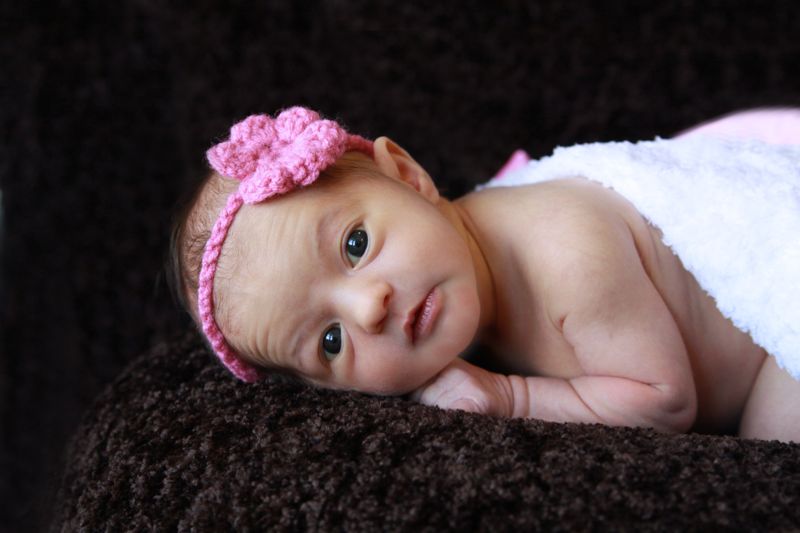
This photography series teaches parents how to take newborn photos at home. Everything you need to know for a DIY baby photoshoot in your own home. Posing.

This photography series teaches parents how to take newborn photos at home. Everything you need to know for a DIY baby photoshoot in your own home. Posing.

Pose #2 – On her back or side

Once I have plenty of pictures of baby on her tummy, I take a few with her on her side or back. These get a little more challenging to do naked, as you have to make sure baby’s legs stay crossed.
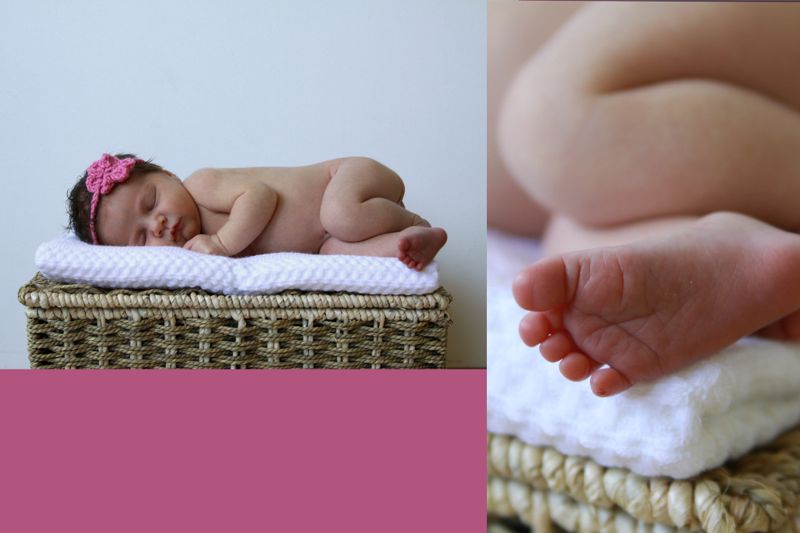
This photography series teaches parents how to take newborn photos at home. Everything you need to know for a DIY baby photoshoot in your own home. Posing.

Start the same way you would for the first pose, with a naked baby in a blanket in your arms. Once he’s sleepy, gently lay him down on his back and remove the blanket. Cross his feet and bend his knees like you see in the photo below and just hold them there with your hand for a few minutes. If he relaxes in that position, you’ll be able to slowly remove your hand and his legs will stay crossed.
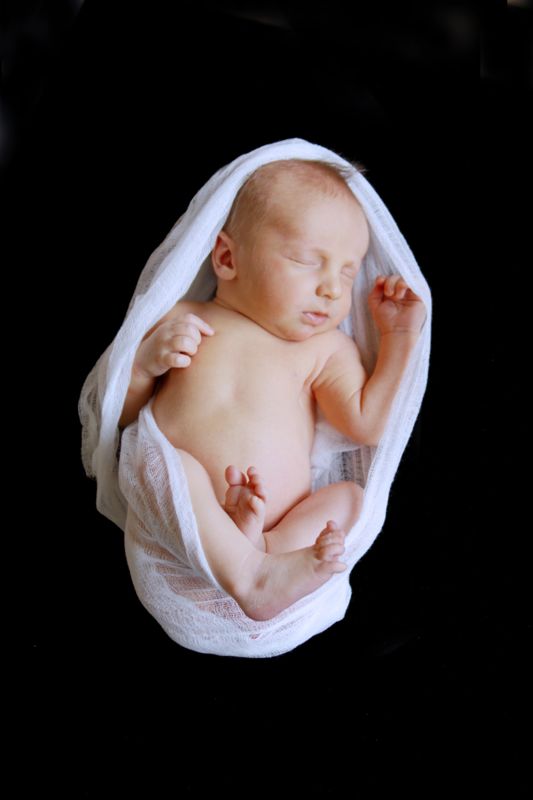
This photography series teaches parents how to take newborn photos at home. Everything you need to know for a DIY baby photoshoot in your own home. Posing.

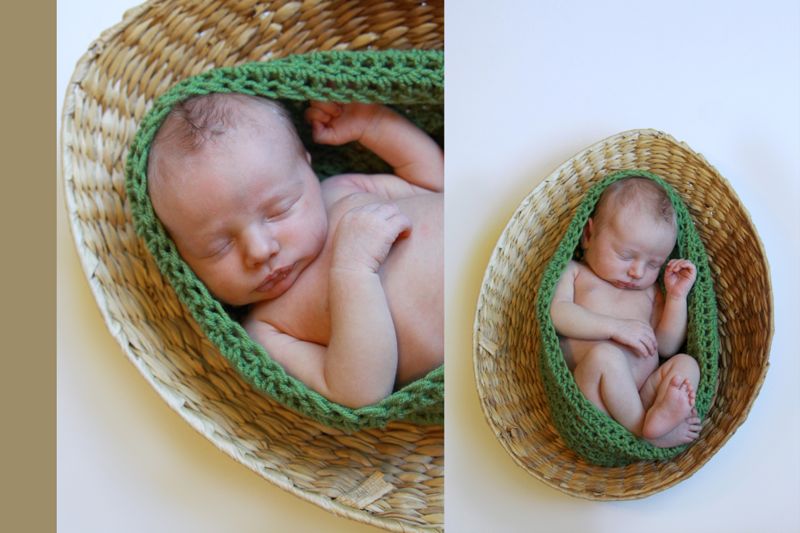
It helps if you have something you can gently wrap the baby in to hold the legs crossed. The white fabric above is just a length of cheesecloth. You can also make or buy (check etsy) a pretty crochet “bowl” or “peapod” that will help keep the baby’s legs pulled in and crossed.

This photography series teaches parents how to take newborn photos at home. Everything you need to know for a DIY baby photoshoot in your own home. Posing.

For this type of pose I usually move my couch cushions out of the way and put the baby all the way down on the floor. Then I stand on a chair near him and photograph him from directly above (see the first photo below). But if the baby really wants to turn her head to the side it’s worth hopping off the chair and lying down right next to her to get a few photos that show her face better (second photo below).
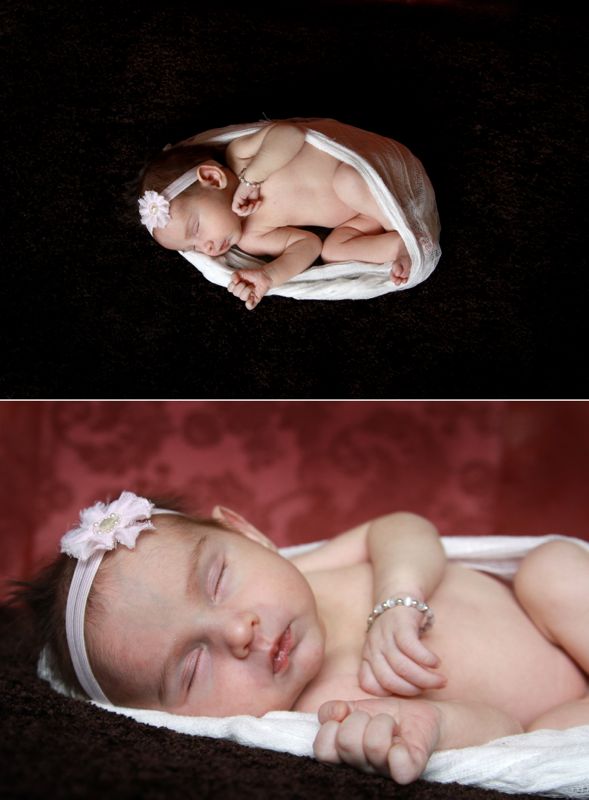
This photography series teaches parents how to take newborn photos at home. Everything you need to know for a DIY baby photoshoot in your own home. Posing.

For this last photo I was crouching so I was still above the baby, but not directly above her.
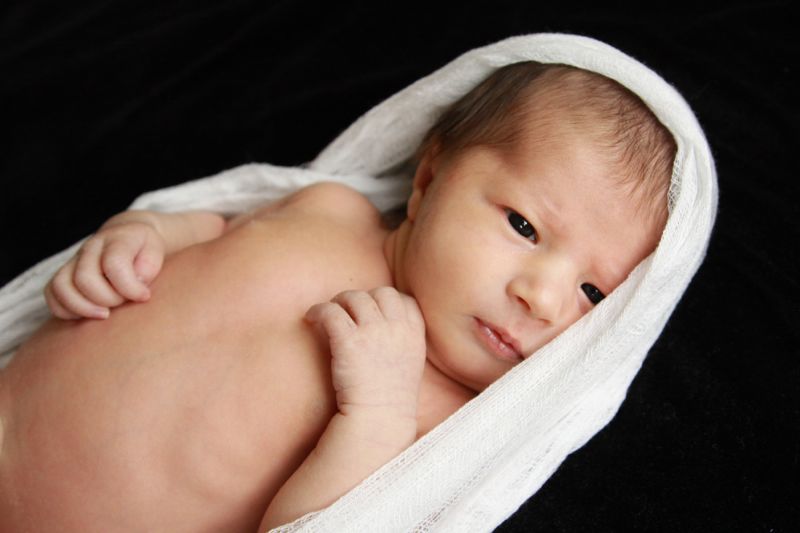
This photography series teaches parents how to take newborn photos at home. Everything you need to know for a DIY baby photoshoot in your own home. Posing.

Pose #3 – Swaddled

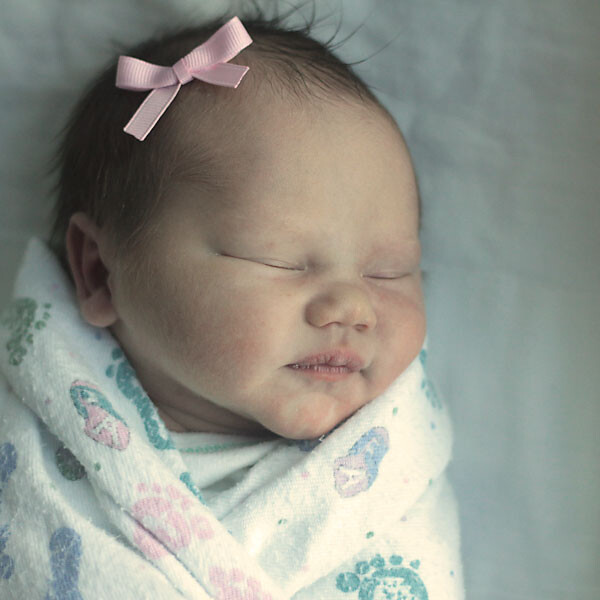
Swaddling a baby is the easiest way to pose her for newborn photos at home. Simple wrap her up tight and lay her down on a pretty blanket of piece of fabric. I usually save swaddled photos for the end of the photoshoot, when the baby has woken up. Newborns love to be swaddled and will usually stay pretty calm if they’re wrapped tight enough (check out this post on swaddling if you don’t know how).
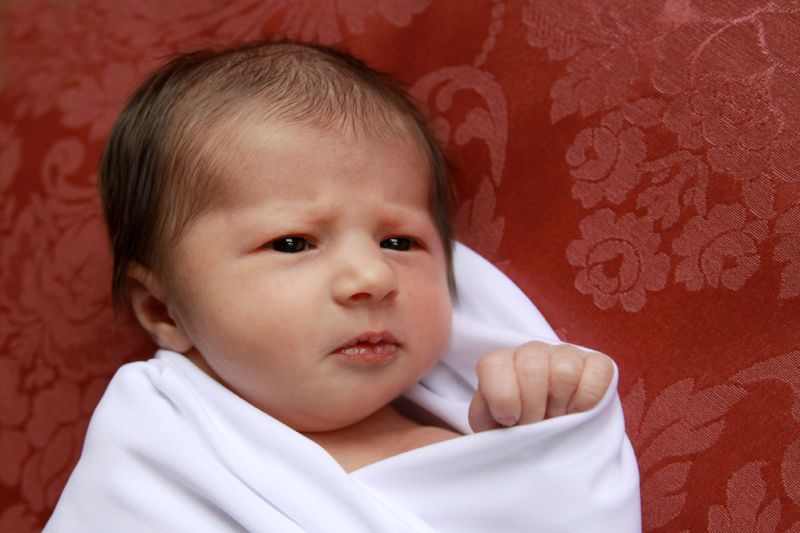
This photography series teaches parents how to take newborn photos at home. Everything you need to know for a DIY baby photoshoot in your own home. Posing.

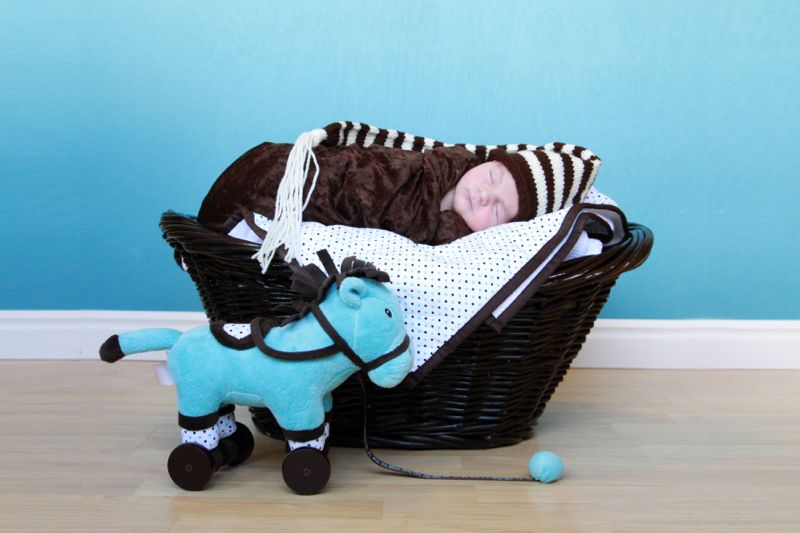
If the baby is still asleep you won’t have to wrap her as tightly to keep her calm. Use a favorite blanket (like this one that my awesome friend Heidi made for me) to wrap the baby and lay her down in a pretty basket or bowl. The bowl seen here is extremely shallow, which makes it the perfect prop for a DIY baby photoshoot (it’s from IKEA).
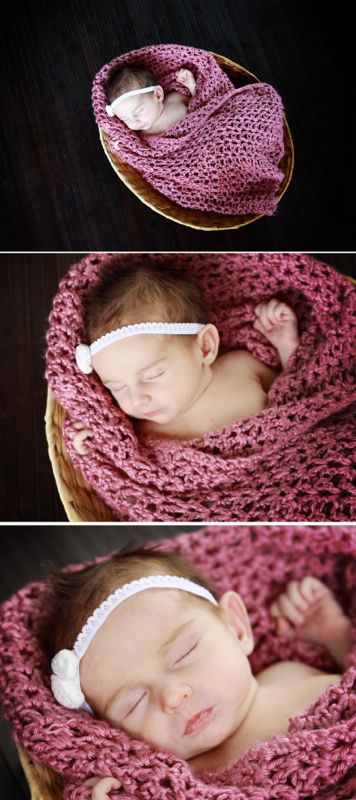
This photography series teaches parents how to take newborn photos at home. Everything you need to know for a DIY baby photoshoot in your own home. Posing.

If your basket is deep, you’ll need to fill it with blankets first and then sit the baby right on top so he doesn’t sink to the bottom of the basket.
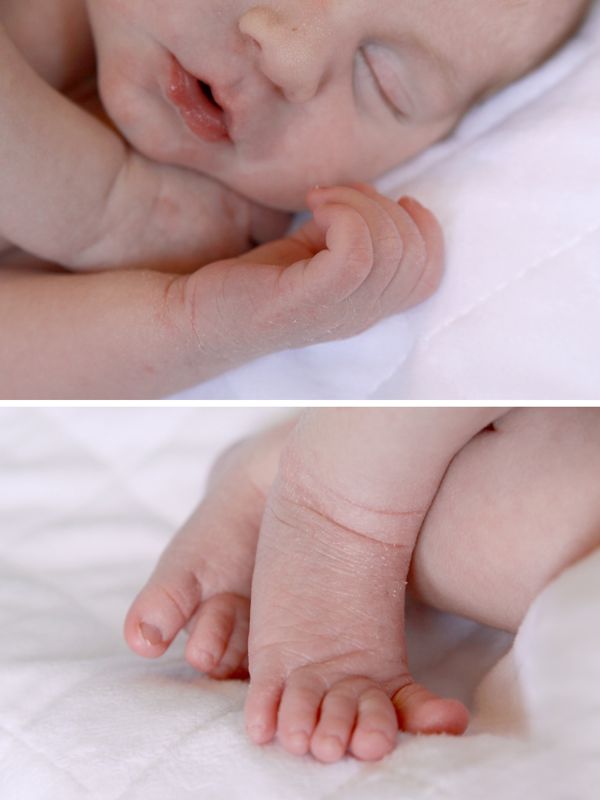
Don’t forget to take more detail shots when the baby is swaddled. You can pull the blanket up at the bottom to uncover those tiny toes.
This photography series teaches parents how to take newborn photos at home. Everything you need to know for a DIY baby photoshoot in your own home. Posing.

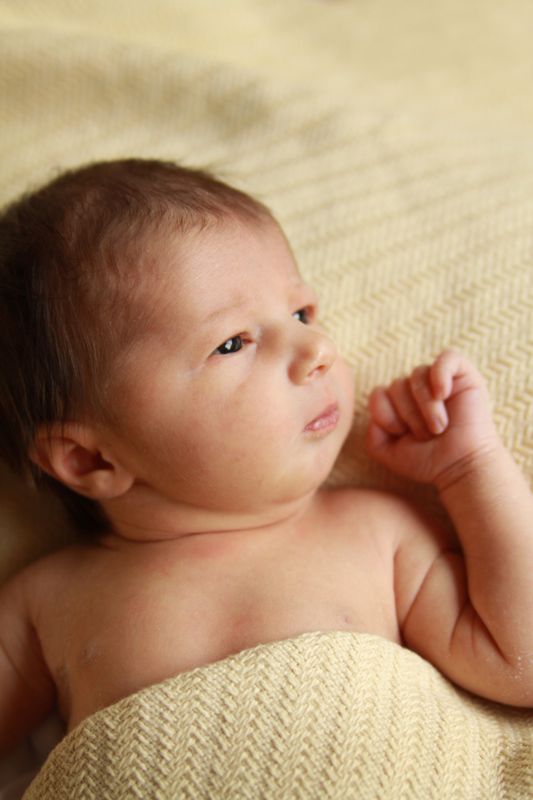
Here’s another variation on the swaddled pose – instead of being wrapped up, this time the baby is simply covered with the end of the same blanket she’s lying on. It makes her look ready for bed. It’s very simple and very sweet.
This photography series teaches parents how to take newborn photos at home. Everything you need to know for a DIY baby photoshoot in your own home. Posing.

I know this is a lot of information about how to take newborn photos already, but there’s one more thing I want to show you. No matter how the baby is posed you need to remember not to shoot up his nose! If the face will be visible in the shot you should always be slightly closer to the top of baby’s head than his feet. Look at these two photos:

This photography series teaches parents how to take newborn photos at home. Everything you need to know for a DIY baby photoshoot in your own home. Posing.

They are very similar and both are cute pictures. However, the bottom photo is much more flattering to the baby’s face. In the top photo I was slightly closer to his feet and shooting up his nose, which makes his nostrils very prominent in the photo. It also makes the bottom half of his face look larger than the top half. The second photo shows his face in much better proportion. (Did you notice his hand? I should have pulled that pinky finger out so the whole thing would be visible – it’s those little details that really make a beautiful photo.)

I hope these tips on how to take newborn photos at home have been helpful! Check out the rest of the series for even more info on setting up your own DIY baby photoshoot.

Part 1: the basics: newborn props + setup | Part 2: DIY baby photoshoot: posing | Part 3: posing baby with family members | Part 4: How to edit baby photos | Part 5: how to get this shot (setup to post processing)


(Need posing ideas for girls? Click here. For boys? Click here.)


You may also like:

  • How to pose a newborn with family members {newborn photography pt. 3}How to pose a newborn with family members {newborn photography pt. 3}
  • Newborn photography tips for beginners {pt 1: the basics}Newborn photography tips for beginners {pt 1: the basics}
  • photograph: take great photos of your newborn baby {pt 5: get this shot}photograph: take great photos of your newborn baby {pt 5: get this shot}
  • How to edit baby photos {newborn photography for beginners pt. 4}How to edit baby photos {newborn photography for beginners pt. 4}

Share this:

  • Tweet
  • Print


42 Comments

« the perfect flattering gathered skirt for summer
10 fantastic love stories (perfect for reading this summer!) »

Comments

  1. Denise says

    June 15, 2012 at 12:06 am

    More great tips! I need to go to Ikea and get that small basket and ditch the big one I have — it would take less room to store anyway and I love the look! 🙂

    Reply
  2. Christine says

    June 17, 2012 at 12:06 am

    What great tips! I just found your site and I am loving it! You have great posts and amazing pictures. Looking forward to your future posts.

    Reply
  3. Stephanie says

    August 16, 2013 at 12:08 am

    Thanks for these great tips and inspiration. Looking at all these adorable babies, I can’t wait to meet (and photograph) my little girl in a few weeks!

    Reply
  4. Lauren @ Imperfect and Fabulous says

    August 17, 2013 at 12:08 am

    This is so great. I’ll definitely be using these tips in a few months when baby boy arrives.

    Reply
  5. Abigail says

    August 17, 2013 at 12:08 am

    This post is super helpful. Your photos look like the pros! I especially like the second to last photo, with the baby’s mouth open.
    ~Abigail
    handsofmine.com

    Reply
  6. JUAN MIGUEL says

    February 19, 2014 at 5:04 pm

    ACABACO DE ENCONTRAR SU SITIO Y LA VERDAD EN UNA GRAN AYUDA , ESTOY EMPEZANDO COMO AFICIONADO EN FOTOGRAFIA Y ESTO ME SIRVE DE MUCHO. UN SALUDO CORDIAL DESDE ARGENTINA.

    Reply
  7. JUAN MIGUEL says

    February 19, 2014 at 5:05 pm

    ACABACO DE ENCONTRAR SU SITIO Y LA VERDAD ES UNA GRAN AYUDA , ESTOY EMPEZANDO COMO AFICIONADO EN FOTOGRAFIA Y ESTO ME SIRVE DE MUCHO. UN SALUDO CORDIAL DESDE ARGENTINA.

    Reply
  8. Excellent Newborn Photography in Toronto says

    August 12, 2014 at 6:19 am

    I am pleased to see such useful post on newborn photography. Your guidance is amazing and the parents who are really crazy to get unique poses of their newborn will get much help from the article.

    Reply
  9. Kellie says

    September 4, 2014 at 4:07 pm

    Please send me any more info for shooting babies and toddlers. I love your website!

    thank you ; )

    Kellie
    NZ

    Reply
    • autumn says

      September 5, 2014 at 2:09 pm

      Kellie – I have quite a few posts on photographing babies and toddlers – just search “baby photography” or “toddler photography” and you should find quite a few. Thanks!

      Reply
  10. ELINA says

    January 12, 2015 at 2:08 am

    Thanks for these simple but great tips! I just found your blog on pinterest as I was looking for ideas on baby posing. I am just starting out as a photographer (still very much an amateur) and this week I am photographing a friends baby to gain experience. I will set up something in her home, so therefore this post was very helpful!

    Reply
  11. Jasmin White says

    February 5, 2015 at 8:36 pm

    I really like your site and the tips you give on photographing toddlers, children, and newborns! They are so very helpful. I think your photos look 100% professional! I was wondering if you had any articles on photographing babies (older than newborns)? My son is 6 months old and I want to photograph him. If not, these tips are still super helpful! Especially the other article that includes the links on how to make different backdrops! Thanks!

    Reply
  12. Kate says

    March 15, 2015 at 4:36 am

    Great blog post for someone who actually knows how to photograph newborns and use their camera and settings. However very DANGEROUS for a newbie to try.

    Reply
  13. Dawne says

    June 23, 2015 at 3:47 pm

    I would like to know if you can provide the link for the crochet pattern for the afghan you used in the picture.

    Reply
  14. leslie says

    July 16, 2015 at 7:36 pm

    Wow! love your blog! But I’m not sure what type of camera to use. please help

    Reply
  15. Justin Knox says

    February 11, 2016 at 8:22 am

    A friend of mine asked me to do a shoot with her newborn, but I’ve never done that before. This was a huge help, thanks for sharing.

    Reply
  16. Looky Looky says

    May 23, 2016 at 2:45 am

    what a great article and some awesome newborn photography tips. I agree – the blankets and the right posing beanbag make a huge difference, as does natural light.

    Reply
  17. yuguhun says

    June 4, 2016 at 8:13 pm

    Footwear is to get mandatory finishing touches for female. After you like per couture top for any special event and likewise you put on a shoe who wonderfully mismatches within your clothe, you may style unconventional. Which means, you really should be cautious if finding an individuals boots. Howe

    Reply
  18. yuguhun says

    June 4, 2016 at 8:14 pm

    Getting startedHelping to bring balance to your lifeTalk to your doctor first?Through reading this article in Zone 3 of the Centre you will learn all about why it is important to talk to your doctor first before exercising. You will also find out about the sorts of questions your doctor may ask, and

    Reply
  19. yuguhun says

    June 4, 2016 at 8:15 pm

    The Internal Revenue Service has free tax forms and publications on a multitude of topics. Because of continued development in electronic filing, the availability of free of charge options to taxpayers and to reduce costs, the IRS discontinued the actual automatic mailing of paper tax packages last

    Reply
  20. yuguhun says

    June 4, 2016 at 8:17 pm

    A lot of things are there to consider while thinking of making investment in Portland Condos. In fact many of us find it as a tricky task to lookout for a real estate that is worth investing. And this situation arises only because of the availability of myriad choices in real estate.You may find a w

    Reply
  21. Vera Kruis says

    April 8, 2017 at 1:54 am

    Great tips! I love taking photographs of newborn babies too.

    Reply
  22. Ronda says

    October 16, 2017 at 11:29 am

    Oh my gosh – I love all of your photography tips!! I am a fairly new grandmother whose decided that I want to start taking newborn/toddler pics as a hobby and maybe one day a side business. Thank your for sharing!! I don’t think I’m ready to invest in Photoshop yet but I’m excited to learn about photo editing.

    Thanks again! Ronda

    Reply
  23. Lasly says

    March 1, 2018 at 3:13 am

    Very interesting article with plenty of useful tips. Thanks to the author. The babies are sooooo nice))) But to my opinion it’s better to invite a professional photographer for the baby. By the way if you need one in UAE I can recommend you this one http://www.atsaltstudio.com/newborn-photography

    Reply
  24. Wendy J. Lopez says

    April 28, 2018 at 3:56 pm

    Your newborn photo shoot was very helpful. I especially like the actual photos that you use as examples. Thanks so much! I am going to read the other posts as well.

    Reply
  25. Mr. Laudahl says

    December 8, 2018 at 9:08 am

    I just discovered this website and am impressed . . . excellent, helpful tips and cute photographs! I have one question: why are women–instead of men– always holding newborn boys in their hands? I’d like to see a photo of a little boy being held by a man (such as its father, uncle, older brother, etc.). Happy Christmas and New Year to everyone!

    Reply

Trackbacks

  1. how to get great DIY newborn photos in the hospital says:
    January 15, 2014 at 6:00 am

    […] home and you have time for a longer photo shoot, you can try some different poses. Read this post for an explanation of how to pose […]

    Reply
  2. white stuff says:
    October 9, 2014 at 5:47 am

    white stuff

    how to take DIY newborn and baby photos in your own home

    Reply
  3. yacht.rit.edu says:
    October 14, 2014 at 1:22 pm

    yacht.rit.edu

    how to take DIY newborn and baby photos in your own home

    Reply
  4. mouse click the up coming post says:
    October 18, 2014 at 3:42 pm

    mouse click the up coming post

    how to take DIY newborn and baby photos in your own home

    Reply
  5. Magnmag.Com says:
    November 19, 2014 at 12:00 am

    Magnmag.Com

    how to take DIY newborn and baby photos in your own home

    Reply
  6. click the up coming website says:
    February 6, 2015 at 9:49 am

    click the up coming website

    how to take DIY newborn and baby photos in your own home

    Reply
  7. Stitch Blog says:
    June 24, 2016 at 8:31 am

    Crochet Autumn 2013 Electronic

    […] and the tips you give on photographing toddlers, children, and newborns! They ar […]

    Reply
  8. Baby Photography Tips (by an amateur) – Miracle Babies says:
    July 31, 2016 at 11:32 am

    […] It’s Always Autumn […]

    Reply
  9. Bracelet Blog says:
    November 28, 2016 at 10:19 pm

    Hold That Pose Baby

    […] I want to photograph him. If not, these tips are still super helpful! Especially […]

    Reply
  10. First shoot – Newborn – kirstywallwork says:
    February 3, 2017 at 8:48 am

    […] I decided to use the techniques I had practised with during my test shoot with the doll, anbd bring them into the shoot I did with the real newborn, as well as looking online for any tips that could help me with getting the images perfect. I found a site which talked me through the different poses, the best way to move the newborn and then preparation before hand, I found the advice quite helpful: DIY newborn shoots […]

    Reply
  11. January Favorites - says:
    February 26, 2017 at 2:52 pm

    […] How to Take Newborn Photos […]

    Reply
  12. Preparing For Your First Child - MommaWannabe says:
    July 25, 2017 at 6:52 am

    […] the expensive baby photo shoots, get the family to take personal family snaps they always look gorgeous in black and white. As the […]

    Reply
  13. Easy poses for your newborn shoot | DIY Baby Photos says:
    January 7, 2018 at 10:55 pm

    […] https://www.itsalwaysautumn.com/photograph-take-great-pictures-of-your-newborn-baby-pt-2-pos.html […]

    Reply
  14. Just Found Out Your Pregnant? Below Is A Guide To EVERYTHING You Should Know! - Skirt Girlie says:
    February 16, 2018 at 3:03 pm

    […] incredibly fast, so if you want to catch them in all their newborn glory, it’s important that you take lots of photos from the moment that they come home. What you can also do is choose to hire a professional […]

    Reply
  15. How to Prepare for a Newborn Photoshoot – How to Prepare for a Newborn Photoshoot says:
    March 21, 2018 at 11:27 am

    […] to have natural light as well. Nothing flatters like natural light, so use it whenever possible. Plan the shoot to be done mid-morning to late-afternoon when window lighting is at its best. Sometimes the best location ends up being a […]

    Reply
  16. Baby Shadow Box for Keepsakes Step by Step Tutorial says:
    June 23, 2018 at 2:58 pm

    […] Birth Announcement (I actually took my newborn pictures for this announcement myself.  If you decide you want to include pictures in the frame that you take yourself, check out this great tutorial from It’s Always Autumn – How to Take Newborn Photos at Home.) […]

    Reply

Leave a Reply Cancel reply

Your email address will not be published. Required fields are marked *

Hey, glad you’re here!

I'm Autumn, a mom of five who loves ice cream, Masterpiece Theatre, and clothes that hide the fact that I eat so much ice cream. When I was 18 I got a job at a craft store and told everyone (regularly) how much I hated crafts. Well, things change! Read More…

Find me here

  • Facebook
  • Instagram
  • Pinterest
  • Twitter

Get the latest

Get the latest

Popular Posts

How to make mini donuts! {baked cake mix donuts recipe}

This artisan bread recipe is so easy to make and turns out amazing! It only takes 4 ingredients and 5 minutes of hands on time for crusty, delicious bread! How to make bread.

Crazy easy homemade artisan bread {only 4 ingredients!}

Tissue transfer art is not only gorgeous, it's totally easy enough for kids to make! Fun kid's art project - perfect indoor activity for rainy days.

tissue transfer art {easy kid art project!}

20 pretty DIY paper flower tutorials

girl’s flutter sleeve dress or top sewing tutorial & free pattern in 4T

Blog policy

All posts and pictures are copyrighted by Autumn Baldwin and blog content may not be reposted elsewhere. However, linking back to my content is just fine. You may use one photo as long as you link directly back to the specific post. Thank you!

Please view our Privacy Policy here.

Also, please note that this blog is a participant in the Amazon Services LLC Associates Program, an affiliate advertising program designed to provide a means for sites to earn advertising fees by advertising and linking to Amazon.com.

Copyright © 2019 · Divine theme by Restored 316