
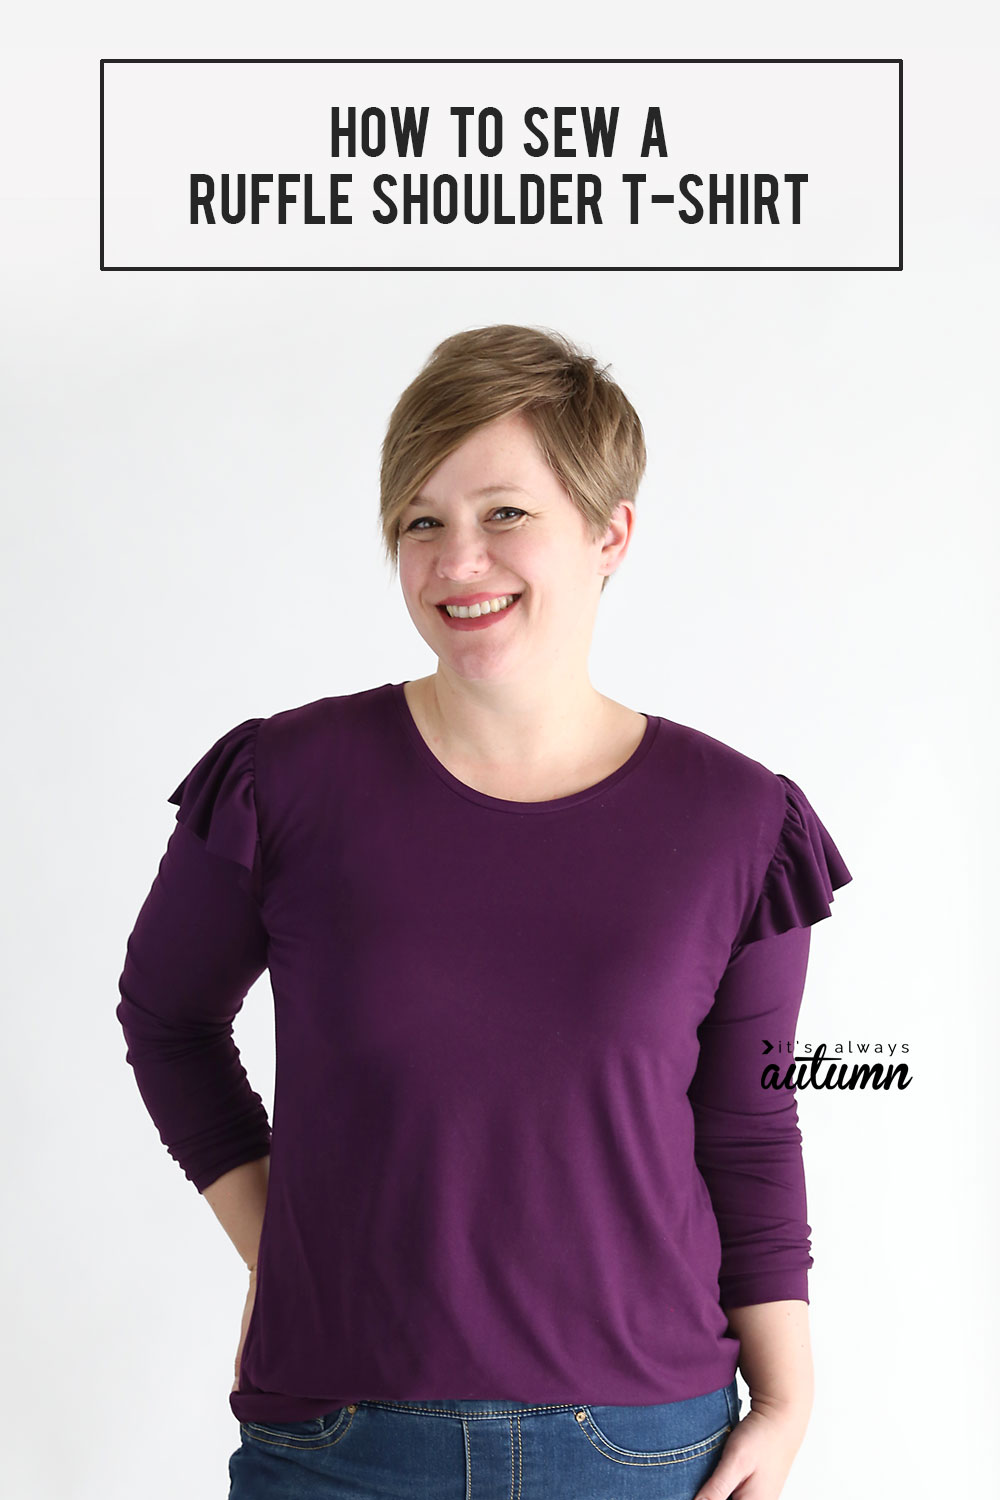
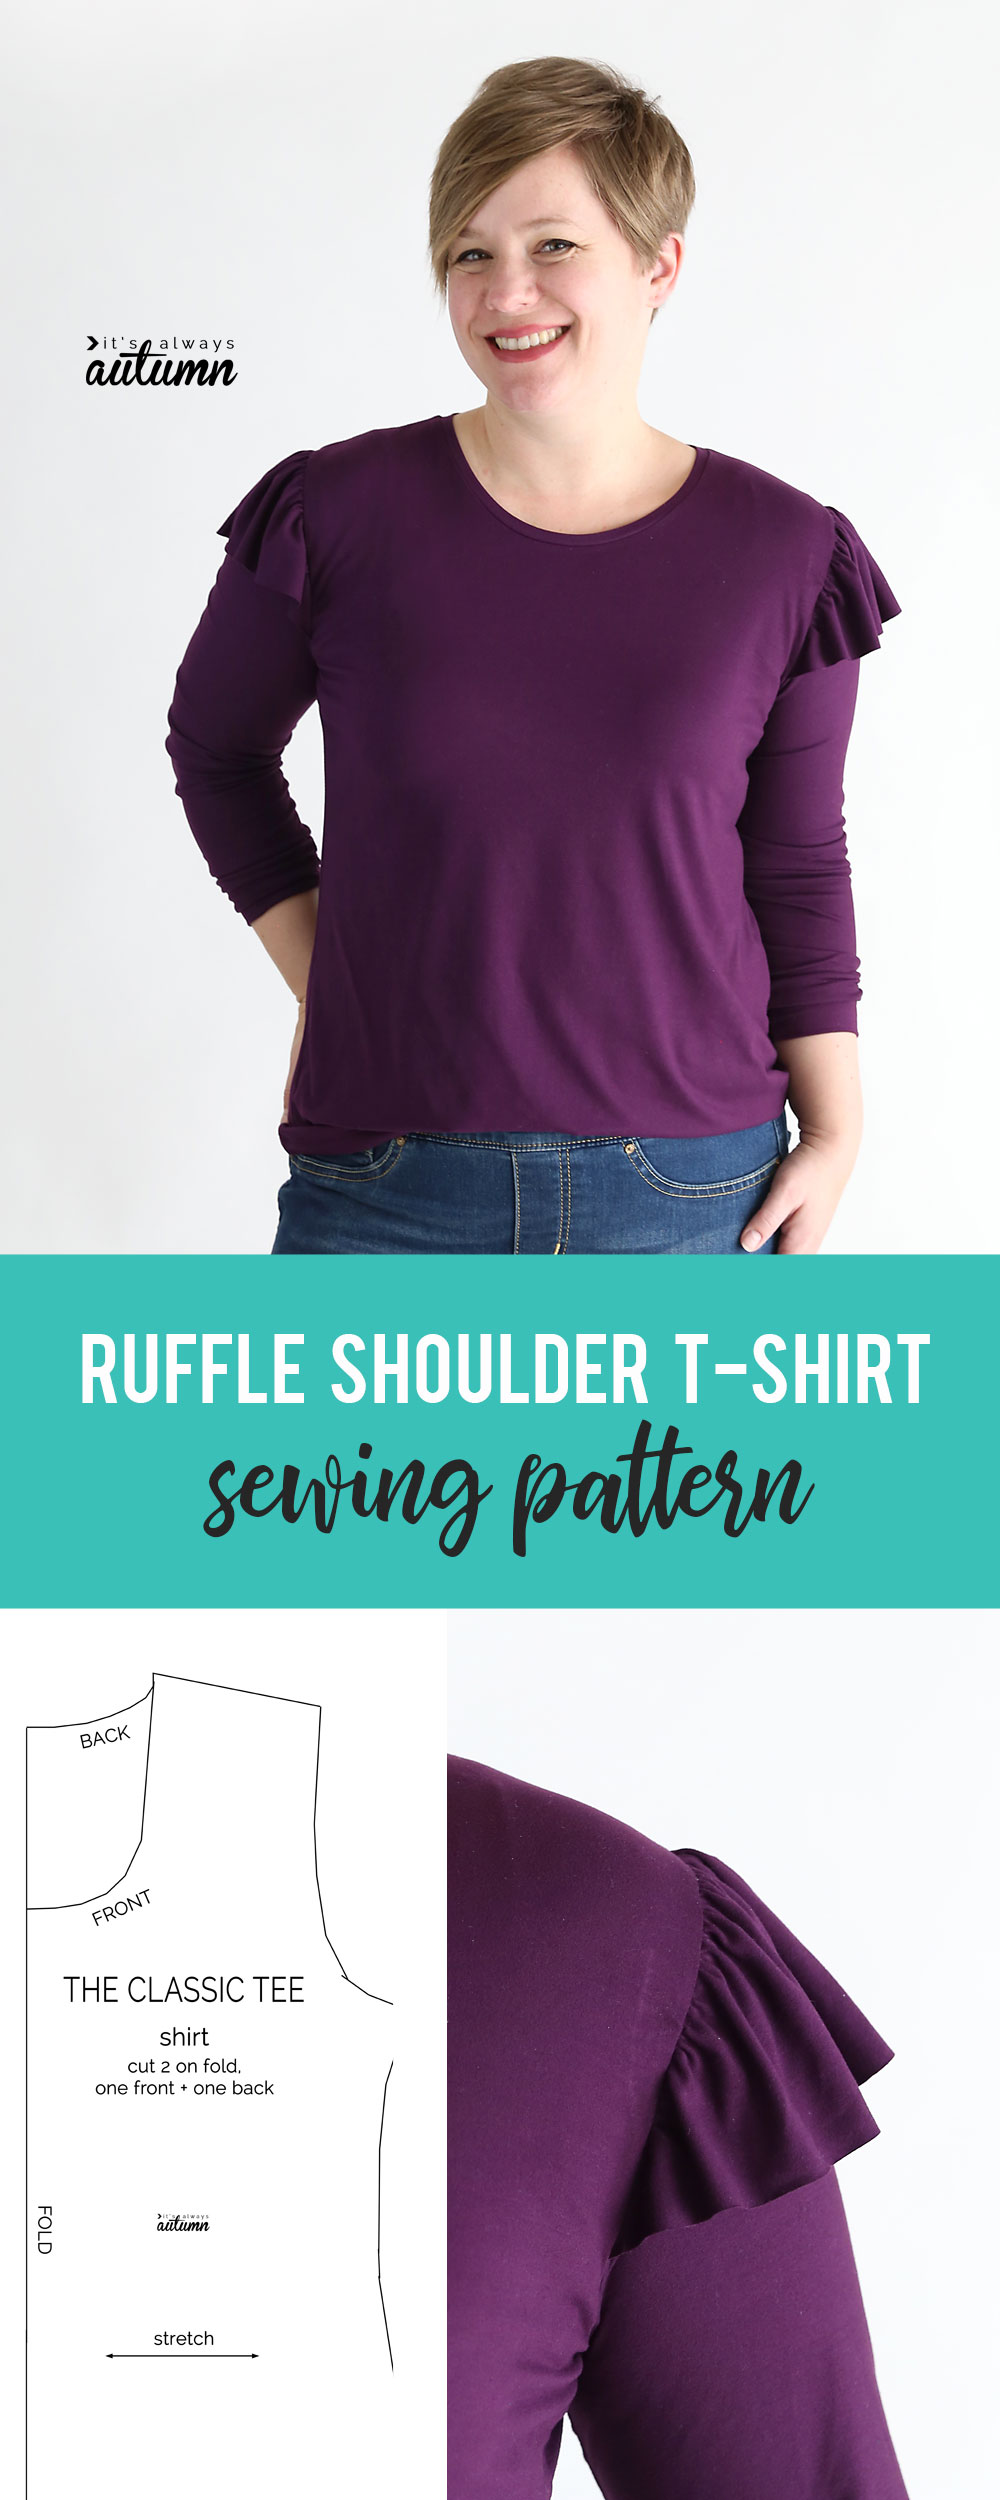
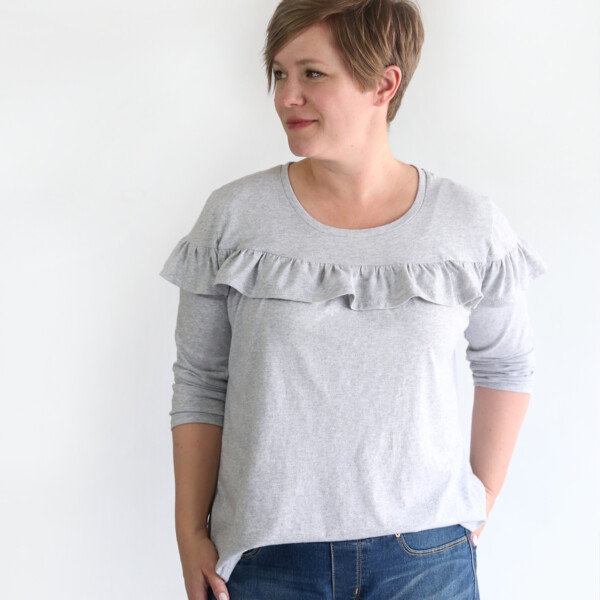
In today’s post: Learn how to modify the free Classic Tee Pattern to add a cute ruffle shoulder.
Ever since I made my daughter the Ruffle Top and Ruffle Dress last month, I’ve really been wanting to make a me-sized version. Buuuuut I just can’t shake the feeling that a loose top with a line of ruffles across my bust is not a good idea. Things that look good on adorable little girls don’t necessarily translate to my mom bod (aka ice cream bod). I worried I’d end up feeling like I’m wearing an old fashioned pioneer nightgown, you know? So I compromised and made a new long sleeve t-shirt with ruffles at the shoulder. A little of the fun from my daughter’s new look without veering into Little House on the Prairie territory.
This shirt is a hack of my Classic Tee Pattern, which is available in women’s size L (38 inch bust). It’s nice to have a basic t-shirt pattern that fits well, because then you can use it as a starting point for lots of other sewing projects. I’ve hacked my classic tee pattern into an elastic waist midi dress and my favorite ever maxi dress, among other things.
Today’s hack is actually very easy.

You just add one pattern piece (which you can download below) for the shoulder ruffle, and then everything else follows the same process as the basic Classic Tee.
How to sew a ruffle shoulder t-shirt
Head on over to the Classic Tee post. There you will be able to download the pattern in size L and learn how to sew it up. Then come back here and click here to download the ruffle shoulder add-on pattern, seen below.
Print both patterns out at 100% or full size, and measure the test squares to make sure they are exactly 1 inch. Butt the pages up against each other without overlapping and tape together.
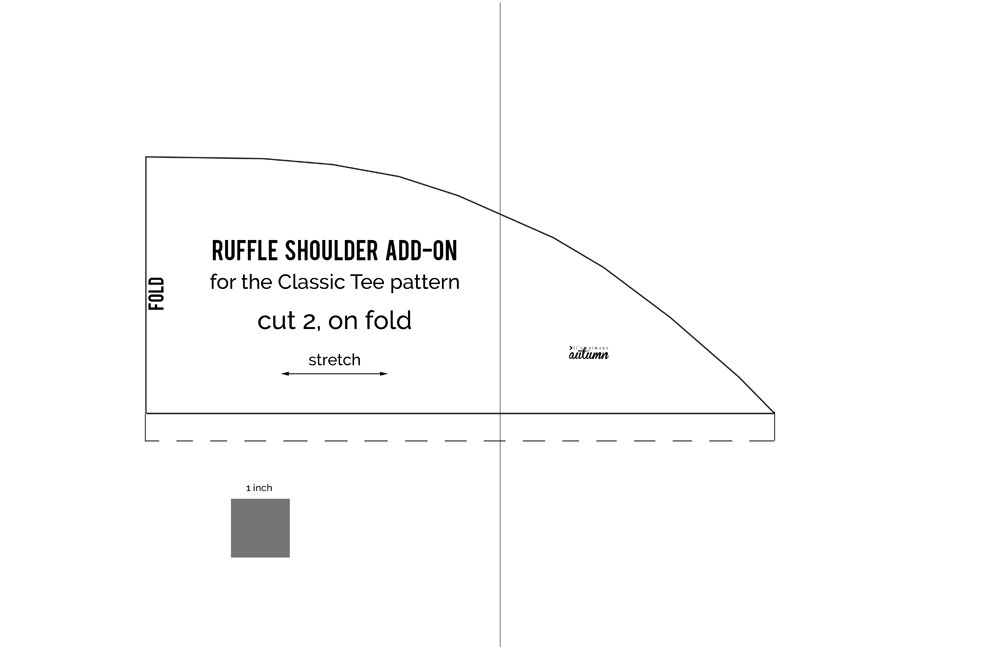
You will need about 1.5 yards for 56-60 inch wide KNIT fabric for this top. Be sure to prewash and dry your fabric before you begin. Cut the pattern pieces as directed on the Classic Tee pattern (extending the sleeve piece to make long sleeves like I did if desired). Also cut two of the ruffle pattern pieces on the fold.
IF your knit fabric does not fray or curl badly along the edges, you can leave the bottom edge of the ruffle raw (unhemmed) like I did. If you will not be hemming it, cut the piece out using the solid line for the bottom edge. If you prefer to hem the ruffle, cut the pieces using the dashed line for the bottom edge, then turn that edge up 1/2 inch and hem.
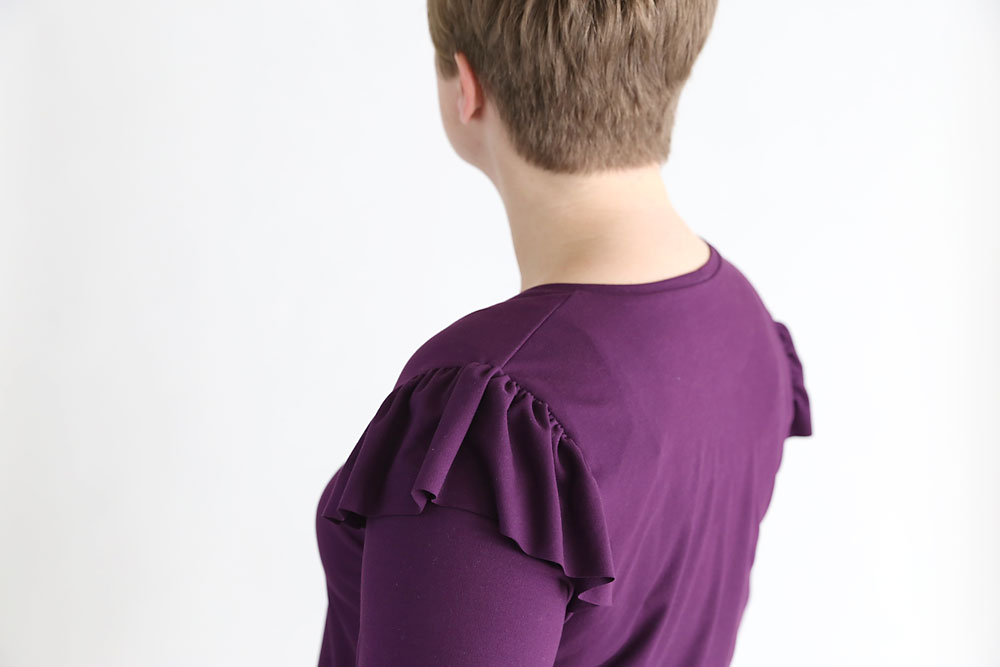
How to add a ruffled shoulder
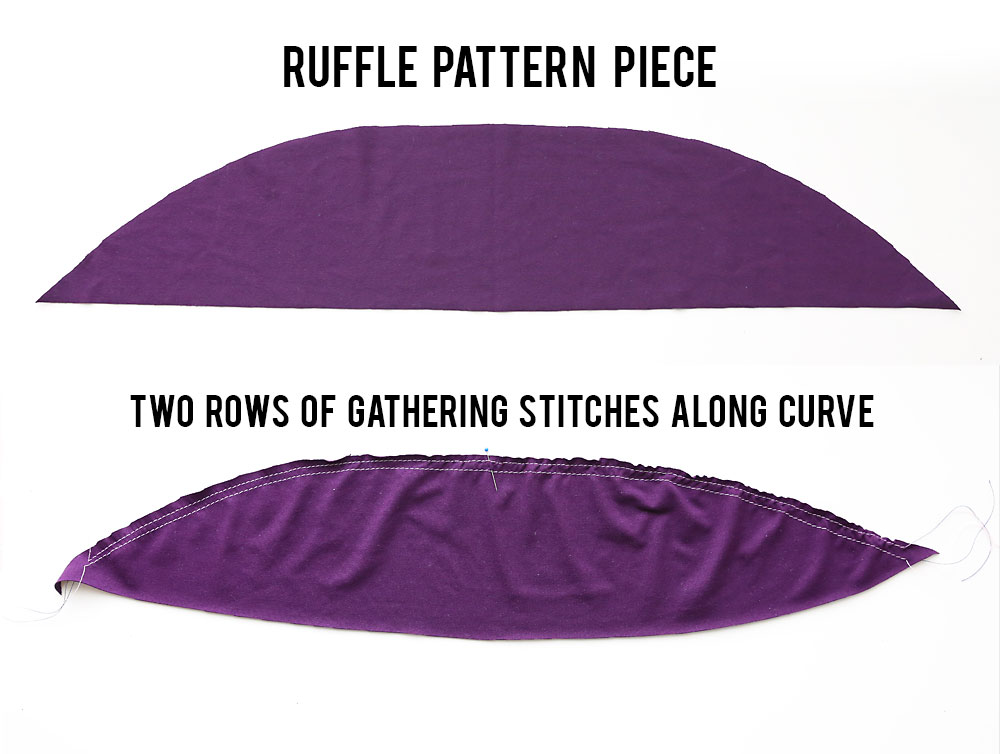
Step 1: Sew 2 rows of gathering stitches along the curved edge of both ruffle pieces. A gathering stitch is a long straight stitch sewn at a low tension setting. Begin and end the gathering stitches about half an inch from each corner, as shown below.
Step 2: Mark the center of the curve. Fold each ruffle piece in half and use a pin to mark the center of the curve you just stitched along.
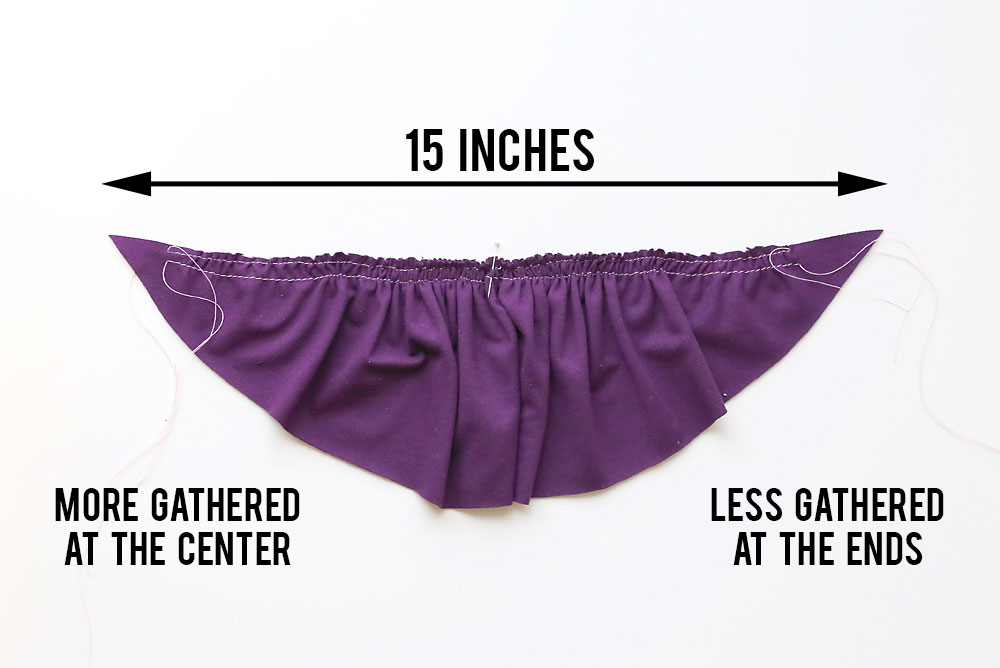
Step 3: Gather the ruffles. Pull on the lower threads to begin gathering up the ruffles. You want to gather until the ruffle piece is 15 inches across. Please note you want the area in the middle to be more gathered than the area toward the edges, as you can see if you look closely at the photo below.
Step 4: Pin the ruffle to the sleeve piece. Find the center of the sleeve curve and match it with the pin marking the center of your ruffle. Pin together. Both pieces should have right sides facing UP.
Continue to pin the ruffle to the sleeve curve, as you see below. The goal is to make the bottom edge of the ruffle fairly even. This may require a little manipulation of the gathers. Do this with both ruffle pieces on both sleeves, and compare them to make sure they look the same.
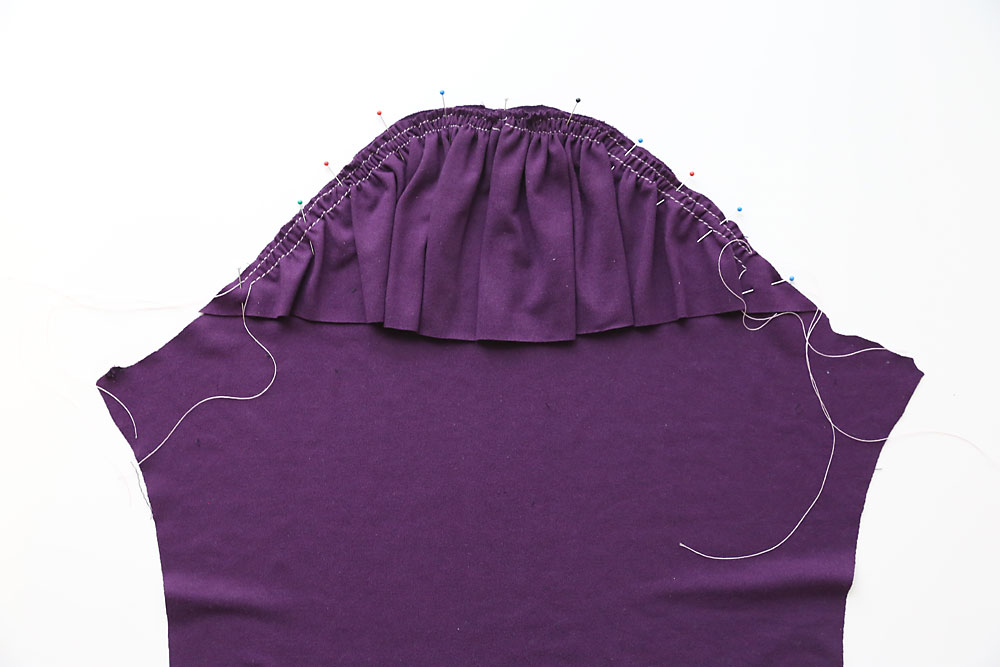
Step 5: Baste the ruffle down. Sew the ruffle to the sleeve. I like to sew right in between the gathering stitches.
From here, you can treat the ruffle/sleeve as one piece. Follow the directions in the Classic Tee post to sew up the shirt.
Kristie says
Thank you for doing this. I have toyed with the ruffle at the bottom of the sleeve look, but sometimes there is too much volume there. This is a ruffle without the super volume and I’m excited to make me a couple in neutral colors to go with everything this summer! (I’m thinking short sleeves.) So thanks so much!