
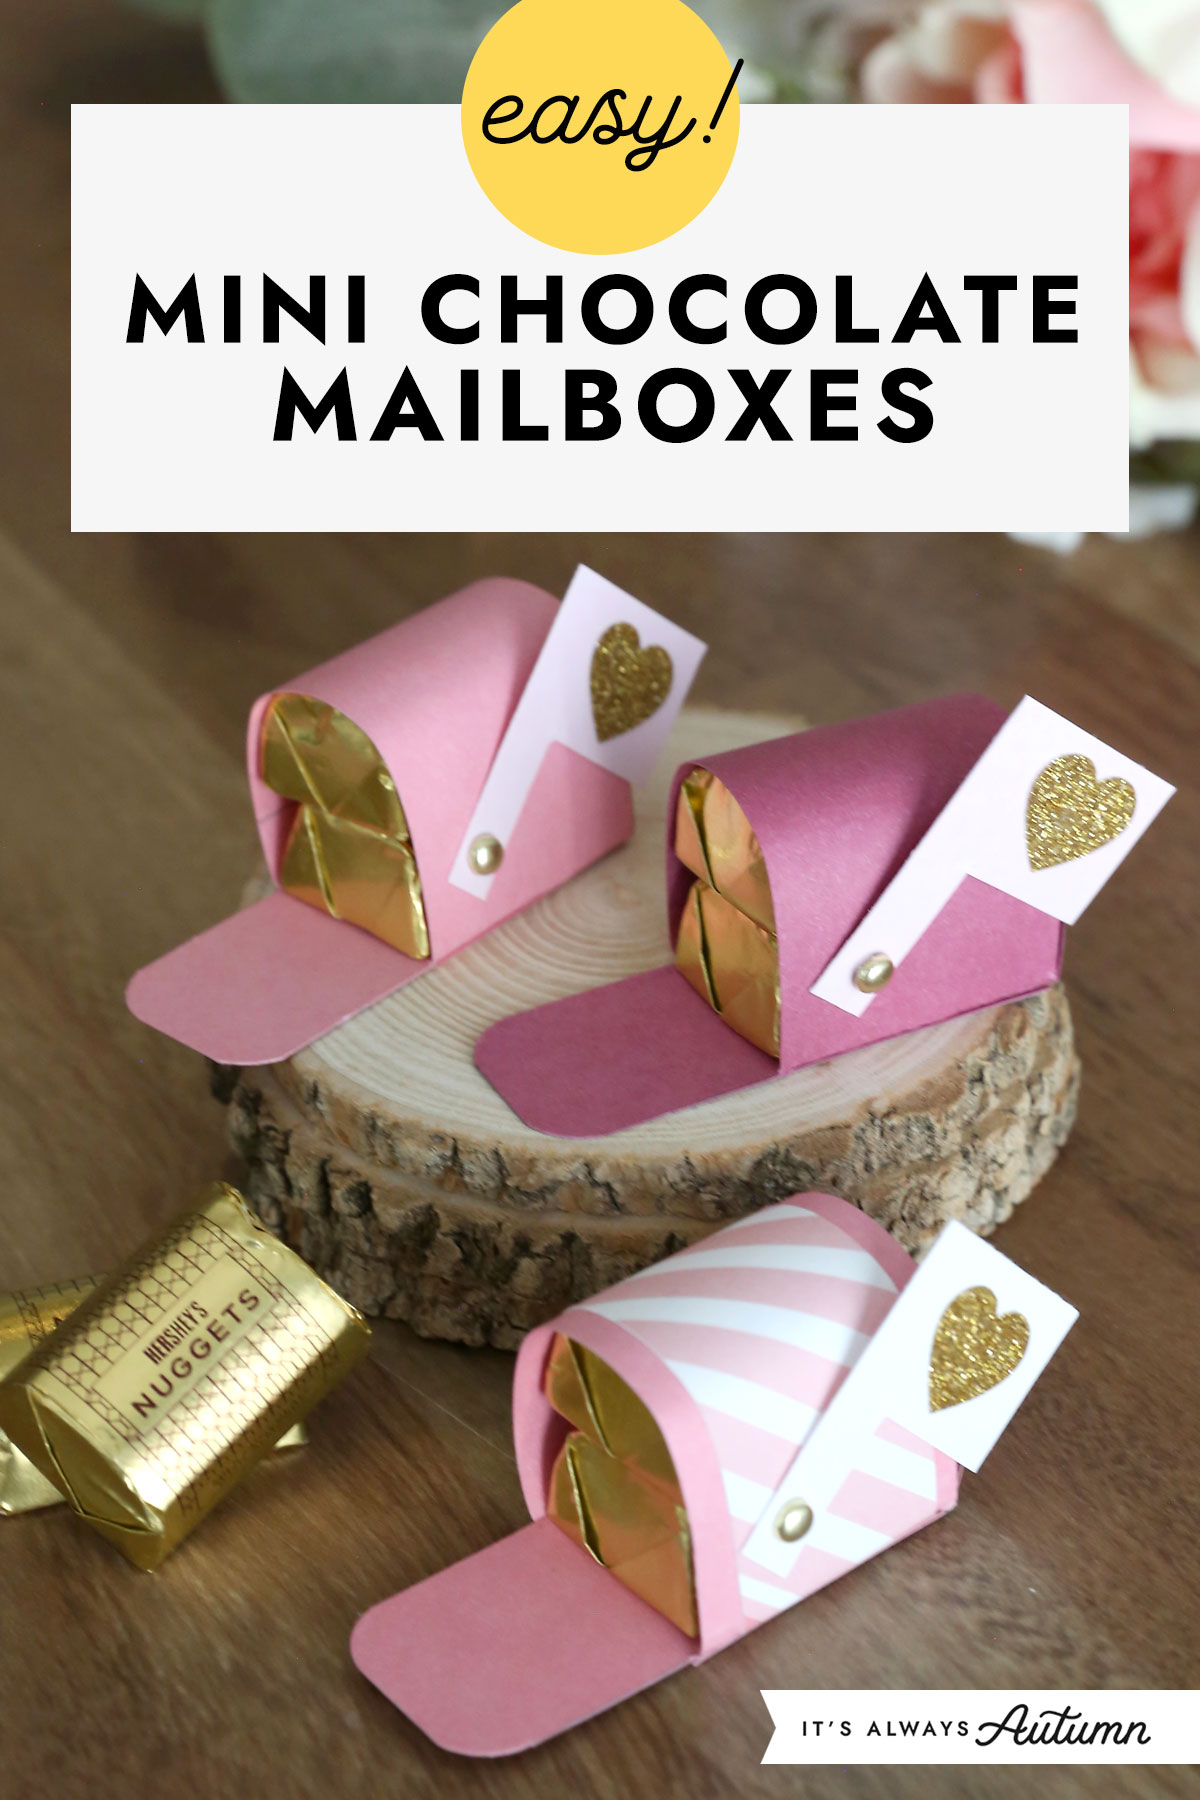
In today’s post: Use our template to make adorable mini chocolate mailboxes filled with Hershey’s Nuggets. This is a fun Valentine’s Day craft you can do with your kids.
DIY Valentine’s Treat
These chocolate mailboxes are a fun little treat your kids can make for their friends for Valentine’s Day. Or you could make them for your kids, and even write a short note on the inside of the mailbox. They’re easy to put together and turn out cute. You can use any color cardstock to make the mailboxes, and you can add a strip of patterned paper if you’d like. I’ve created a printable template to make creating the mailboxes easy.
Supplies
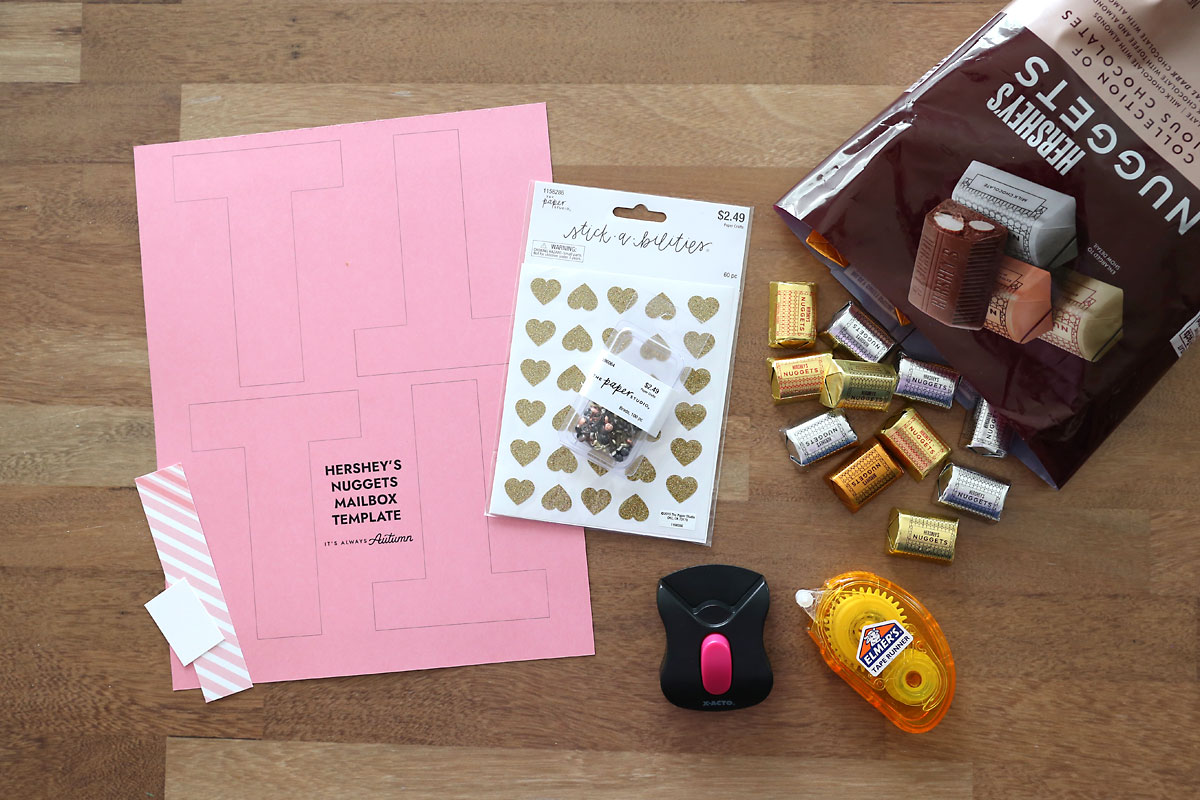
Here’s what you need to make Mini Chocolate Mailboxes:
- Template: you’ll find the printable template in the light blue box right above the word “supplies”
- Cardstock: one sheet of 8.5×11 cardstock will make 4 boxes
- Scrap of White Cardstock: you’ll use a 1 inch x 1.5 inch square of white cardstock to make the flag
- Heart Stickers: to decorate the flag
- Small Brads: to attach the flag
- Corner Rounder Punch: if you don’t have one, you can just use scissors
- Adhesive Tape Runner: found in the craft section of Walmart or at any craft store
- Hershey’s Nuggets: you’ll use two nuggets for each mailbox
- Patterned Paper (optional): to decorate the mailbox
How to Make a Mini Chocolate Mailbox
Making each mailbox will take about ten minutes, with most of that time being cutting out the template. Here’s what you’ll do:
Cut out the Mailbox Template
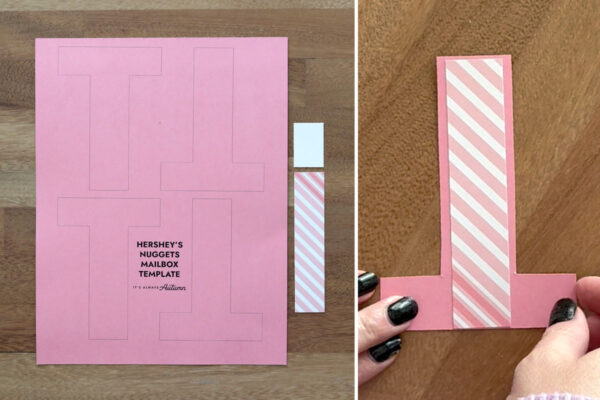
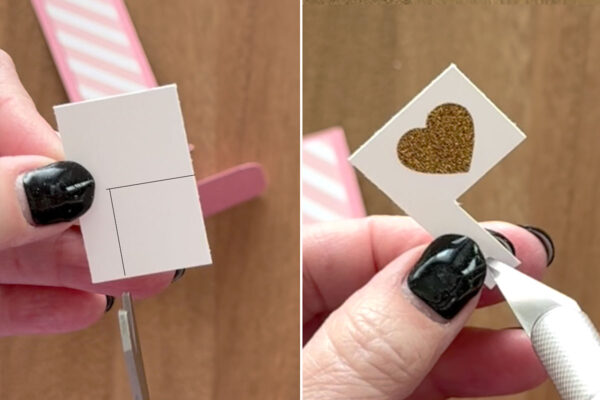
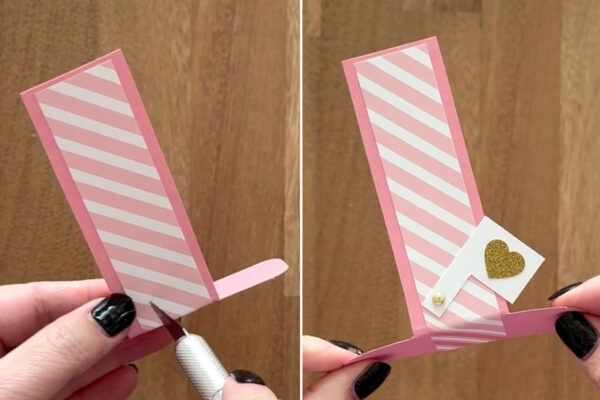
Begin by printing the template onto an 8.5×11 sheet of cardstock (be sure to print it at 100% or full size; the grey test box should measure one inch). Cut along the lines to get four “T” shaped templates. You’ll use one per mailbox. Also cut a 1 x 1.5 inch piece of white cardstock that will be used for a flag. Optional: Cut a 1 x 4.75 inch piece of patterned paper and adhere it along the vertical line of the “T”, as shown below.

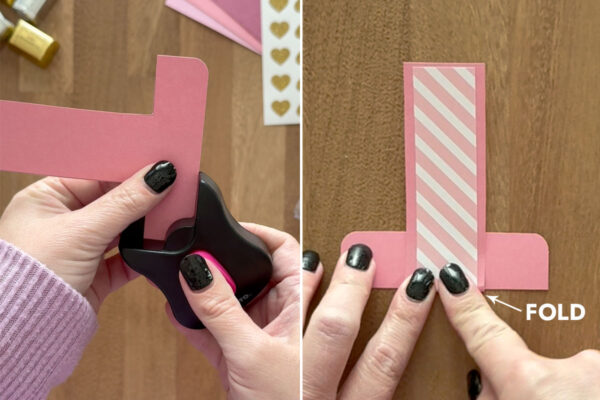
Next, you need to round the corners of the horizontal part of the “T”. If you have a corner rounding punch, use it to round the top two corners. Then fold over the vertical part of the “T” and crease it, then use the punch to round the bottom two corners. (If you don’t have a corner punch, use scissors to round the corners. You will still need to make the fold.)

Attach the Flag
Grab the small piece of white cardstock and cut it into a flag shape. Add a heart sticker to tiny note, if desired. Use an exacto knife, toothpick, or other sharp item to poke a small hole at the bottom of the flag.

Hold the mailbox with the rounded corner piece down and the long piece folded up at a 90 degree angle. Poke a small hole about 3/8 of an inch up from the fold and in from the left side. Use a small brad to attach the flag.
s

Assemble The Mailbox
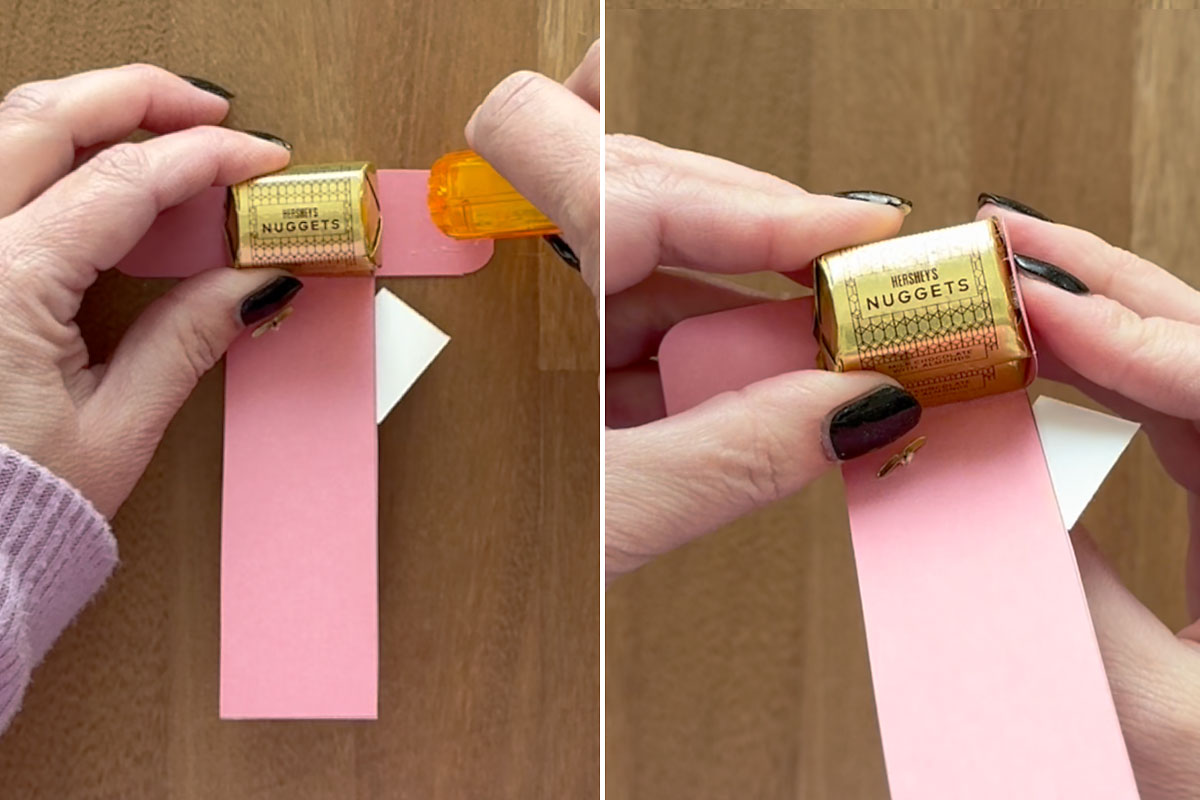
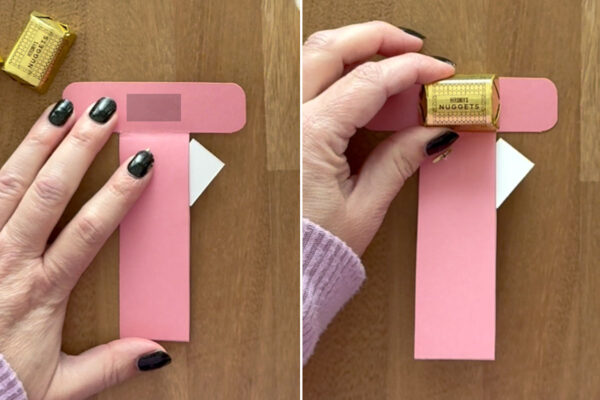
Now you’ll lay the mailbox template with the flag (and patterned paper if using) down on the table. Add some tape runner adhesive in the area shown by the grey box below, and then place a Hershey’s nugget on the adhesive. Add a little bit of adhesive on top of the nugget to adhere a second nugget on top of the first.
s

Add more adhesive on the flap with rounded corners to the right of the nuggets. Fold it up and press it to adhere to the nuggets.
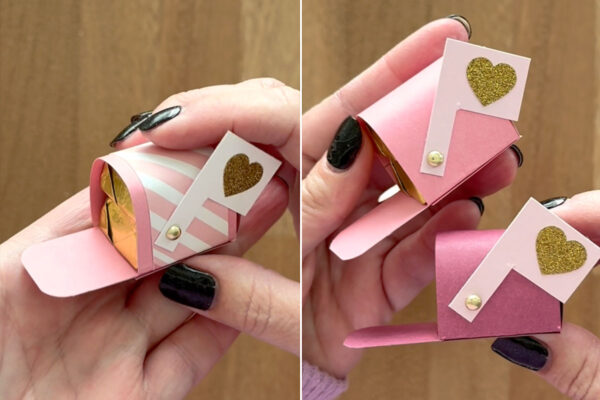
At this point you can take the long piece and wrap it all the way around the nuggets and across the bottom. Add adhesive to secure it along the bottom.
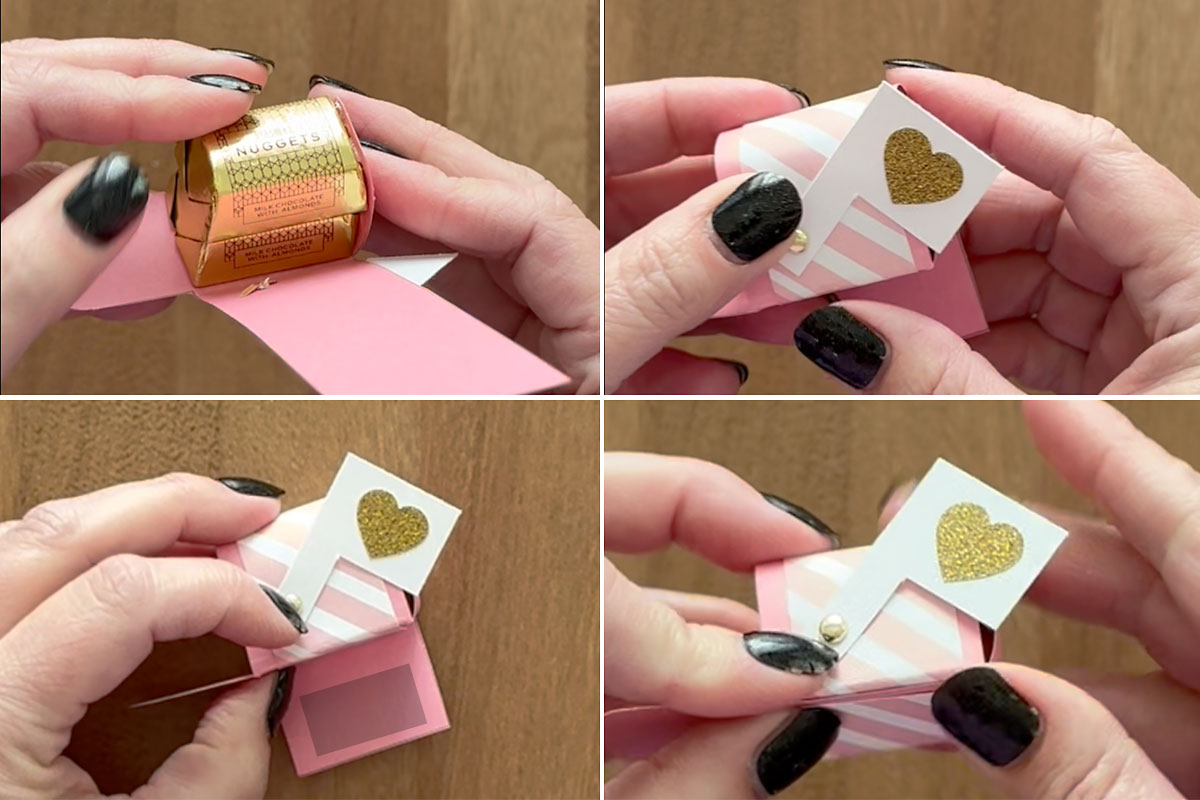
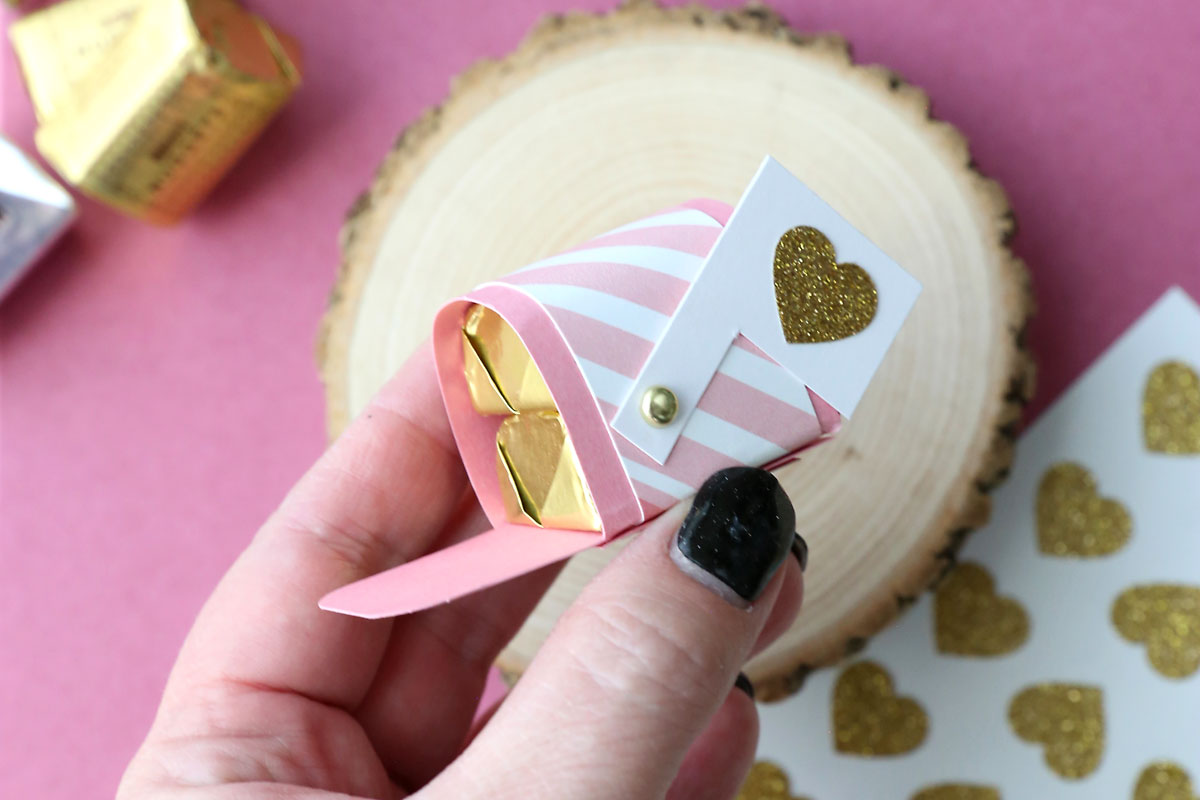
Here’s what it looks like finished:


Mini Chocolate Mailboxes
Supplies
- 1 piece 8.5 x 11 Cardstock any color
- 1 piece 1 x 1.5 inch Cardstock for a flag
- Small Brads
- Heart Stickers
- Hershey's Nuggets two per mailbox
- Patterned Paper optional
Want more project ideas? Sign up to get my favorite easy crafts and recipes straight to your inbox!
Equipment
- Corner Rounder Punch optional
- Adhesive Tape Runner
Instructions
- Print the template on cardstock and cut out each "T" shaped piece. If desired, cut a 1 inch x 4.75 inch strip of patterned paper and adhere it over the long vertical portion of the "T".

- Round the corners of the horizontal portion of the "T" using a corner rounding punch or scissors. Fold the long vertical piece of the "T" up as shown.
- Start with a 1 x 1.5 inch piece of white cardstock, and cut it into a flag shape. Add a heart sticker. Poke a small hole near the bottom of the flag.
- Hold the mailbox with the rounded corners piece down flat and the long piece folded up at a 90 degree angle. Poke a small hole on the long strip, near the fold on the left side. Use a brad to attach the flag.
- Place the "T" down on the table with the flag facing down. Add adhesive in the area shown by the grey box and place a Hershey's nugget there. Add a little adhesive on the top of the nugget and stack another nugget on top.
- Add adhesive on the right flap and fold it up, adhering to the nuggets.
- Wrap the long piece all the way around the nuggets and use adhesive to secure it at the bottom.
- The mailbox is complete.


Cheryl says
I was at a craft retreat and brought all the materials with me to make these. I made 24 of them! Your directions were so excellent they went right together. I ended up giving them to all the ladies at the retreat and they were just thrilled with them. Had to make another batch when I got home for the family. Thank you for sharing this.