

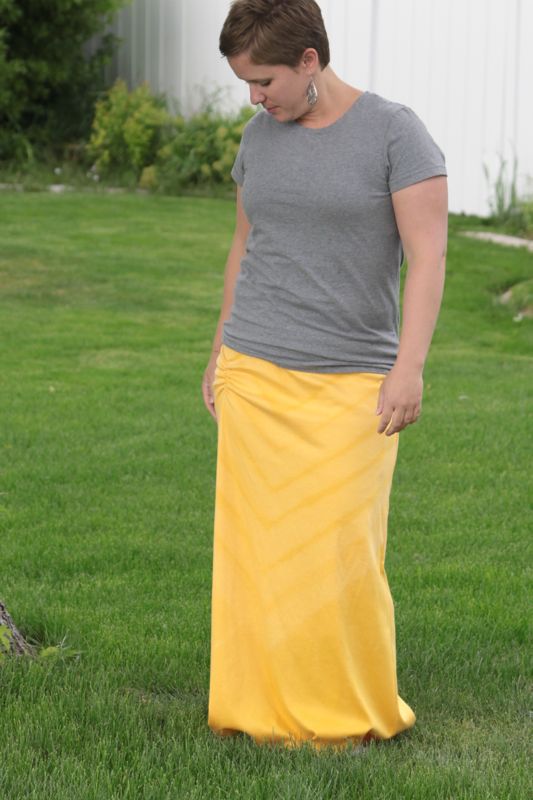
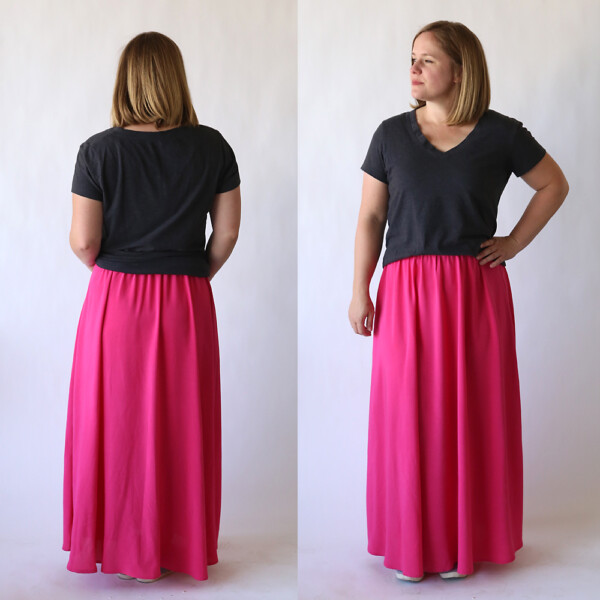
I decided it was time to hop on the bandwagon and make myself a maxi skirt, so I headed to Joann’s with my 50% off coupon and purchased a yard and a half of goldenrod interlock knit for $7.50. Then I got a little nervous. Did I really want to swath myself from waist to feet in bright gold? Was there some way to lighten the color a bit? Maybe some way to break up the solid sheet of gold?
I decided to try using bleach to create a chevron pattern of lighter yellow across my skirt pieces. It turned out very subtle, but I like it.
Bleach will affect different fabrics in different ways, so when you use bleach to create a pattern you may end up with slight color variation, like I did, or a huge color variation (like when you happen to wear your favorite tee while bleaching the tub and invariably splash a drop of bleach right near the bustline. Or is that just me?)
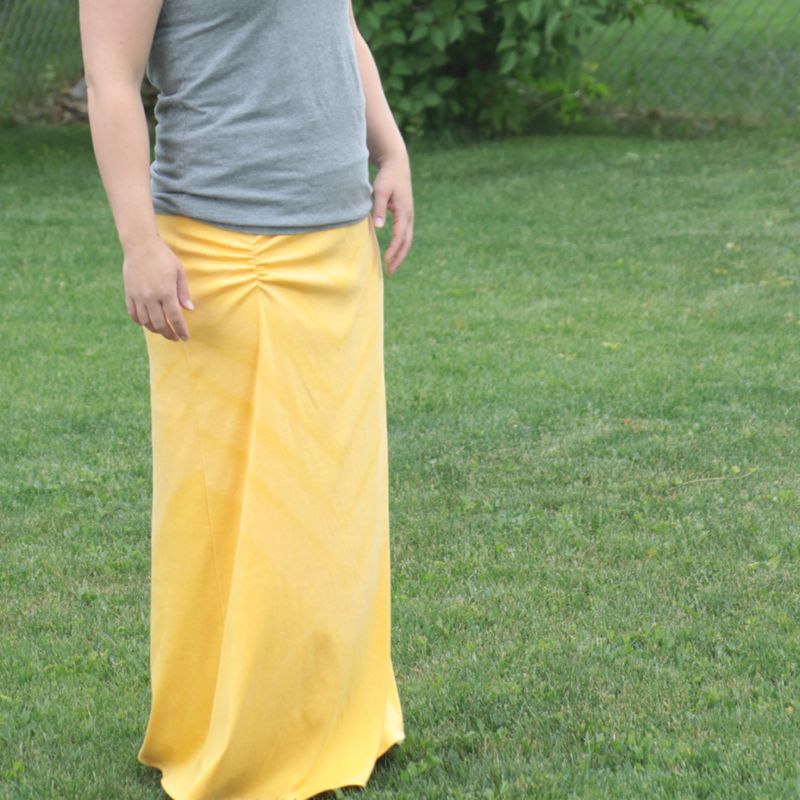
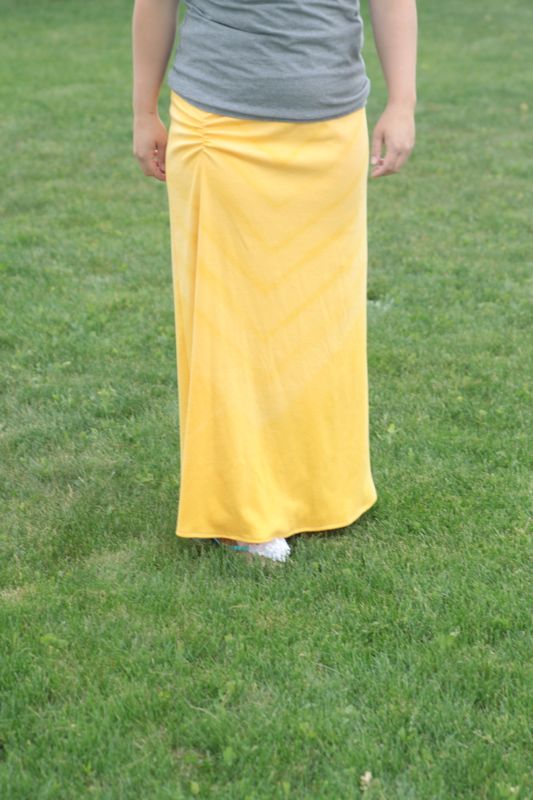
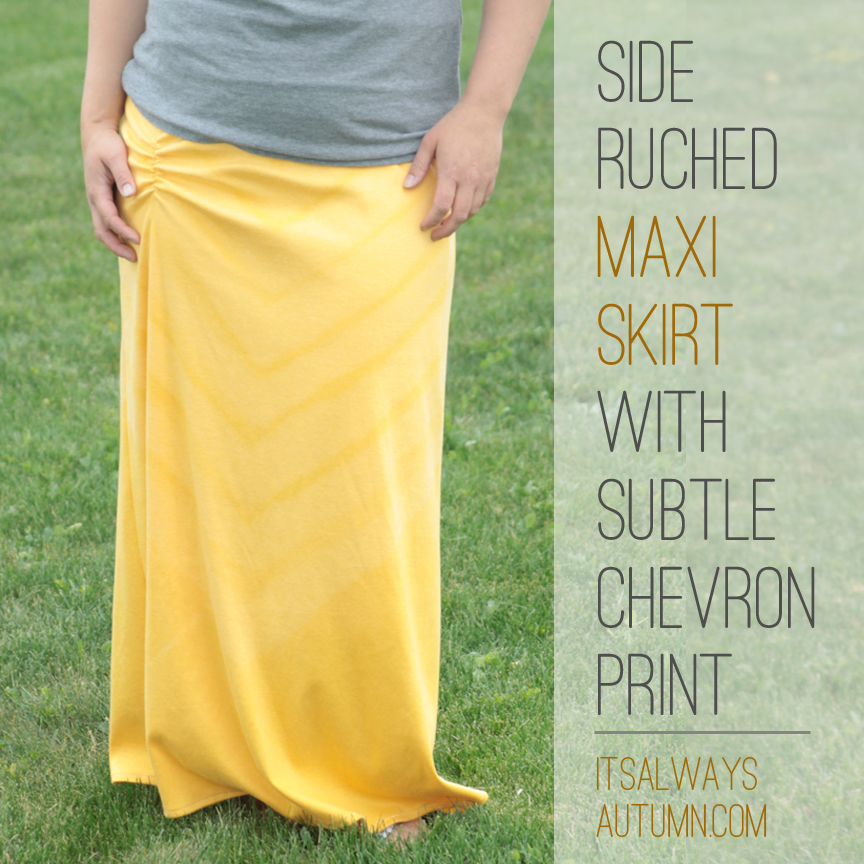
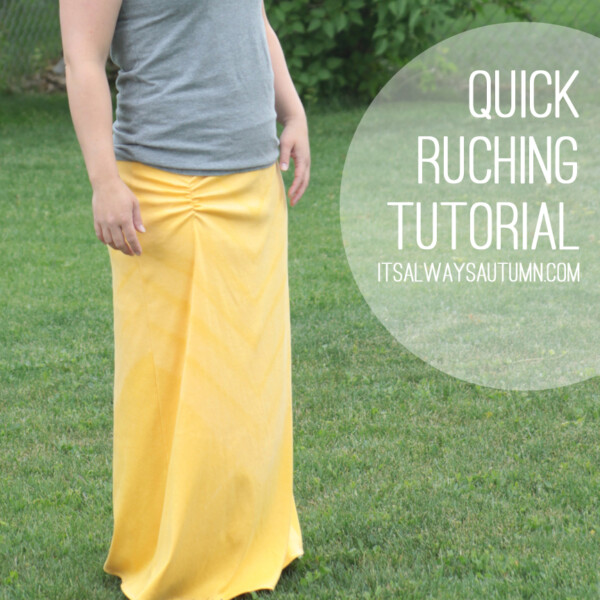
Because my bleach effect wasn’t as strong as I might have liked, I decided the skirt needed another little something to keep it from looking like a straight column of goldenrod. So I added a bit of ruching on one side.
Interested in the chevron process? Read on. I’ll share a quick tute for the ruching later in the week.
I started by cutting out my skirt pieces according to the directions posted at Elle Apparel. (Note if you use this tute: cut the waistband pieces smaller/tighter than you think you need – you really need it tight to hold up all the weight of the skirt.)
I laid one skirt piece out on my counter and used 2 inch wide painters tape to create a chevron pattern.
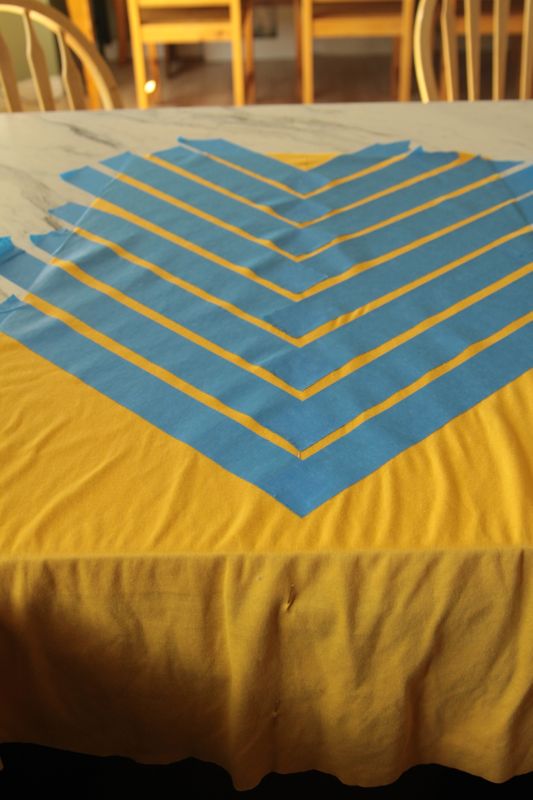
I kept the lines of tape close together because I knew the bleach would bleed under them (the dry parts of the fabric suck the wet bleach in), and it’s a good thing I did or else I might have ended up with no design at all. Once the tape was down I sprayed undiluted bleach on the lines in between the tape using a spray bottle.
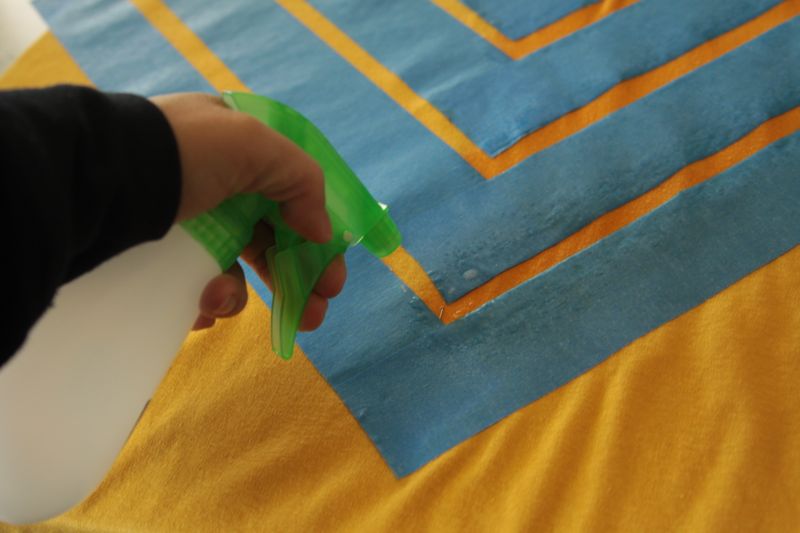
In retrospect I probably would have gone a little easier on the bleach (I made sure the area was completely saturated), but live and learn. Once the whole thing was sprayed I laid out the other skirt piece and transfered the tape over to it and repeated the process. Here’s what the skirt piece looked like right after I removed the tape (immediately after spraying):
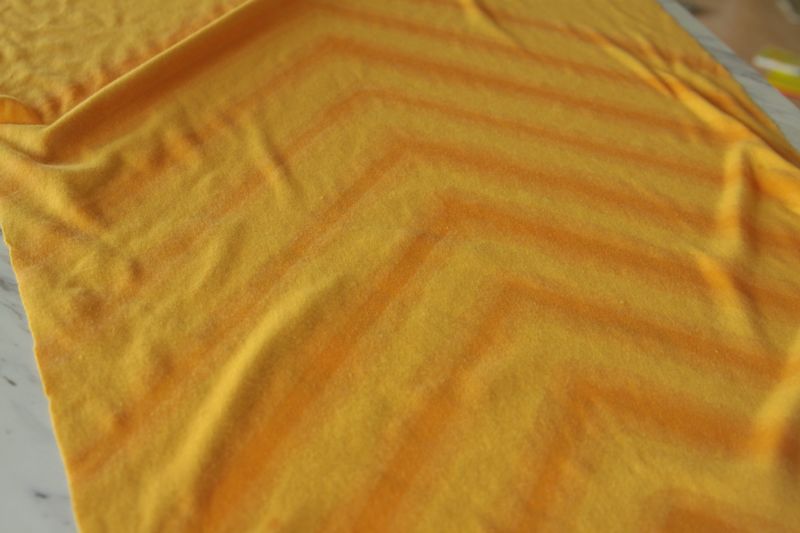
The dark portions are the places that are wet with bleach. Now here’s where some experimentation comes in. I could tell the bleach wasn’t affecting the color very drastically, so I waited almost half and hour before I rinsed the bleach out. This gave the bleach plenty of time to continue to spread, making the unbleached lines narrower than originally planned:
So if the bleach affects your fabric quickly, I’d rinse it out right away and it won’t have as much time to bleed past the taped lines.
I’m going to try this again soon with a different fabric, so I’ll keep you posted!
As I mentioned before, I also added a few inches of ruching along one side of the skirt. I did this because every time I walk wearing a very long skirt, I have to grab one side and pull it up a few inches so I don’t step on it. I figured, hey, why not pull it up a few inches permanently? Plus, I’ve had five kids, and something that adds a few concealing gathers across the middle can’t be a bad thing. It only takes about five minutes to add a little ruching like this – click here to learn how to ruche fabric!

Caprice says
I’m tired and lazy, please just make this stuff for me!! I love how you put “tute” for tutorial. I can totally hear your voice in my head as I read your blog, it’s fun. Lisha’s not coming until August, how ’bout we all pitch in and get you up here too. It’s been 7 years since we all were together!
katie says
LOVE this skirt & I too love using bleach to transform fabric!
Heidi says
Very cute Autumn, you did great. I love the color, and chevron on it.
Stacy Sews and Schools says
CUTE! I love it!! 🙂
Brittany says
The skirt looks really nice and great on you! I like it a lot.