
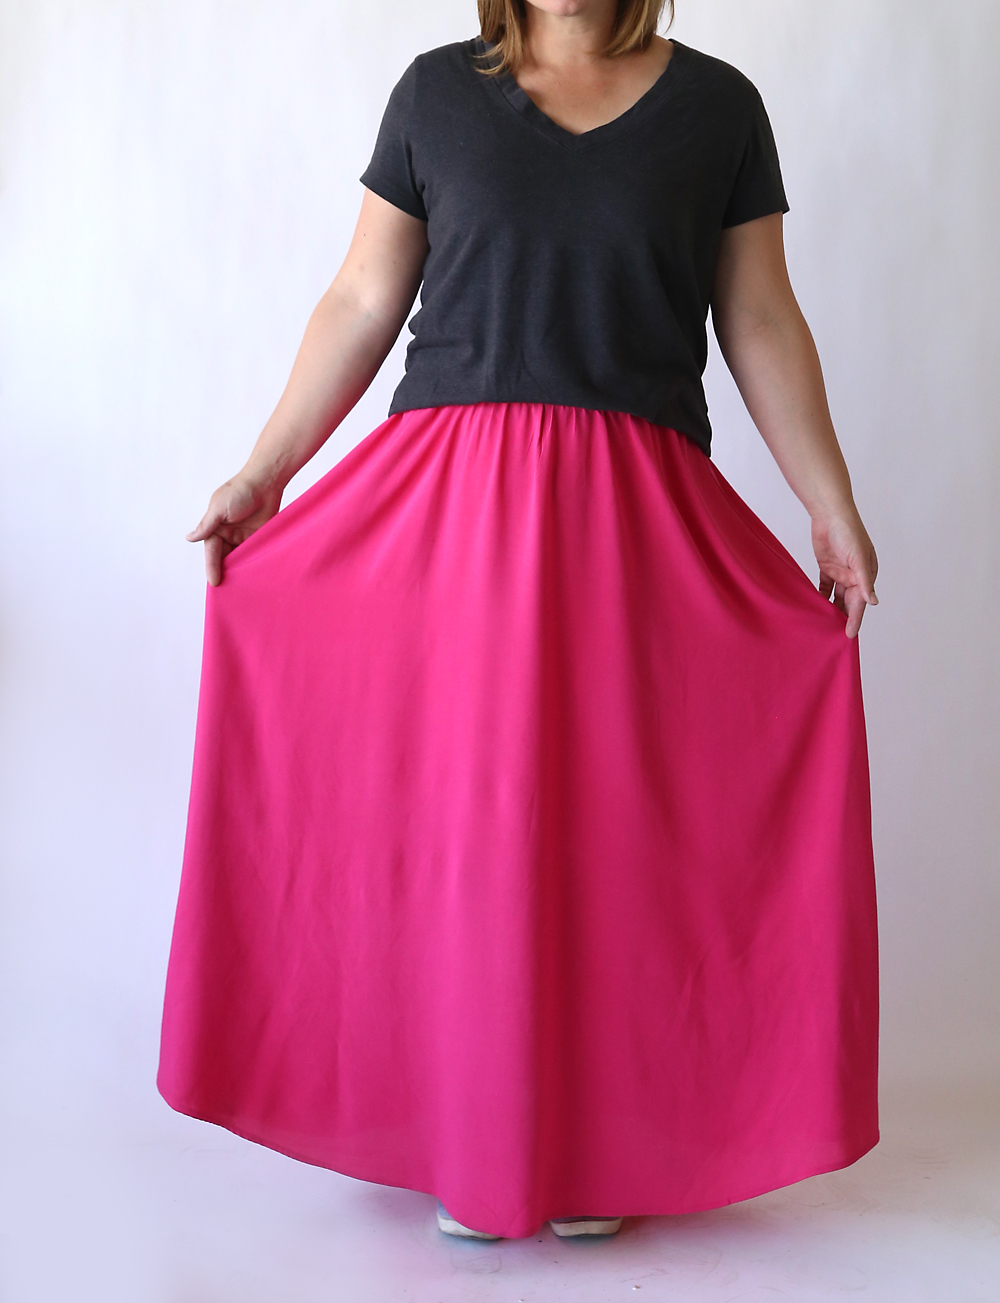
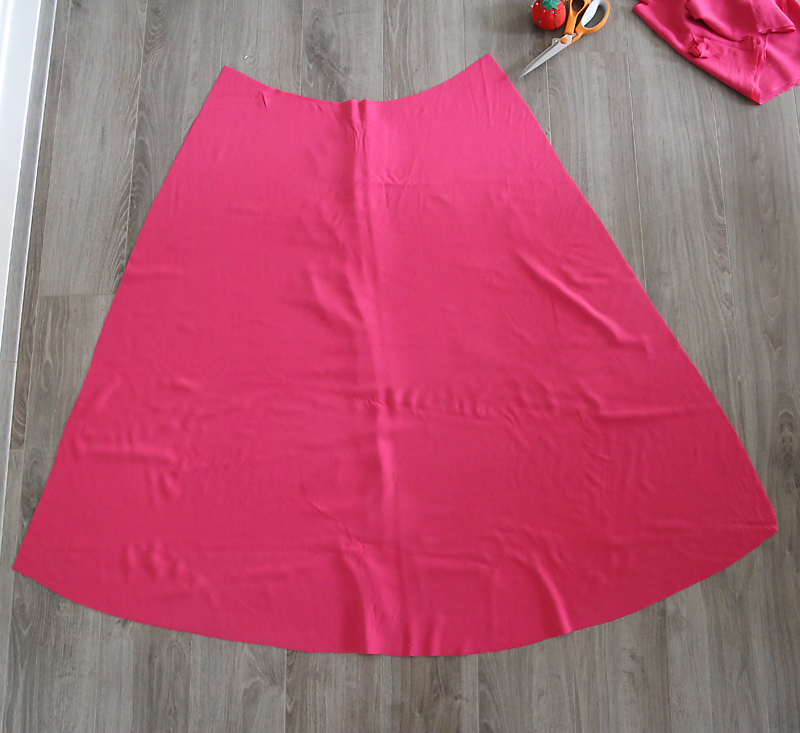
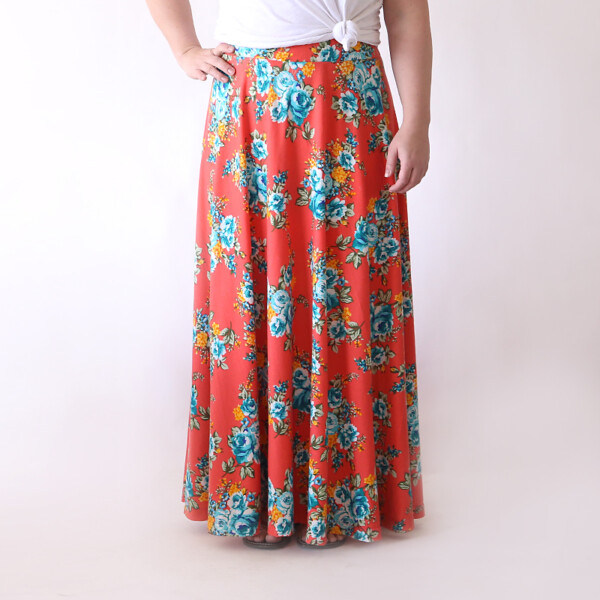
Guess what? I made another skirt. I know, you can hardly believe it. Anyway, as you can see it’s a maxi skirt. It was insanely easy to sew, AND it’s made out of a beautiful, flowy, lightweight fabric which is just perfect for summer. It’s cut wider at the bottom than most maxi skirts, which I like because it makes it easy to walk in and it doesn’t cling where it shouldn’t. ‘Cuz I just don’t need cling at this point in my life.
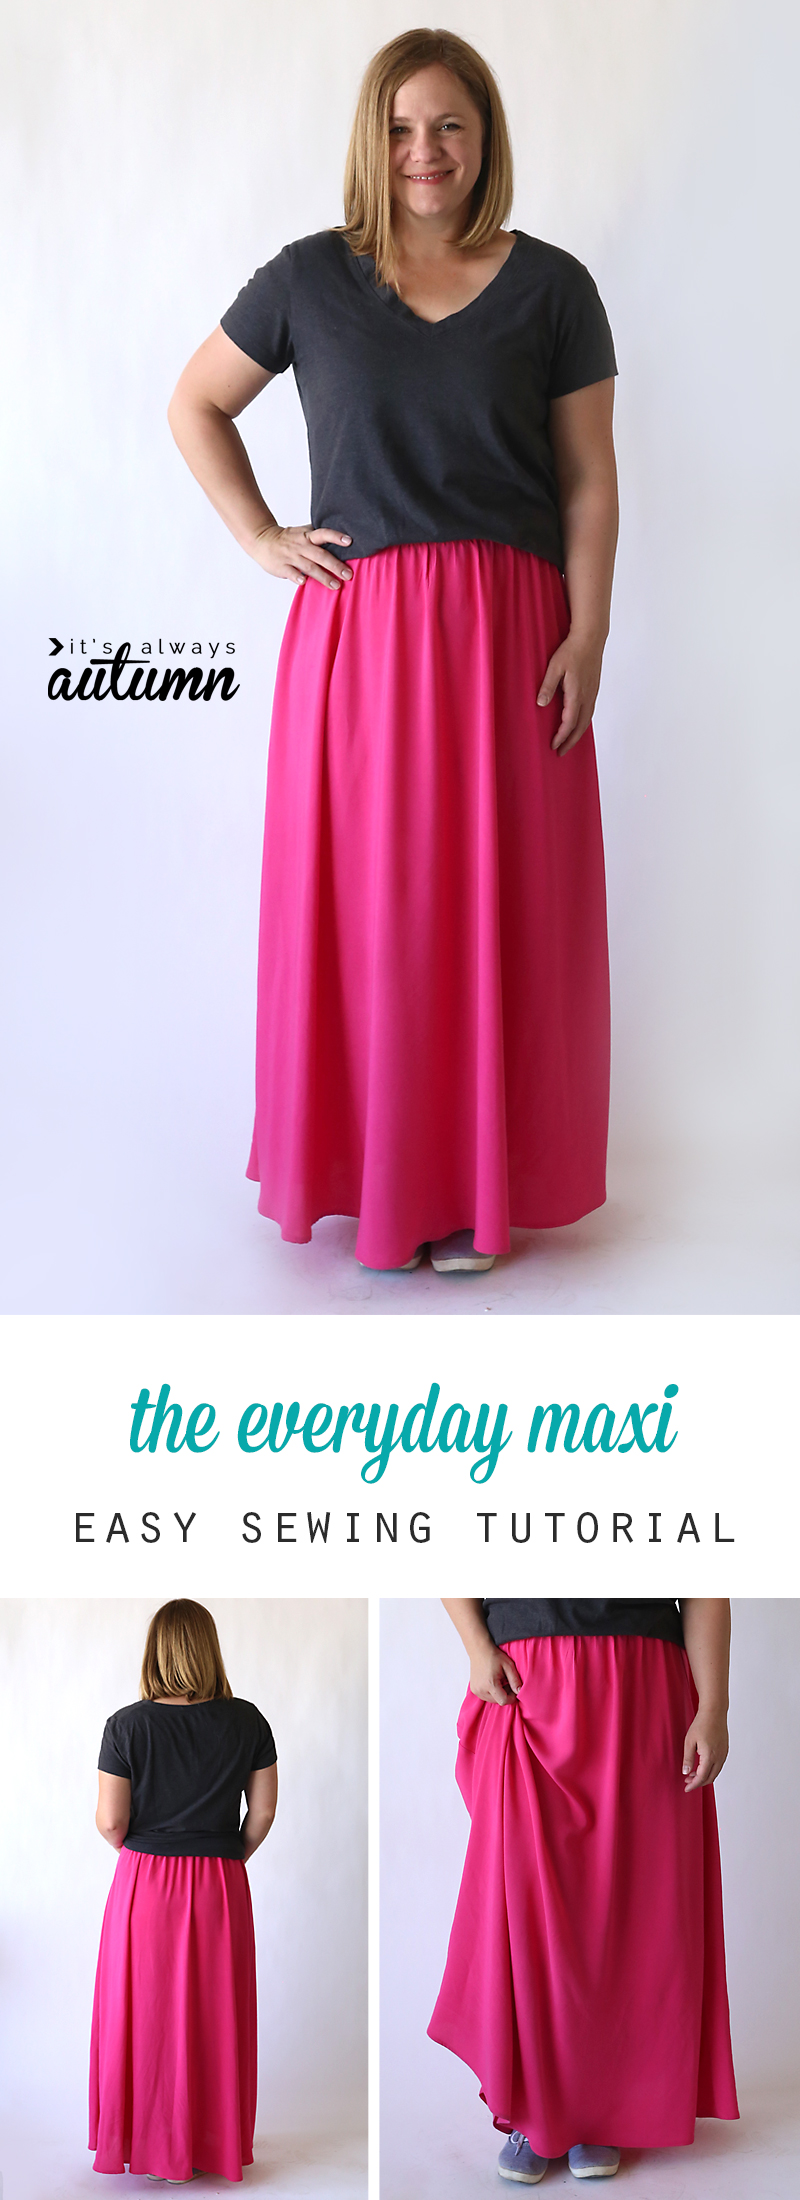
You might be thinking: “Hey, you’ve made a knee length version of this skirt already and it’s called the Everyday Skirt.” If you are, you’re completely correct. And you maybe need to stop reading my blog and get out more 😉
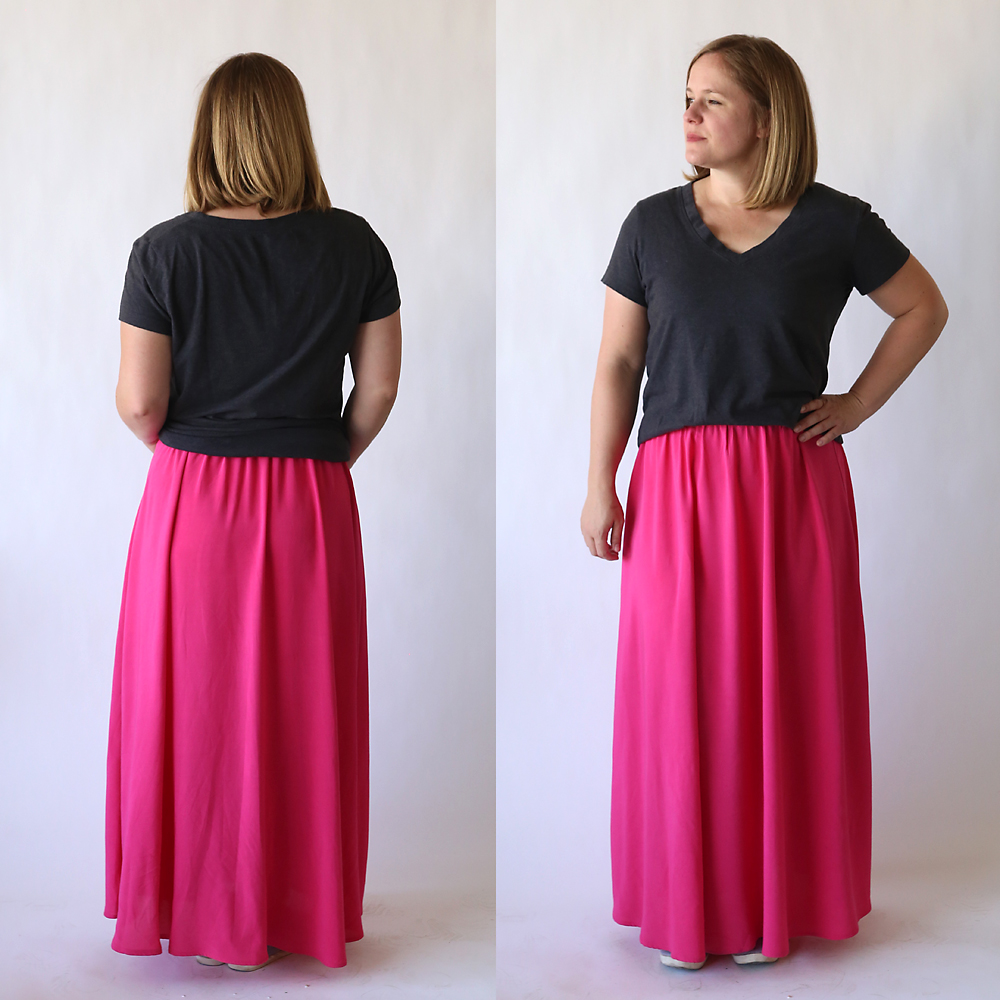
If you don’t recognize this as an Everyday Skirt, I’ll recap the beauties of said skirt: Number one, it’s crazy comfy, thanks to an elastic waist, but it features a curved waistline, which means you get fullness at the bottom of the skirt without too many gathers in that elastic waist, so it doesn’t bunch or pouf. And number two, it’s crazy easy, thanks to the fact that there are only two pieces to put together and we attach the elastic in an ingenious method that doesn’t require threading it through a waistband. Yep, it’s great.
For an everyday maxi skirt, you’ll need about 2.5 yards of wide fabric (mine was 52 inches wide). You definitely want to use a lightweight, drapey fabric. I used rayon challis from Raspberry Creek Fabrics (a fabulous etsy fabric shop – check it out!) and it worked beautifully. Stiffer fabrics like quilting cotton just won’t look good. Wash and dry it however you plan to treat the finished garment.
Fold the fabric in quarters, and lay it out as shown below, with the corner of both folds in the upper left. Take two measurements: the widest part of your hips (mine is 42), and the finished length of the skirt (mine is 36). Divide the hips measurement by 4 and add one inch to get your measurement A (11.5), and add an inch to the length measurement to get your measurement B (37).
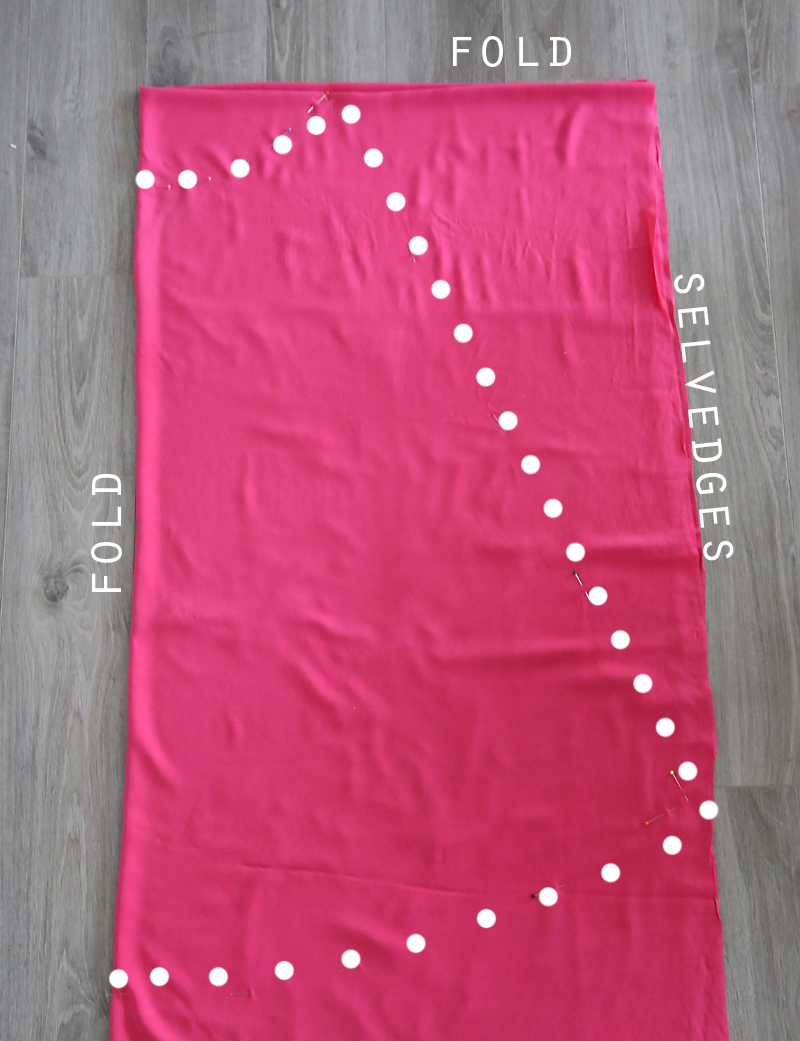
Most gathered skirts have you cut a rectangle, but we want more of an A-line shape that has a slightly curved waistline and hemline. This gives you less gathers at the waist but still gives a fullness at the hemline. Starting a few inches down from the main corner (photo above), pin a slightly curved waistline that measures the length of your measurement A (mine was 11.5 inches). From the end of this curve, measure down and out to the edge of the fabric, using measurement B (mine was 37 inches). Continue to measure B inches down from the waistline, making a gently curved hem that matches the gently curved waistline. Cut along the pins and you’ll have two pieces that look like this:
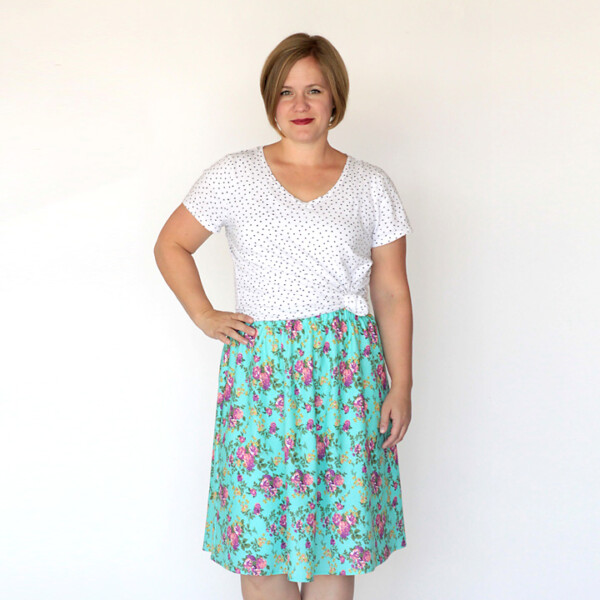
Ok, the measuring and cutting is by far the hardest part. The sewing is easy! Grab some elastic (1 to 1.5 inches wide) and cut it an inch shorter than your waist measurement. Sew the ends together and zigzag the seam allowance flat. Place the two skirt pieces RST and sew down the sides. (You’ll notice the photos here switch to the original (knee length) skirt I made using this tutorial. That’s because the sewing portion is exactly the same for either a knee length or maxi length skirt.)
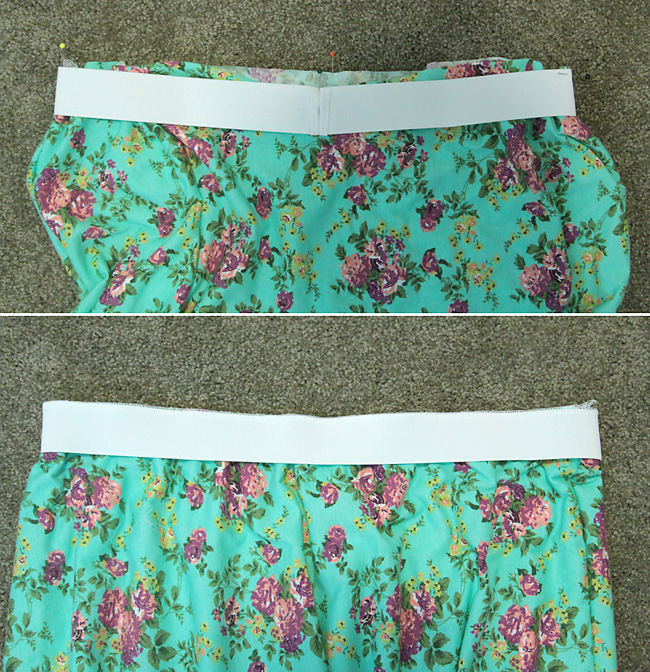
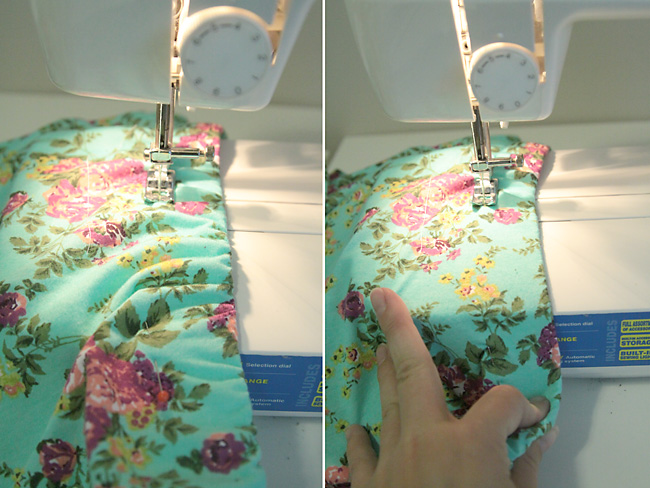
Turn the skirt right side out. Divide both the elastic and the skirt into quarters or eighths and mark with pins. Place the elastic over the right side of the skirt and match up the pins – the skirt will be bigger than the elastic, causing the skirt fabric to bunch up a bit. You’ll need to stretch the elastic until the fabric lays flat in order to sew them together.
Once the elastic is sewn to the skirt, flip it to the inside of the skirt and pin the bottom edge of the elastic to the skirt in about 8 places. Sew the bottom edge of the elastic to the skirt to create a “waistband”. You’ll need to stretch the elastic again to keep the material flat as you sew. A straight stitch is fine here.
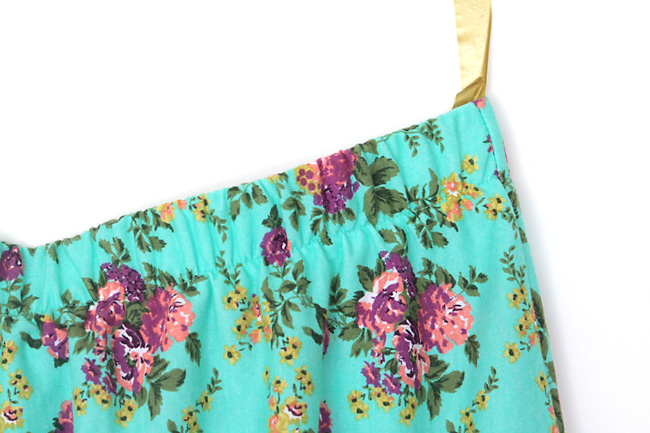
This is what the finished waistband looks like up close:
At this point, try on your skirt and ensure that the bottom edges hang evenly an inch or so above the ground. It helps to have someone sit on the ground next to you with a ruler and mark an inch above the ground with pins all the way around. This just ensures that if your cutting was off a little you get things even before you hem.
To hem, turn up the bottom edge 1/4 of an inch twice, and sew with a straight stitch. Done!
Looking for more skirt sewing tutorials? Try these posts:
How to sew a half circle skirt
The half circle skirt in a maxi length
The perfect flattering gathered skirt
The easy everyday skirt tutorial
The everyday skirt in maxi length

Barbara Swartzberg says
Thank you!!
Holly says
Where do you sew on the waistband? Middle, top and bottom?
Julie says
Hi! This is a lovely pattern for me as a beginner as it’s easy to follow!
I’m thinking of doing it in Linen. Do you think that material will be ok? I also want to try with a drawstring or zip instead of an elastic waist. Any tips on how to do this?
Thanks,
Julie
Kim says
I love this ! Going to try to make it , thank you for the simple instructions , been looking at patterns to make a skirt and was getting upset – some are just to complicated ! Feel confidence about trying this -THANK YOU !