
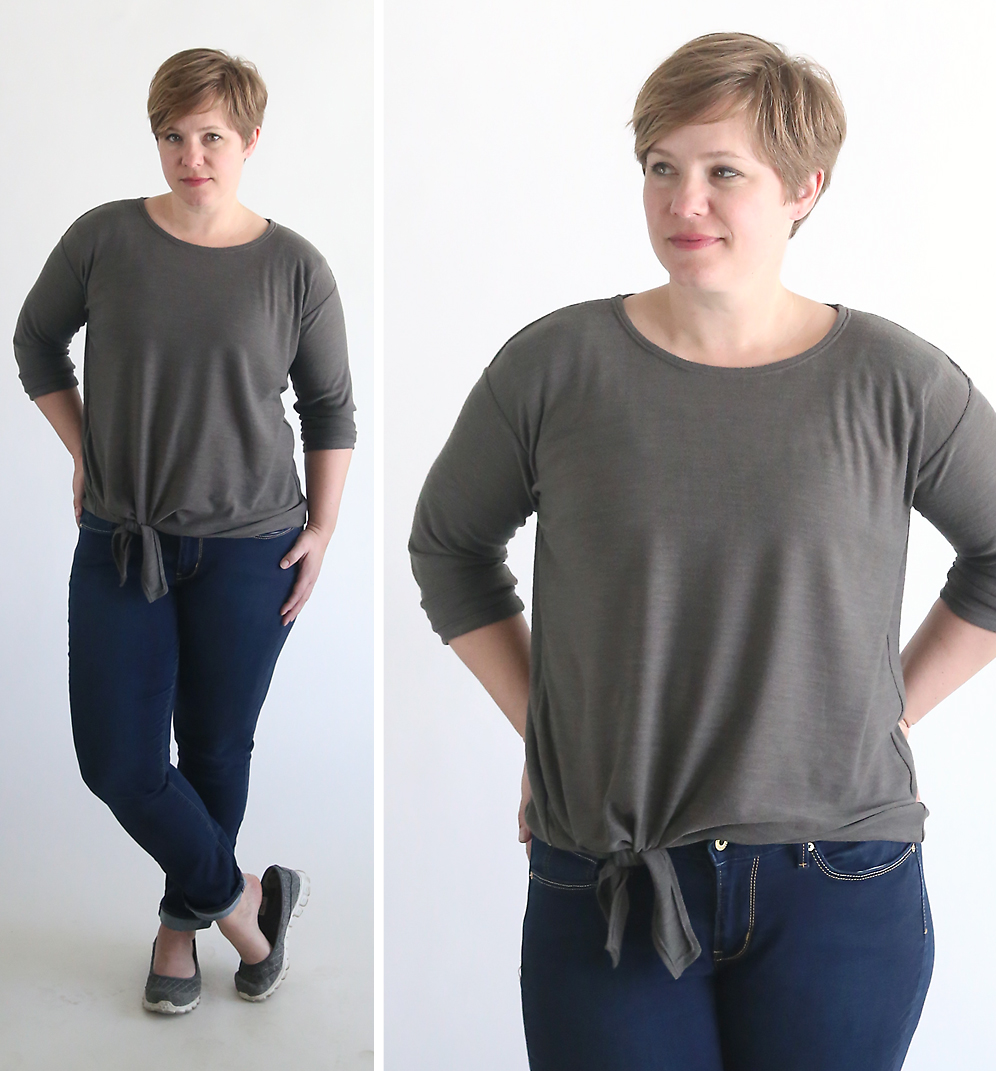
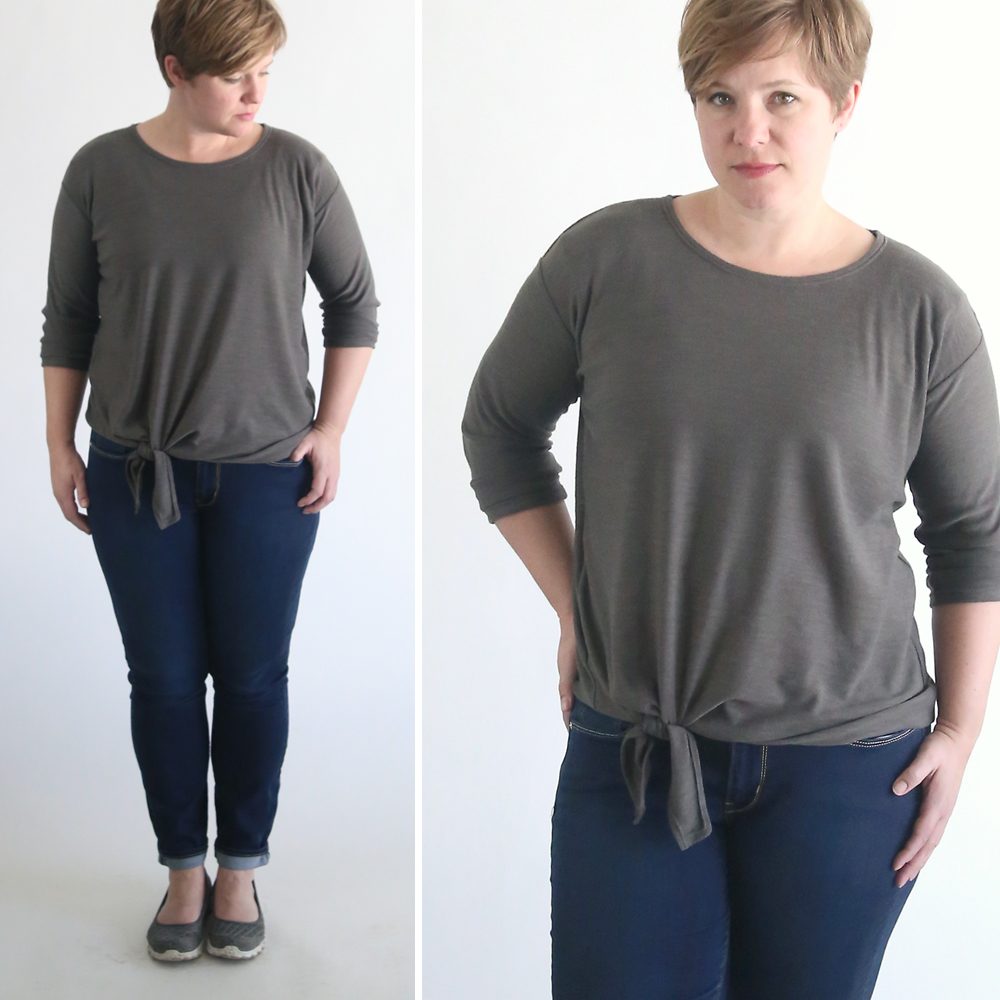
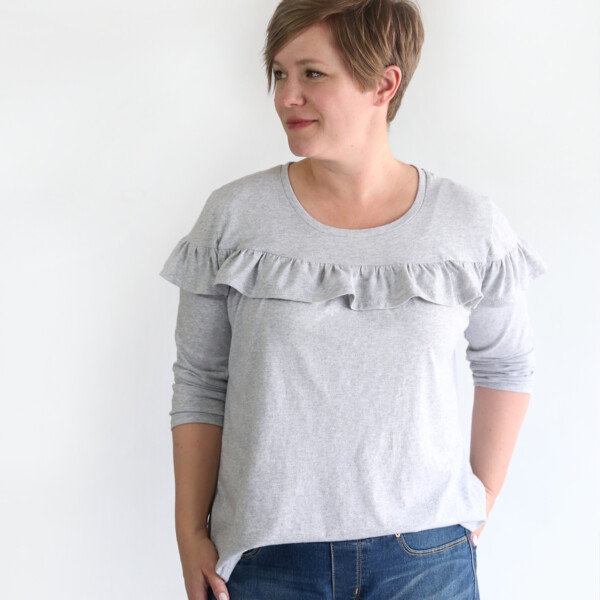
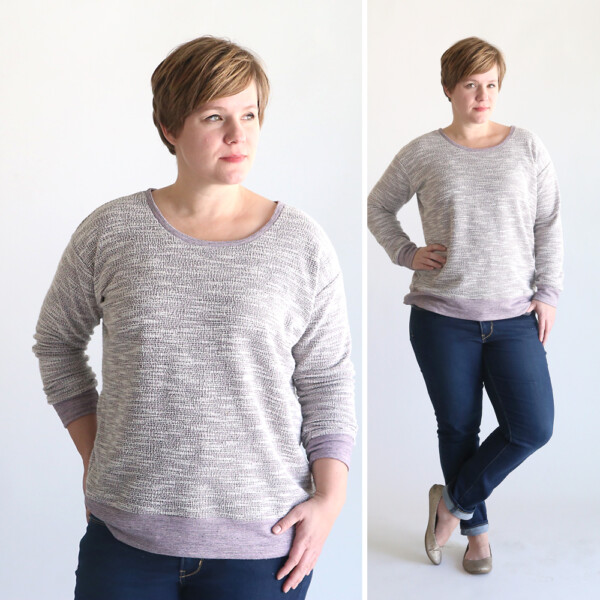
I’ve been enjoying the slouchy sweatshirt I made a few weeks ago and wanted to make another one, but in a lighter weight fabric for spring. And I decided to add some ties to the front to change things up a little. So today you can download a free tie front add-on pattern for the slouchy sweatshirt.
You’ll want to read through the original perfect slouchy sweatshirt tutorial first, so you know how to sew one up. Then I’ll explain here what modifications you’ll make to add the tie front.
You’ll need 1.5 – 2 yards of 60 inch wide knit (stretchy) fabric for this top, which is a women’s size L. Prewash and dry your fabric.
You can download the free slouchy sweatshirt pattern by clicking here. Print it out as directed in that tutorial, at 100% or full size. Butt the pages together and tape together, then cut it the pattern.
You can download the tie front add-on pattern by clicking here. It prints on 3 pages and looks like this:
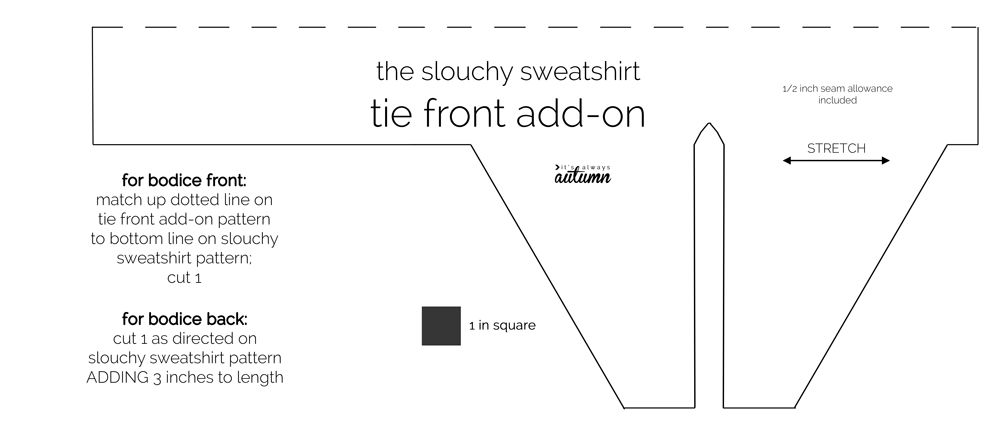
Ok, for the tie front variation you will need to cut two sleeve pieces as directed on the normal pattern. Then you’ll need to cut a bodice front and a bodice back. For the bodice front, it’s probably easiest if you print the normal pattern out twice. Then print the tie front pattern our and match it up to the bottom of the bodice patterns, as shown here:
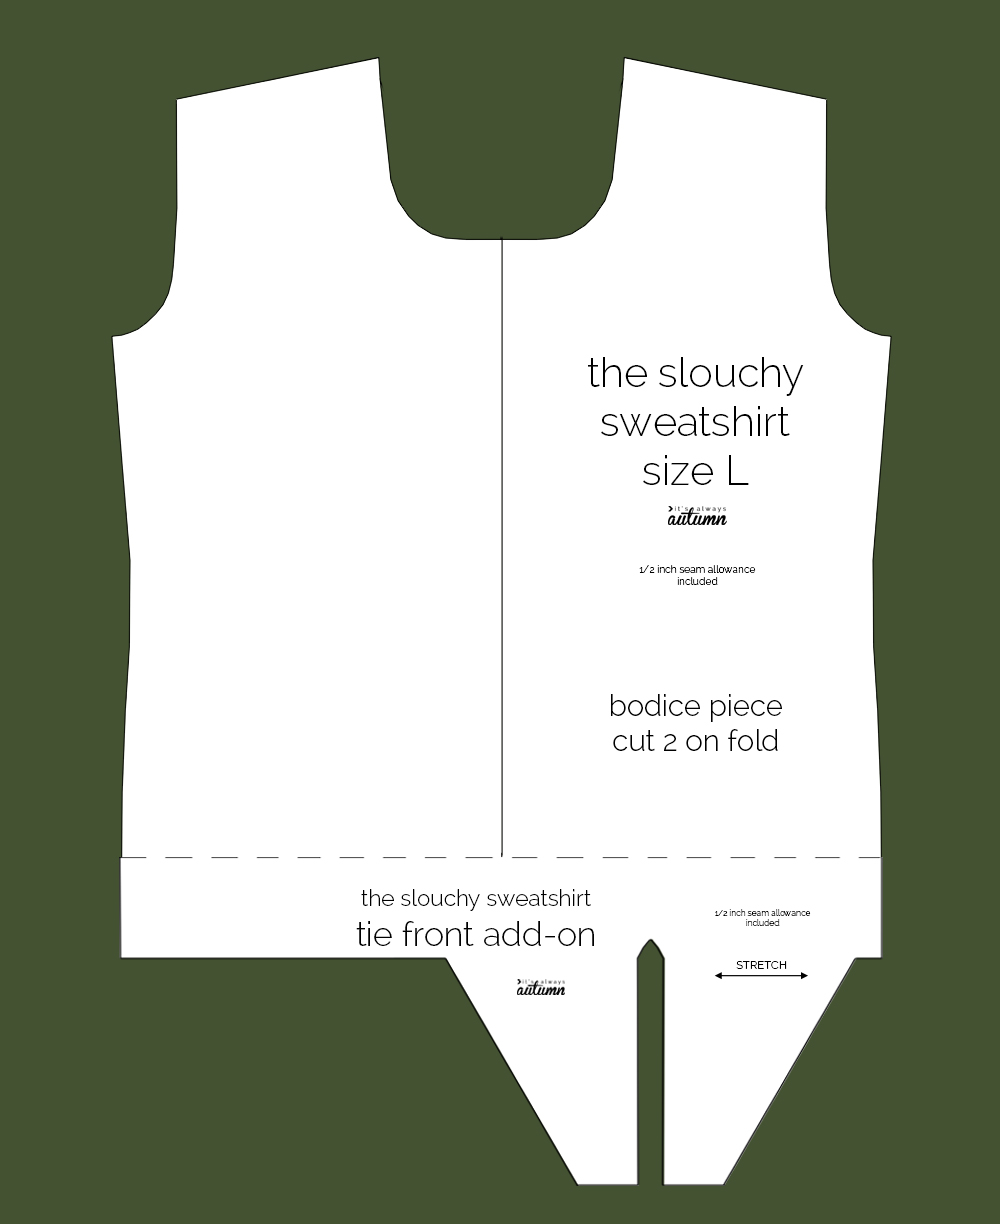
Then for the bodice back, just cut another one of the shapes above, except cut it straight across the bottom (without the ties).
You’ll also need neckbinding as directed on the original pattern, but you will not need a hem band or sleeve bands.
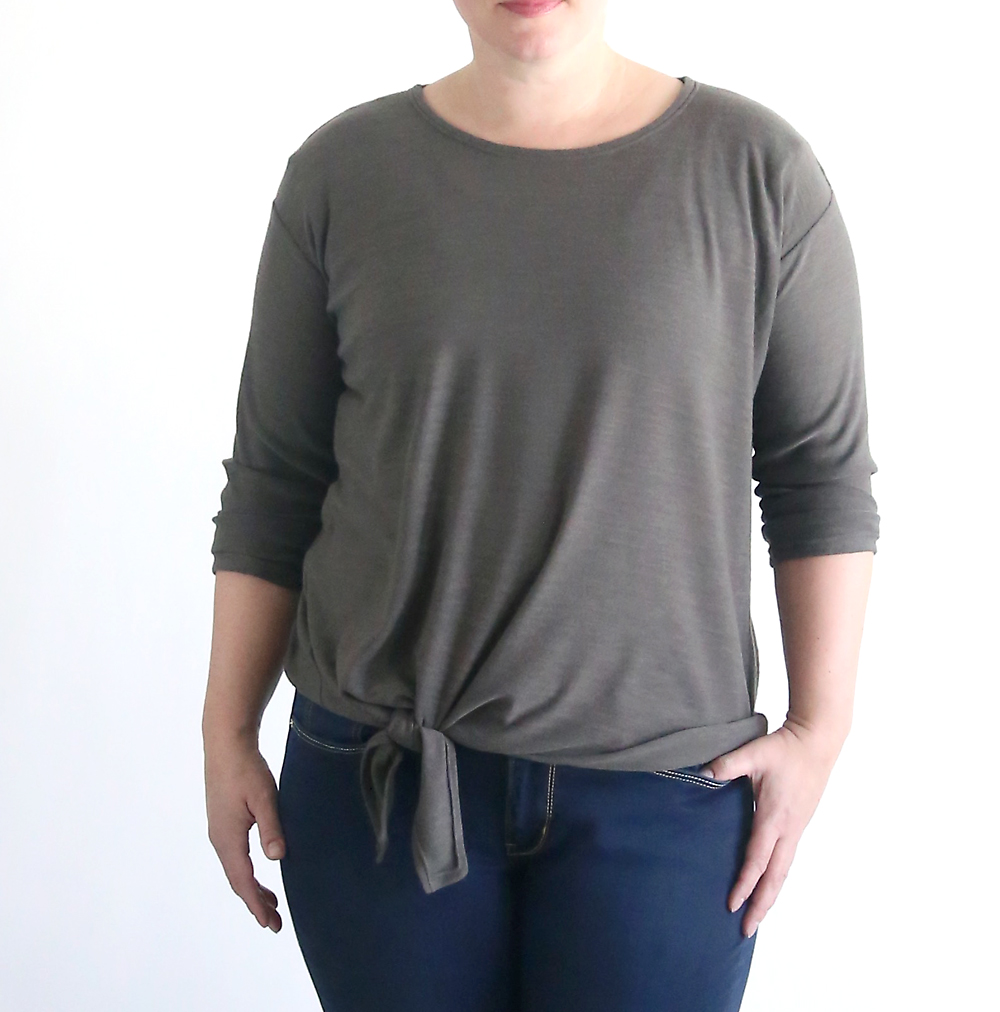
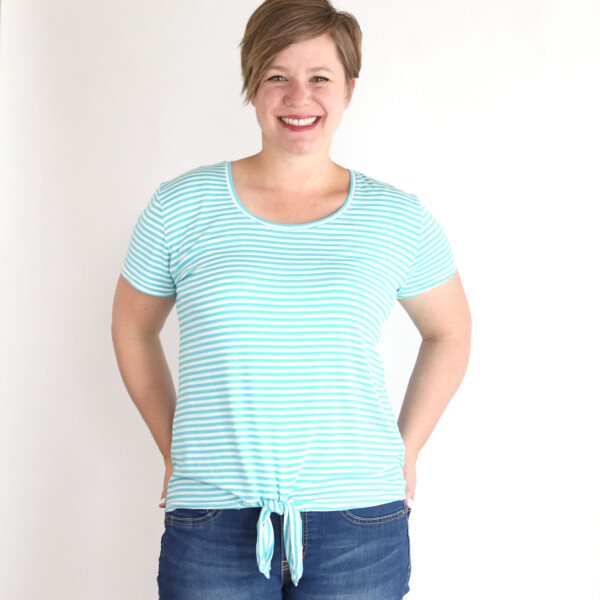
Sew the shirt together as directed in the original tutorial, finishing the neckline and hemming the sleeves to the desired length (I made mine 3/4 length). It will look like this:
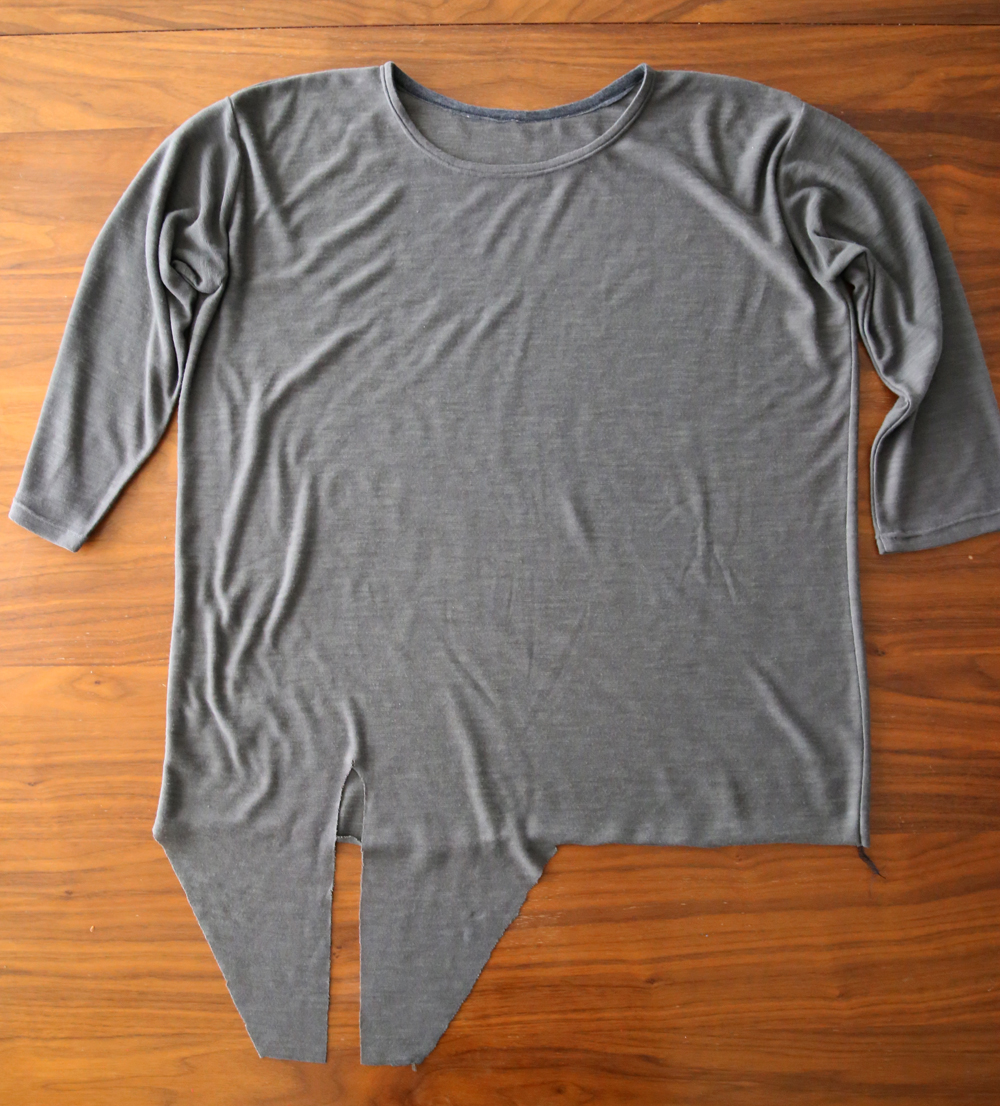
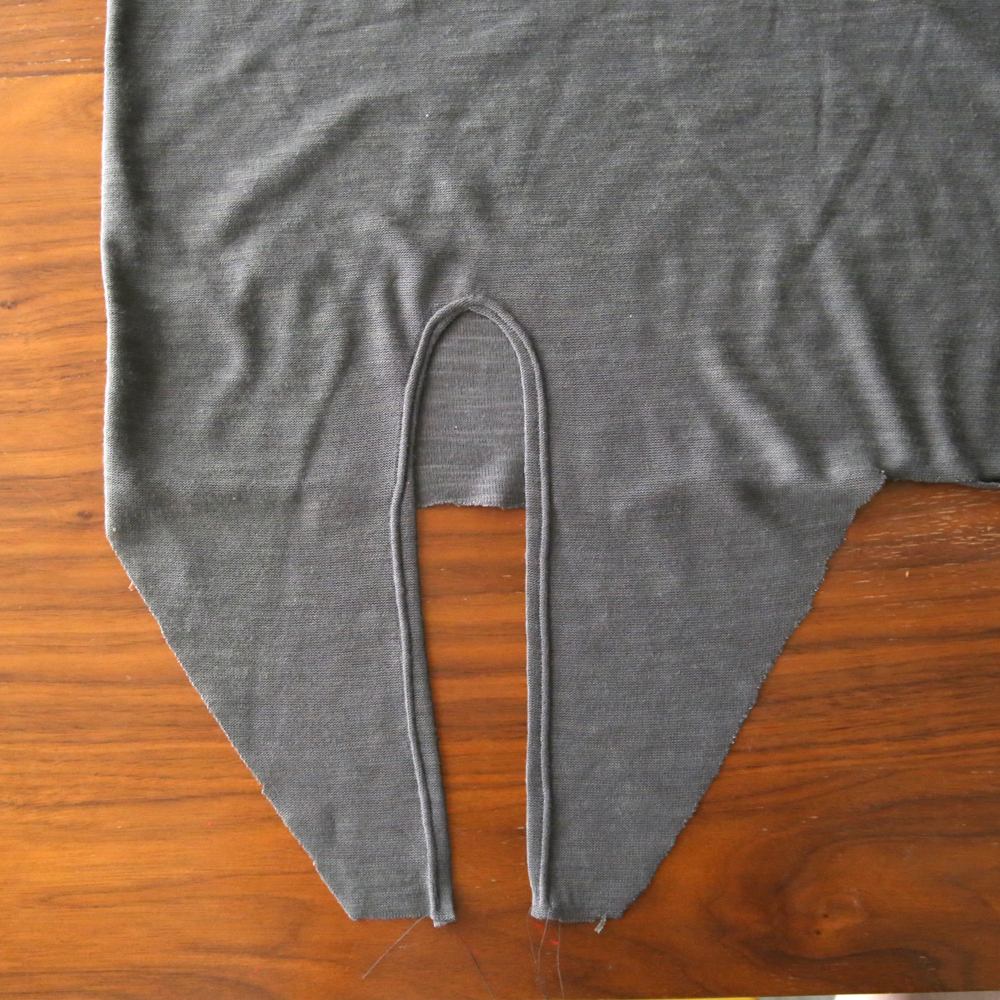
Then we just need to hem the bottom of the shirt, including the ties. You will need to use a double needle or a zig zag stitch for this hem to make sure it can stretch. Start with the inside of the ties. Turn the fabric on the inside of the ties up 1/4 of an inch, press, and sew. If it ends up looking a bit wonky (like mine do) don’t worry – once the ties are tied you’ll never notice the hem.
Once that is done, turn up the bottom of the entire shirt about 1/2 an inch, press and sew (again with a double needle or zig zag).
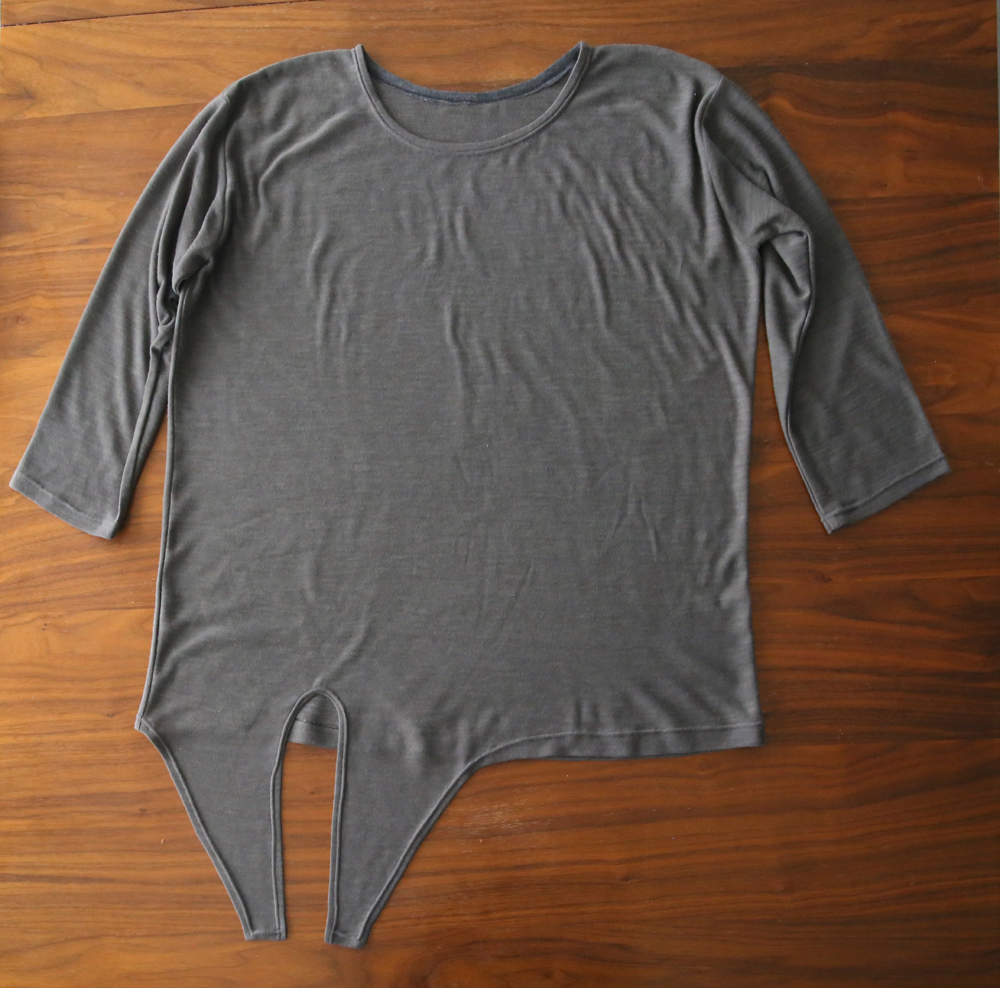
That will finish off your shirt and it’s ready to wear!

Sharon Gough says
this is just the cutest, I’m going to work on one of your tee’s first then do this! thankfully I am a large YAY..so no pattern adjustments
Helen Young says
Thank you so much. I am a large/x-large and it sure is nice to be able to make something with an easy pattern. The fact that you model the tops is a plus. Keep up clothed. Hugs Helen
Dara says
Very Cute! thank you!