
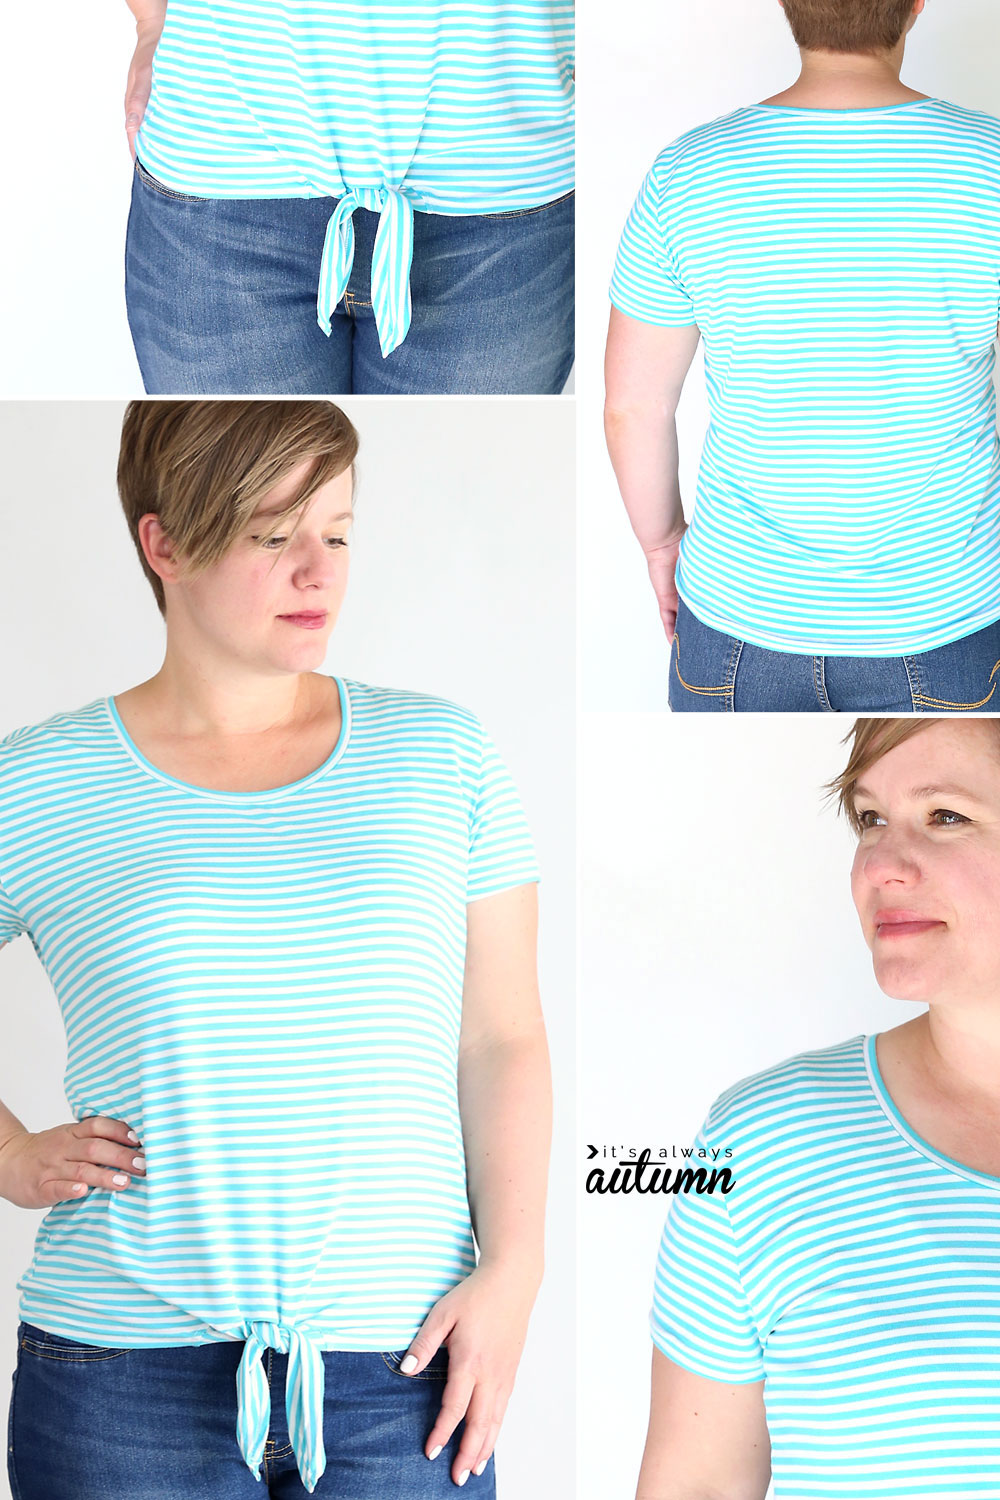
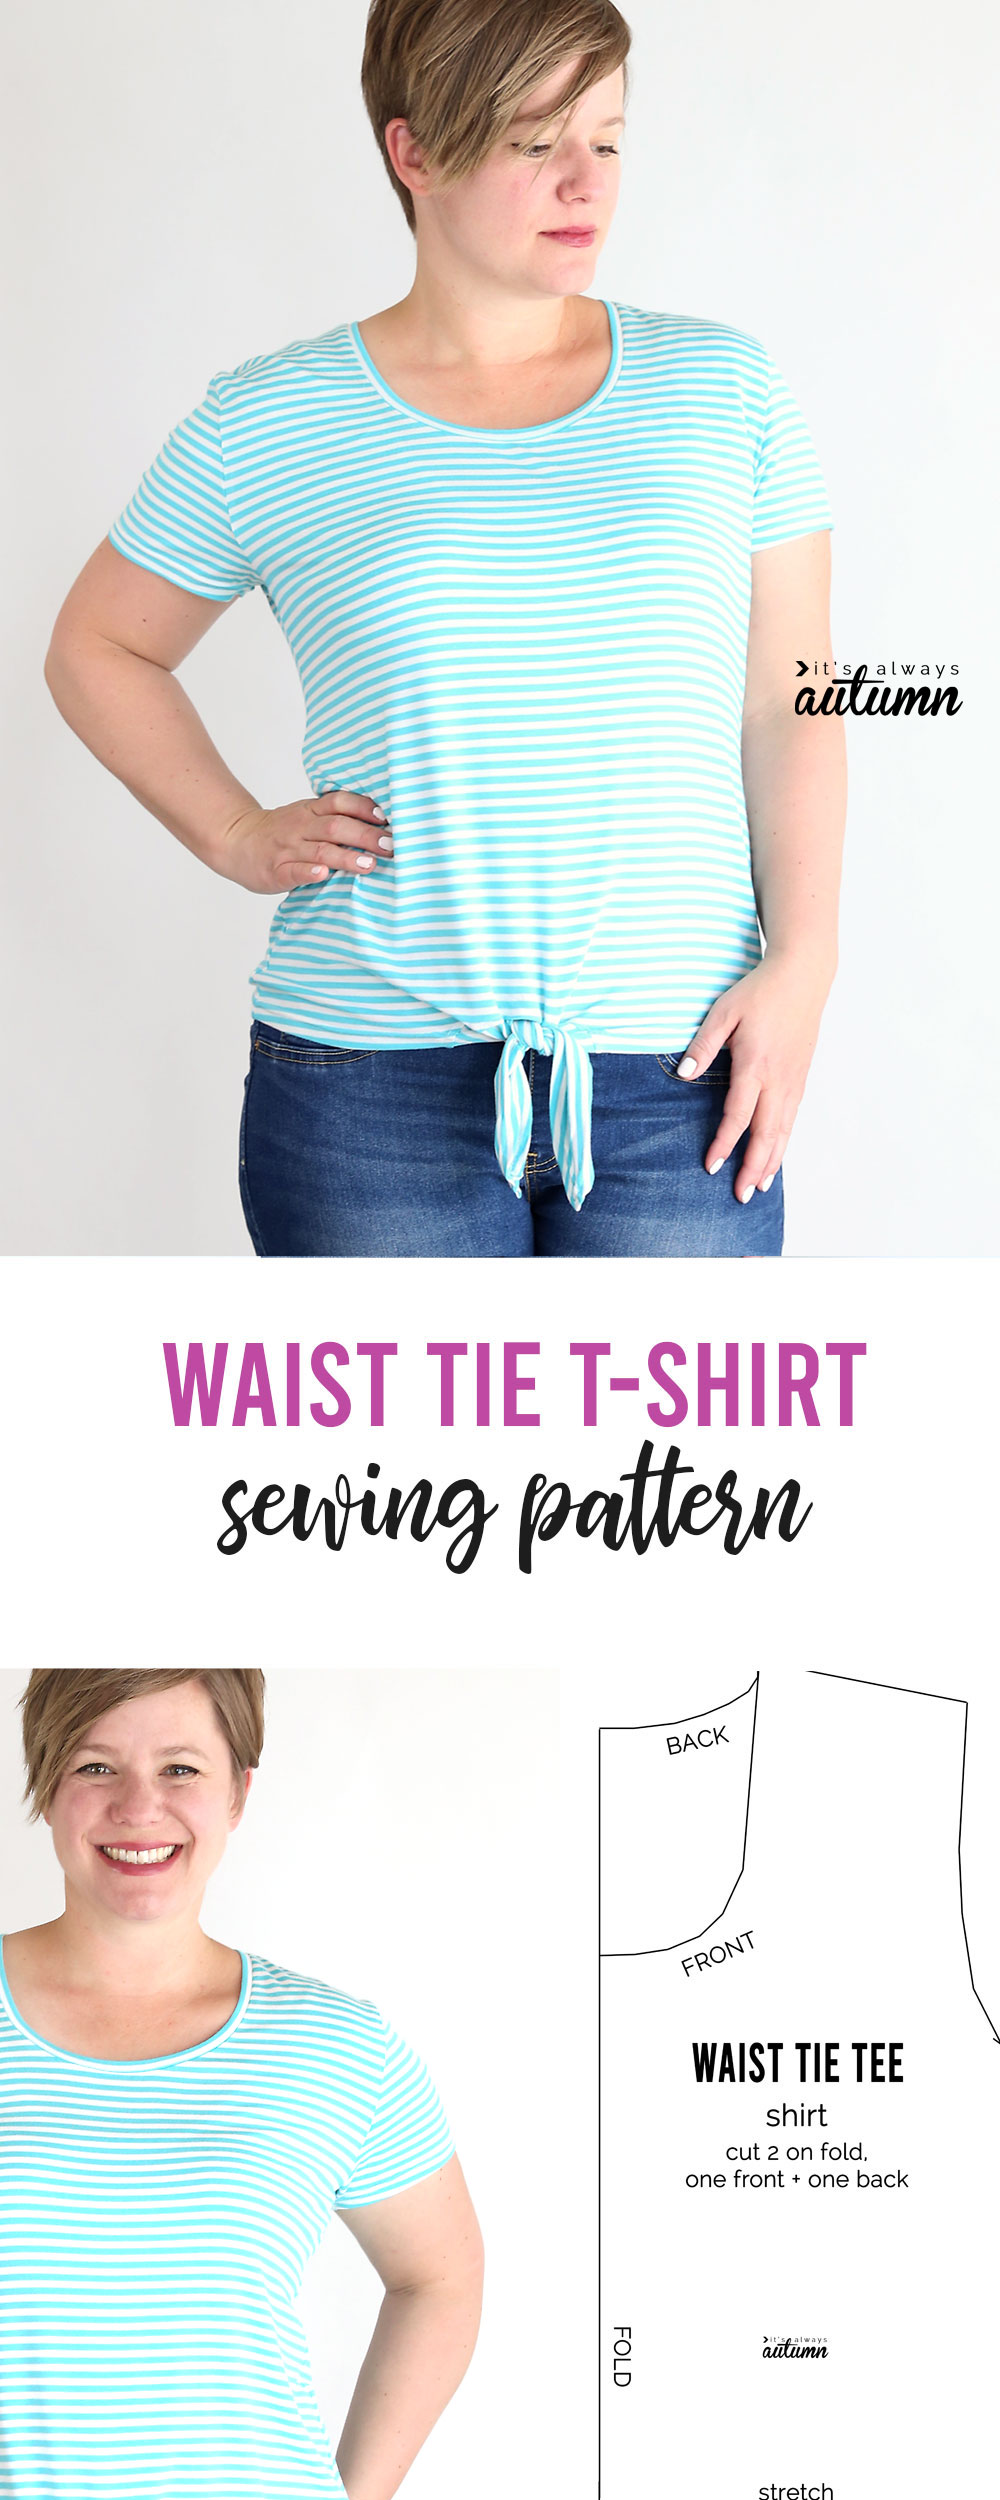
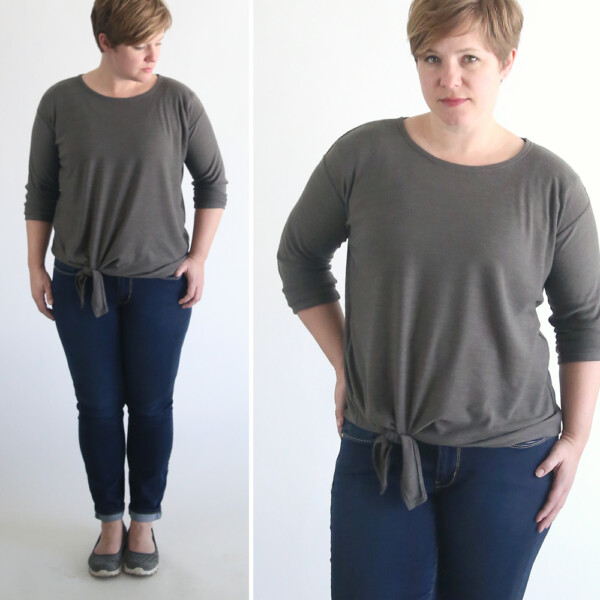
In today’s post: Make a cute waist tie t-shirt with this free sewing pattern in women’s size L.
I got dressed yesterday morning and started laughing because I realized I’d worn jeans and a grey t-shirt three days in a row (it’s my favorite t-shirt, so I actually do have three of them!). I always think I’m going to buy and wear dressier clothes, like blouses and jackets and other cute stuff, but when it comes right down to it that feels like too much work, so I end up in jeans and a t-shirt. Pretty much every day. Oh well. ?♀️
At least when I sew I try to add a little variety to my t-shirt lineup. Since I’ve seen so many shirts this season with ties at the waist, I drafted up a waist tie t-shirt pattern.
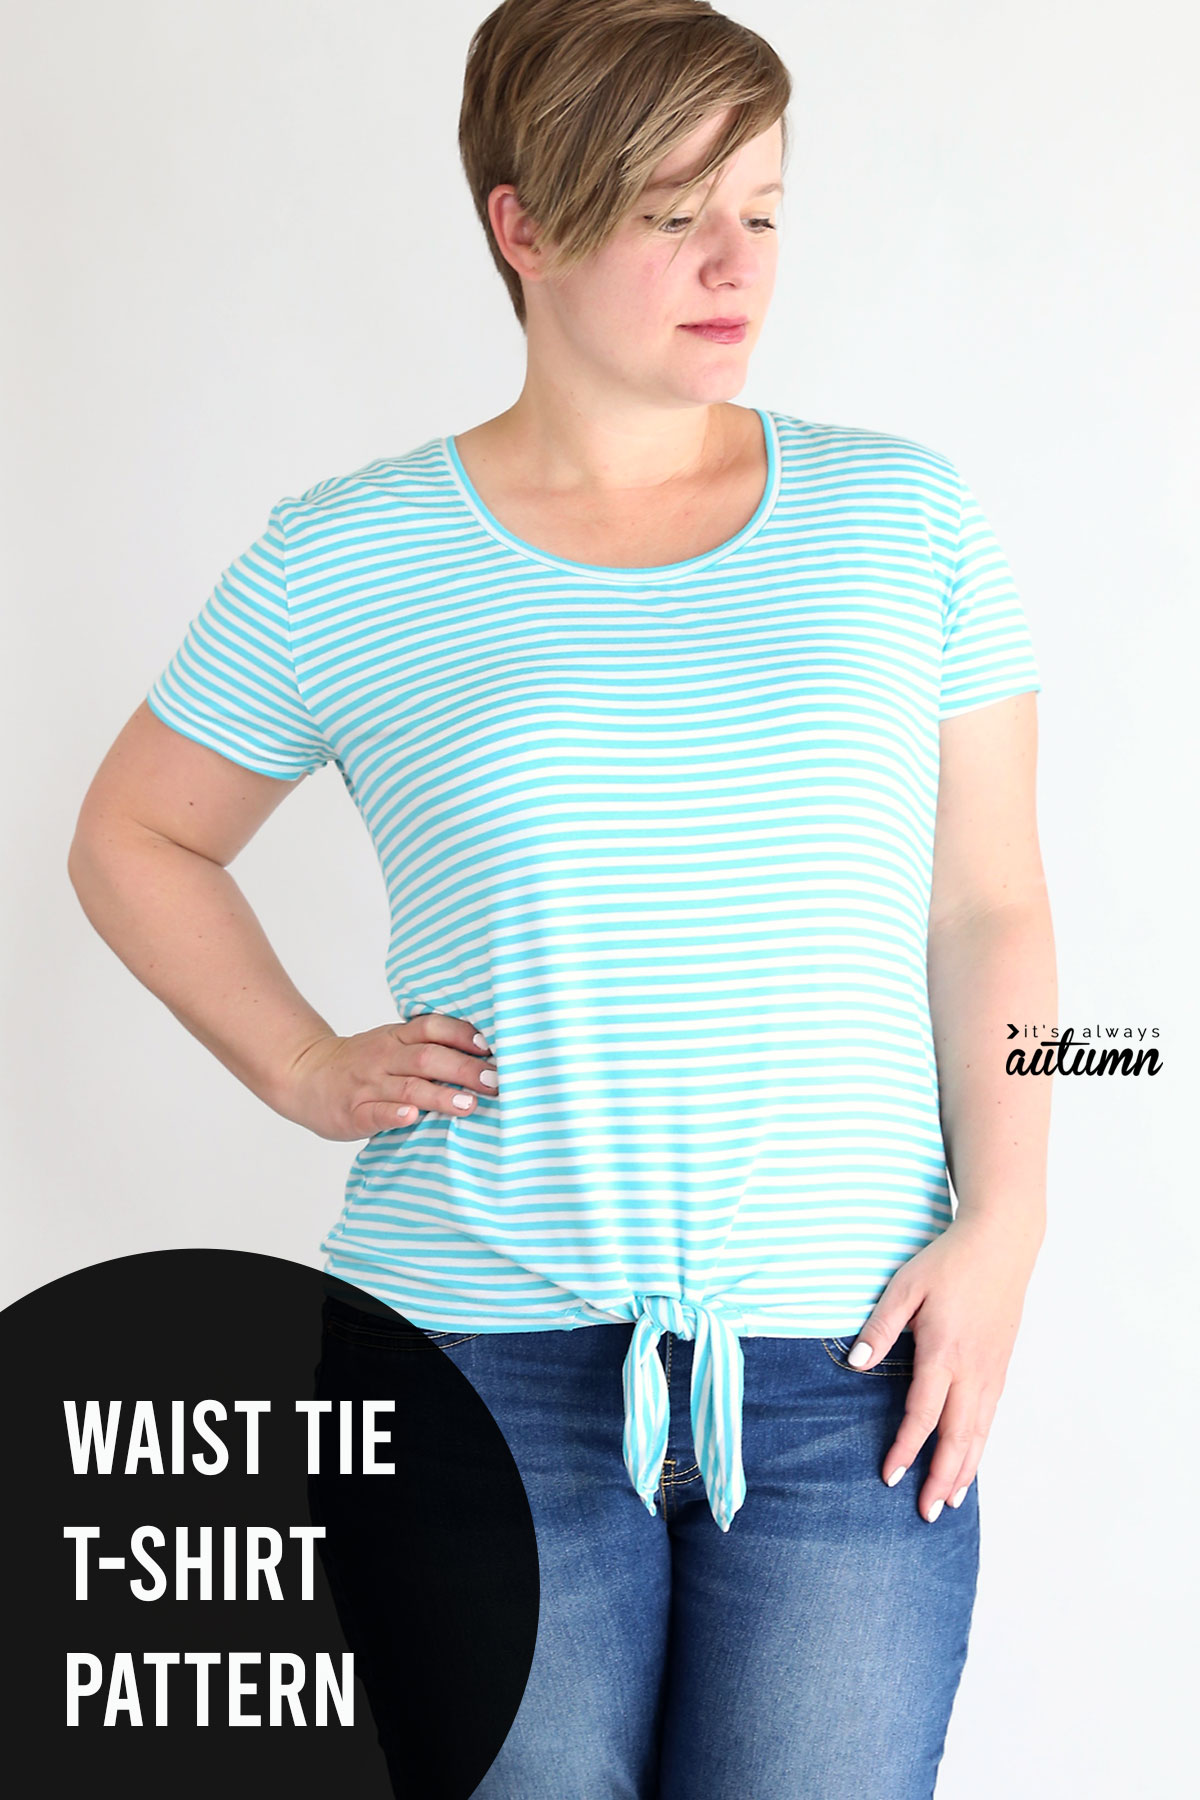
Like all of my t-shirt patterns, this one is easy to make. I started with my Classic Tee pattern and shortened it a few inches, then added ties at the waist.

It actually hits a bit below my waist because I wanted to make sure it covers the top of my jeans without any peekaboo at the waist, so if you’d like it to hit at your true waist you’ll probably want to take two or three more inches off the length.
The Waist Tie T-Shirt Sewing Pattern
This free sewing pattern is a women’s size L, sized for a 38 inch bust with a relaxed fit.
You will need about a yard and a quarter of 50-60 inch wide knit (stretchy) fabric. Please wash and dry your fabric before you begin.
You can download the waist tie t-shirt pattern by clicking here. It will print on 8 pieces of 8.5×11 inch paper. Please be sure to print it out at 100% or full size. You can print page 8 first and measure the test square to ensure you are printing at full size – the square should measure exactly 1 inch.
Butt the pages together and tape them without trimming. The pattern will look like this:

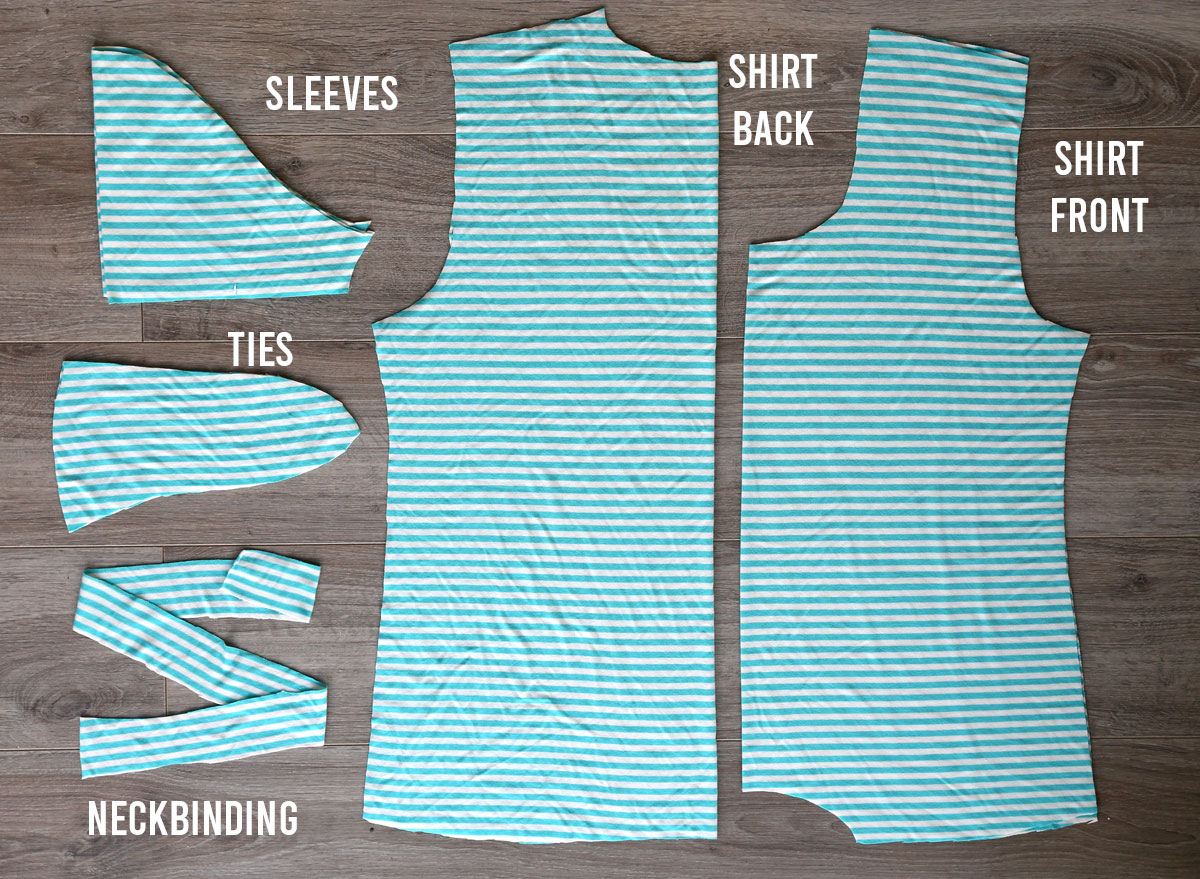
Step 1: Cut your pattern pieces
Cut out the pieces as directed on the pattern. You will have two sleeve pieces (shown folded). You will also have a shirt back piece, cut with the higher neckline and the standard hemline (shown folded). Then you will have a shirt front piece, cut with the lower neckline and the curved section at the hemline (shown folded). Finally, you will also have two tie pieces, and a long neckbinding piece.
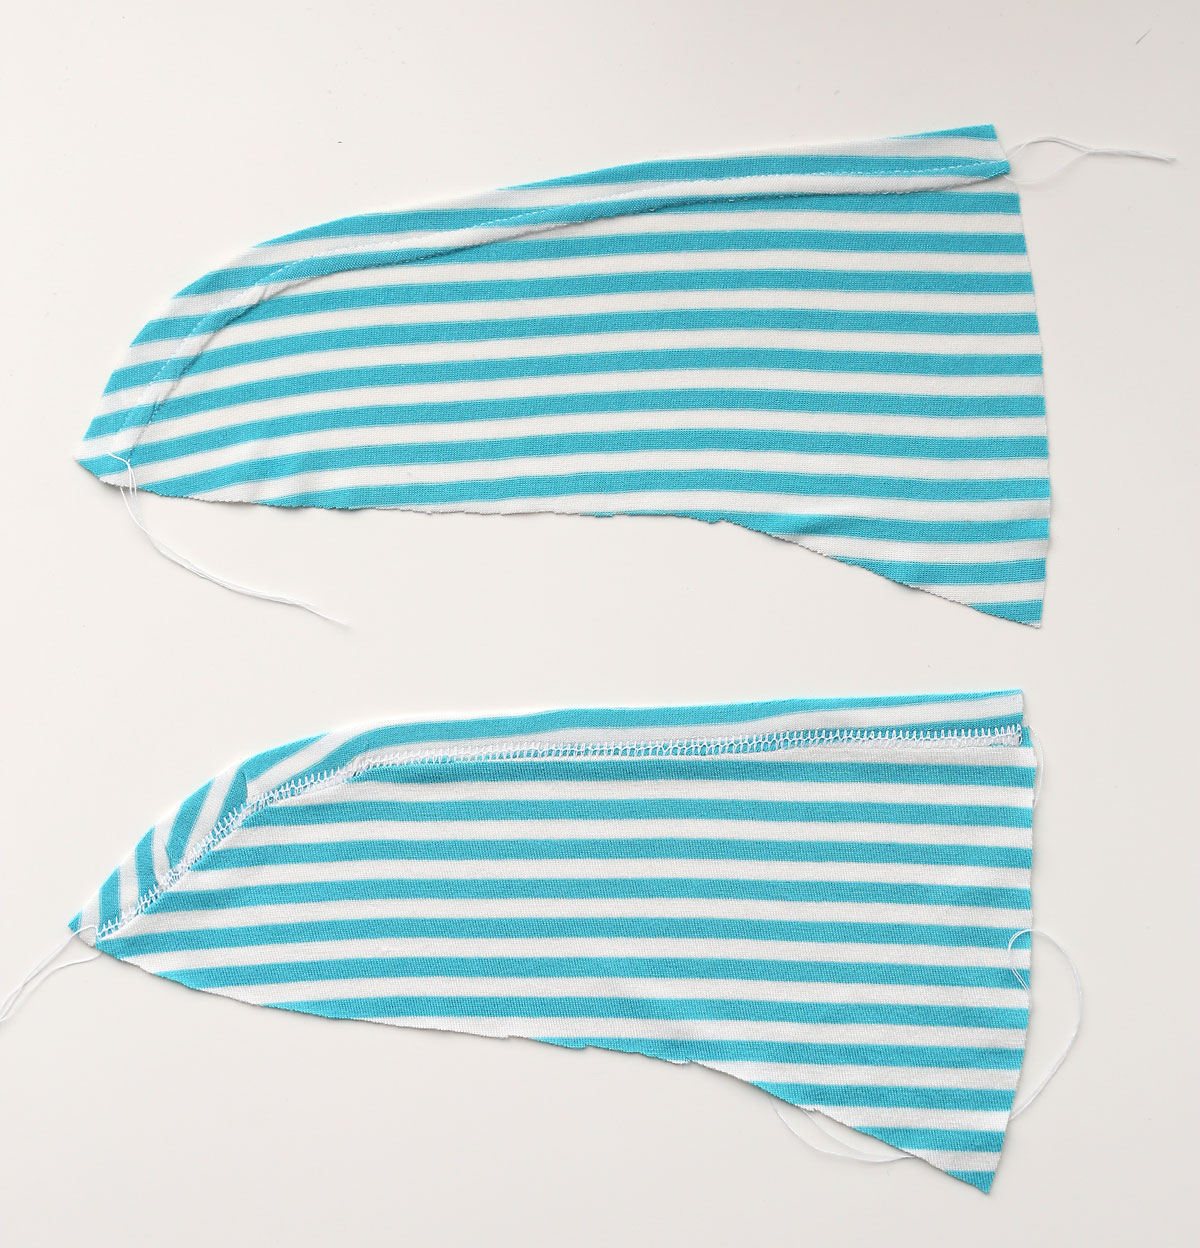
Step 2: Hem the ties
Note on the pattern which side of the tie is the top. Fold the top under 1/2 an inch and hem using a stitch that will stretch. I used a double needle here, but you can also use a zigzag. Remember that the underside of the ties will sometimes be visible when wearing the shirt, so try to catch the edge of your hem in your stitch so it looks tidy. The top tie below shows the double needle hem from the right side, and the bottom tie below shows the double needle hem from the wrong side.
Step 3: Attach the ties to the shirt front
Lay the shirt front flat on a table, with the right side facing up. Grab one of your ties and lay it on the shirt front with the right side facing down. The hemmed portion should be on top. Match the bottom corner of the tie (as shown below) with the bottom corner of the cut-out curve on the shirt. Pin.

Continue to pin the raw edge of the tie to the curve. Repeat with the other tie on the other side of the curve. When both ties are pinned to the curve, there should be just under an inch of space between them at the top of the curve (as shown below). Remember, right sides are facing here.
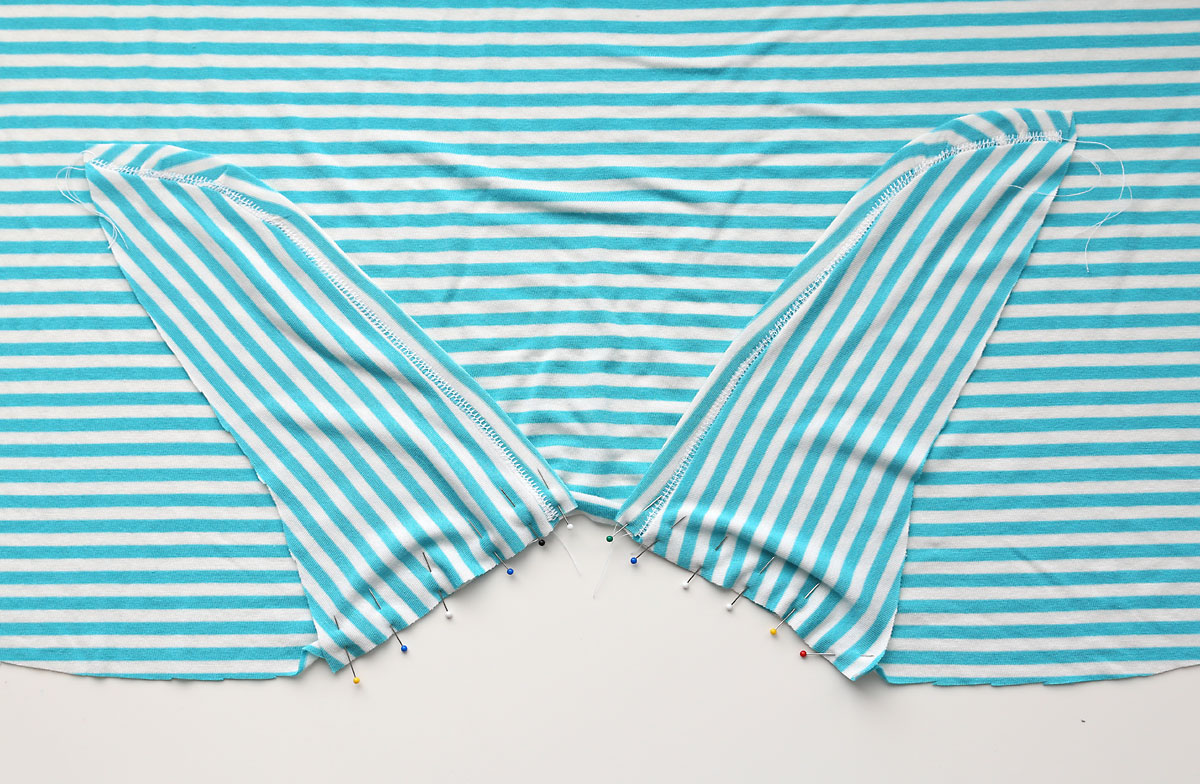
Sew the ties to the curve, using 1/2 inch seam allowance, taking care not to stretch out the curve as you sew. Press the ties down and the seam allowance up.

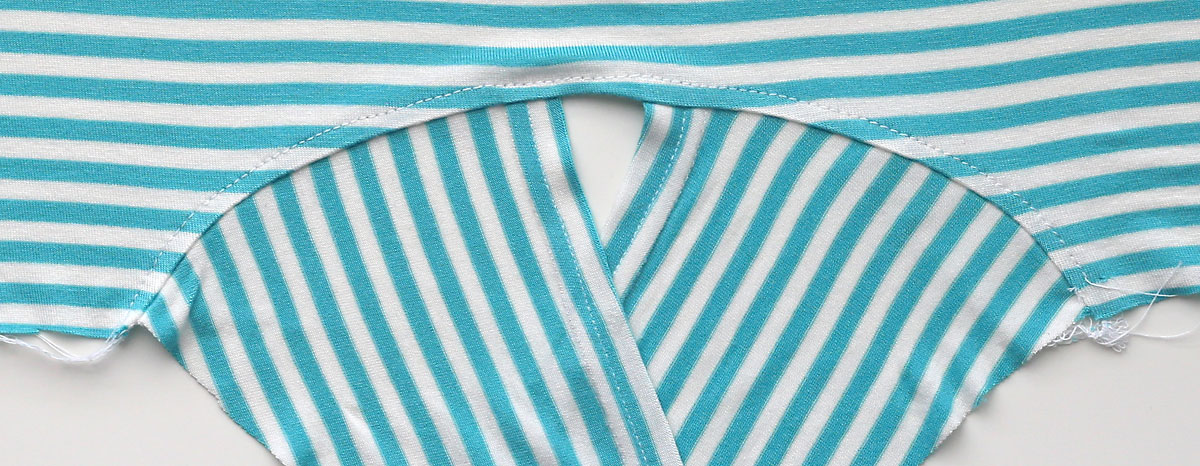
Topstitch the seam allowance, as shown below. Press again with plenty of steam.
Step 4: Assemble the shirt
The remaining shirt assembly will follow the instructions given in the Classic Tee post. For detailed instructions on attaching the neckbinding, visit this post: How to sew a t-shirt neckline
Step 5: Hem the shirt
Before hemming, try the shirt on and tie the ties. Determine whether you’d like to shirt any tighter, and take in the side seams if needed.
To hem, fold up the bottom of the shirt 1/2 and inch and press. Continue folding up 1/2 an inch when you get to the ties. Start at the end of one tie and sew along the hem, then go all the way around the bottom of the shirt, and finish hemming on the other tie. Be sure to use a stitch that will stretch for this hem (double needle or zigzag) and make it as tidy as possible. Hem the sleeves as well, and you’re done!
Linda Tamkin says
Thank you so much for this pattern, it’s really lovely 😊
Sherri says
I am so happy I found your site; have been looking for a pattern just like this! Thank you!
Nancy says
Thank you for another great pattern. I have read somewhere (so not my original idea) that you can cut a complete front pattern, not on the fold,without cutting the tie cut out. Trace the cut out and then move the cut out for the ties to the side, if you want to change the tie location. I’m going to give it a try and will let you know if it works!!
Danielle says
Woo hoo! I can’t wait to make this shirt. It’s so cute! Plus that color on you is fantastic!