
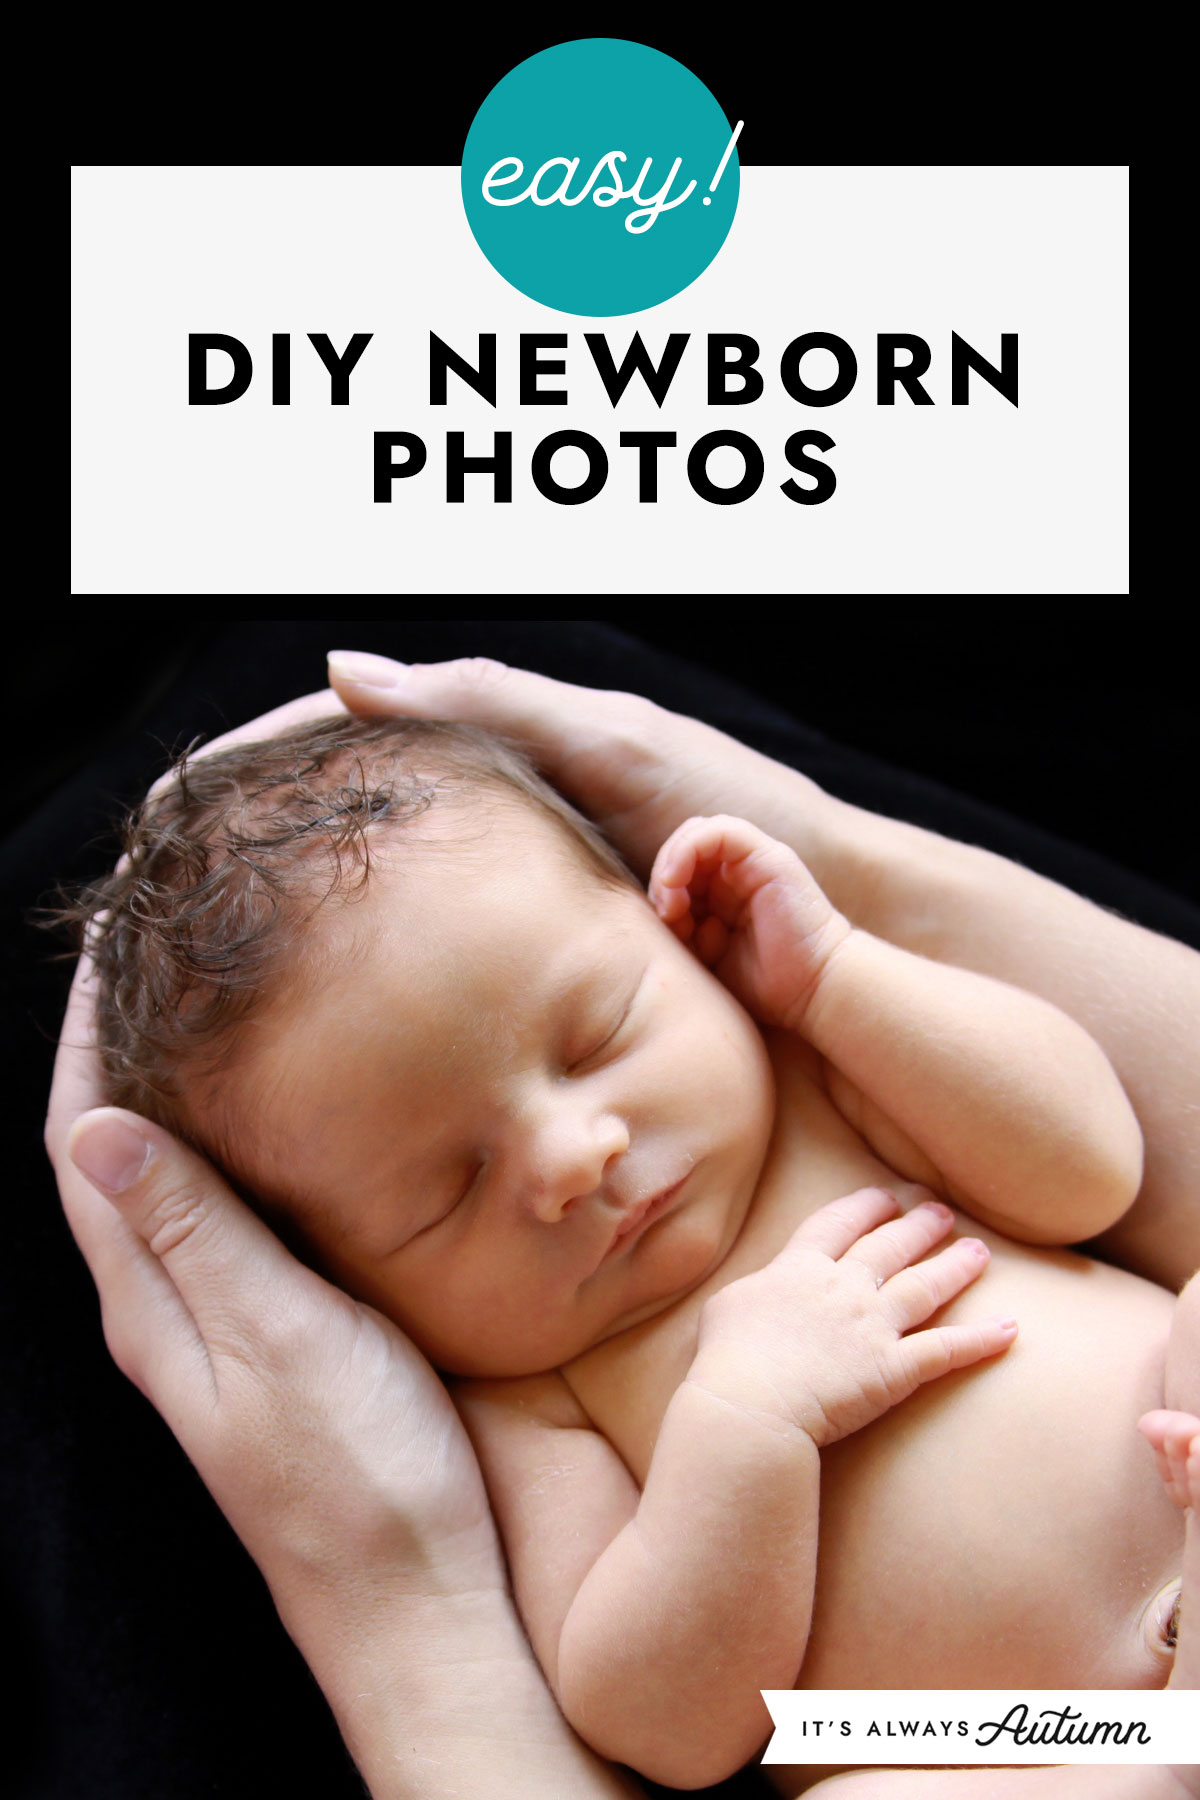
In today’s post: Learn how to take amazing photos of your newborn baby at home! Learn about setup, props, posing and more in this easy to follow guide.
If you want amazing photos of your new baby, the easiest way to get them is to invest in a newborn photo session performs by a professional photographer. However, if you don’t have hundreds of dollars to spend on a newborn session, YOU can get great photos of your baby at home. Follow this guide to do your own DIY newborn photoshoot and capture images of your baby that you’ll treasure forever.
Related: How to Take Pictures of Your Newborn Baby in the Hospital
Today’s post is Part 1 of my DIY Baby Photoshoot series, and it will cover all the basics you need to know for newborn photography. After that you can read Newborn Photo Ideas Part 2: Posing.
Ensure Your Baby’s Safety
PLEASE NOTE: YOU MUST ENSURE YOUR BABY’S SAFETY during a photoshoot. Any time you are taking pictures of a baby, you MUST have another adult acting as a spotter that stands near the baby at all times. Any backdrops that you use must be secured. Do not try any poses that aren’t safe, and when trying any poses I may describe, ensure another adult is within arms reach of the baby AT ALL TIMES. You are responsible for ensuring the safety of your children or anyone else you photograph.
DIY Newborn Photography
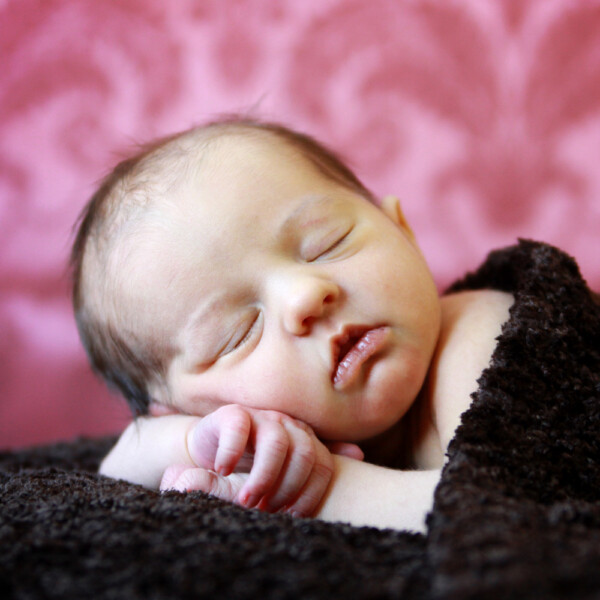
When my first son was born, I had no clue as to what made good newborn pictures. I ended up with a lot of shots that look like this:
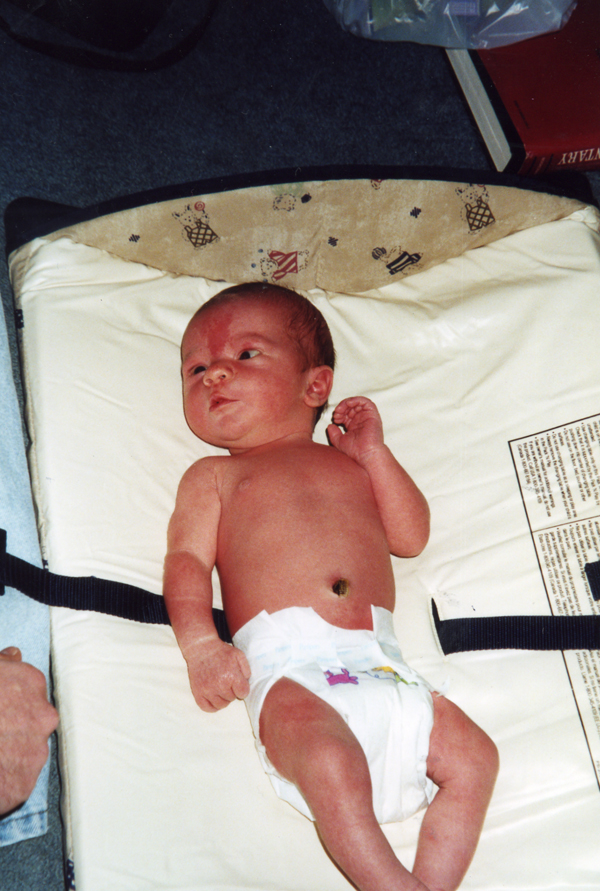
Yes, this was back before digital photography, so we didn’t have the chance to take a billion pictures and keep only the good ones – we just kind of had to take what we got. But still, it’s kind of sad that I only have pictures like this when I could have had photos that are so much better if only I’d known what I was doing.
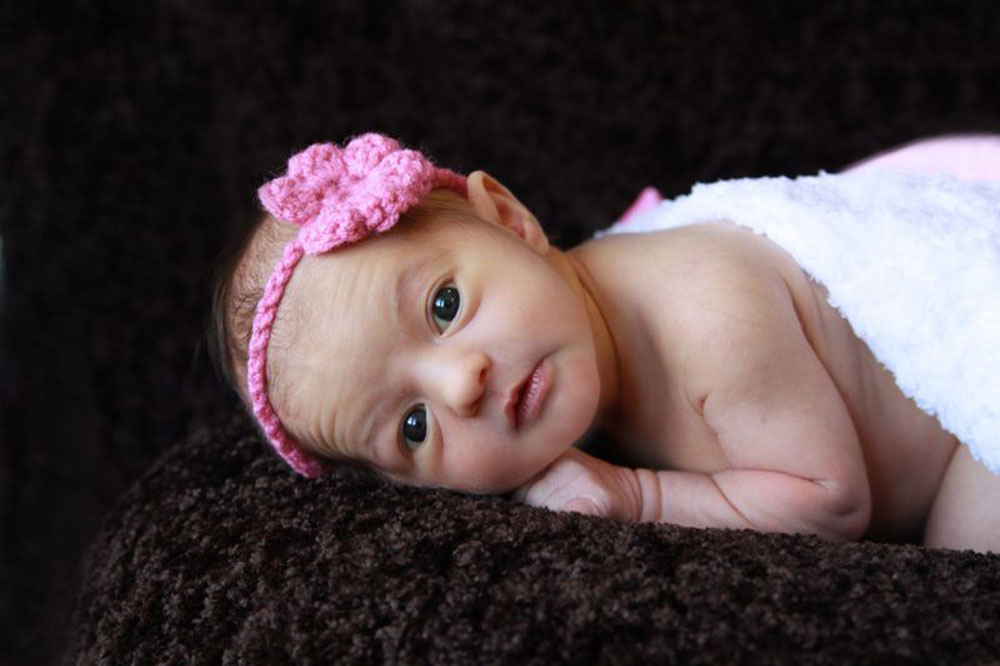
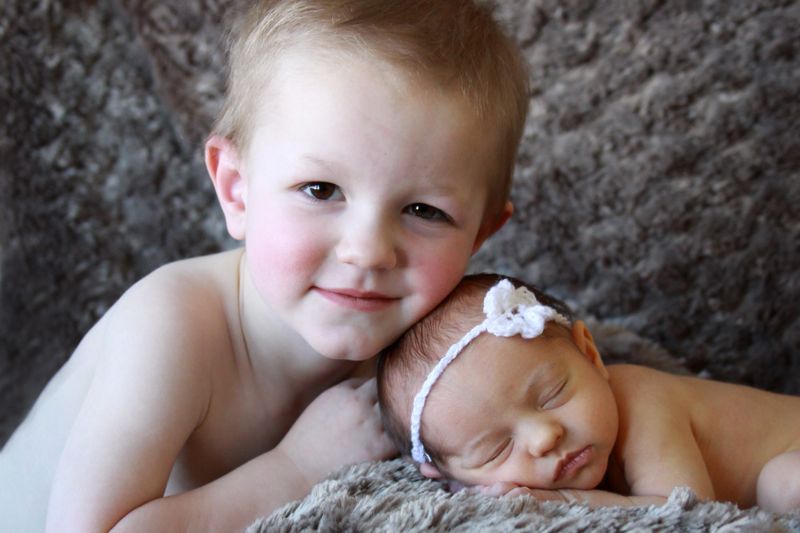
By the time our fifth baby (and only girl!) was born, I’d figured a few more things out, and was able to take photos like this:
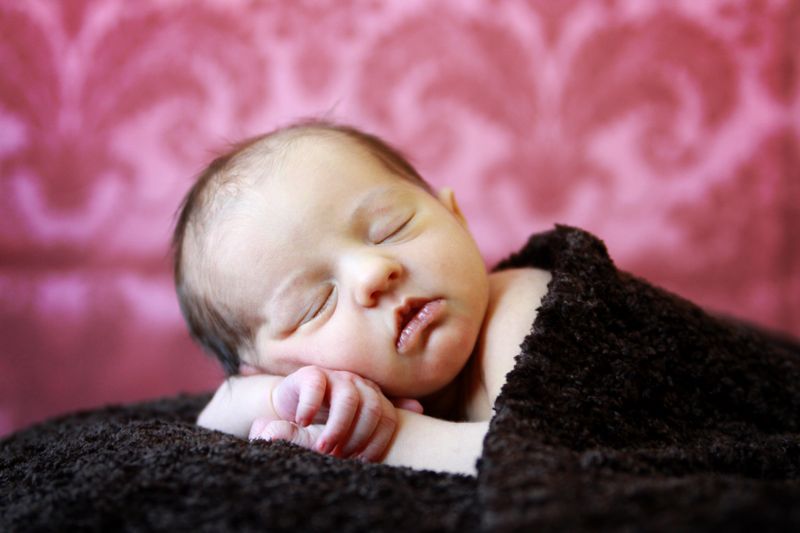
Better, right? I only wish I knew eleven years ago what I know now. Hopefully the newborn photography tips I share in this series will help you avoid portraits that look like that first one, and learn to take photos you love. In today’s post we’ll cover lighting, setup, and general tips for a newborn photo shoot.
The Best Time to take DIY newborn photos
Most people recommend holding a newborn photo shoot within the first ten days of your baby’s life. When babies are this young they are generally very sleepy, which is a good thing for photos. Why? Because a sleeping baby isn’t crying, doesn’t have crossed eyes, doesn’t have a huge pacifier in her mouth, and isn’t flailing her arms about uncontrollably (all of which happen quite regularly when she’s awake). Sleeping newborns look sweet and peaceful, while awake newborns can look a little awkward. If you start your photoshoot while the baby is asleep you can get lots of sweet sleepy pictures, and then a few more when she wakes up.
Another reason to hold a newborn photo shoot soon after birth is because babies change so quickly the first few months, and you don’t want to miss the chance to photograph that uber tiny newborn look. Does this mean you can’t get good pictures when your baby is three weeks old instead of seven days? Of course not. But earlier can be simpler, which is always a good thing.
Plan to set up everything you need for your photoshoot early in the day. Then keep your baby active and awake for a while, then feed her, then get ready to take pictures when she starts to fall asleep.
How Long Will it Take?
Plan on spending at least an hour to get some good shots. I generally spend two hours when I photograph a newborn (some pros spend twice that much time). If you’re taking pictures of your own baby, you could also plan to spend just half an hour but try once a day for the first week. Figure out what will work best for your schedule, but realize this won’t be a quick process. Also, the photoshoot will be much easier if you have someone to help you, so rope your husband/mom/friend into being your assistant.
What Should the Baby Wear?
I think newborns look best in very simple clothing, like a plain white onesie, or naked or in a wrap (wrapped in a blanket). Most baby clothes are way too big for newborns and just don’t photograph very well. Keeping the clothes extremely simple keeps the focus on the baby. However, naked babies are cold babies, so keep a space heater going right next to your baby the whole time you are photographing him. You’ll end up covered in sweat, but your baby will stay comfortable.

Lighting tips for newborn photos
For good portraits you must turn off your flash. Your camera’s pop-up flash does more harm than good in most photography situations, so make sure you aren’t using it when you try to photograph your newborn. Instead, find a good source of natural sunlight, like a large window or glass door, and set up close to it. If you have enough light coming in you won’t need either your flash or your overhead lights (which are also not a good plan when taking portraits). If it’s warm enough you can even set up in your garage with the door up to allow lots of light in. Start paying attention to the light in the room in your house with the largest window. Notice when the room is bright, but you can’t see a bright outline of the window on the floor in front of it – you want soft light, not harsh light (see this post for more explanation of this). That’s the time of day when you’ll have the best light for your newborn photo shoot.
Camera and equipment for newborn photos
You can get good photos of your baby using any camera, even if you shoot on auto. I find that most photos taken on auto tend to be underexposed, so if you are going to shoot on auto, read my post on brightening photos in post processing.
If you have a dSLR and any lenses with wide aperture capabilities (like a 28-70 2.8 or even a 50 1.8) I’d recommend using one of those lenses and keeping your aperture open fairly wide, around 2.8. That will help to blur the background and make the photographs look a little more professional. If not, don’t sweat it – turning off your flash will force your camera to use the widest aperture it’s got (using the portrait setting will also help here – if you’ll be taking the photos with your iPhone, definitely plan to use portrait mode.). Your camera may have a harder time keeping the shutter speed high if it’s not very bright in your house, so consider using a tripod if you have one. Better equipment sometimes makes for better photos, but knowing how to use what you have is really more important. If you have a few months before your baby is born, spend a little time getting to know your camera. If you don’t have time to practice, following my tips will still help you improve your photos.
Newborn photo setup
You don’t need a studio to take newborn photos! All you need is a place to safely set the baby and a plain background that’s free of clutter. Here’s a photo of where I take newborn photos. Let’s look at the important parts.
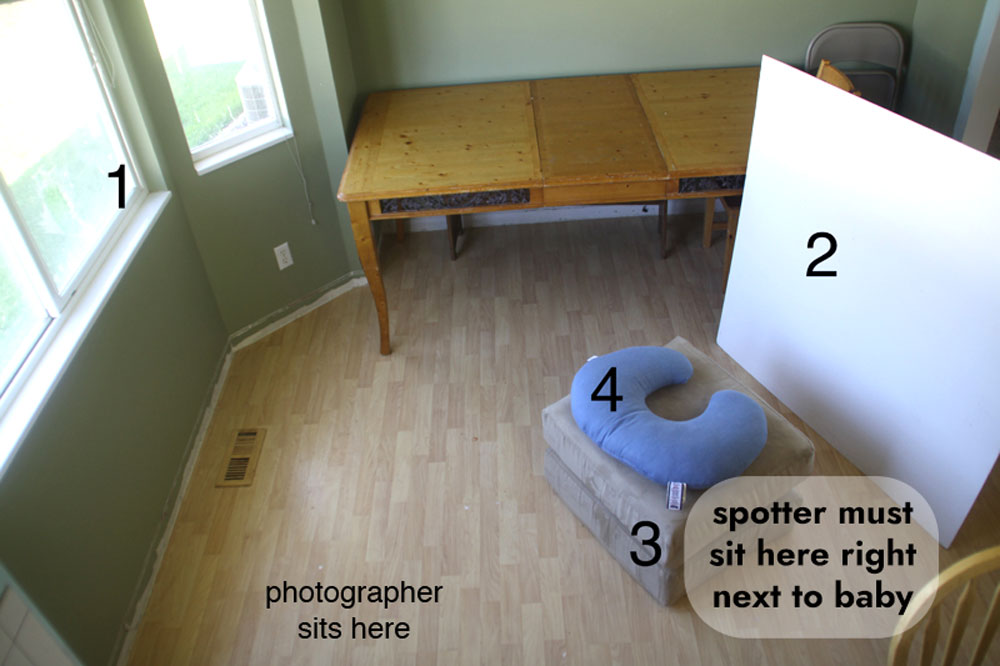
- Large window. A window that goes all the way to the floor would be even better, but I don’t have one, so I make do with what I do have. Keep the curtains open to let plenty of natural light in, but remember not to take photos during the time of day when the sun is shining directly into the room.
- Backdrop board or blanket. I have a couple DIY backdrop boards that I made for about $10 each (full instructions in this post). I stand one up against the backs of two of my kitchen chairs and clamp it securely to the chairs. The backdrop boards can be used alone for a solid colored background, or can be used to drape blankets from for more background options. The background should be angled so it faces the right or left side of the window, not the middle of it, as you can see in the photo above. This will allow the baby’s head to be a little closer to the window than her feet, allowing the light to hit her forehead first, causing gentle shadows just under her nose and chin. If you don’t have a backdrop board, stand two kitchen chairs backwards here anyway so you can drape a blanket from them. PLEASE NOTE that if you use a backdrop board it MUST BE secured with clamps to the chairs it stands in front of to assure it will not fall over. You MUST also have another person present standing near the baby AT ALL TIMES to ensure baby is safe and secure. DO NOT do anything that could endanger the baby’s safety.
- Couch cushions. It’s easier if the baby is up off the ground so you can photograph her from all angles, not just from above. But again, remember another adult must be right next to her at all times.
- Pillow, Boppy, or beanbag. It’s nice to have something a little bit soft you can lay the baby on and then move around to help position him. A small bean bag would be perfect, but I don’t have one, so I use a pillow or Boppy.
- Protective plastic (not shown). This is only necessary if you plan to photograph the baby without a diaper on. He will go to the bathroom sometime during the photo shoot (it always happens) so protect your pillow and cushions.
- A spotter. Anytime you are photographing a baby, you MUST HAVE another person to act as a spotter. The other person’s only job is to make sure the baby doesn’t roll off the cushions onto the floor. If you are photographing a newborn it’s extremely unlikely they’ll be strong enough to roll anywhere, especially once they are nestled inside the Boppy pillow or bean bag, but you can never be too safe. So make sure your “assistant” sits on the floor within arms length of the baby at all times during the photoshoot.
Here’s how the set-up looks when you sit down in front of it (as noted in the photo above):
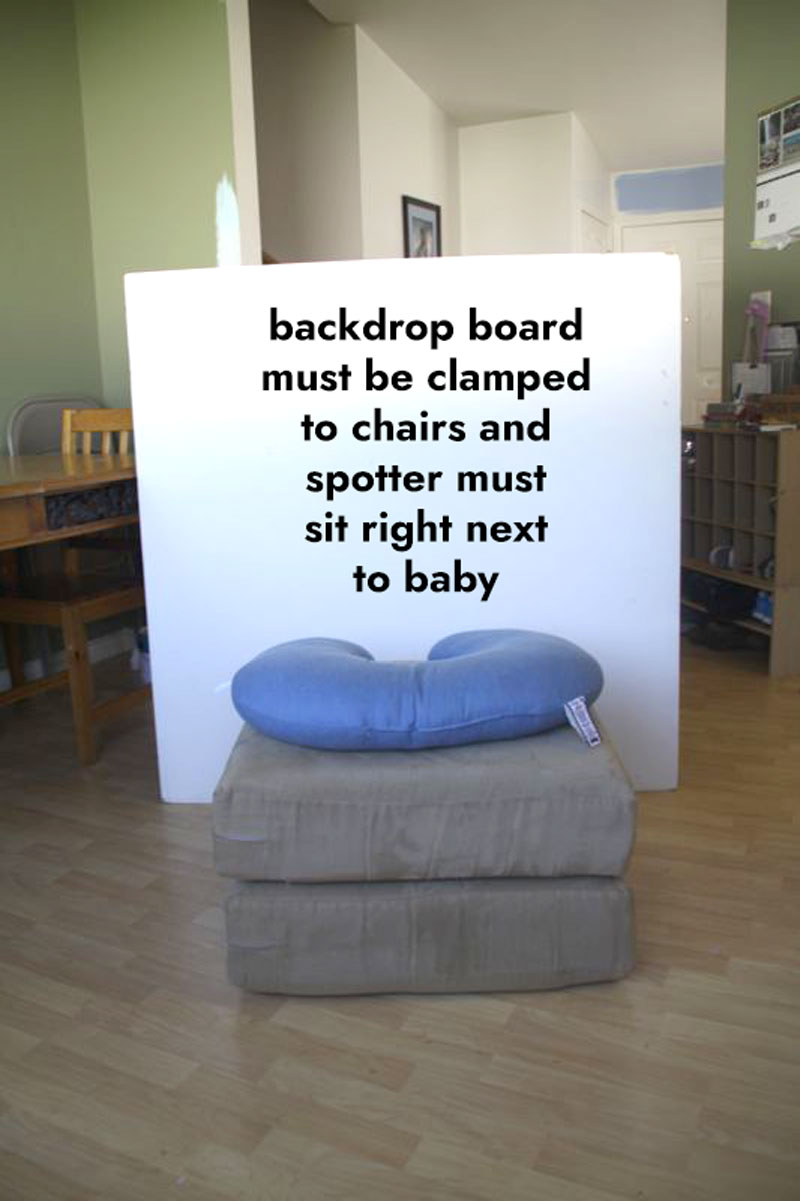
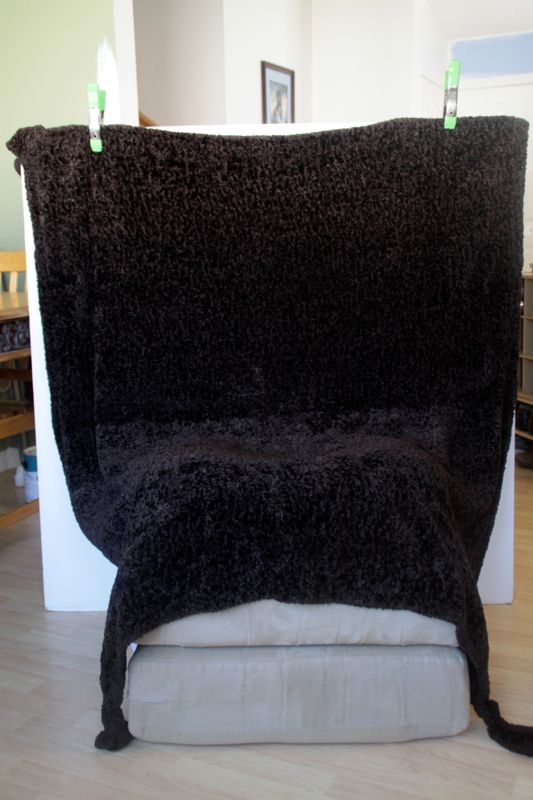
Once you have the basics set up, you can drape a solid colored blanket over it all. Use clamps to attach the blanket to the backdrop boards and make sure the clamps also attach the board to the chairs so it will not fall over (if you don’t have a backdrop board just attach the blanket to the tops of the chairs). Let it drape down the board until it is level with the pillows, then lay it over the pillows. You want to minimize wrinkles as much as possible, because they will be very distracting in the final picture, so use more clamps on the sides if you need to. Another adult (your spotter) must sit right next to the baby to ensure her safety at all times. The setup will look like this:
And then you can take a photo that looks like this:
Other newborn photoshoot necessities:
- Wipes/burp rags. Chances are you’ll have to clean up something during the shoot, so keep wipes and burp rags handy.
- Space heater.
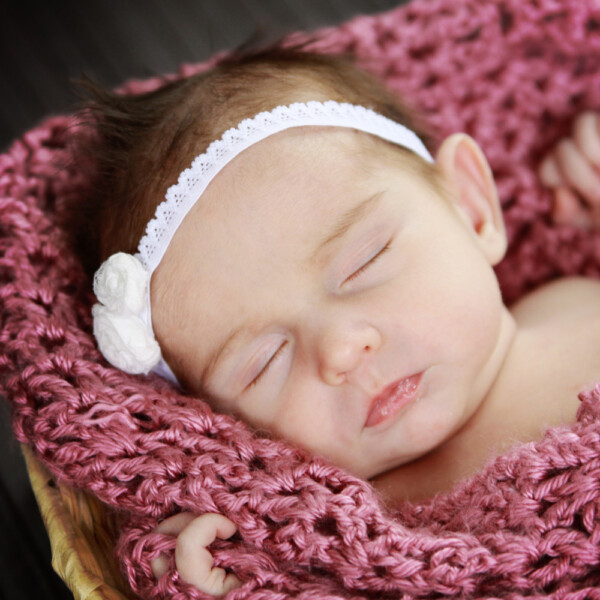
- Blankets or fabric to use as backdrops. If you are going to invest in one thing, I’d say go buy a few yards of the cheapest black stretch velvet you can find (use a coupon at Joanns!). Black velvet is your best bet for a backdrop because it doesn’t show wrinkles and generally shows up as solid black in photos. Otherwise, walk through the house looking for any blankets you might have. Blankets with lots of texture also do a good job hiding wrinkles, like this one:
- Extra blankets. In between poses it’s nice to have a few extra blankets to swaddle the baby in to keep her happy.
- Pacifier. Keep one within arm’s reach at all times. Often when trying to pose a sleeping baby he’ll start to wake up, but a quick pacifier stuffed in his mouth will send him right back to sleep. Then you can ease the pacifier back out and take your photo.
- Any other props or accessories you think you might like to use (hats, headbands, etc.) You want everything ready to go before you start taking photos. Remember, though, that you don’t need lots of props. I think newborn photos look best with fewer accessories and props and more focus on the baby herself. I’ll talk more about this in Newborn Photo Ideas Pt 2: Posing.
I hope that was helpful! It’s a lot of information, so it’s probably worth reviewing a few times. It’s also worth trying out your setup before you plan to take pictures – even before the baby arrives if possible.
Read the rest of the series:
Part 1: DIY Newborn Photos Basics | Part 2: Newborn Photo Ideas – Posing | Part 3: Posing Baby with Family Members
Lauren Martin says
This post was really helpful. Thanks for sharing your photo and lighting setup!