
In today’s post: Learn how to turn socks from the dollar store into adorable snowmen in this easy Christmas craft for kids. You’ll use one white sock to make the snowman, and another cute printed sock to make his hat and scarf.
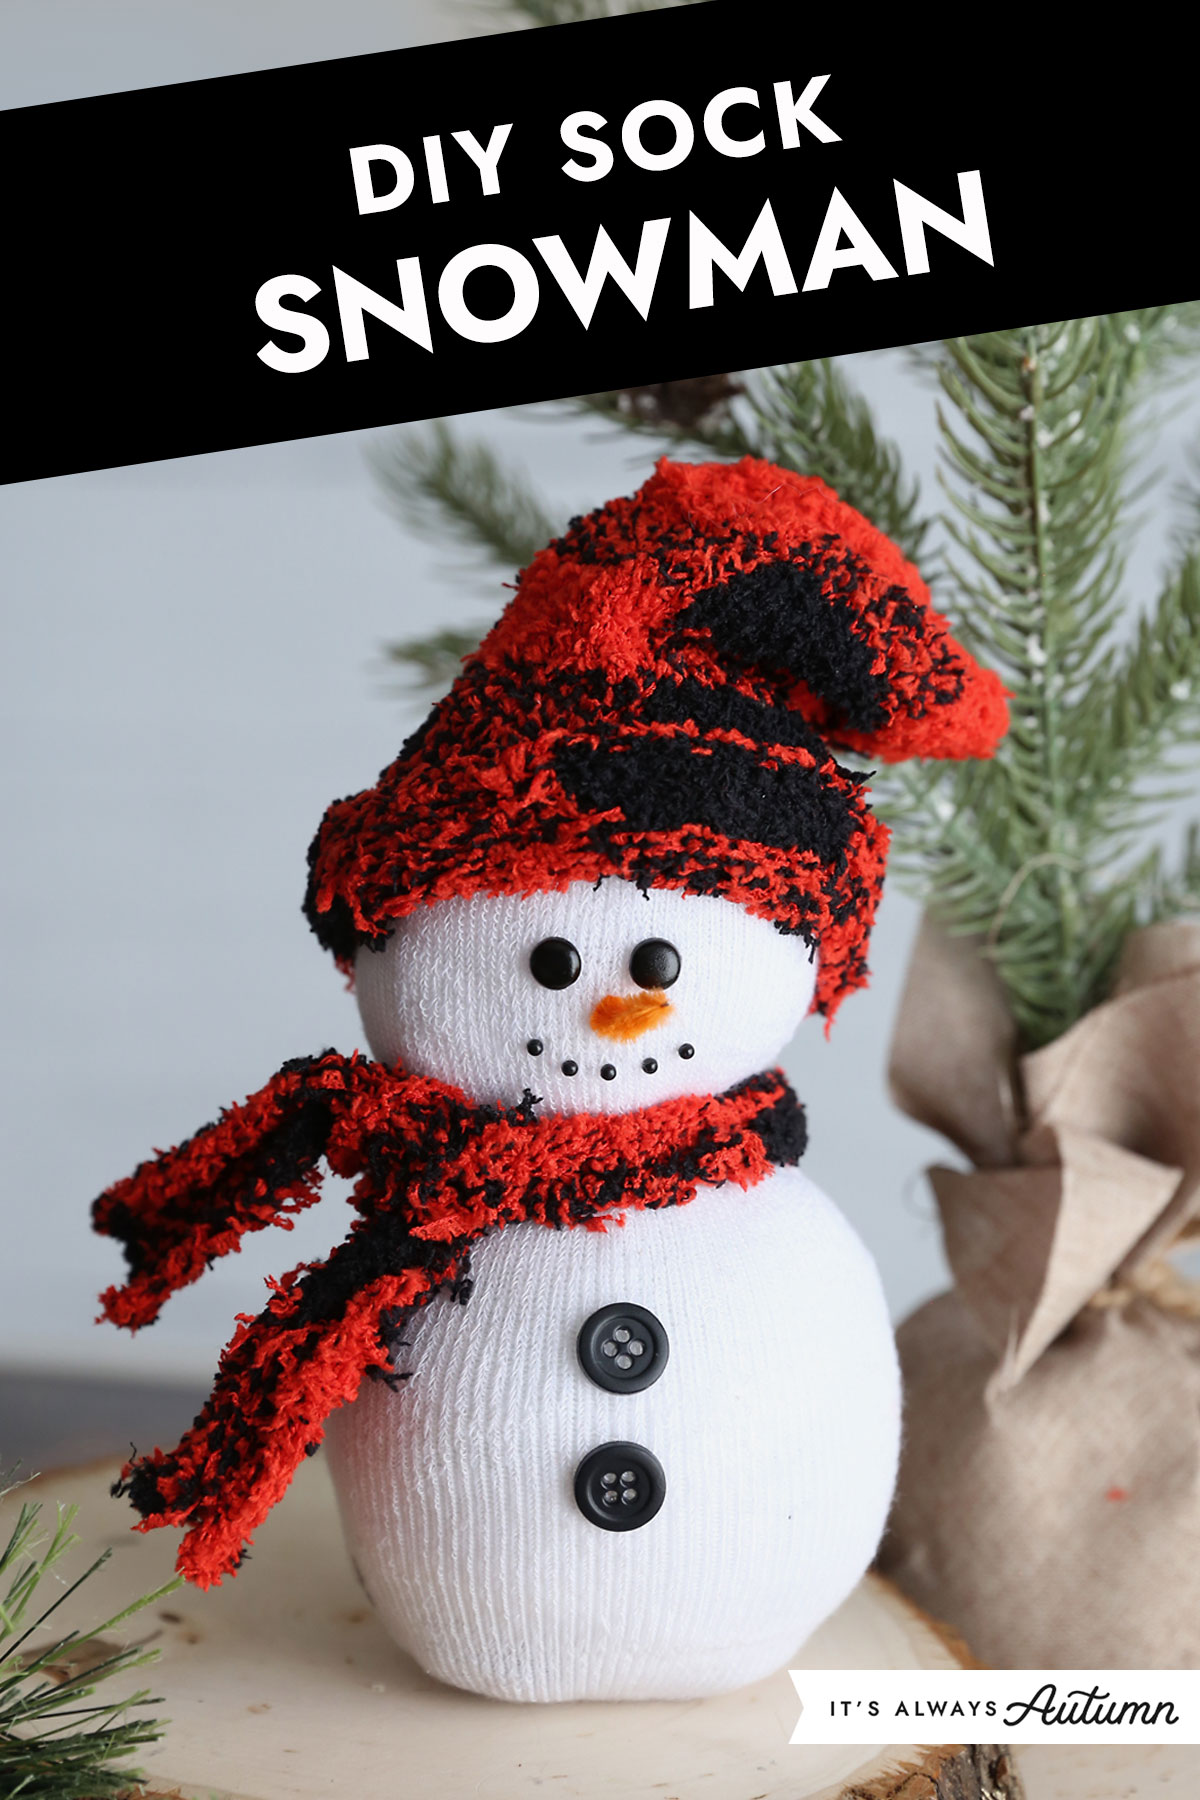
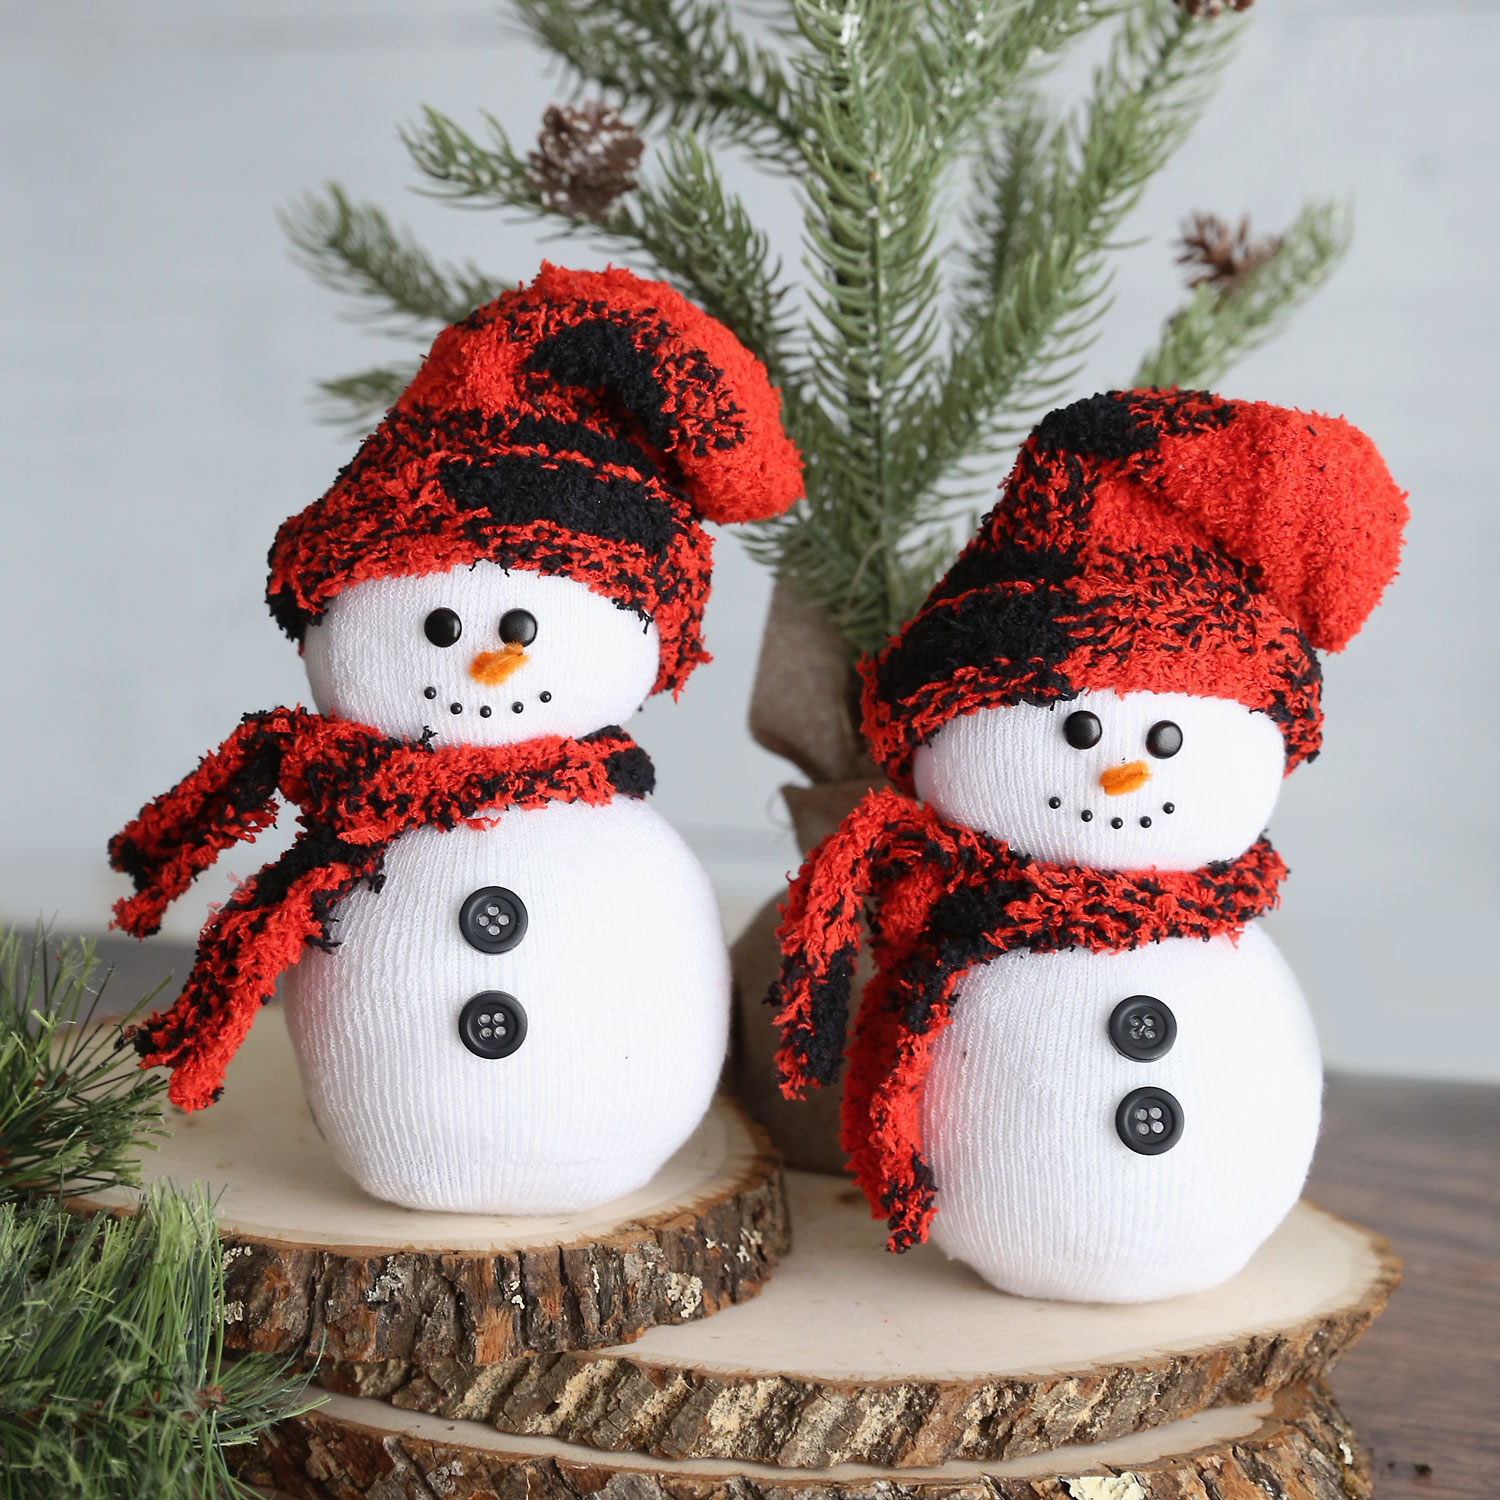
Making a sock snowman is a fun Christmas craft you can do together with your kids. These little guys turn out so cute! They’re easy to make and fun to personalize, and look adorable up on a mantle with your other Christmas decorations. This is a Christmas craft the whole family can enjoy. Kids can even make these cute little snowmen to give away as a gift to grandparents or friends.
Supplies
The best thing about sock snowmen is that if you’re crafty, you probably have many of the supplies on hand already. If not, you can find them at your local dollar store and craft store. Here’s what you’ll need:
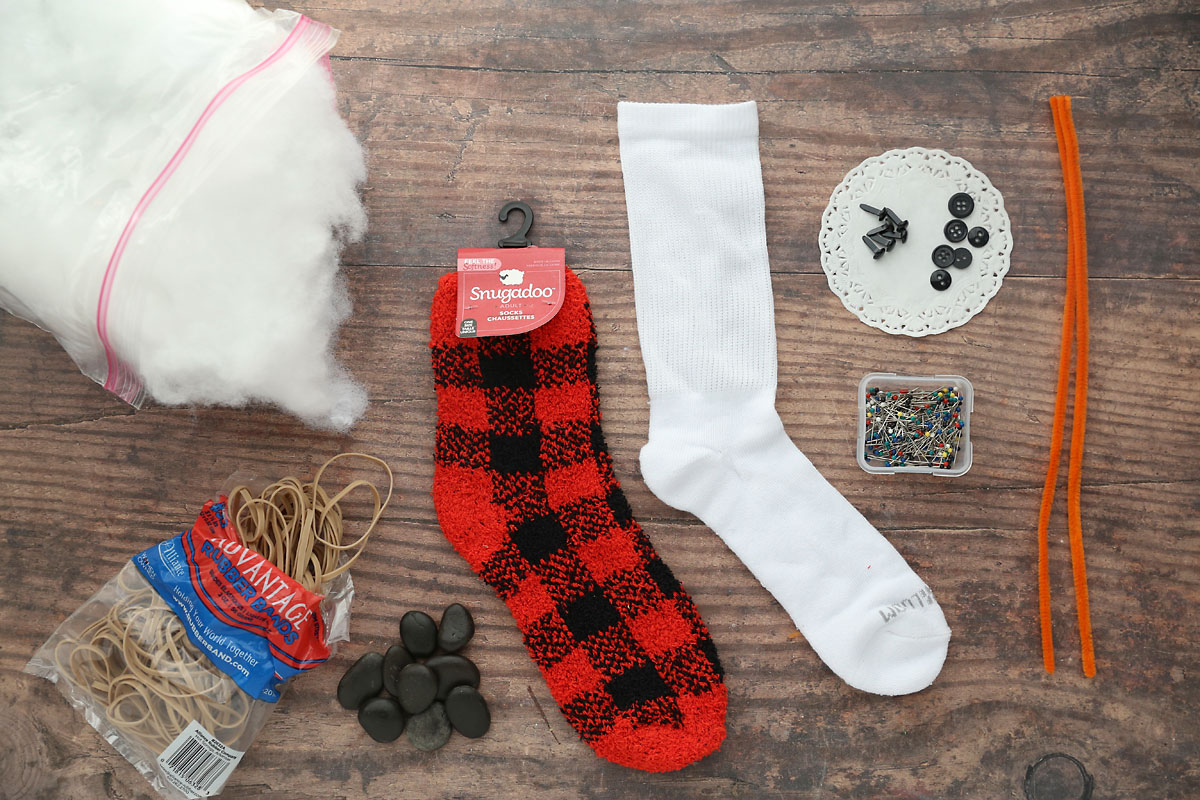
- White sock: You’ll need one white sock to make the body of the snowman. Crew socks work well; a tube sock will also work. A child or women’s size sock works best. You can use men’s size socks; your snowman will just require more stuffing and end up a little bigger. I found the white socks I used at Dollar Tree.
- Patterned sock: You’ll use one patterned sock to make a hat and scarf for your snowman. I used fuzzy plaid socks I found at Dollar Tree. The fuzzy socks look cute, but they do shed fuzz when they are cut, so keep that it mind.
- Rubber Bands
- Polyfill/fiberfill for stuffing the snowman: Some people use rice to fill the snowmen. That’s an inexpensive option that works well, however…if you store these snowmen in your basement or garage the rice can attract pests such as mice. Because of that I decided to use polyfill instead. You can find it at any craft store near the pillow forms.
- Pebbles or something else to weigh down the bottom of the snowman: I used floral pebbles from Dollar Tree but you can use anything you’d like in the bottom of the snowman to give it some weight.
- Buttons
- Orange Pipe Cleaner for the nose
- Black Brads for the eyes: find these in the scrapbooking section; you could also use beads or small buttons if you have those on hand
- Black ball sewing pins for the mouth: from a package of colored ball pins
- Scissors + Hot Glue Gun
Other Stuffing Options
If you use polyfill to stuff your snowman, remember you’ll need pebbles or other weights inside him to make sure he stands up. Alternately, you could use two styrofoam balls to create the snowman shape. If you do this, you’ll want to cut a bit off the bottom of the larger ball to make it flat to make sure the snowman will stand. Finally, you could try using rice but leaving it sealed in the bag it comes in so it won’t attract pests.
How to Make a Sock Snowman
Once you’ve gathered your supplies, follow these simple instructions to make a sock snowman:
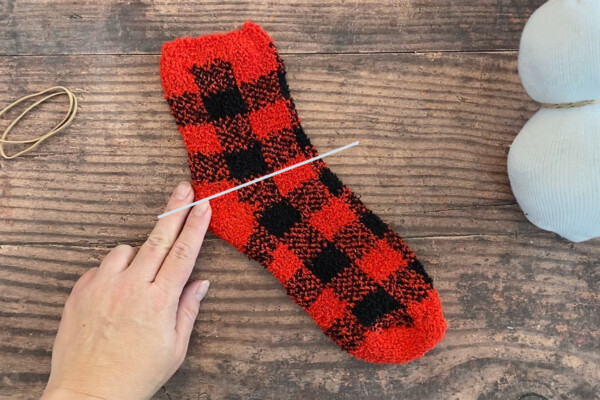
Cut + Stuff the White Sock
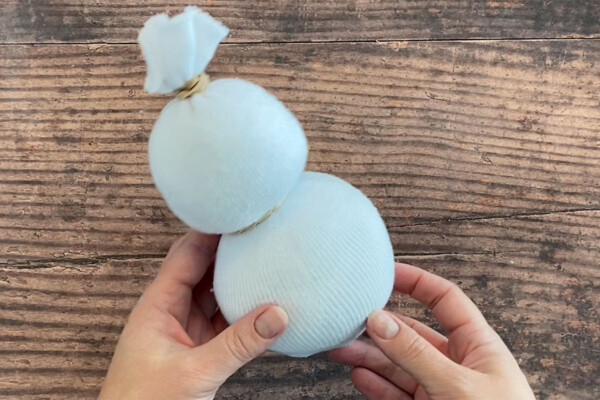
Cut the white sock straight across at the heel. Place pebbles or some other small, heavy objects in the toe of the sock. Begin stuffing the sock with polyfill. You can grab a handful of the filling and pull it into a ball shape before stuffing it inside the sock.
Shape the Snowman
Continue stuffing the sock until it’s quite full with polyfill. Use one rubber band to close off the top of the sock. Use a second rubber band to create the snowman’s neck, dividing the head from the body in a snowman shape, as you can see below.

Make the Hat + Scarf
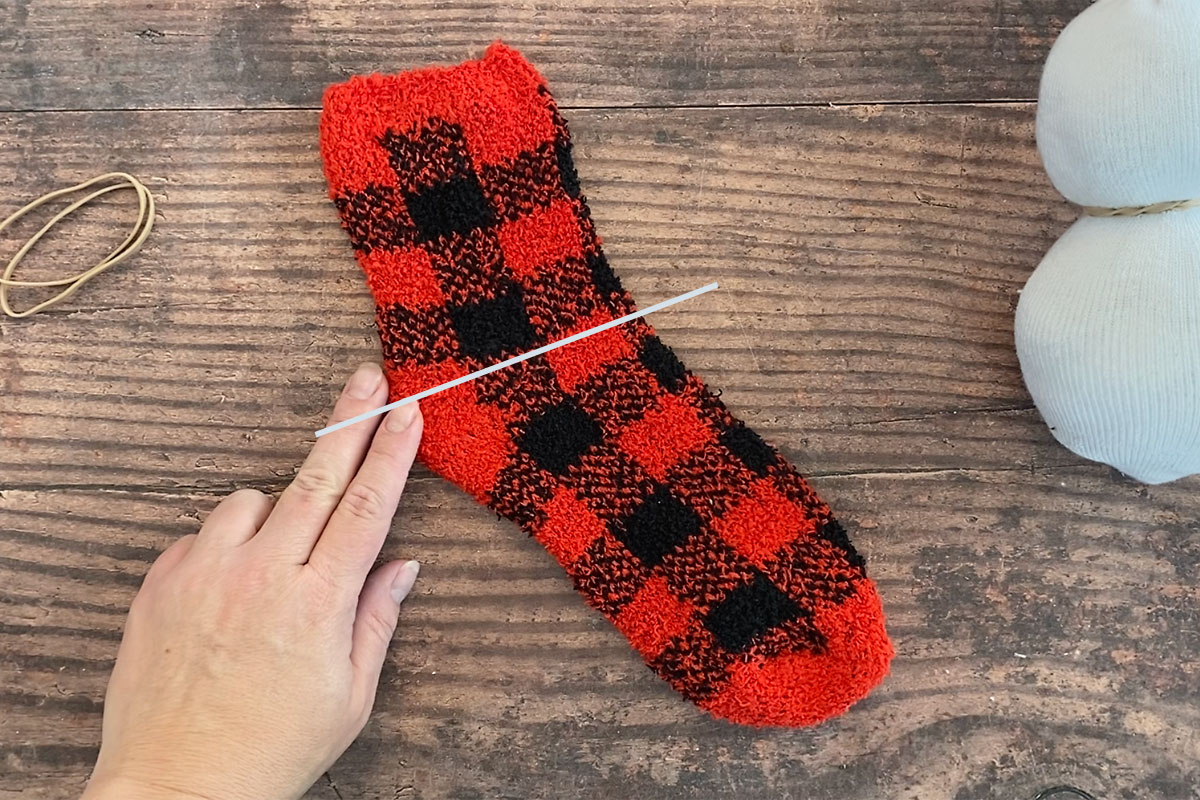
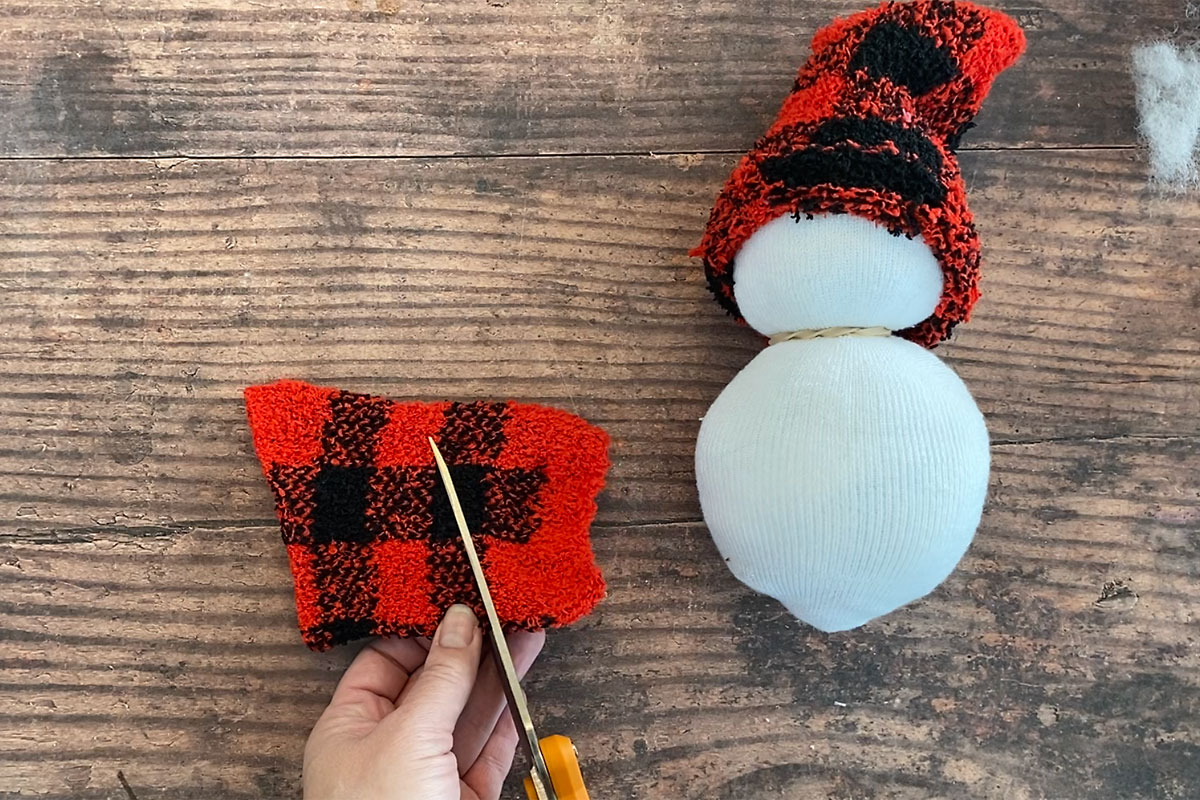
Cut the colored sock straight across at the heel.
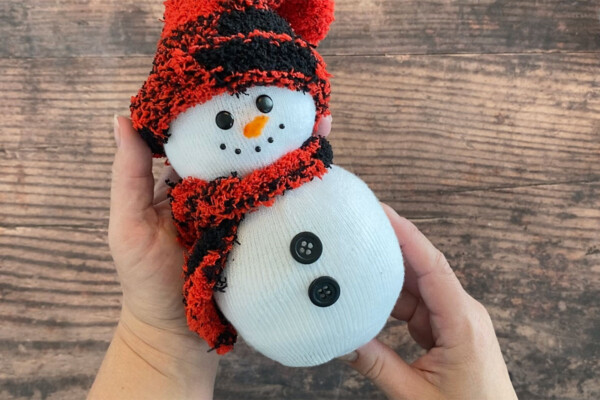
Take the toe portion of the sock and use it as a stocking cap, rolling up the bottom to create a cuff, and place it over the head of your snowman. Then cut the remaining piece of the sock at a diagonal, all the way around, to create a long strip of fabric you can use for a scarf. Tie the scarf around the rubber band in the center of the snowman. Trim and discard any excess fabric.
Decorate
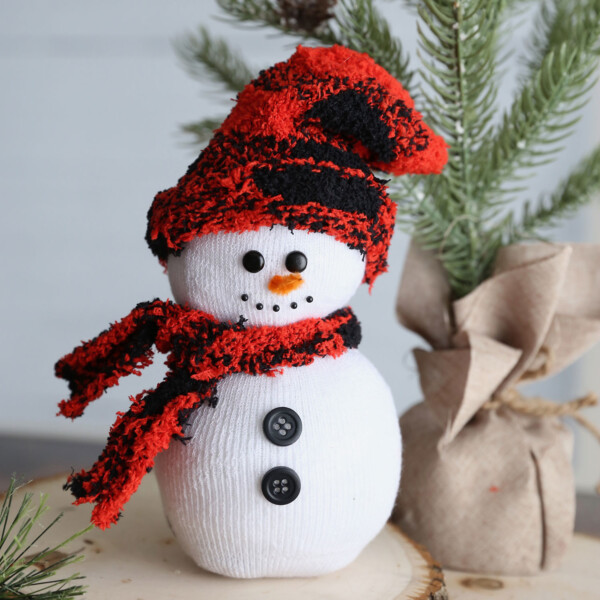
On to the fun part: decorating! Hot glue black buttons onto the snowman’s body. Cut a small piece of orange pipe cleaner and poke it into the center of the snowman’s face to make the snowman’s nose. Secure with a little dot of hot glue. Poke brads in above the nose and secure with a little hot glue for eyes. Poke in five black sewing pins to create a mouth (you will not need to glue these).

If you’d like, you can get creative with how you decorate your snowman. Try these ideas:
- Use ribbon for the scarf and tie it in a cute bow around the snowman’s neck
- Glue a pom-pom to the top of the hat
- Instead of making a scarf, can leave the ankle part of the sock intact and pull it over the snowman’s body to make a cute vest
- Use other embellishments instead of buttons, such as small snowflakes
- Use toothpicks or small twigs to give the snowman arms
- Thread a piece of twine through the back of the snowman’s head and make a loop to turn him into an ornament! If you plan to do this, do not put any pebbles or weights inside.
Sock Snowman
Supplies
- 1 white Sock
- 1 colored Sock
- 2 Rubber Bands
- 2 Black Buttons
- 2 Black Brads or beads, or large ball map pins
- 5 Black Ball Sewing Pins
- 1 Orange Pipe Cleaner
- Polyfill/Fiberfill
- Pebbles or other small weights
Want more project ideas? Sign up to get my favorite easy crafts and recipes straight to your inbox!
Instructions
- Cut the white sock straight across at the heel. Place pebbles or other small weights in the toe of the sock.

- Stuff the sock with plenty of fiberfill. Use a rubber band to tie off the top, then use a second rubber band to create a snowman shape.
- Cut the colored sock straight across as the heel.
- Use the toe of the colored sock to make a hat, rolling up the bottom to create a cuff. Cut the other piece of the sock at an angle to make a long piece of fabric you can use for a scarf.
- Complete the snowman by using brads for eyes, a small piece of orange pipe cleaner for the nose, pins for the mouth, and buttons. Secure with hot glue.


Mauren says
Do the sewing pins for the mouth make it a danger to littler kids? I wanted to make these for a children’s activity but am a little hesitant about the pins.
Autumn says
Hi Mauren! That probably depends on the ages of kids and how much adult supervision you have. For example if you are doing this with one or two children I doubt it would be a problem but handing out pins to an entire classroom of five year olds could lead to trouble 😉 You could try using a fine tip sharpie to make dots instead of using pins if you prefer.
Betty says
Good ideas. Very cute. Easy to make.
Kim Robinson says
I just made this, so easy thanks
Melina says
Klasse