
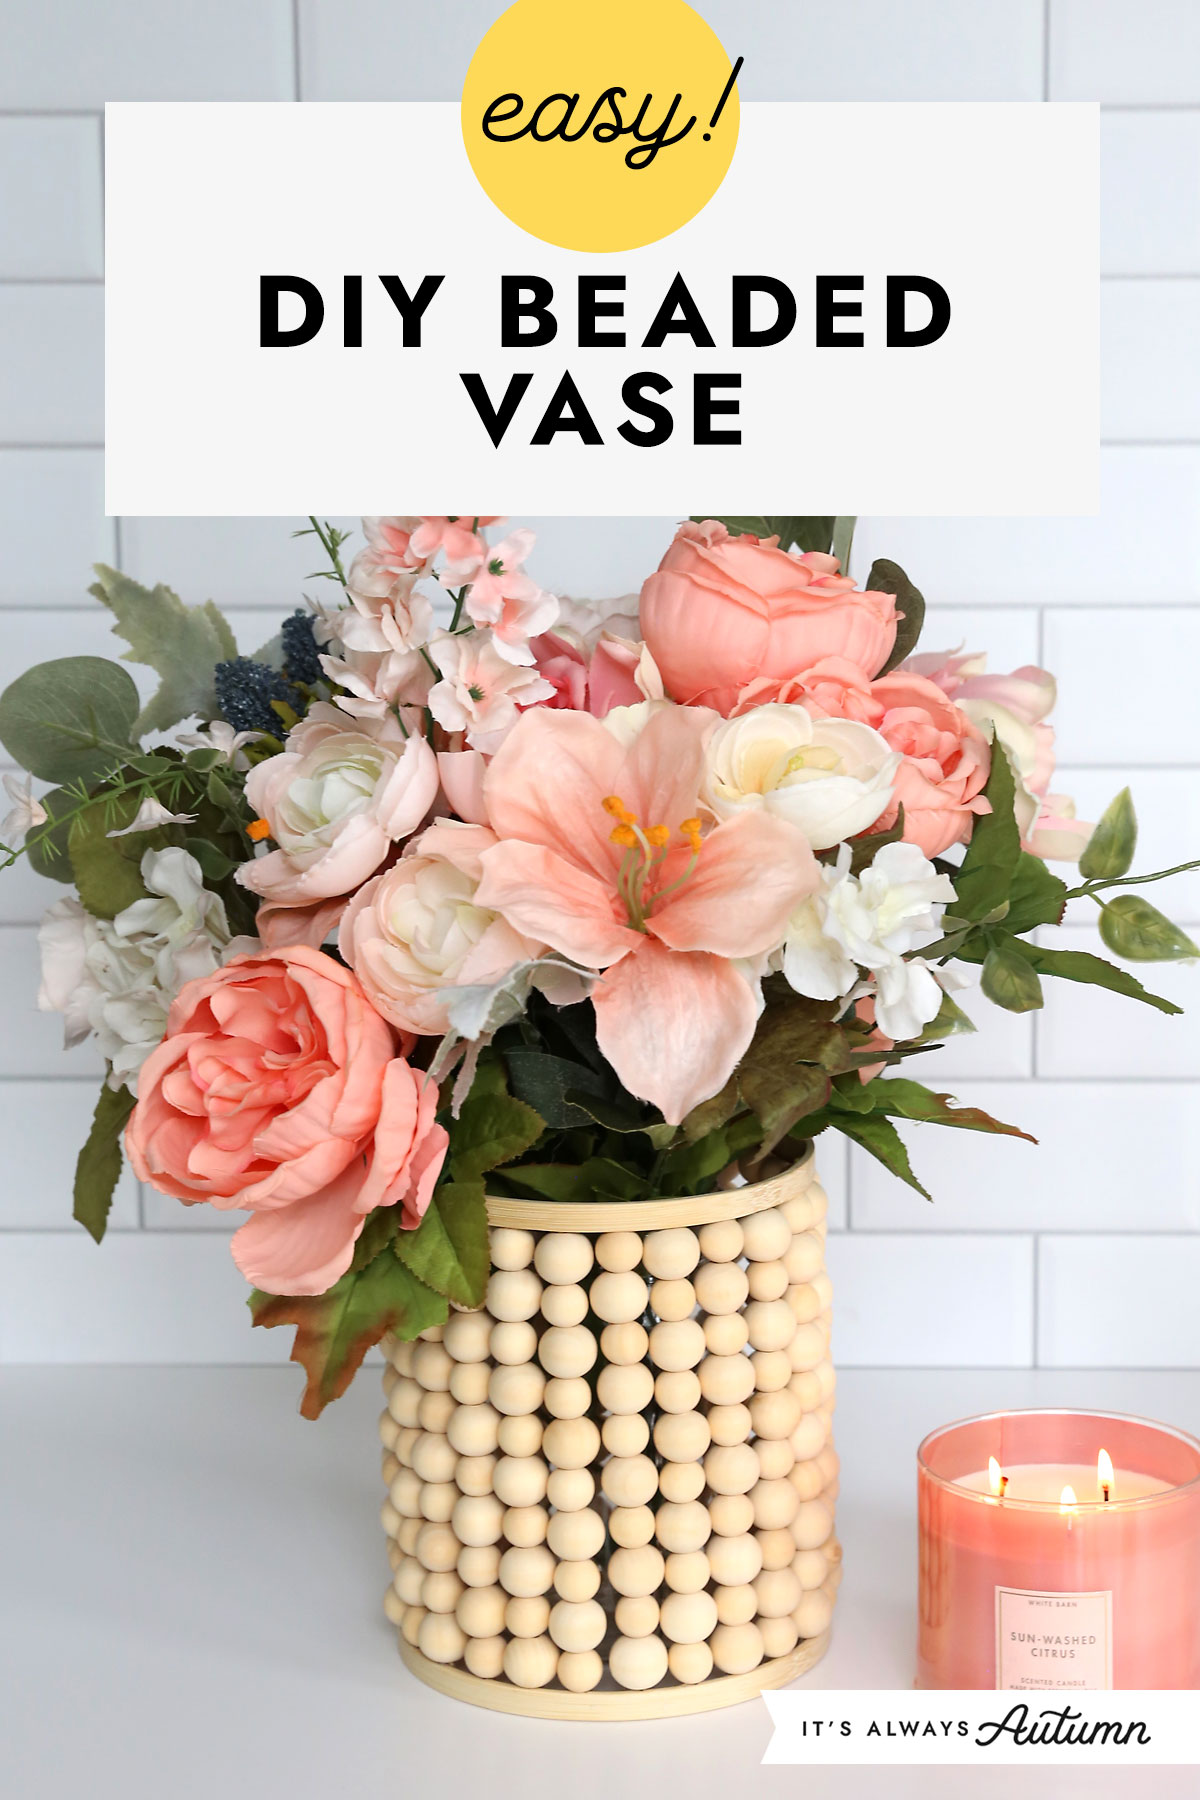
In today’s post: Make a beautiful vase using an embroidery hoop, skewers, and wood beads. This is an easy craft for adults you can complete in about an hour.
Easy DIY Decor Project
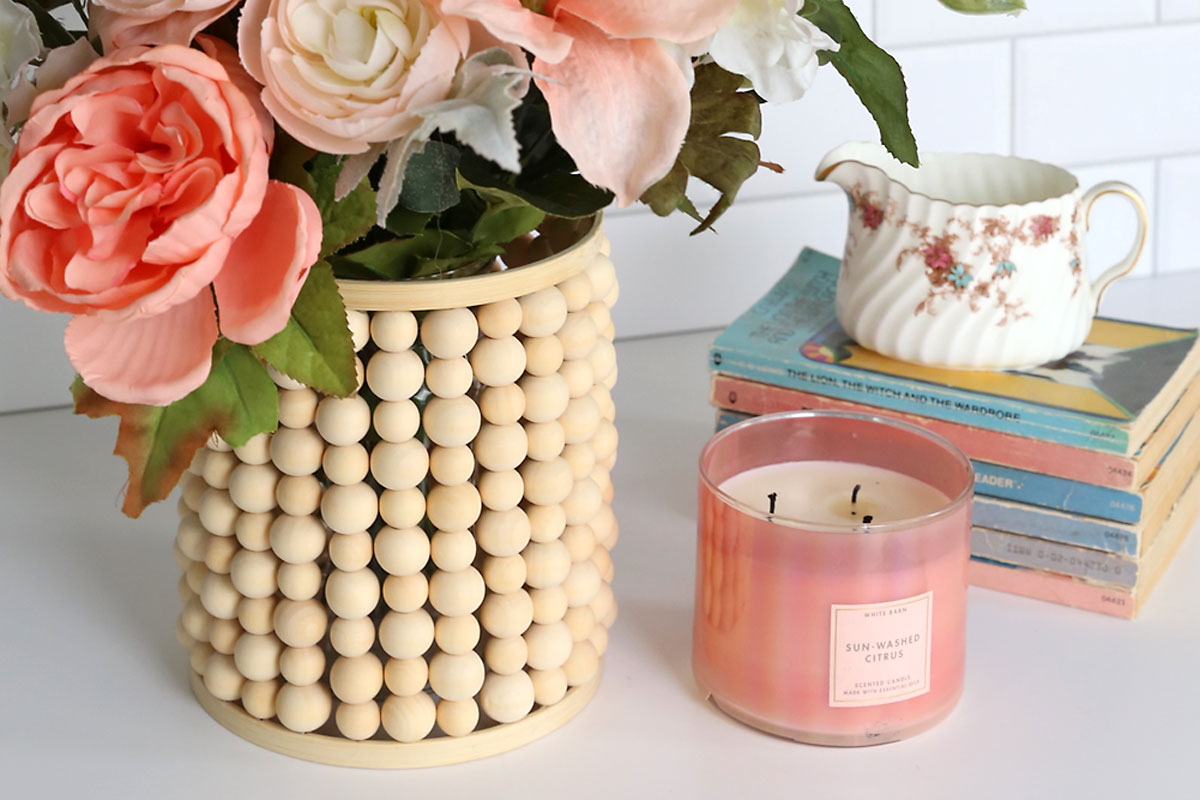
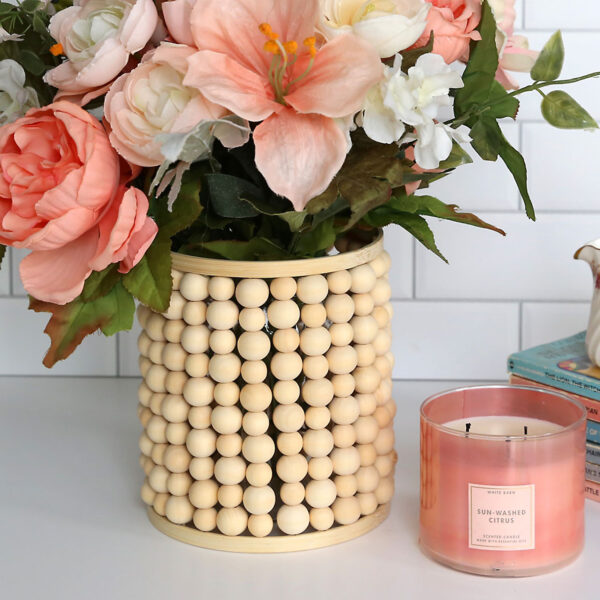
Today’s project is so fun and turns out really pretty! The natural wood goes great with any color flowers, and because it’s sized to fit a mason jar inside it, you can use real or faux flowers.
Idea Source: Domestically Blissful

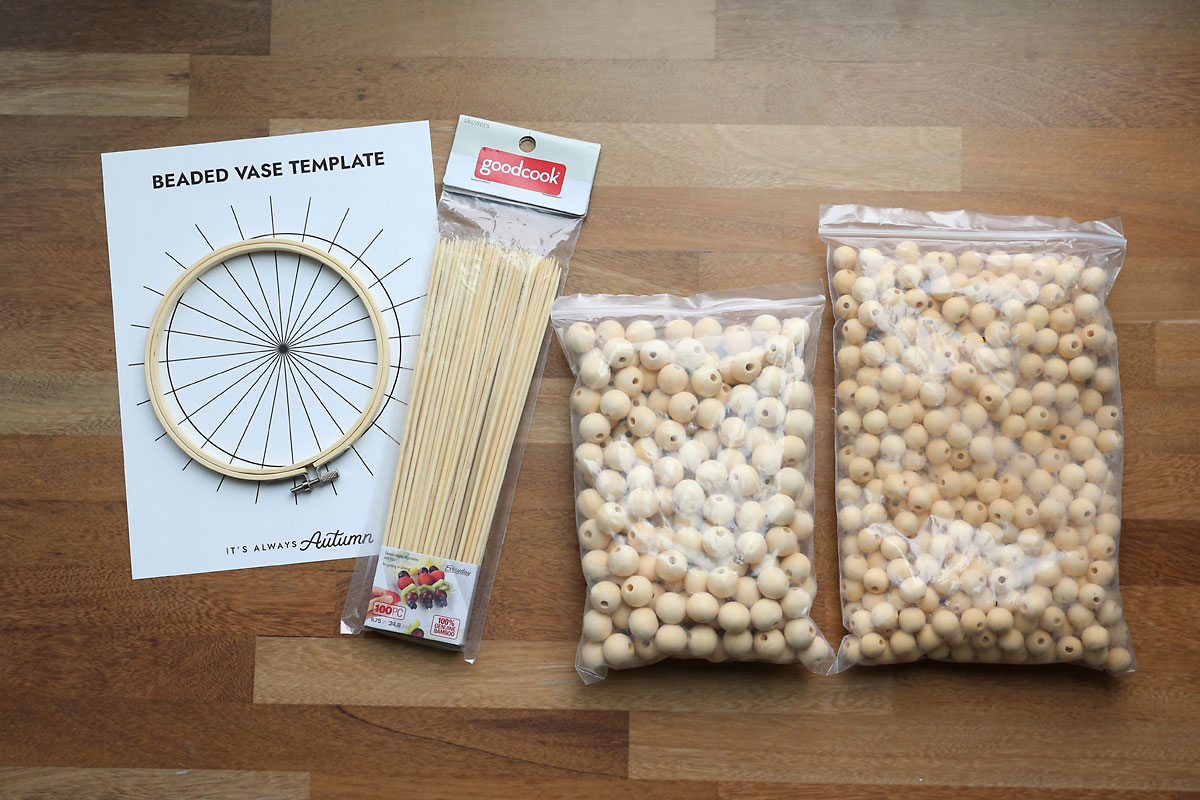
Beaded Vase Template
To make this pretty vase (or vase cover) you’ll start with a six inch embroidery hoop. You’ll glue skewers inside the hoop at regular intervals, then thread beads onto the skewers. To make it easy, I’ve created a printable template that will show you exactly where to add the skewers. You can find the template in the blue box that’s directly below this next photo.
Supplies
Here’s what you need to make this pretty DIY beaded vase:
- Six inch embroidery hoop: You can find these at Walmart or any craft store. You can use a different size hoop if you’d like to make a different size vase, but my template only works for 6 inch hoops (so if you use a different size you’ll have to figure out the skewer spacing on your own).
- Bamboo skewers: Find them at Walmart or any grocery store
- Wood Beads in two sizes: This project uses 20mm and 16mm wood beads (about 120 of each). This package of beads includes plenty to make a vase plus lots of leftovers for other projects.
- Wide Mouth Quart Size Mason Jar: You’ll use this inside the beaded vase to hold your flowers. A wide mouth jar works better than a standard jar.
- Wood Vase Template: you can find this in the blue box above the heading that says “supplies”
You will also need a hot glue gun and snips or scissors that can cut through the skewers.
How to Make a DIY Wood Bead Vase
This is an easy craft for adults that will take about an hour to make. It’s easy to work on while watching a show. I made my beaded vase a little over seven inches tall so it would cover a quart size mason jar. Please note this beaded vase is meant to go around a jar or vase that actually holds the flowers.
Mark the Hoop
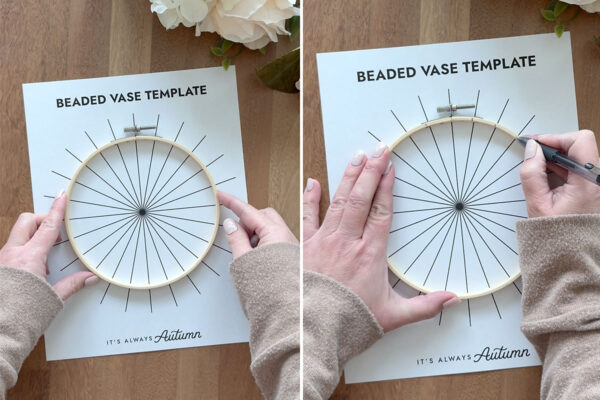
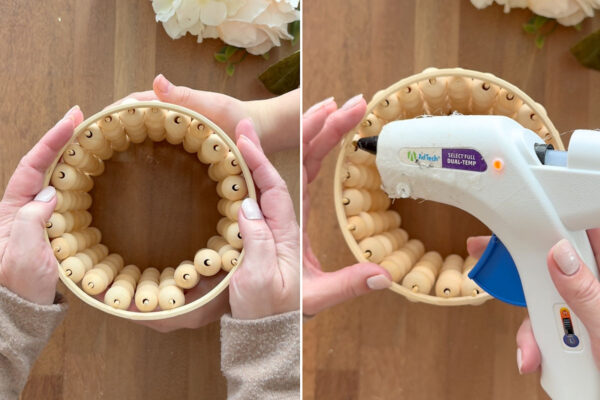
Separate the inner and outer rings. Screw the outer ring closed as tight as possible. Print the template and place the OUTER ring down on the template so it covers the circle. Make a small mark on the inner edge of the hoop where each line touches it.

Attach the Skewers
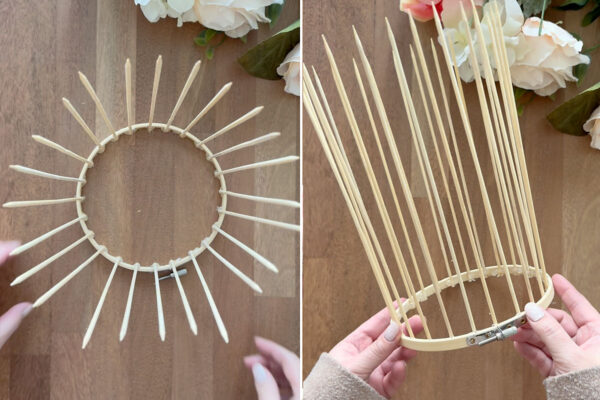
Cover your work surface with a sheet of wax paper or other covering if you are worried about getting hot glue on it. Holding the outer ring in one hand, place a line of hot glue inside the ring at the first mark. Quickly press a skewer into the glue, with the flat end of the skewer flush with the bottom of the hoop. Hold the skewer in place for about 30 seconds to allow the glue to cool and adhere. As you do so, put the hoop down flat on a table so you can ensure that the skewer is flat to the table as well and that the skewer is pointing straight up. Once the skewer is secure, repeat at the next mark.
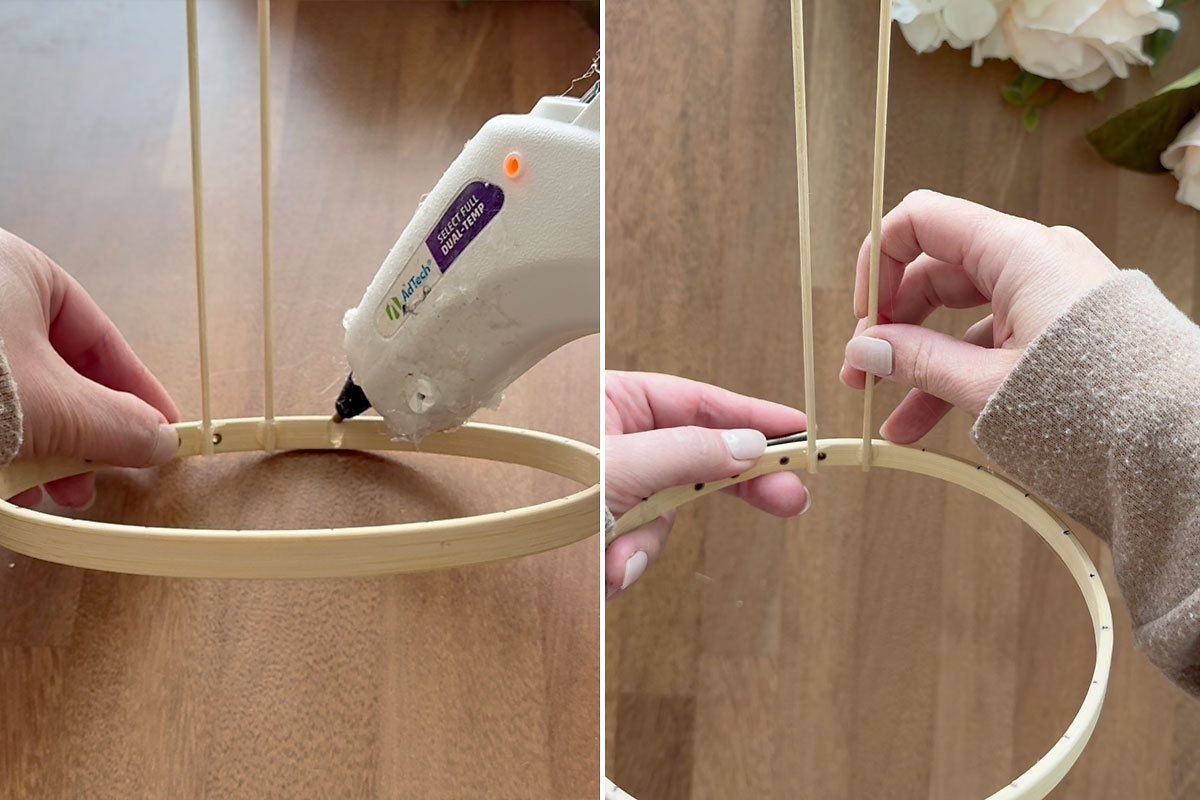
After you’ve attached about six skewers, stop for a moment and add more hot glue over the skewers you’ve already attached to make sure they are super secure.
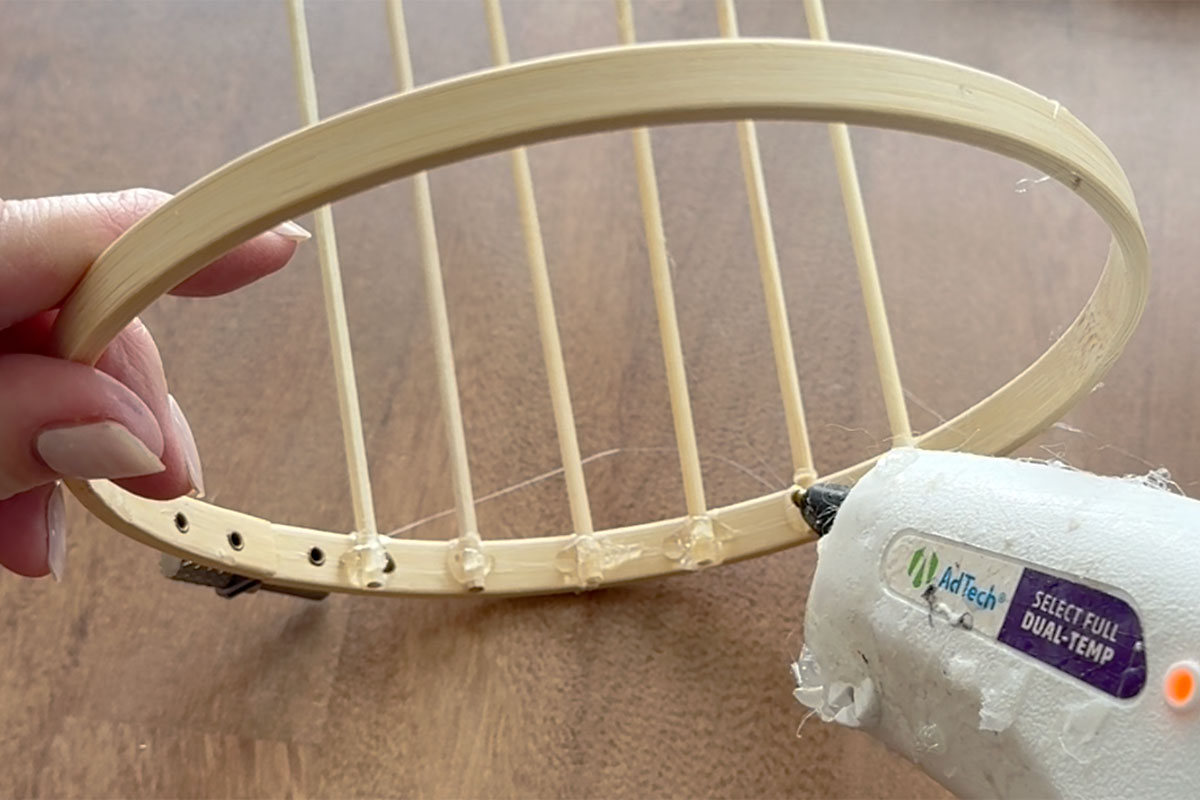
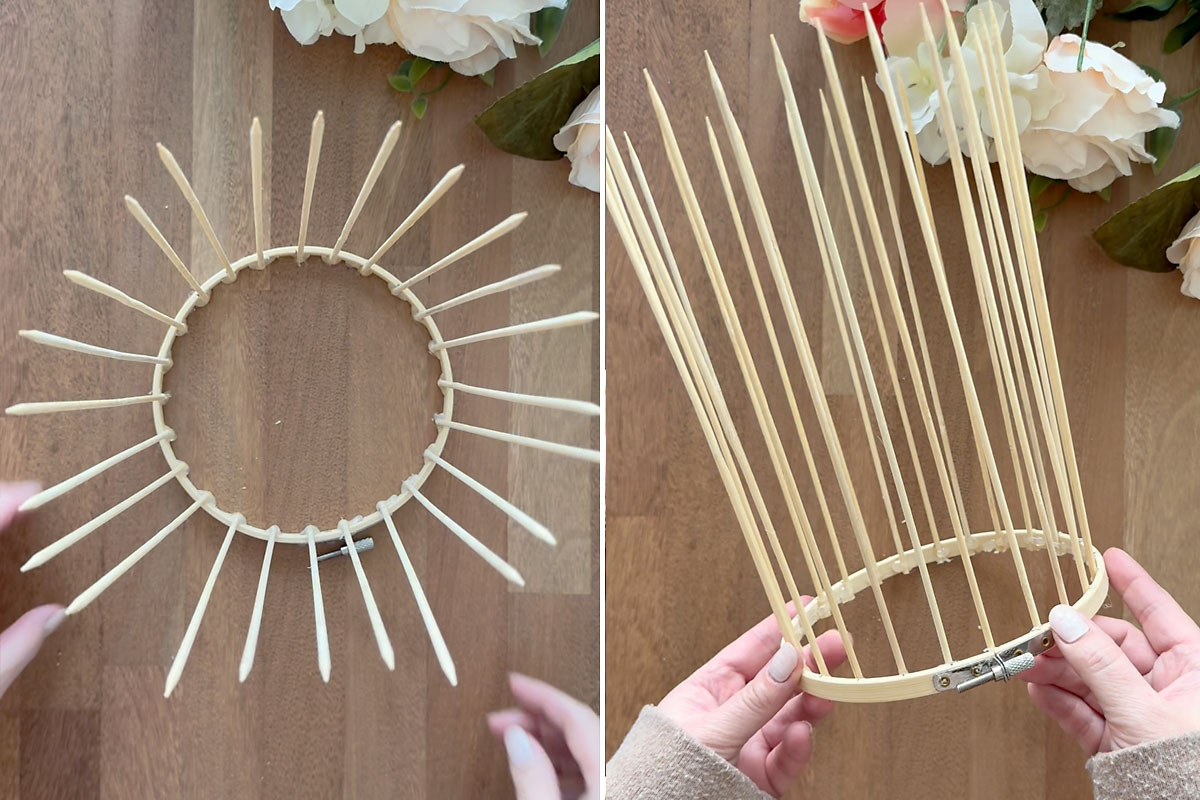
Continue adding skewers until you’ve gone all the way around the hoop (you will use 24 skewers). The photos below show what the vase looks like at this point from the top (L) and from the side (R).
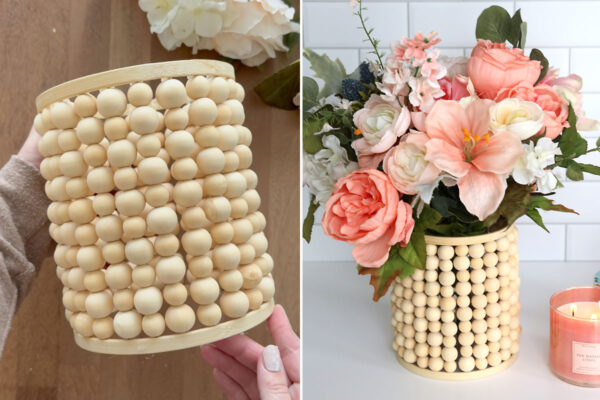
Add the Beads
Now it’s time to start adding beads. Alternate adding a 16mm bead and a 20mm bead, working your way around the hoop. For the second row, you’ll put a 20mm bead on top of each 16mm bead, and vice versa.
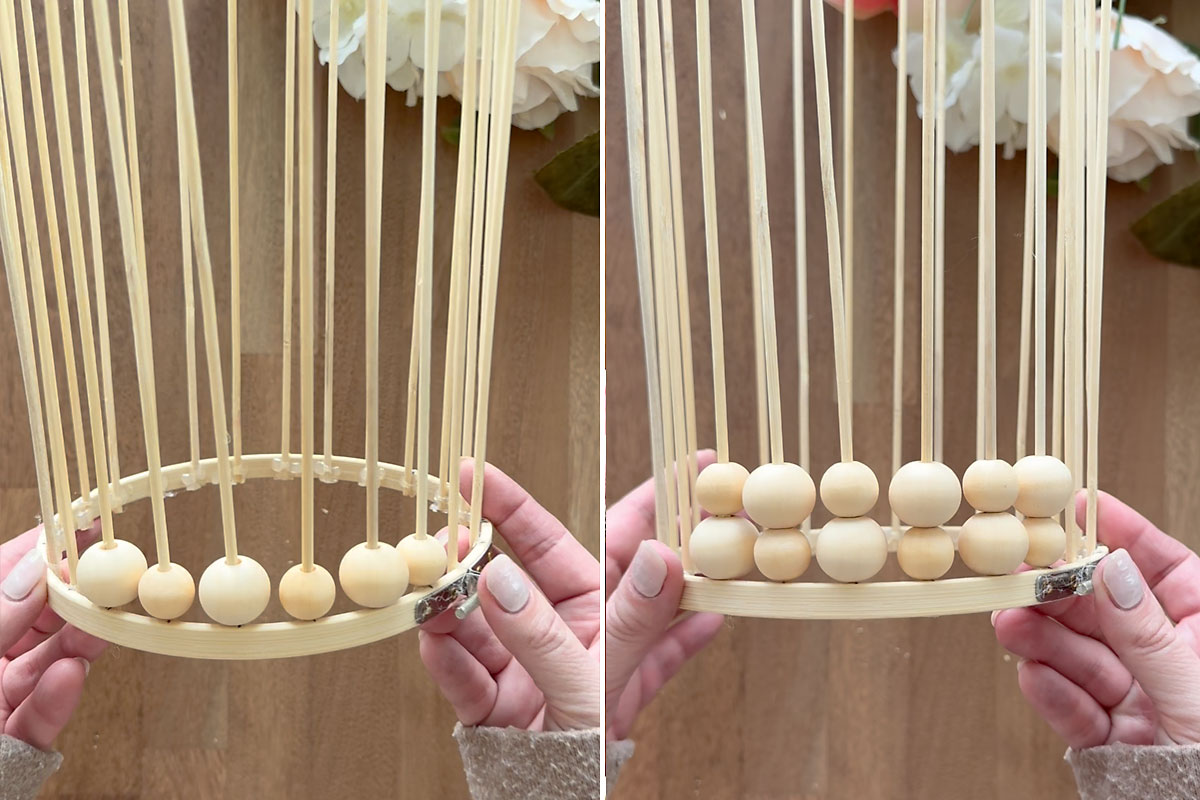
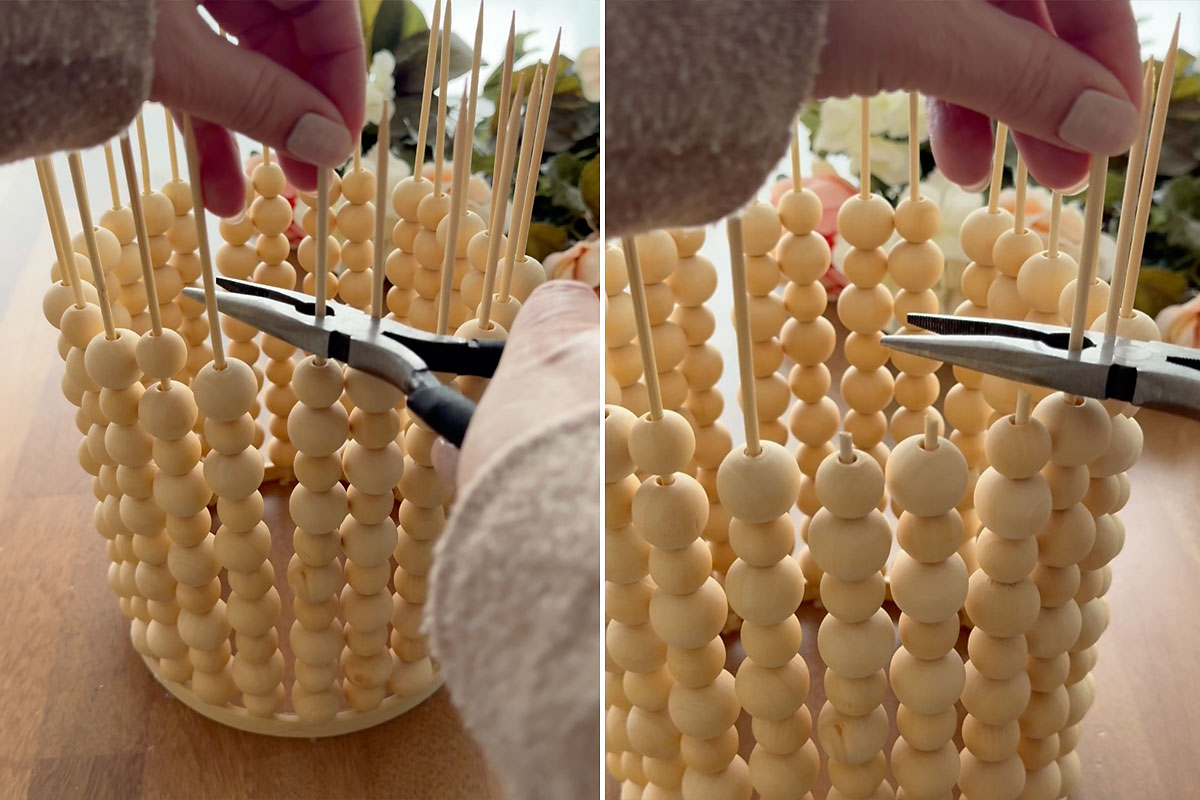
Continue until the beads are high enough to cover whatever vase you plan to use inside the beaded vase. I made mine tall enough to cover a quart size mason jar by using ten beads on each skewer (five of each size). You can make your vase taller or shorter, but use an even number of beads on each skewer to make sure the bead stacks are the same height. Once you’ve added all the beads, use snips or sharp scissors to cut off each skewer about 3/8 inch above the top of the beads.
Finish with Other Hoop
Grab the inner hoop that you set aside. Gently hold the beaded skewers and place the inner hoop over them, making sure all of the skewers go inside the hoop. This is pretty hard to do by yourself so enlist the help of another person. Push the hoop down so it sits right on top of the beads. Check to make sure none of the skewers extend above the hoop; if they do you’ll want to cut them a little shorter. Add hot glue inside the inner hoop where each skewer hits it. Don’t use too much glue – if you do it will drip down and be visible – just enough to secure each skewer.

Ready to Display
Allow the hot glue to cool and harden and your beaded vase is ready to display! I placed a wide mouth quart jar inside the beaded vase then added a faux flower arrangement. Working with faux flowers is nice here because you can bend the stems if desired. However because you are using a mason jar inside the beaded vase you can also display real flowers! I think this vase looks best for displaying flowers that fall over the edges a bit as opposed to ones that just stick straight up.

DIY Wood Bead Vase
Supplies
- 1 6 inch Wood Embroidery Hoop
- 24 Wood/Bamboo Skewers
- 120 20mm Wood Beads
- 120 16mm Wood Beads
- Beaded Vase Template link in notes
Want more project ideas? Sign up to get my favorite easy crafts and recipes straight to your inbox!
Equipment
- Hot Glue Gun
- Snips or Sharp Scissors
Instructions
- Separate the inner and outer hoops and set the inner hoop aside. Tighten the outer hoop completely closed. Print the template and set the outer hoop on top of it, covering the circle. Mark where each line hits the hoop on the inner edge.

- Glue a skewer to the inside of the hoop at each mark, making sure the flat end of the skewer is flush with the bottom edge of the hoop. Hold each skewer in place for about 30 seconds to allow the glue to cool before moving on to the next one.
- Add extra hot glue over the skewers to make sure they are secure.
- Continue until all 24 skewers have been attached to the inside of the hoop. As you do so, make sure the skewers point straight up.
- Add beads to the skewers, alternating a smaller bead then a larger bead. For the second row, place larger beads on top of smaller beads and vice versa.
- Continue until the vase is as tall as you'd like. I used 10 beads on each skewer. Use snips to cut off the skewers about 3/8 of an inch above the top beads.
- Place the inner embroidery hoop over the skewers, making sure all the skewers go inside the hoop (it's easiest to have a helper when doing this). Glue the top of each skewer to the inside of the hoop.
- Allow the glue to cool and harden, then your vase is ready to display! Place a wide mouth quart size mason jar inside it, then fill with flowers.


Amy says
Love this! So cute!
Dottie says
Yet again Autumn you deliver a wonderful project thankyou for always being there, in these tough times you are a breath of fresh air. X