

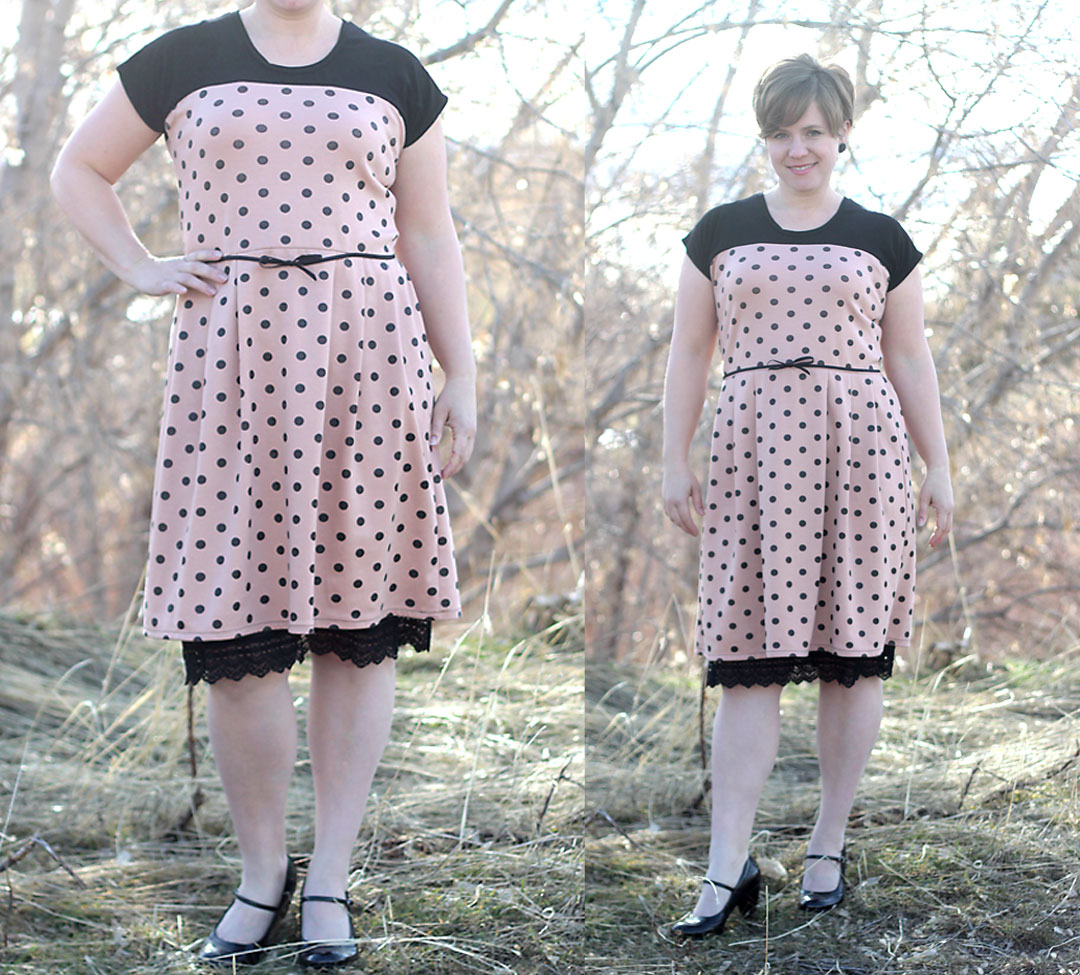
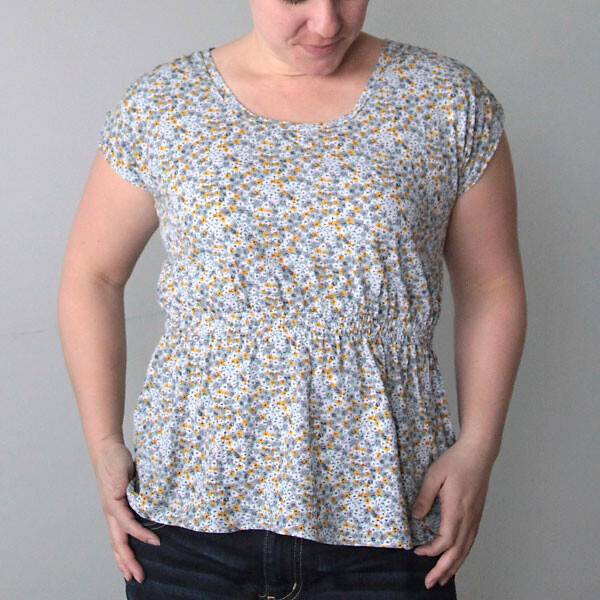
I made this dress a few weeks ago in just a few hours. I started with my colorblocked easy tee pattern and used that for the bodice portion of the dress, then just added a simple pleated skirt. The dress is made out of knit fabric, so it’s nice and stretchy, which means there was no zipper or buttons to install, and the cap sleeves are just part of the bodice piece, so I didn’t even have to set in sleeves. Easy, quick, and cute – just how I like my sewing projects.
I made the dress using 1 yard of polka dot ponte de roma knit, which is a nice, heavier-weight knit than something like jersey, which makes it perfect for dresses. I salvaged the black knit from an old dress that’s too small, so my dress cost about $7 (ponte de roma fabric from Girl Charlee).
I used every inch of length in that one yard of fabric and the dress wasn’t quite knee length (and remember I’m short!), which is where I like my skirts to hit, so I’ve been wearing it with a cute lace trimmed black slip I found at the thrift store. I tied some black bias tape around my waist like a belt for a finishing touch.
Here’s how the dress is constructed
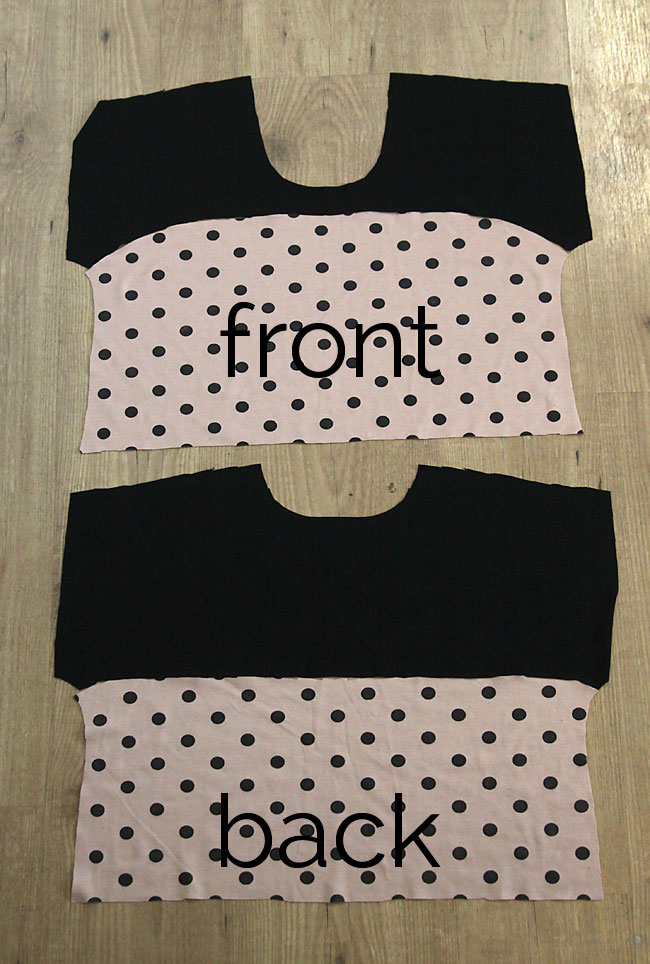
I started with my easy tee pattern (found in this post) and cut a bodice using the colorblocked cutting lines (I actually cut it a few inches smaller than the pattern calls for because the pattern gives a loose, easy fit and I wanted it slightly slimmer). I cut the bodice so it would stop at my natural waist, so it wasn’t nearly as long as the original pattern. I sewed the colorblocked pieces together as directed in that tutorial, then sewed the front to the back at the shoulders and side seams. I took in the side seams a bit so the bodice was fitted, but not actually tight.
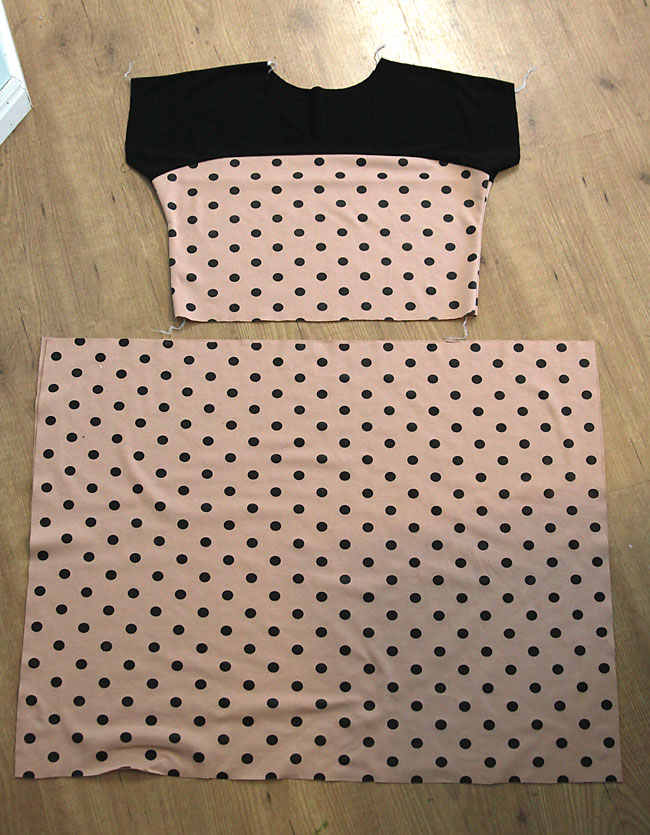
I used the remaining polka dot fabric to make the skirt. I used the entire width of the fabric, so the skirt was quite a bit wider than the top. Then I figured out how many pleats I needed to put in the skirt to make it the same width as the top (I tried a few different configurations, pinned the pleats in place, and then tried it on to see what I liked best – and I actually just gathered the skirt in the back instead of pleating).
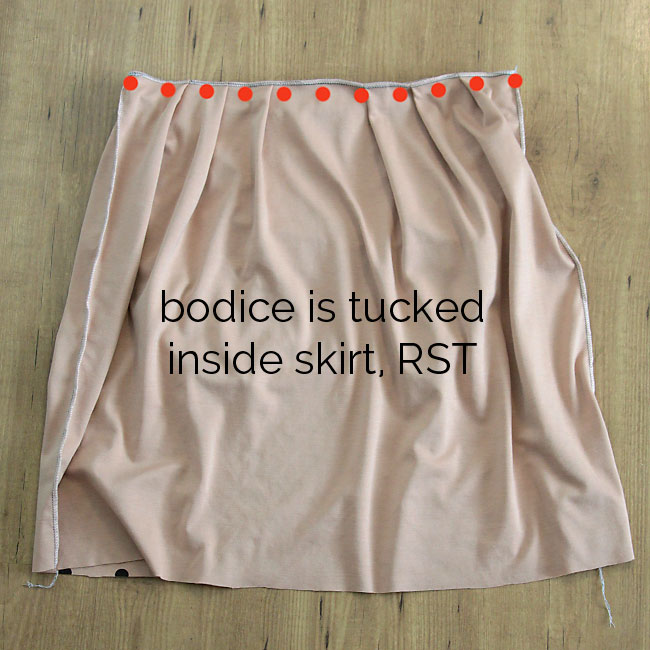
Then I tucked the bodice inside the skirt, right sides together, and sewed the pieces together at the waist. This seam has to be able to stretch, or it will pop the first time you put it on. I used my serger, but you can also use a zig zag seam or a double needle. I’m careful when I put the dress on and take it off not to put too much pressure on this seam.
Lastly I hemmed the skirt, and the dress was finished! Here’s a shot of the pleats in front and gathers in back:
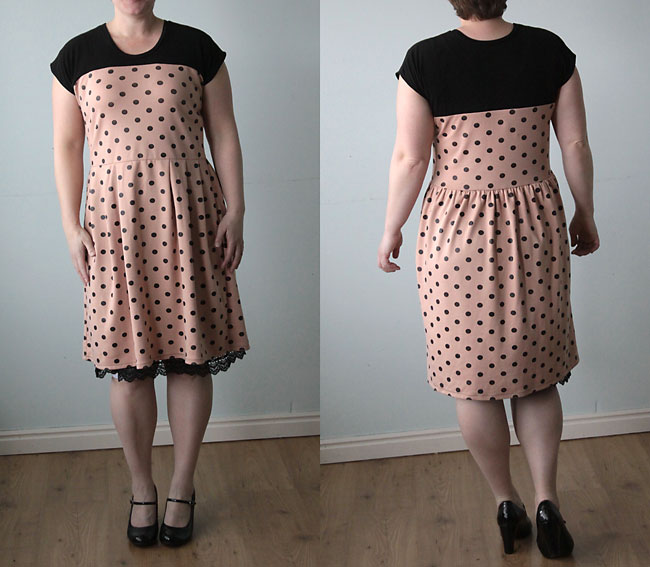
You could use any t-shirt pattern to make a simple dress like this one. The silhouette feels a little retro, but the colorblocking keeps it modern. I’m always a little nervous the first time I wear a handmade outfit out of the house, but I got I couple of compliments on this one at church, so I guess it’s ok! Thanks for reading 🙂

linked at: Make it and Love it, I Heart Naptime, Whipperberry, Tidy Mom


autumn says
Rachel – that’s a great idea. I don’t know if I can’t do that or not but I’ll look into it – thanks!
Tami says
Oh my gosh-I love polka dots and this is just too darn cute!
autumn says
Thank you! I like that it’s super comfortable and feels kind of retro. I just can’t get enough polka dots these days.
danielle says
What a great dress!!! I came over from Pinterest.
I love the modern nod to the past! I’m excited to try and make this one!
autumn says
Thanks so much – good luck making your own and I’d love to see a photo if you do!
kathy says
This dress is really cute. I like the idea of wearing the pretty slip under, it makes the dress a little “fancy”. PS Your hair is adorable, I love it a little longer.
Emma J says
This is such a cute idea! You are so creative! I love the fabric you used too. Thanks for sharing!
Emma