
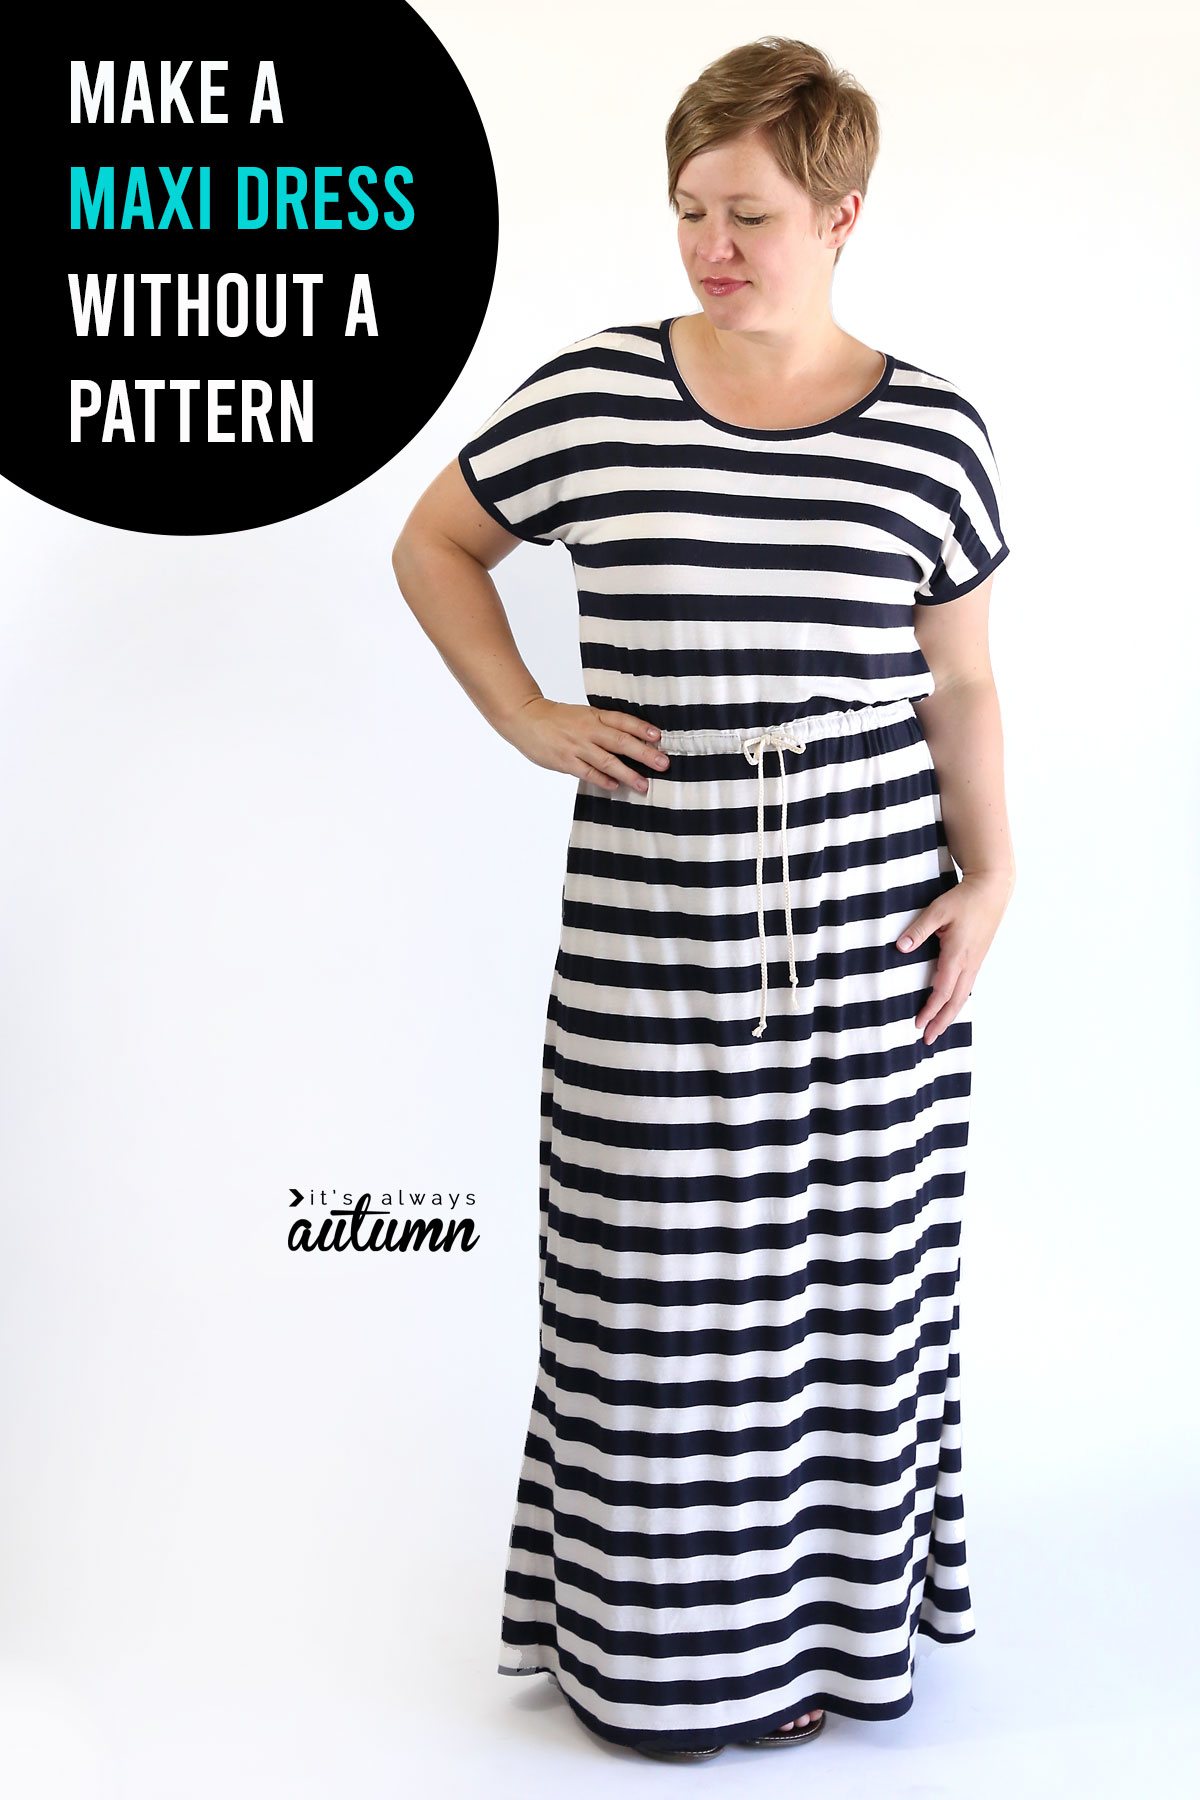
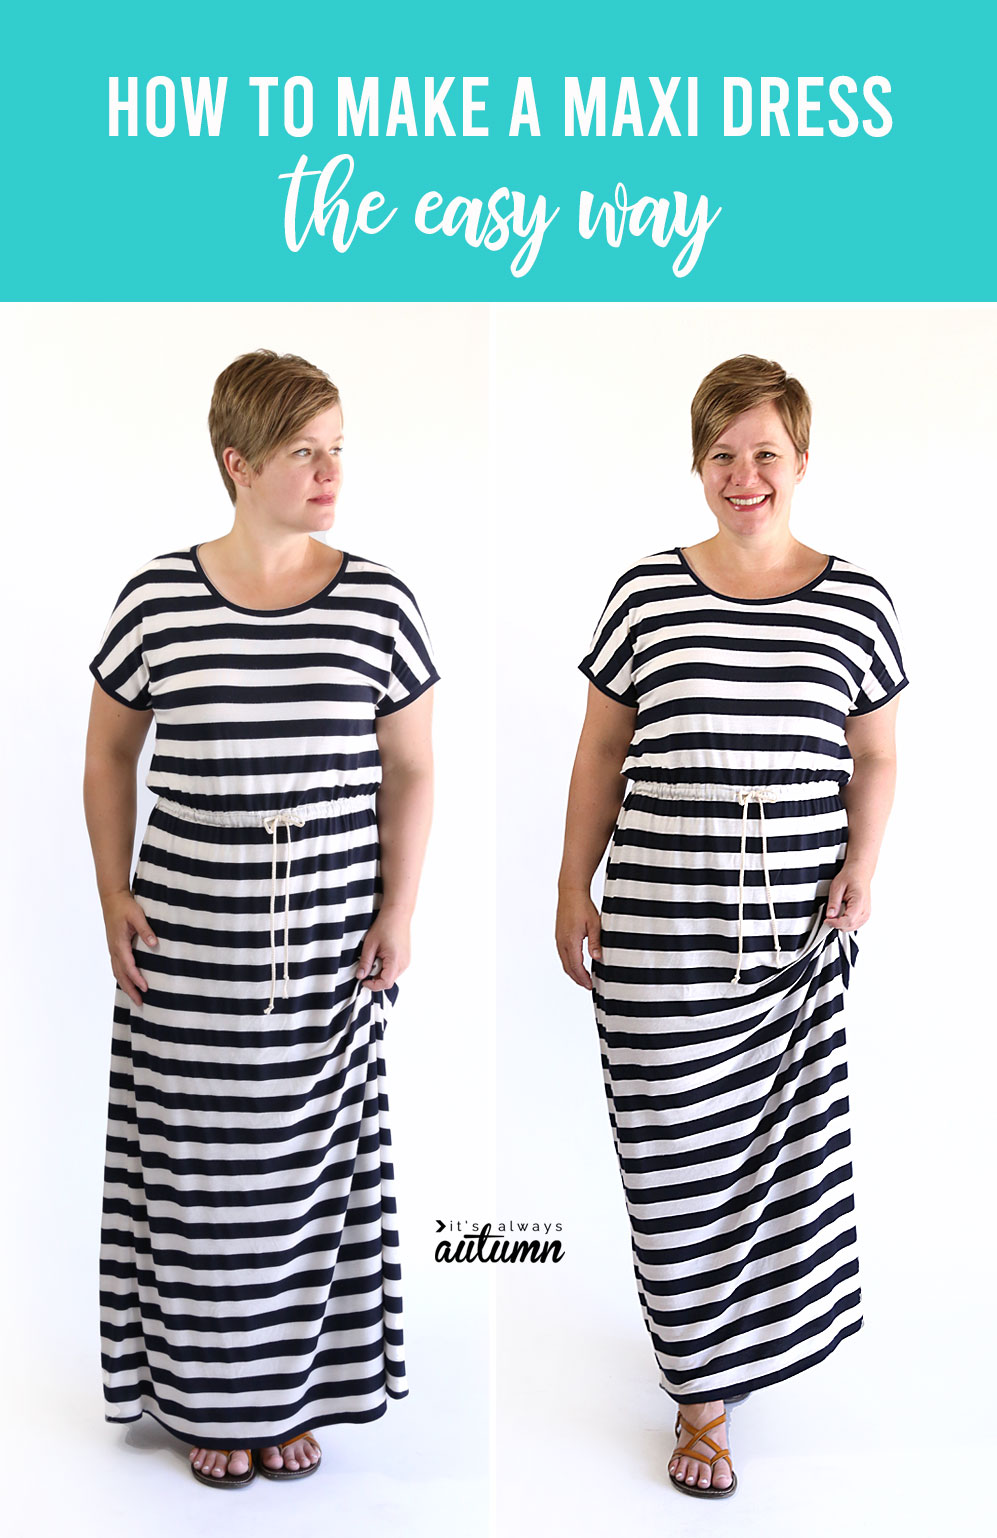
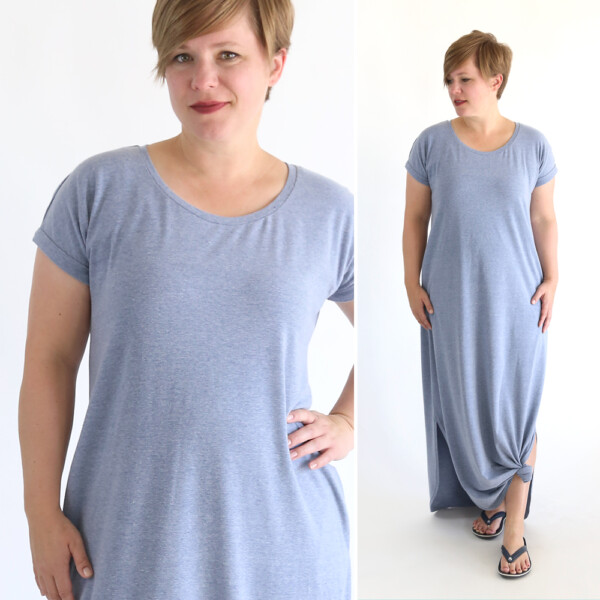
In today’s post: Learn how to make a super easy maxi dress without a pattern!
***Five years ago I shared a tutorial for a SUPER EASY maxi dress. It’s the simplest way I could come up with to sew up a maxi dress that has sleeves. The original tutorial used my Easy Tee pattern as a base, but I decided to revisit it today and show you how to make this simple maxi dress without a pattern. I’ve included new photos and more detailed instructions. Enjoy!***
I got the idea for this easy to sew maxi dress when I saw the dress below (from The Gap years ago). It was so cute and looked perfectly comfortable and cool for summer. But it was $75, which is a little pricey, and I could tell from the photo that the gathered waistline would hit very low on me which just looks terrible. Plus in the reviews people complained that the fabric was very thin, which means it wouldn’t hide my muffin top very well.
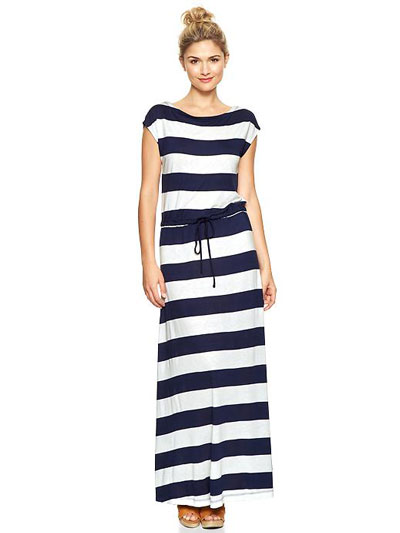
So I figured out how to make my own. It takes 2 yards of knit fabric and one yard of elastic, so you’ll be able to make it for $50 or $60 less than the Gap version. You don’t need a sewing pattern, because you’ll make your own simple pattern using a t-shirt as a guide.
How to make a Maxi Dress pattern
This maxi dress just has two main pattern pieces: a front and a back. You’re basically going to draw around a t-shirt that fits you well to create your own pattern for these pieces.
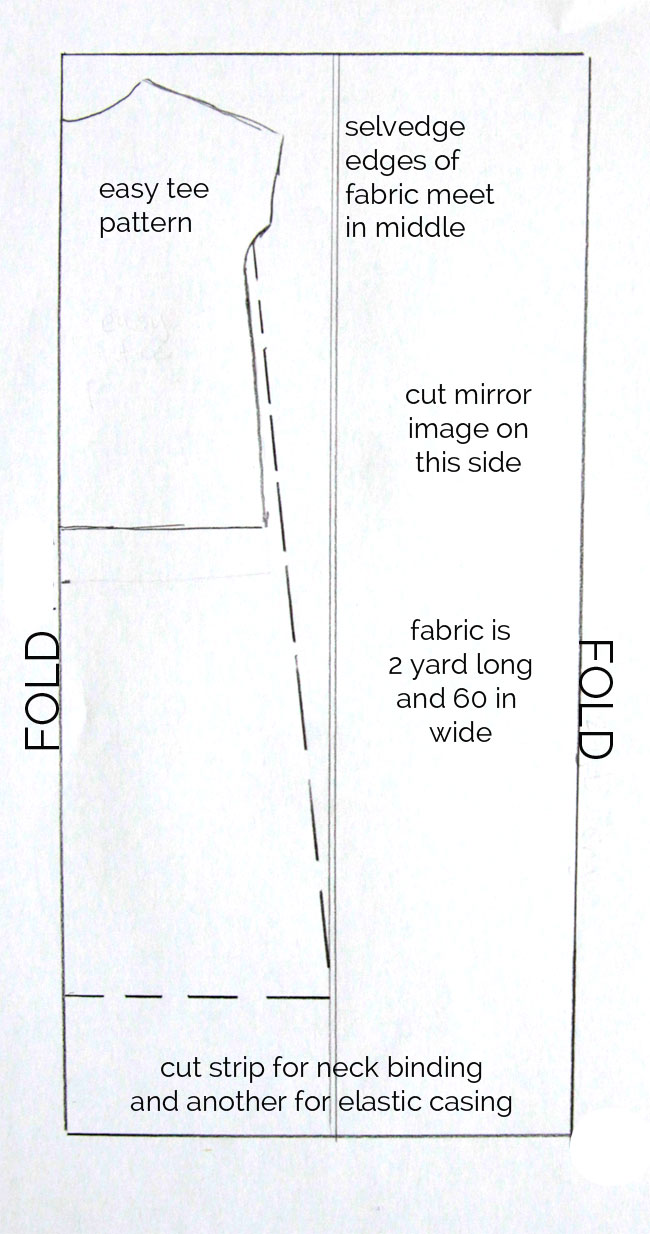
You will need 2 yards of 60 inch wide knit (stretchy) fabric. You’ll also need a yard of 1/2 inch elastic. Wash and dry your fabric before you begin. Then lay the fabric out on a flat surface and smooth it out. Fold the fabric in from each side so that the selvedge edges meet in the middle (see photo below). Please note that this method of cutting out a maxi dress will not work with sizes above an XL.
NOTE: If you wear a womens size L (approx 38 in bust), you can print out my Easy Tee pattern and use it to make this dress. If you’re a different size, don’t worry! I’ll show you how to make this dress using a t-shirt you own. The illustration below shows how the pieces will be cut for this dress if you use the Easy Tee pattern.
To make this dress using a t-shirt instead of my pattern, find a tee that fits close to your body without being so tight it stretches when you put it on. If you use a t-shirt that has to stretch to fit you, your finished maxi dress will be tight. To get the loose fit you see here, you need to use a t-shirt that fits well without being tight. (Please note that this method of making a maxi dress will not work for sizes above an XL.)
Set up your fabric as described above. Fold your t-shirt in half and line it up along one of the folded edges of the fabric. Be sure to smooth the shirt out flat. Use pins to “trace” around the shirt, as shown below. You do not need to add seam allowance along the neckline, but you do need to add seam allowance everywhere else. You’ll notice that we aren’t treating the sleeves as a separate piece; just trace all the way around the shirt and sleeve together as you see below. Usually when tracing a pattern I add 1/2 an inch seam allowance; for this dress I added quite a bit more room (1-2 inches) to get a relaxed fit. Remember, you can always take something in, but once it’s cut you can’t take it out!
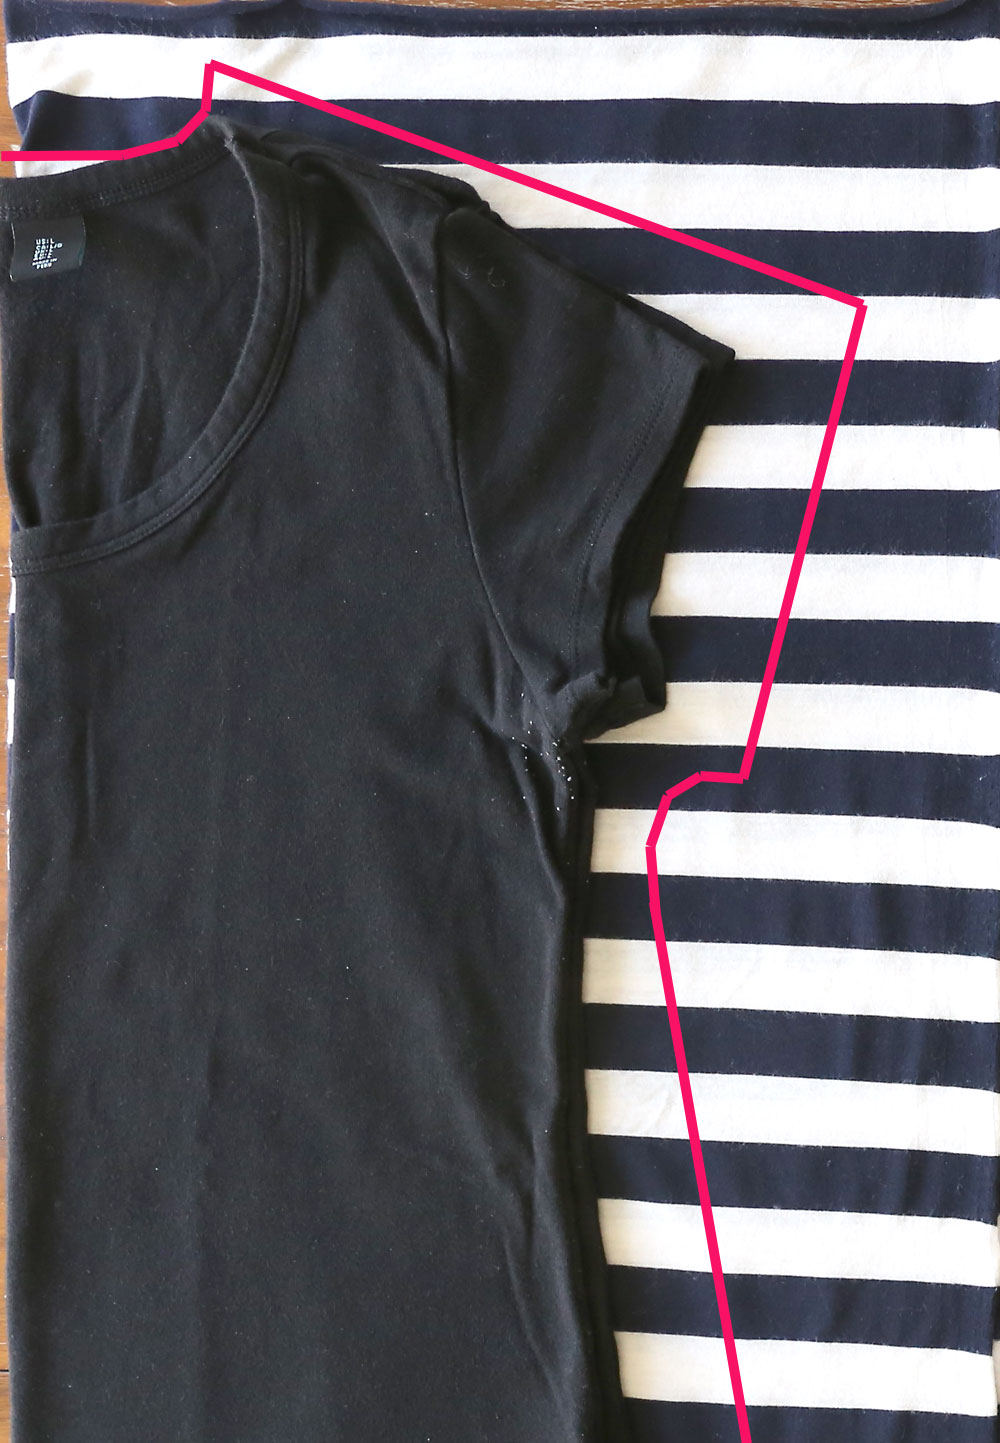
Curve in right below the sleeve, and then immediately angle out as shown below. You’ll trace/pin a straight side seam all the way down the side of the dress. The dress pieces should be about 60 inches long from the top of the shoulder to the hem (or a bit longer if you’re really tall – I’m 5’3″ and I cut at least 5 inches off the bottom before hemming).
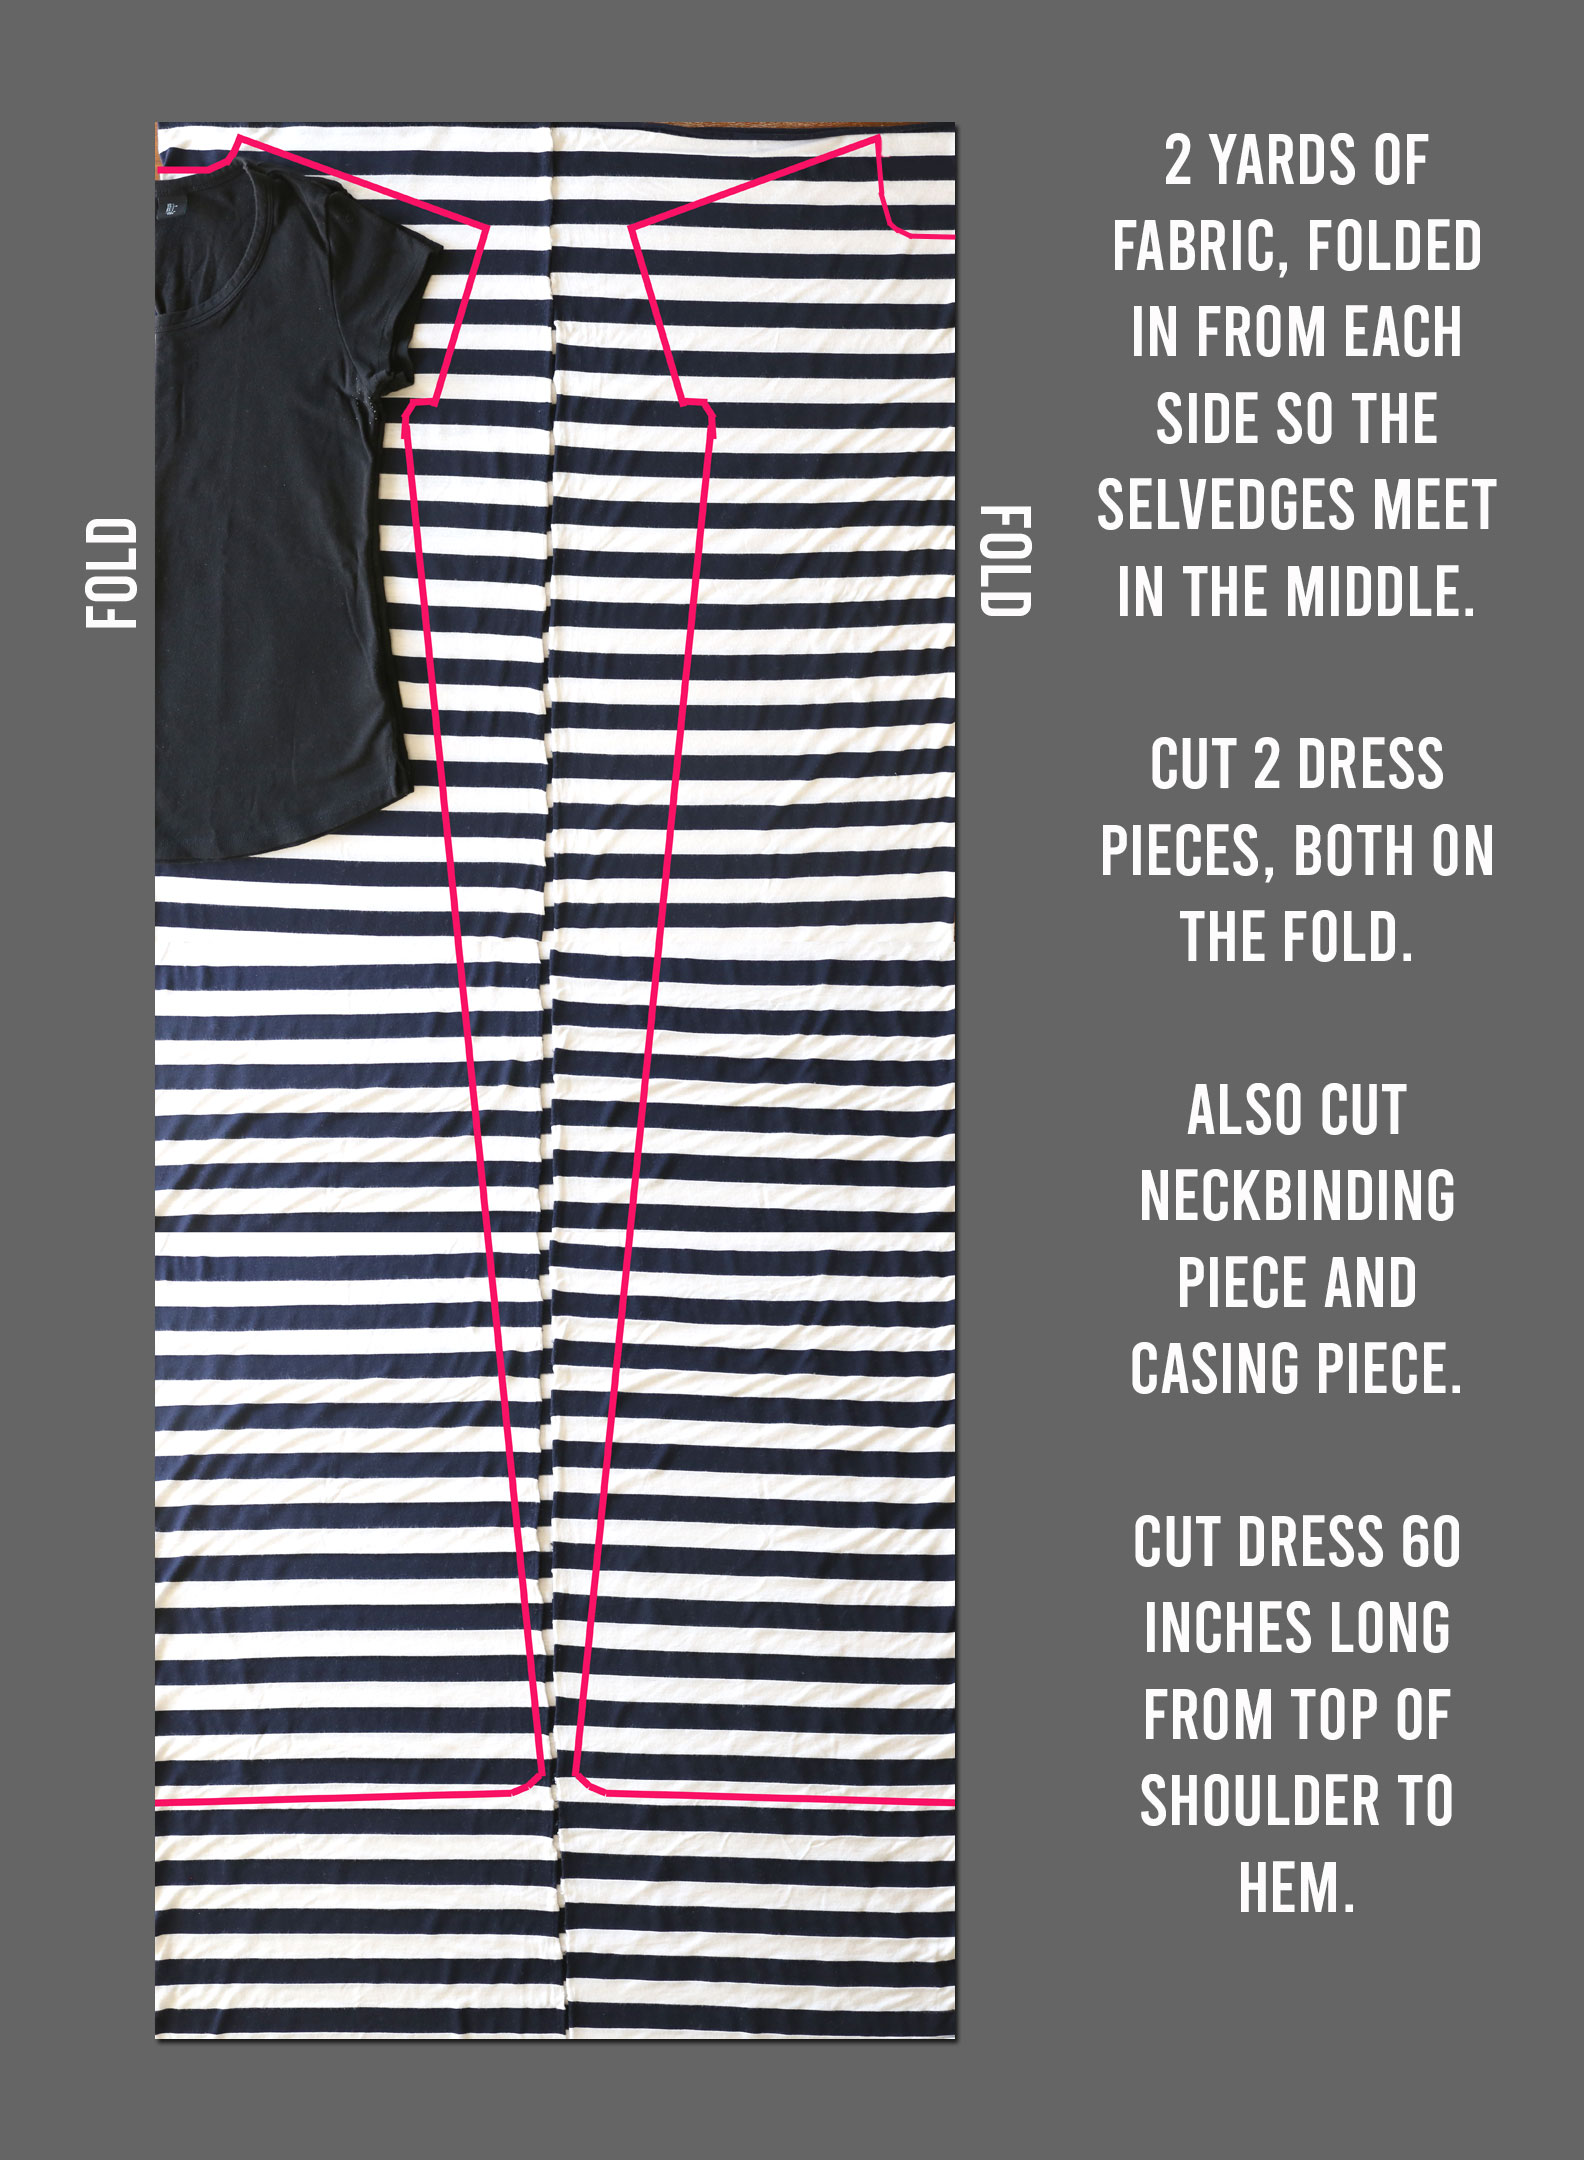
Repeat on the other side with a mirror image. On this side, cut the neckline lower, tracing the front neckline of your t-shirt.
You’ll have some extra fabric left below the dress pieces. From this you’ll want to cut a neckbinding piece that’s approximately 1.75 inches high and 28 inches wide (stretch goes along the width). You’ll also want to cut a casing piece that’s approximately 1.25 inches high and 50 inches wide (stretch goes along the width).
How to sew a maxi dress
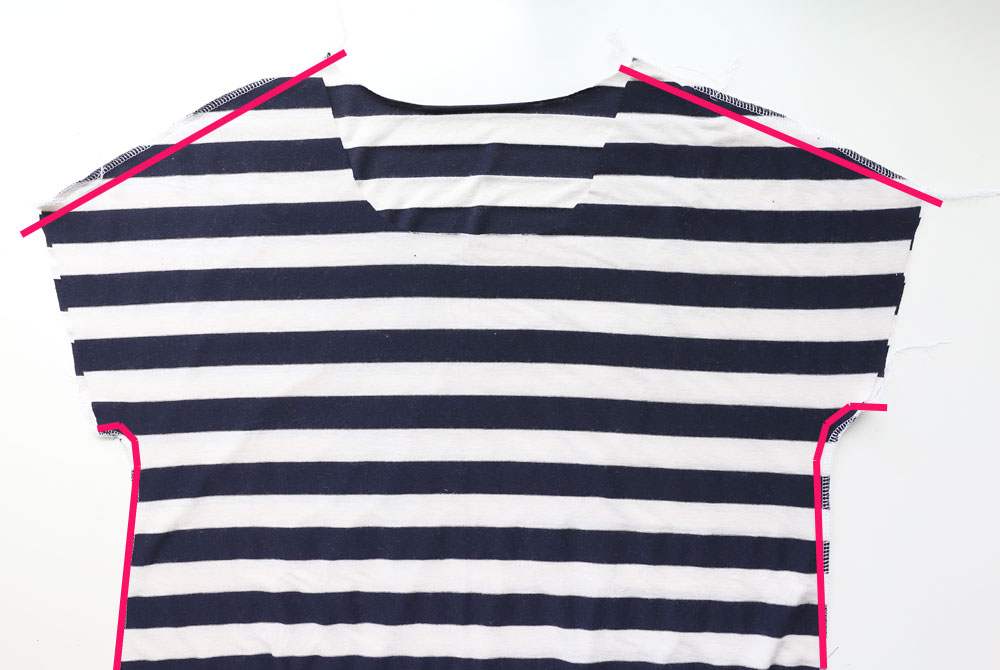
Take your two maxi dress pattern pieces and lay one on top of the other, with right sides together. Sew across the shoulder seams. Sew the sides seams, starting under the sleeve and continuing all the way to the bottom of the dress.
That completes the very basic dress construction! Now we need to add some elastic to define the waist. I prefer my dresses to have elastic right at my natural waist; however, depending on your body type, you may prefer a higher or a lower waistline. So put your dress on and grab your elastic. Standing in front of a mirror, tie the elastic around your waist, then move it up and down to see what sort of waistline looks best on you. Mark the place you’d like the elastic to hit with pins.
NOTE: If the dress feels too big even with elastic pulling it in at the waist, you can take it in along the side seams at this point.
We’re going to create a casing to thread elastic through. You should have cut a long strip of knit that’s 1.25 inches high and long enough to go all the way around the dress at the waistline.
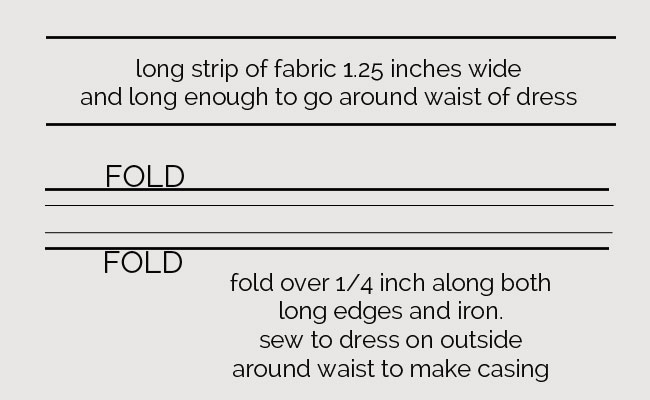
Place one end of the casing strip in the middle front of your dress, right where you marked the waistline. Carefully pin the casing all the way around the dress and back to the middle front. Trim it when it meets itself. Fold each short end under and press. That will create about a 1/2 inch opening in between the casing ends.
Now you’ll sew the casing to your dress. First you’ll sew along the top of your casing, very close to the edge. Use a long straight stitch and stretch the fabric just slightly as you sew. Then you’ll sew along the bottom of your casing, again very close to the edge. Go slowly here so you can keep your stitch lines straight, but don’t get too stressed if they wobble a bit. No one will ever notice once the elastic is inserted.
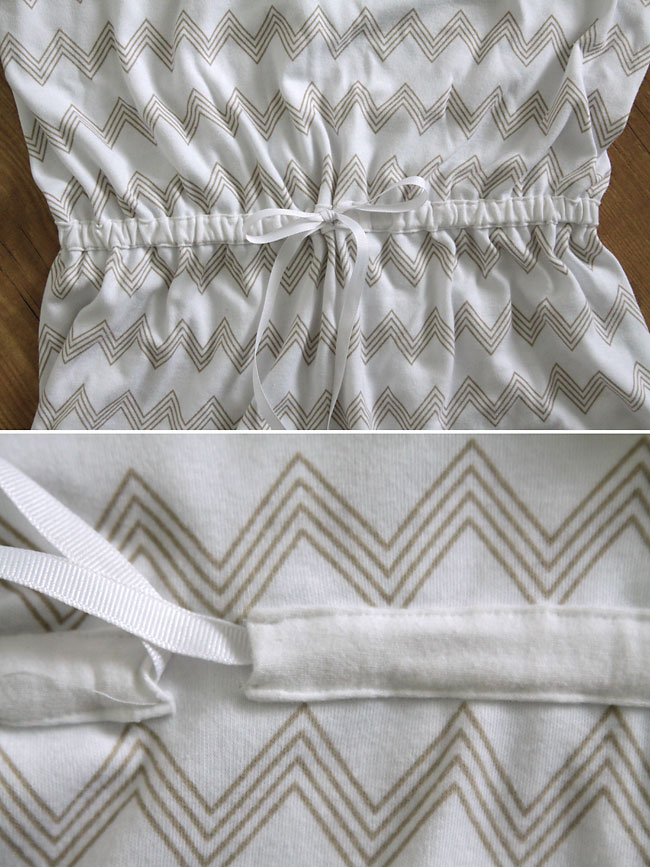
You can see in the close-up photo that my stitching is a little wonky here, but when the elastic cinches it up you can’t tell. (Be sure to use a long stitch length when sewing on knits.) I cut 1/2 inch elastic just shorter than my waist measurement, then sewed ribbon to each end of the elastic, and threaded it through. That way all the elastic hides inside the casing, and I can use the ribbon to tie a bow in front.
Making a maxi dress: Finishing
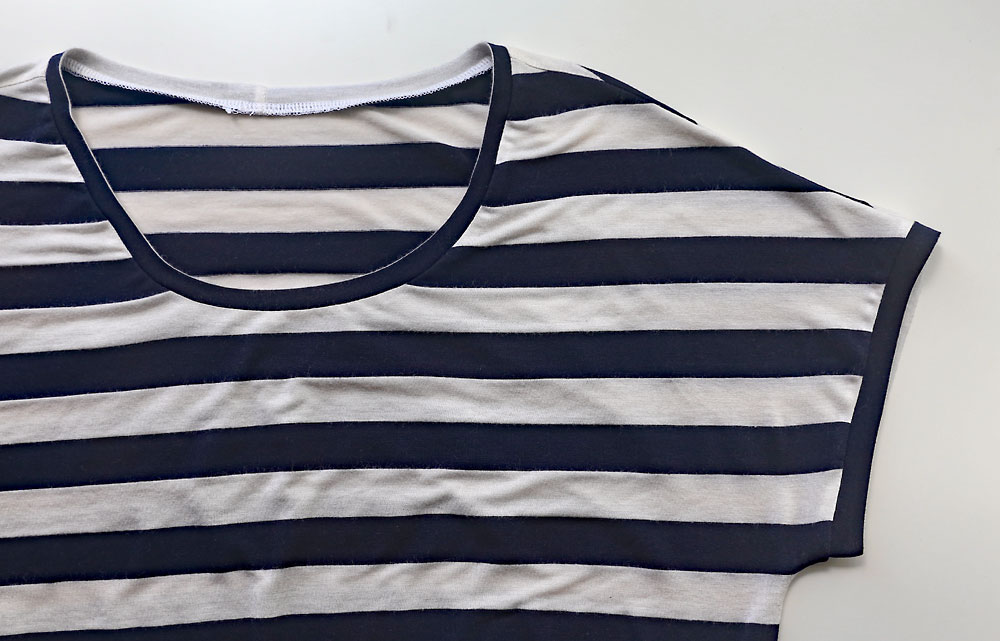
At this point you just need to finish up the neckline, sleeve, and hem. If you aren’t familiar with binding a neckline, read my post on how to sew a t-shirt neckline.
For the sleeves, you can turn them up 1/2 an inch, press, and sew with a zig zag, double needle, or stretch stitch. For this dress, I actually finished the sleeves with a band so they would match the neckline.
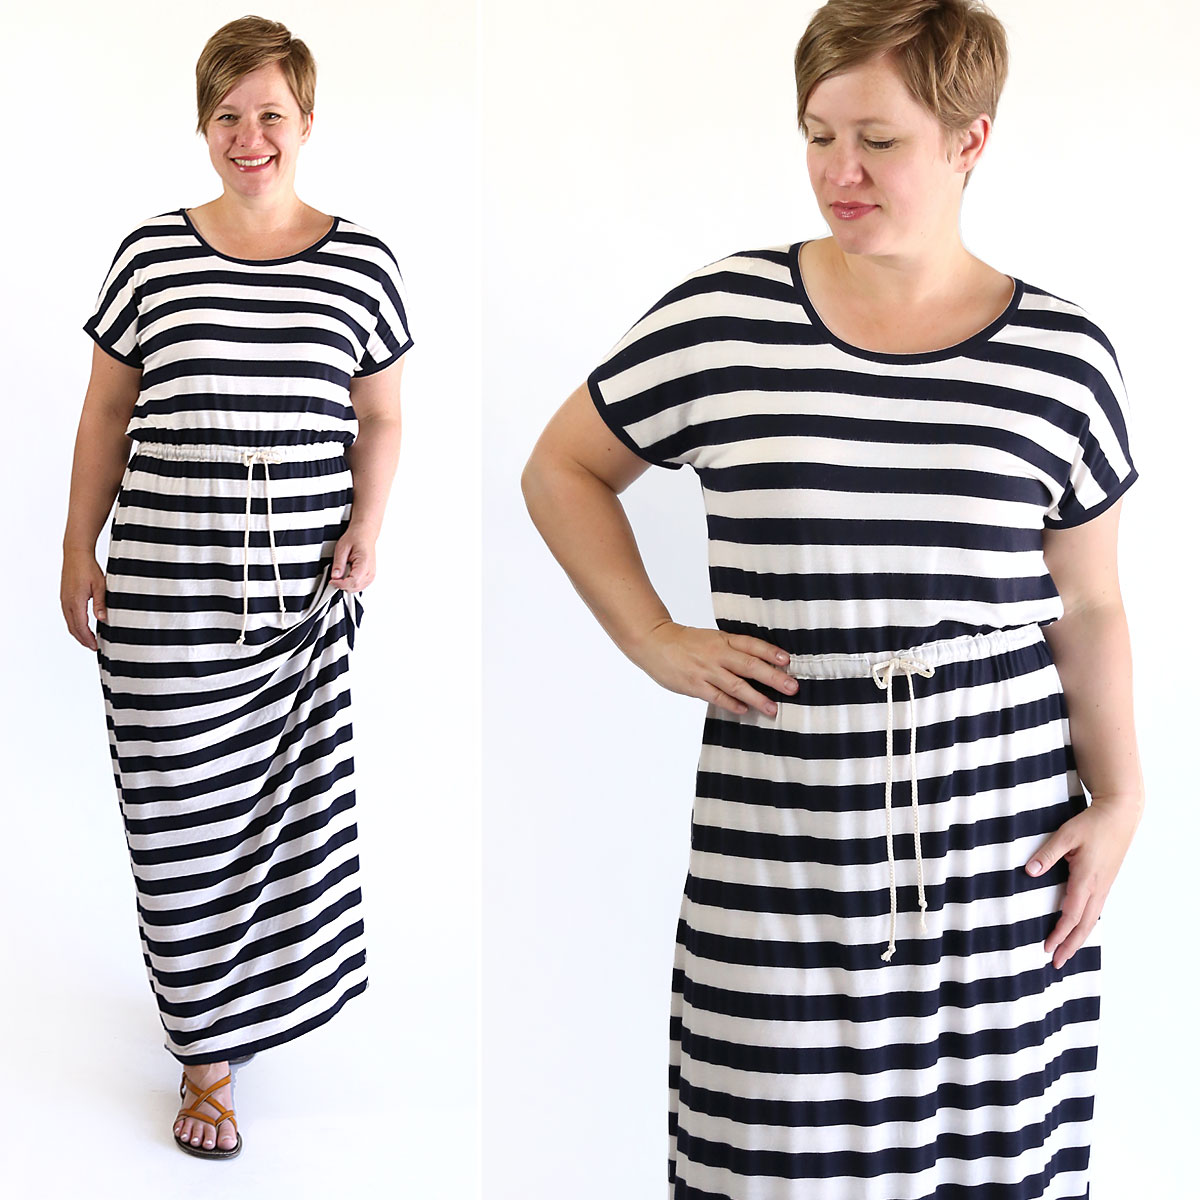
Finally, you’ll hem the dress to your desired length, and you’re done! An easy to sew maxi dress that doesn’t require a pattern.
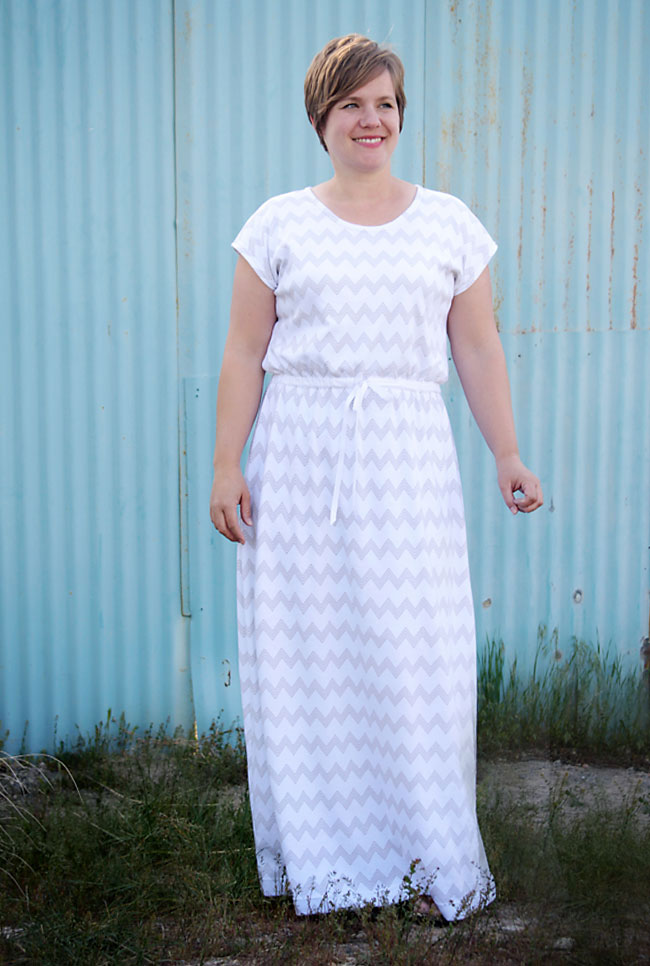
Wanna see the version from 5 years ago just for fun? Here you go:


Leave a Comment