Sometimes a little bit of editing can turn a good photo into a great one. In the next few weeks, I’m going to share a variety of simple photo edits that will help you make the most of the photographs you take. Today’s easy edit focuses on how to brighten and color boost a dull photo.
When you shoot on AUTO, there are lots of reasons your photos may end up a little dark or dull (if that background is bright, if the person you are photographing has fair skin, if it’s a cloudy day, etc.) Even if you shoot on manual it’s easy to end up with photos that are either a little underexposed or just don’t have much contrast and as a result look a bit lackluster. Luckily, it’s super easy to brighten and color boost your photos, and it makes a big difference.
I’ve mentioned before that because monitors are generally quite bright, even photos that look ok on your screen may end up quite dark when they’re printed. Turn the brightness on your monitor down at least halfway to get a better sense of how the photo will look printed out. When you do that, you may find that many of your photos could use a little boost & brighten.
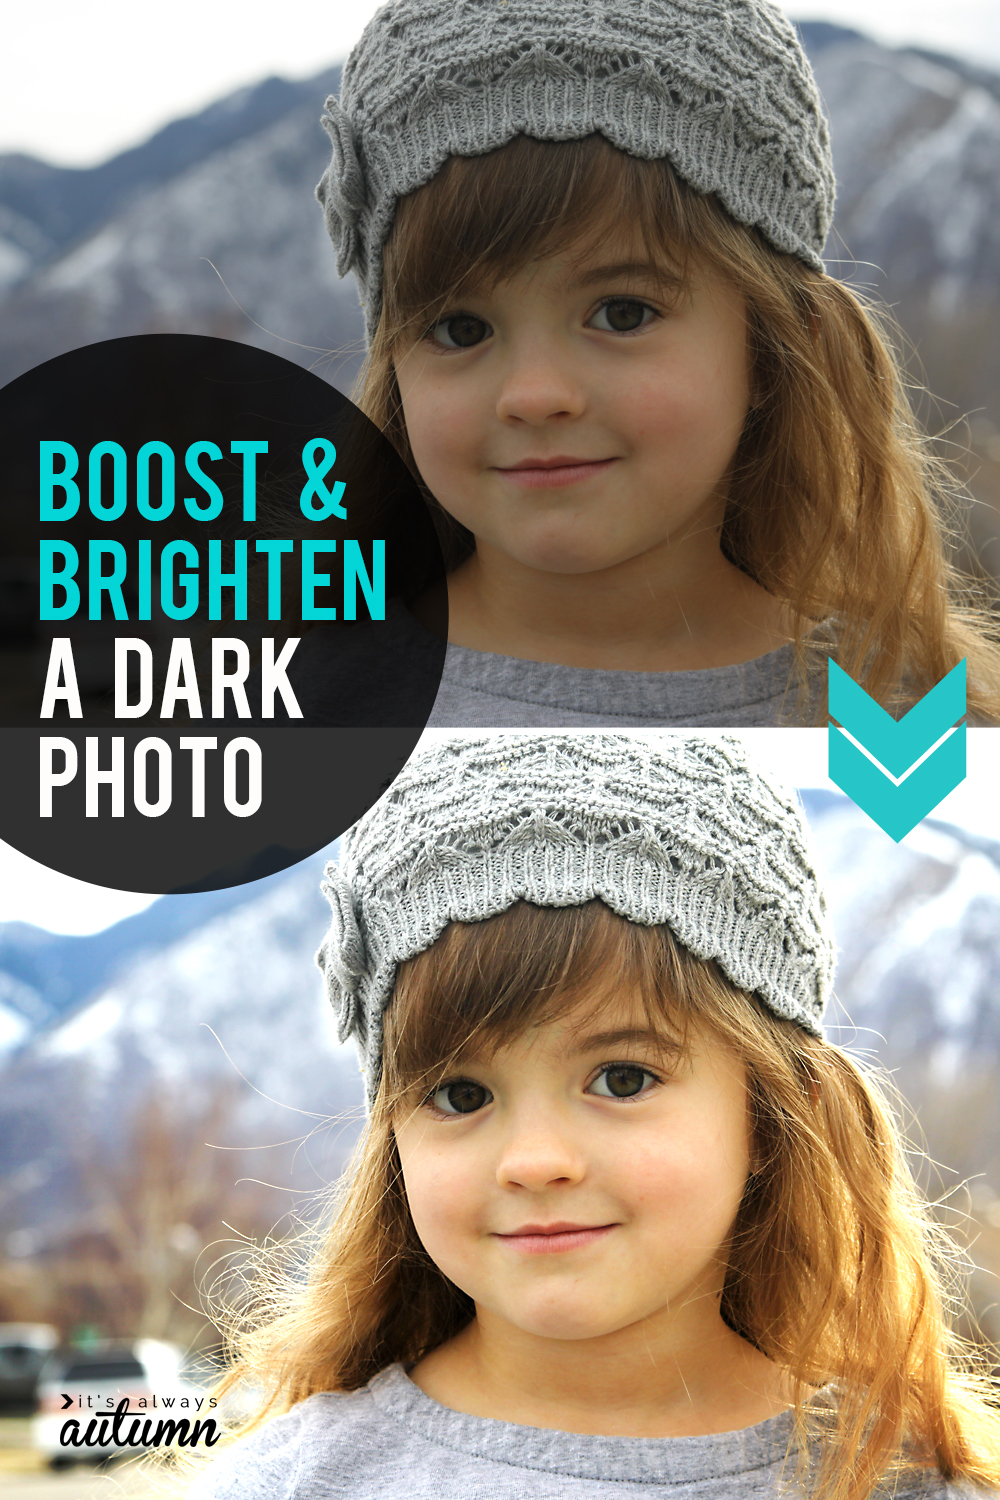
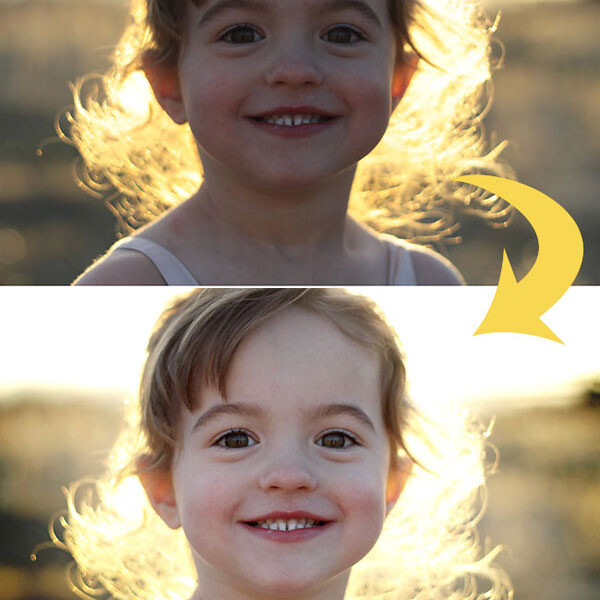
A fairly subtle change can make a big difference in how engaging the photo is to look at. Pay special attention to the eyes, skin, and hair in the next set of photos:
The technique I’m going to show you today uses Photoshop Elements and includes use of a free action (Vivid 2 from The CoffeeShop Blog). You can also find installation instructions for actions on the Coffeeshop Blog. If you don’t want to use an action, you can follow my easy fix for dark photos instructions to brighten your photos, which will help a lot. I like using the action, however, to give them an extra color pop.
NOTE: as with all Photoshop edits, a little usually goes a long way, and it’s easy to go too far and get photos that look completely unrealistic. I’ll show you how to adjust settings for edits that are subtle enough to look realistic but bright enough to make a difference.
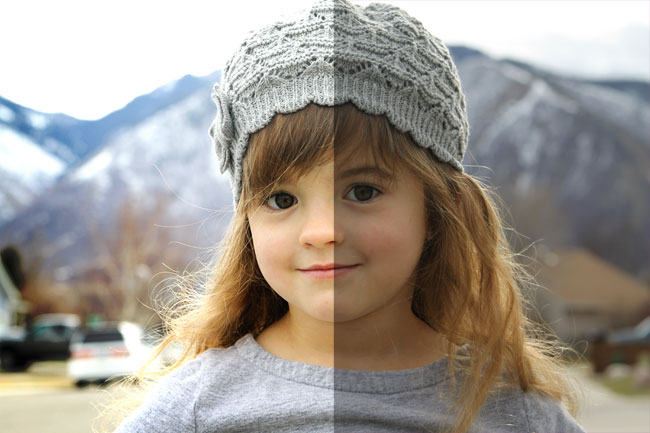
Here’s the photo I started with. Taken outside on AUTO, my daughter’s skin and eyes ended up a little dark and dull due to the brightness of the sky behind her.
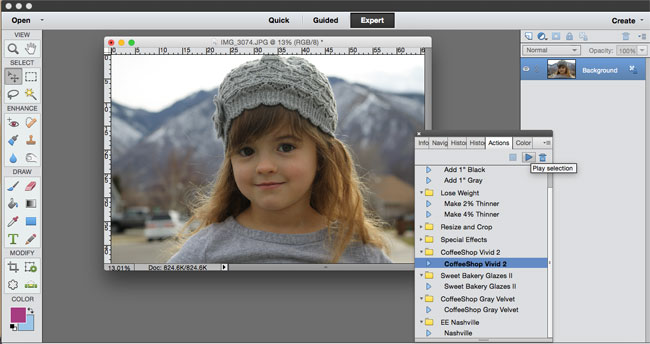
I started by opening the photo in Photoshop Elements, then going under window-actions to locate the Coffeeshop Vivid 2 action. Hit the play button to begin the action, and hit “ok” through the introductory windows that pop up.
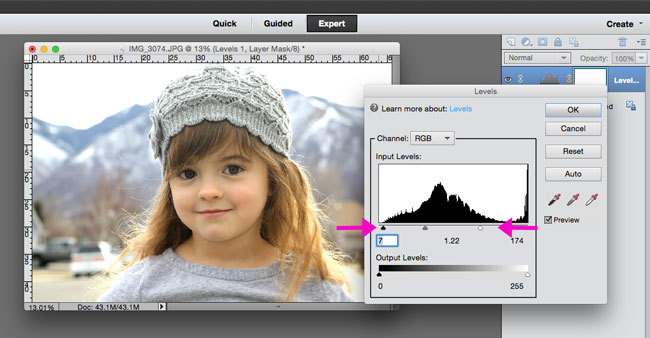
First, you’ll get a levels box, where you can adjust the brightness and contrast. For a more thorough explanation of this window, click through to this post. Basically, you want to move the white and gray sliders to the left to brighten up the photo, and then move the black slider to the right to darken the darks and add contrast. The photo looks a lot better already.
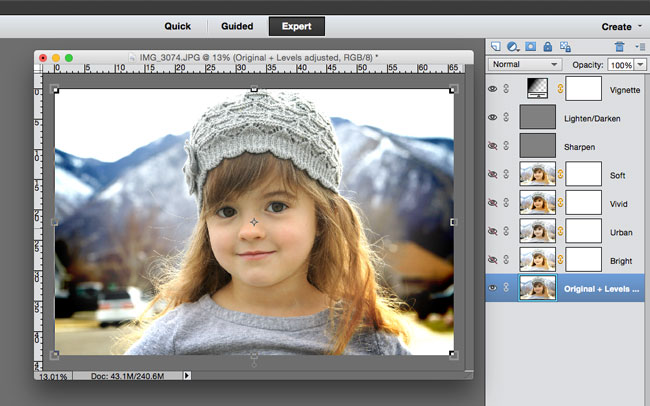
Once you hit ok, the action will continue to run. Once it finishes, you’ll see you have a bunch of different layers over in the layers palette on the right. You’ll notice a vignette has been applied to the photo, darkening up the outer edges.
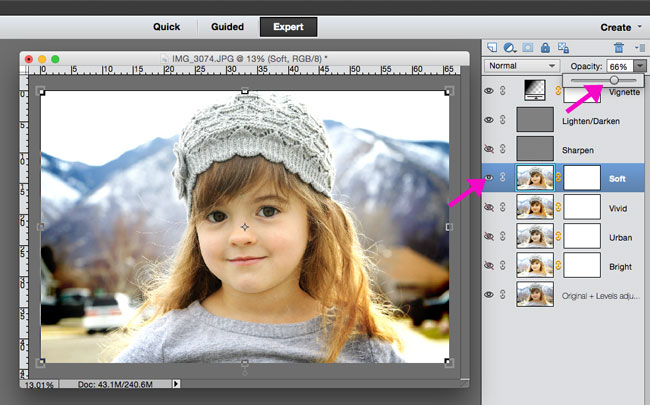
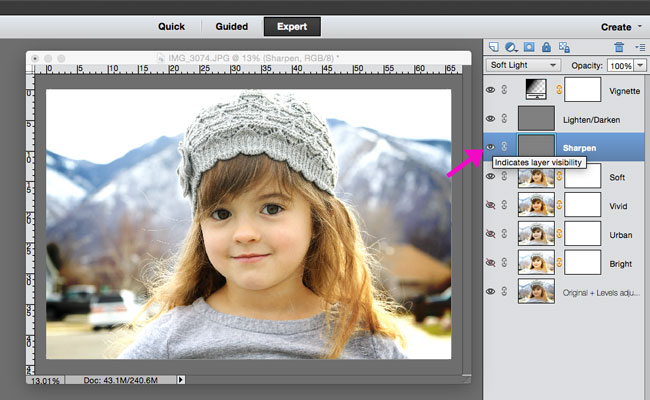
You can experiment with turning on and off the four layers (soft, vivid, urban, and bright) by clicking the eye on each layer. You can also experiment with setting different opacities for each of these layers. I almost always turn on the soft layer only, leaving the other three off. The soft layer brightens up the photo even more, giving it a bit of a “glow.” I usually turn the opacity of the soft layer down, but the amount depends on the photo. I generally set it anywhere between 25% and 75%. Just move the slider around until you like how the photo is looking.
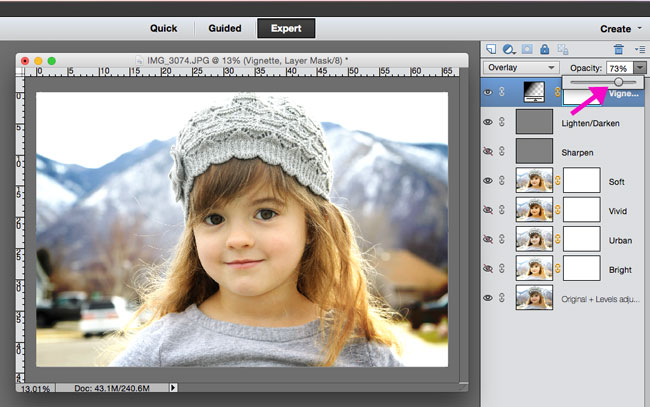
Next, I almost always turn down the opacity of the vignette layer a bit so it’s pretty subtle (on some photos the vignette shows up extremely dark, which just looks dumb). Again, experiment and see what you like best.
This action also has a Sharpen layer, which you can turn on by clicking the eye next to it. Sharpening helps everything pop in the photo.
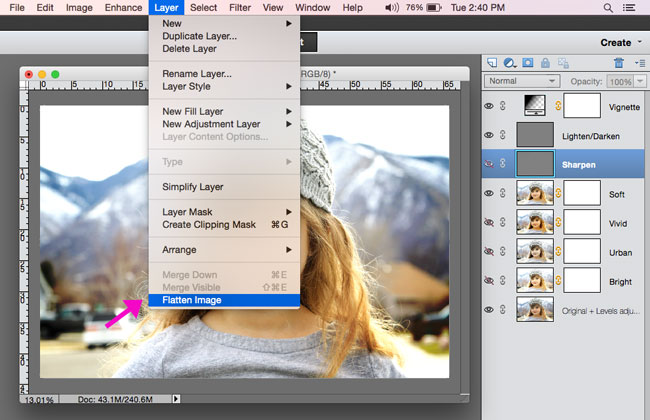
Once you’ve made all the adjustments and you’re happy with the photo, you’ll want to flatten the layers.
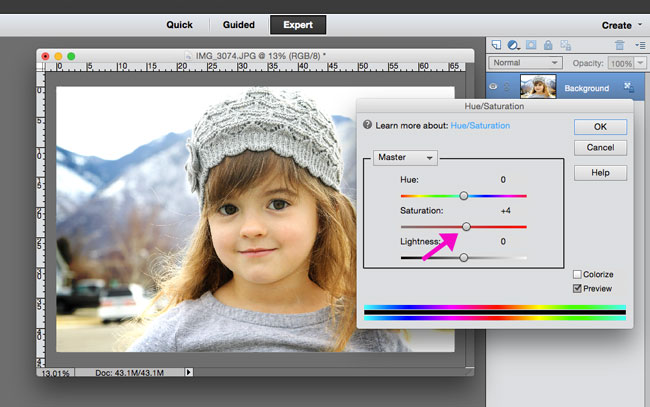
As a final step, I often open the Hue/Saturation box (ctrl-U) and turn up the saturation just a bit (I used +4 here). If you go too far, your photo will start to look really fake, but a small bump can be nice.
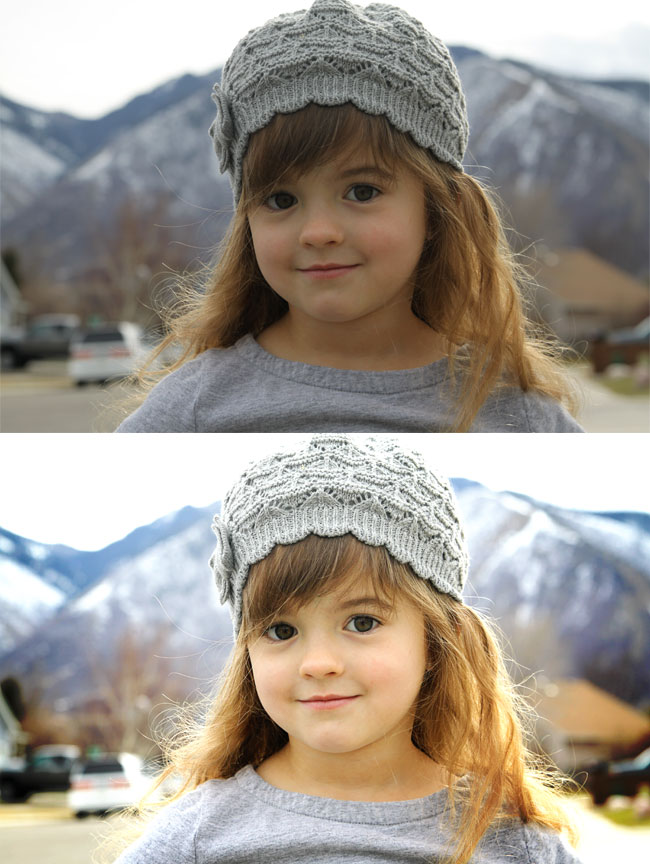
And you’re done! It may seem like a lot of steps, but once you get used to doing this you can get through it in about 60 seconds. Here’s the before and after:
And a split version so you can really see the difference it makes:
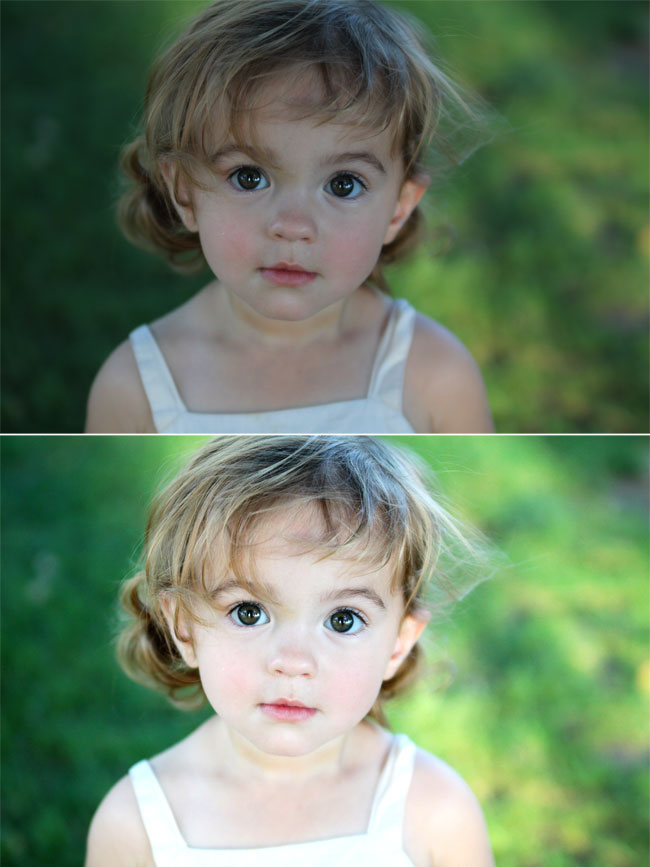
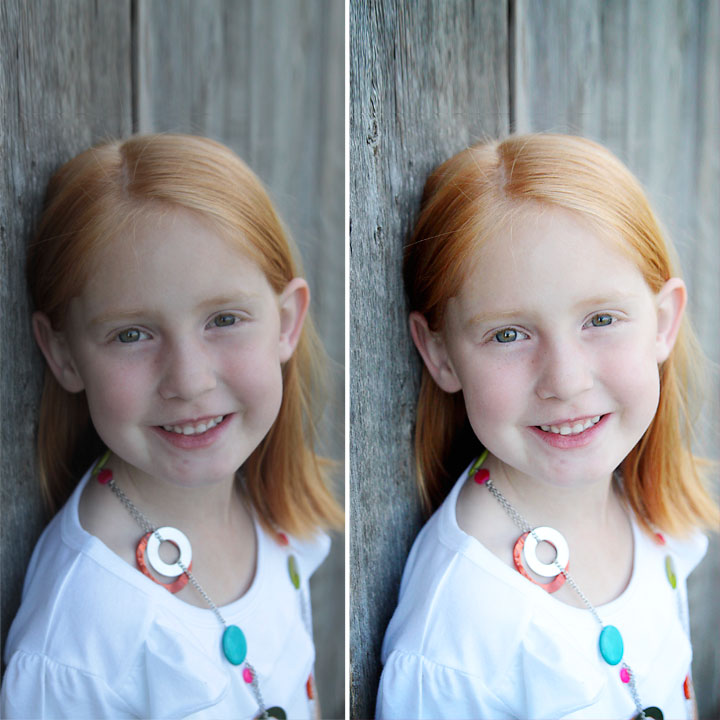
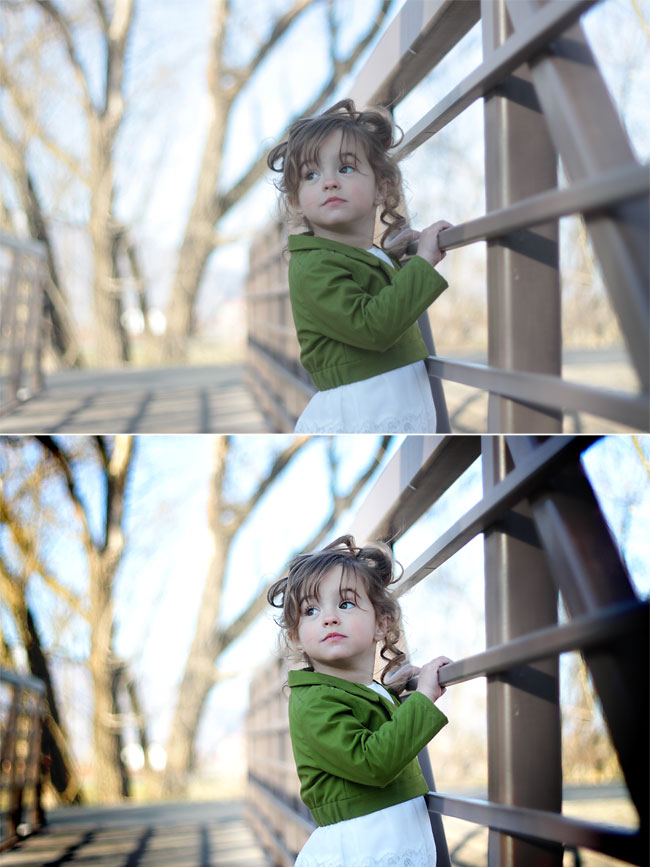
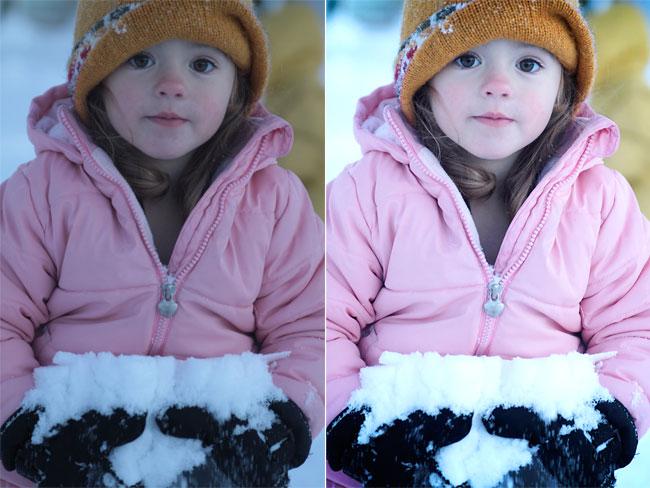
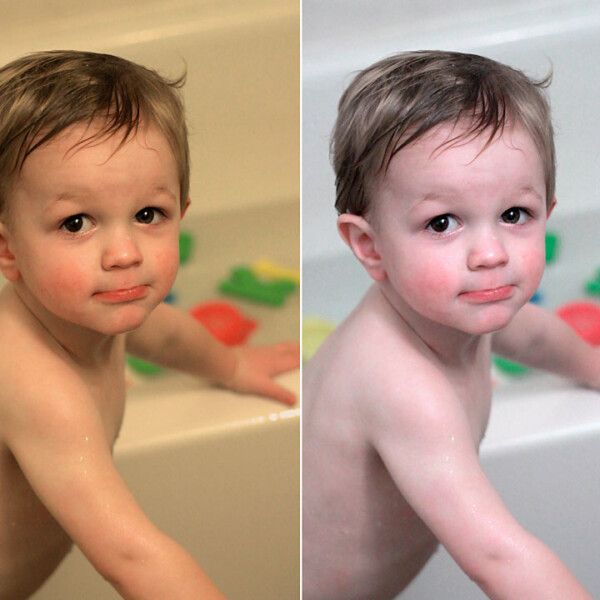
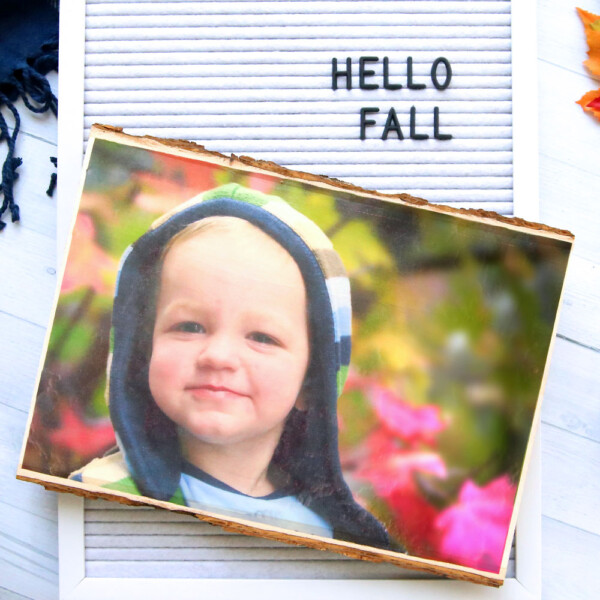
I’ll leave you with a few more examples of what a difference a quick boost & brighten can make in your photos.
If there are any photo edits you’d like to learn how to do, just let me know in the comments – thanks!




Laurie Williams says
Thank you so much for the nicely-detailed instructions!