
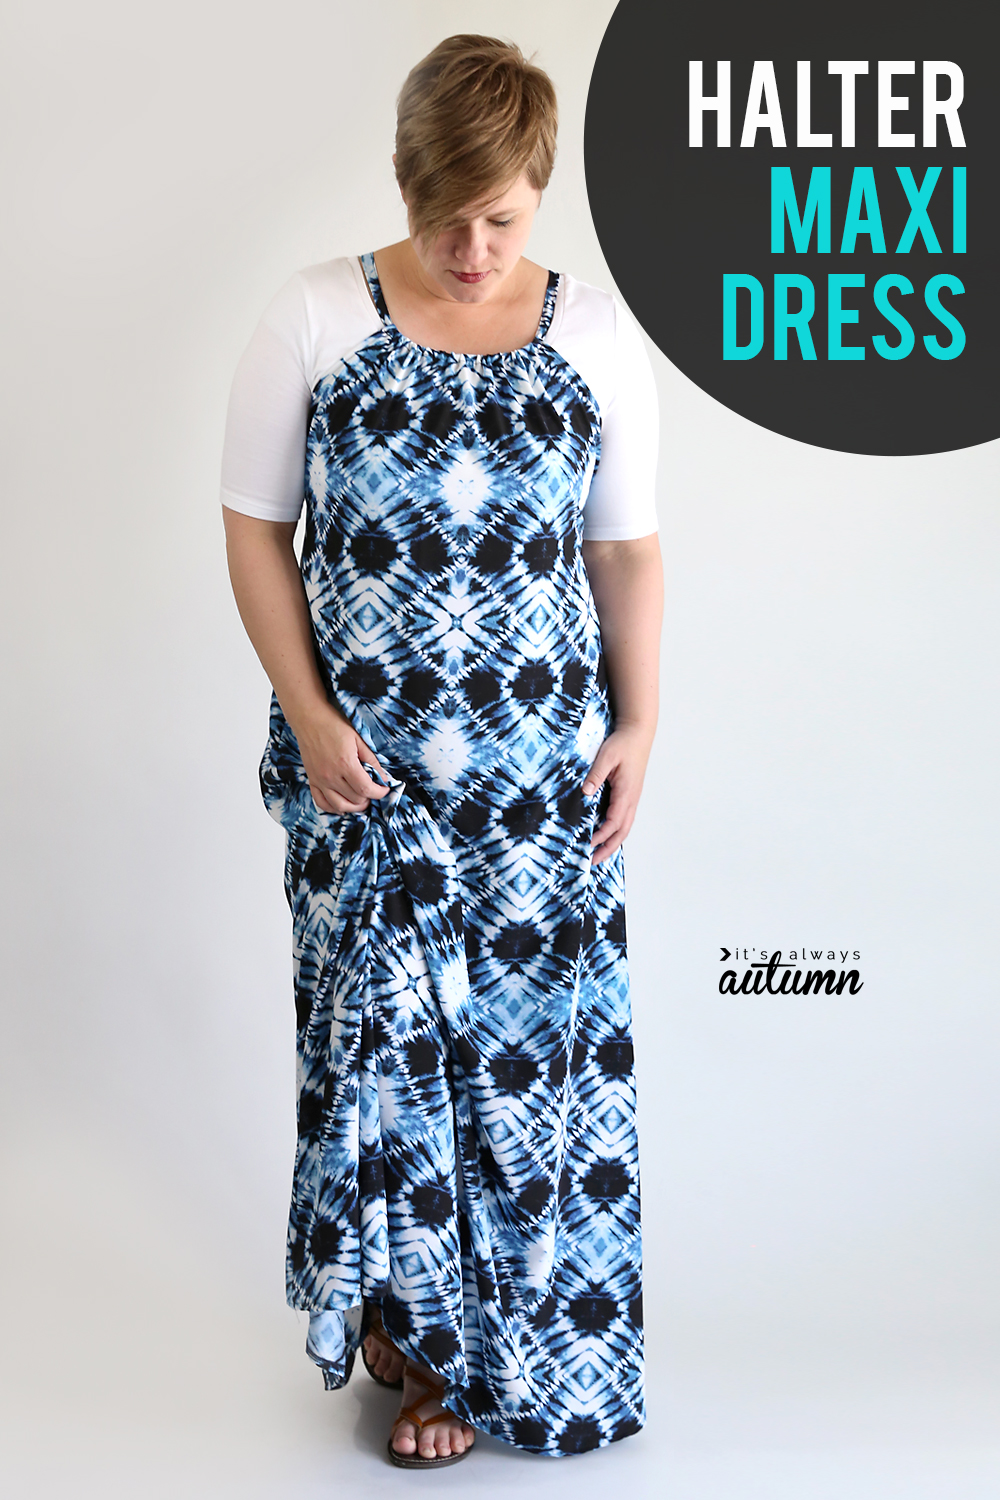
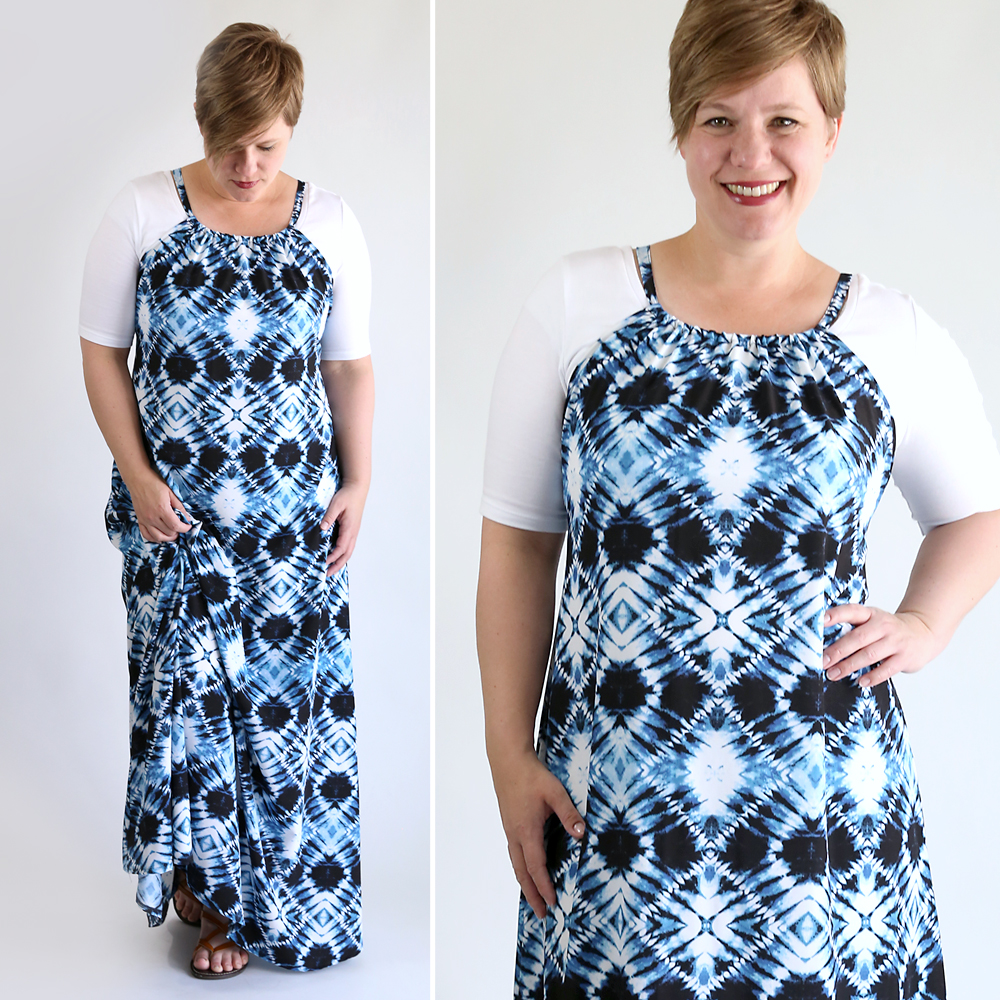
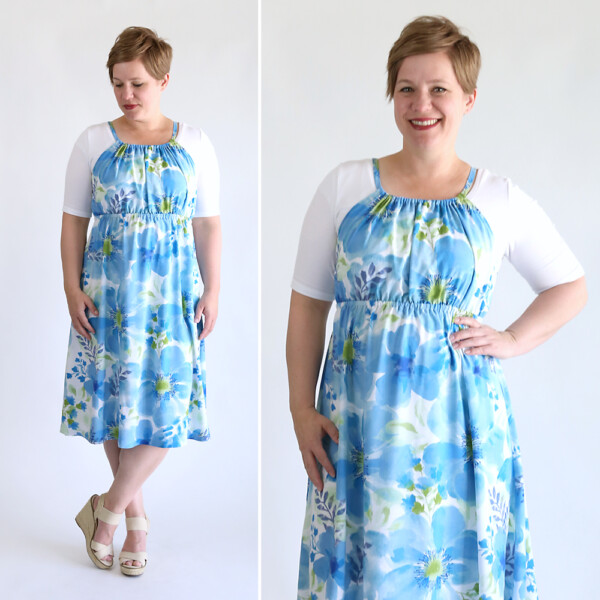
In today’s post: Learn how to make a pretty halter maxi dress for summer!
So yeah, I’m a maxi dress addict. They’re comfy without looking frumpy, they hide my big calves, and my muffin top can jiggle as much as it wants without anyone noticing. Plus they’re cool in the hot summer weather. What’s not to love?
If you’re a repeat blog reader, you know all this already, so you won’t be surprised that I have another maxi dress tutorial for you today. (Want to check out all my other maxi dress tutorials? Click here.)
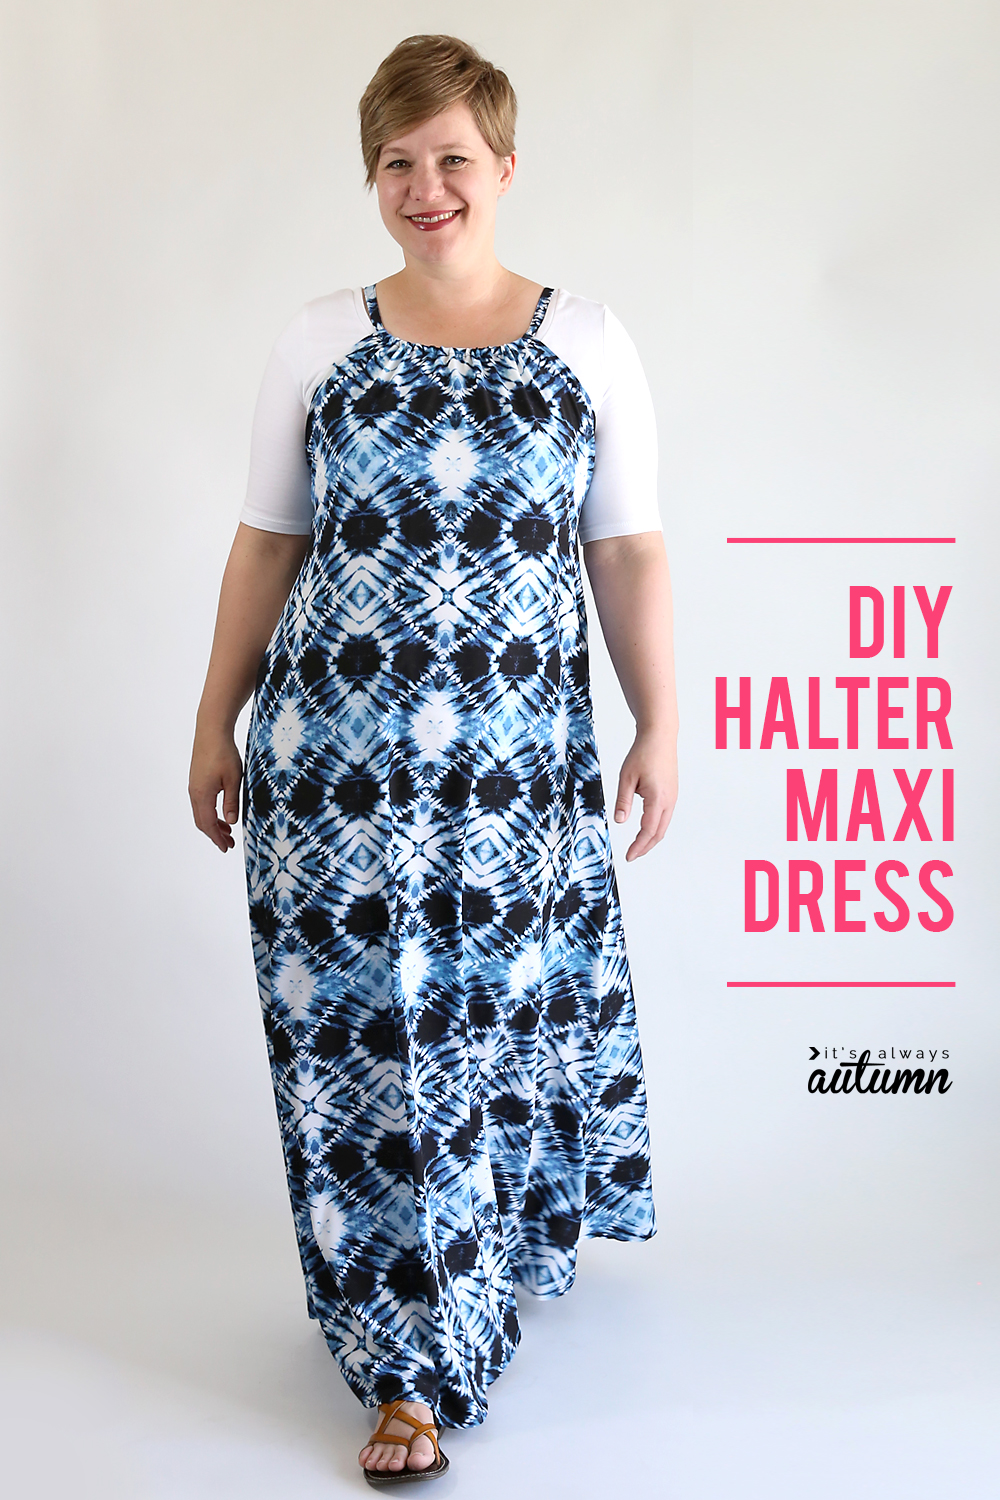
How to make a DIY halter maxi dress
I usually make maxis that have attached sleeves because I generally keep my shoulders covered for religious reasons, but I really like the look of a halter sundress with a gathered neckline. So this dress is sleeveless; I’m just wearing it over a white tee.
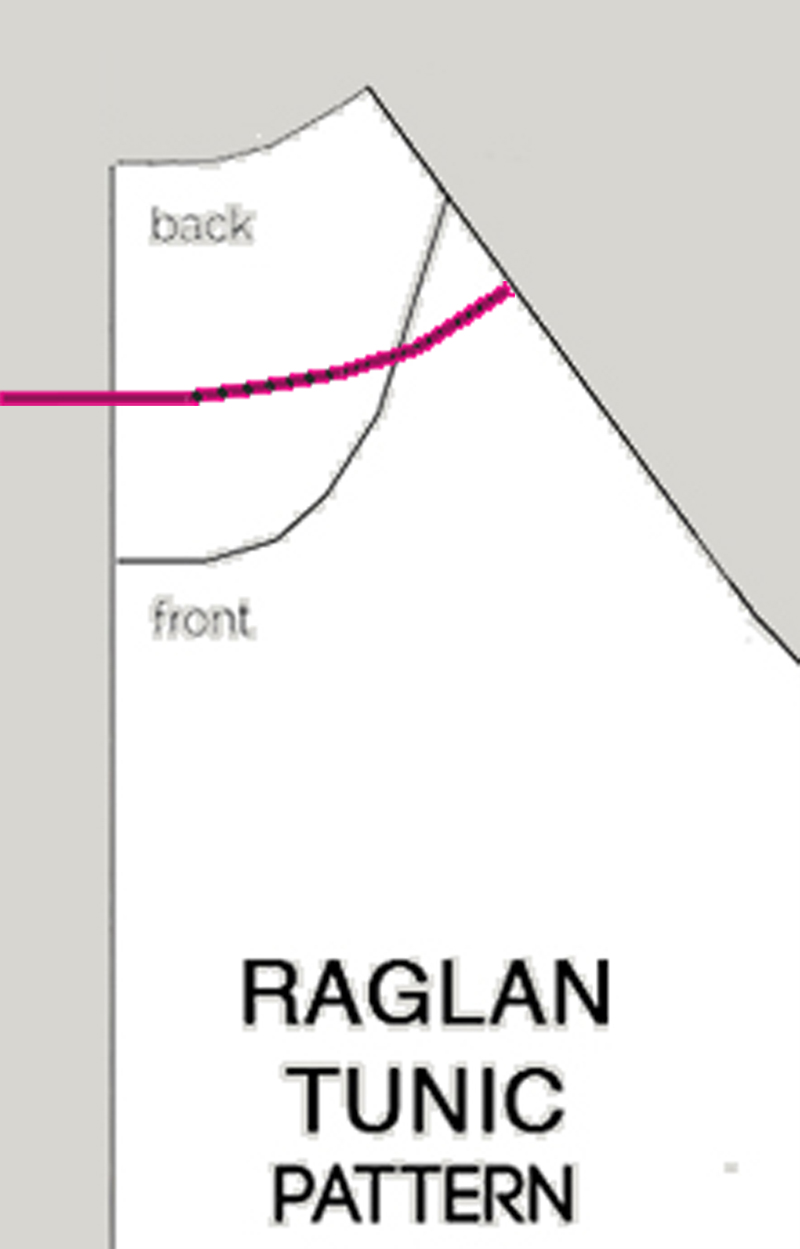
To make this dress, you want to start with my Raglan Tunic pattern (click though to this post to download the pattern). The pattern has two pieces, a bodice and a sleeve, and you will only need the bodice for this dress. This pattern is in a size L (made for a 38 inch bust). If you are a bit bigger or smaller than that, this tutorial should still work fine. If you are much bigger or smaller, you’ll need to find another raglan t-shirt pattern that you can modify to make this dress.
To make a maxi dress, you will need 2.5 yards of 55-60 inch wide fabric (get 3 yards if you are tall). I used one of the “silky prints” from Jo-Ann Fabrics. You want a very lightweight, drapey woven fabric. Rayon challis would be a great choice, just make sure it’s one that comes 55 inches wide (some are only 45 inches wide).
Wash and dry your fabric before beginning, then fold it lengthwise and lay it out on a long table or the floor. This is how you’ll cut your pieces:
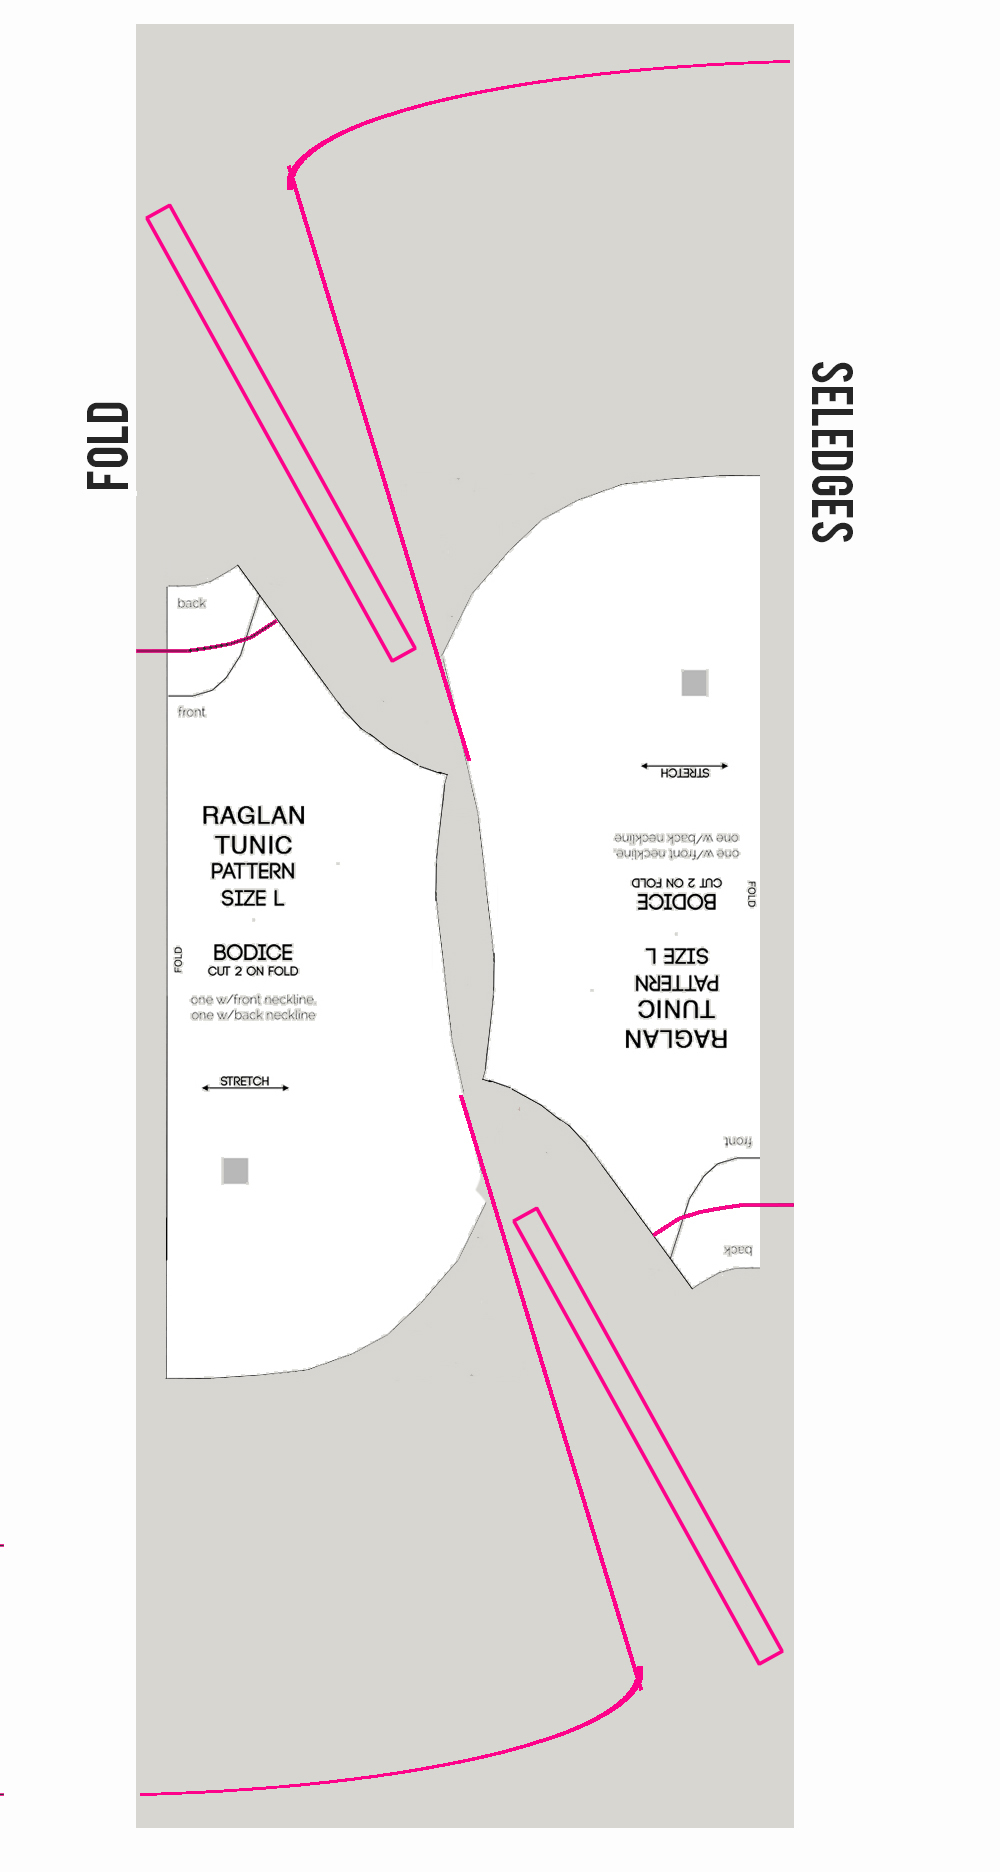
Remember, you are using the bodice pattern piece from the Raglan Tunic pattern. You’re going to cut out one dress piece on the fold, and one on the selvedges. Place the pattern about 2 inches away from the fold (or selvedge) as shown above. Cut it out, extending the bottom edge as shown to cut a long dress piece.
NOTE: If you wear size M, just line the pattern up with the fold or selvedges. If you are a size XL, move it 3 inches away from the fold or selvedges.
Here’s a closeup of what you will cut at the neckline (cut line shown in pink):
Please note you will also need 1 yard of bias tape or other cording to create the dress straps. If you’d like to make bias tape from your fabric (that’s what I did), the pattern placement diagram above shows where you can cut strips to make bias tape. Cut the strips 2 inches wide to create double fold bias tape that ends up 1/2 inch wide.
Once cut out, you will have three bodice pieces:
- 1 full piece for the front that was cut on the fold (shown folded below)
- 2 half pieces for the back that were cut on the selvedges

Your first step is to place the back pieces right sides together and sew down that middle seam, so you end up with two dress pieces that look the same, except one has a middle seam.
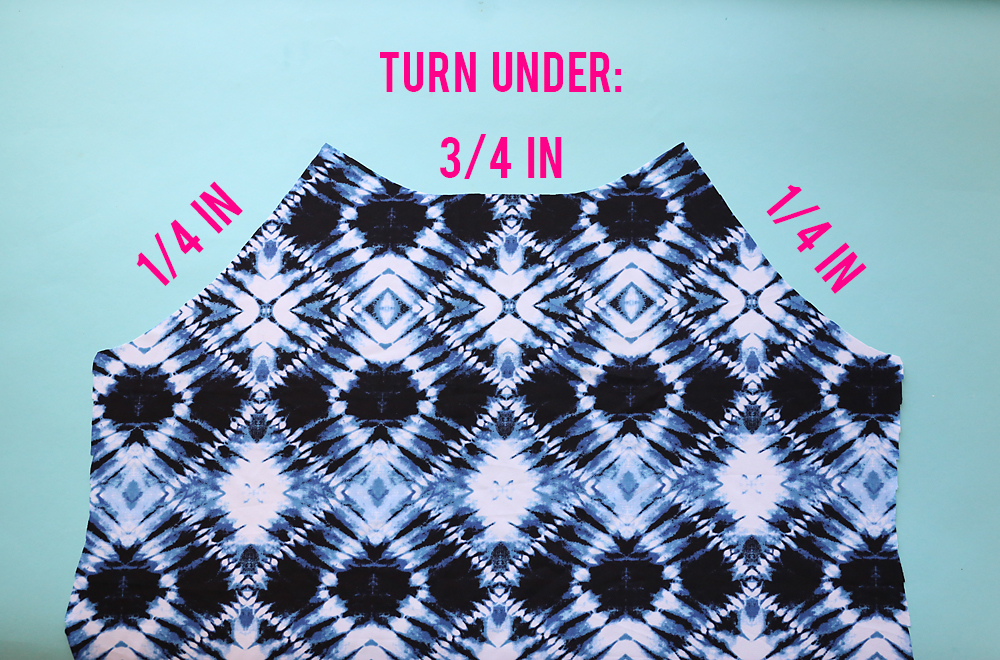
The top of each dress piece will look like what you see below, with three edges. Finish each of these edges by serging, zigzagging, or pinking.
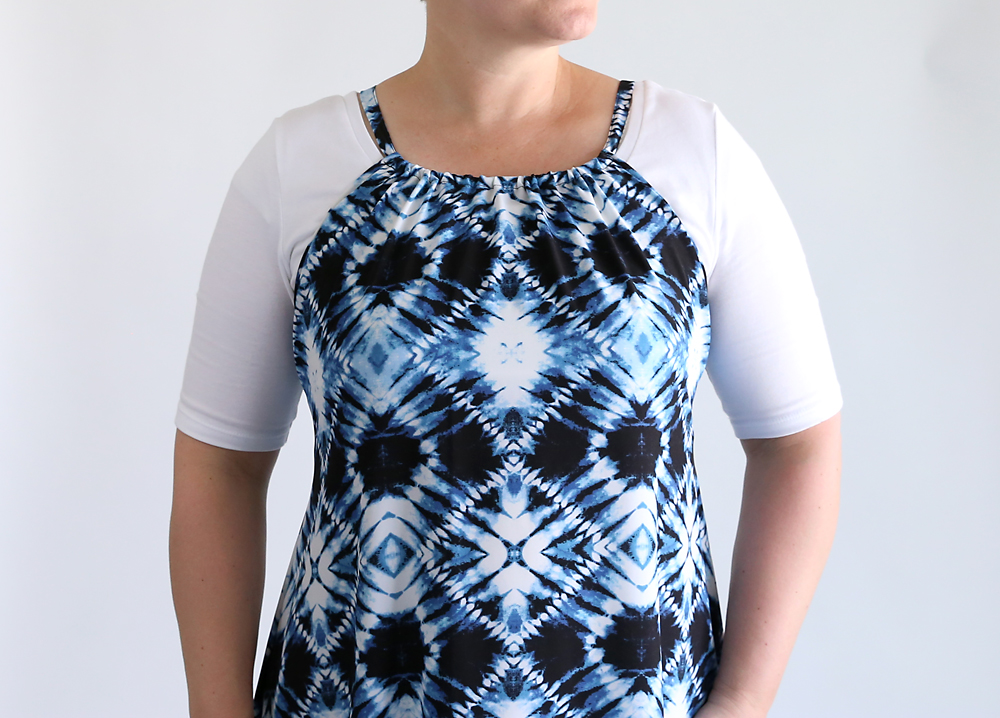
On each diagonal edge, turn the edge under 1/4 inch and sew. For the edge in the middle, we are going to make a casing (this will be the neckline). Turn that edge under 3/4 inch and sew.
Repeat with the back dress piece.
Now, place the front piece and back piece right sides together and sew down the side seams. Also make double fold bias tape that ends up 1/2 inch wide and sew it shut OR cut 1 yard of cording.
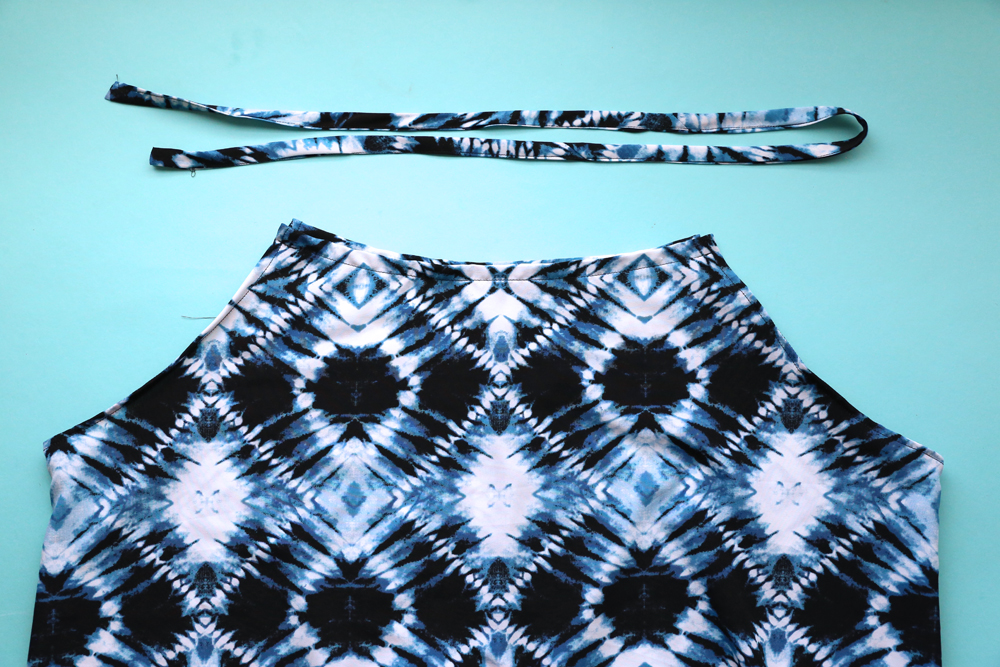
The bias tape or cording needs to thread through the front neckline, then through the back neckline. Use a safety pin to help thread it through, gathering up the necklines as you do so.
At this point, try the dress on and figure out how long you want the straps over your shoulders to be and how gathered you prefer the neckline to be.
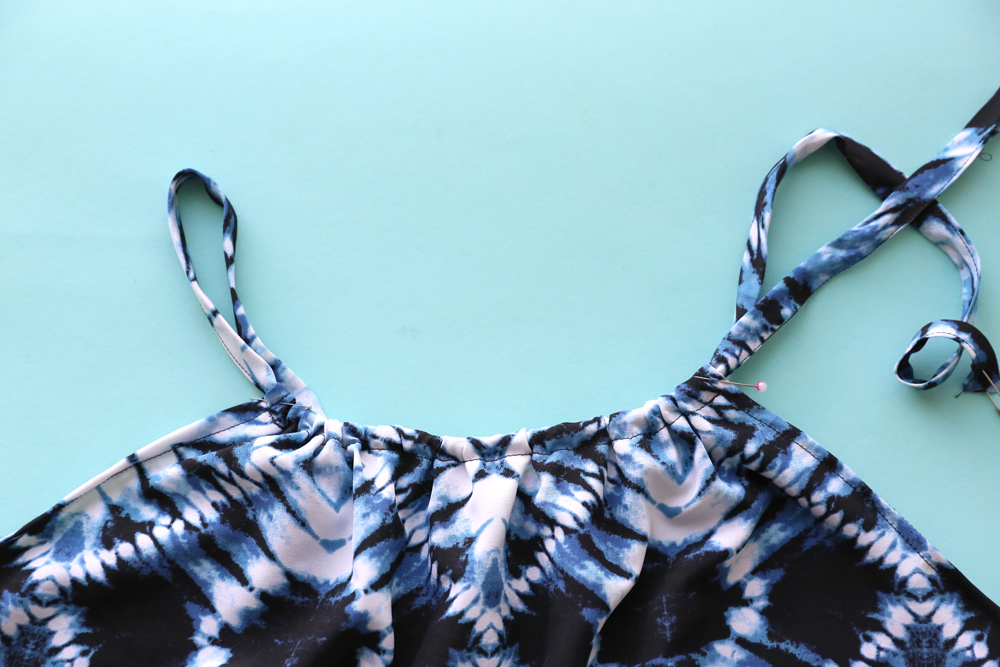
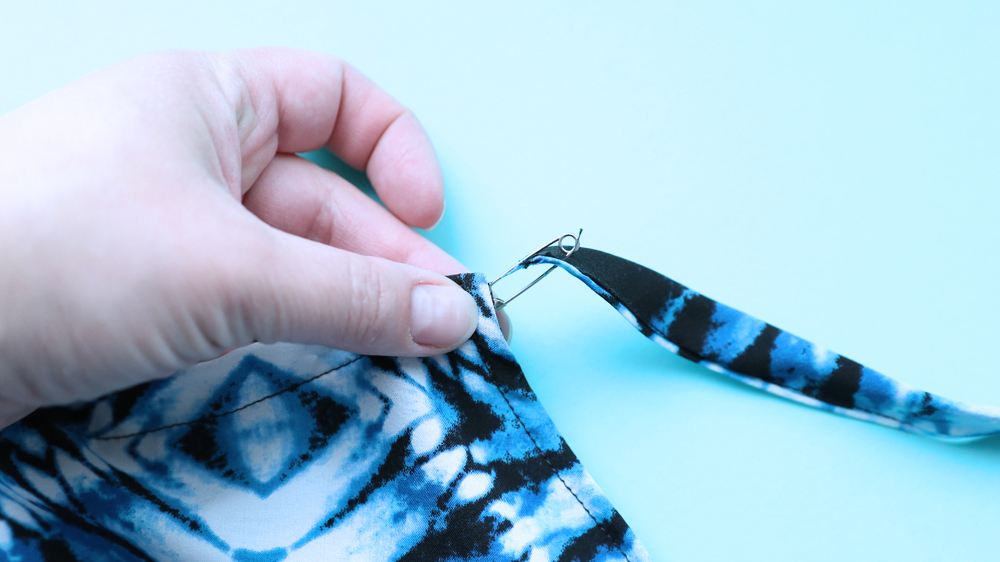
When you are happy with the fit of the neckline, sew the two ends of the bias tape together and clip off any excess. Hide the seam inside the back casing.
You can add a couple of stitches where the straps go into the front and back casings to keep the straps even.
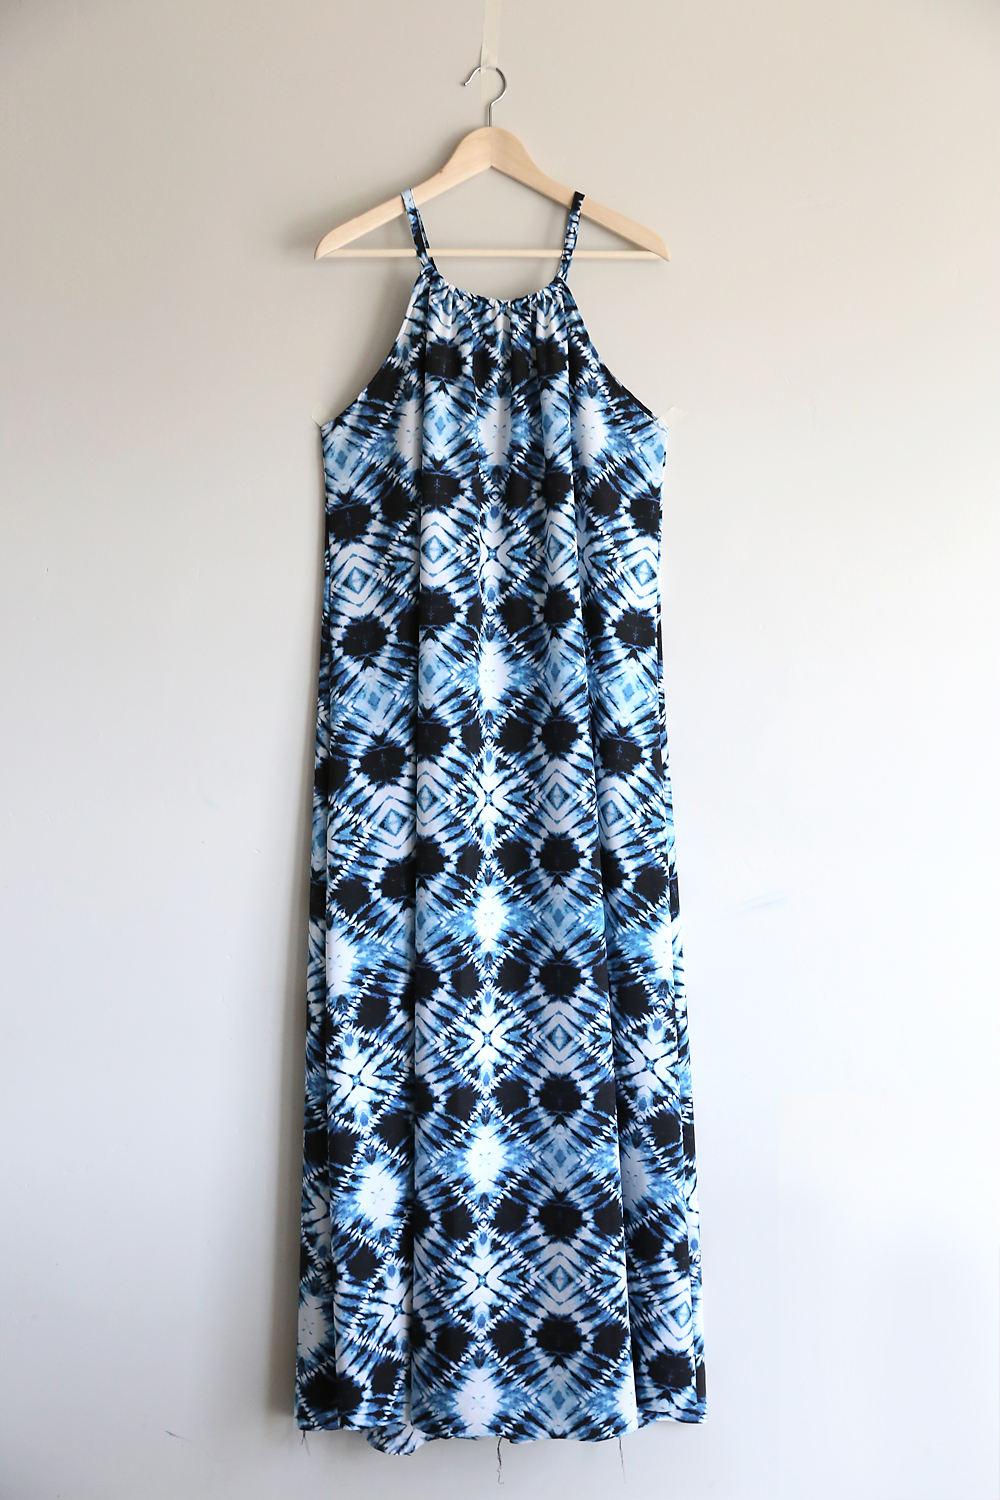
At this point you have a lovely, drapey maxi dress with lots of volume. Depending on your body shape, it might look great as is, or it might look like a tent. You have some options for adding a little more shape to your halter maxi dress.
- You can take the dress in along the sides, especially near the top.
- You can take the dress in along the back seam.
- You can add elastic all the way around the dress to define a waist (I’ll show an example of this next week).
- You can add elastic just across the back of the dress to cinch it in a bit. That’s what I did here. It leaves the dress very drapey in the front, but gives a bit of shape so it’s not tent-like.
To add elastic across the back of the dress, I cut an 8-inch long piece of 1/4 inch elastic. I turned the dress inside out, and placed a piece of masking tape across the mid-back. The masking tape is there to make sure you sew the elastic in nice and level, so be sure it’s even.
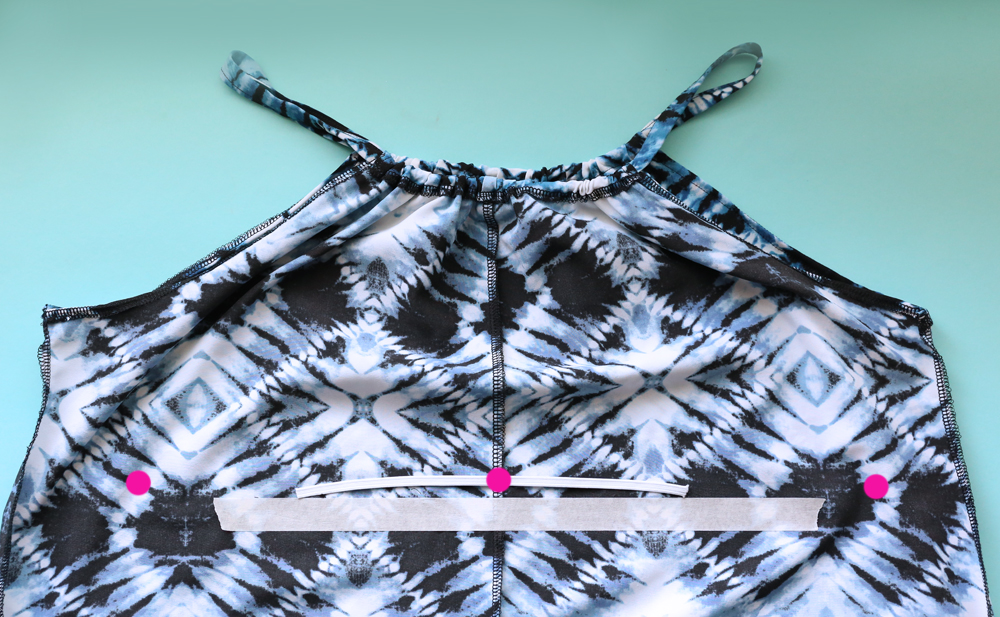
I pinned the center of the elastic to the center seam of the dress (middle dot above). Then I pinned the ends of the elastic to the outer dots shown above. Each dot was 8 inches from the center. Then I sewed the elastic to the back of the dress, stretching the elastic so that it laid flat against my fabric (the elastic was stretched out nearly as far as it could go). I made sure the elastic stayed right next to the edge of the masking tape as I sewed, and I sewed it on using a zigzag stitch, and backstitched at the beginning and end.
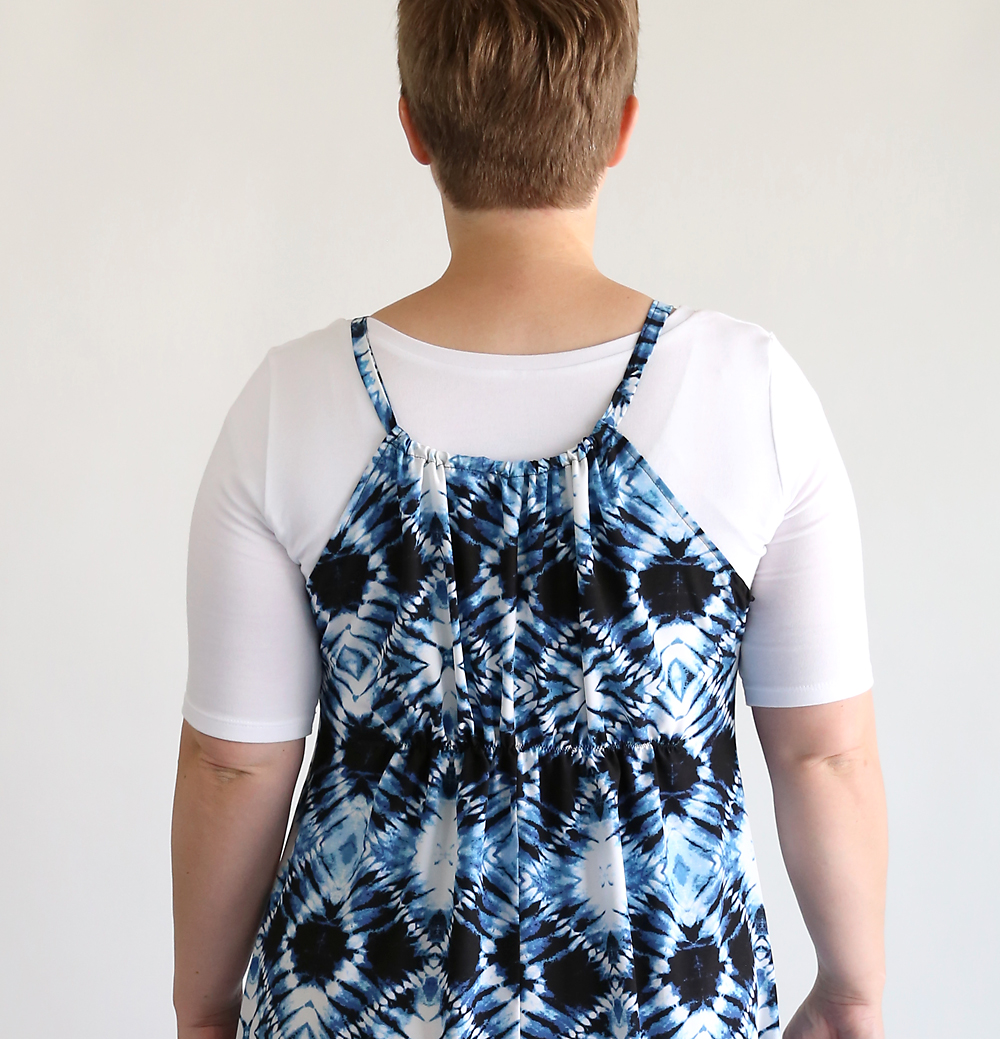
Remove the masking tape after sewing. The elastic will gather up the fabric in the back of the dress, as you can see above, giving the dress a little more shape. Hem the bottom to the desired length and your halter maxi dress is done.
Be sure to check out some of my other maxi dress tutorials!
How to sew a one-seam maxi dress
The Classic cap sleeve maxi dress


Irene says
Thank you from a big “girl” in Sweden. I look forward to more nice tips.
Kind regards Irene
SueHarper says
I’m glad I saw these hints for more fitting dress. I’ve made several like this but they looked like tents! Thanks for hints
Beatriz says
What a beautiful dress! Thank you for the instructions. Your words makes it all so much fun, Thank you again.