In today’s post: Learn how to make a sweet felt Baby Jesus ornament and an easy wooden manger ornament.
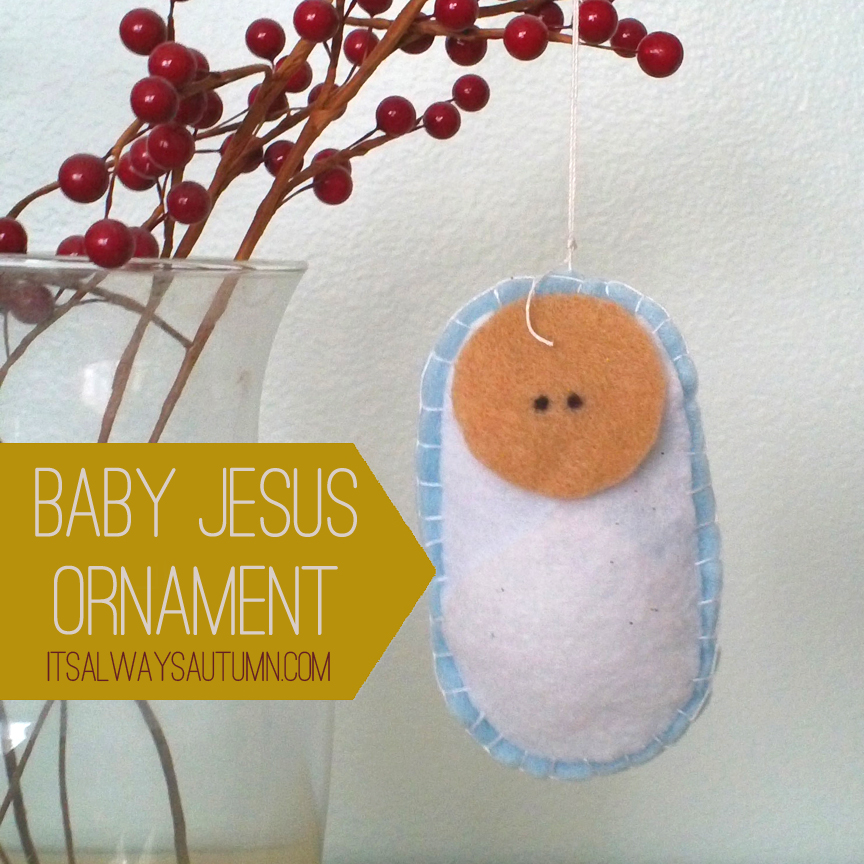
How to make a felt baby Jesus ornament
Begin by downloading the free pattern for the baby Jesus ornament, found here.
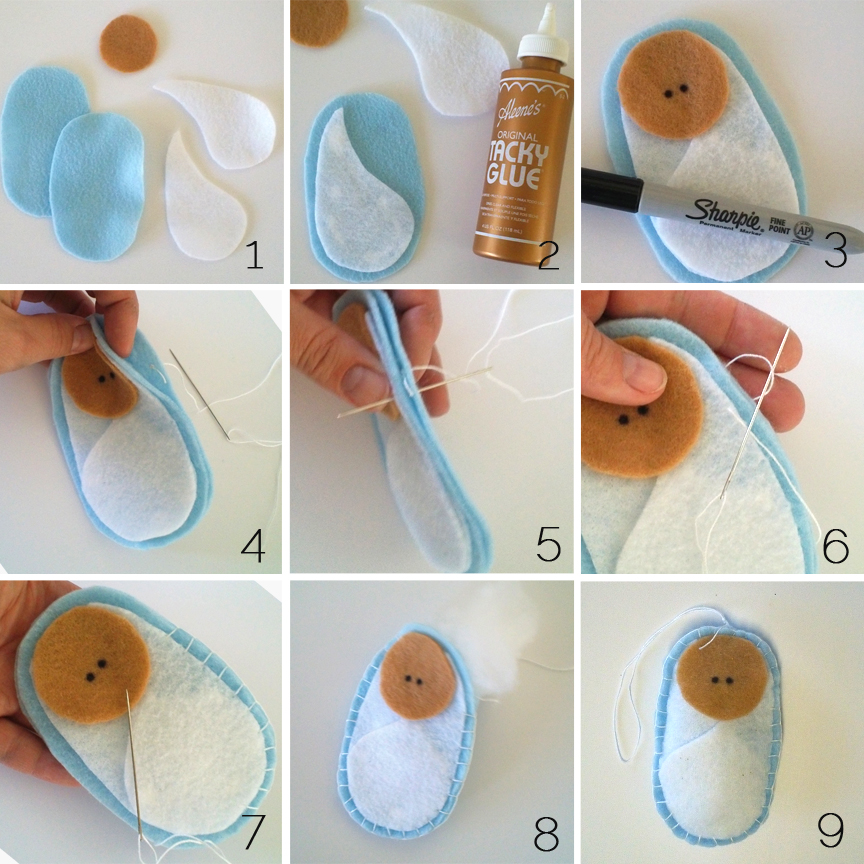
You’ll need the following supplies: felt in three different colors, glue, Sharpie, thin string or embroidery floss, large-eyed needle. Assemble as shown below.
1 – Cut pieces from the pattern – 2 bodies, 2 blankets, 1 head.
2 – Glue one blanket piece down on one body piece.
3 – Flip second blanket piece over and glue down on top of first blanket. Glue down head. Use Sharpie to add eyes.
4 – Place completed body on top of second body piece. Using thin string or embroidery thread and a large-eyed needle, blanket stitch around body. Begin by knotting string and sending needle just through back body piece, about 1/4 inch from the edge.
5 – About 1/4 away from where you’ve just come down through the body piece, come back up, this time through both pieces. Don’t pull thread all the way through – just pull until there is a small loop of thread in the back.
6 – Run needle down through loop of thread and pull thread tight. This completes the first blanket stitch.
7 – Continue blanket stitching by sending the needle up from the back, 1/4 inch away from where you came up last time, then sending needle down through the loop of thread and pulling thread tight.
8 – When there’s a small opening left, stuff with a small amount of polyfil or other stuffing material. Continue blanket stitching the opening closed.
9 – Add a loop for hanging and your Baby Jesus ornament is finished!
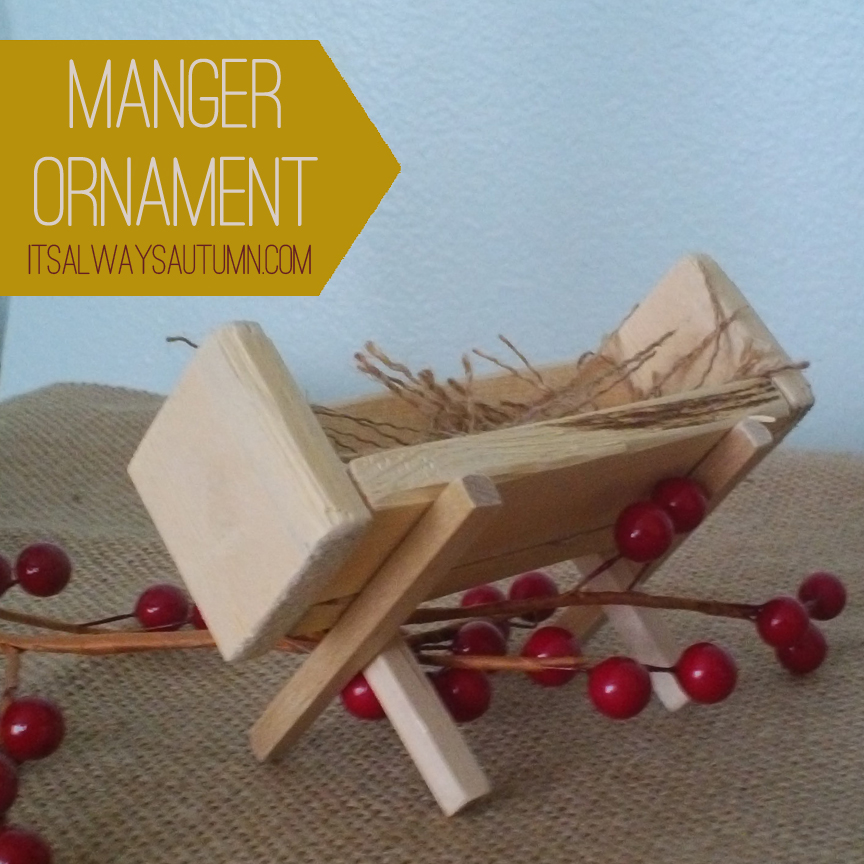
How to make a wooden manger ornament
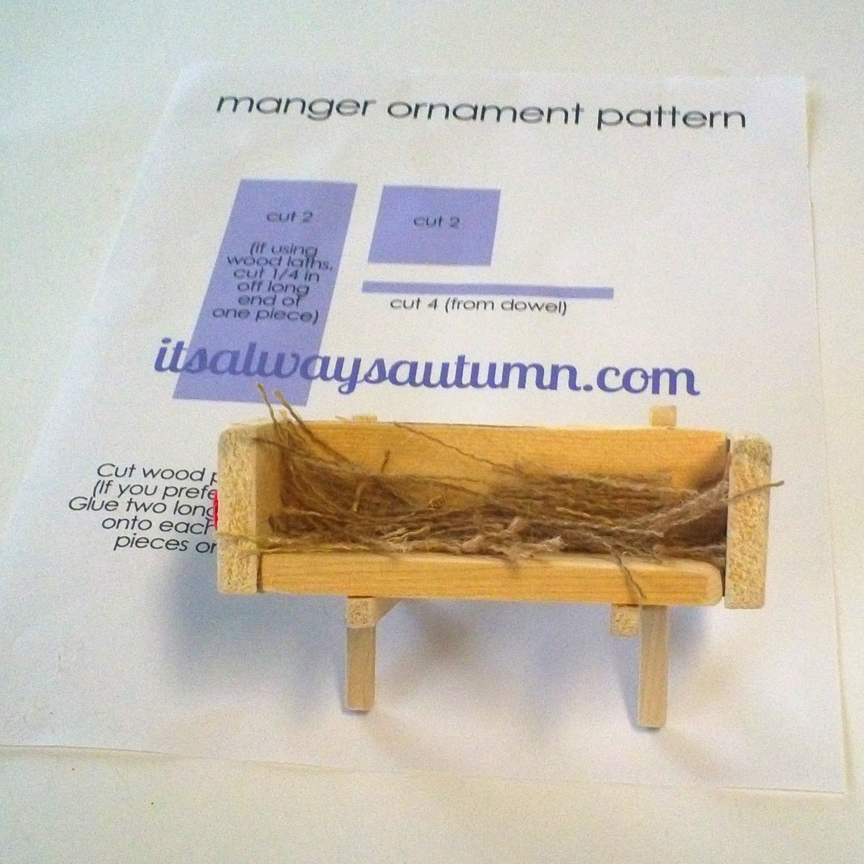
Begin by printing the manger pattern, found here.
I made my manger using a wood lath and a 1/4 inch square dowel. Wood laths are inexpensive (50 cent) pieces of wood that are 4 ft long, 1.5 inches wide, and about 1/4 inch thick, and you can easily find them at Home Depot or Lowes. You could certainly use nicer hobby wood, but wood laths are so cheap and you can make four mangers from each one, which is nice if you have multiple children. Wood lath will require some sanding.
If you don’t have access to a saw to cut the wood lath, you could make a manger using chipboard, which is a type of thin, hard cardboard that can be found at scrapbook stores. Cardboard could also be used.
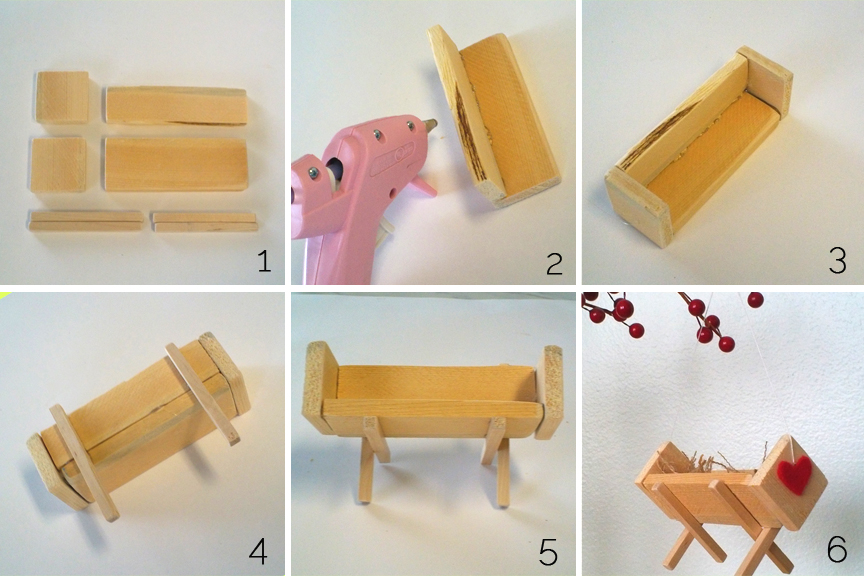
1 – Cut pieces as shown on pattern. If using wood lath, trim 1/4 inch off one long side of one of the larger pieces. (No need to trim if using chipboard.)
2 – Glue two long pieces together to form a V, stacking piece that has been trimmed on top of untrimmed piece.
3 – Glue squares ontos ends of V to form a manger.
4 – Tip manger on it’s side and glue two dowel pieces on as shown.
5 – Glue other two dowel pieces to form X shaped legs.
6 – Ornament can simply be set on a tree branch. However, if loop for hanging is desired, either drill small holes at top of each square and then tie a loop between them, or glue loops on and cover ends with hearts cut from felt.
For more DIY ornaments, visit these posts:




Rebecca says
You are AWESOME!!!!