
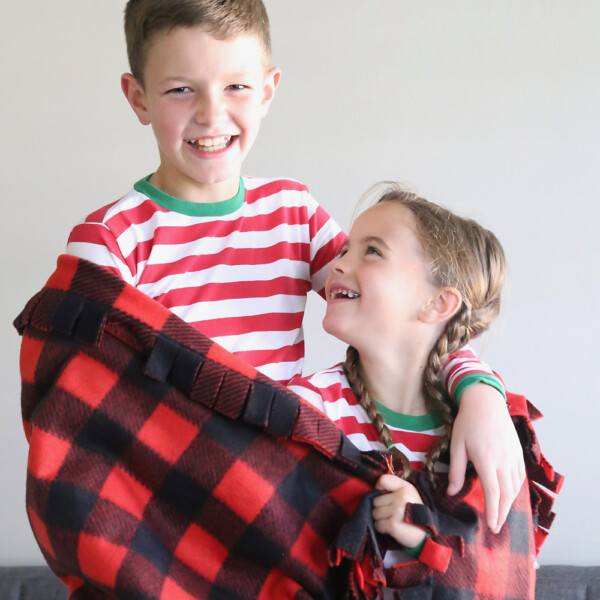
In today’s post: No Sew Fleece Blankets make gorgeous handmade gifts for the holidays. Today we’re showing you the second of four different easy ways to finish a fleece blanket: How to make a no sew fleece blanket with a fringed edge.
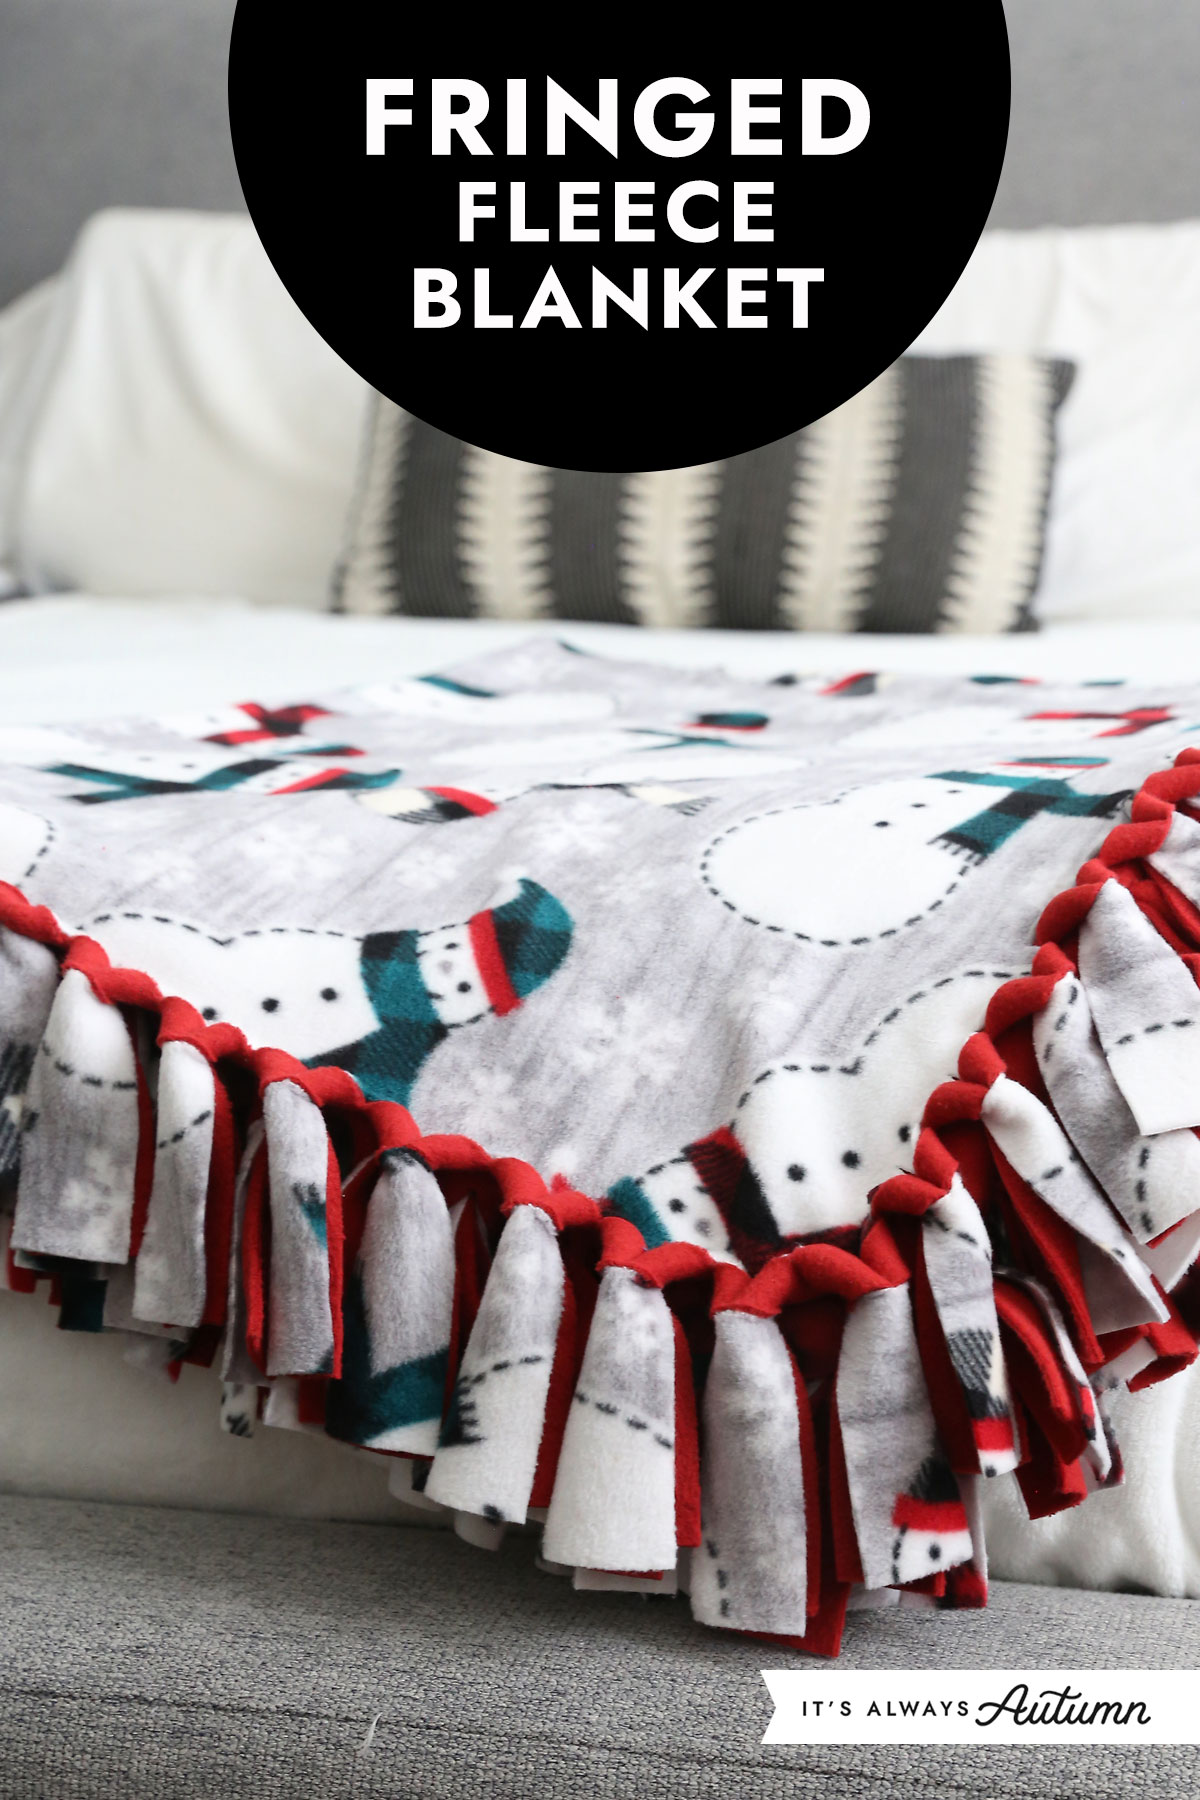
Every fall fleece goes on sale at the fabric store because everyone is in the mood to make fleece blankets! Double layer blankets are an easy homemade Christmas gift idea. This week I’m sharing four different ways to make no sew fleece blankets, and today we are to Method #2: the Fringed Fleece Blanket.
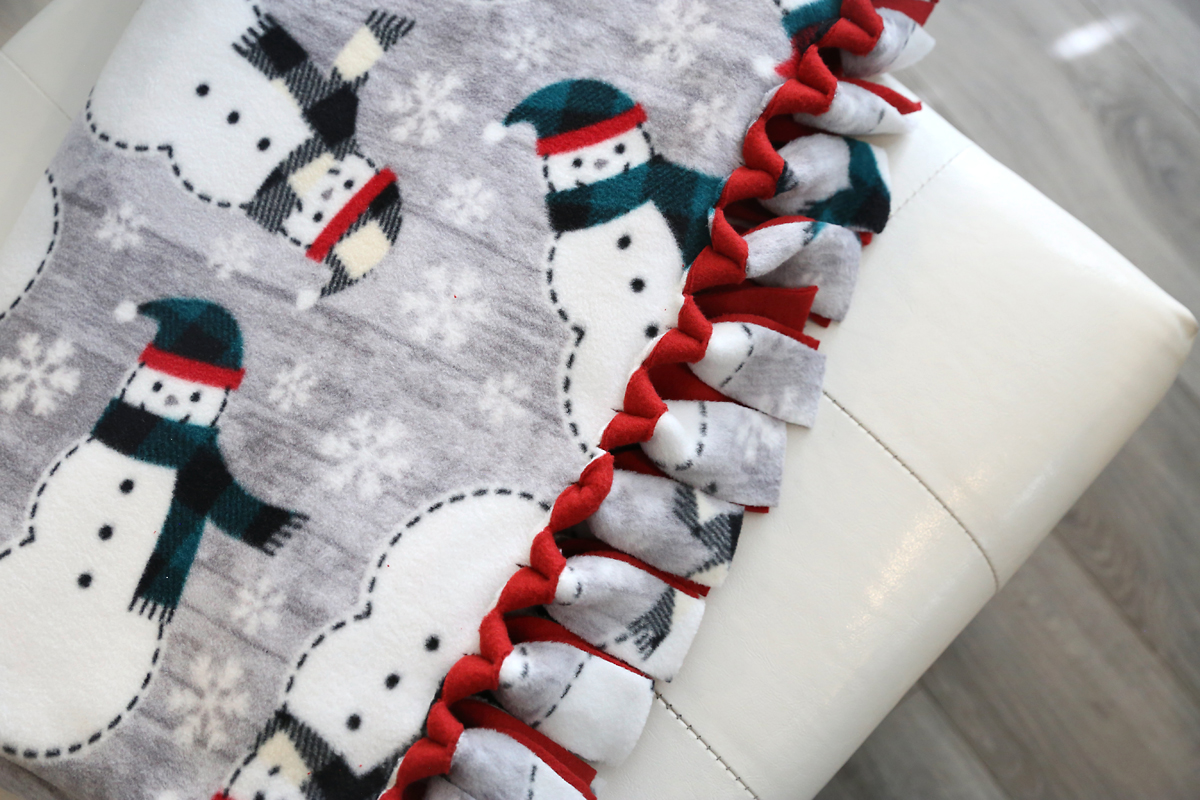
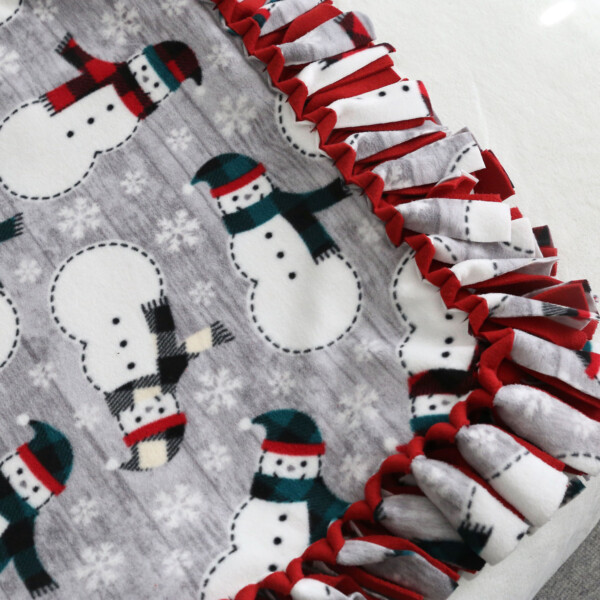
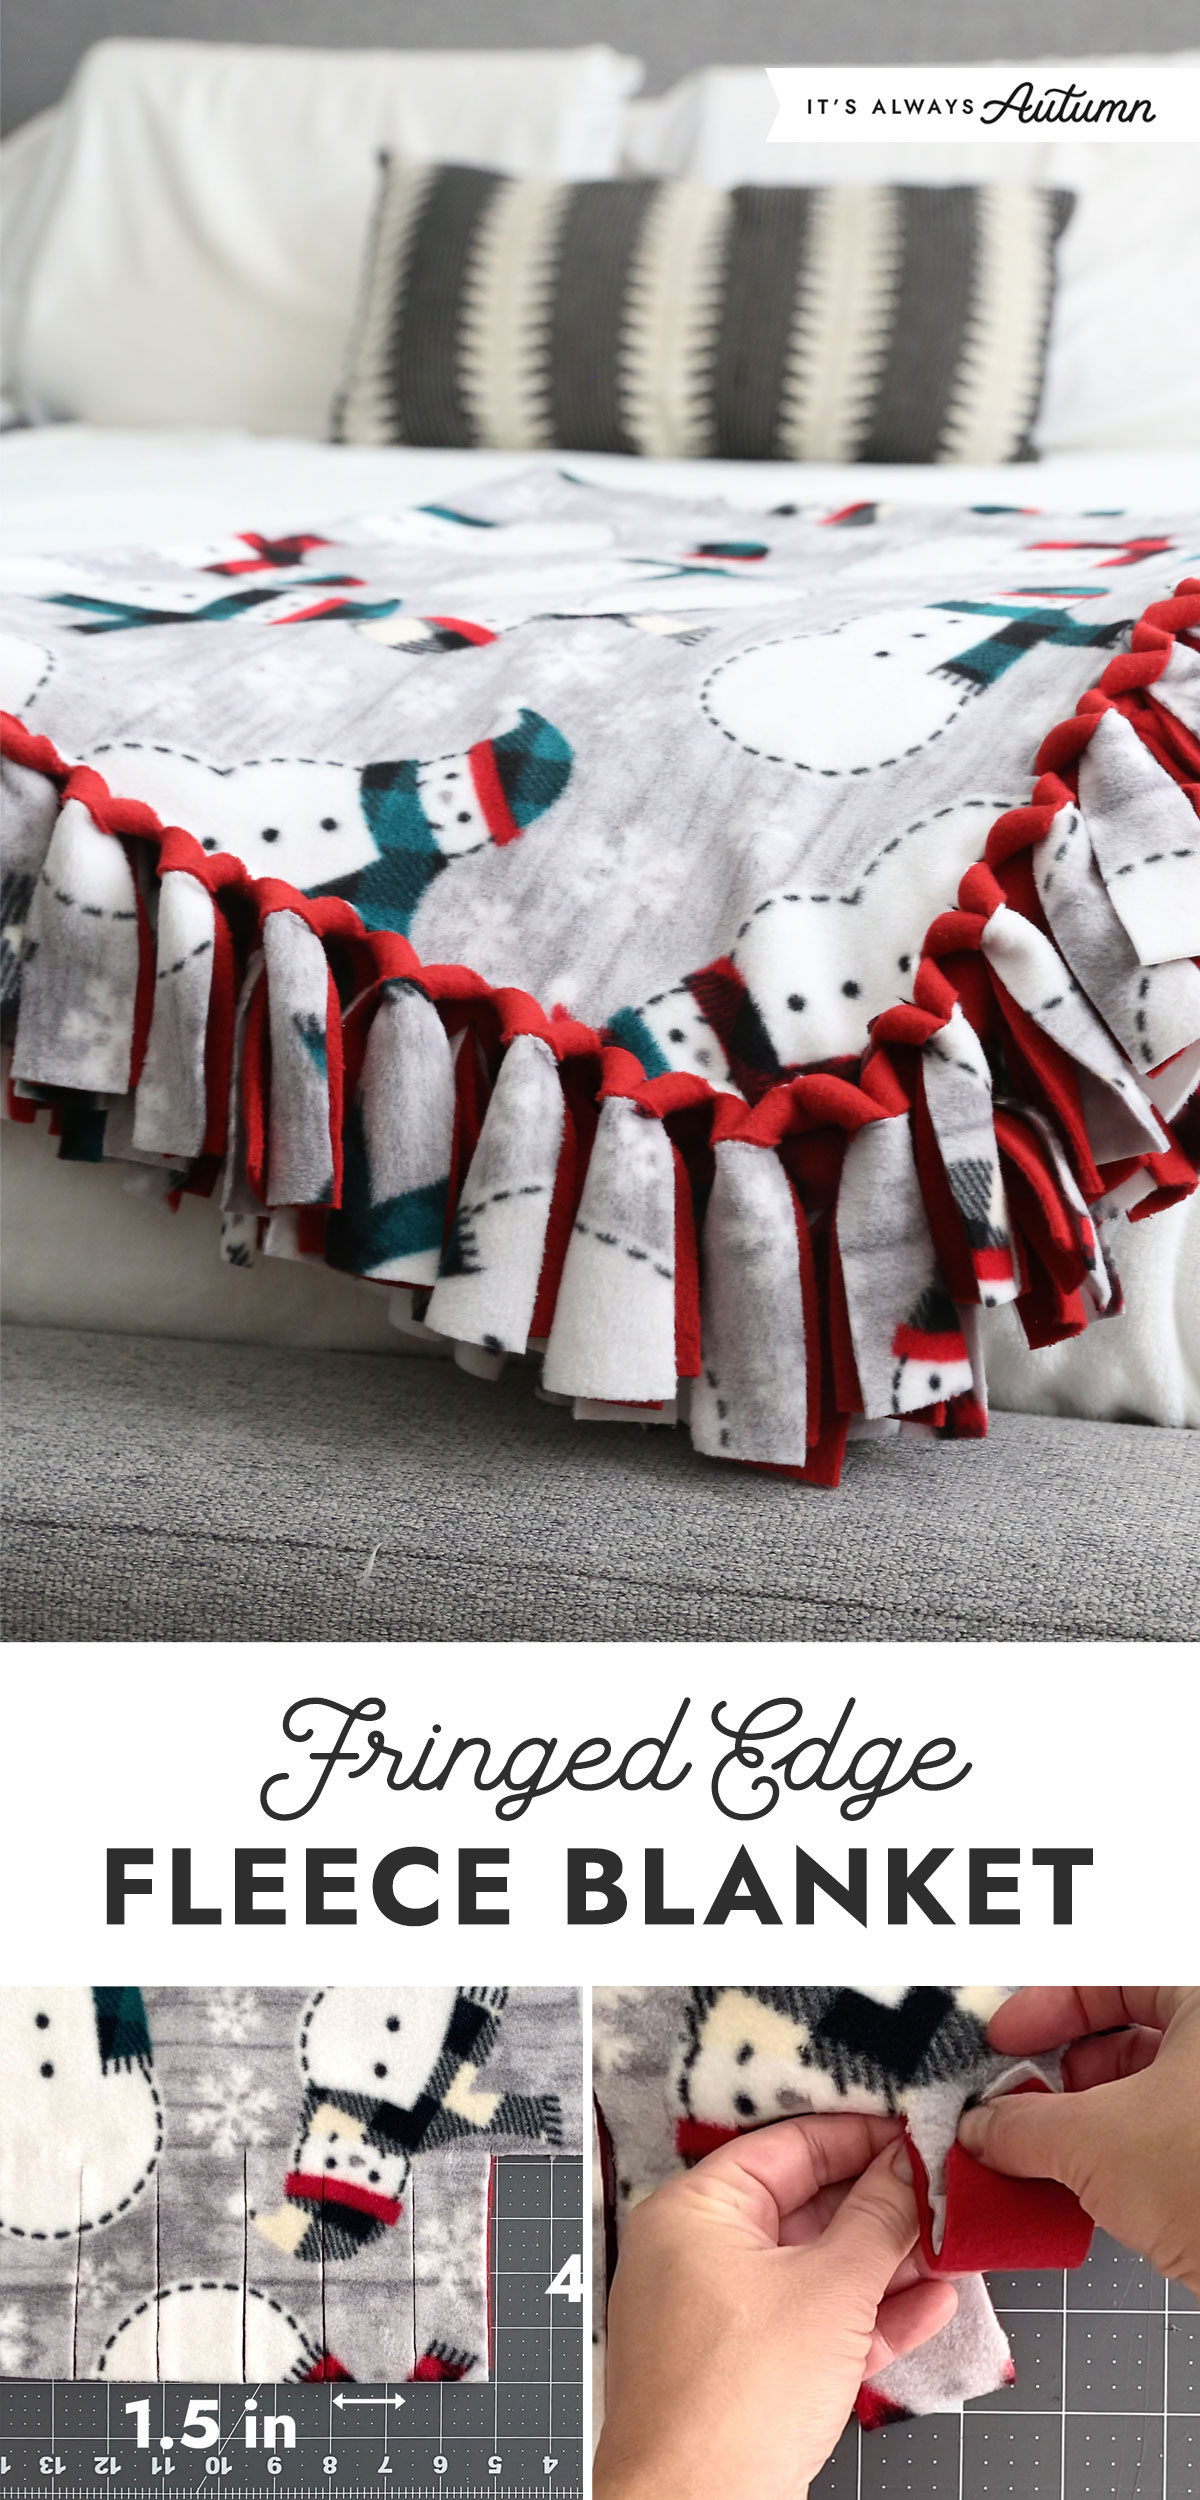
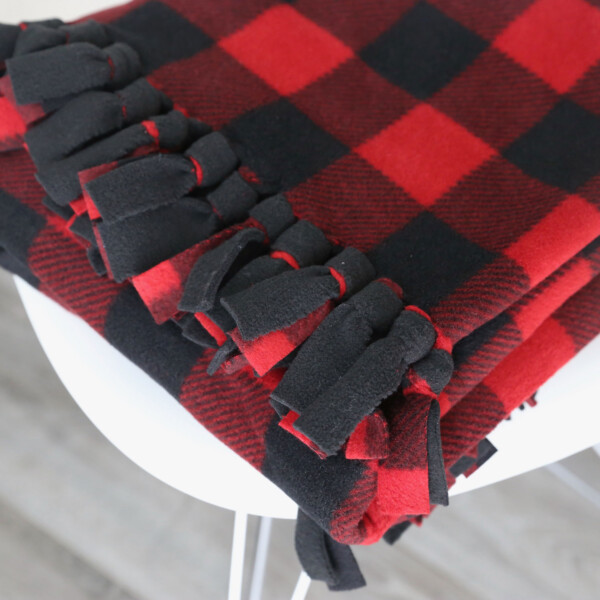
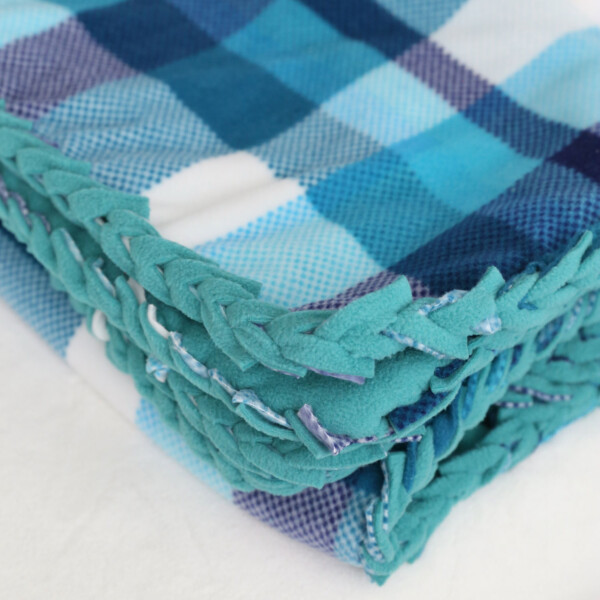
The fringed fleece blanket looks a lot like a standard tied fleece blanket, but there are no knots! Instead of being knotted, the strips along the edge of the blanket get flipped through a small hole, giving a really pretty fringed effect. I think this is my favorite way to make no sew fleece blankets, and if you have a rotary cutter it’s definitely the easiest!
Fleece Blanket Video
This video shows you each of the four methods for making fleece blankets. Specific instructions for the Fringed version follow the video.
No Sew Fleece Blankets
If you’ve never made a fleece blanket before, I recommend you read the original post in this series: How To Make a No Sew Fleece Blanket
That post focuses on how to make a tied fleece blanket, but also covers lots of information that’s useful for any type of no sew fleece blanket, such as:
- what type of fleece to buy and where to find it on sale
- how to trim up your pieces of fleece
- how to make a template to make the cutting easier
- how to find the right side of your fleece
If you have questions about any of these things, please visit the original No Sew Fleece Blanket post
And if you are looking for the other fleece blanket versions, find them here:
Learn how to make a fleece blanket with a braided edge
Learn how to make a fleece blanket with bows along the edge
Supplies
For a fringed fleece blanket, you will need:
- Two pieces of fleece fabric in coordinating colors (1 yard each for a baby blanket, 1.5 yards for a kid size blanket, 2 yards for a teen/adult size blanket)
- Rotary Blade and a cutting mat (you can make this version using scissors, but it will take quite a bit longer)
- Ruler
How to Make a Fringed Fleece Blanket
Remember, if you get stuck on any of the steps, you can see how to make this blanket in the video, which you’ll find above under the heading “Fleece Blanket Video” and below in the printable instruction card.
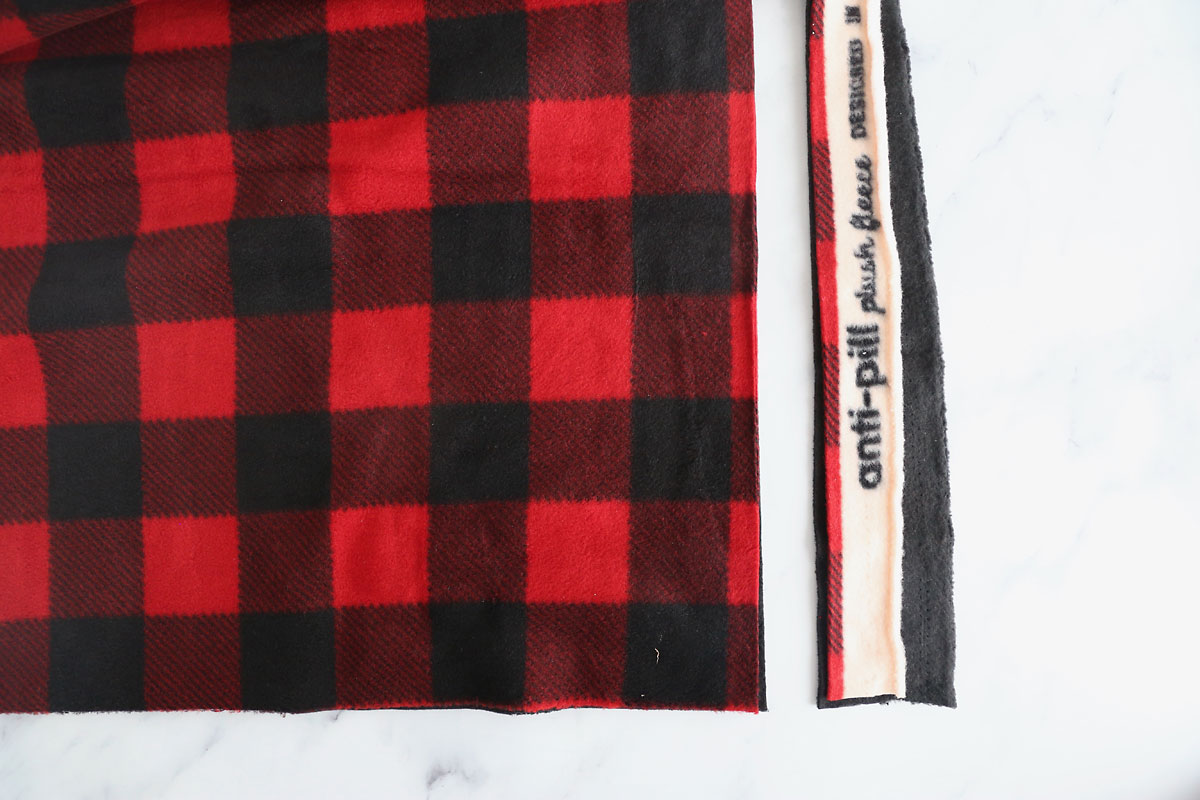
Get started by laying the bottom layer of fleece down on the ground, with the right side down. Smooth it out and place the top layer of fleece over it, right side up. Smooth the top layer out and try to match the edges as well as possible. Trim along the edges to make them straight, cutting through both layers of fabric at once so they end up the same size.
Cut the Fringe
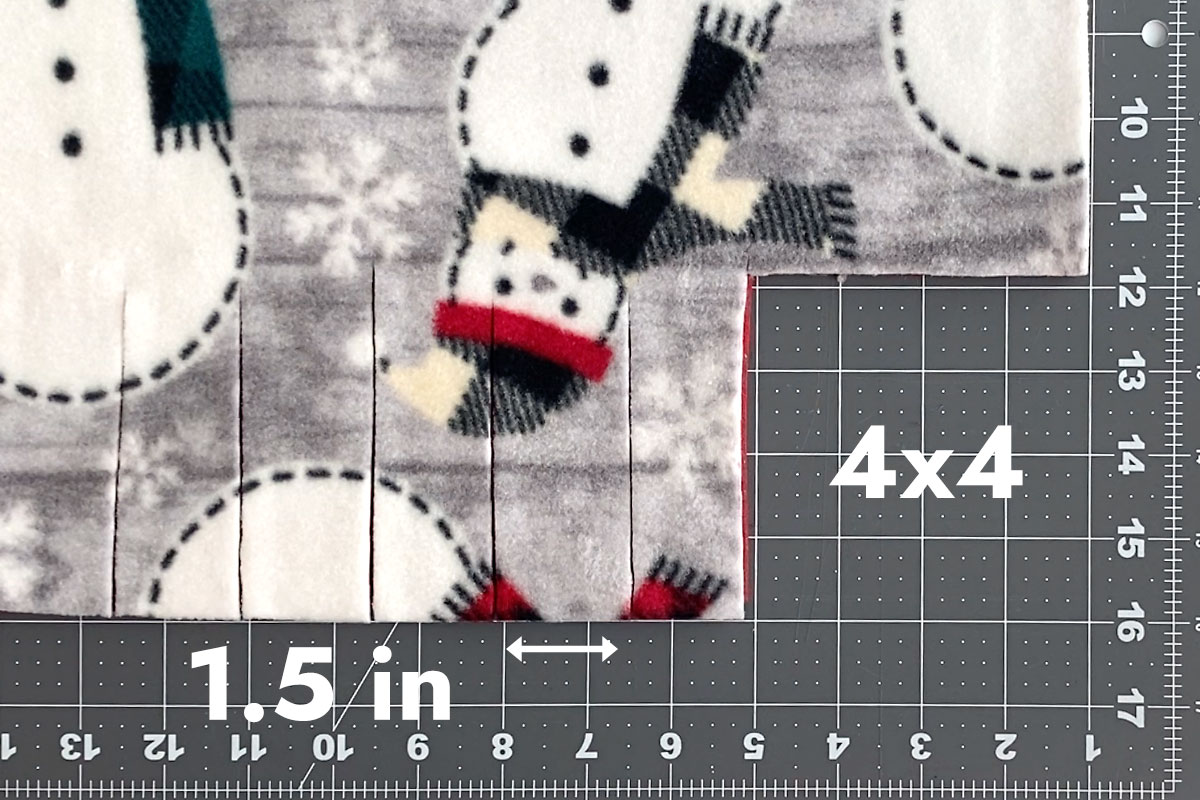
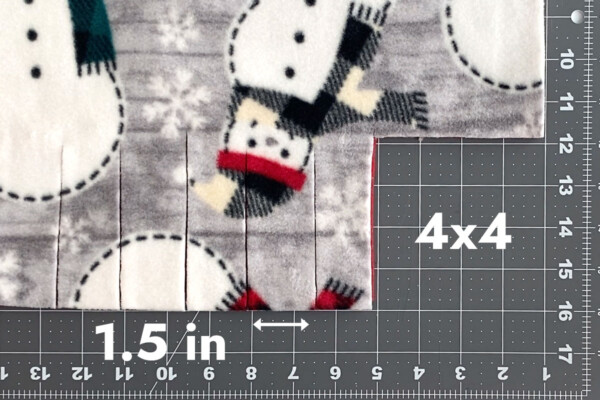
At each corner, cut away a 4×4 inch square. Make cuts 4 inches deep and 1.5 inches apart along all four edges of the blanket.
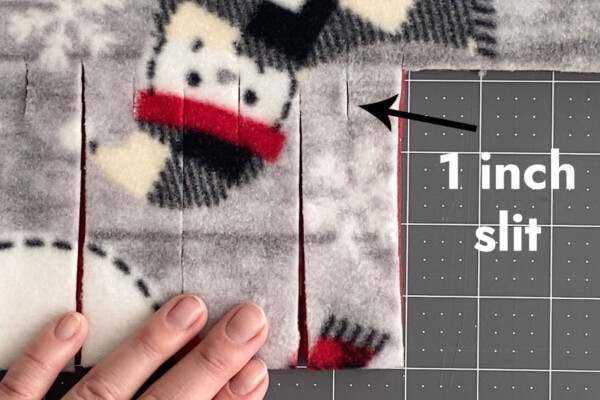
Cut a slit in each Strip
Cut a 1 inch slit in the middle of each strip at the top end. This is MUCH easier to do using a rotary cutter + cutting mat. If you plan to use scissors instead, you will need to cut through each layer separately.

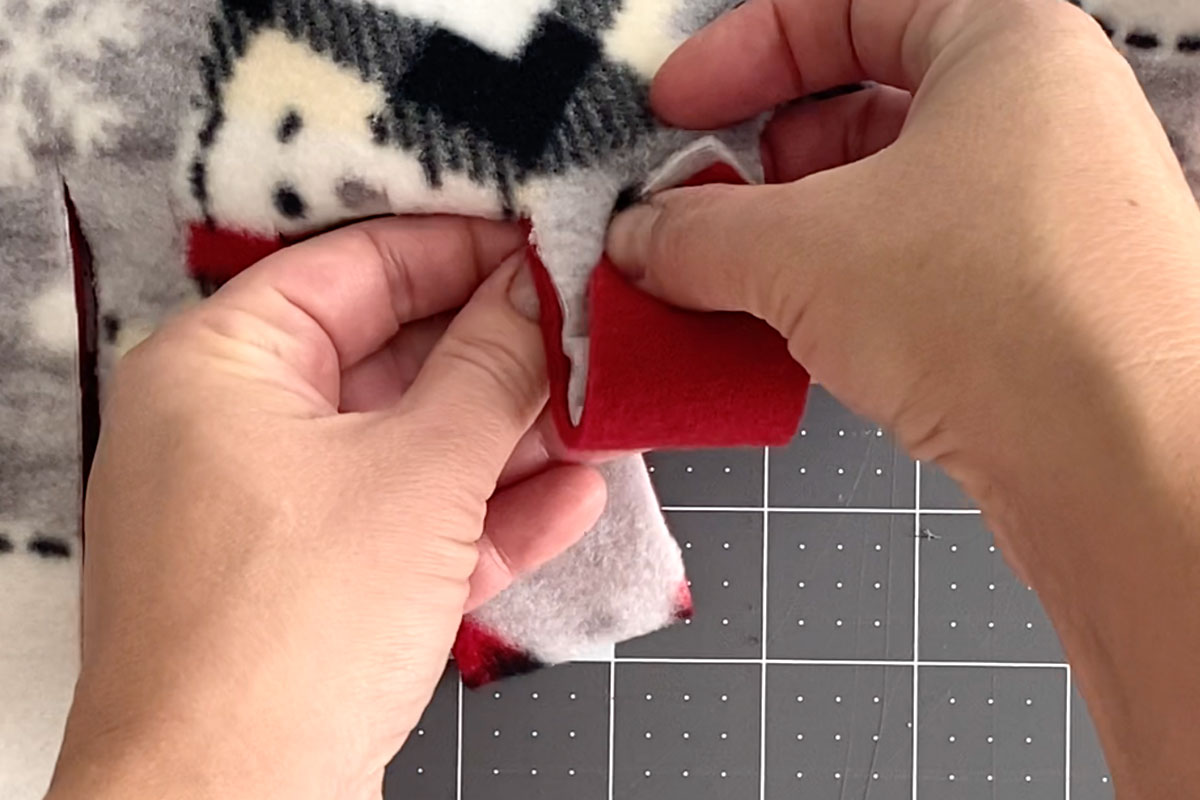
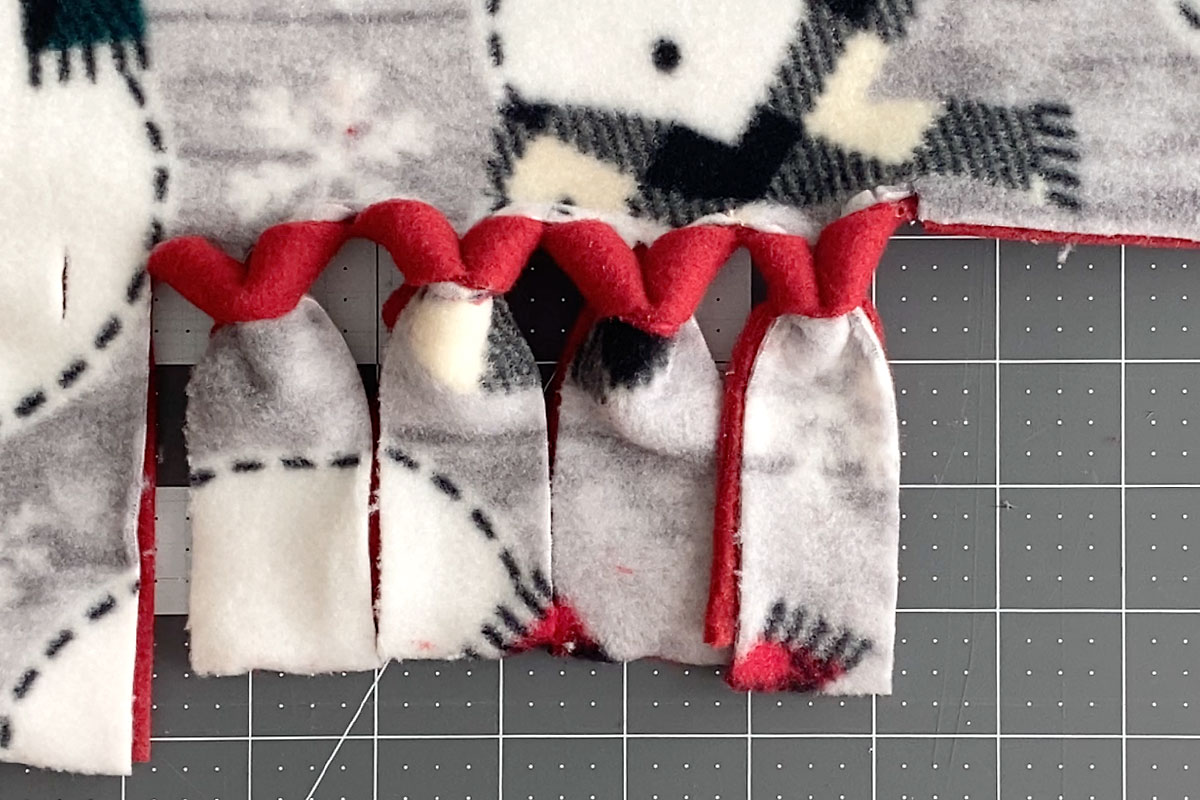
Flip the Fringe
Holding both layers, flip the bottom end of each strip up and push it through the hole. Pull the strip down to create a pretty twisted fringe. Repeat all the way around the blanket.
No Sew Fleece Blanket with Fringed Edge
Supplies
- 2 pieces Fleece 1 yard each for baby blanket, 1.5 yards for kid size blanket, 2 yards for teen/adult size
- Rotary cutter + cutting mat
- Ruler
Want more project ideas? Sign up to get my favorite easy crafts and recipes straight to your inbox!
Instructions
- Place both pieces of fabric down on the floor, right sides facing out. Smooth out fabric and match up edges. Cut edges straight, trimming through both layers of fabric at once so both layers are the same size.
- Cut a 4×4 inch square from each corner of the fabric (you will be treating both layers of fabric as one from here on out). Make 4 inch cuts all the way around the edges of the fabric, 1.5 inches apart.

- Cut a 1 inch slit in the center of each strip at the top edge.
- Flip up the bottom edge of a strip and thread it through the slit (both layers).
- Pull the strip down to make a pretty twisted fringe.


Tips
Video Tutorial

Lynette says
Hello Autum
making knotted fleece blanket.
The fleece fabric at top and bottom edges has stretch, so easy to pull to knot.
However, the fabric on blanket sides does not stretch and is impossible to pull to knot.
Help!
Laurie Dreier says
Thank you! I’ve never seen the fringed method before and really like it!
Julie M Bartosh says
I have a question … made these years ago and know how, but I was wondering If u could use flannel on one side?
Ty
Julie
Mary says
I absolutely love this edging! My only problem was with the measurement for the 1″ slit to pull the strips through. I followed the instructions very carefully and when pulling the strip through part of the one inch slit was showing at the top of the twist…any remedy’s? I’m really trying to figure out where I went wrong…but to no avail. Hope to hear from you soon….
Gail H. says
I’m now making a no sew blanket with this edging method. My directions call for about a 1/8th inch slit. Mine is working nicely. One inch seems way too large!
Mary says
Thank you! This was exactly what I had been wanting to know!