
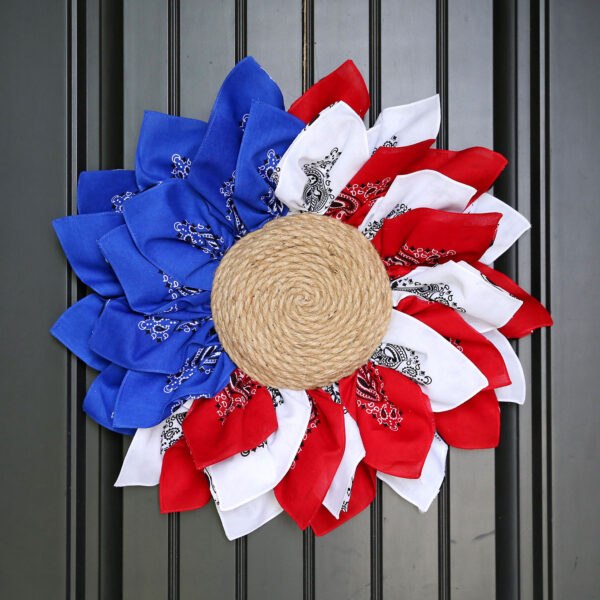
In today’s post: Learn how to make a cute patriotic bandana wreath in the shape of a sunflower! This is an easy Fourth of July craft you can complete in about an hour and a half.
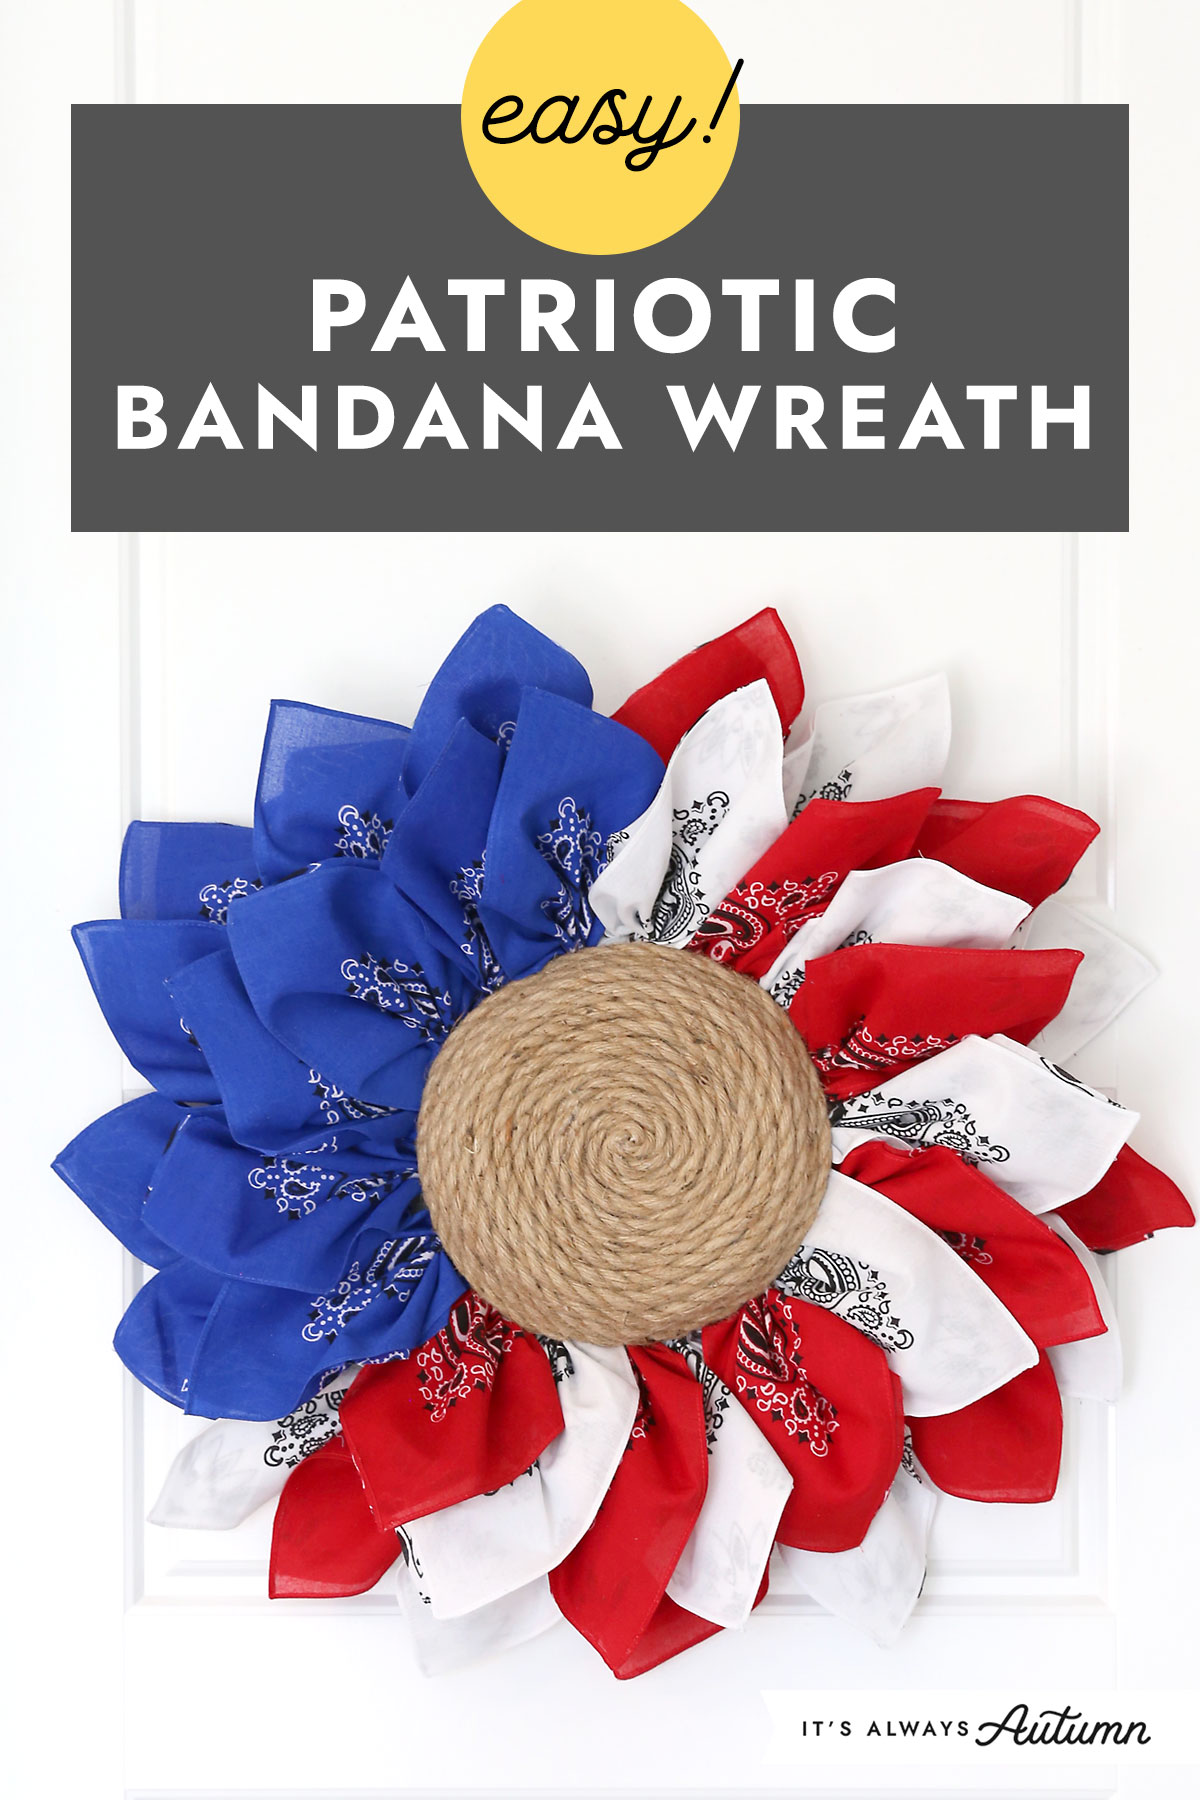
Easy Red White and Blue Wreath
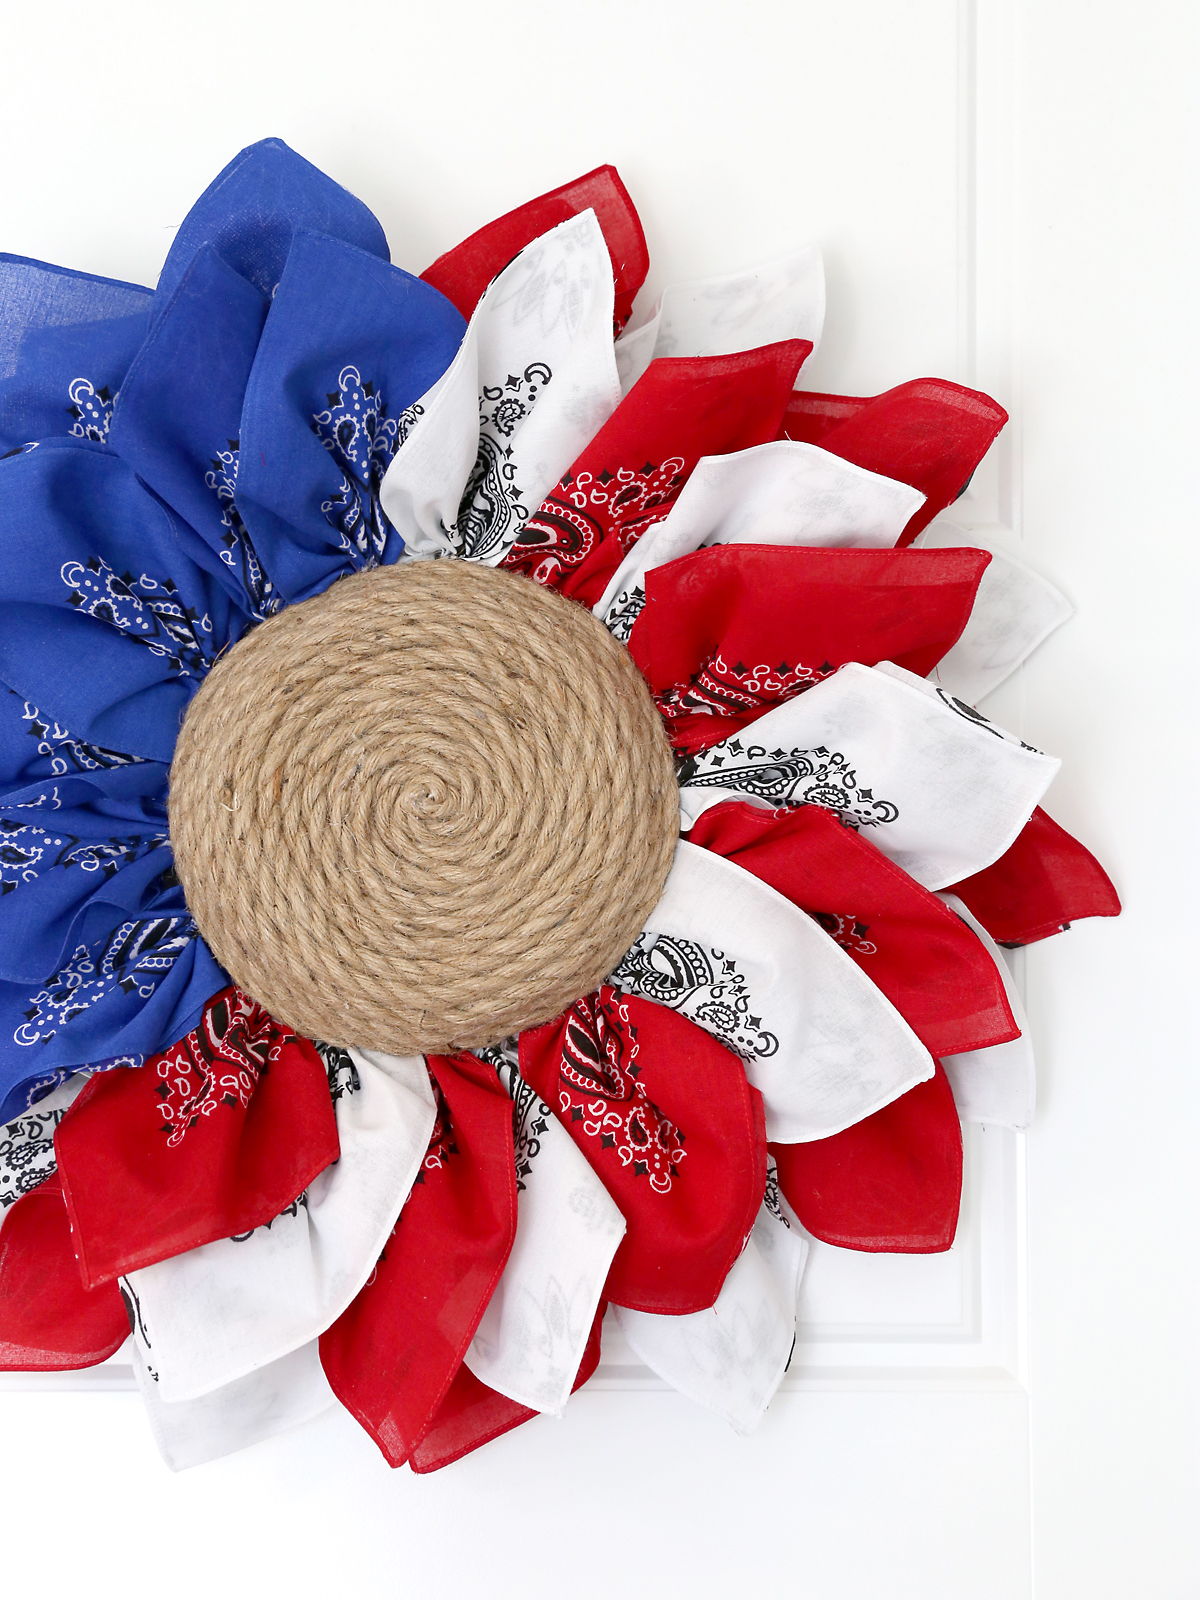
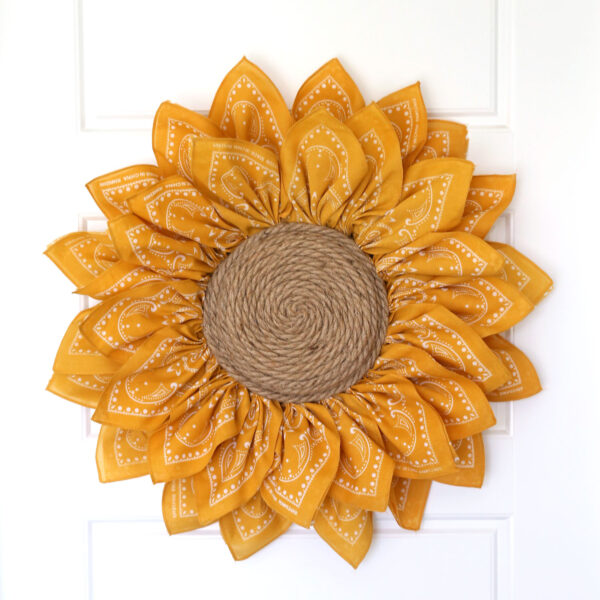
A few summers ago I made bandana sunflower wreath that ended up being one of my top posts for the year. So this year I thought it would be fun to remake it as a Fourth of July craft. Red, white and blue bandanas turn this sunflower into a cute flag inspired wreath that will look great on your door all summer long!

This wreath is easy to put together using a round wire wreath form, bananas, and rope for the center. I kept my wreath simple, but you could add little white stars to the blue portion of the wreath or a larger star in the center.
Avoid Floppy Petals
Plan to display this wreath somewhere it will stay dry. You’ll use spray starch to get the petals to stand up straight instead of flopping over, but if they get wet the starch will dissolve. Also, if you live in a very humid climate it’s possible the petals will eventually get floppy. Some readers who made the original bandana wreath glued small popsicle sticks behind the top petals to help them stay standing straight. If you display this wreath indoors or live in a dry climate that shouldn’t be necessary.
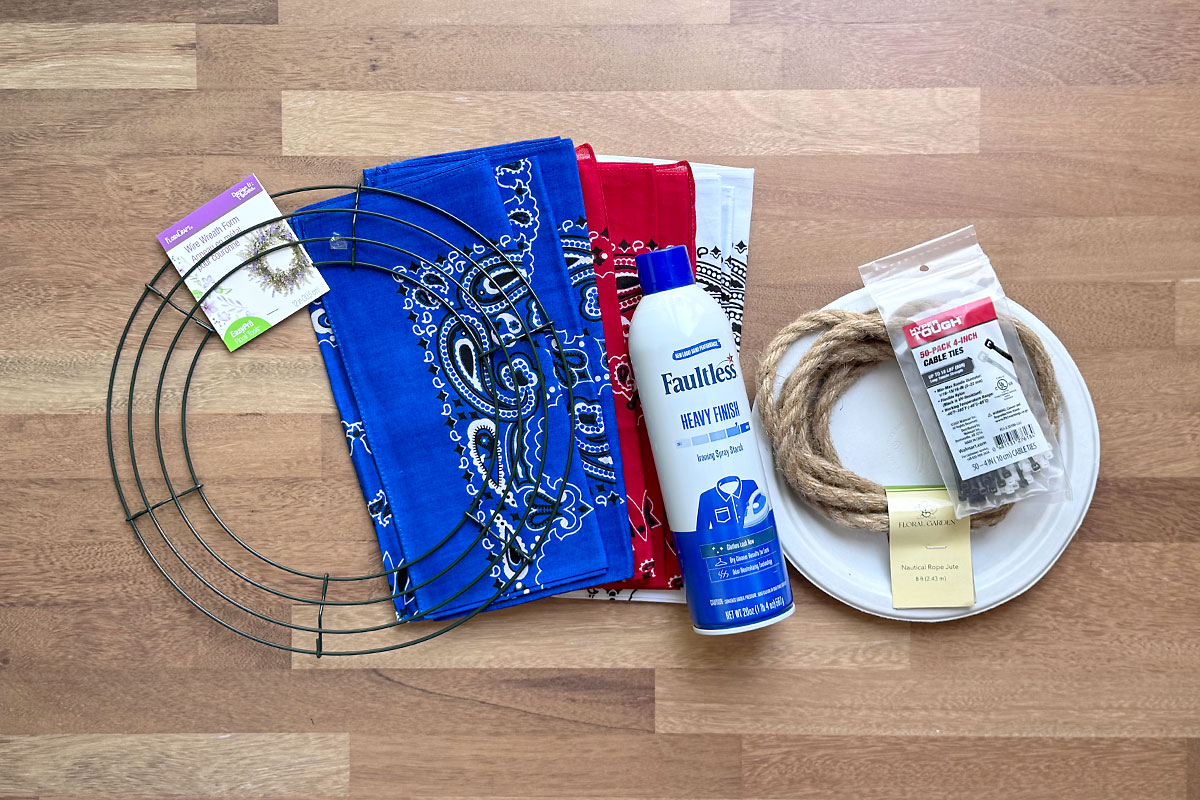
Supplies
Here’s what you need to make your own patriotic bandana wreath:
- Nine Bandanas (three each of red, white and blue): I found these bandanas at Hobby Lobby for 99 cents each.
- 12 inch round wire wreath form: I used this wreath form from Walmart. If you use a larger wreath form you may need more bandanas.
- 4 inch zip ties
- Spray Starch: You’ll find this in the laundry section of your supermarket
- Rope: I used rope from Dollar Tree which came in 8 ft lengths and I used two of them. You’ll need enough rope to cover a circle that’s just larger than the inside diameter of your wreath.
- Paper plate or cardboard circle that’s just larger than the inside diameter of your wreath. I used an 8.5 inch paper plate.
- Hot glue gun, scissors
How to Make a Patriotic Bandana Wreath
This project will take between 90 minutes and two hours, but it’s very easy to do! It’s a nice relaxing project you can work on while watching a show or listening to a podcast. And you can stop and come back to it at any time in the process.
Prep the Bandanas
To begin, cut each bandana into fourths. That will give you 36 bandana squares. Spray each one with spray starch and then iron until dry. This is an extra step that most tutorials don’t call for and it will take some extra time, but it’s totally worth it! The spray starch stiffens the fabric so your petals will stand up straight instead of flopping over.

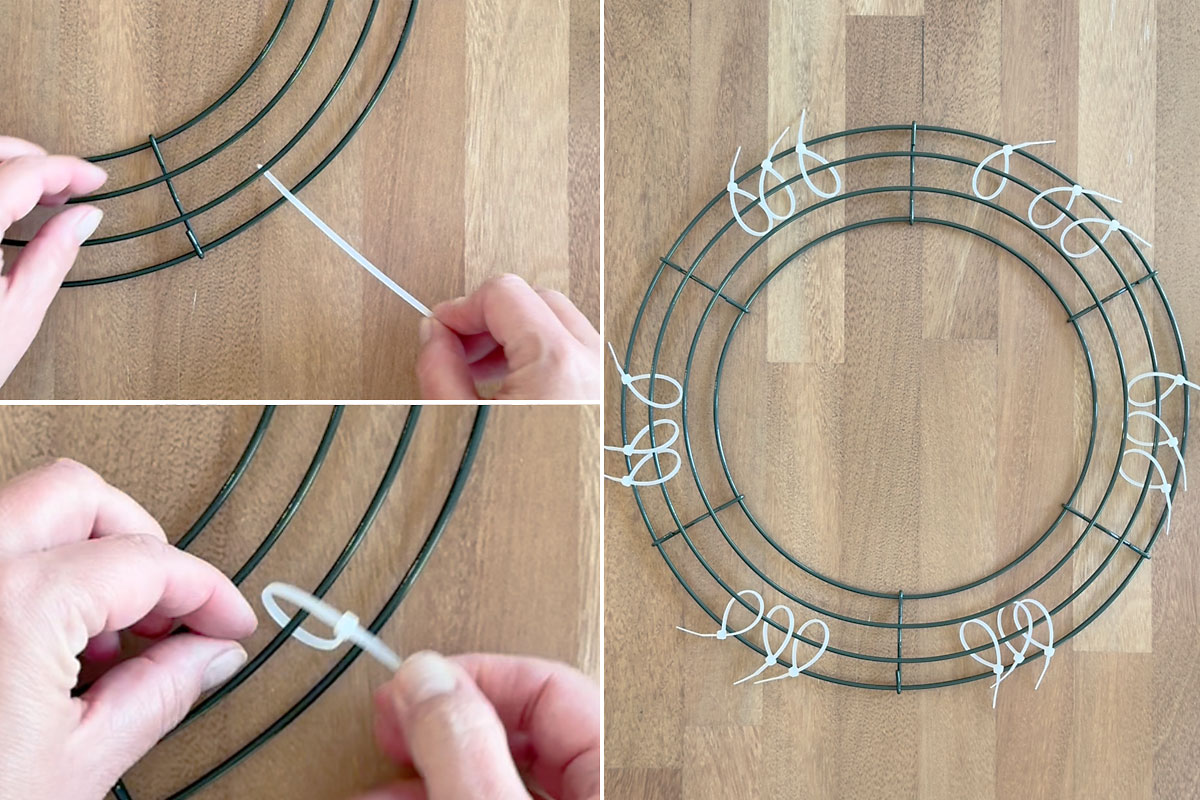
Prep the Wreath Form
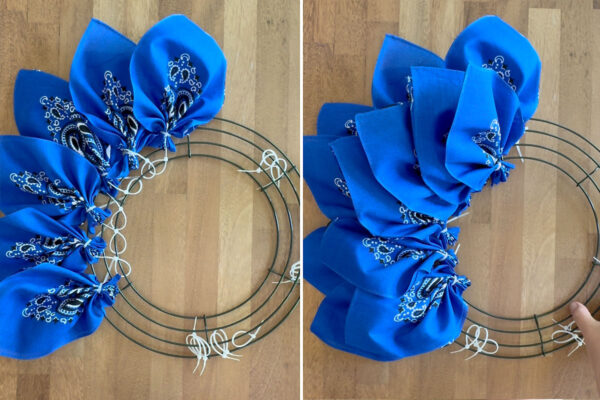
Next, you’ll get the wreath form ready by adding zip ties all around it. The wreath form has 4 different wire circles connected together. For the first layer of petals, you’ll attach petals to the wire circle that’s second from the outside. Slide a zip tie under that wire, then attach it together just until you hear it begin to click, but don’t pull it tight. Attach 18 zip ties to that circle, three in each section as you see below.
Add the Blue Petals
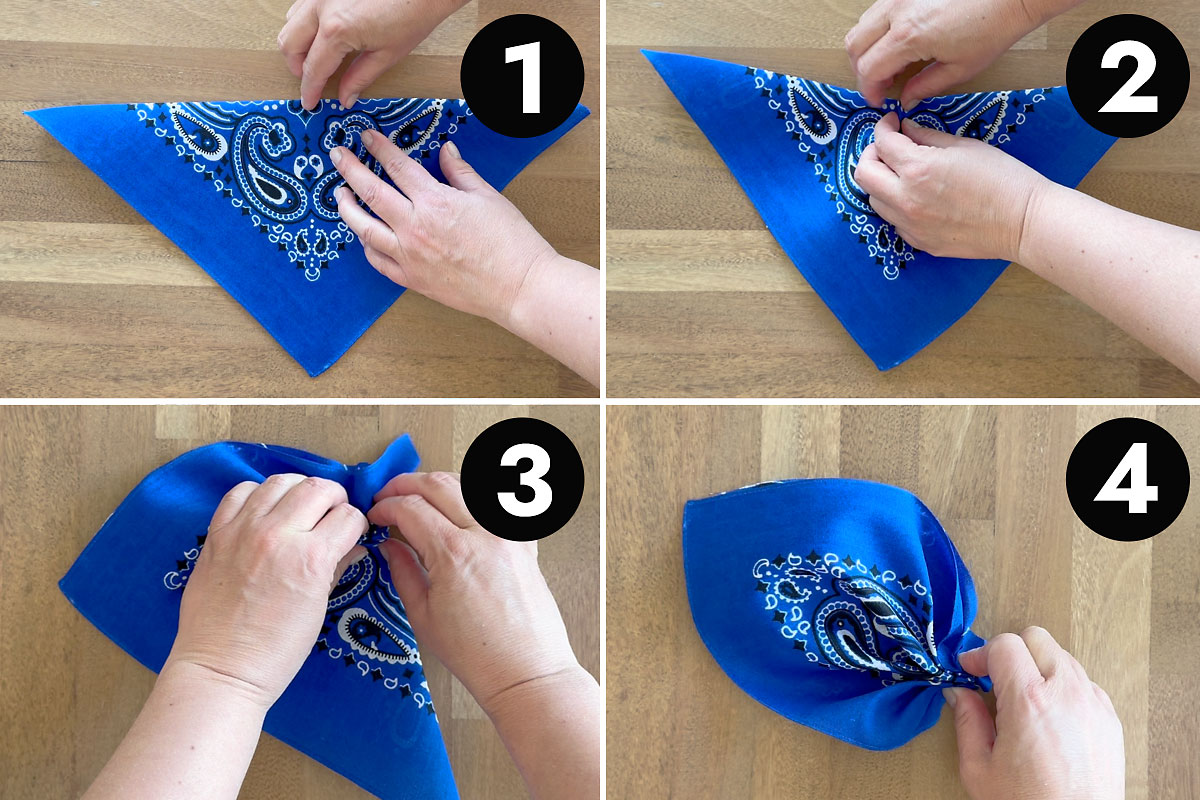
You’ll start with the blue bandanas. To create your first petal, fold one bandana square in half diagonally, with the finished edges facing up (1). Pinch the bandana between two fingers in the middle of the long folded edge (2). Continue to pinch up fabric along the long edge, first working up (3), and then working down, until you have a petal shape (4).
Hold the pinched edge of the petal in one hand, and grab one of the zip tie loops with the other hand. Push the pinched edge through the zip tied loop, then pull the zip tie tight, with the tail of the zip tie toward the back of the wreath. Repeat with two more petals in the same section, then three more petals in the next section.
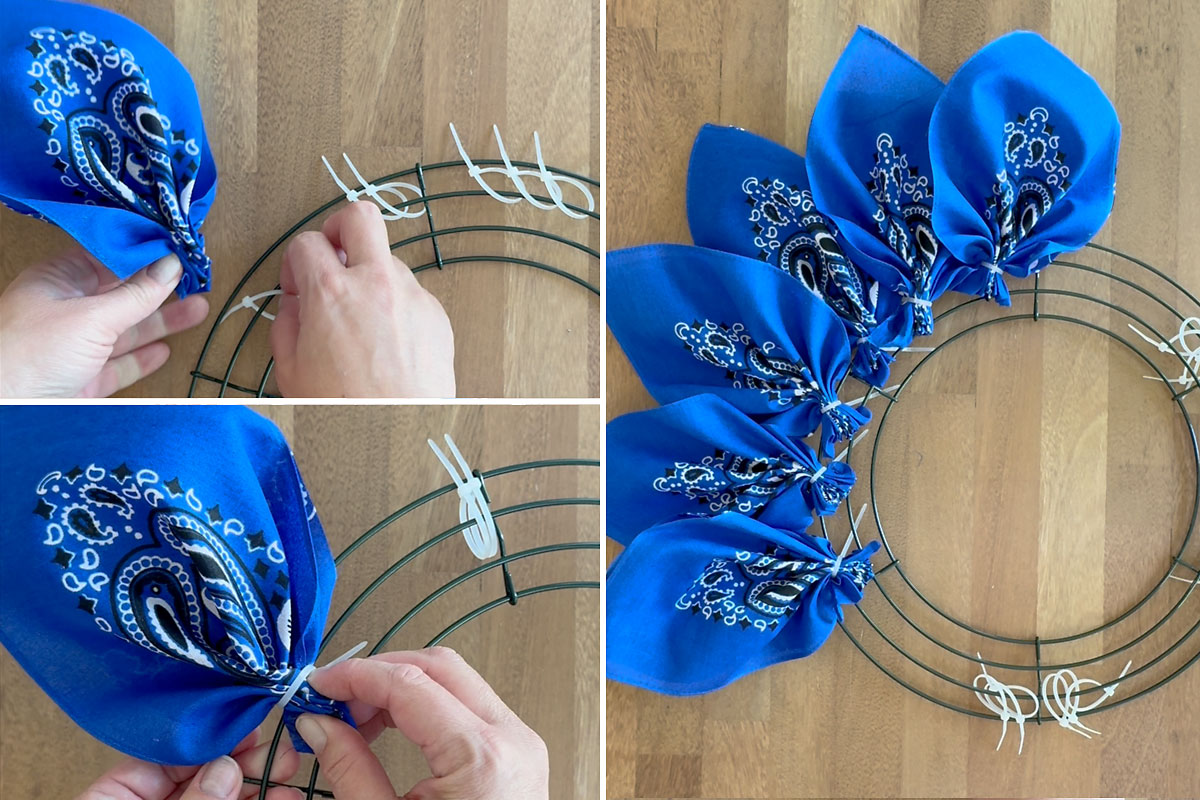
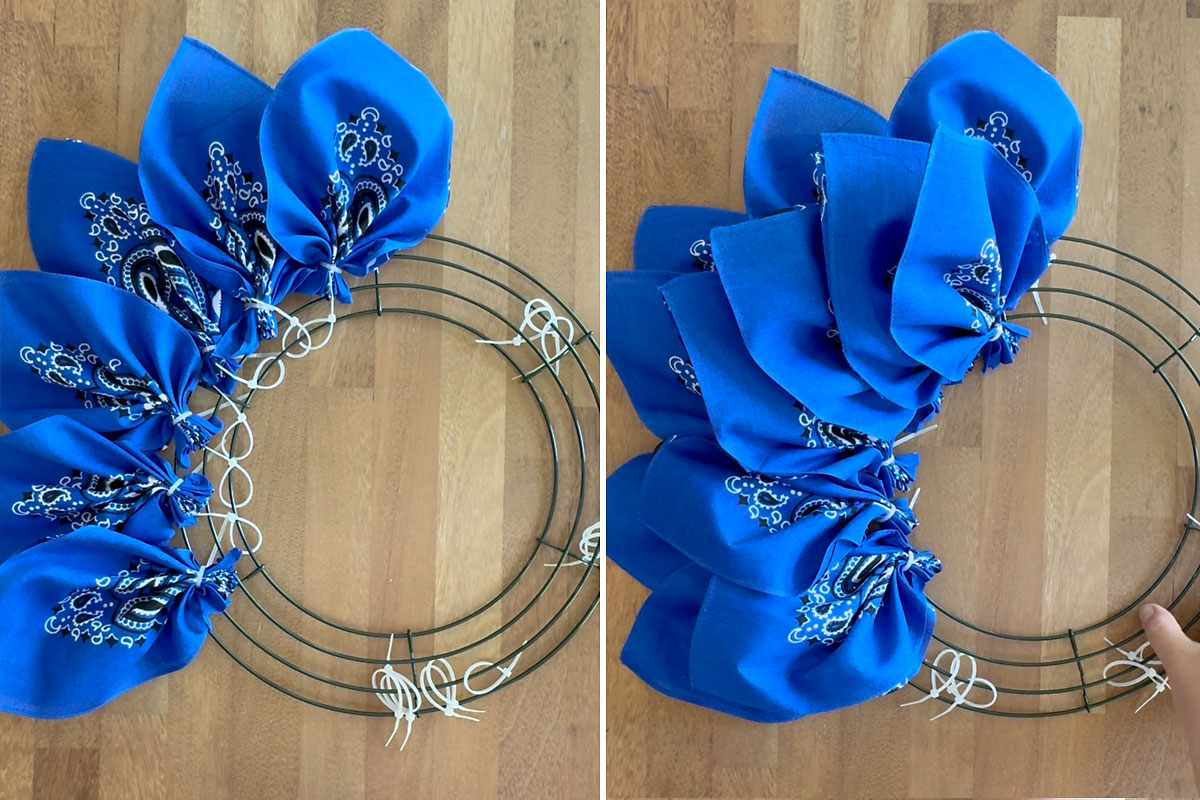
Next, add six zip ties to the center wire, three in each section where you just added the blue petals. Use these zip ties to attach six more blue petals, so you’ll now have twelve total blue petals in two layers.
Add Red and White Petals
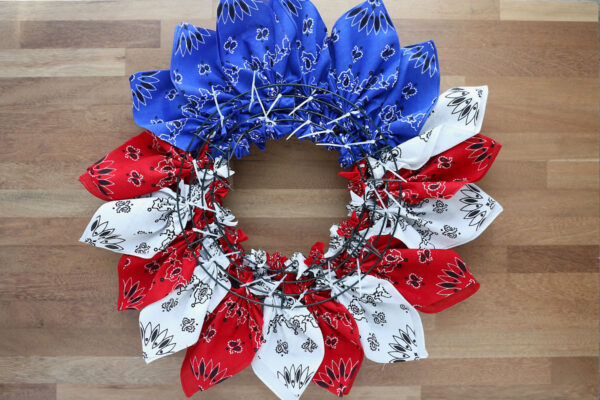
Now you’ll repeat the same process to add red and white petals to the remaining two thirds of the wreath. Starting adding petals to the wire circle that’s second from the outside. At the top, add a red petal, then a white petal, then a red one, etc, until you have added six of each. Then add a second layer of petals on the inside circle, this time starting with a white petal and continuing to alternate.
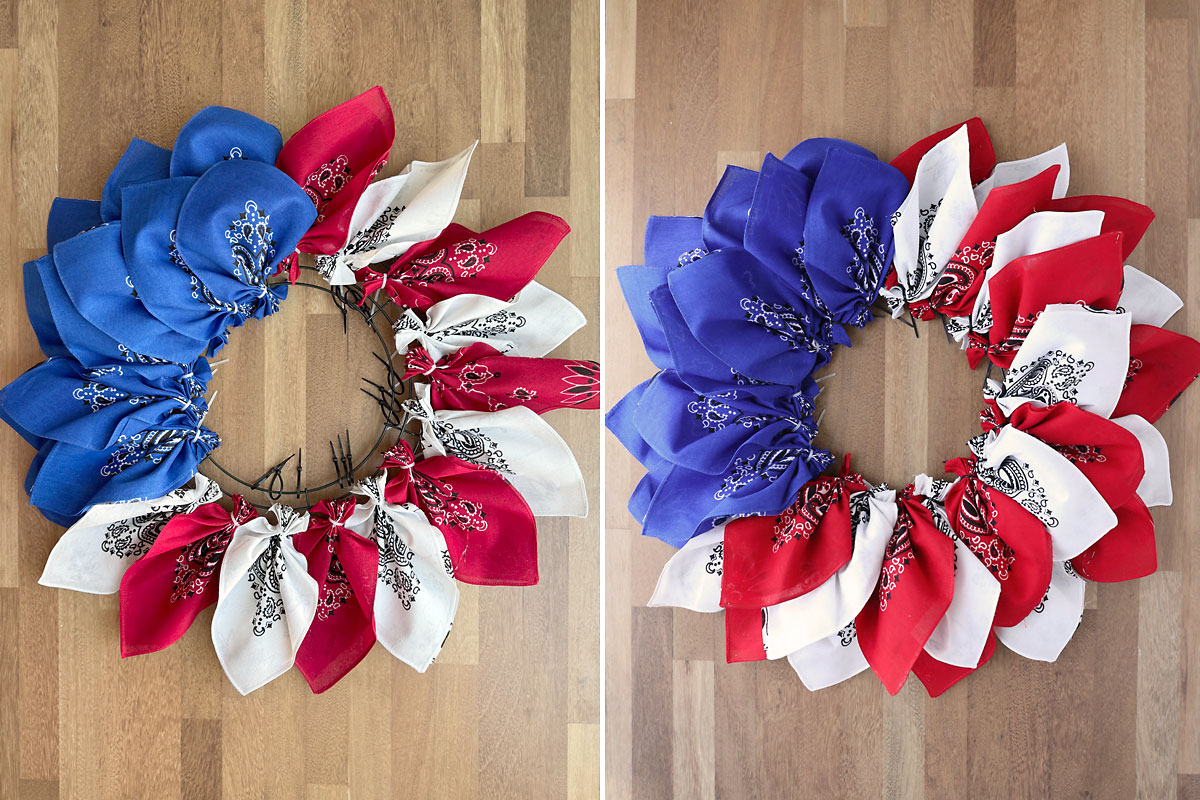
At this point you can adjust the placement of the petals by sliding them along the wreath form if necessary. Then flip the wreath over and pull all the zip ties as tight as you can. Feel free to trim the tail ends of the zip ties if you like.

Create the Center
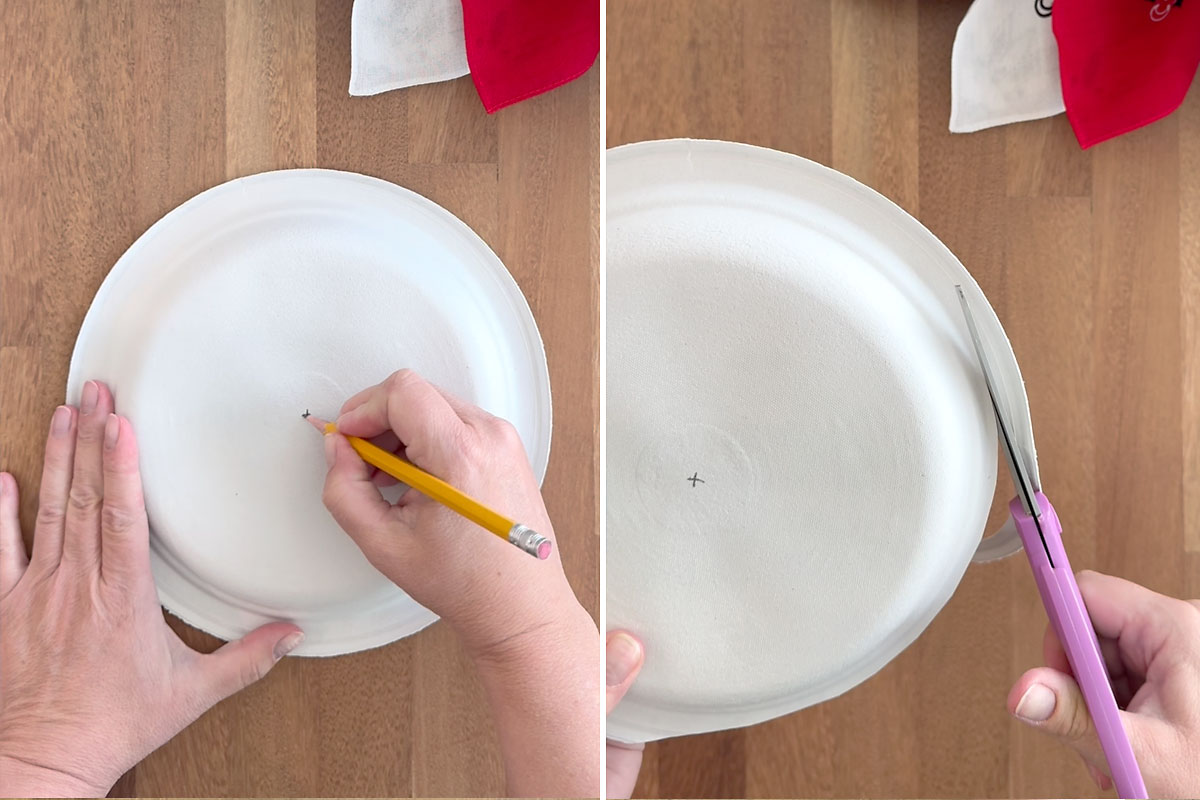
To make the center of the flower, you’ll glue rope to a paper plate or a circle of cardboard. You’ll need a plate or circle that’s a little bigger than the smallest ring in the wreath. I used an 8.5 inch plate. If you are using a plate, flip it over. If there’s a small lip on the outside that points back up, trim it off. Mark the center of the plate.
Cut one end of the rope at an angle. Place some hot glue along the cut edge and bend it up to create a spiral. Glue the spiral down onto the center of the plate. Continue to glue more rope to the plate in a spiral pattern. Keep going until you get to the end of your rope, or cover the entire plate.
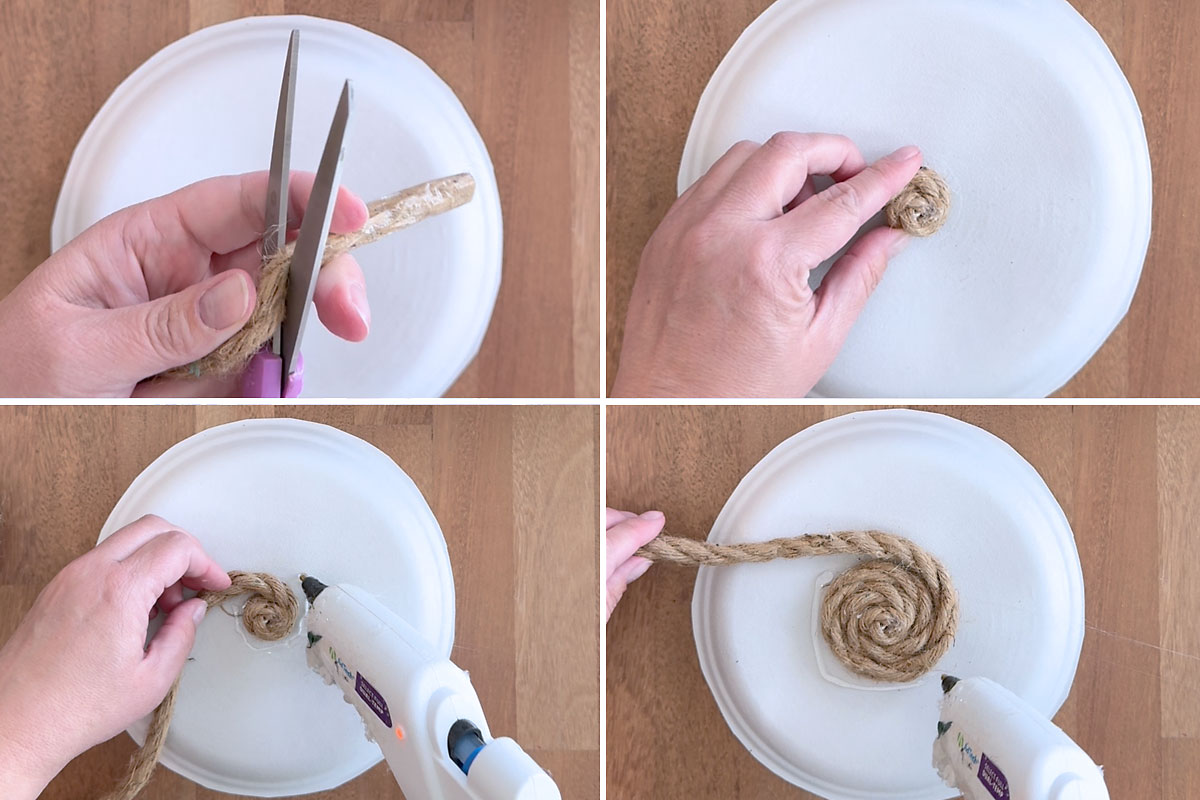
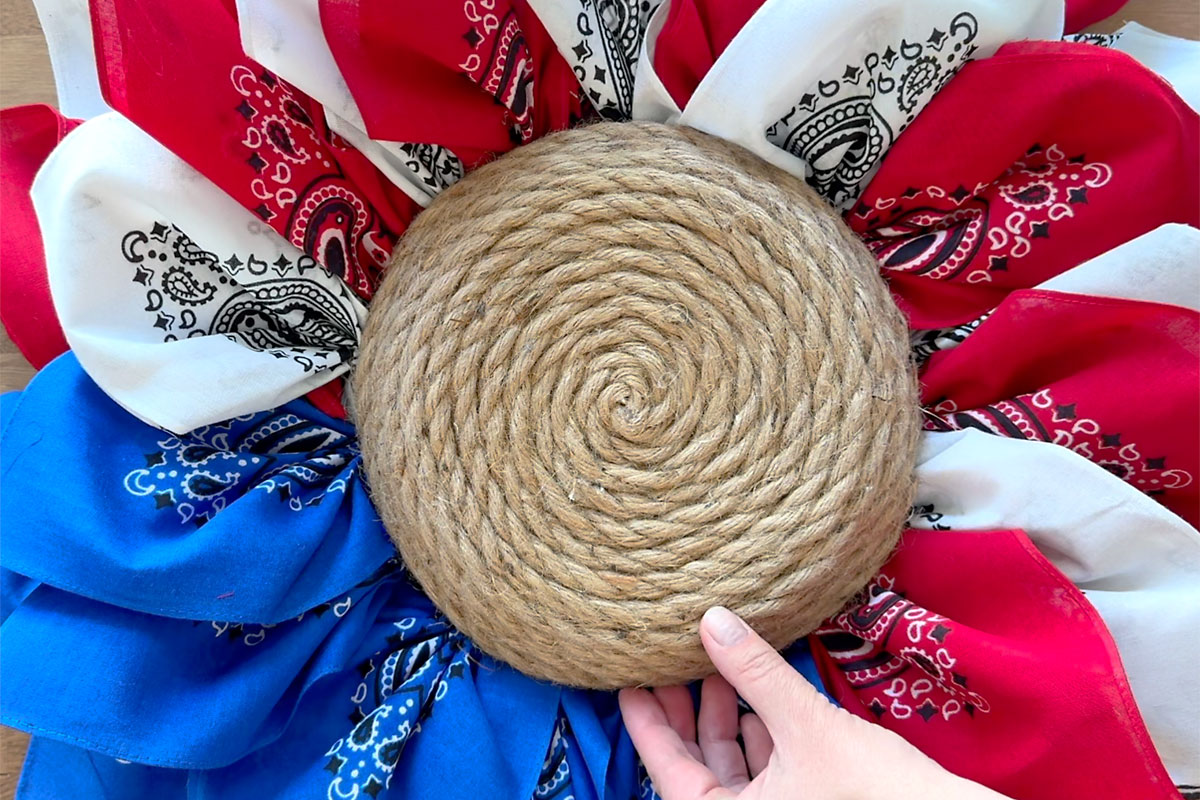
If you need to add more rope, just cut the current rope at an angle and the new rope at an angle and use hot glue to wedge them together. You won’t even be able to see the seam once you’re done. Continue gluing rope to the plate until the entire surface is covered. Now, flip the plate over and quickly put a generous amount of hot glue all around the edge of it on the back. Then place the rope covered plate over the wreath, centering it so that it covers all the zip ties. Hold it there until it is securely adhered. You can add more glue from the back of the wreath if needed.
Patriotic Bandana Wreath
Supplies
- 1 12 inch Wire Wreath Form
- 9 Bandanas three each red, white and blue
- 36 4 inch Zip Ties
- Spray Starch
- Rope
- Paper Plate or cardboard circle
Want more project ideas? Sign up to get my favorite easy crafts and recipes straight to your inbox!
Equipment
- Hot Glue Gun
Instructions
- Cut each bandana into fourths. Spray each bandana square with spray starch and iron dry.

- Loop 18 zip ties around the ring that is second from the outside on the wreath. Distribute the zip ties around the ring (if there are six sections, put three zipties in each section). DO NOT pull the zip ties tight; leave them as loops.
- Start with the blue bandanas. To create your first petal, fold one bandana square in half diagonally, with the finished edges facing up (1). Pinch the bandana between two fingers in the middle of the long folded edge (2). Continue to pinch up fabric along the long edge, first working up (3), and then working down, until you have a petal shape (4).
- Hold the pinched edge of the petal in one hand, and grab one of the zip tie loops with the other hand. Pull the pinched edge through the zip tied loop, then pull the zip tie tight, with the tail of the zip tie toward the back of the wreath. Repeat with two more petals in the same section, and then three more petals in the next section.
- Add six more zip tie loops to the inner wire circle in the same two sections you just worked in. Add six more blue petals to those zip ties, so you have twelve blue petals total in two rows.
- Fill in the remaining sections of the wreath, alternating red and white petals. On the second wire from outside, start with a red petal and alternate. On the inner wire circle, start with a white petal and alternate. You will have 36 petals total (12 of each color).
- Position petals as desired, then flip wreath over and pull each zip tie very tight. Trim if desired.
- Glue rope onto a paper plate or cardboard circle in a spiral. See blog post for more details if needed.
- Glue the sunflower center to the wreath, centering it so that it covers all of the zip ties.


Tamra Williams says
Great instructions!!