

You’ve probably heard a million times that the best way to get a gorgeous portrait of your subject while indoors is to use window light. What’s so great about window light? Well, first off using natural light from your window instead of lamps or overhead lights in your house eliminates the nasty green or yellow color cast that artificial lighting usually brings to a photo. But even better, window light makes for gorgeous portraits because it’s directional (which means it will cast some shadow on your subject’s face, which makes it easier to distinguish her features), but as long as the sun isn’t shining directly in the window it’s also indirect (which means you won’t get harsh ugly shadows, like you’d get from using a flash).
There are a few important things you need to know in order to take advantage of window light:
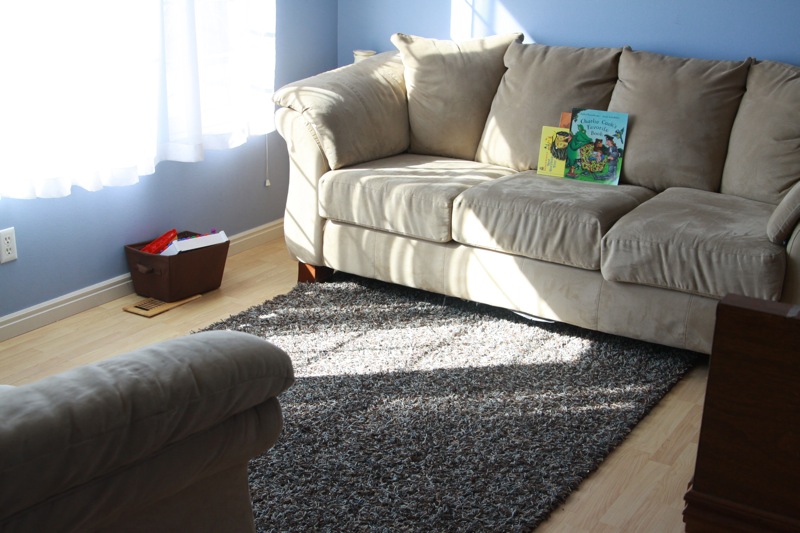
1. Do not try to photograph a subject near a window when the sun is shining directly through it. Take a look at the floor in front of the window – if there is a window-shaped bright patch surrounded by shadow, you will not be able to place your subject there (you’ll get harsh light and dark shadows, not to mention shadow lines from windowpanes all over your subject’s face). Check the floor in front of your window at different times of day—an area that gets harsh light at one point will receive indirect light a few hours earlier or later. Plan to use you windows to take pictures when there’s plenty of light coming through, but you don’t see that window-shaped patch.
2. It’s important to know how to position your subject in relation to the window to get the best photos. Look at the following examples and pay attention to two things: 1) whether the subject’s eyes are bright (small white dots in the eye are called catchlights and you want these!), and 2) how the shadows look on the subject’s face.
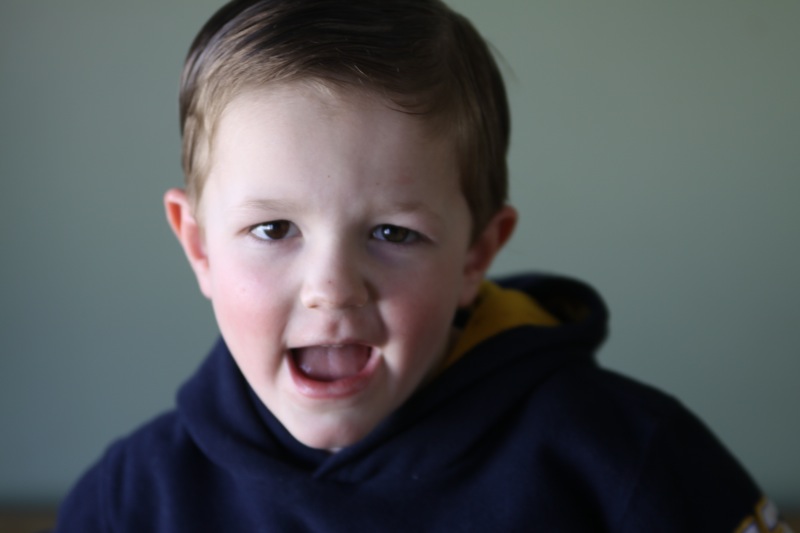
Example A: Subject is standing a few feet from the window facing away from it. His entire face is in the shadow while the background is bright – this positioning will generally result in an underexposed photo with dark eyes.

Example B: Now the subject has turned 90 degrees toward the window. Now half his face is bright, and half is heavily shadowed. This lends some drama to the photo, which can be fun, but for a traditional portrait it’s probably too much.
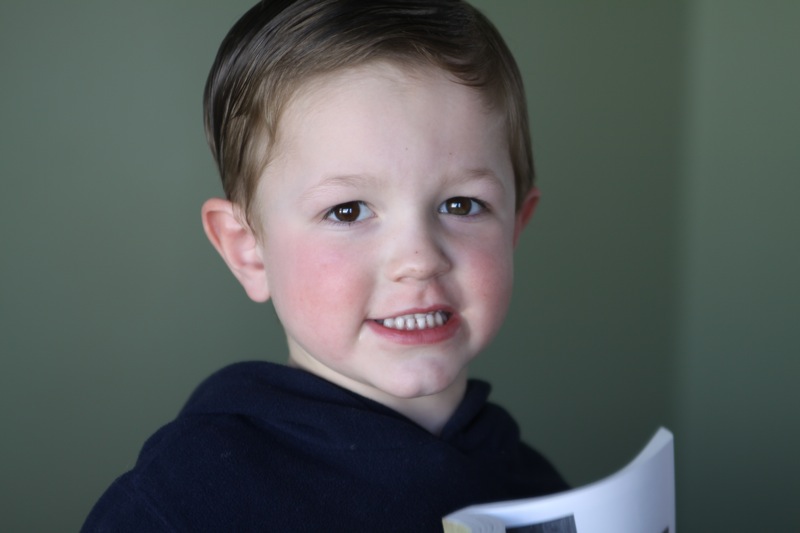
Example C: Now he’s facing directly out the window. This one looks much better – his eyes are bright with nice large catchlights, but his face is evenly lit (called flat lighting), which makes his features harder to distinguish in a photograph.

Example D: In this photo the subject has turned away from the window 45 degrees, so he’s actually facing the right edge of the window. His eyes are bright, and one side of his face is nicely lit while the other side is gently shadowed, making his features visible and his skin glow. Stand near the edge of the window your subject is facing toward and shoot away!
PS – I took all these example shots using the auto feature on my camera. I think the auto setting generally underexposes a little, so I’d probably lighten them all a little in post processing. Stay tuned for post on how to do this with ease!

Shelbi says
Thank you, thank you, thank you!
I was looking for some DIY lighting tips and stumbled across your blog. I take pics of my kids all the time – I have a few good lenses and a good camera – but the shots are always hit or miss! Reading this post was an eye opener for sure!
Terri Wyatt says
I am an aspiring photographer and will be using my garage as my studio for now. Your tips are great for us beginners ona small budget. Well done!!
Ange says
I just ran across your blog on Pinterest….LOVE it, great job on all the photography tips. I received a Canon DSLR for Christmas and have been searching the web for help and your site has been so very helpful Thank you!!
autumn says
Thank you so much for your kind comment! I hope you’re having fun with your new camera.
Emily says
Great post with clear examples. 🙂
Denise says
I always use the auto setting, so I look forward to your tutorial.