My oldest starts seventh grade this year and I have never purchased school pictures for any of my kids. I sometimes will buy the class photo for them, but I have no interest in paying exhorbitant prices for a school snapshot of them with messy hair and a cheesy smile. Instead I spent about ten minutes per child in my own home taking yearly photos that look loads better than the school pics and cost me almost nothing. You can do this too, even if you only shoot on AUTO. There are just two things you need for a great portrait: a plain background and good light. Keep reading to learn how you can take great portraits of your kids at home.
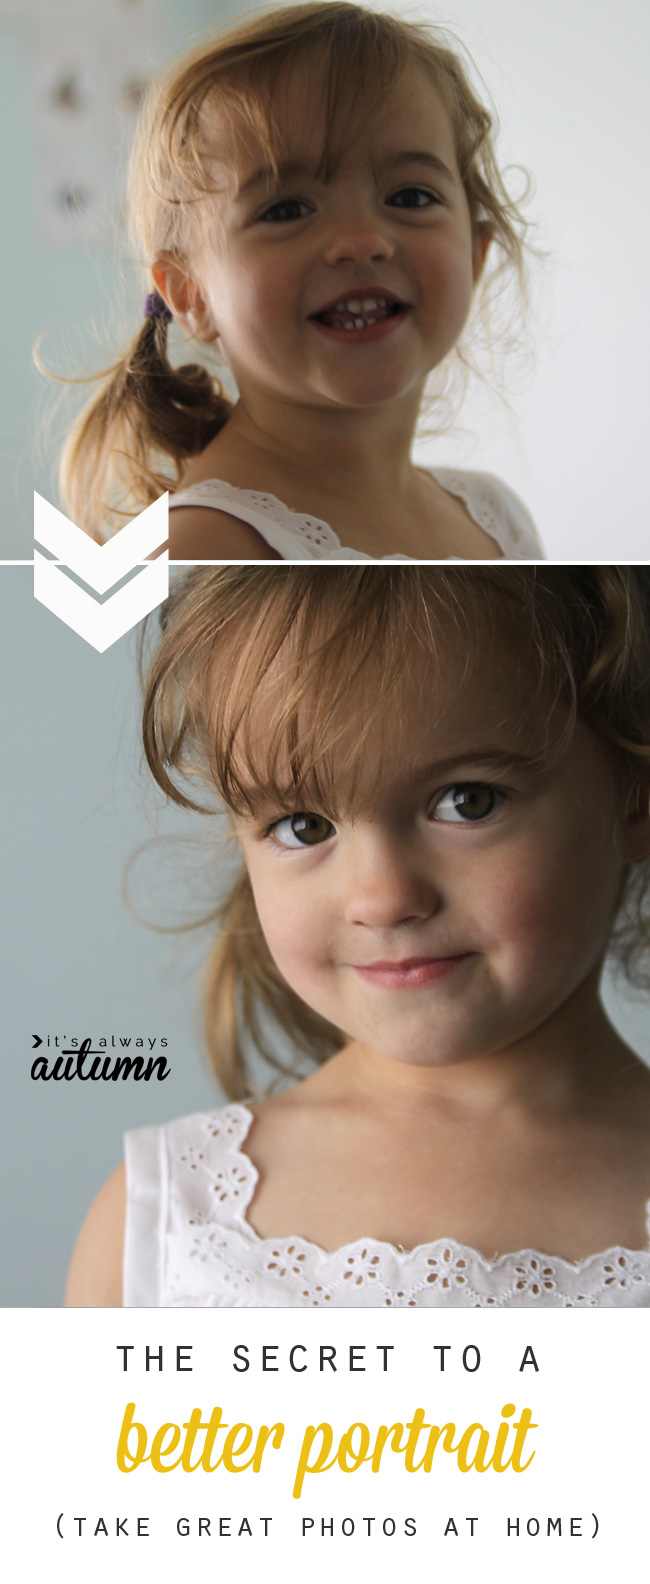
I’ve talked about backgrounds before. For a school picture type photo I prefer a plain background. You can create an inexpensive DIY backdrop board, use black velvet or another large piece of fabric or blanket, or simply position your child in front of a wall, like I did for the photos in today’s post. This post and this post give even more background ideas.
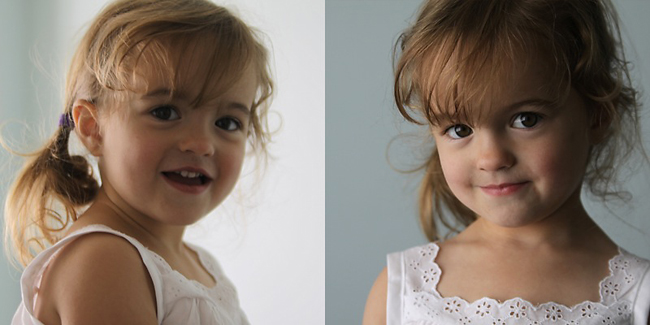
Today I want to talk a little more about lighting and the HUGE difference it makes in how your photos turn out. In a studio, a photographer has lights that provide the look she or he wants on a photo. Since you and I don’t have lights, we can just use window light instead. But you have to position your subject (the person you are photographing) correctly in relation to the window to get a great photo. Look at these two pictures:
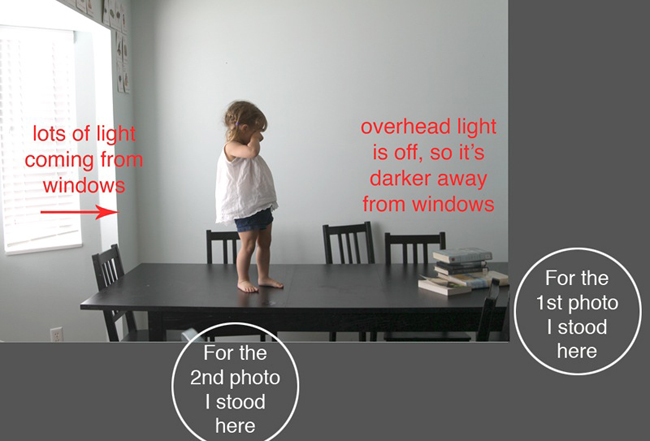
They were both taken on auto, in my kitchen, just a few minutes apart, but there’s a huge difference. The photo on the left is a snapshot: slightly blurry and kind of dark. The photo on the right, however, is a portrait: it’s super crisp and clear and the girl’s eyes sparkle and her skin glows. What made the difference? Where both of us stood in relation to the window (the dominant light in the room – always turn off your overhead light and use window light instead when taking indoor portraits).
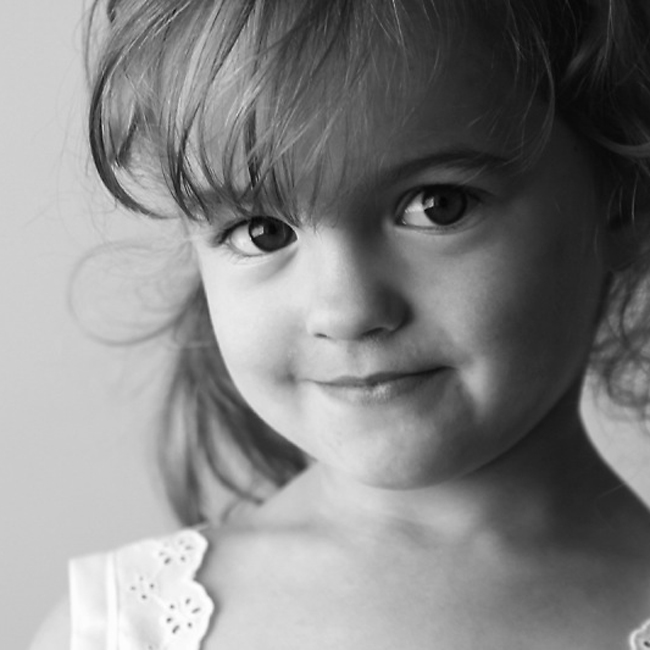
The photo above shows our setup for these pictures (and it’s a good reminder than you don’t need a studio to get great headshots!). When I stood away from the window and my daughter looked at me, all the light was coming from behind her, leaving her face and eyes dark in the photo. But when I stood closer to the window and she looked at me she was facing one side of the window (at about a 45-60 degree angle), allowing the light to brighten one side of her face while the other side was softly shadowed, which gives the photo a beautiful amount of light/dark contrast. Photos with lots of light/dark contrast look stunning when converted to black & white:
So pull up and wall and a window and try taking photos at home this year – get better photos and save yourself some cash (which you could in turn donate back to your school!). Check out these posts for a little more info:
For more in-depth discussion of how to position your child toward window, read this post.
Remember that photos taken on auto are often underexposed and need to be brightened, so read this post on how to do that – it’s super easy!
And for more info on a better black and white, check out my post over at eighteen25 today!
Like this post? Follow It’s Always Autumn for more:
LINKING Tip Junkie | Sugar Bee Crafts | Today’s Creative Blog | Naptime Creations | Lil Luna | SNAP | Someday Crafts | Somewhat Simple | House of Hepworths | The 36th Avenue | Whipperberry | Naptime Crafters | Tatertots and Jello | Little Inspiration | I Heart Naptime






Ridley Fitzgerald says
These are some great tips for a good portrait. Lighting is super important, so using the open window and turning off the overhead light is great. When my kids start going to school, I’ll remember this.
Cindy cottle says
How do you achieve the soft smiles? I take a lot of pictures of 4 yr olds in my class for a memory book at the end of the year. They all want to do the cheesy smile.
autumn says
Yes! That is one of the toughest things about photographing kids that age. I usually ask them to take their smile away, then I either ask them to give me a tiny smile OR I say, “now don’t smile, don’t smile!” and that usually makes them laugh so you end up with a much more genuine smile. I actually have a whole post just about this if you want to check it out: https://www.itsalwaysautumn.com/2012/08/08/photography-tips-how-to-get-a-great-smile-from-your-toddler.html
Birgit says
Just discovered your blog and it seems I have some reading to do! Just did a photography workshop (totally new to it), and I think your blog is a great follow up to it!
Thank you!
Happy 2014!!!
Tracy T. McWilliams says
This page really has all the information I needed about this subject and
didn’t know who to ask.
sonja says
oh, very helpful. Would love to read some more photographing tips. For example “how to get great party-snapshots” (my problem there:dark light, people dancing etc…..)