
In today’s post: Find free templates for five adorable print + fold Christmas origami bookmarks! Fun, easy kids’ activity, perfect for class Christmas parties.
Last month I shared some woodland animal print + fold origami books, and they were so popular I decided to do a Christmas version! These cute little bookmarks print out on an 8.5×11 piece of paper, and all you (or your kids) have to do is cut them out and follow the easy folding instructions.
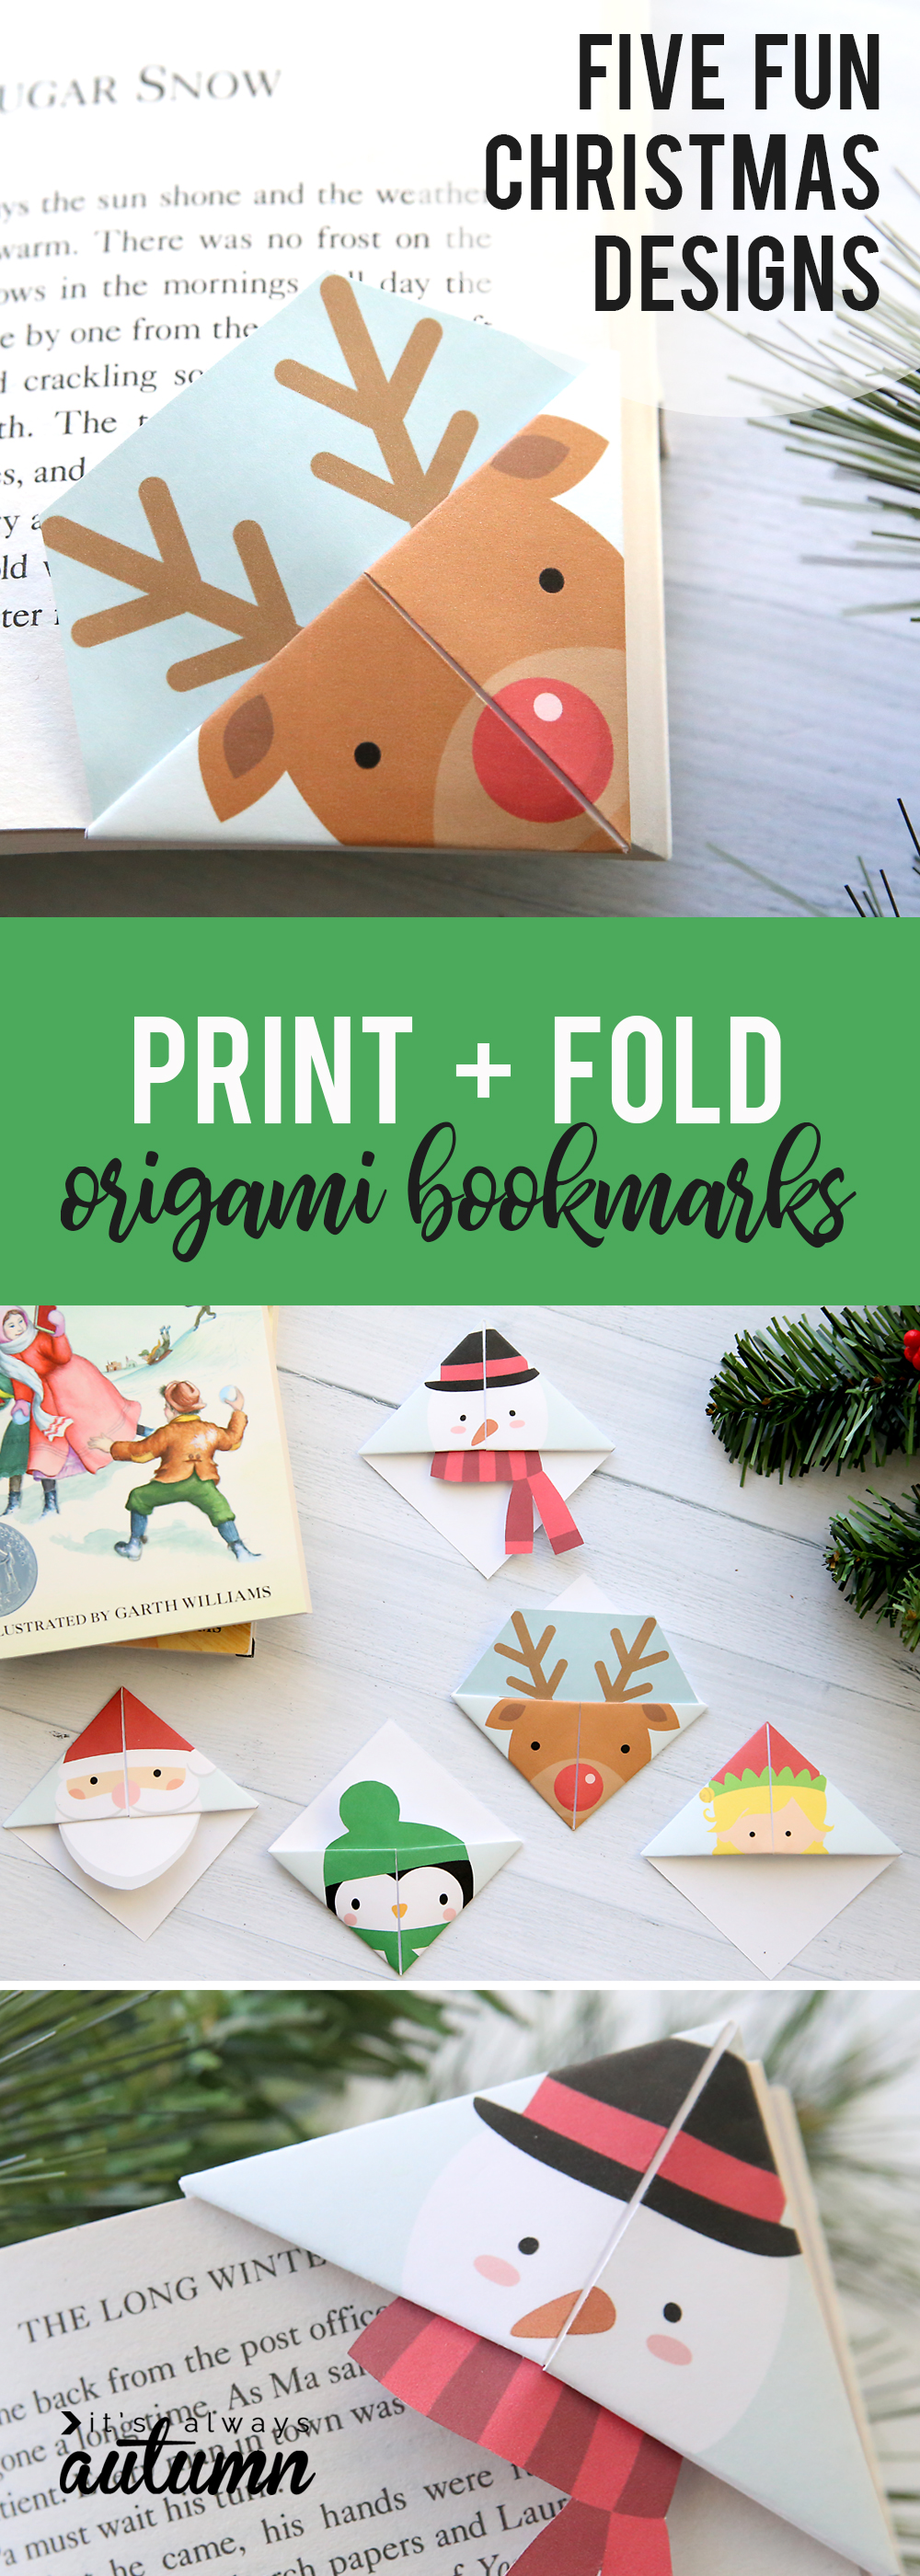
This an easy, inexpensive activity that’s perfect for craft time with your kids. It would also be great for a class or church Christmas party!
Free Christmas origami bookmark templates
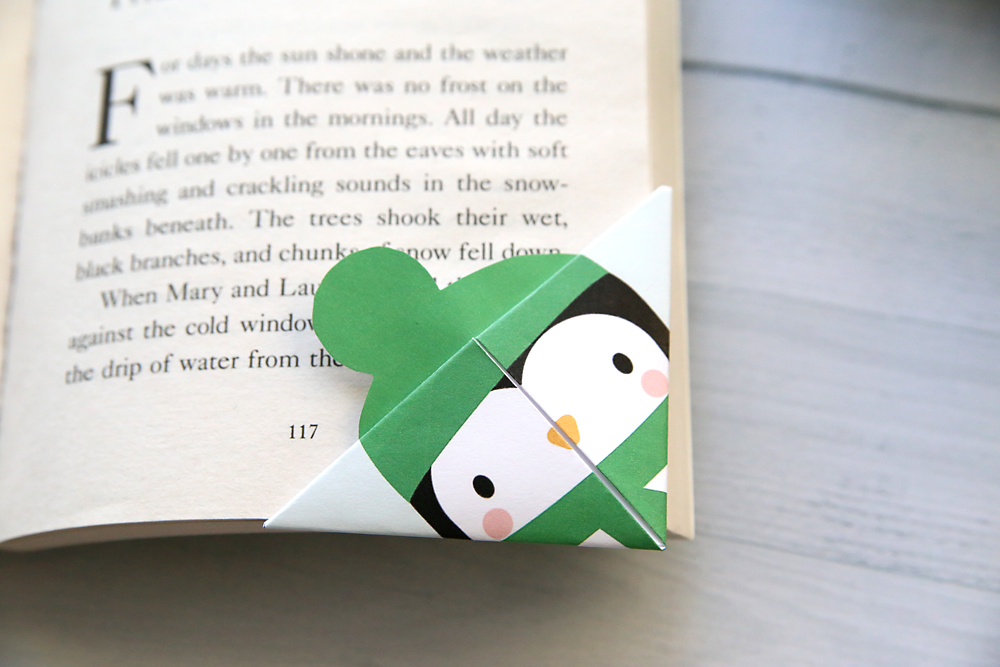
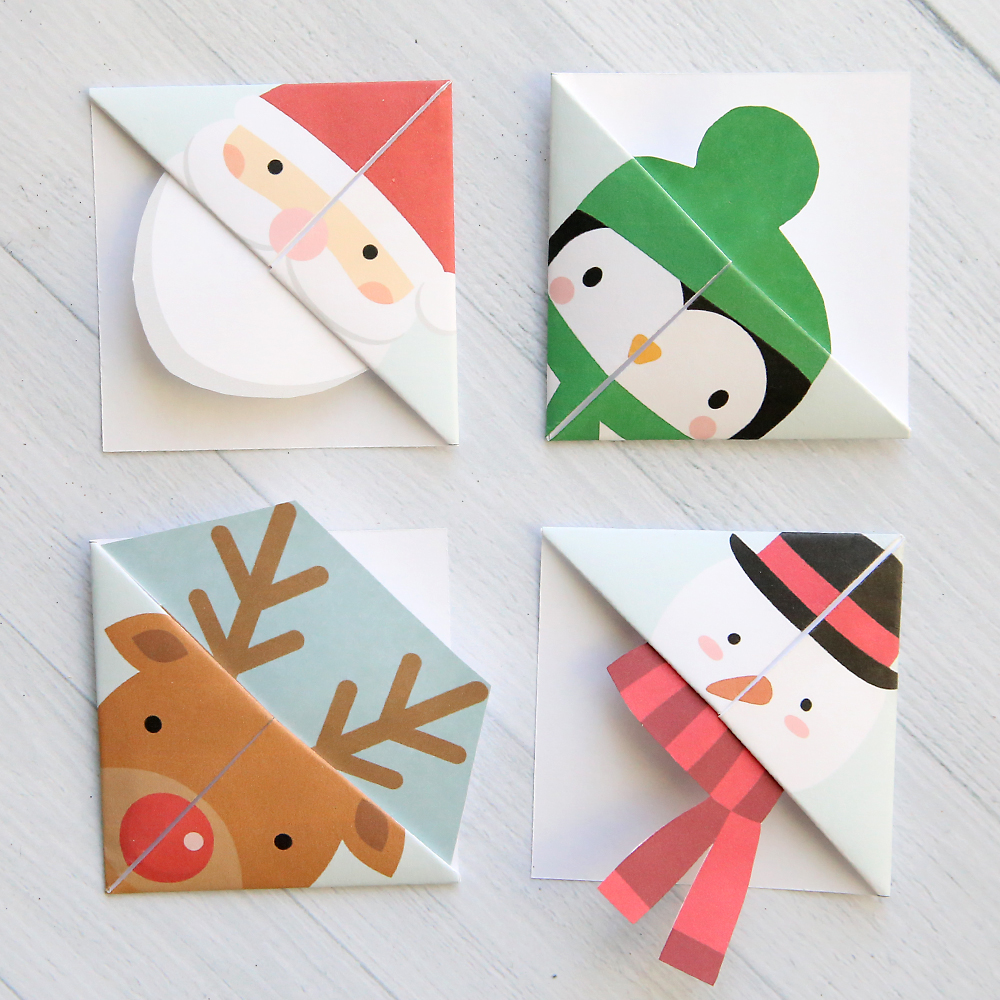
Just download one of the five free templates below and then print on normal printer paper. Once folded, the bookmark slides over the corner of the page you are on to save your spot. Choose from a penguin:
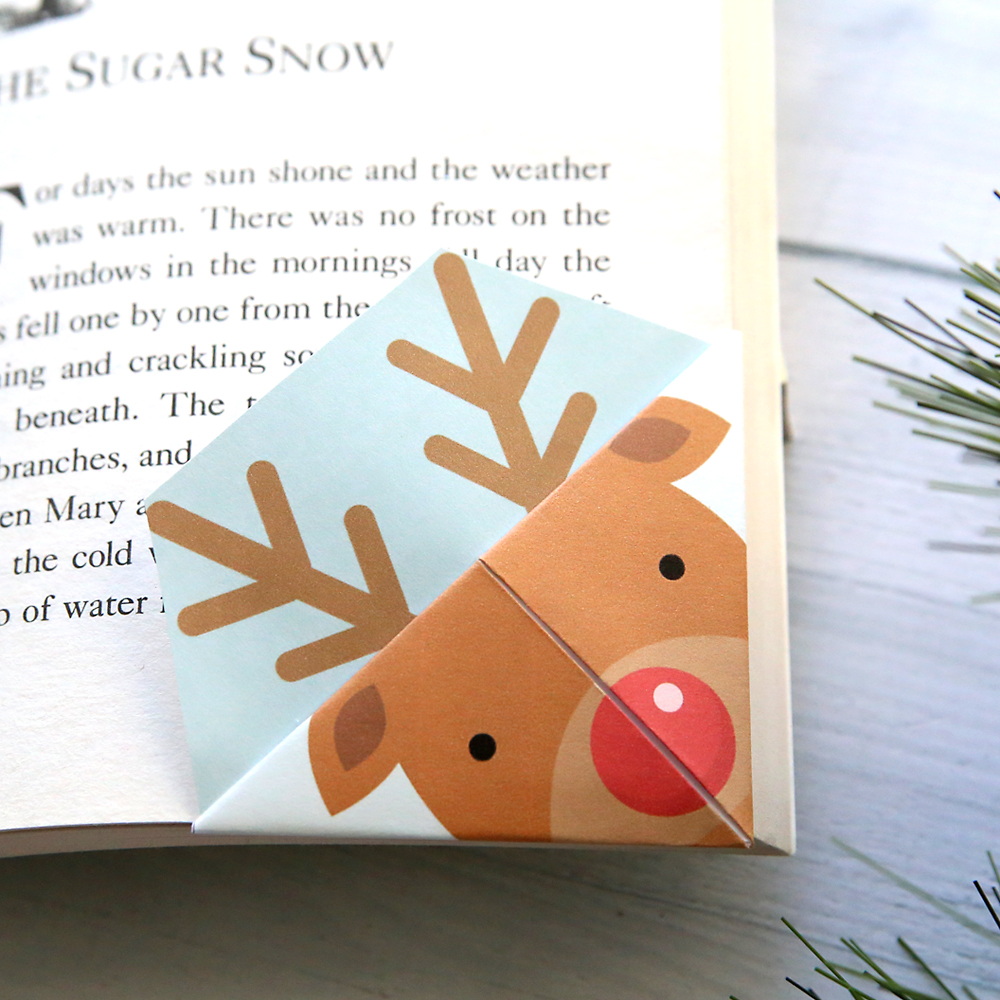
Rudolph:
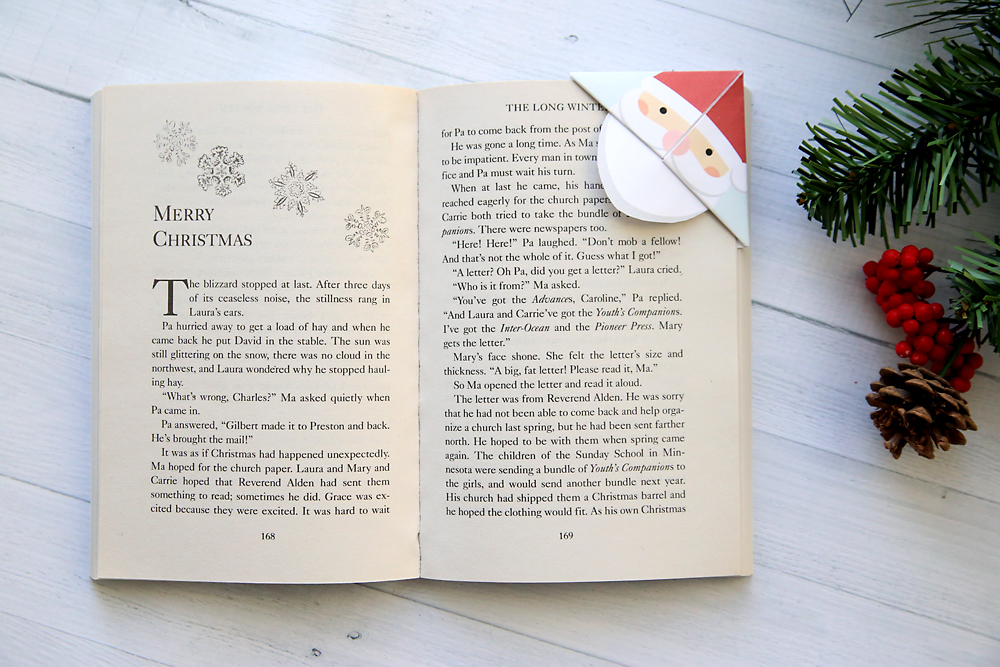
Santa:
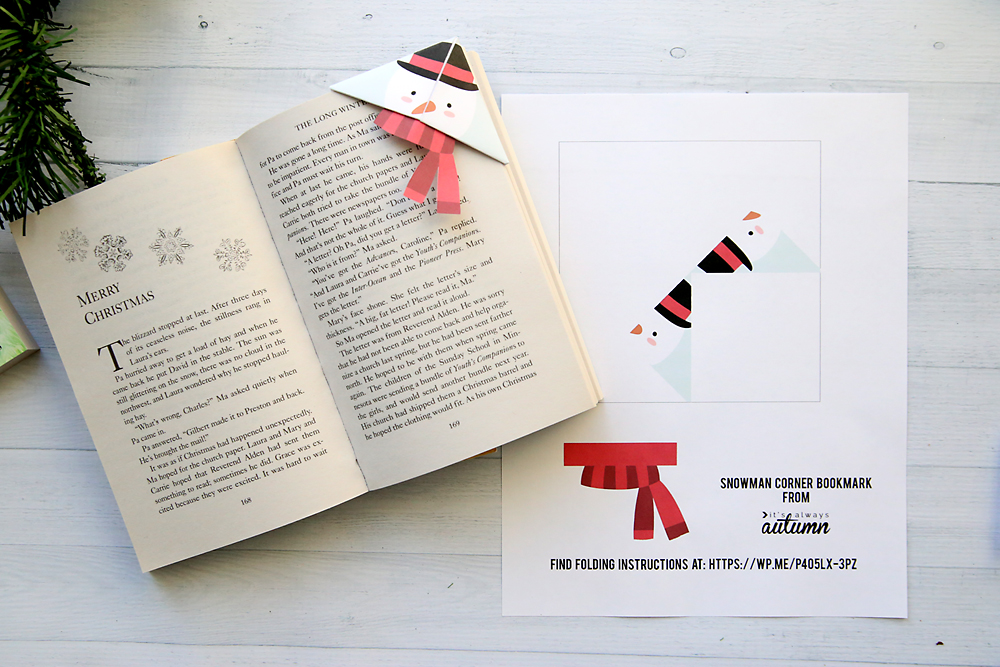
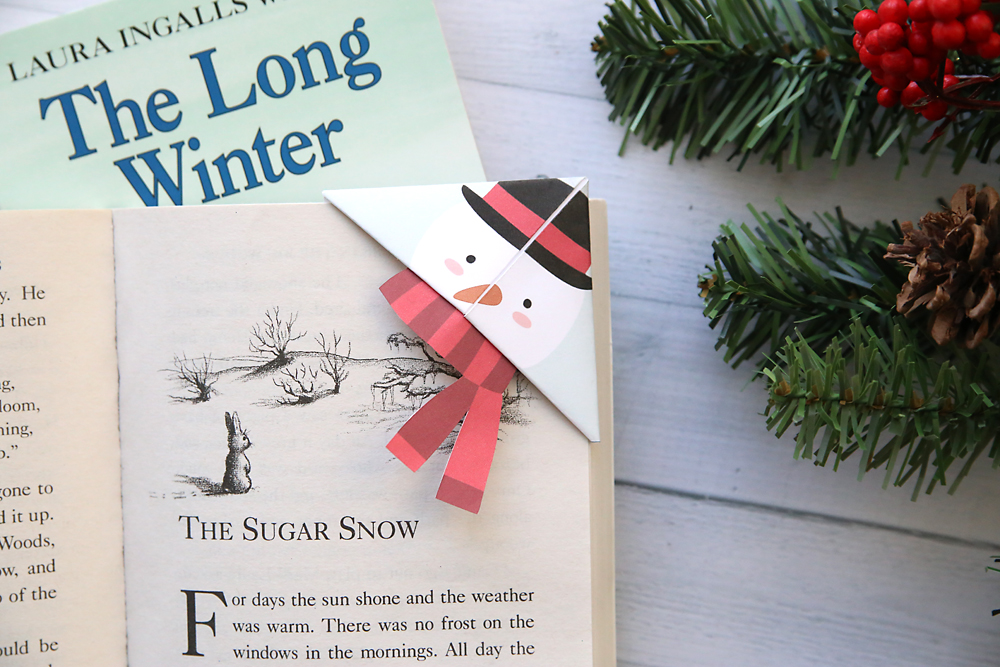
A snowman:
Or an elf:

How to fold an origami Christmas bookmark
Click here to download the Santa origami bookmark template
Click here to download the Snowman origami bookmark template
Click here to download the Reindeer origami bookmark template
Click here to download the Penguin origami bookmark template
Click here to download the Elf origami bookmark template
Watch this video to learn how to fold an origami bookmark:
And here are the written instructions (these photos feature one of the woodland animal bookmarks):
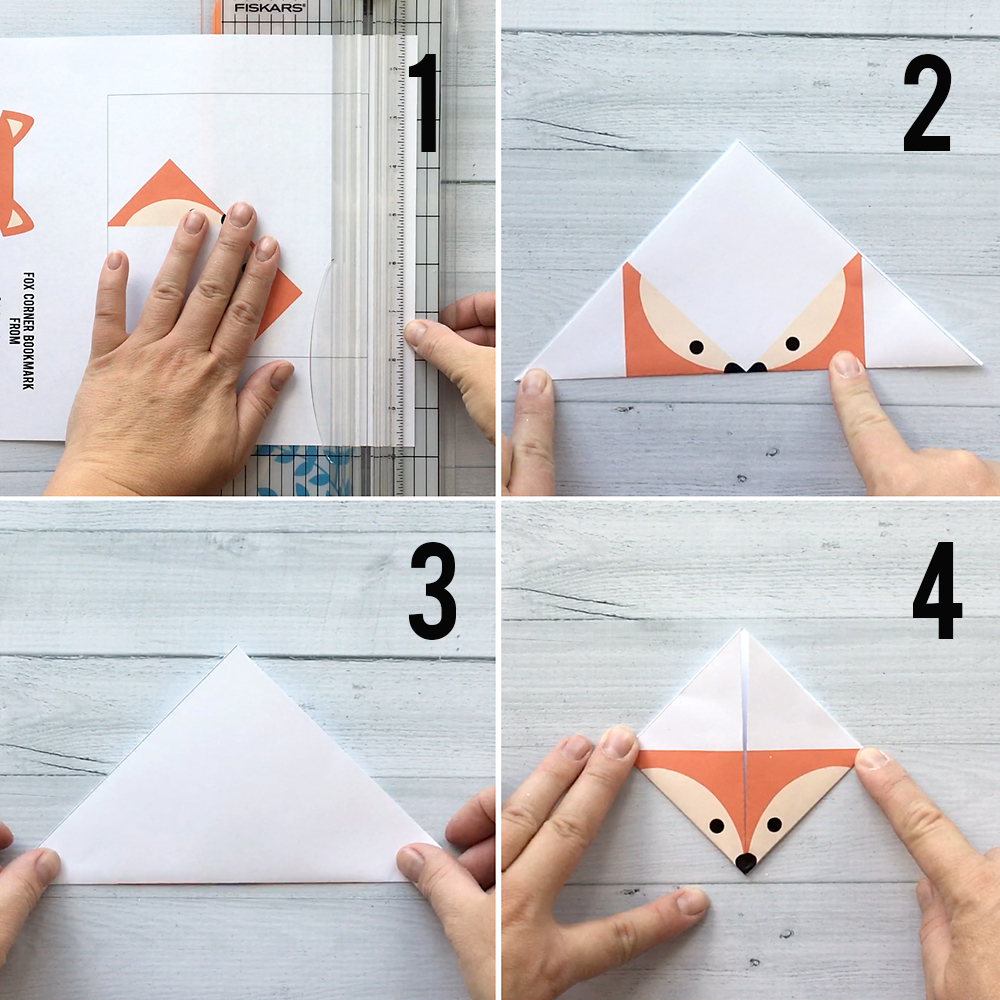
1 – Print bookmark template on plain white printer paper. Trim along lines to cut out the square. 2 – Fold square in half diagonally to create a triangle. Both colored areas should show on the top of the triangle. 3 – Flip the triangle over. 4 – Fold each outer corner of the triangle to meet together at the top of the triangle and form a face. When doing this, make sure the two sides of the face line up. Press along all the folds to crease.
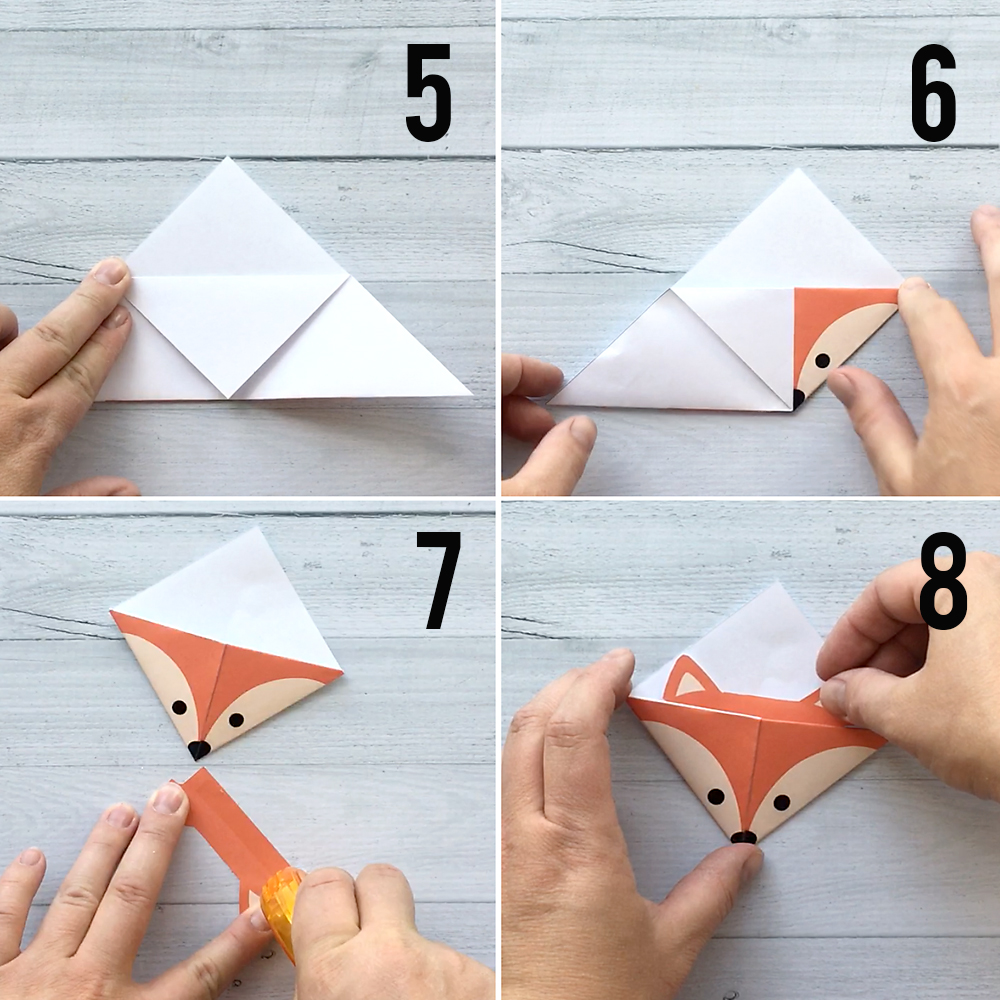
5 – Open up the last fold you did so you are back to the original triangle. Fold the top point of the triangle down, using only the *top* layer of paper. 6 – Fold one corner back up and tuck it into the “pocket” created in the last step. Repeat with the other corner. 7 – Cut out the ears and add adhesive along the straight edge. 8 – Tuck the ears inside the pocket to complete the bookmark.
One DIY origami bookmark complete! Now go ahead and print out all the other versions so your woodland animals can have some friends.
A few last notes:
- Be sure to use plain printer paper and not cardstock or these will be very hard to fold
- The faces will line up better if you are exact with your cuts and folds. Help younger children so they don’t get frustrated (although most kids aren’t going to mind if the faces don’t line up exactly!)
These bookmarks were created using purchased clipart from following Etsy sellers: clipartland, KennaSatoDesigns, and ClipArtisan.


Michele Brady says
I can’t find the folding directions for the Christmas bookmarks. I put that long url, the https one the comes out under the pdf bookmark in my url box and what comes up? The Santa bookmark. Thank you. They are so cute. I just started origami and really want to make these.
Autumn says
Hi Michele. Scroll down in this post to the heading that says: “Watch This Video To Learn How To Fold An Origami Bookmark”. There you can watch a video showing you how to fold it, and written instructions along with photos are right below the video.
bb-online says
lovely bookmars … I and my children enjoy them. Thanks a lot
Maike says
Thank you very much for this nice bookmarks.
Merry christmas from France 😉