It's Always Autumn

creative tutorials for everyday life

  • Holidays
  • Holidays
    • back to school
    • birthdays
    • Christmas
    • Easter
    • Halloween
    • July 4th
    • Mother’s Day/Father’s Day
    • teacher appreciation
    • Thanksgiving
    • Valentine’s
  • Crafts
  • Crafts
    • crafts + DIY
    • handmade gifts
    • photo crafts
    • kid crafts + activities
  • Recipes
  • Recipes
    • bread
    • dessert
    • main dish
    • side dish
  • Sewing
  • Sewing
    • free sewing patterns
    • sewing for women
    • sewing for kids
    • how to sew
    • gifts
  • Photography
  • Photography
    • beginning photography tips
    • posing tips
    • photo editing tips
  • Tips
  • Tips
    • parenting tips
    • travel tips
    • books I love
  • FAQ

crafts handmade gifts photo crafts
November 1, 2017

Easiest-ever photo transfer to glass {DIY glass photo block}

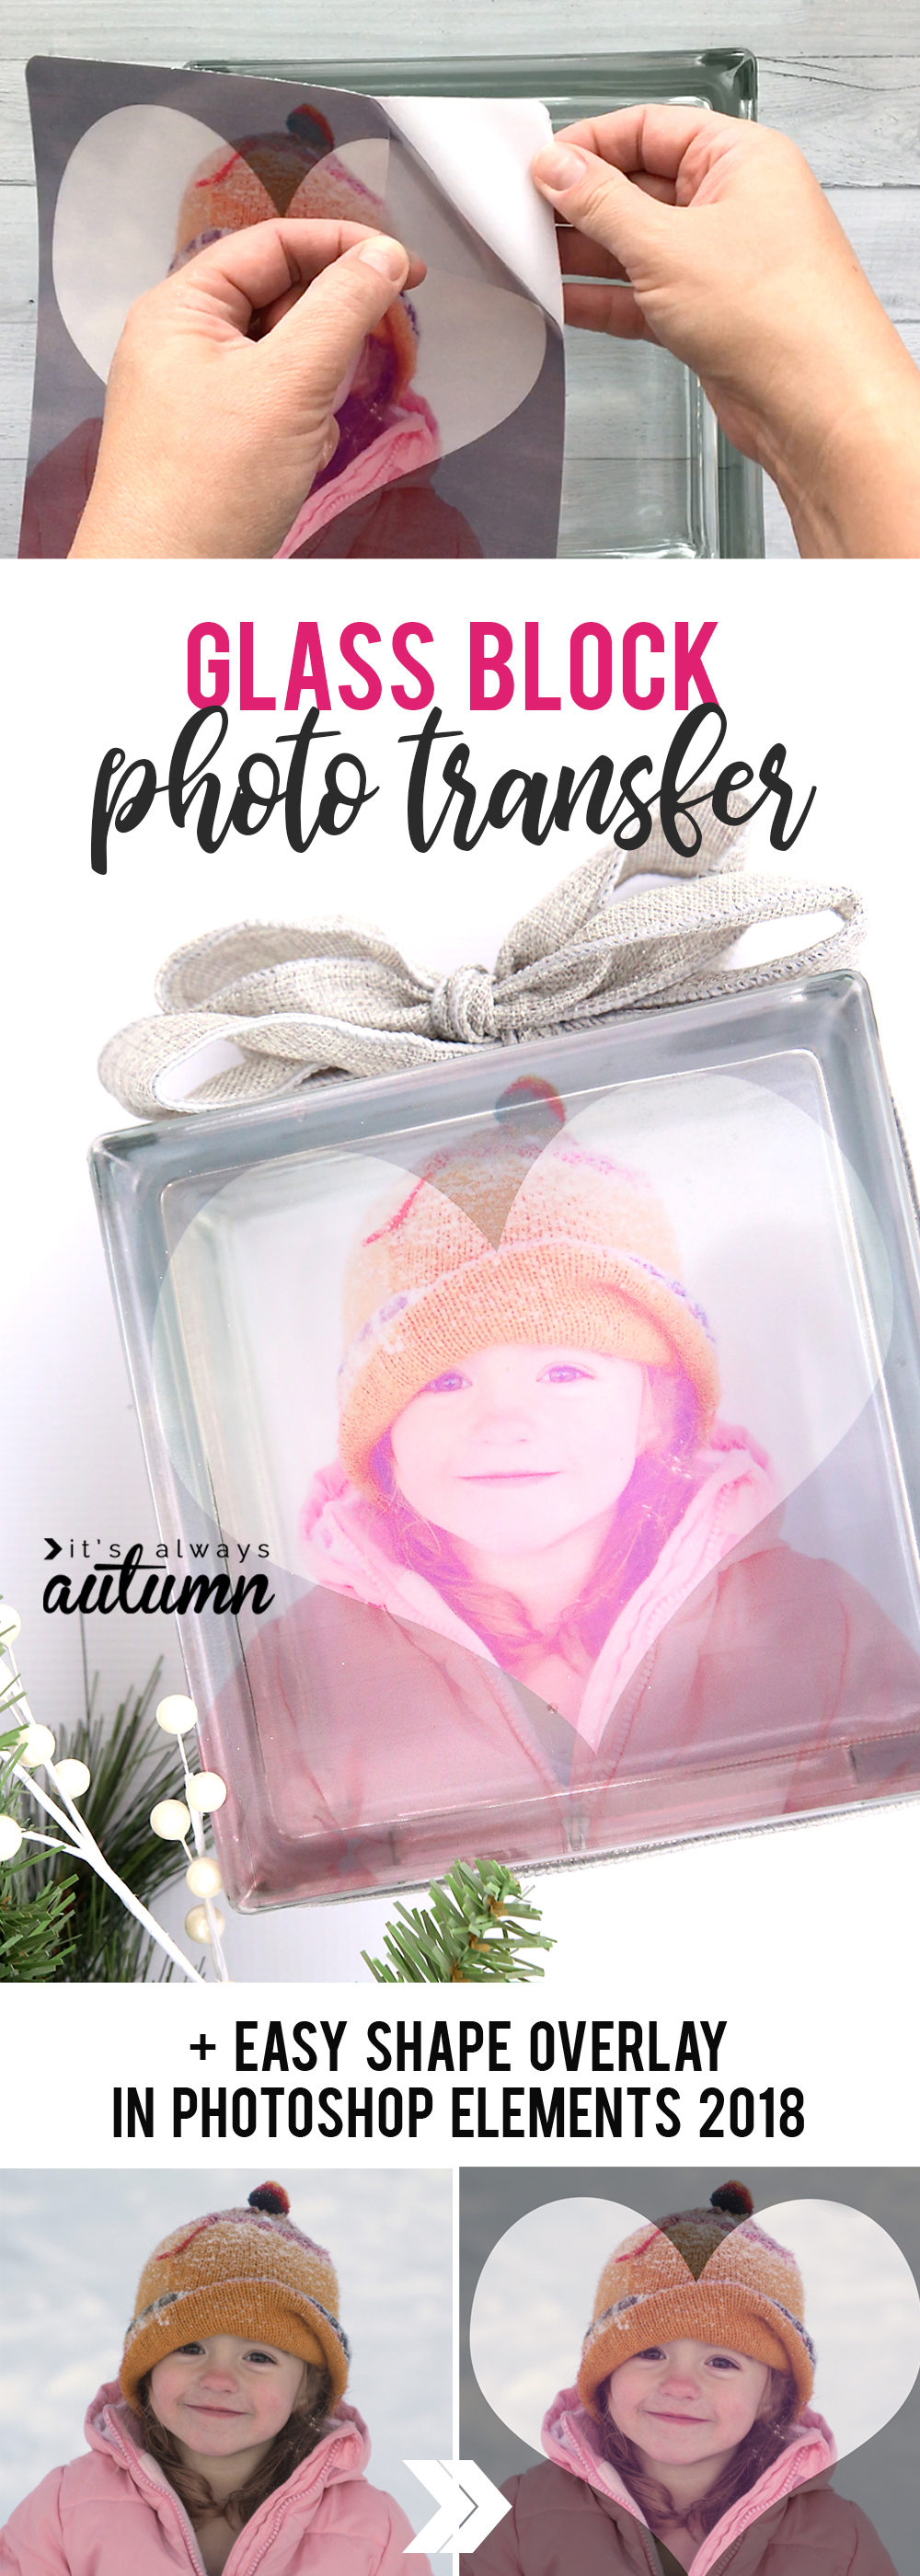
In today’s post: A glass photo block makes a gorgeous DIY gift! Learn the easiest-ever method for photo transfer to glass, plus a quick way to add a shape overlay to your favorite photo.

If you’re a regular visitor of this blog, you know I like trying out different photo transfer techniques. Because, you know, pretty much any surface is better with a picture on it, right? Recently I’ve discovered a couple new, easier-than-ever photo transfer techniques. I shared the easiest way to transfer a photo to wood last month, and today I’m showing you the easiest way to transfer a photo to glass, so you can make a personalized glass photo block. This glass photo transfer technique is easy, foolproof, and takes less than 5 minutes!

Learn how to make a beautiful glass photo block in 10 minutes! Click through for easy instructions.

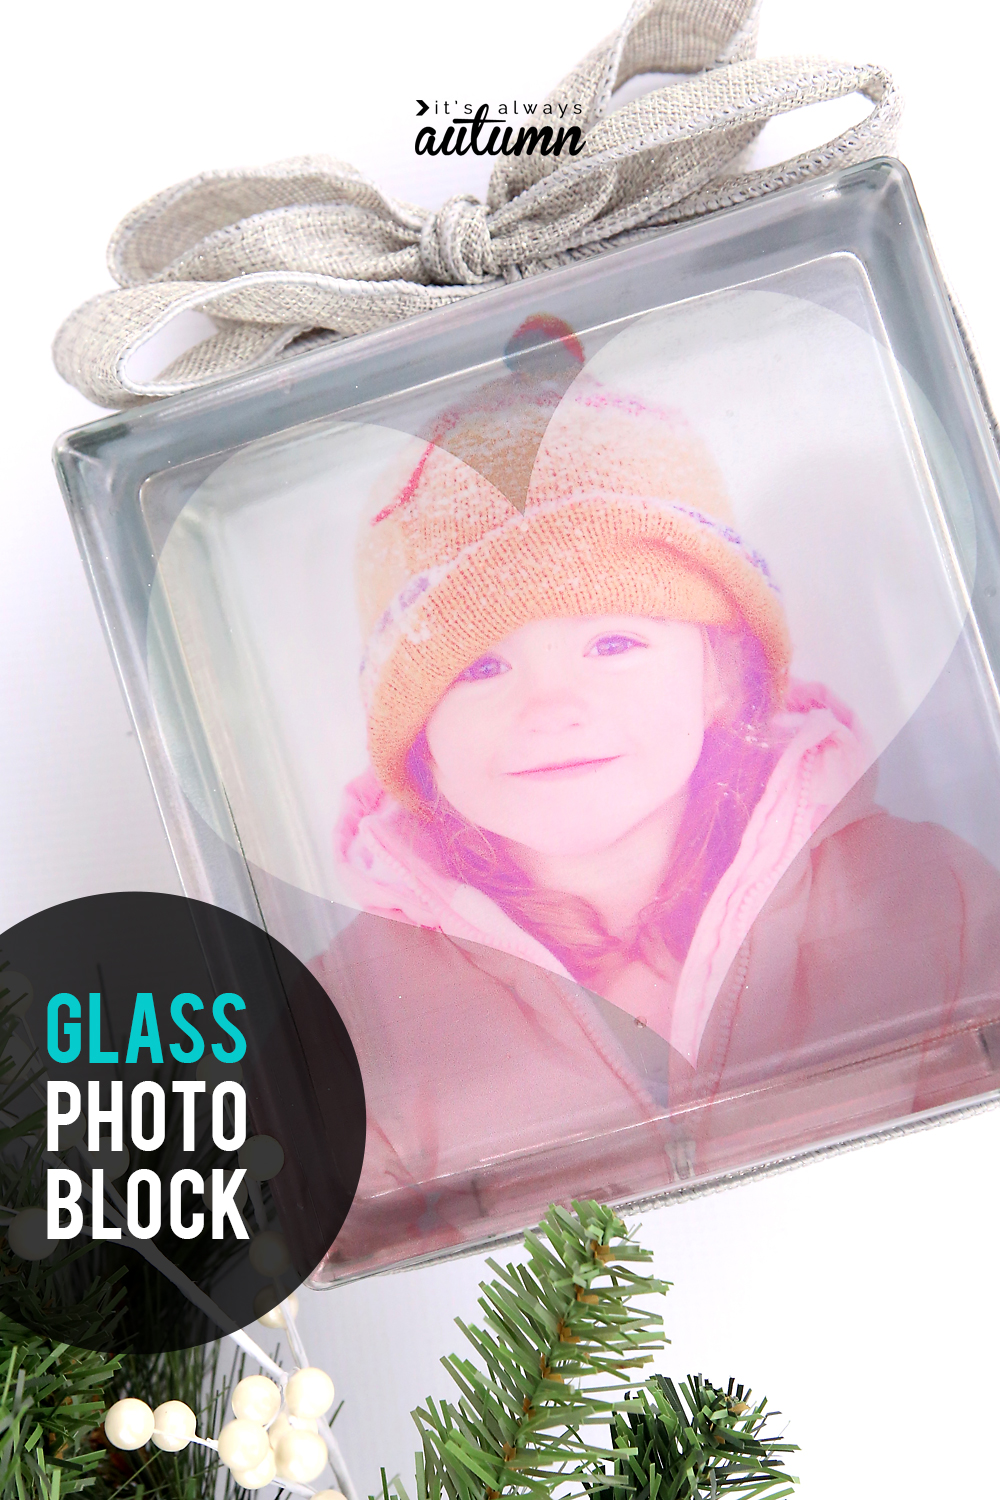
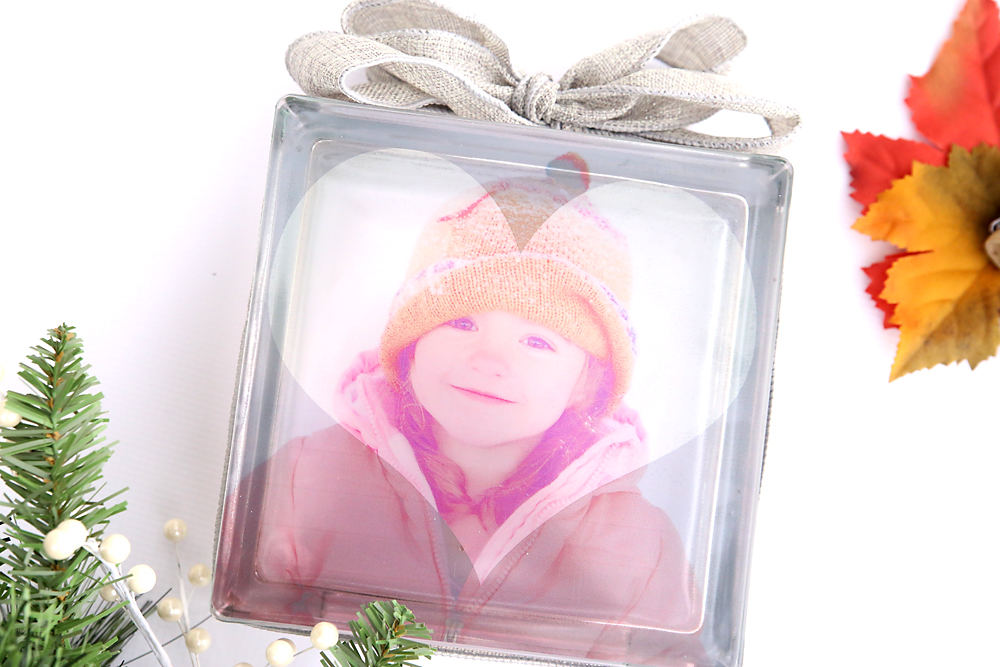
A personalized glass photo block makes a great DIY gift! See how cute it turns out?

Click here for 40 more photo craft ideas!

This is the absolute easiest photo transfer to glass technique ever! Print, peel + stick! Makes a great DIY Christmas gift.

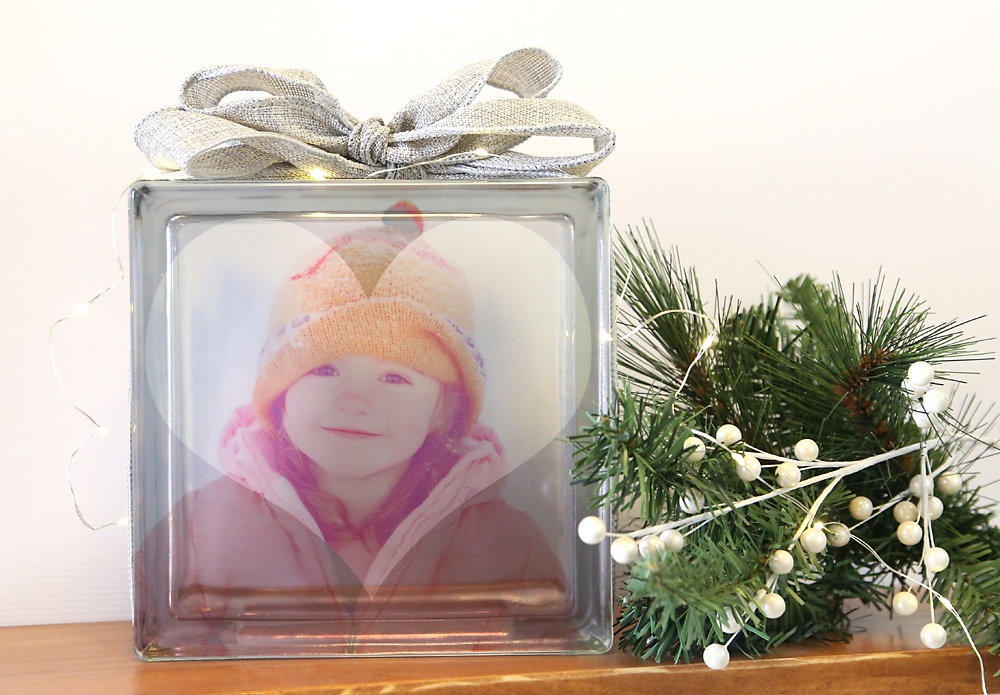
It makes a really pretty decoration up on a shelf or mantel, and is a fun way to display one of your favorite pictures. You can even add a string of fairy lights around it for a bit of extra prettiness.

How to make a glass photo block - it's so easy! Gorgeous DIY gift idea.

Today I’m also going to be showing you how to add a shape overlay to your photos using Adobe Photoshop Elements 2018. Keep reading for both tutorials. Thank you to Adobe for sponsoring this post!

How to add a shape overlay to your photos

How to add a shape overlay to a photo using Photoshop Elements 2018 - easy photo editing tip.

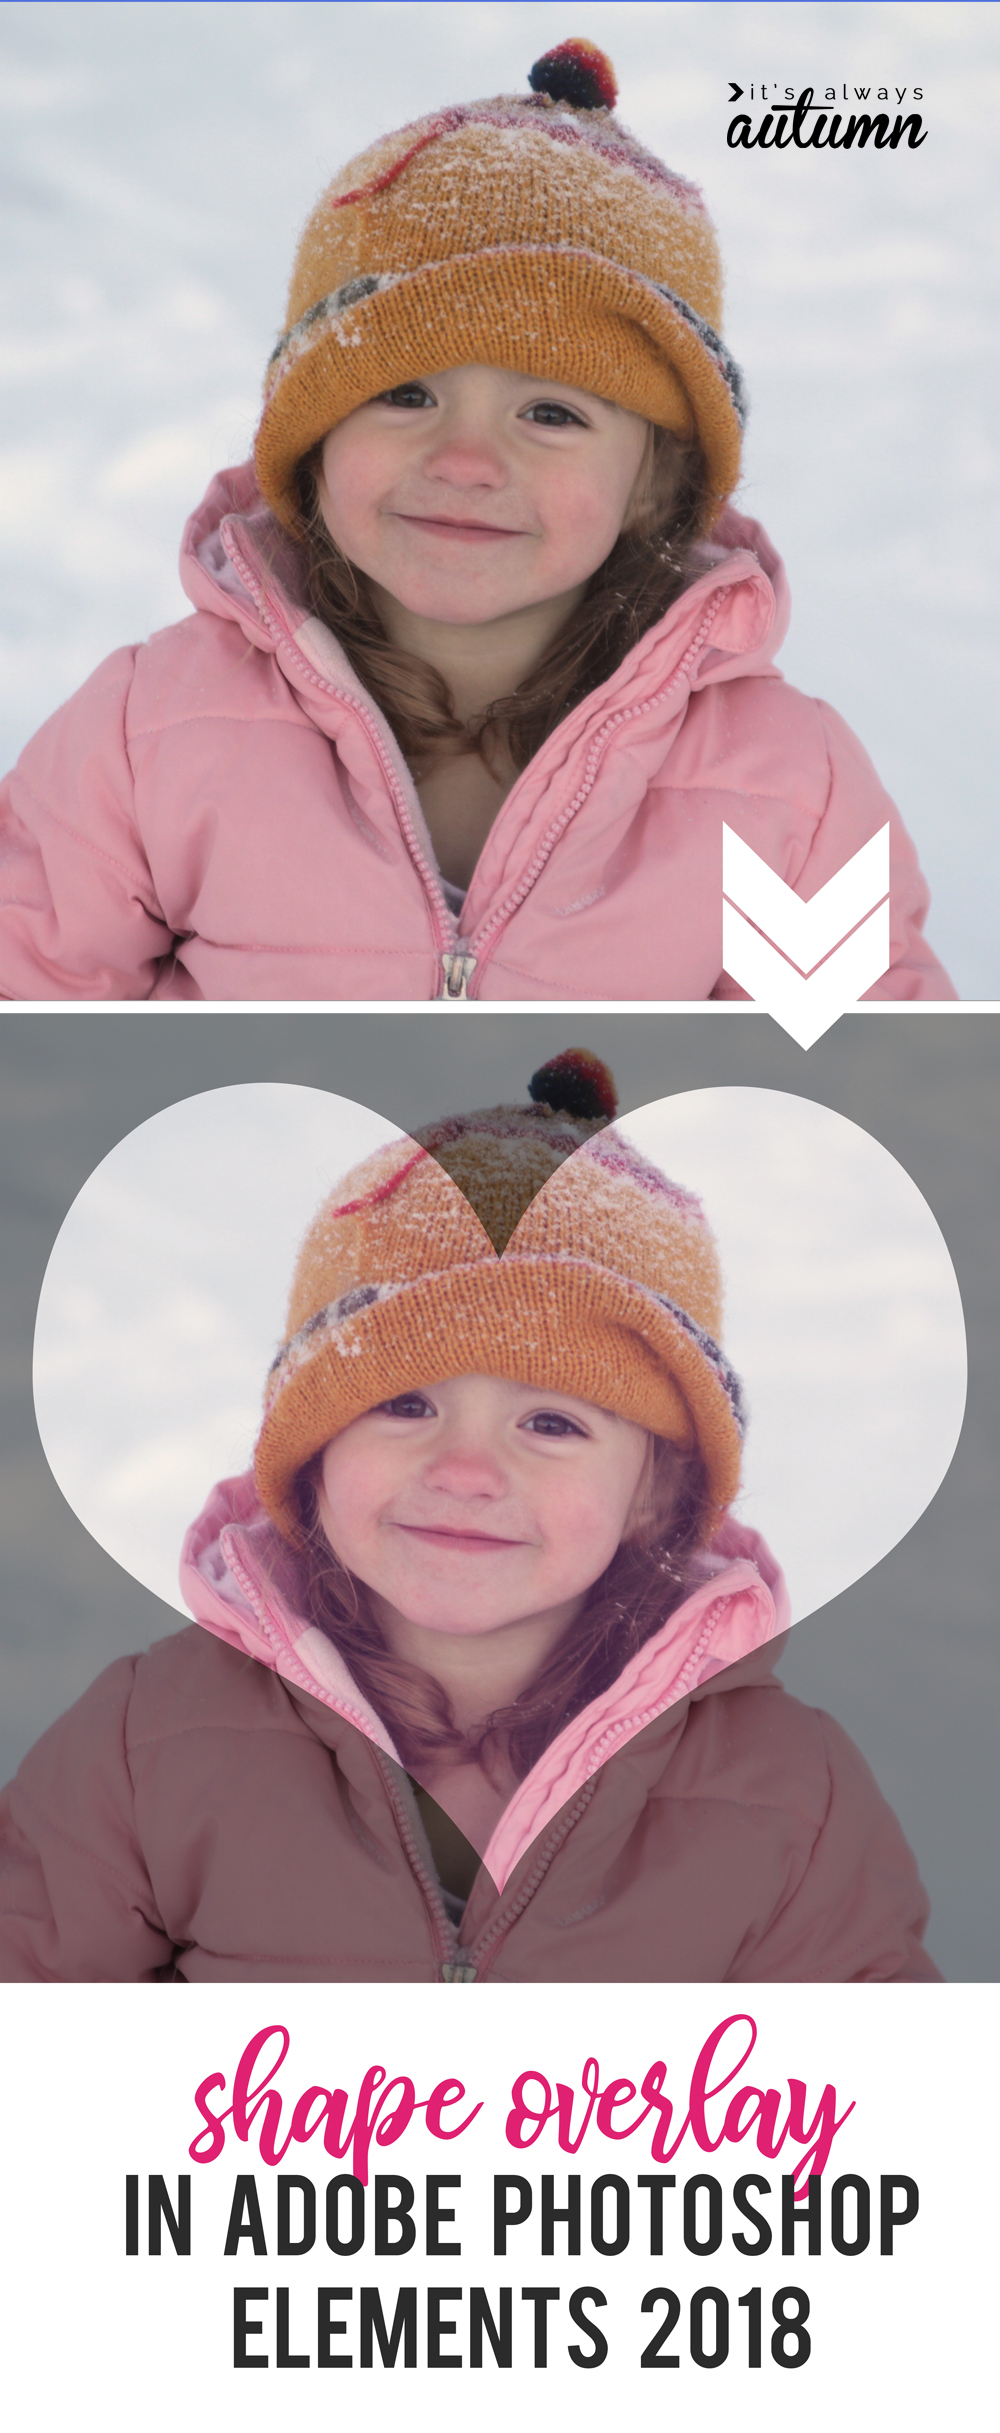
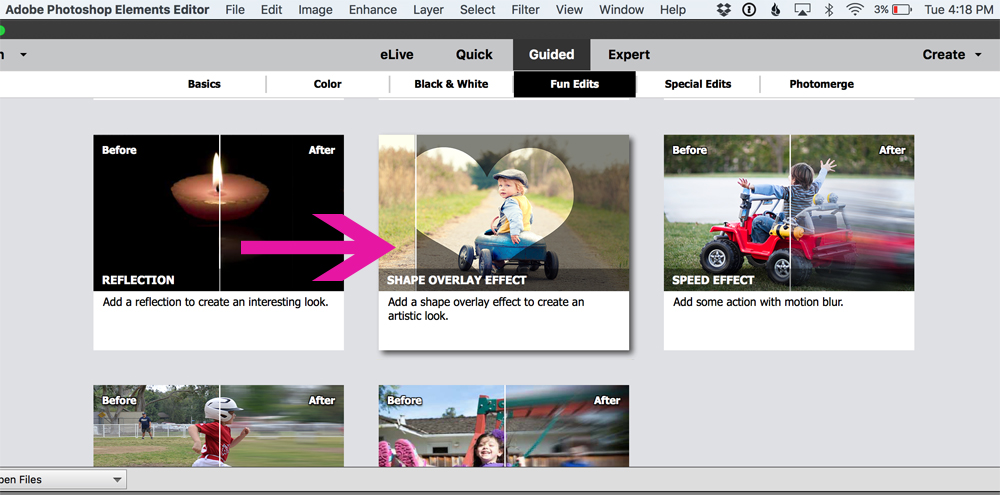
A shape overlay is a great way to add an artistic touch to one of your favorite photos, and it only takes a minute or two using Photoshop Elements 2018. The Shape Overlay Effect is one of the new Guided Edits in Photoshop Elements 2018. It allows you to add a shape to your photos as well as multiple photo effects. It’s found in Guided mode, with all the other simple step-by-step edits:

How to add a shape overlay to a photo using Photoshop Elements 2018 - easy photo editing tip.

Watch this video to see how it works:

Photoshop Elements is my favorite photo editing software because it allows me to do so many fun things with my photos! If you’d like to give it a try, click here to download a free trial. And click here to see all the other photo projects I’ve made using Photoshop Elements.


How to make a DIY glass photo block

Watch this video to see how easy it is to transfer a photo to a glass block (written instructions follow video):


This is the absolute easiest photo transfer to glass technique ever! Print, peel + stick! Makes a great DIY Christmas gift.

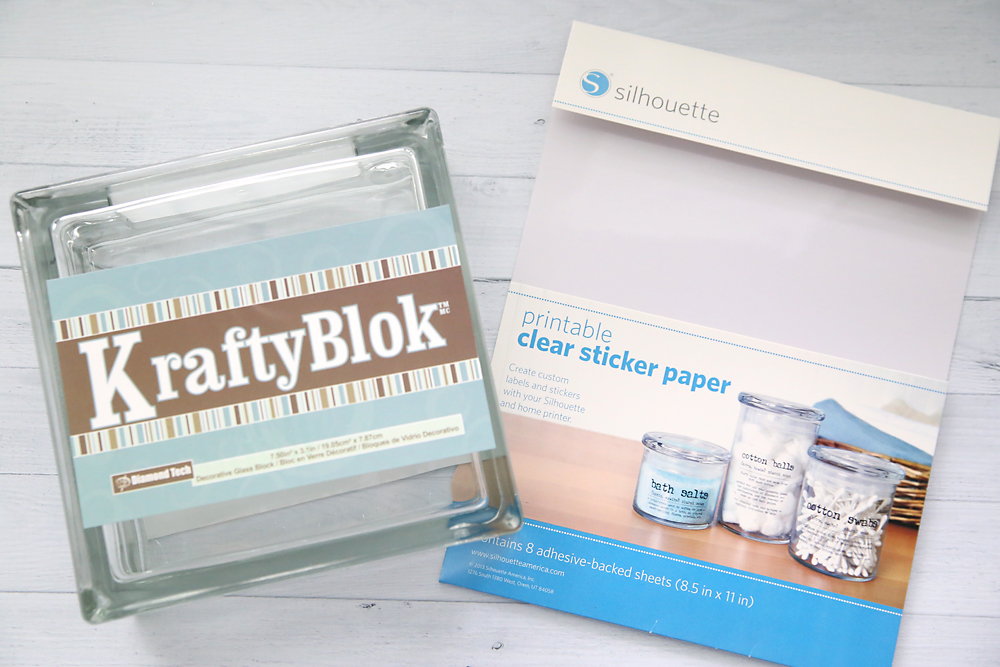
To make a glass photo block, you will need:

  • Glass block: I used the KraftyBlok brand found at many craft stores for around $10
  • Sticker paper: I used the Silhouette brand clear printable sticker paper found on Amazon

How to make a glass photo block - it's so easy! Gorgeous DIY gift idea.

Easiest photo transfer to glass technique

For the easiest photo transfer to glass, follow these 3 steps:

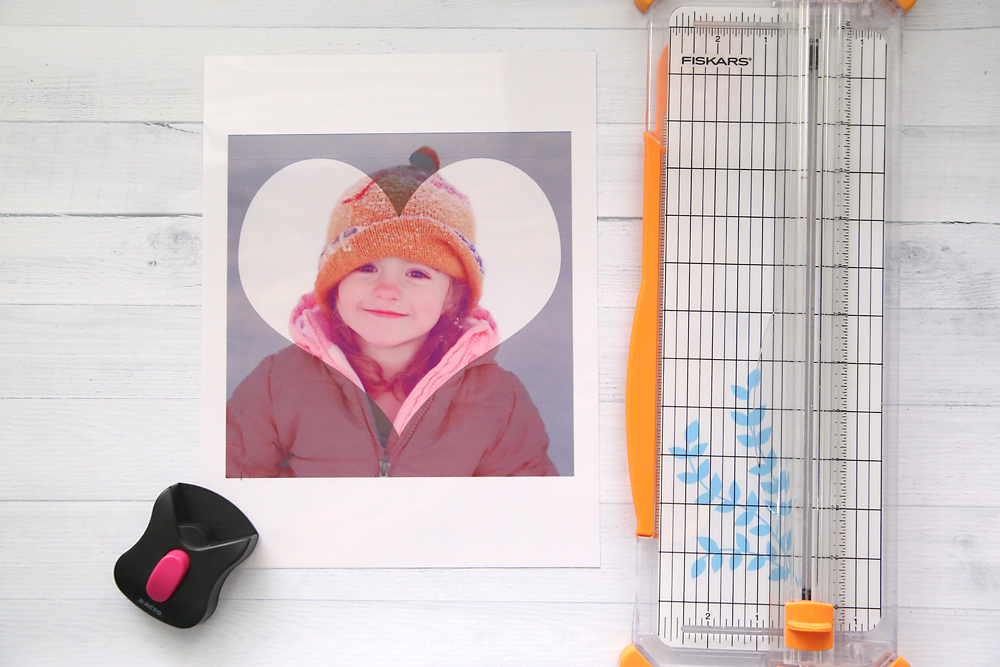
1. Prep your photo. In Photoshop Elements, crop your photo to the same size as your glass block (7.4 in x 7.4 in if using the same block I did). You can also bump up the photo saturation to make sure it prints nice and bright: Enhance -> Adjust Color -> Adjust Hue/Saturation.

2. Print your photo. Feed a sheet of sticker paper into your printer so the photo will print on the shiny side of the paper. Print using normal ink settings. Trim around the edge of the photo and use a corner rounder to round corners if desired.

How to make a glass photo block - it's so easy! Gorgeous DIY gift idea.

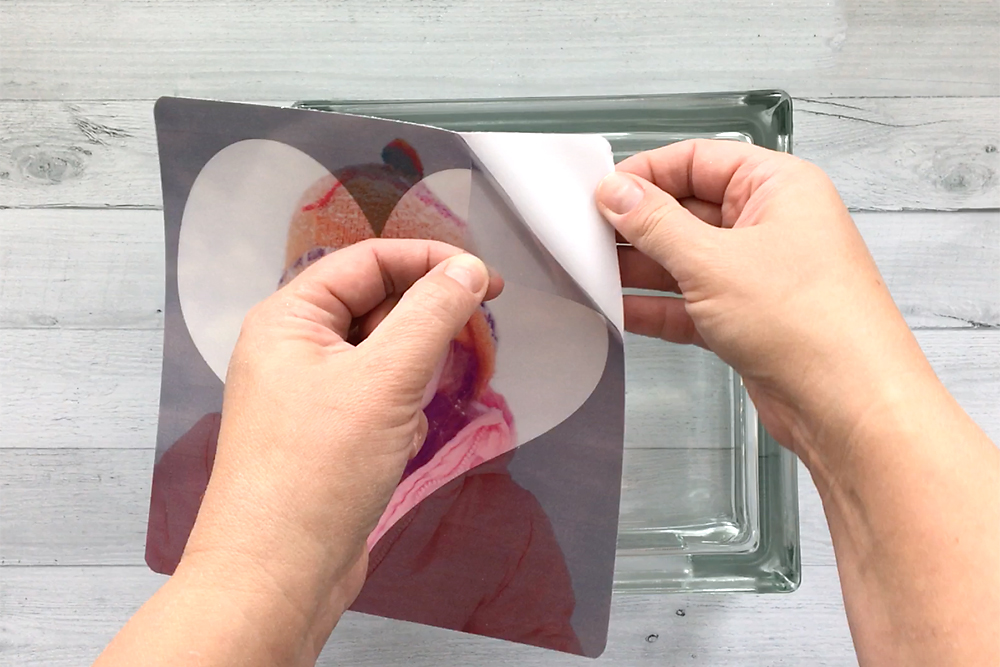
3. Apply the photo to the glass block. Remove the plastic backing from the sticker paper and stick the photo down on the glass block. Gently smooth it down. Tie ribbon around block if desired.

How to make a glass photo block - it's so easy! Gorgeous DIY gift idea.

Super easy way to make your own glass pictures! Glass photo block DIY tutorial.

How to make a glass photo block - it's so easy! Gorgeous DIY gift idea.

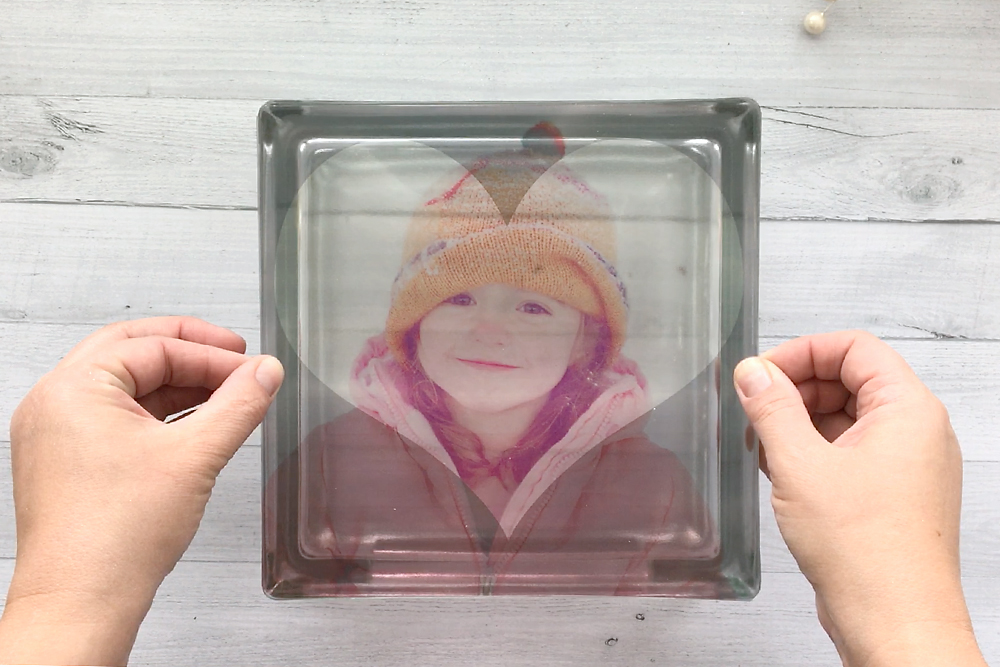
And your photo transfer to glass is done! Now you have a beautiful glass picture ready to display in your home or give as a gift.Super easy way to make your own glass pictures! Glass photo block DIY tutorial.

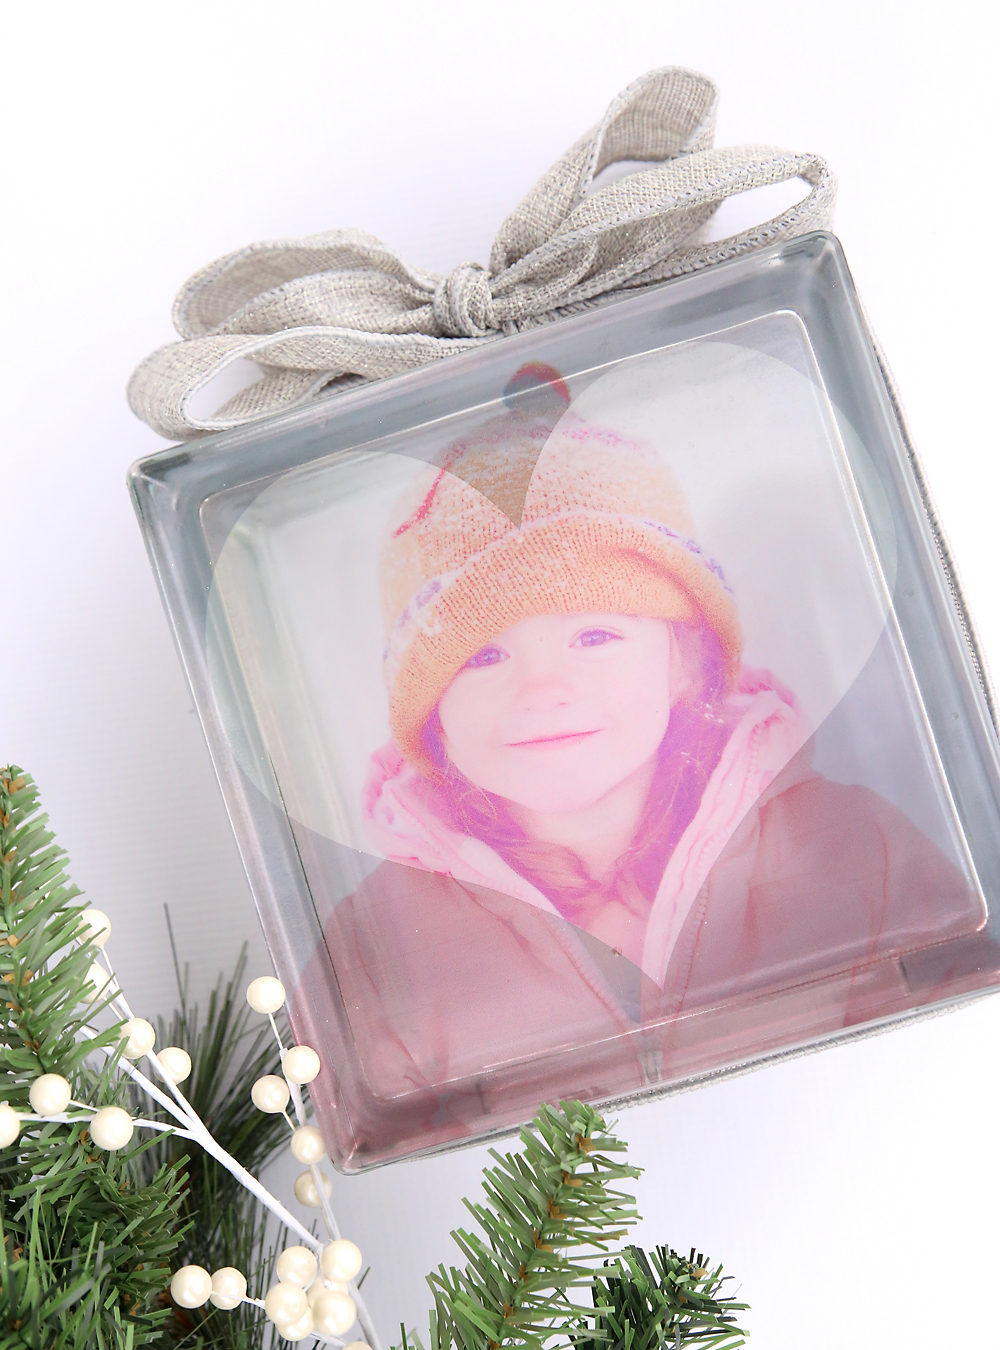
Click here to learn more about what Photoshop Elements 2018 can do. To add a shape overlay to one of your favorite photos, download a trial of Photoshop Elements 2018 for free!

Looking for more photo projects?

40 DIY photo crafts and photo gift ideas

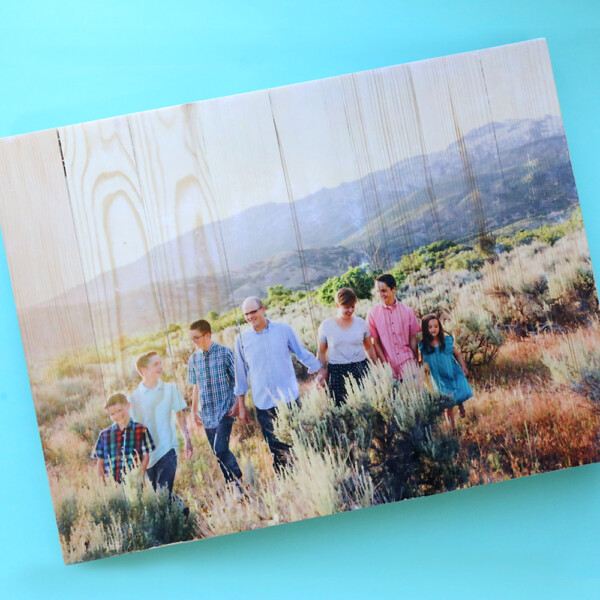
Easier-than-ever wood photo transfer

Personalized photo calendar magnets

DIY photo display

Personalized photo clock


How to make a glass photo block - it's so easy! Gorgeous DIY gift idea.

Share this:

  • Tweet
  • Print

Home » holidays » Easiest-ever photo transfer to glass {DIY glass photo block}


9 Comments

free email series

NO FAIL CRAFTS + RECIPES

Get my favorite EASY craft and recipe ideas straight to your inbox!

« How to make gorgeous DIY fleece blankets {it’s so easy!}
Printable Christmas origami bookmarks »

Comments

  1. Sherry Fletcher says

    November 2, 2017 at 12:05 pm

    Is it possible to put the picture on the back of the block, facing forward. So that you could see the picture(on the back) from the front side. I want to put a poem on the front side and be able to see the picture.

    Reply
    • autumn says

      November 3, 2017 at 5:04 pm

      Hmm, I’m not sure. I guess you could try printing your photo backward and putting it on the back of the block, but I’m not sure about that. Good luck!

      Reply
    • Pax says

      January 12, 2019 at 10:16 am

      Sherry, it has been a while since you posted your question. Have you tried it? I am wanting to do your idea for memorial block of/for my friend’s son.

      Reply
  2. Suzanne says

    November 8, 2017 at 9:02 pm

    Reverse decoupage it on the back and use the sticker paper for the poem.

    Reply
  3. Debbie Cundiff says

    December 1, 2017 at 2:09 pm

    How did you enlarge the photo so that it still prints well? I tried this and made the photo 7″ x 7″ and when I print on the sticker paper I get a message that it will print less than 300dpi. The image is pixelated and the darker areas seem to have extra ink. Any suggestions?

    Reply
  4. Lydia says

    November 2, 2018 at 10:39 pm

    I would like to put lights in the block. Any ideas?

    Reply
  5. Stephanie Catron says

    November 12, 2018 at 6:21 pm

    What type of printer did you print from on the sticker paper ….laser or ink jet?

    Reply
  6. Carole Marsico says

    January 9, 2020 at 6:23 pm

    If I sprayed the back of the block with frost spray, would the picture be more clear?

    Reply

Trackbacks

  1. 31 creative DIY Photo Crafts and Projects - Ideas To Know says:
    March 14, 2020 at 3:02 am

    […] Source: itsalwaysautumn.com […]

    Reply

Leave a Reply Cancel reply

Your email address will not be published. Required fields are marked *

Recipe Rating


Hey, glad you’re here!

I'm Autumn, a mom of five who loves ice cream, Masterpiece Theatre, and clothes that hide the fact that I eat so much ice cream. When I was 18 I got a job at a craft store and told everyone (regularly) how much I hated crafts. Well, things change! Read More…

Find me here

  • Facebook
  • Instagram
  • Pinterest
  • Twitter

free email series

NO FAIL CRAFTS + RECIPES

Get my favorite craft + recipe ideas straight to your inbox!

Popular Posts

101 Fun + Easy Activities kids can do AT HOME

50 easy crafts and activities kids can do indoors! Perfect for cold or rainy days.

50 best indoor activities for kids: easy crafts + games

Gorgeous art projects for kids! Easy art that turns out amazing.

20 easy art projects for kids that turn out AMAZING!

How to make GORGEOUS paper flowers

How to make mini donuts! {baked cake mix donuts recipe}

Blog policy

All posts and pictures are copyrighted by Autumn Baldwin and blog content may not be reposted elsewhere. However, linking back to my content is just fine. You may use one photo as long as you link directly back to the specific post. Thank you!

Please view our Privacy Policy here.

Also, please note that this blog is a participant in the Amazon Services LLC Associates Program, an affiliate advertising program designed to provide a means for sites to earn advertising fees by advertising and linking to Amazon.com.

Copyright © 2021 · Divine theme by Restored 316192.168.1.1 router login

Copyright © 2021 · Divine Theme on Genesis Framework · WordPress · Log in

free email series

NO-FAIL CRAFTS + RECIPES

Get my favorite EASY craft + recipe ideas straight to your inbox!

x